
For the month of October we decided to add a little magic to our literary inspiration series by creating a Harry Potter scrapbook layout. J.K. Rowling’s series bewitched the world with her huge imagination and unforgettable characters. She has many themes in her story that inspired us to make a magical Mosaic Moments™ page. In today’s post we will go over how you can use elements from the Harry Potter series to create a unique scrapbook layout. Plus, I have a couple of simple techniques from my page to show you.
Inspiration List for Creating a Harry Potter Page
1. Themes and Subject
There are so many themes within the Harry Potter series that it may seem a bit overwhelming! I will just give a few basic ones to help you get started:
- Friendship – How can we forget the relationship between Harry, Ron, and Hermione? Friends are a very important theme in the story. Harry’s friends are there for him during difficult times and help him during his dangerous adventures. If you have a best friend or a group of friends you love – create a page about your relationship with them. This is also great for your kids/grandkids to have memories of their friends.
- Love – Although there is some romantic love in the story, J.K. Rowling mainly focuses on love between family members and friends. Create a page about your family and how much you appreciate them.
- Bravery, Loyalty, Ambition, and Knowledge – These characteristics describe the four houses within Hogwarts ( Gryffindor = bravery, Hufflepuff = loyalty, Syltherin = ambition, and Ravenclaw = knowledge). Create a page about members of your family or friends and the houses they would likely fit into. (I plan to make a page like this in future). For fun, you can sign up on Pottermore.com to take a test created by J.K. Rowling herself to figure out which house you would go to.
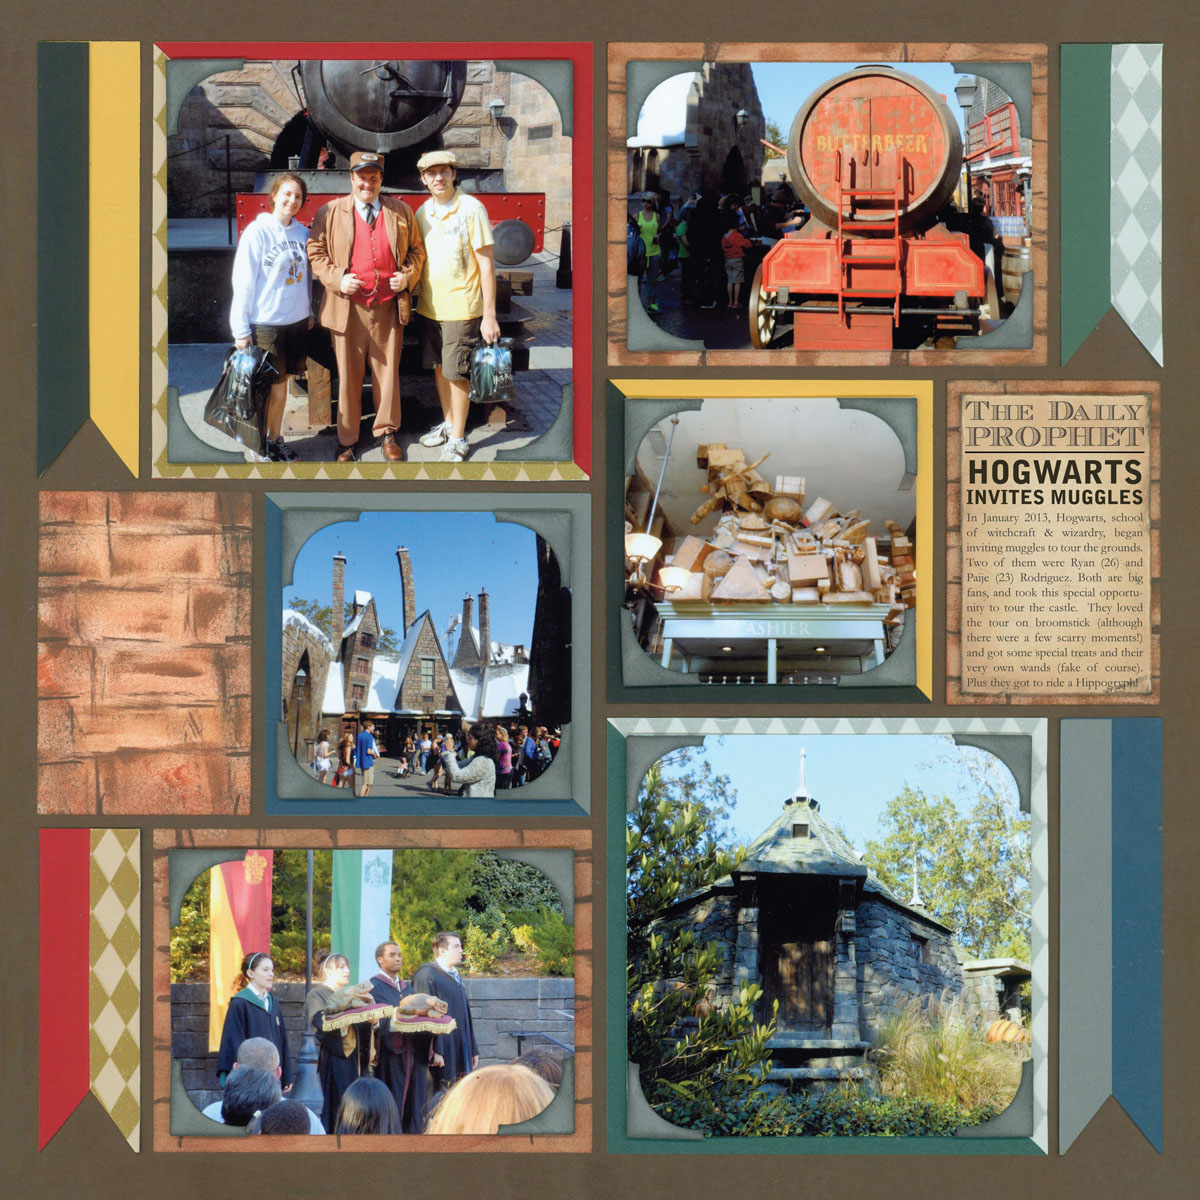
For my page, I did not pick a particular theme from the story. The subject of my page is the Harry Potter theme park at Universal Studios. You can create a Harry Potter themed page if you went to the Universal, a midnight release of one of the books or movies, or to show off a fan (such as one of your children or grandchildren or yourself 🙂 ).
2. Typography
For your page, you can create the main title with the Harry Potter title font. (Get it here for FREE) This font is easily recognizable. Your viewers will immediately know what book inspired your page.
I did not have room to add a large title, so I needed to be a little more creative with my journaling. I decided to make a write up based on The Daily Prophet. This is a newspaper the characters read in the Harry Potter world. I have a font that reminds me of an old newspaper title (It’s called Ecuyer Dax. Get it Here). I then wrote my journaling as if it was a news article.
Here is what I wrote: “The Daily Prophet: Hogwarts Invites Muggles – In January 2013, Hogwarts, school of witchcraft and wizardry, began inviting muggles to tour the grounds. Two of them were Ryan and Paije Rodriguez. Both are big fans, and took this special opportunity to tour the castle. They loved the tour on broomstick (although there were a few scary moments!) and got some special treats and their very own wands (fake of course). Plus, they got to ride a hippogryph!”
3. Colors
There were two things from the book that inspired my color choices. One was the Hogwarts Castle, which is mainly earth-tones such as brown. I also used colors from the four Hogwarts houses (red and gold for Gryffindor, yellow and black for Hufflepuff, green and silver for Sytherin, and blue and grey for Ravenclaw). I discuss the techniques for creating the colorful mats and banners later in this post. You can also use the book covers to inspire your color choices.
4. Patterns
You may notice the diamond pattern paper on the page. I love this paper! I have had it for a long time now, and I thought it would work perfectly with my Harry Potter page. The very first Harry Potter book has a diamond pattern on the bottom and this paper matched the theme very well!
5. Texture
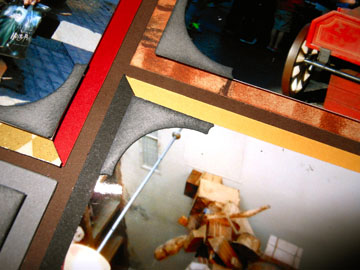
I was inspired by all the portraits that hang on the walls inside of Hogwarts. I wanted to incorporate this concept on my page. So, I created a brick or stone wall texture by coloring sand Paper Tiles with chalk ink. This makes an illustrative appearance of the walls on my layout. I then wanted all my photographs to appear as if they were framed portraits on the wall. So I placed some pop dots behind all my photos.
I know it’s hard to tell in the main image that the photos have pop dots under them. The image below helps you see that my photograph is sticking above the mat.
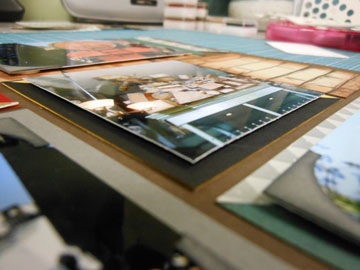
I also put some gray corners on each photo (to seem like a frame). I love how it turned out! I wanted my page to look like a wall of portraits from Hogwarts.
The Techniques Behind this Harry Potter Scrapbook Layout
Banners
In the Harry Potter books, it describes how the Great Hall has banners showing all four houses. I wanted to show this on my page as well, so I took the opportunity to use a couple of Banner Tiles. One problem I had though was I needed two of the banners to be longer. There is a simple solution to make these.
- Get a Paper Tile that is 1 in. width. You can use my method for any length such as a 2.125in Paper Tile or in my case I am using a 4.375 in. height Paper Tile, but it must be 1 in. width.
- Place a Banner Tile over the BACK of your Paper Tile. This is so any pencil or pen marks don’t show. I recommend using a little re-positional glue so your tiles don’t slip around too much.
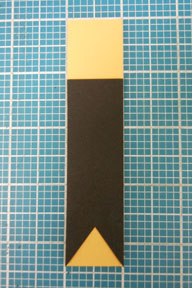
- Trace the bottom of the banner tile with a pen or pencil.
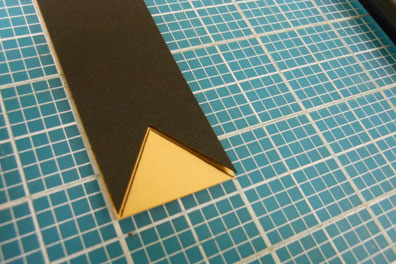
- Take the banner tile off and cut along the lines with an Exacto knife or scissors. You’re Done!
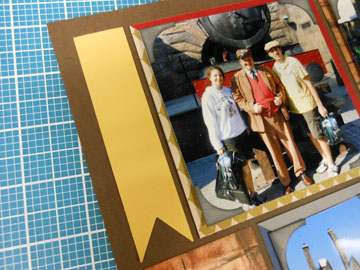
You can use the above steps to make a banner out of pattern paper as well. I did this with the diamond pattern paper I used on my page. All my banners had this look where half was a different color or paper:
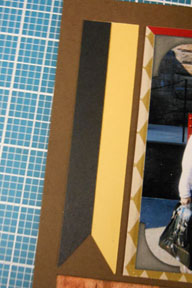
All you need to do is follow the directions shown above and then cut it right in the middle with your Exacto Knife. Layer one of the sides on top of your first Banner.
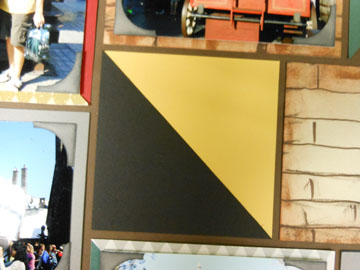
Layering
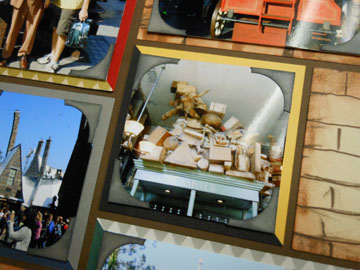
Above is a close up shot of one of the squares. If you look at my page, you may notice that each of photographs has mats with two different colors or paper. This is a really easy technique and it’s great for adding a pop of color to pages. Here are the directions:
- Place one square Paper Tile (I used a 3.25 in. square here) on your grid paper in the spot you want.
- Take another square Paper Tile of the same size, but a different color, and turn it on your mat so it looks like a diamond. Put some re-positional glue on the back of your Paper Tile.
- Line up the top and bottom and corners on one of the thinner lines on your Mosaic Moments™ Mat.
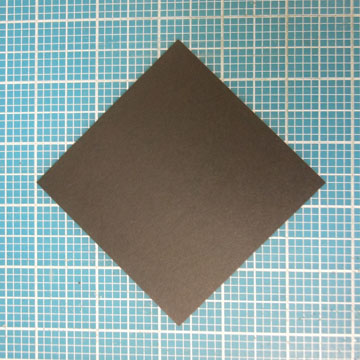
- Use your Exacto Knife and Ruler to cut the square right in the center.
- Last, Place it on top of the first square Paper Tile. Done! Now you can put your photo on top if you want.
Materials Used for This Layout
- 12×12 Deep Creamy Cocoa 12×12 Grid Paper
- Brick, Forest, Black, Caramel, Navy, Sand, and Pewter Paper Tiles
- Pop Dots
- Chalk Ink for distressing and creating the brick background
- Sparkly Diamond Pattern Paper