Architectural Dies: Encircle
Cornerstone Dies: Encircle Dies as a decor piece…makes a great gift!
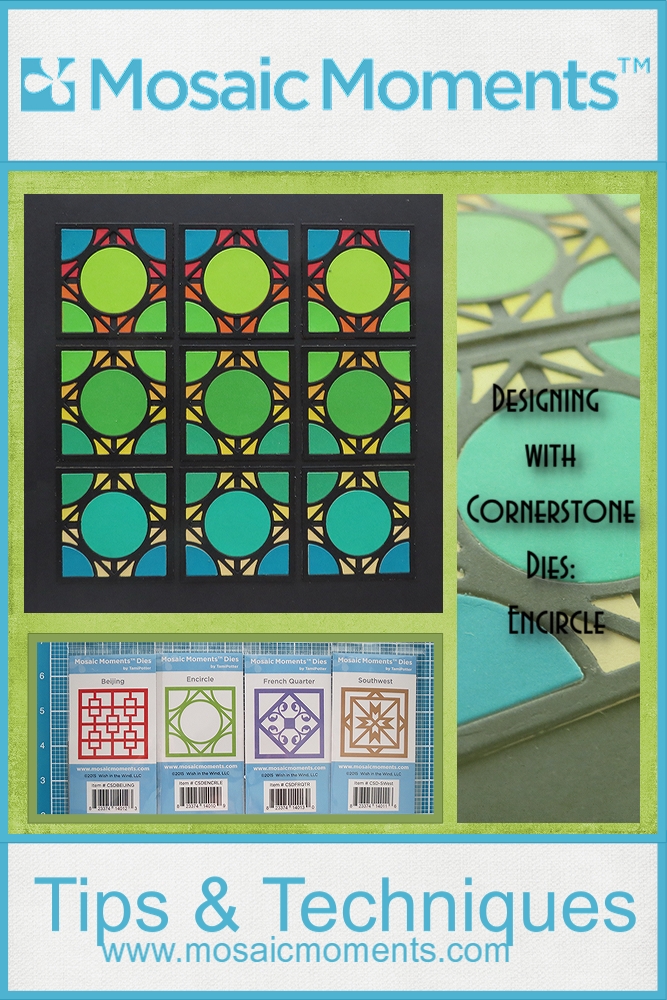
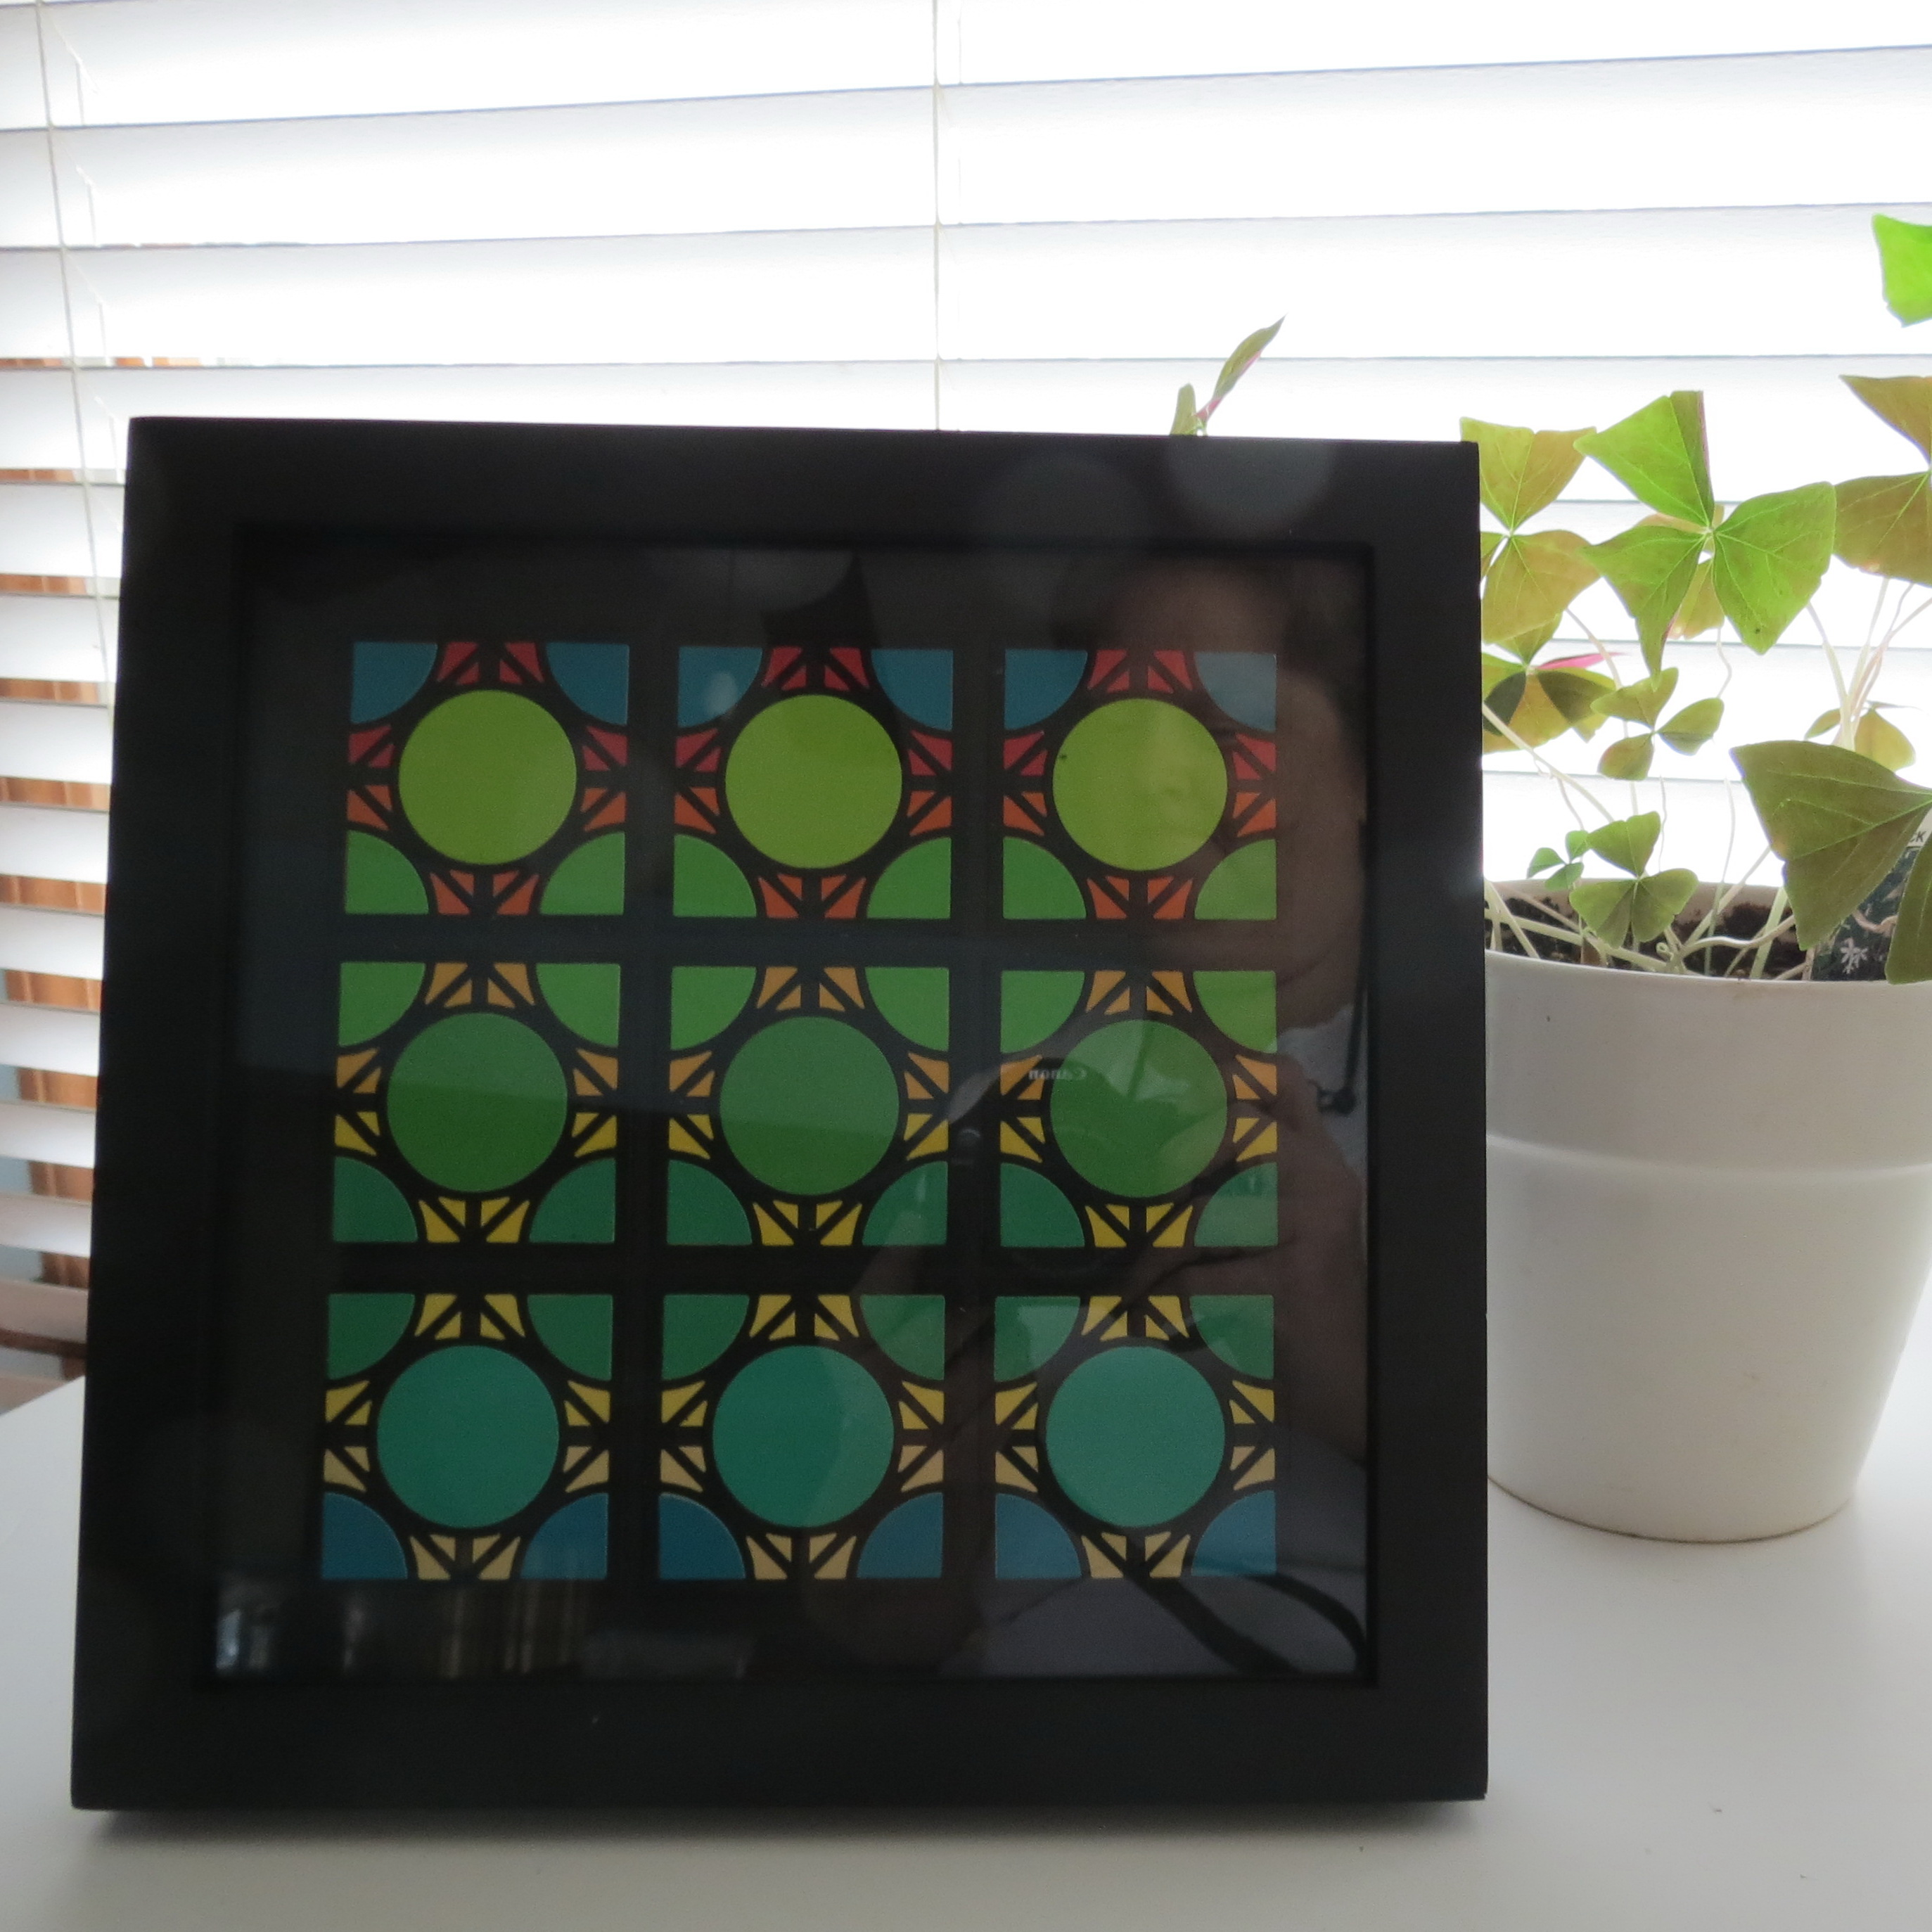
Are you interested in some fun? This unassuming cornerstone die holds so many possibilities for fun, but I’ll begin with one and let you catch the excitement and explore on your own! Designing with Cornerstone Dies without any photos is today’s project. The finished piece framed will make a great art piece to enjoy or give as a gift. The color combinations are totally up to you, but today’s project includes both warm and cool colors on black for a very vibrant look.
WHAT YOU WILL NEED:
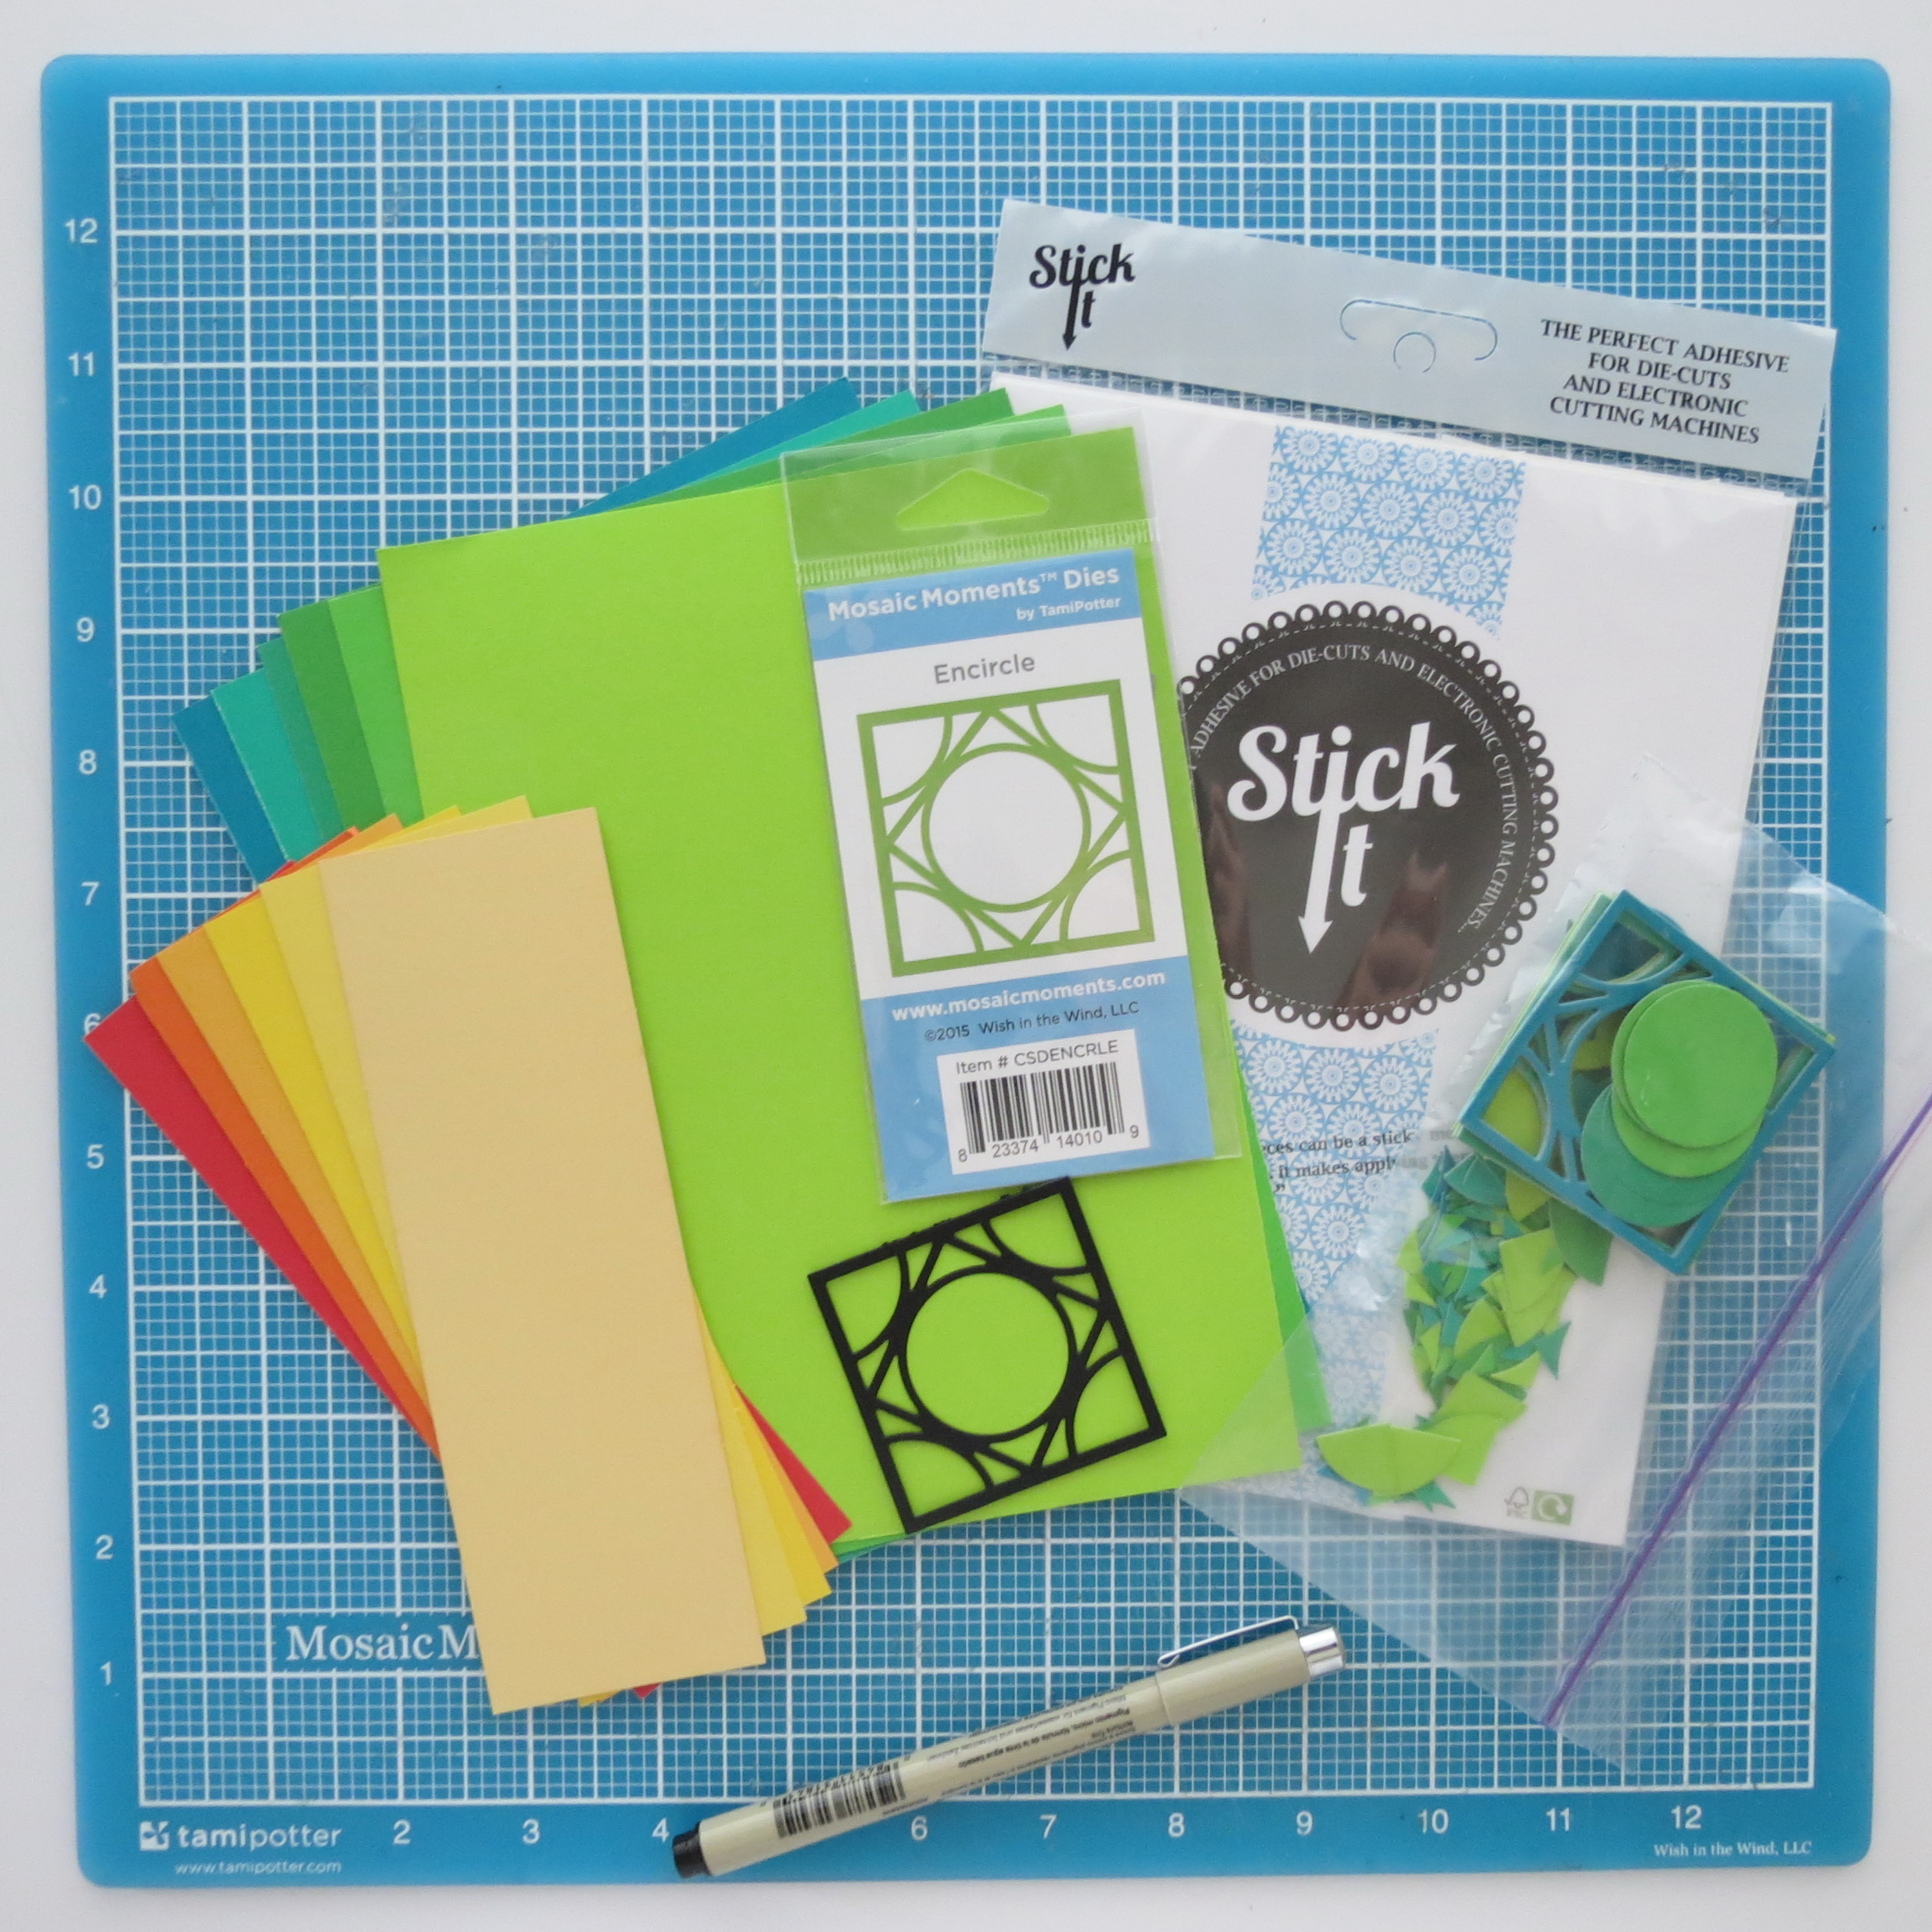
Cornerstone Dies: Supplies
• 8” x 8” black Mosaic Moments grid paper
• 6- 1” MM Paper Tiles in each of these colors: Sunflower, Grapefruit Bliss, Sun Yellow, Pineapple Bliss, Deep Peaches and Cream and Red or colors of your choosing
• Mosaic Moments Architectural Cornerstone Die: Encircle
• Six shades of greens from the “All Occasion Deluxe Cardstock 8” x 8” pack (Walmart)”: Cut 3 Encircle Cornerstones from each shade of green. SAVE ALL THE PIECES and bag them to keep them organized
• Black cardstock: Cut 9 Encircle cornerstones, bag and save the pieces
• Stick It! adhesive sheets
• Black ink for the edges of the 1” paper tiles (I neglected to do this and had to black out the edges of tiles that the color edges showed with a micron pen after the piece was complete. Bigger job than inking to begin with)
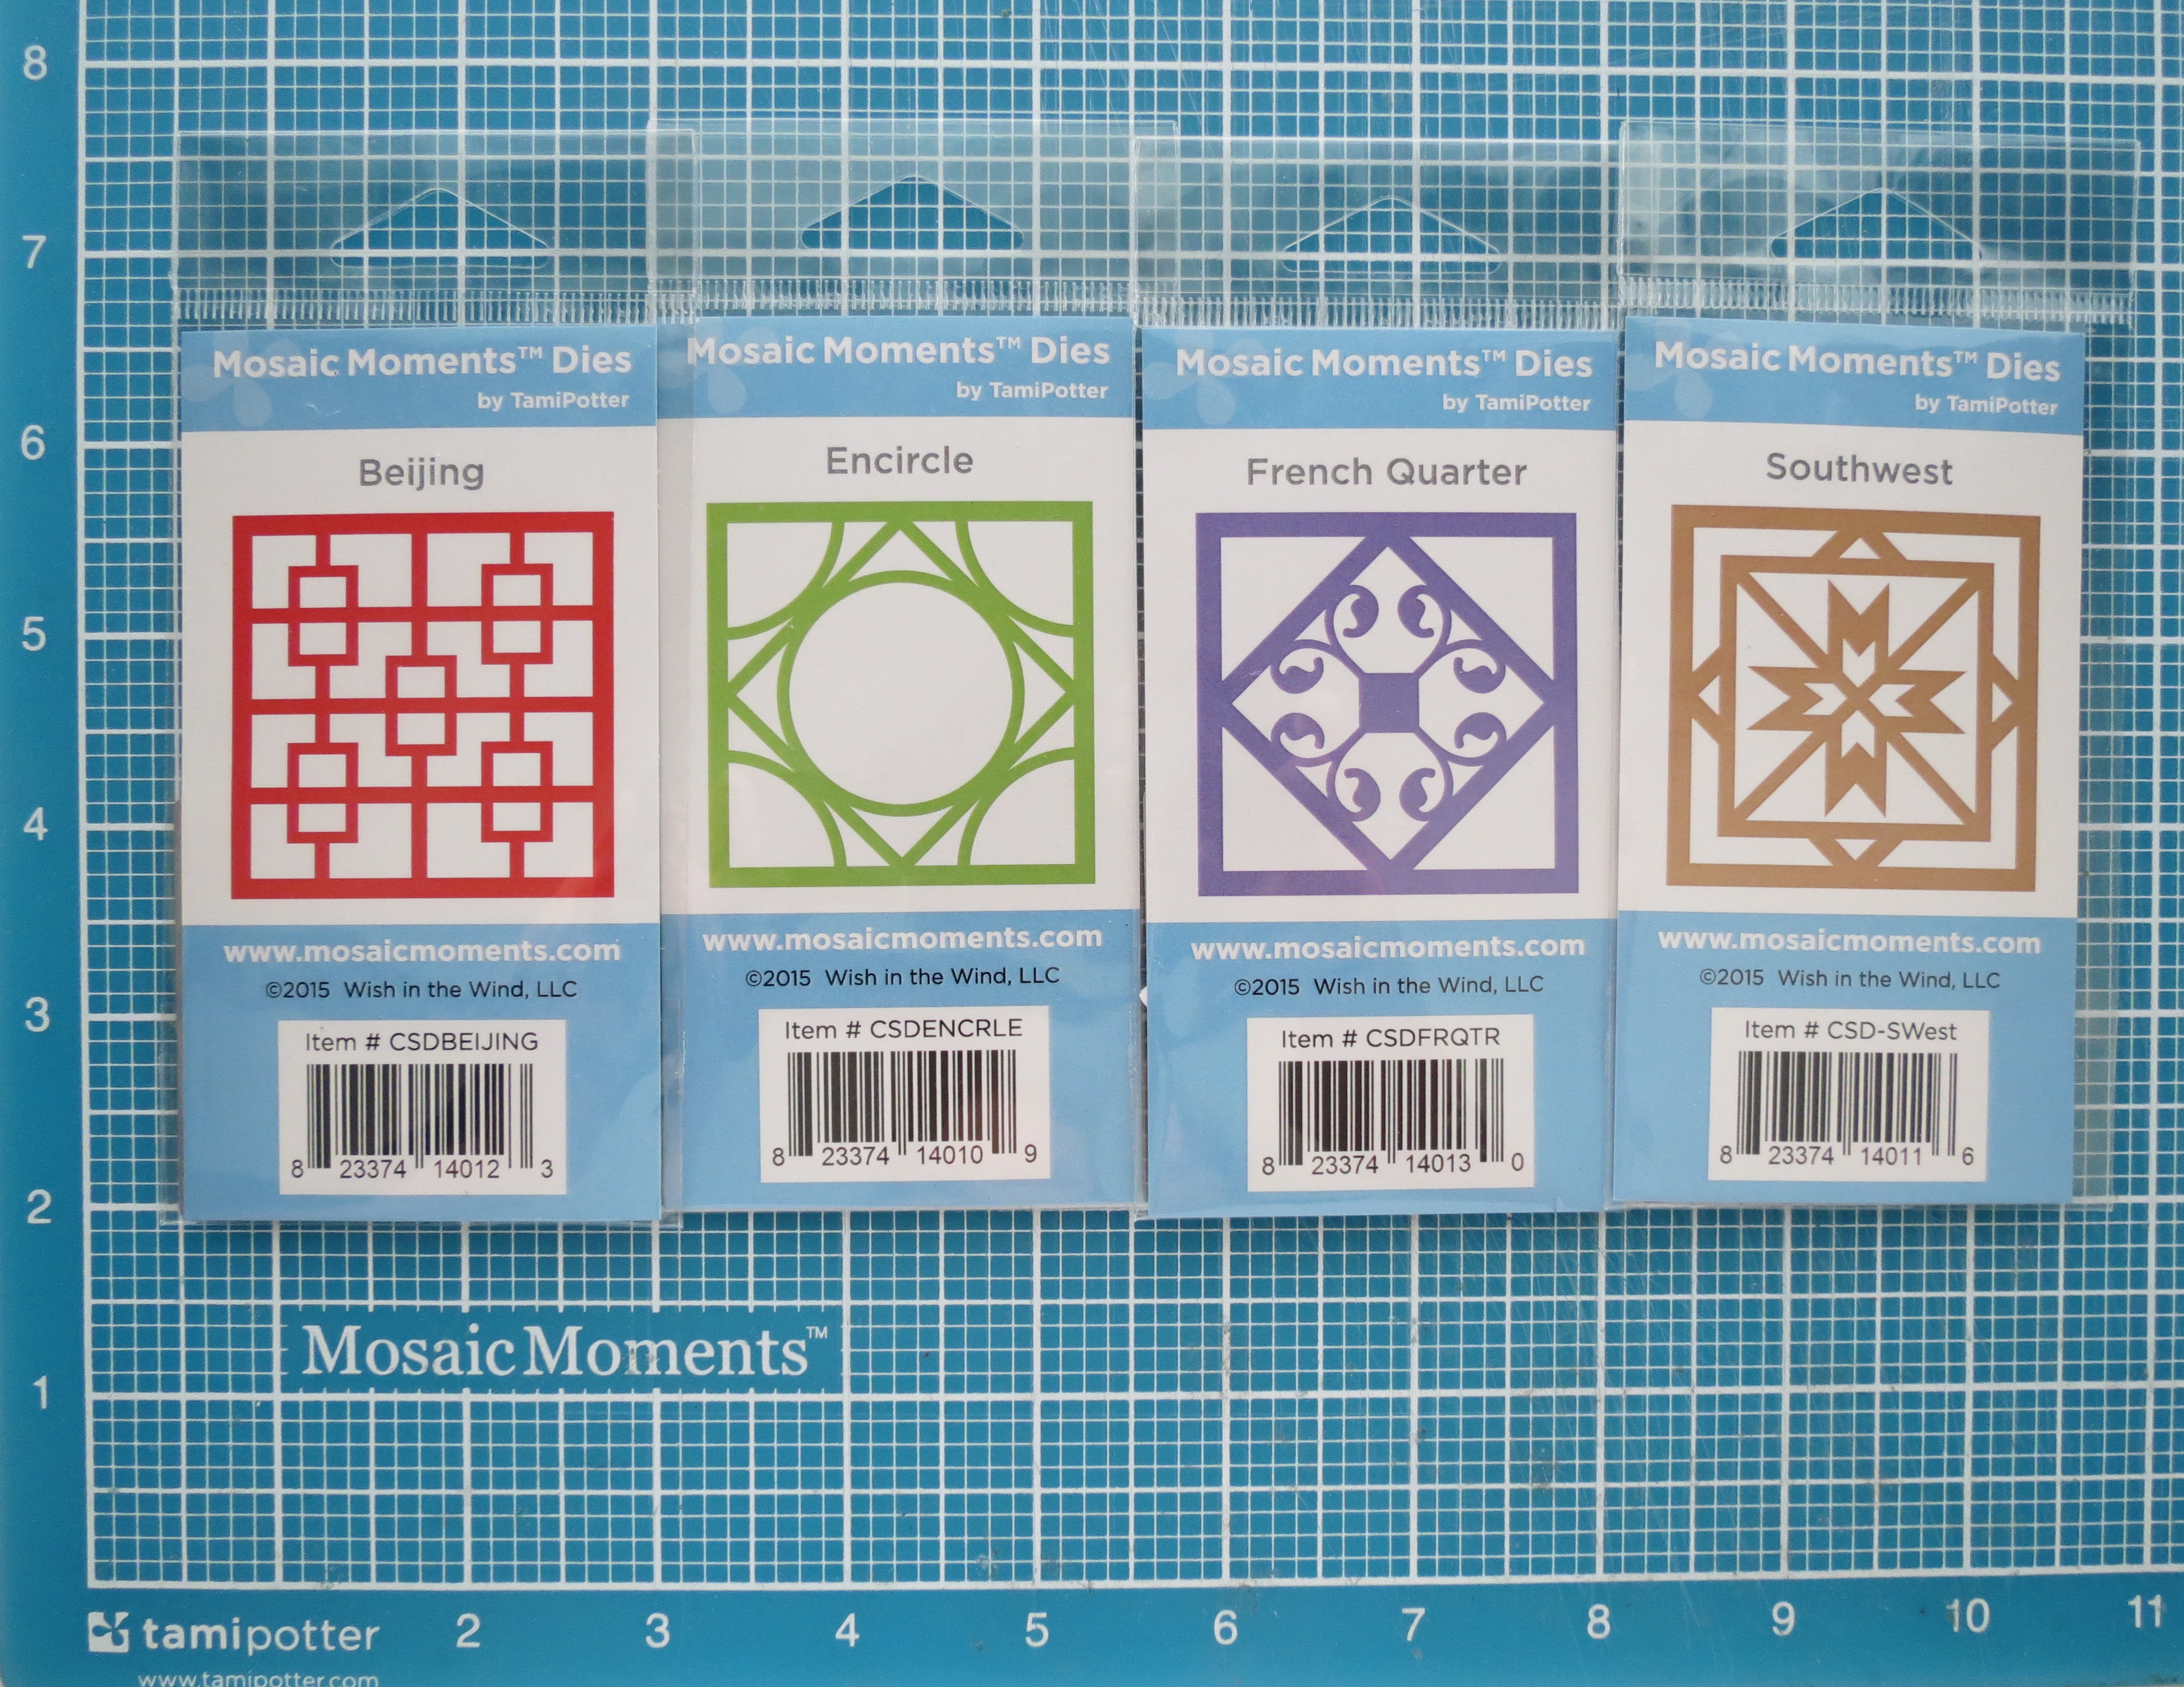
Cornerstone Dies: Beijing, Encircle, French Quarter, Southwest
The first spark for this project began when I cut a sample from the die and sat and played with the pieces. Before long I had a plan. This is one idea that pays for itself the first time you use it! Talk about economical!!
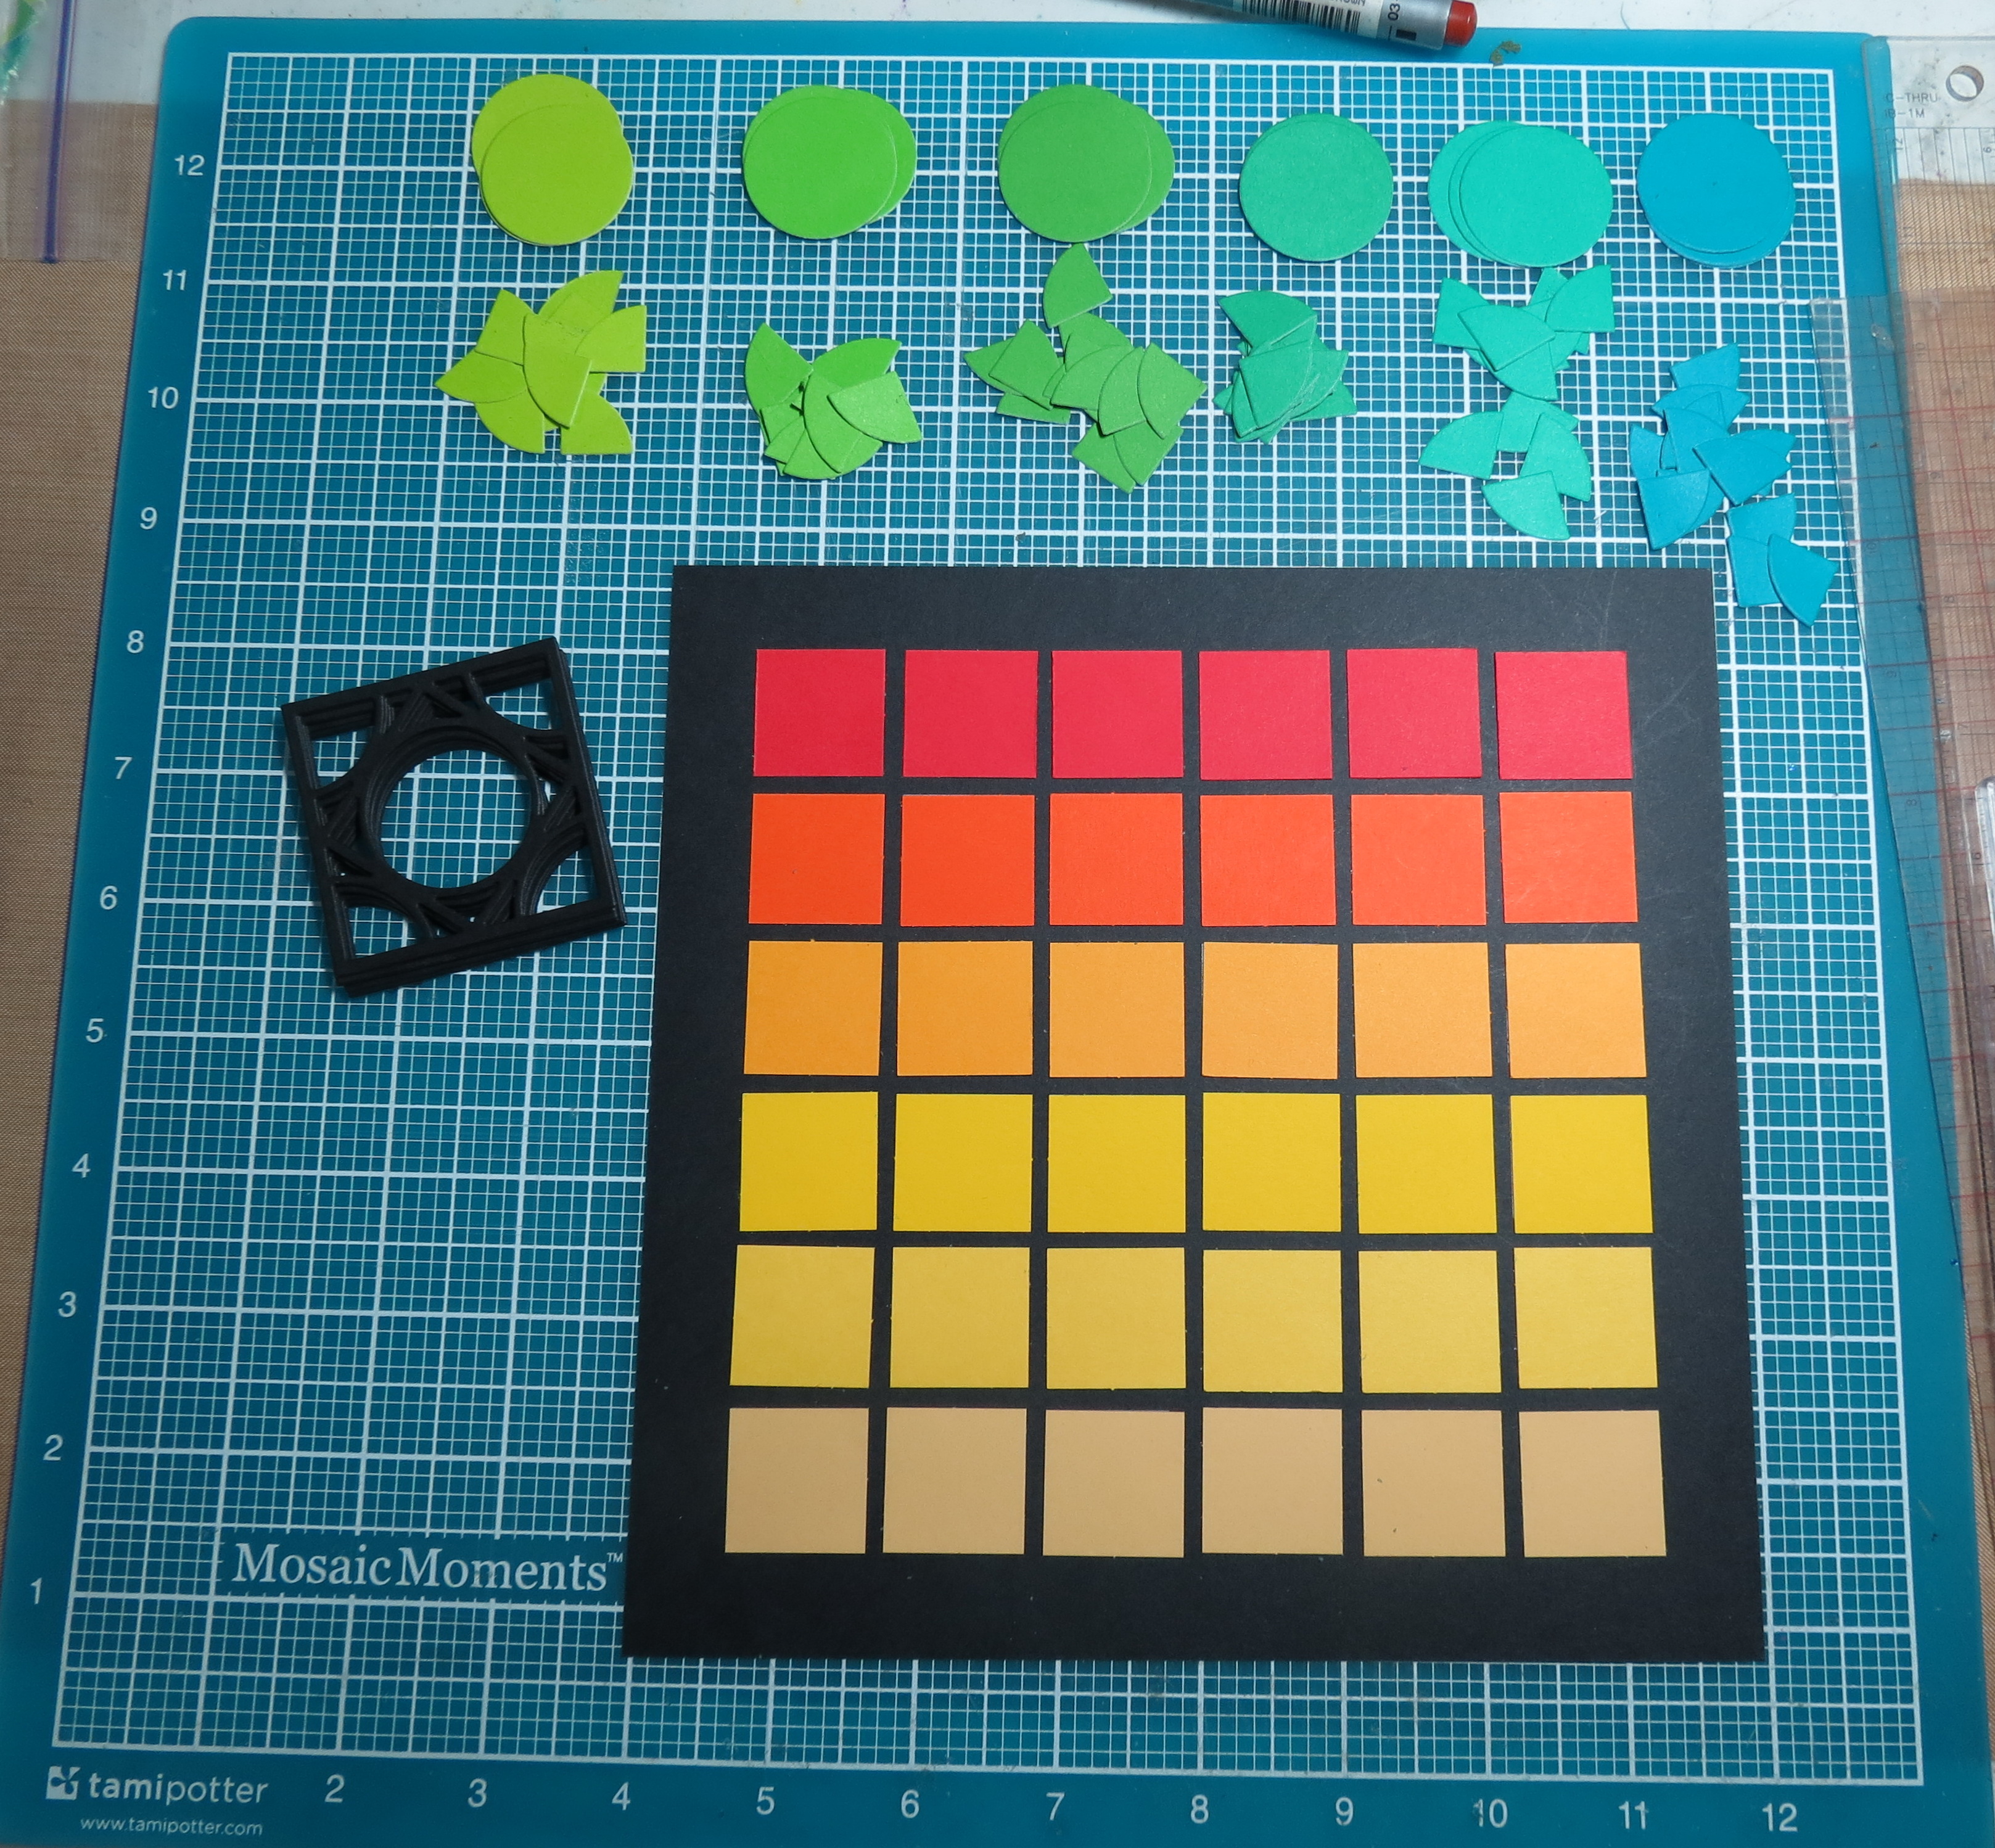
Step One: Cut nine Encircle Cornerstone tiles in Black. (Cost of die: $7.99. Cost of 9-Cornerstone Tiles @ $1.49 each…$13.41) Save all the pieces in small baggie for future use.
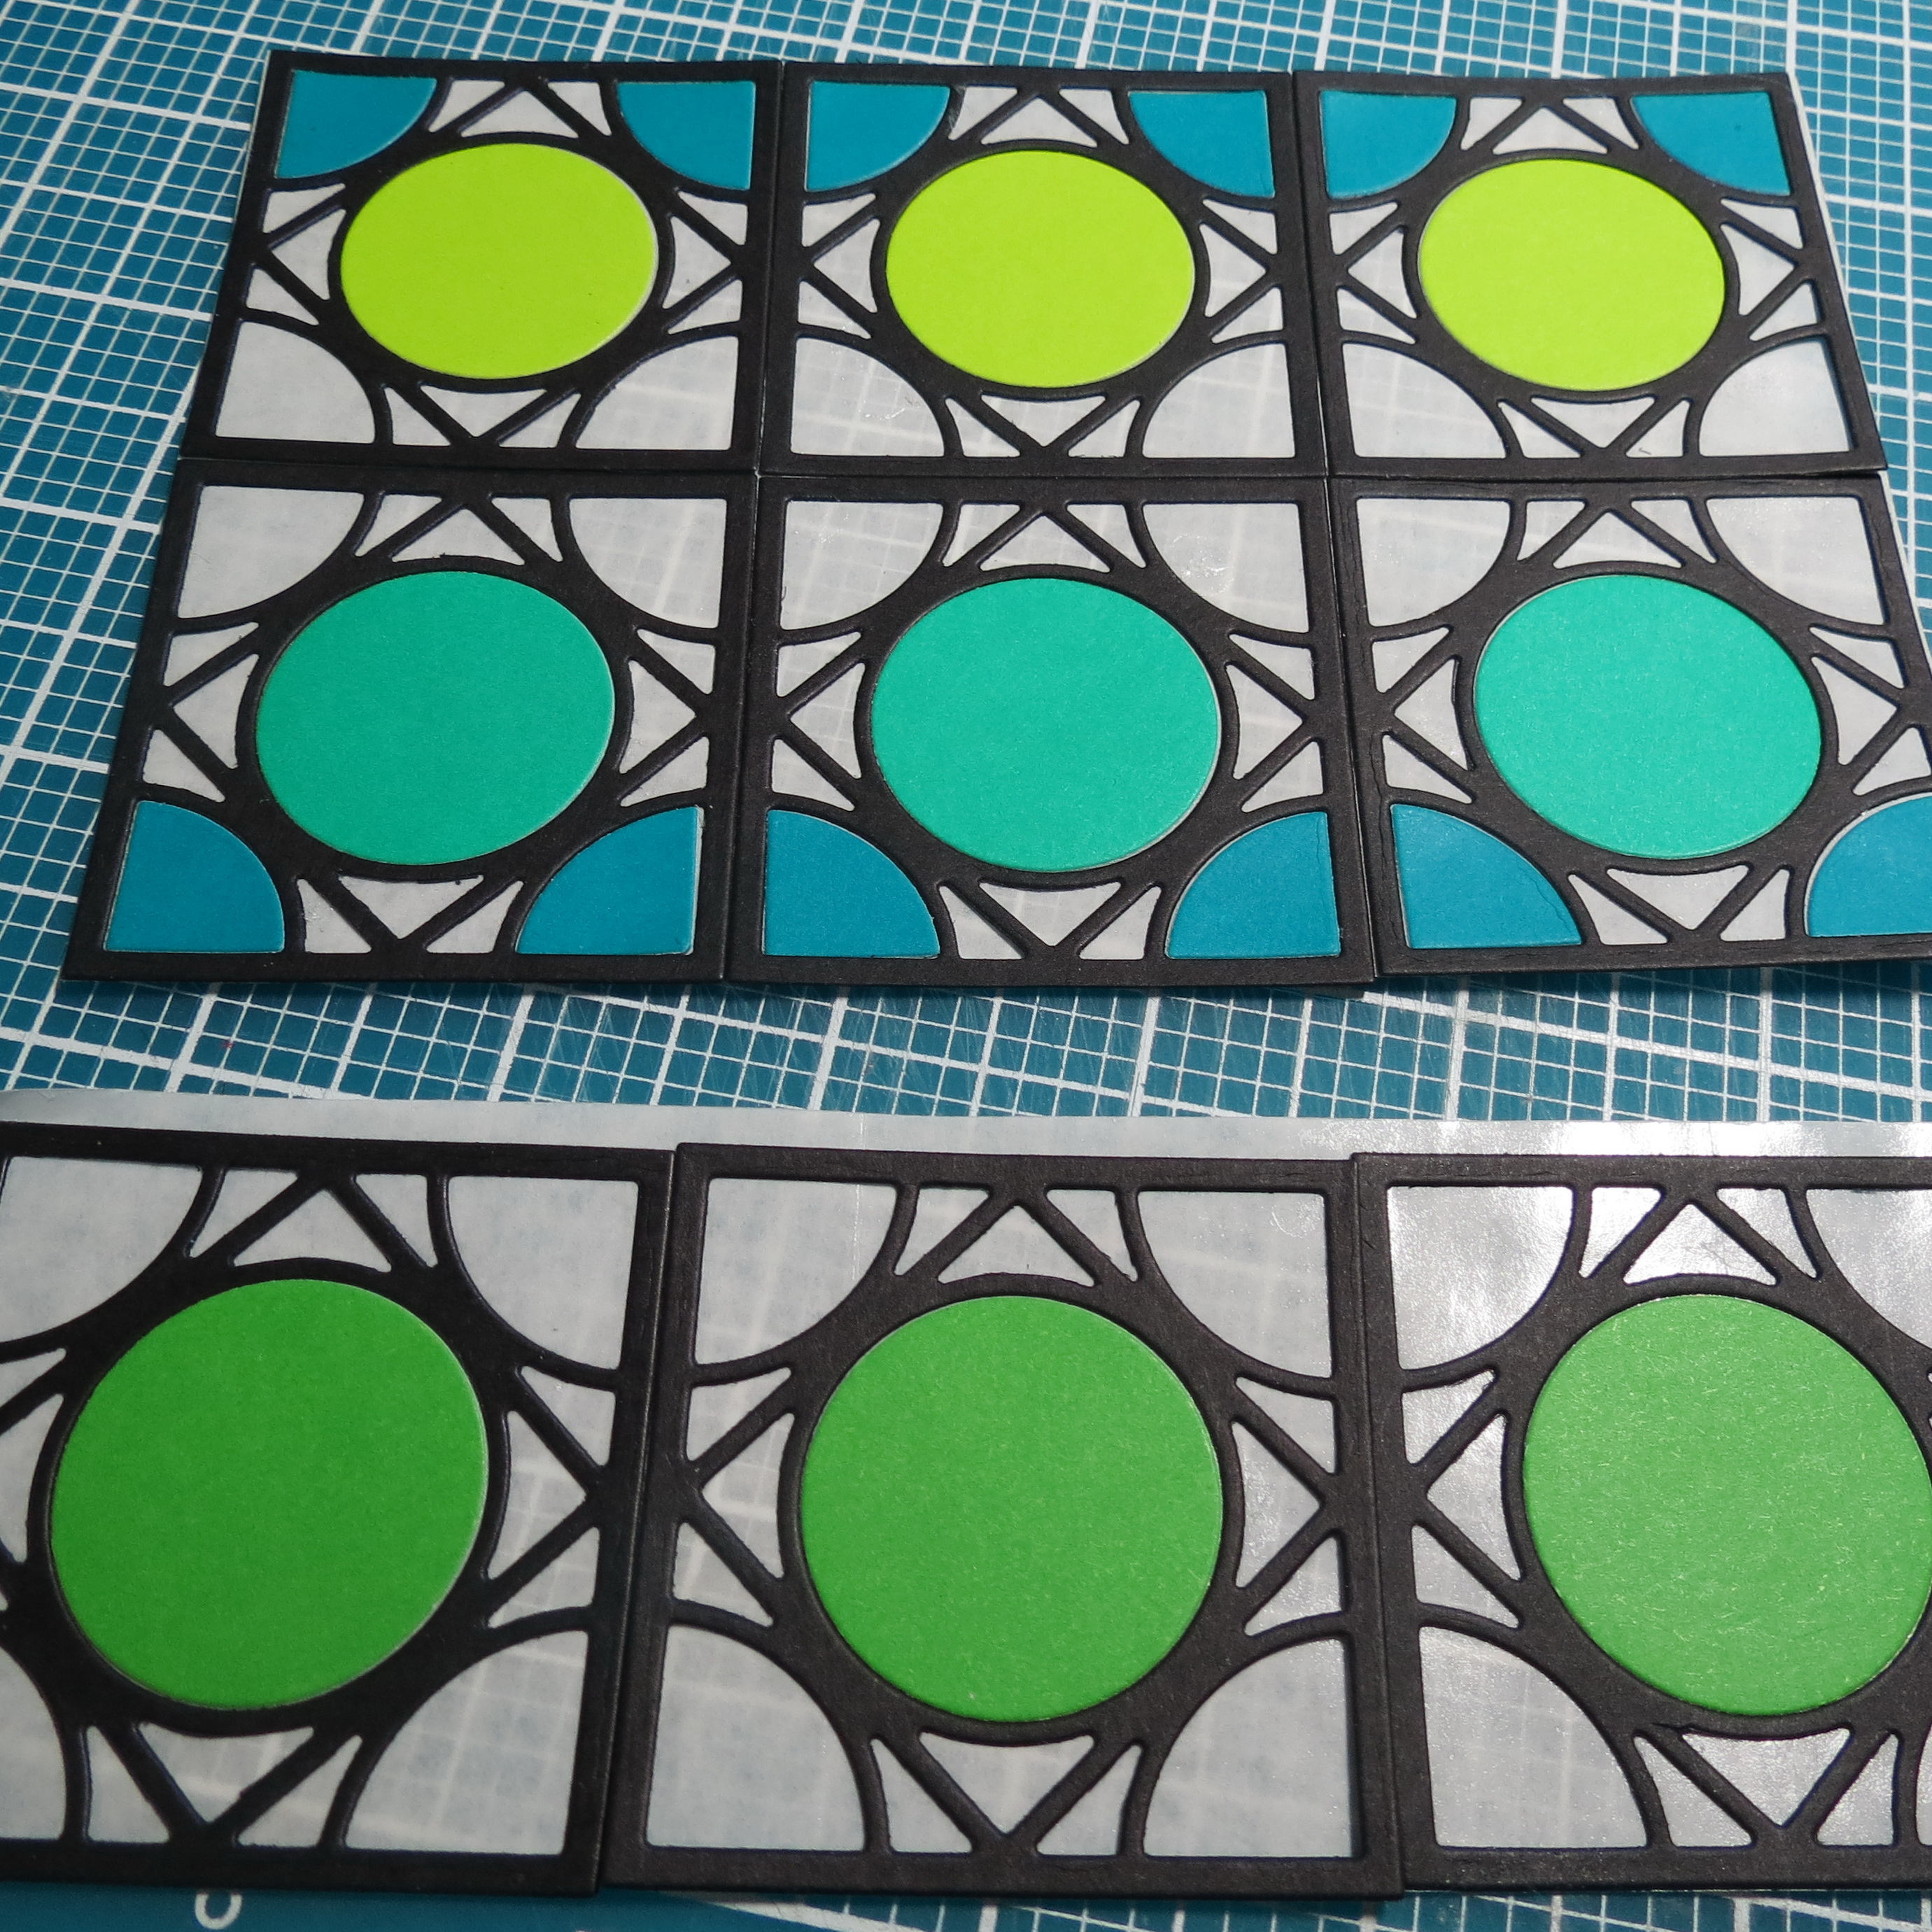
Step Two: Cut three Encircle Cornerstones in each of 6 shades of green. Save all the pieces, we will be using the inside sections, save the cornerstone itself for another project. (18 Cornerstone tiles…for the center sections only…which do not come with those purchased, but if they did would cost: $26.82)
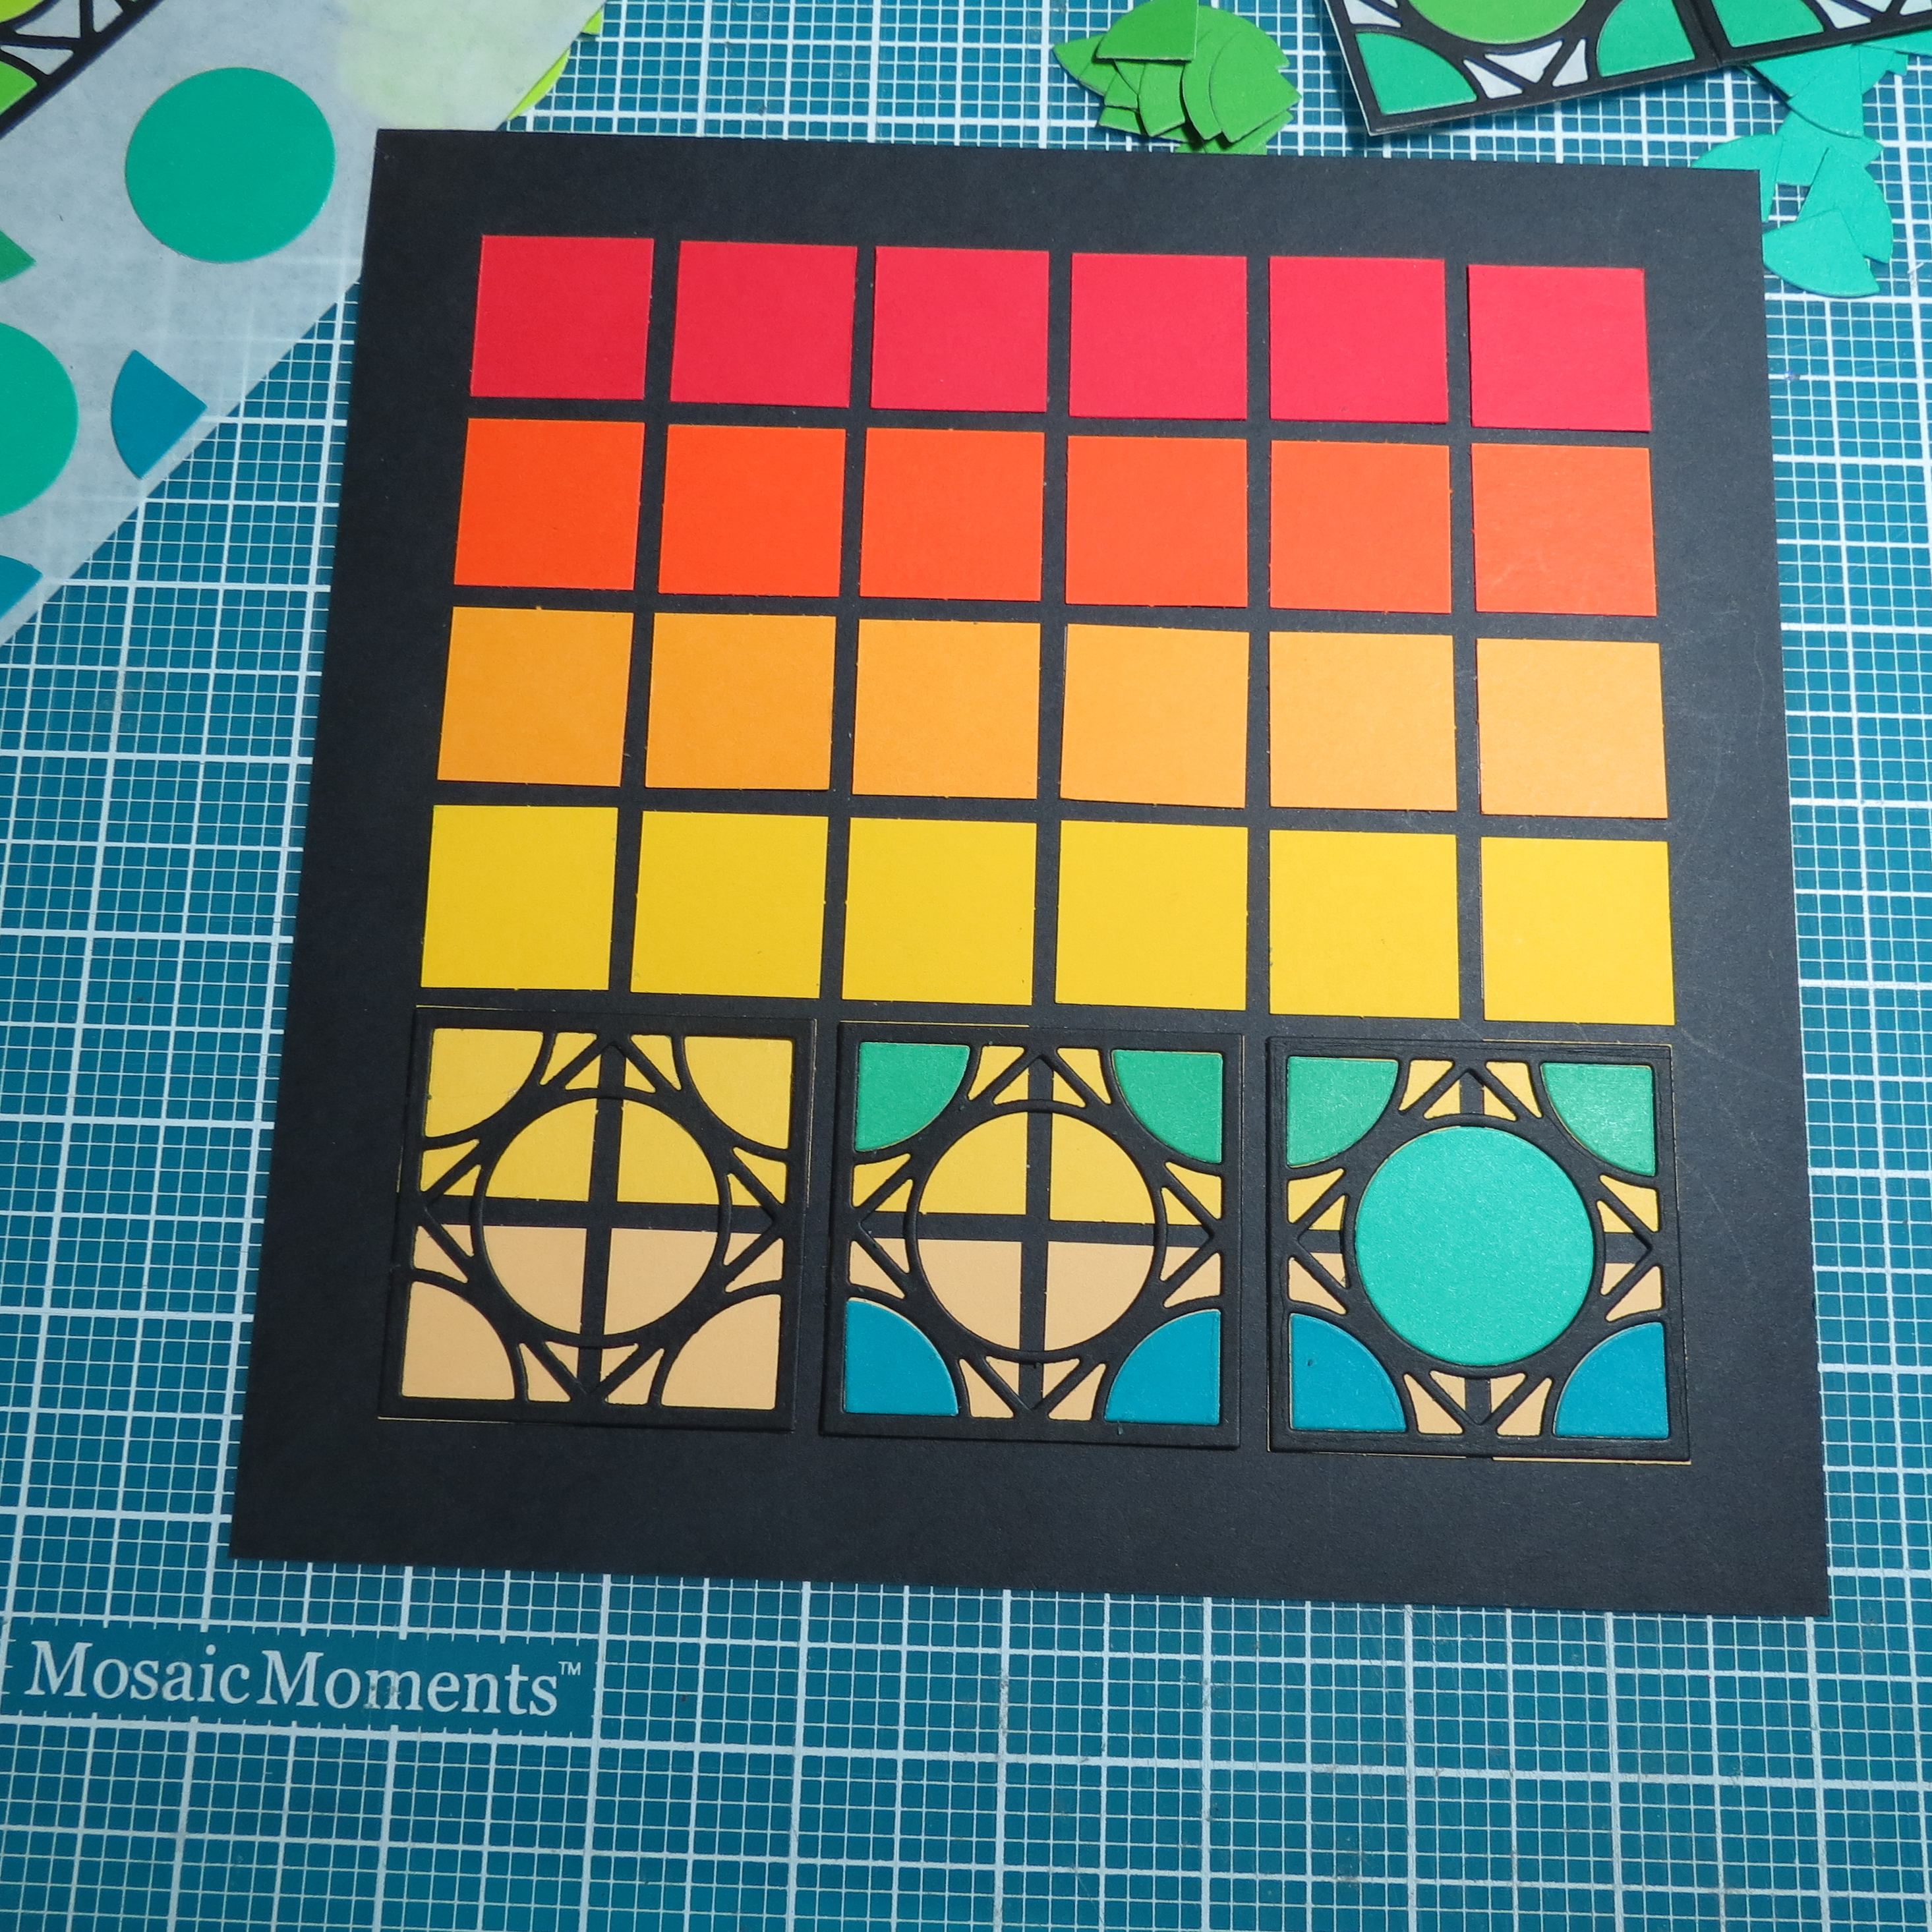
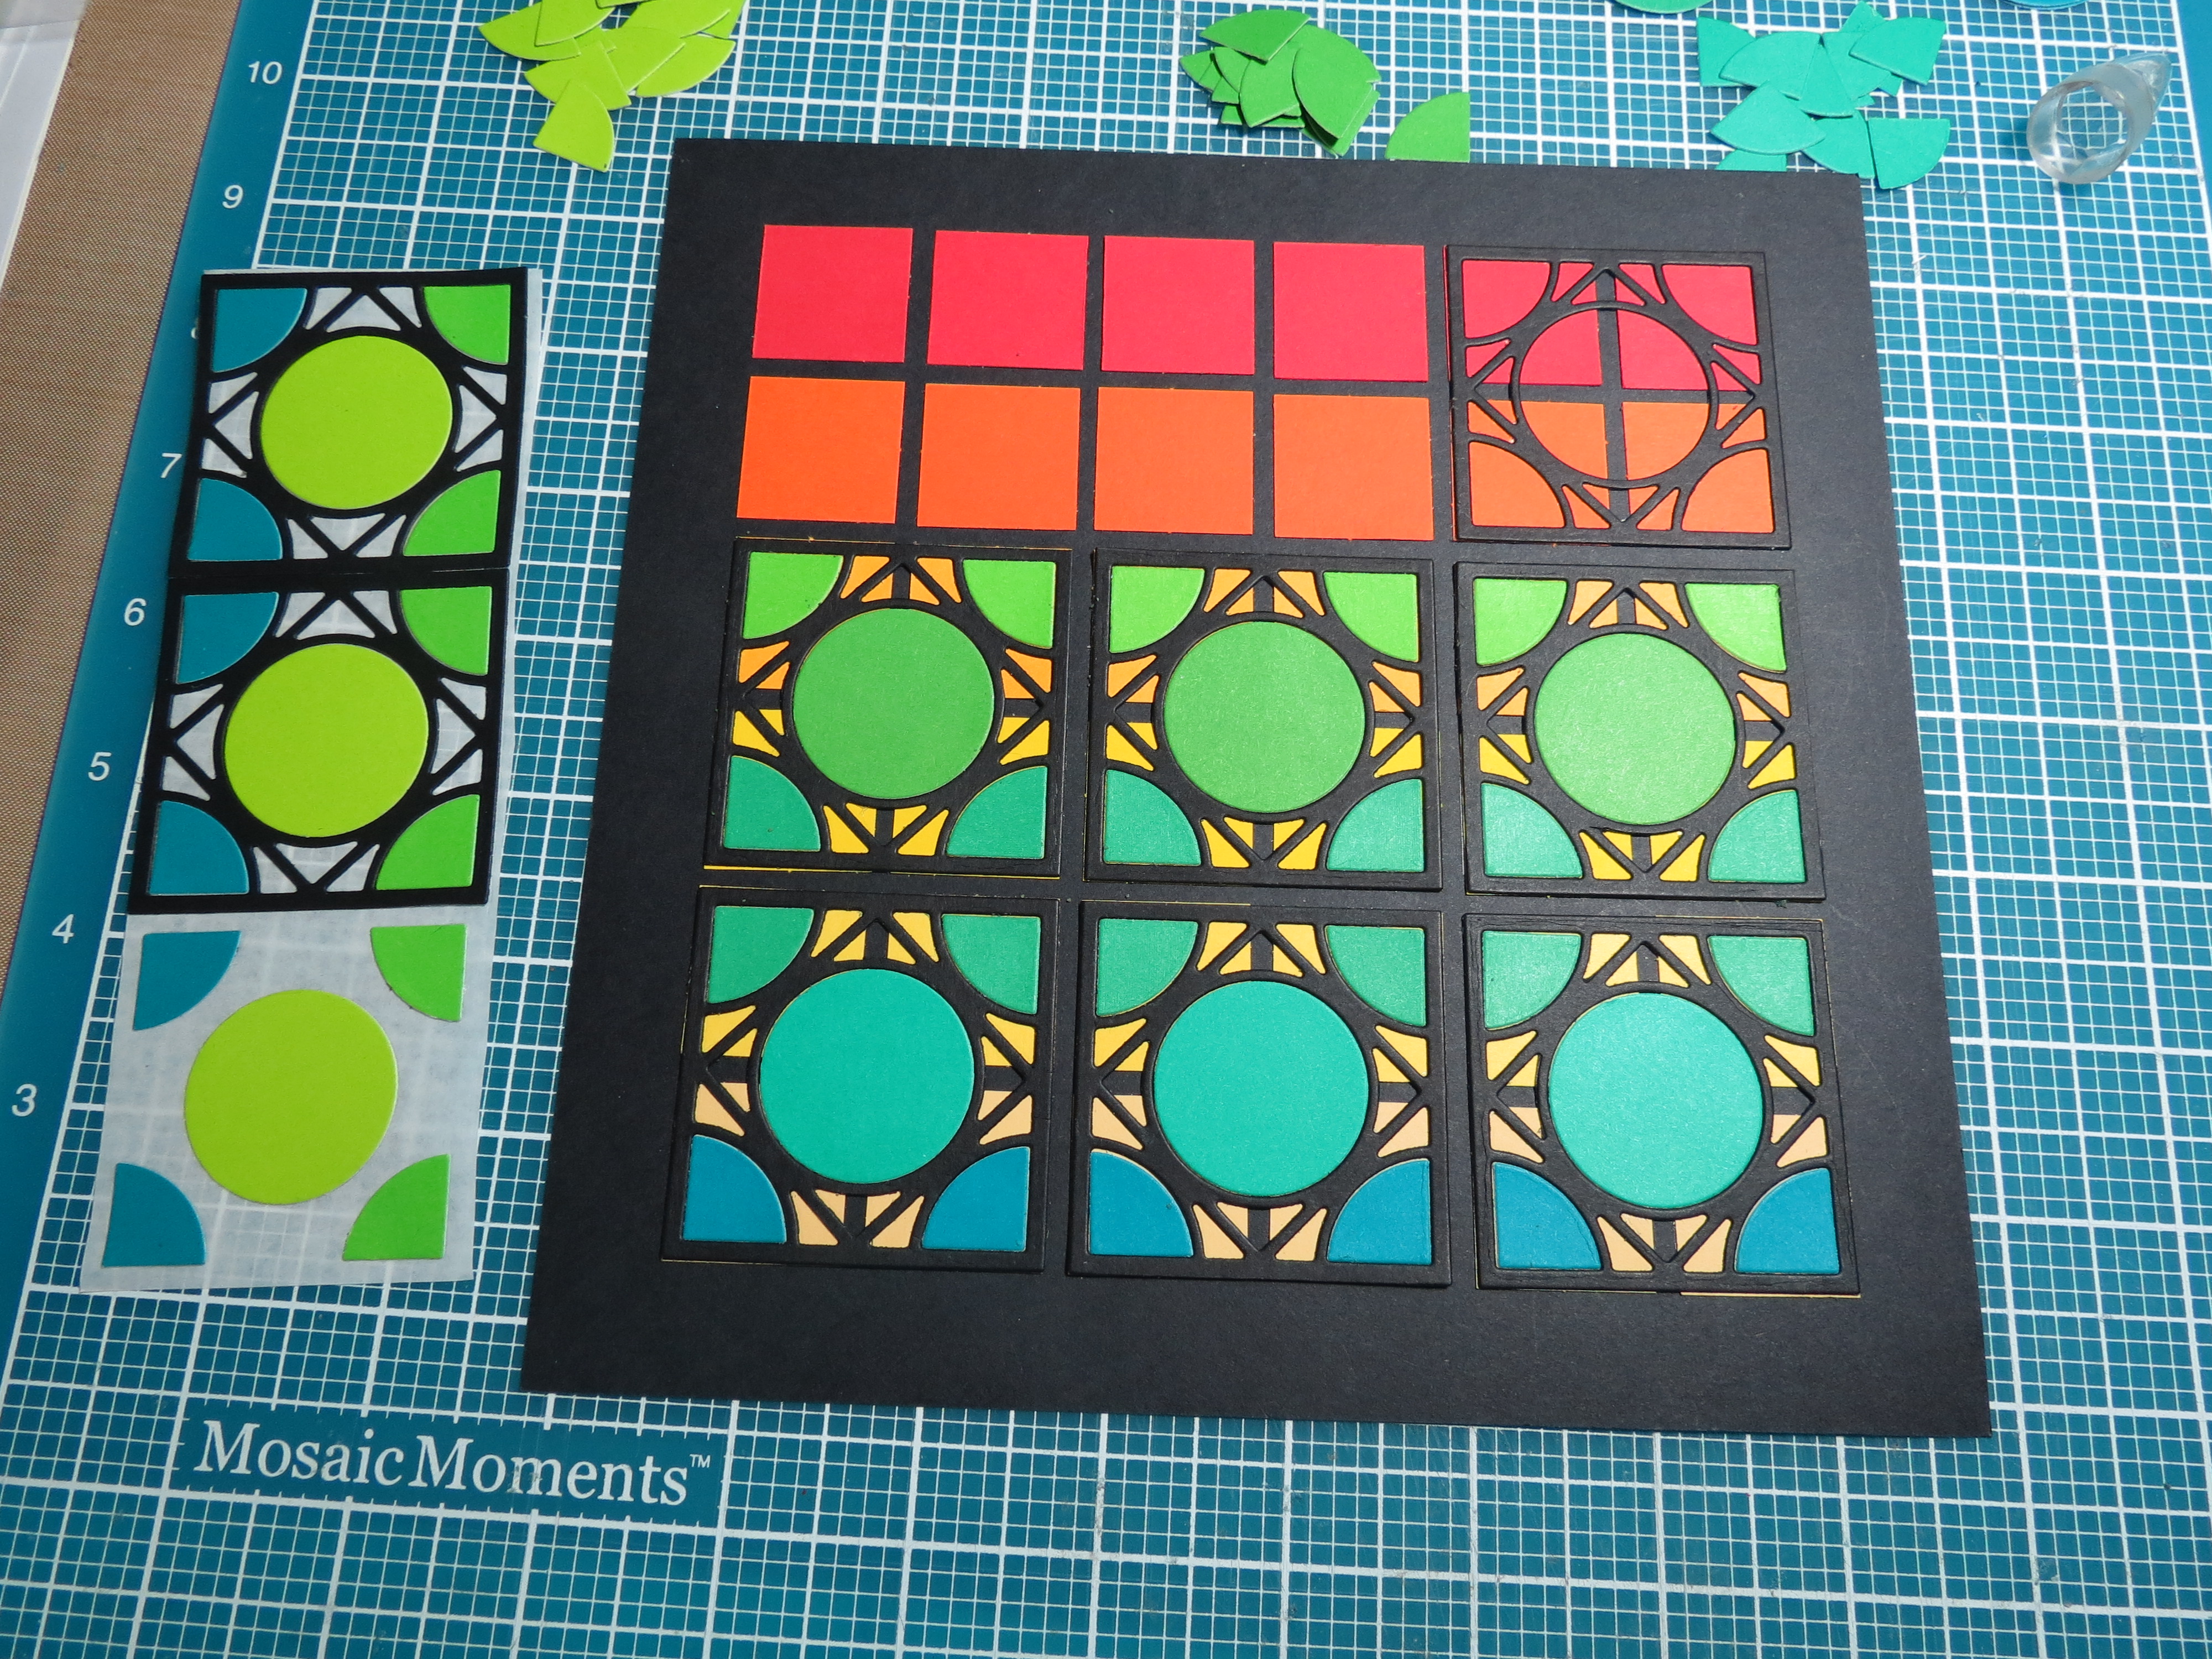
Step Three: Choose your background colors. For ease Paper Tiles were used in a gradient grouping of yellows to oranges to red. You will need 6 shades for a progressive blend, or three shades for an in and out blend. Or you can use entirely random colors and scraps that you can punch 1” squares to fill the back grounds.
Cornerstone Dies: Encircle
Step Four: Work with the pieces you have by making organized piles in the order you will need them.
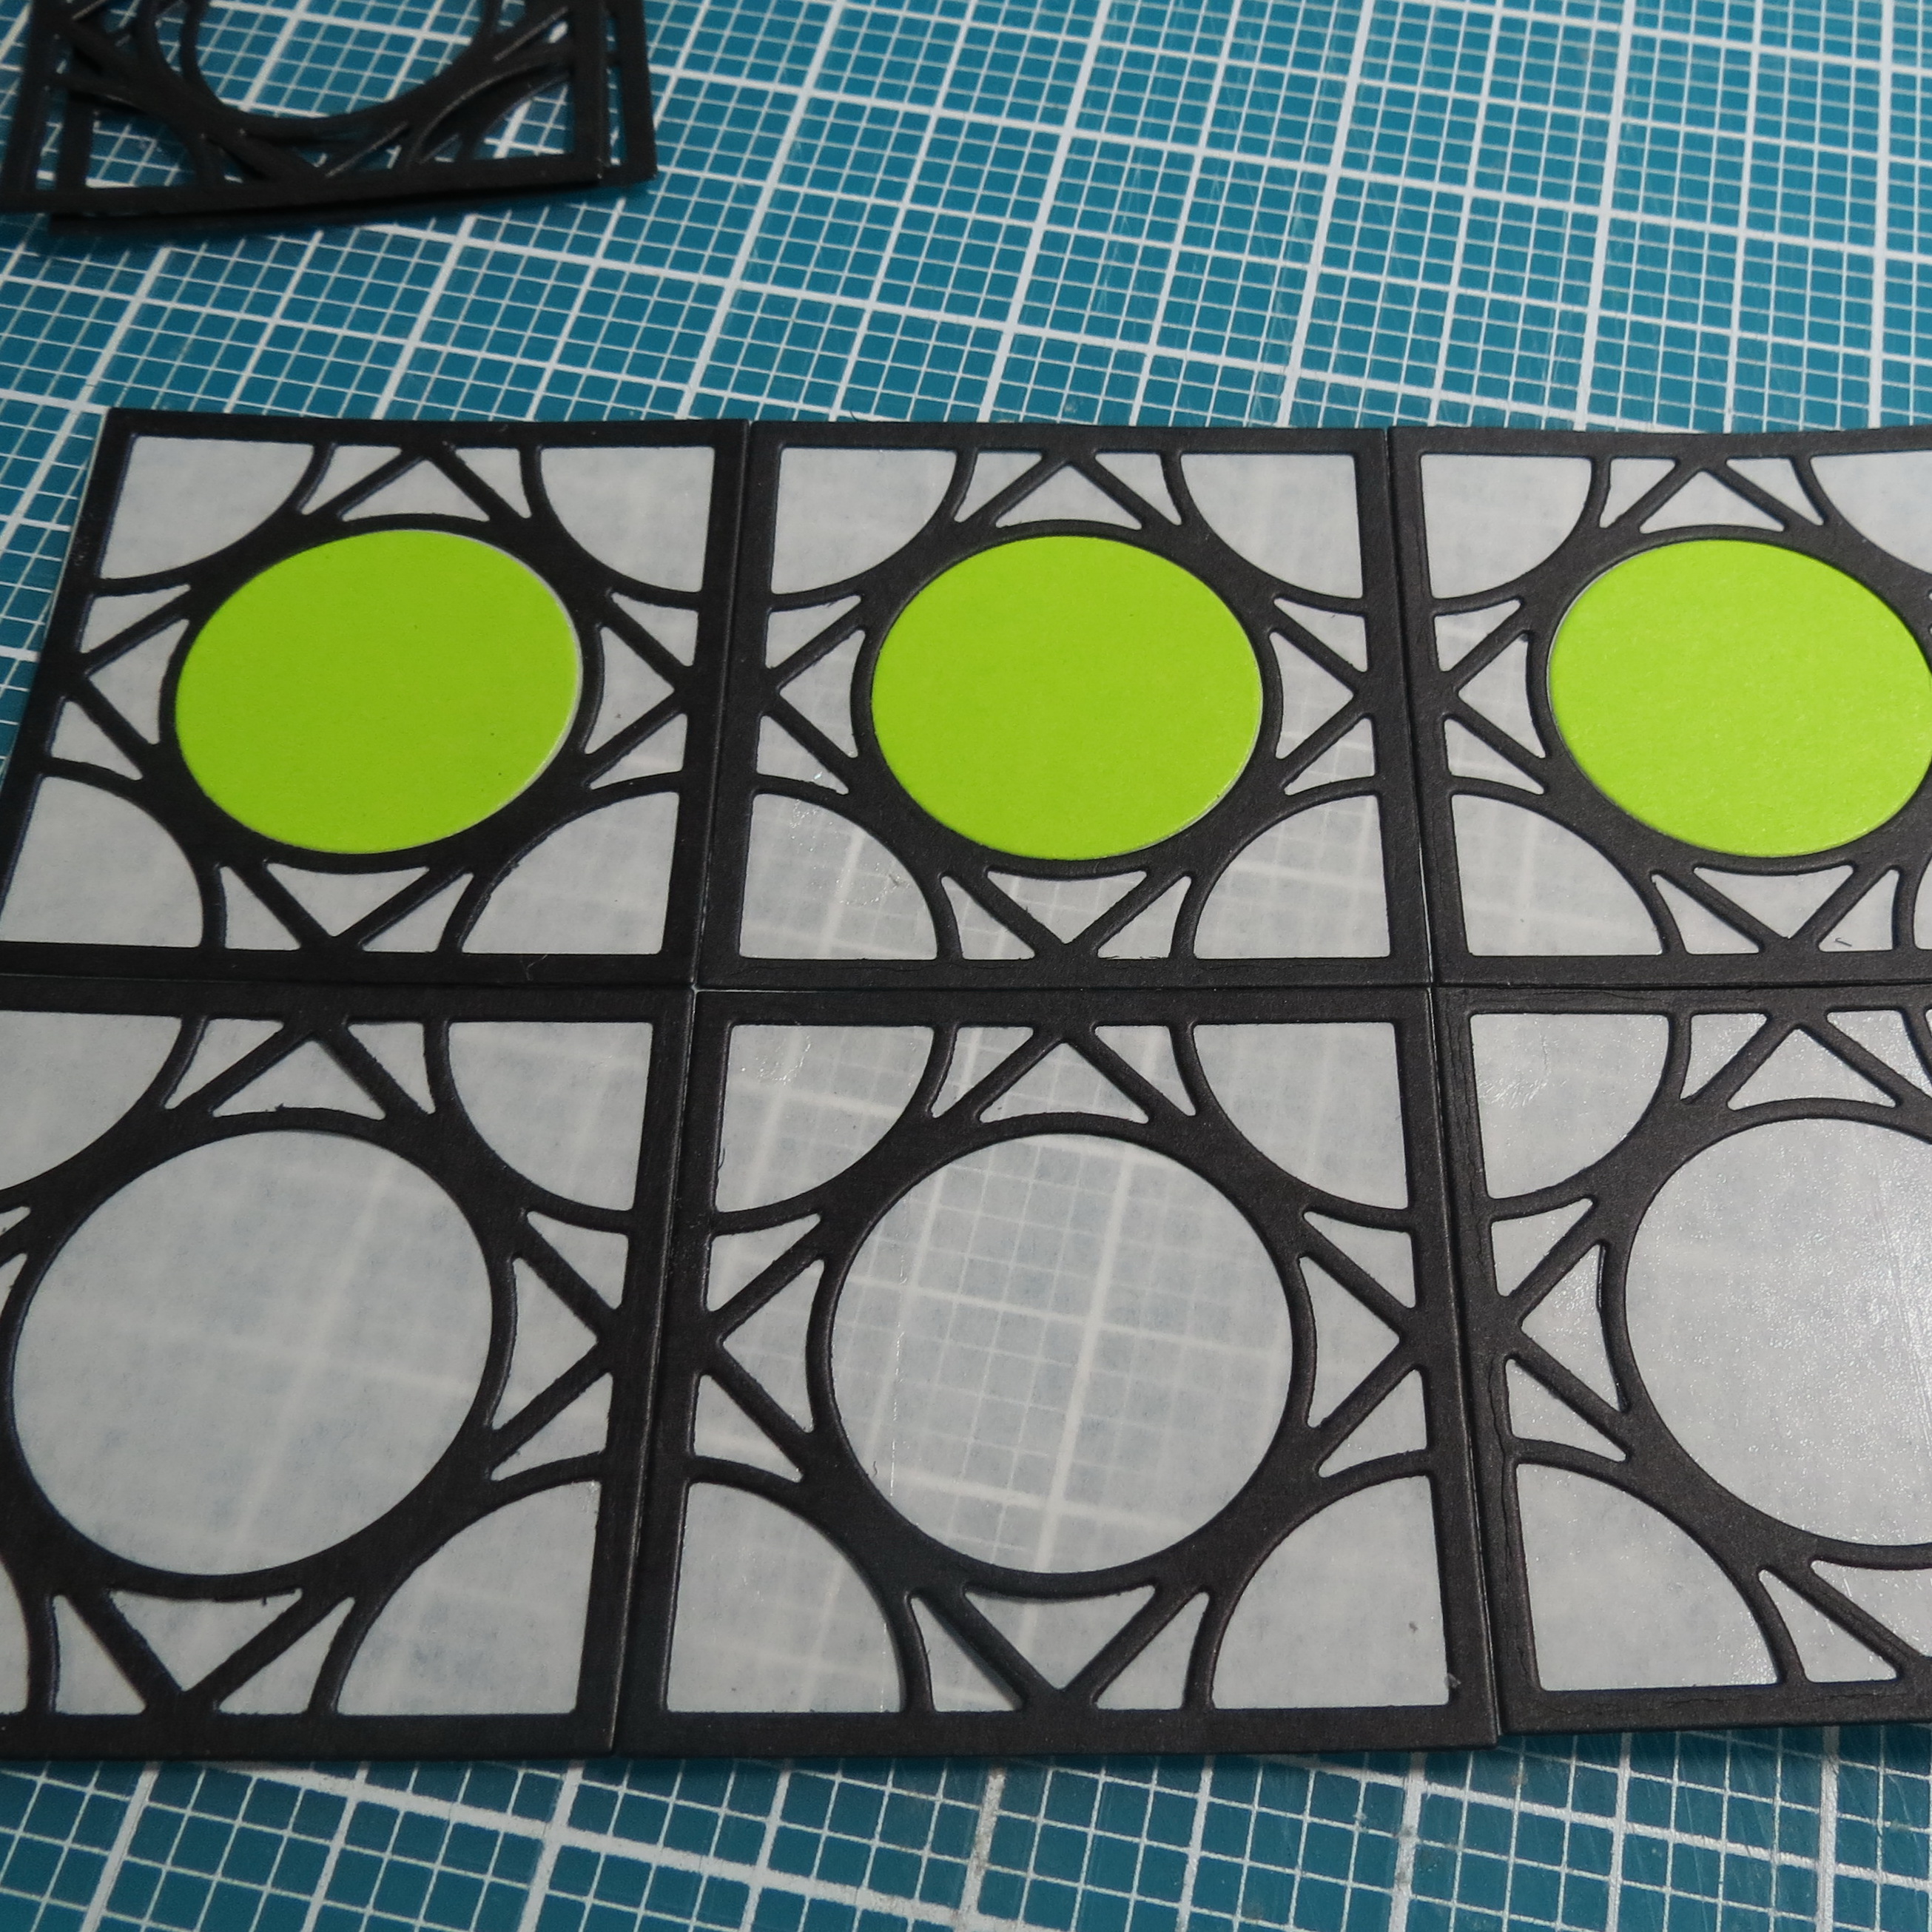
Step Five: Adhere your 1” Paper Tiles in the pattern you want to your 8” x 8” grid.
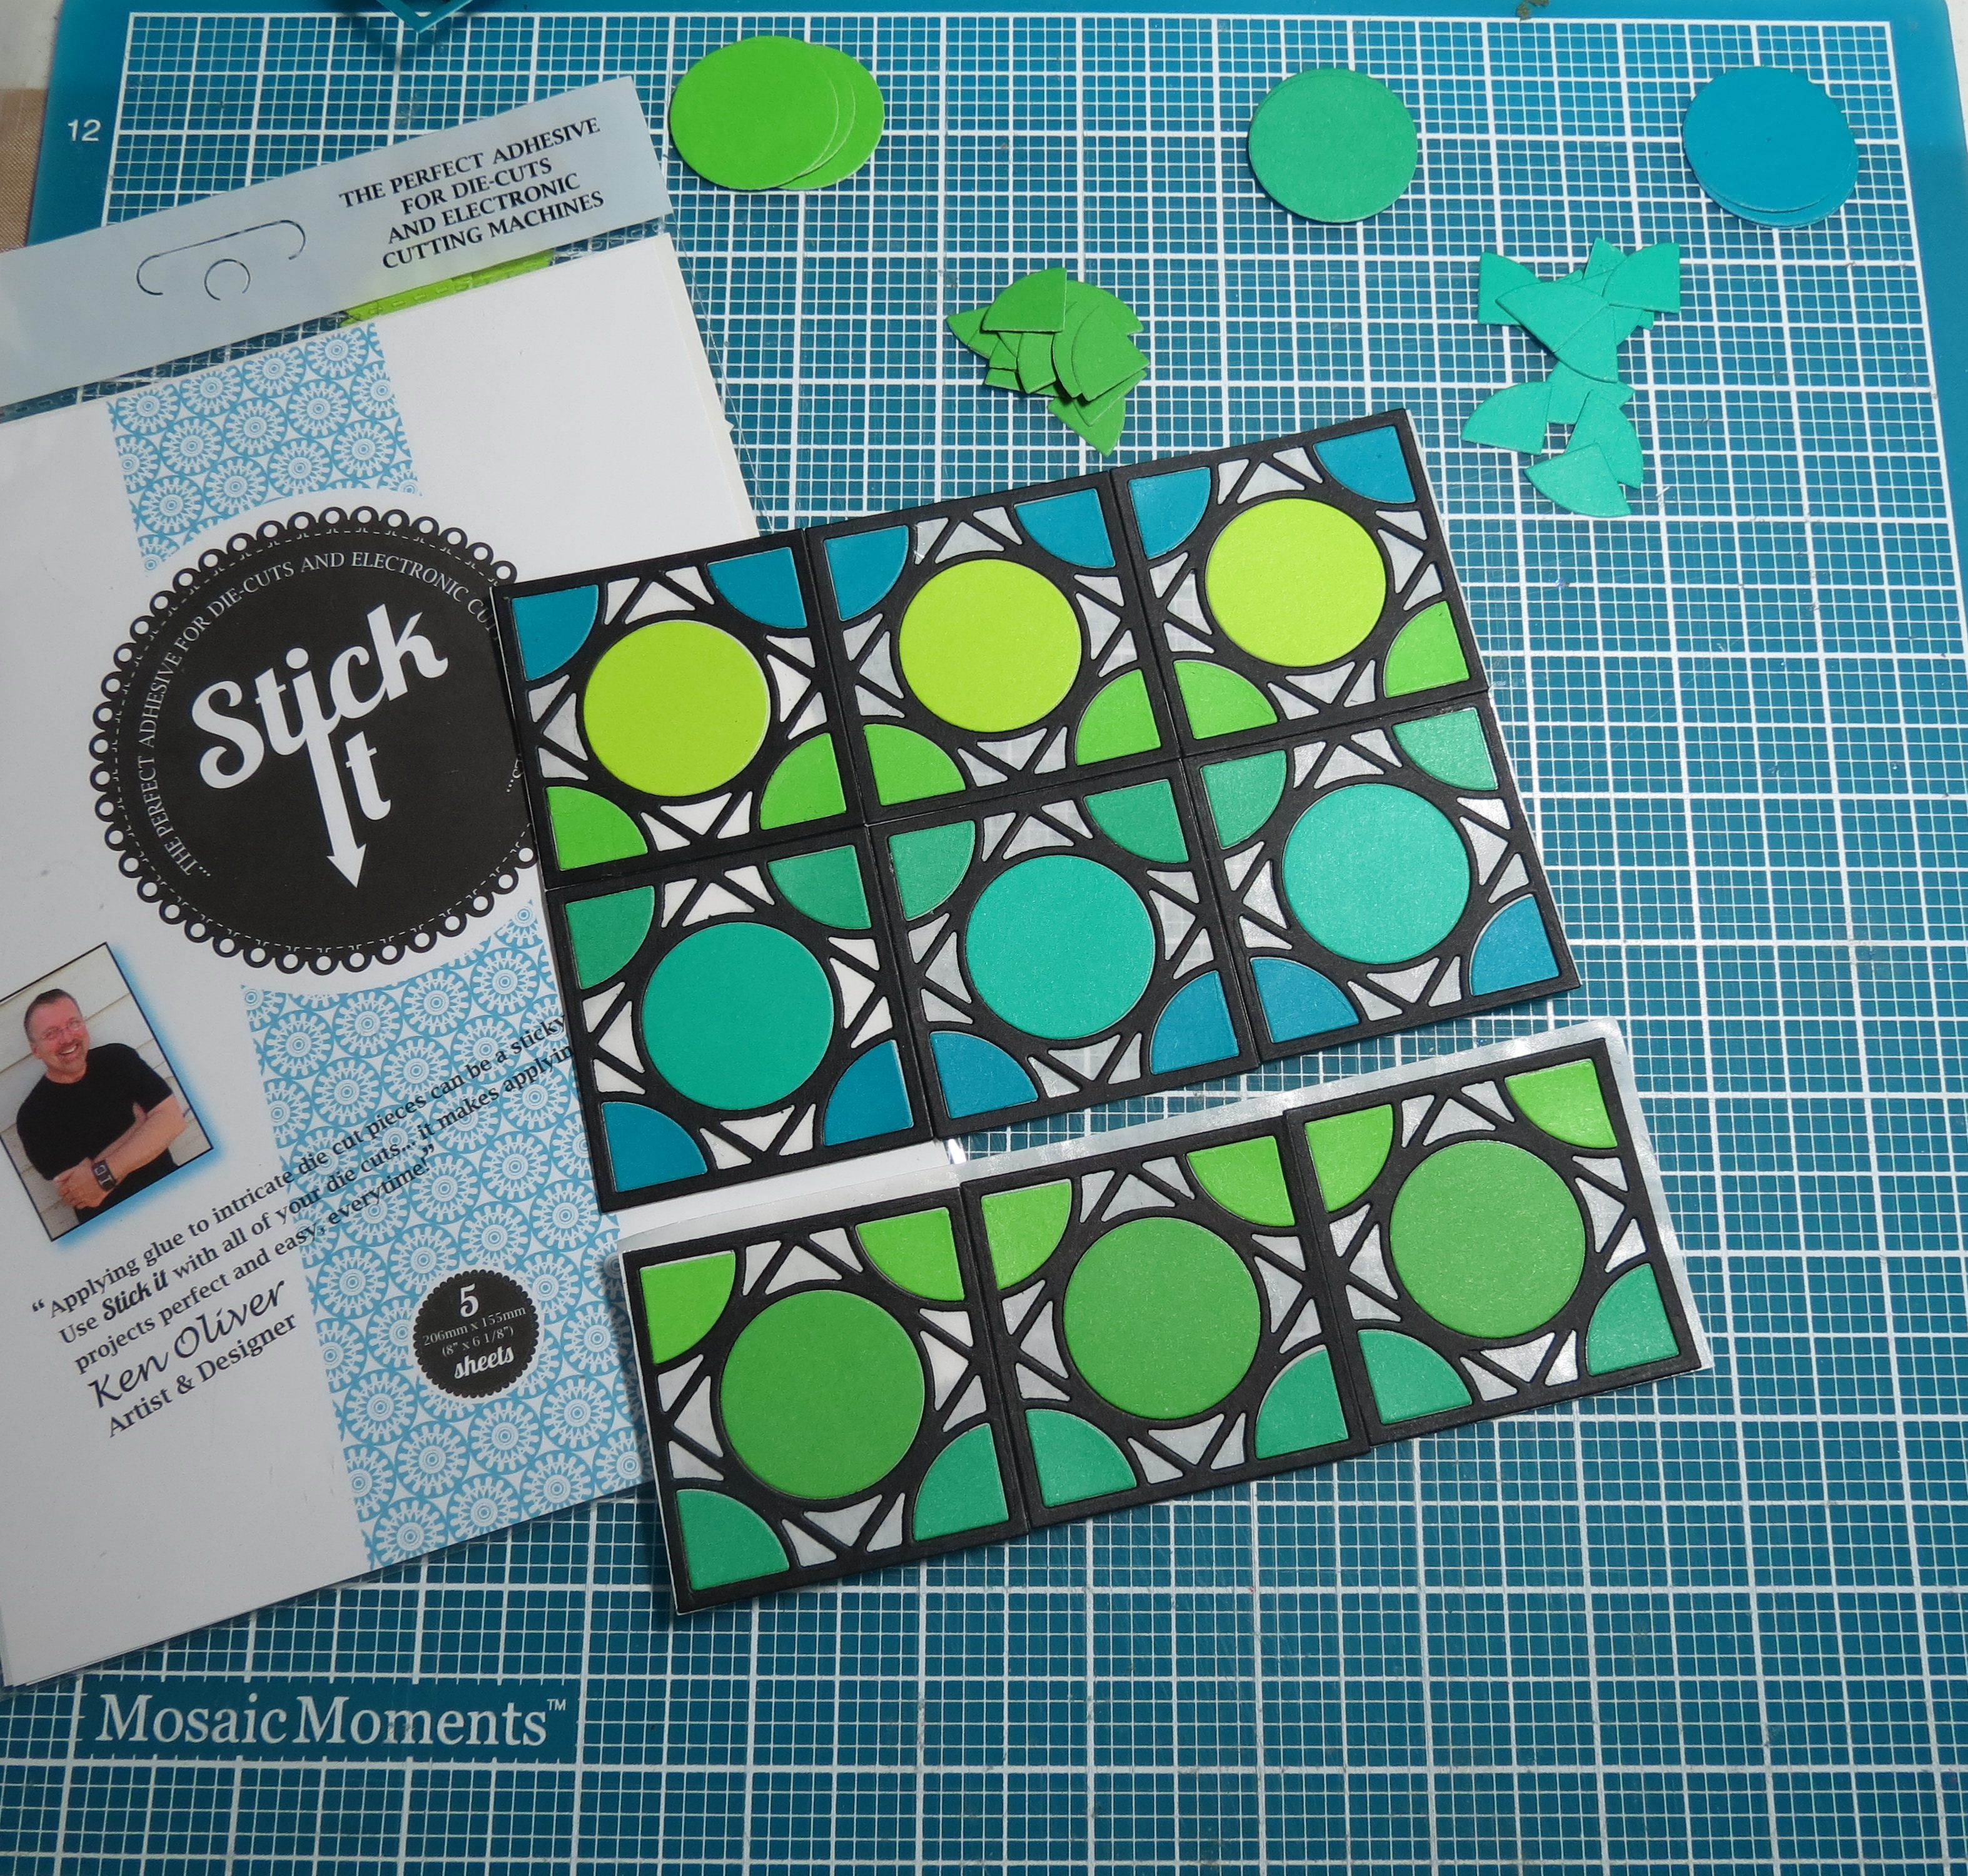
Step Six: Cut a section from each of two sheets of the Stick It! Adhesive Sheets to accommodate your nine black encircle cornerstones. Line them up side by side for maximum use of your sticky paper. Remove the backing as you go, keep your fingers OFF the exposed sticky surface or you will lose it.
Cornerstone Dies: Encircle Die Stick It! Adhesive sheets make covering these pieces with adhesive easy.
Step Seven: Take all of the quarter circle “scraps” in the shades of green and place them into the cutout sections of each of the tiles while on the Stick It! paper. It will help to keep them in the order in which you will be laying them down.
Cornerstone Dies: Encircle Die Stick It! Adhesive
Cornerstone Dies: Encircle Die all the tiles and bits in proper spots
OPTIONAL Step Seven B: if you’d like to try a more complex pattern, now is the time to add all the tiny bits you saved (you did save them, right?) and place them into the appropriate space.
1.) It makes use of the sticky that will be left over if you don’t, plus
2.) It is much harder to try to get glue on them later.
Step Eight: Remove the excess glue from the page by rubbing it loose before you begin to lift pieces.
Step Nine: Begin to add your black tiles covering four 1” tiles at a time.
Cornerstone Dies: Encircle Dies Arranging the cornerstones on the grid layering all the pieces.
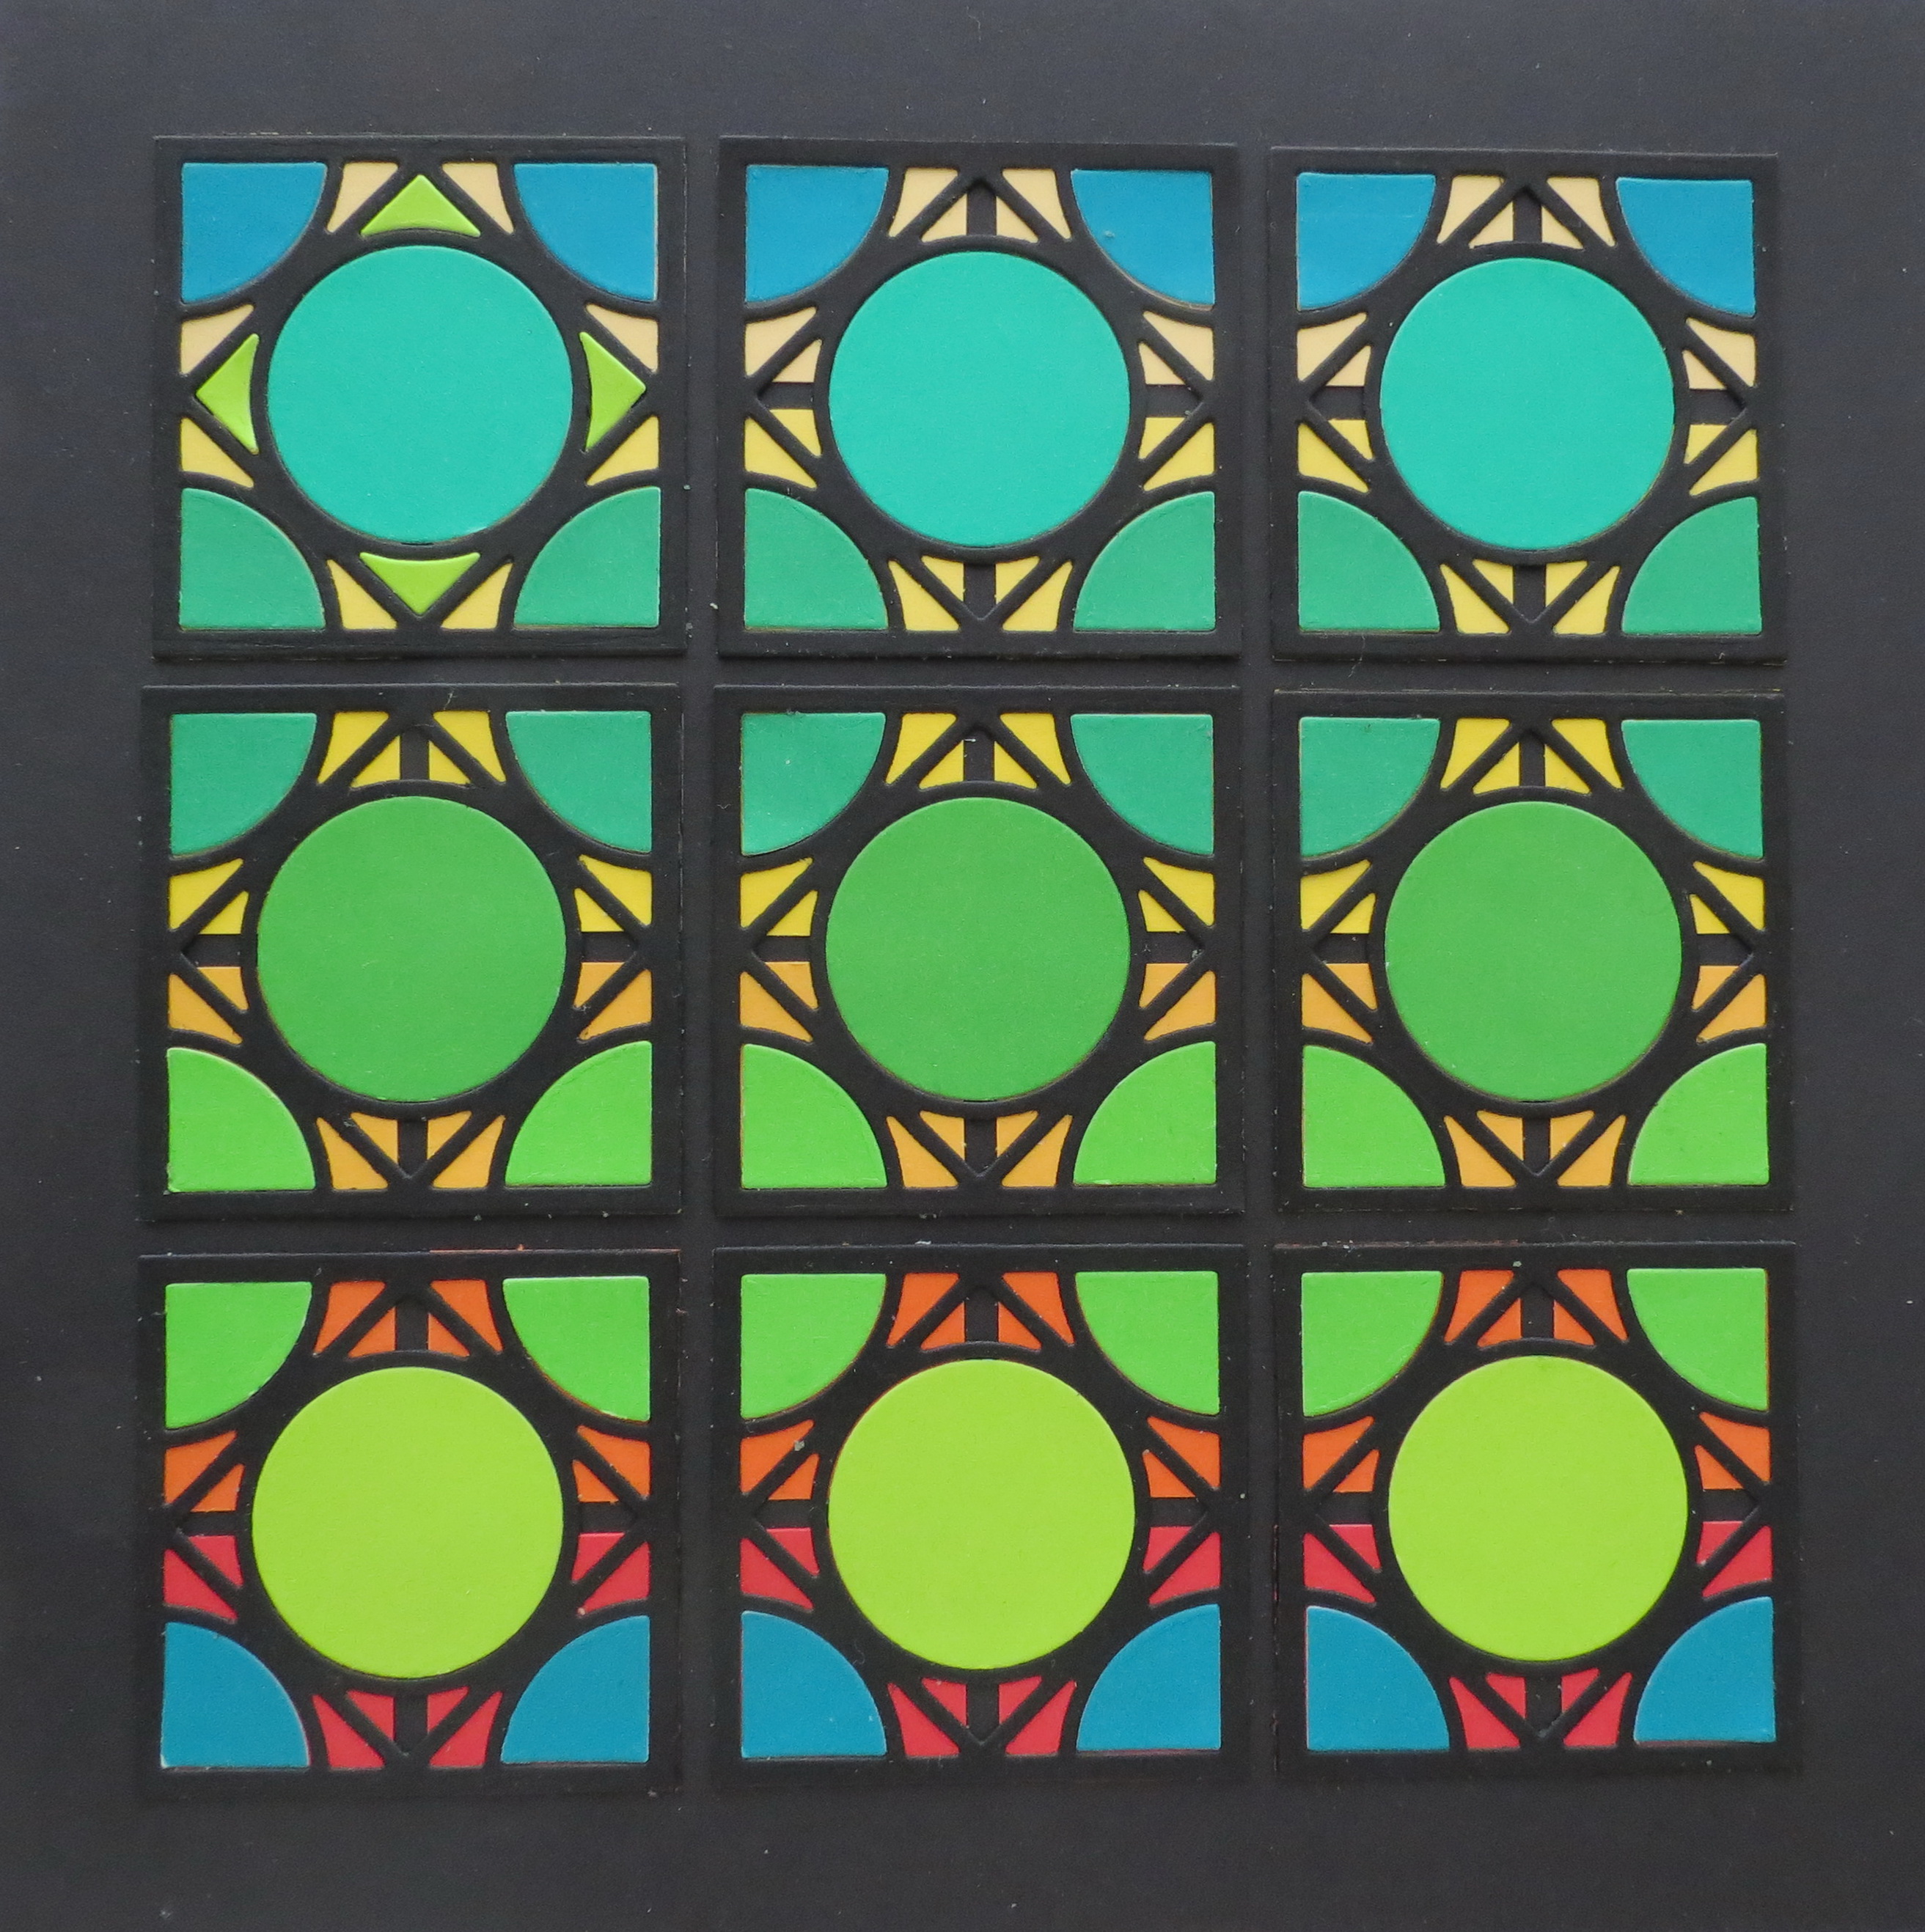
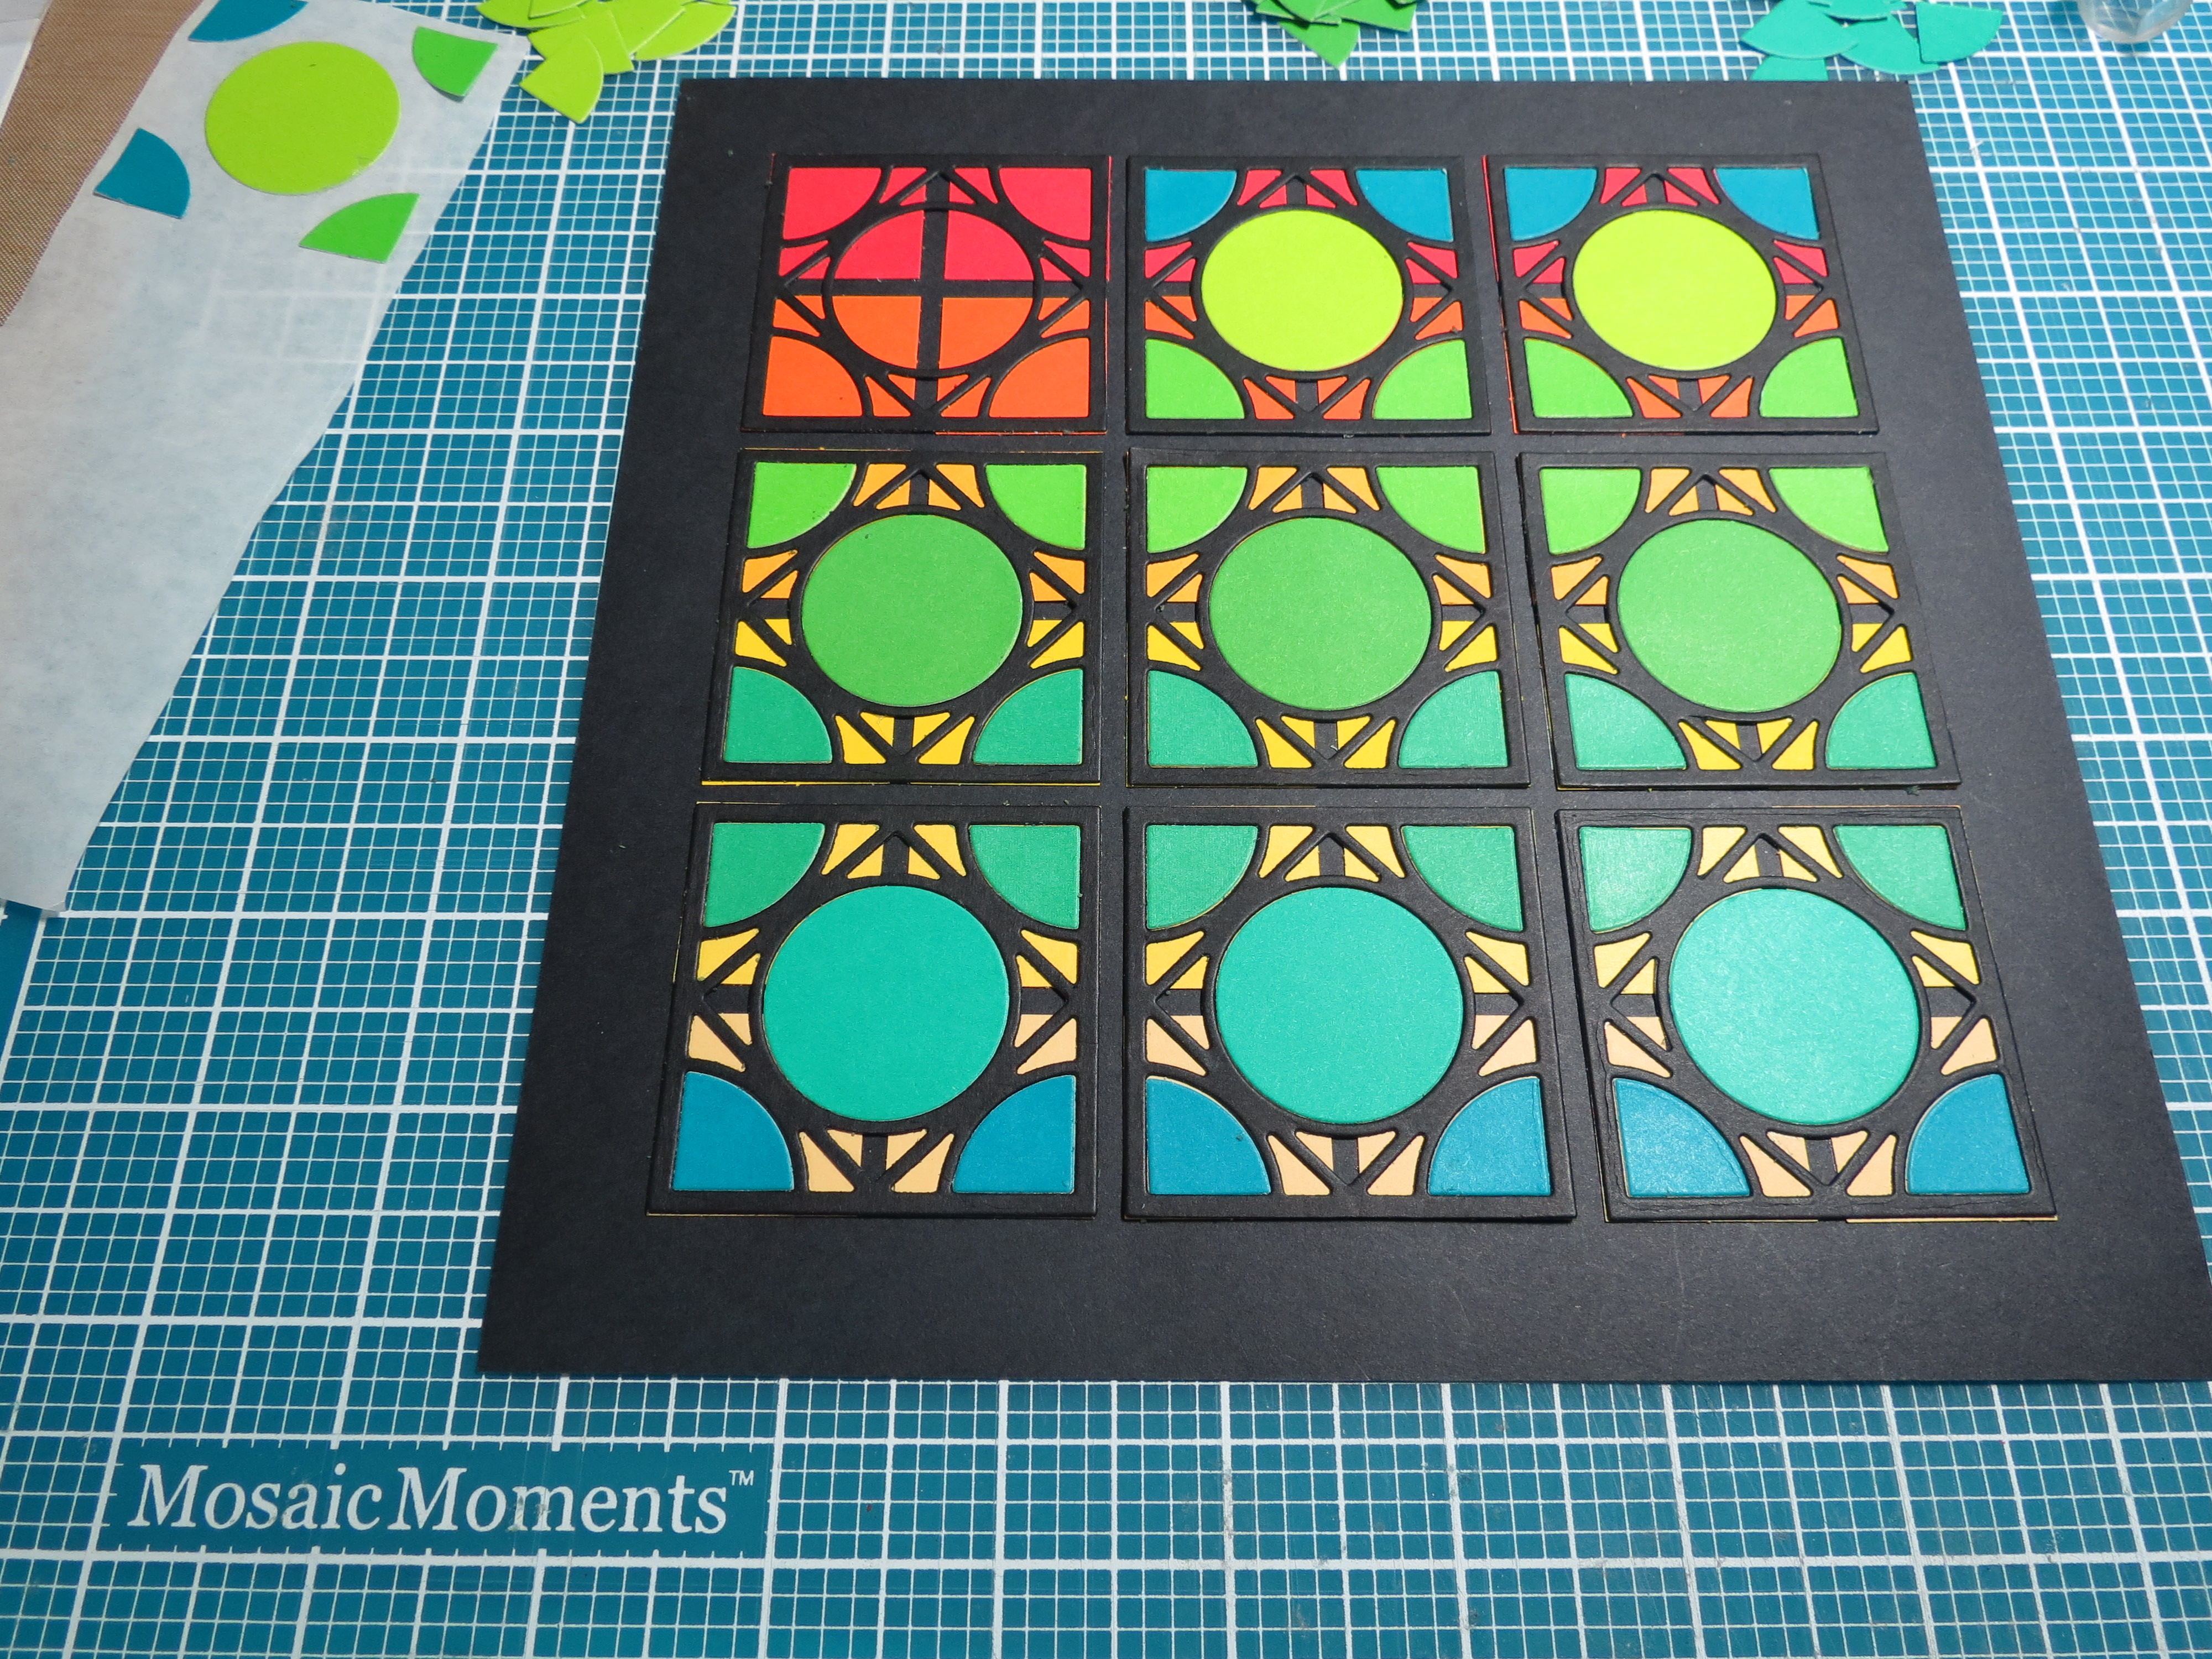
Step Ten: Add the color tiles into the pattern you’ve worked out. I began and ended with the same color quarter tiles alternating the progression between quarter circles and whole circles. Play around with the pieces ahead of time to determine what is visually pleasing to you before you stick ‘em.
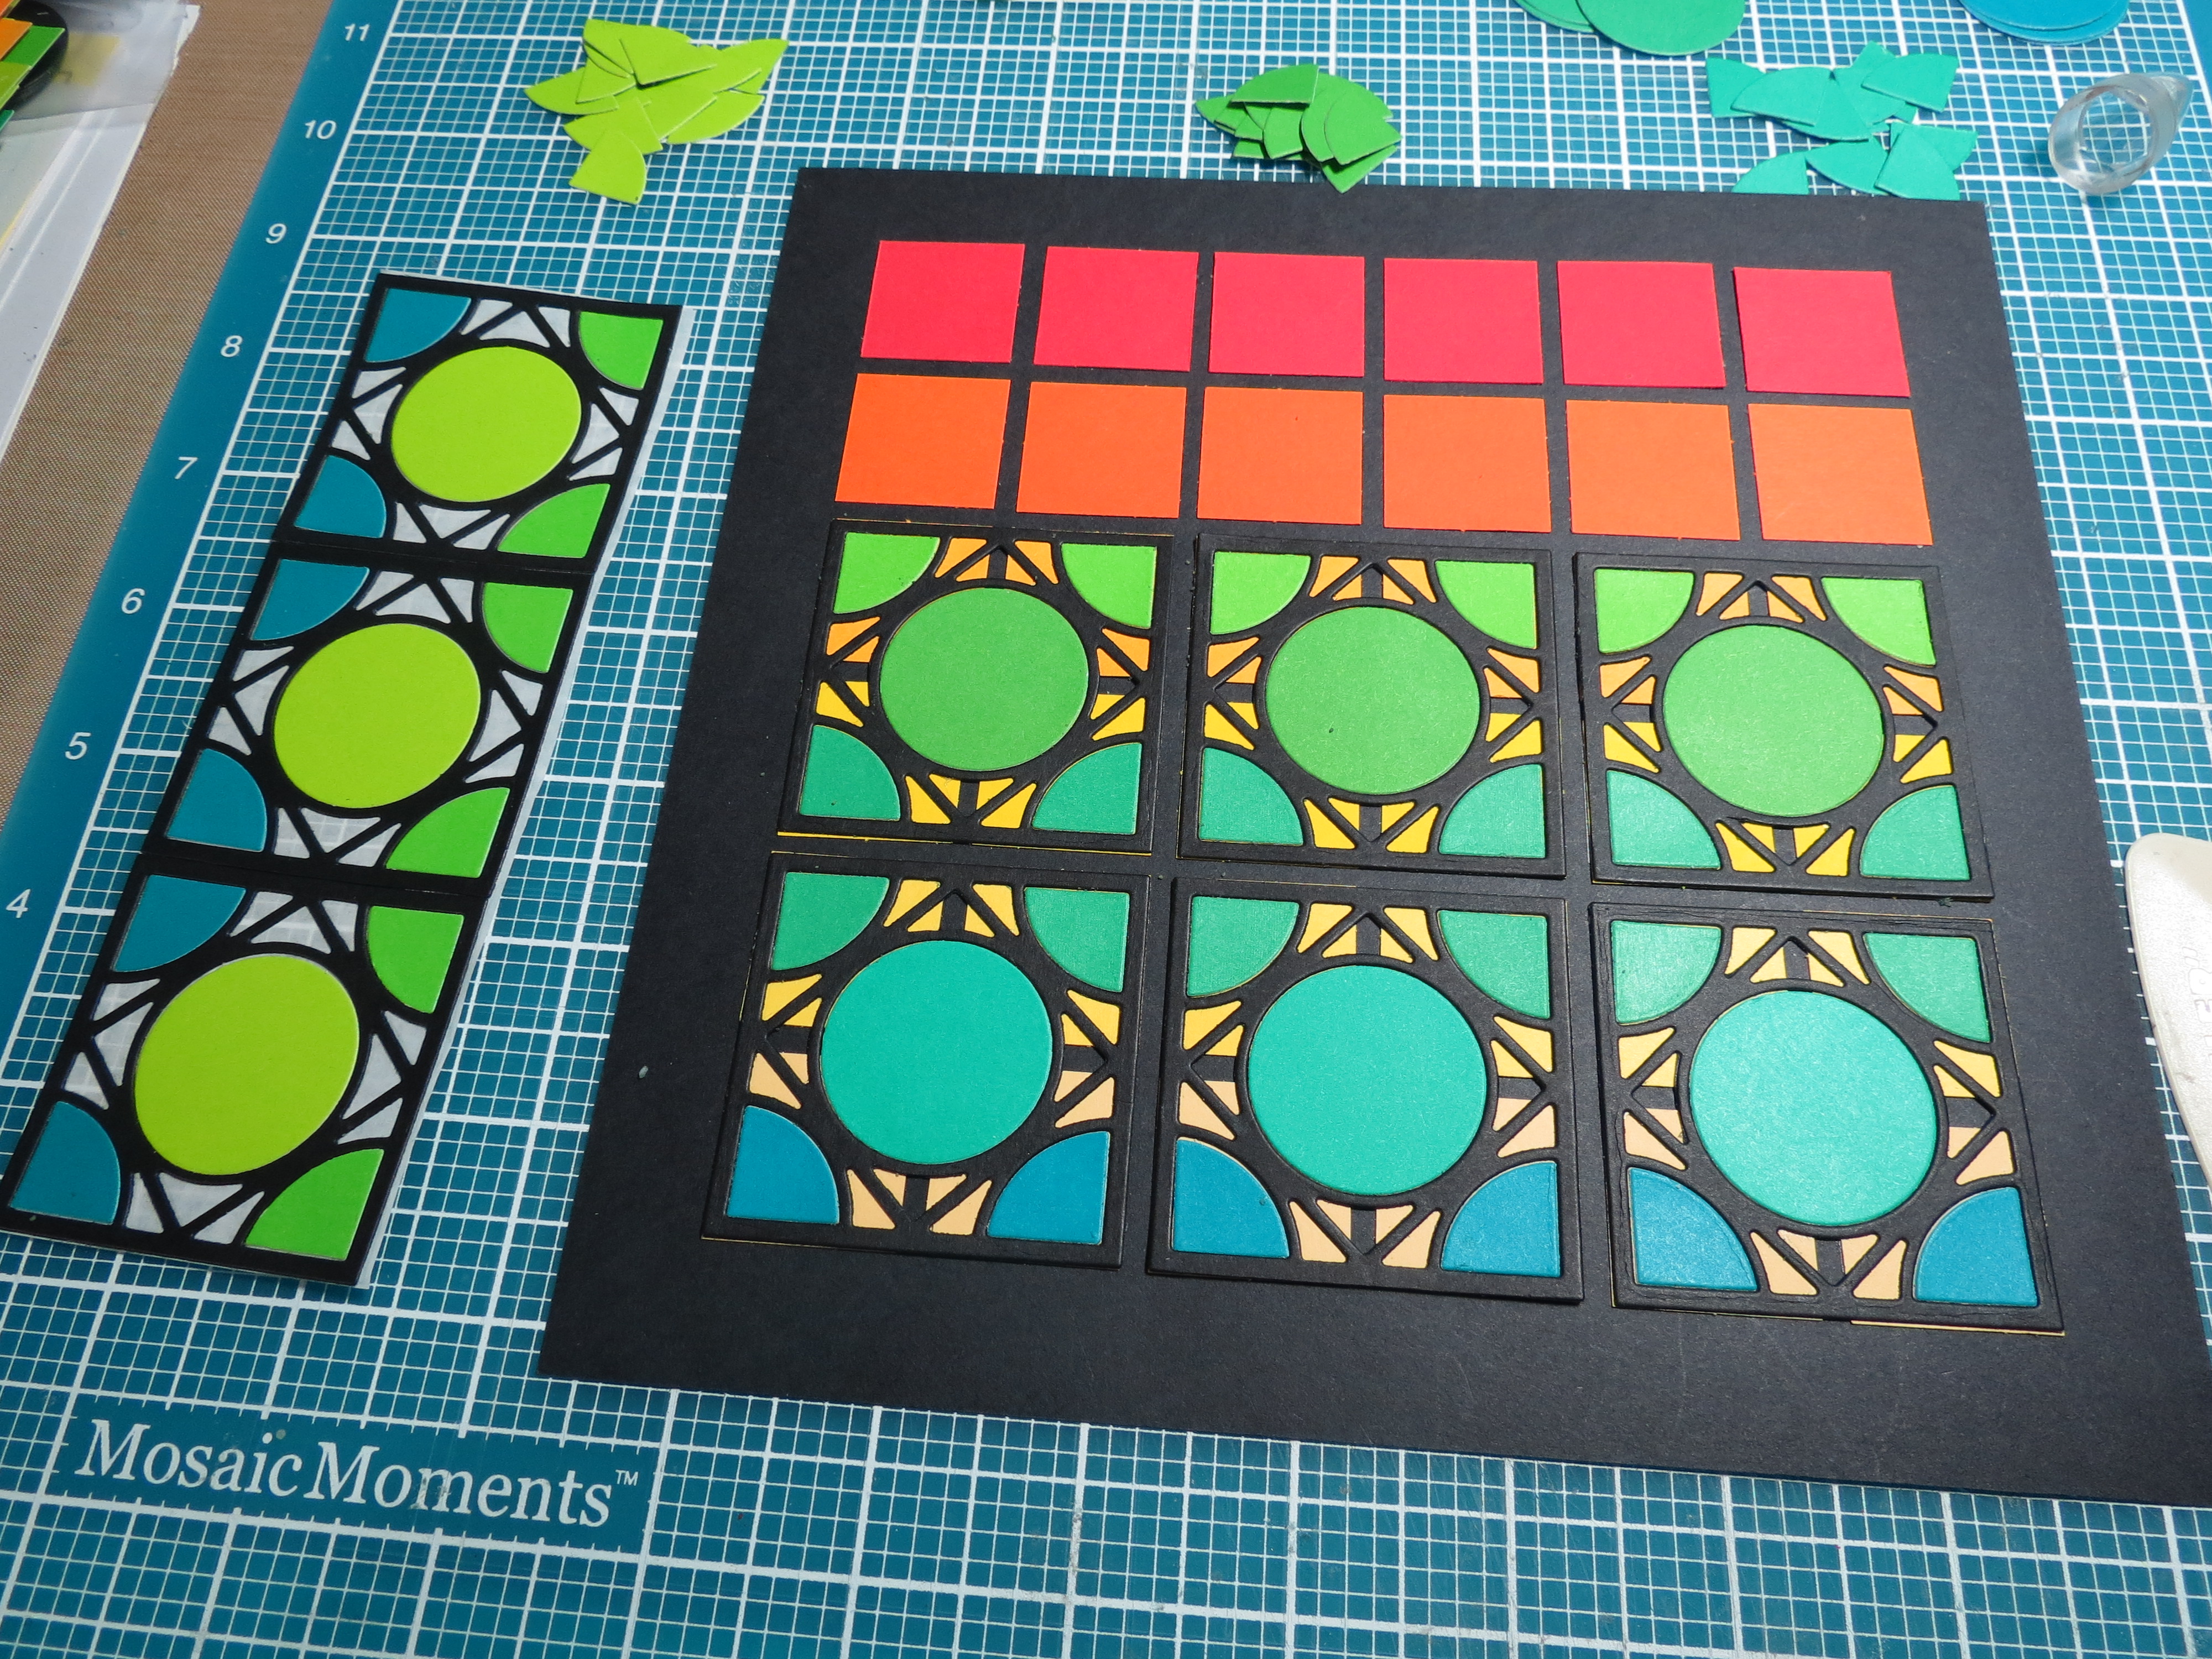
Cornerstone Dies: Encircle Die the pattern progressing as colors are added.
Cornerstone Tiles: Encircle Die pattern in process
Cornerstone Dies: Encircle Dies
Step Eleven: Finishing touch: Remove all the excess glue bits for a clean surface. Now your project is ready for framing!
Tip: If you’d like to add in some of those extra bits, the ones that surround the center circle once filled will give you a square within the square design.
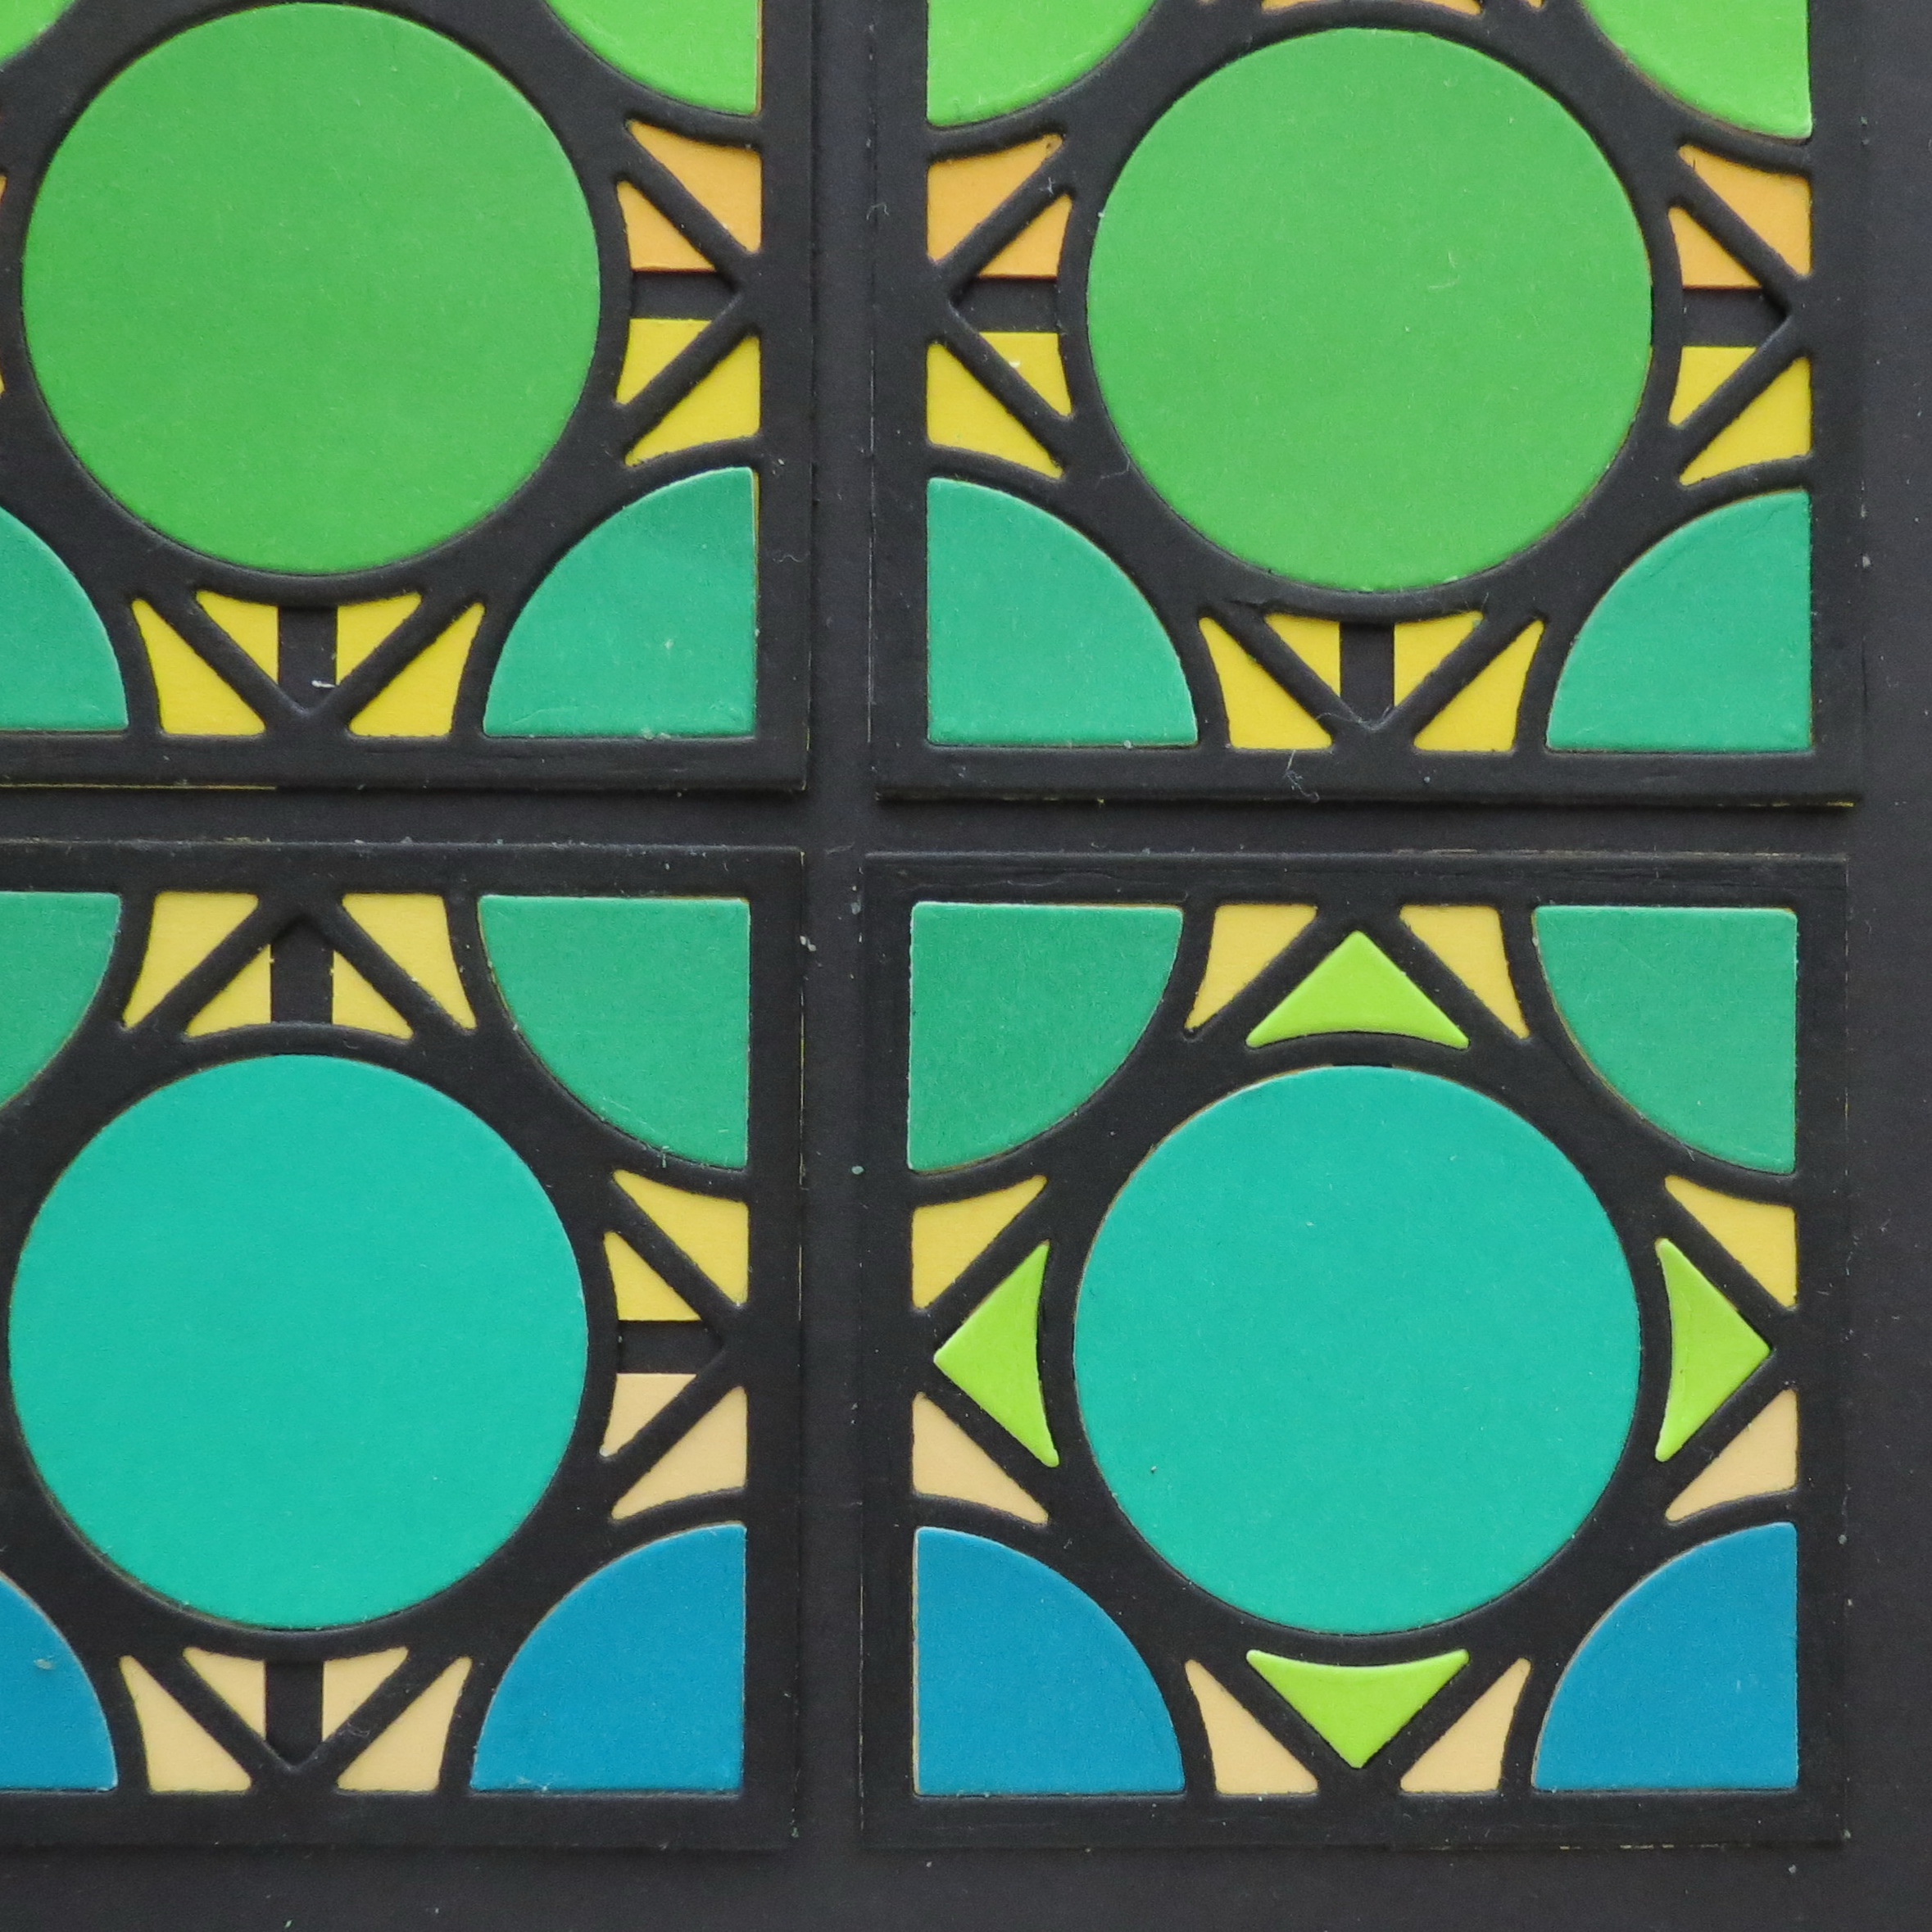
Cornerstone Dies: Encircle Die adding the smaller left over bits to create another style. Adding to the spaces around the circle will show you the square behind the circle.
Cornerstone Dies: Encircle Die notice the layering . Using 1″ tiles on the base divides the pattern further for more mosaic style. Options: Cornerstone Dies: Encircle Die change the direction of the pattern for a different look. I hope you’ll have some fun making your own Mosaic projects with what you’ve seen here. The possibilities are endless! We’d love to see what you are creating, so remember to stop into Journella or our Facebook page and share it with us!! Andrea Fisher See this pin on our Pinterest pinboard: