
…Mosaic Moments style
I know, the Thanksgiving Holiday is just around the corner but we are already on to Christmas! Yes, because sometimes you just need to be able to prepare ahead of time!
In the hustle and bustle of the Christmas season the meaning of the events we celebrate often get lost in the rush. I found that from the time my children were little if I had a daily way of reminding them of why we celebrate Christmas it would help us to stay focused and not get caught up in the wants that often rob us of peace at a time when we talk about the Prince of Peace.
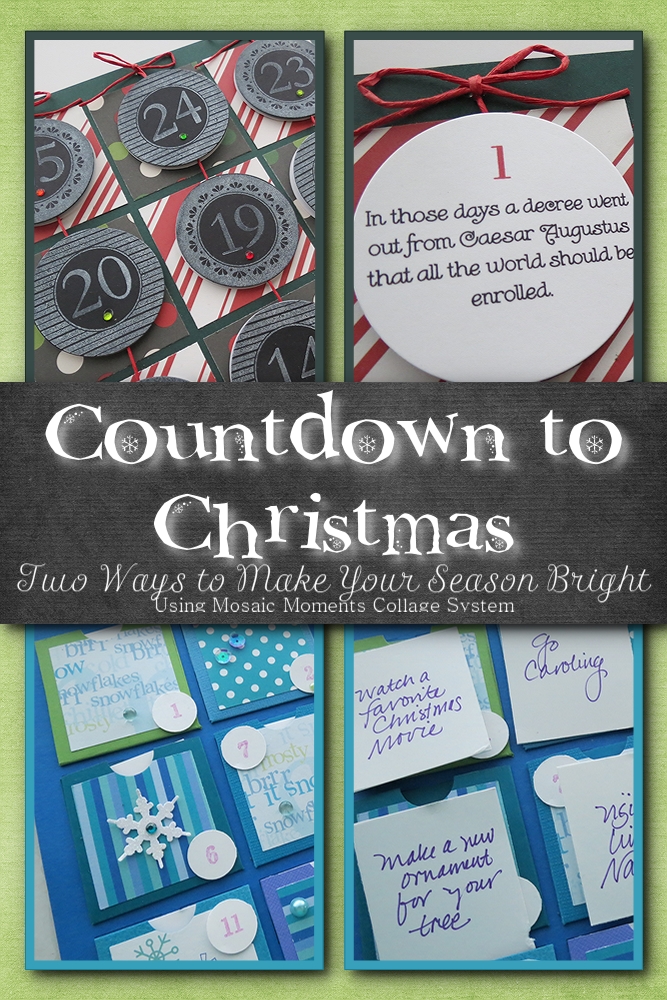
Traditional Twist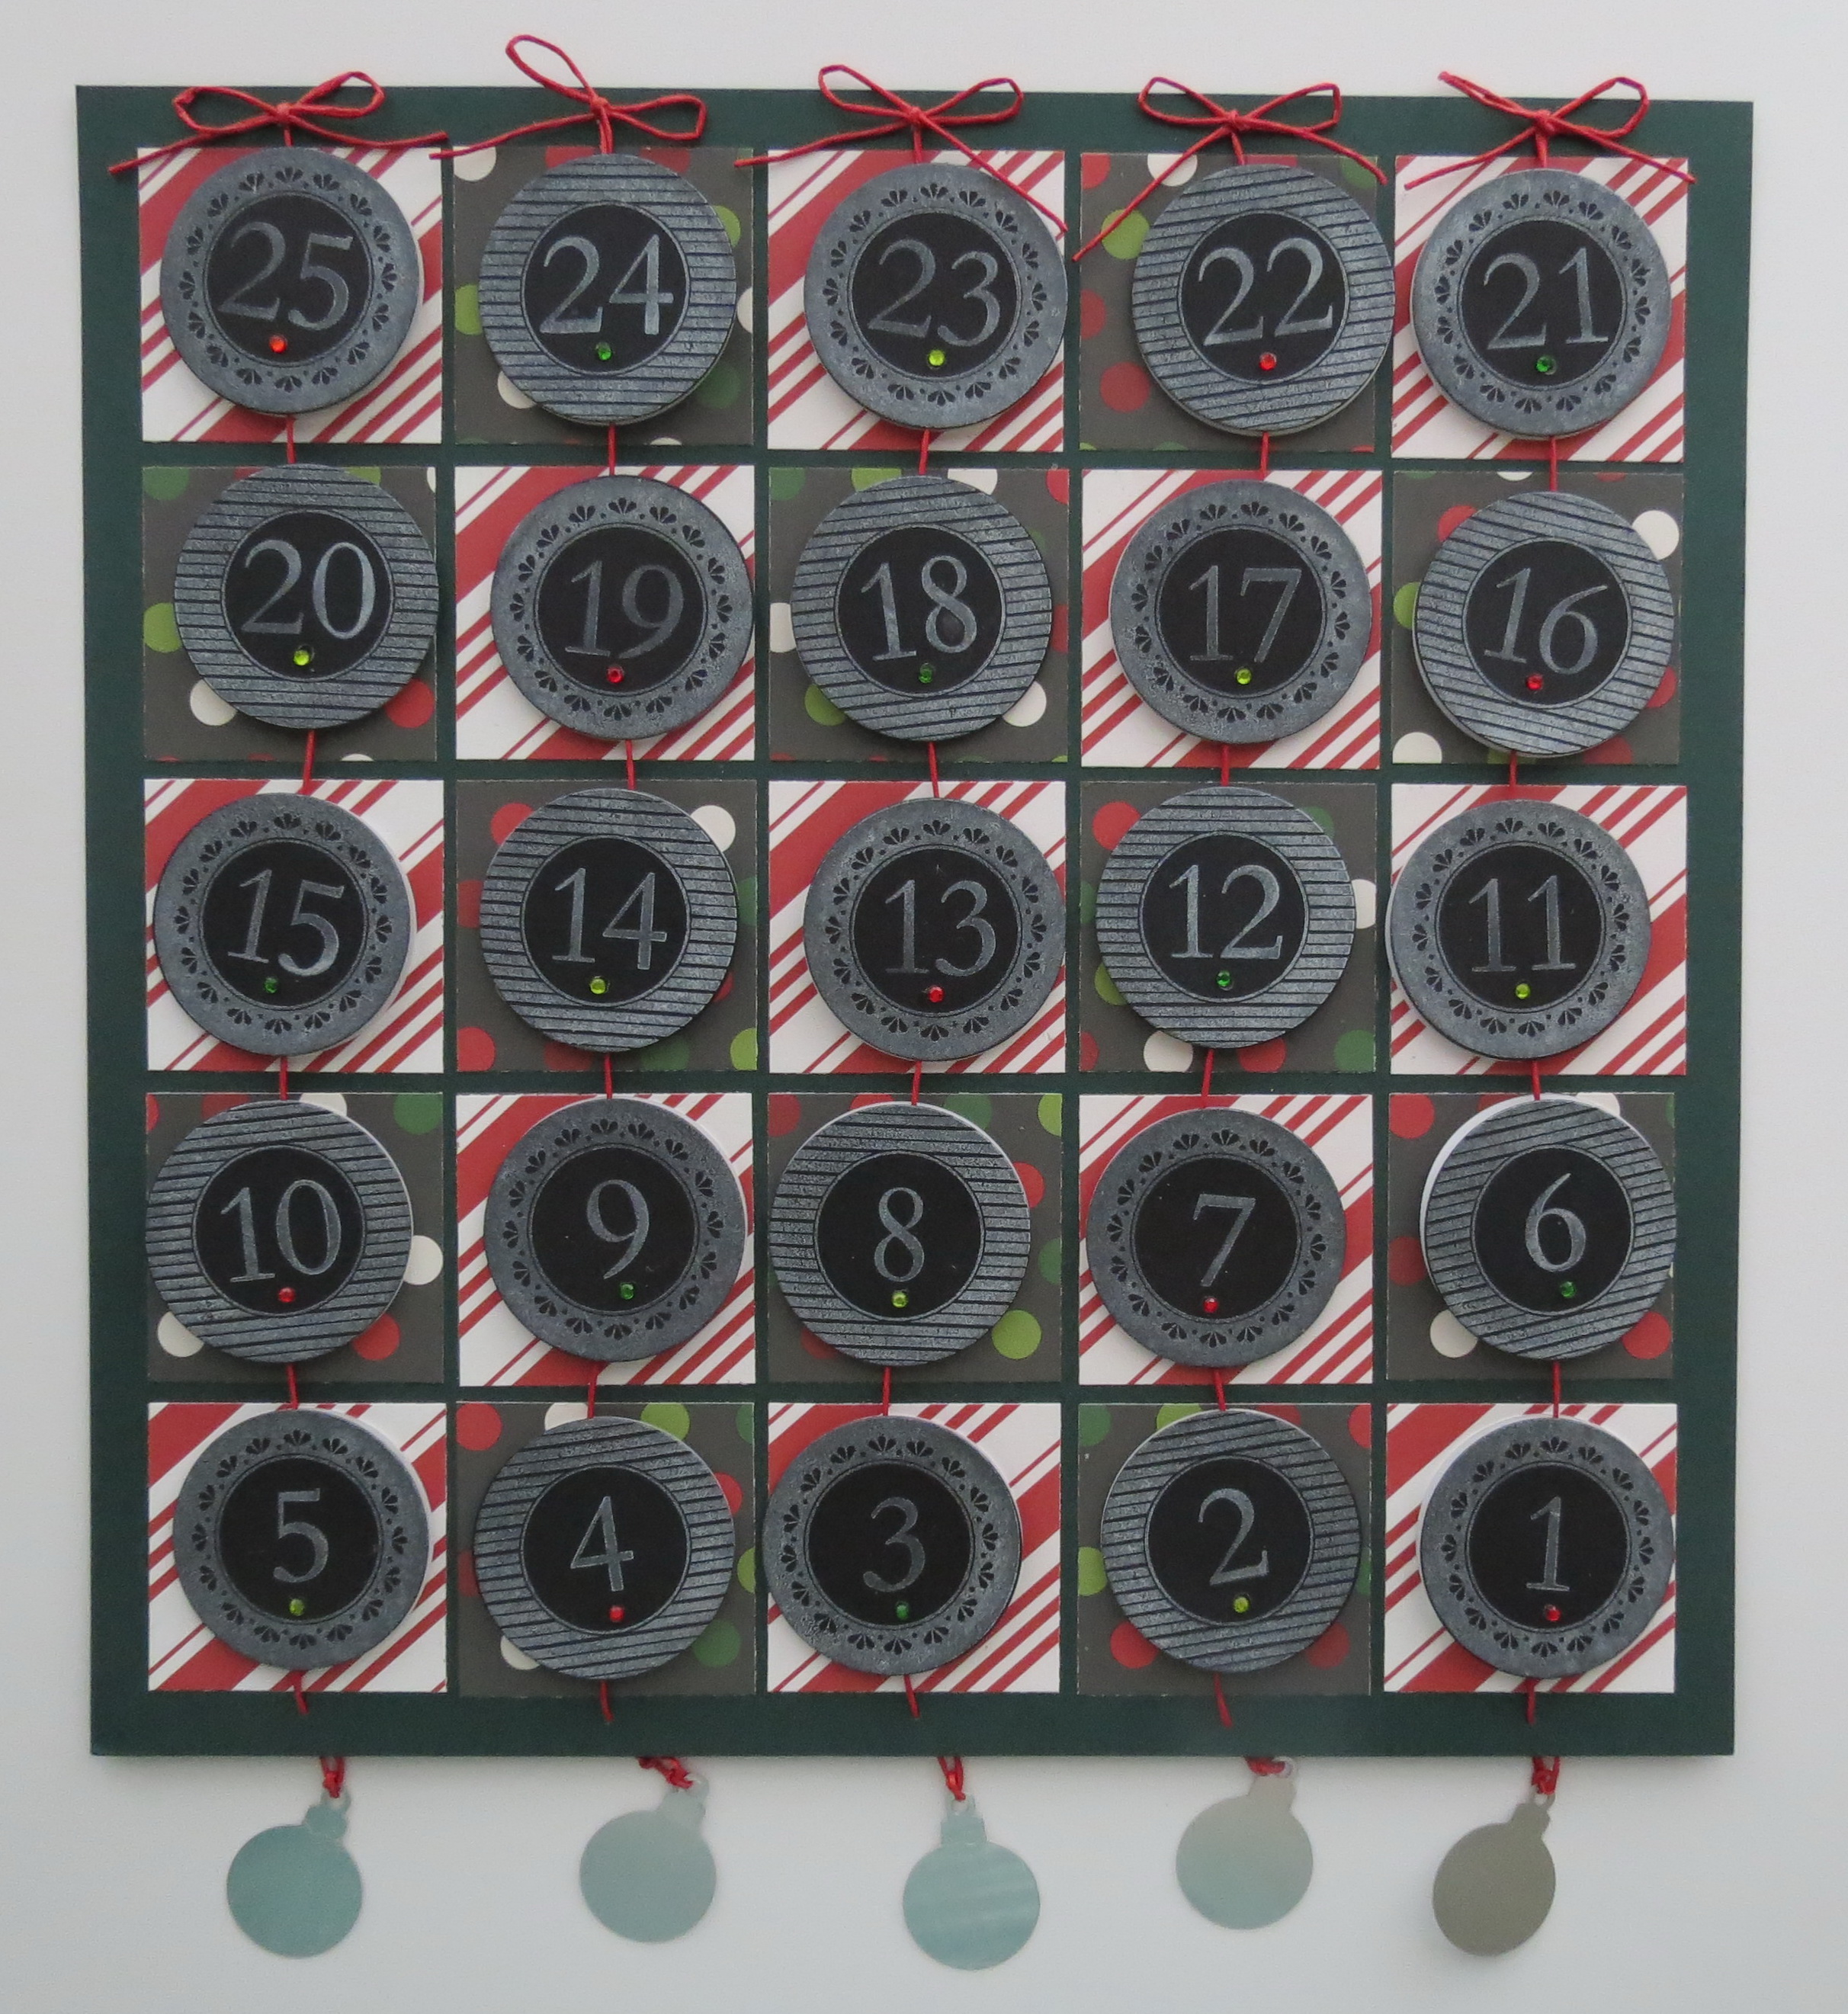
Countdown to Christmas: Tradition with a twist. Chalkboard dates countdown the days and tell the Christmas story on the reverse side.
To help you get started I want to show you a somewhat traditional Countdown to Christmas Calendar with a chalkboard twist that will decorate your home and help you or your children focus on Christmas. The pattern I’ve used is #101 that you can find in the Pattern Gallery.
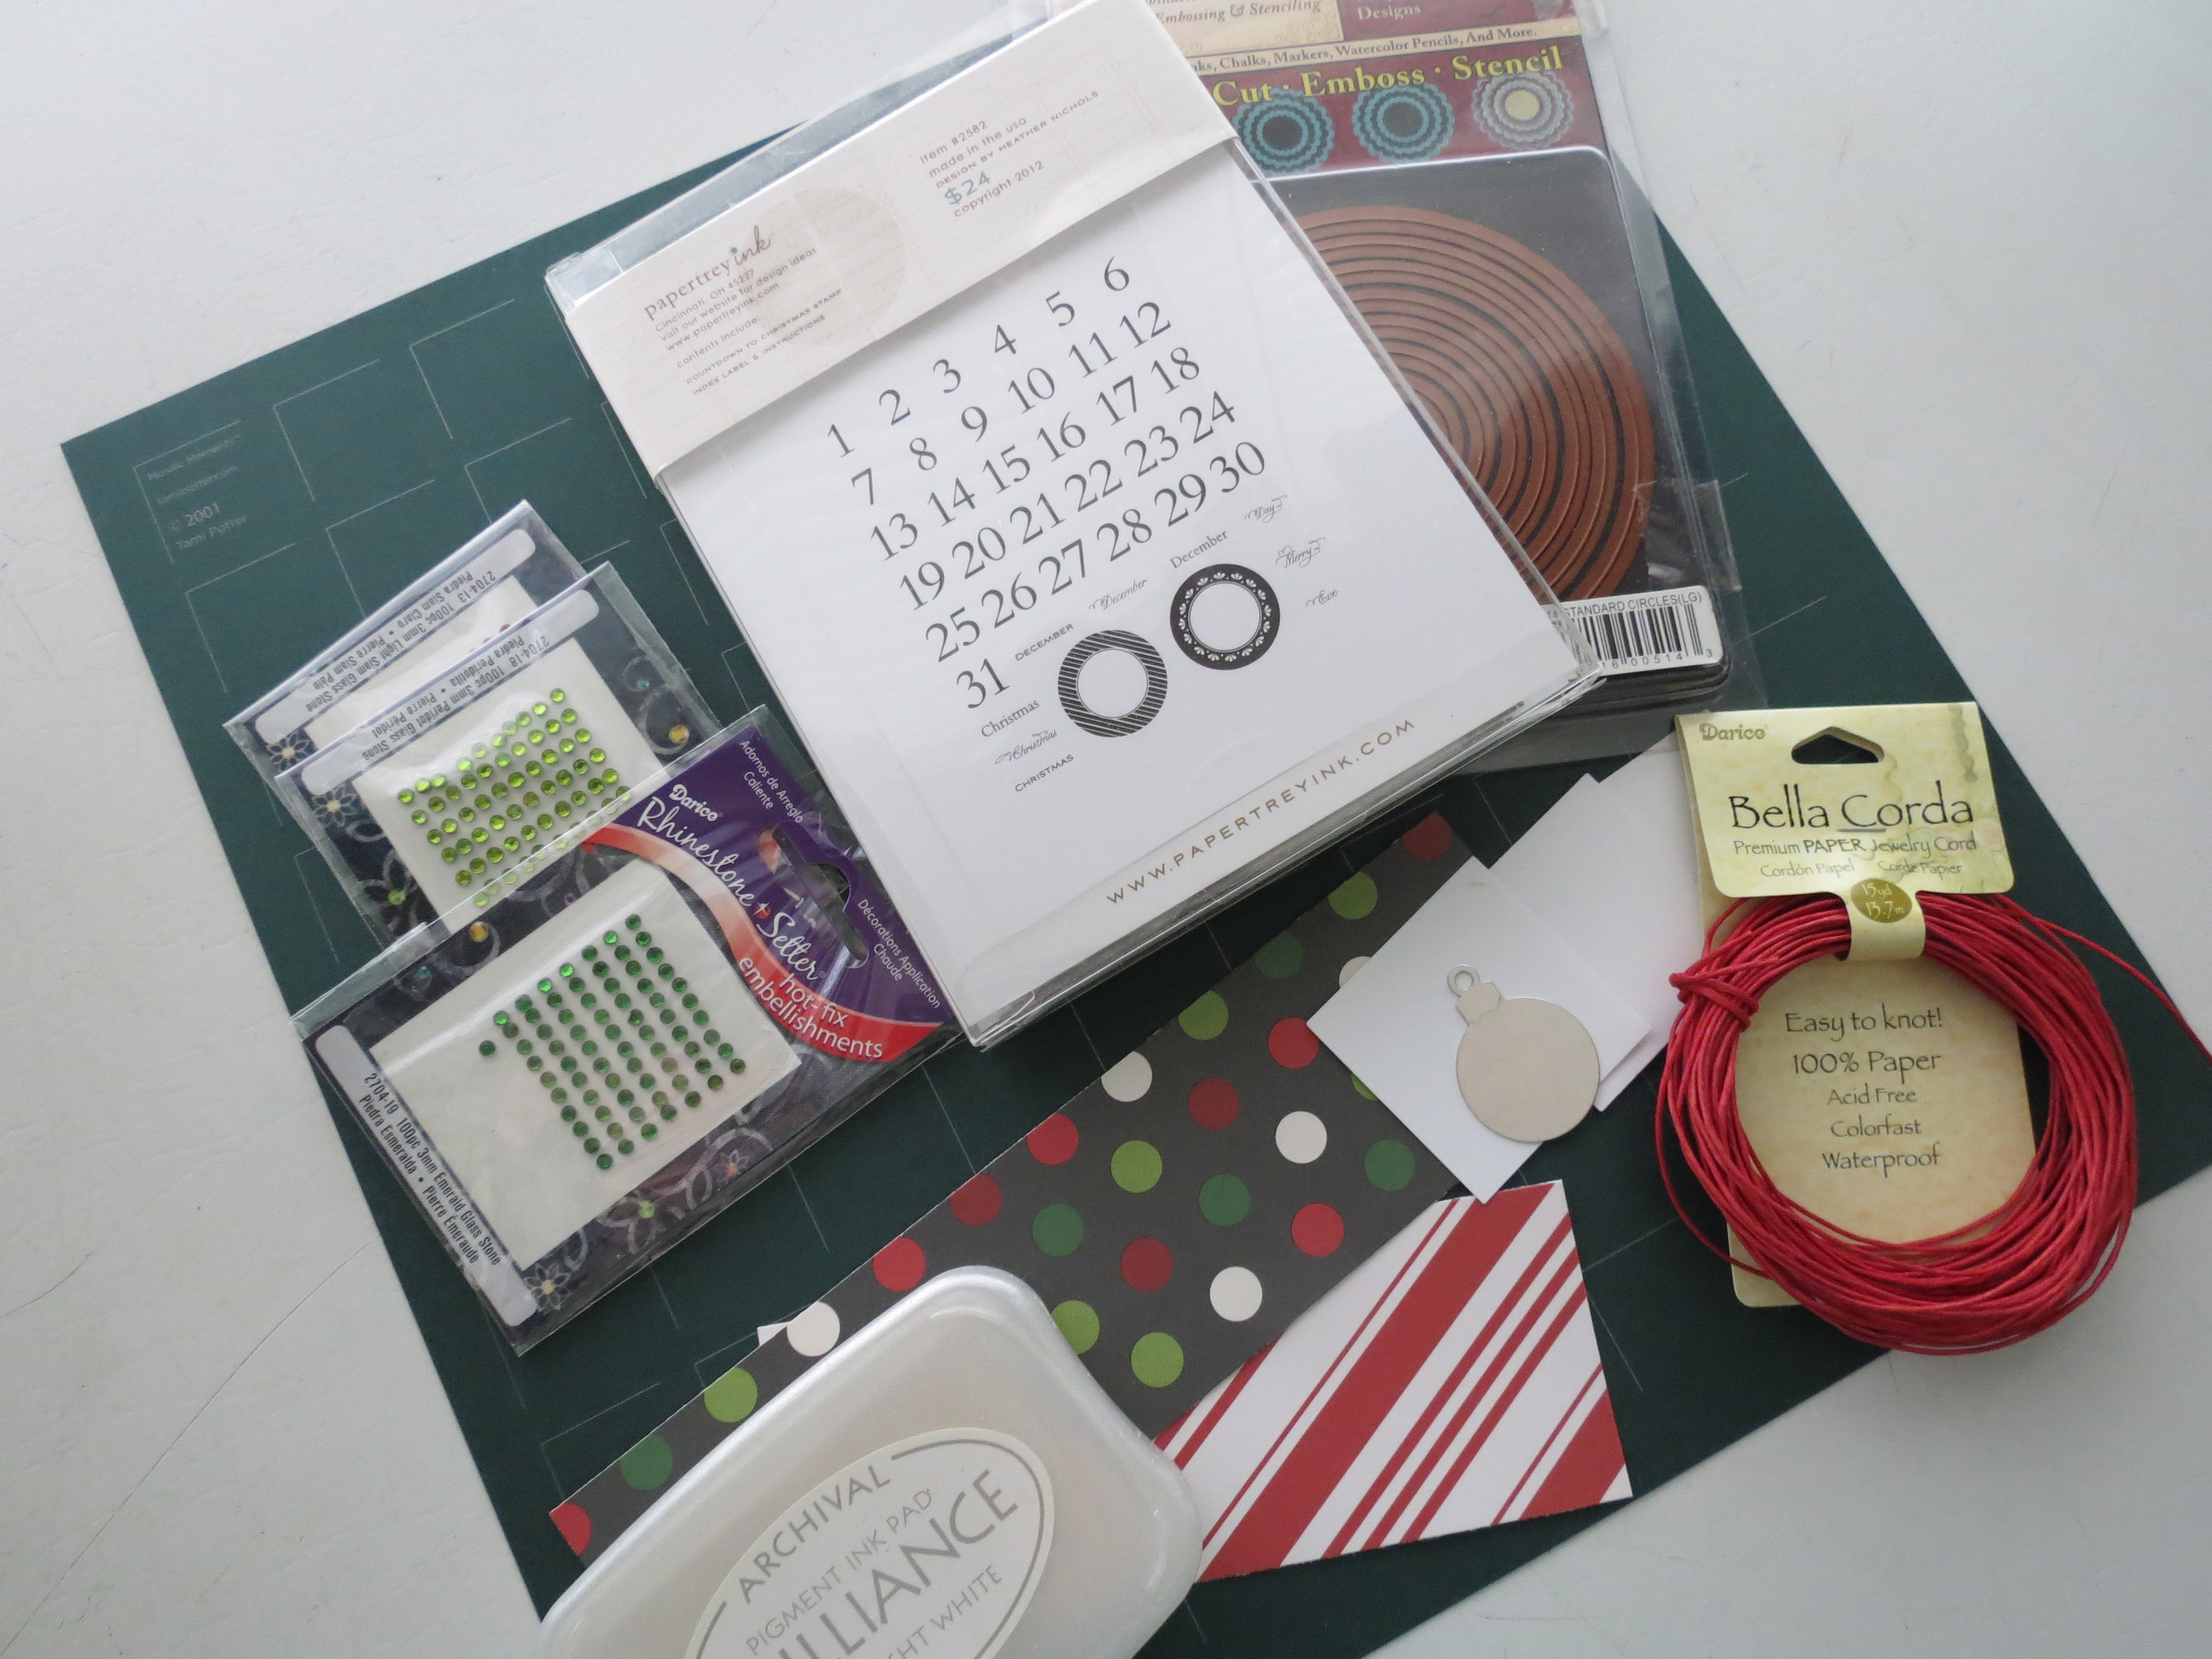
Countdown to Christmas: supplies used for the traditional Calendar.
I began with a 12 x 12 Forrest Green Mosaic Moments Grid, two holiday themed patterned papers (Echo Park), red paper cording (Bella Corda jewelry cording by Darice), Countdown to Christmas rubber stamps (Papertrey Ink), chalkboard paper (I used black cardstock this time), Brilliance Moonlight White Ink, hot fix gemstones (Darice), glue dots, foam mounting tape, metal ornaments as weights (I had planned to use jingle bells but couldn’t find them!) and finally I used a print out with all the verses from the nativity story.
Countdown to Christmas: Use a glue dot to cove the cord and hold it in place.
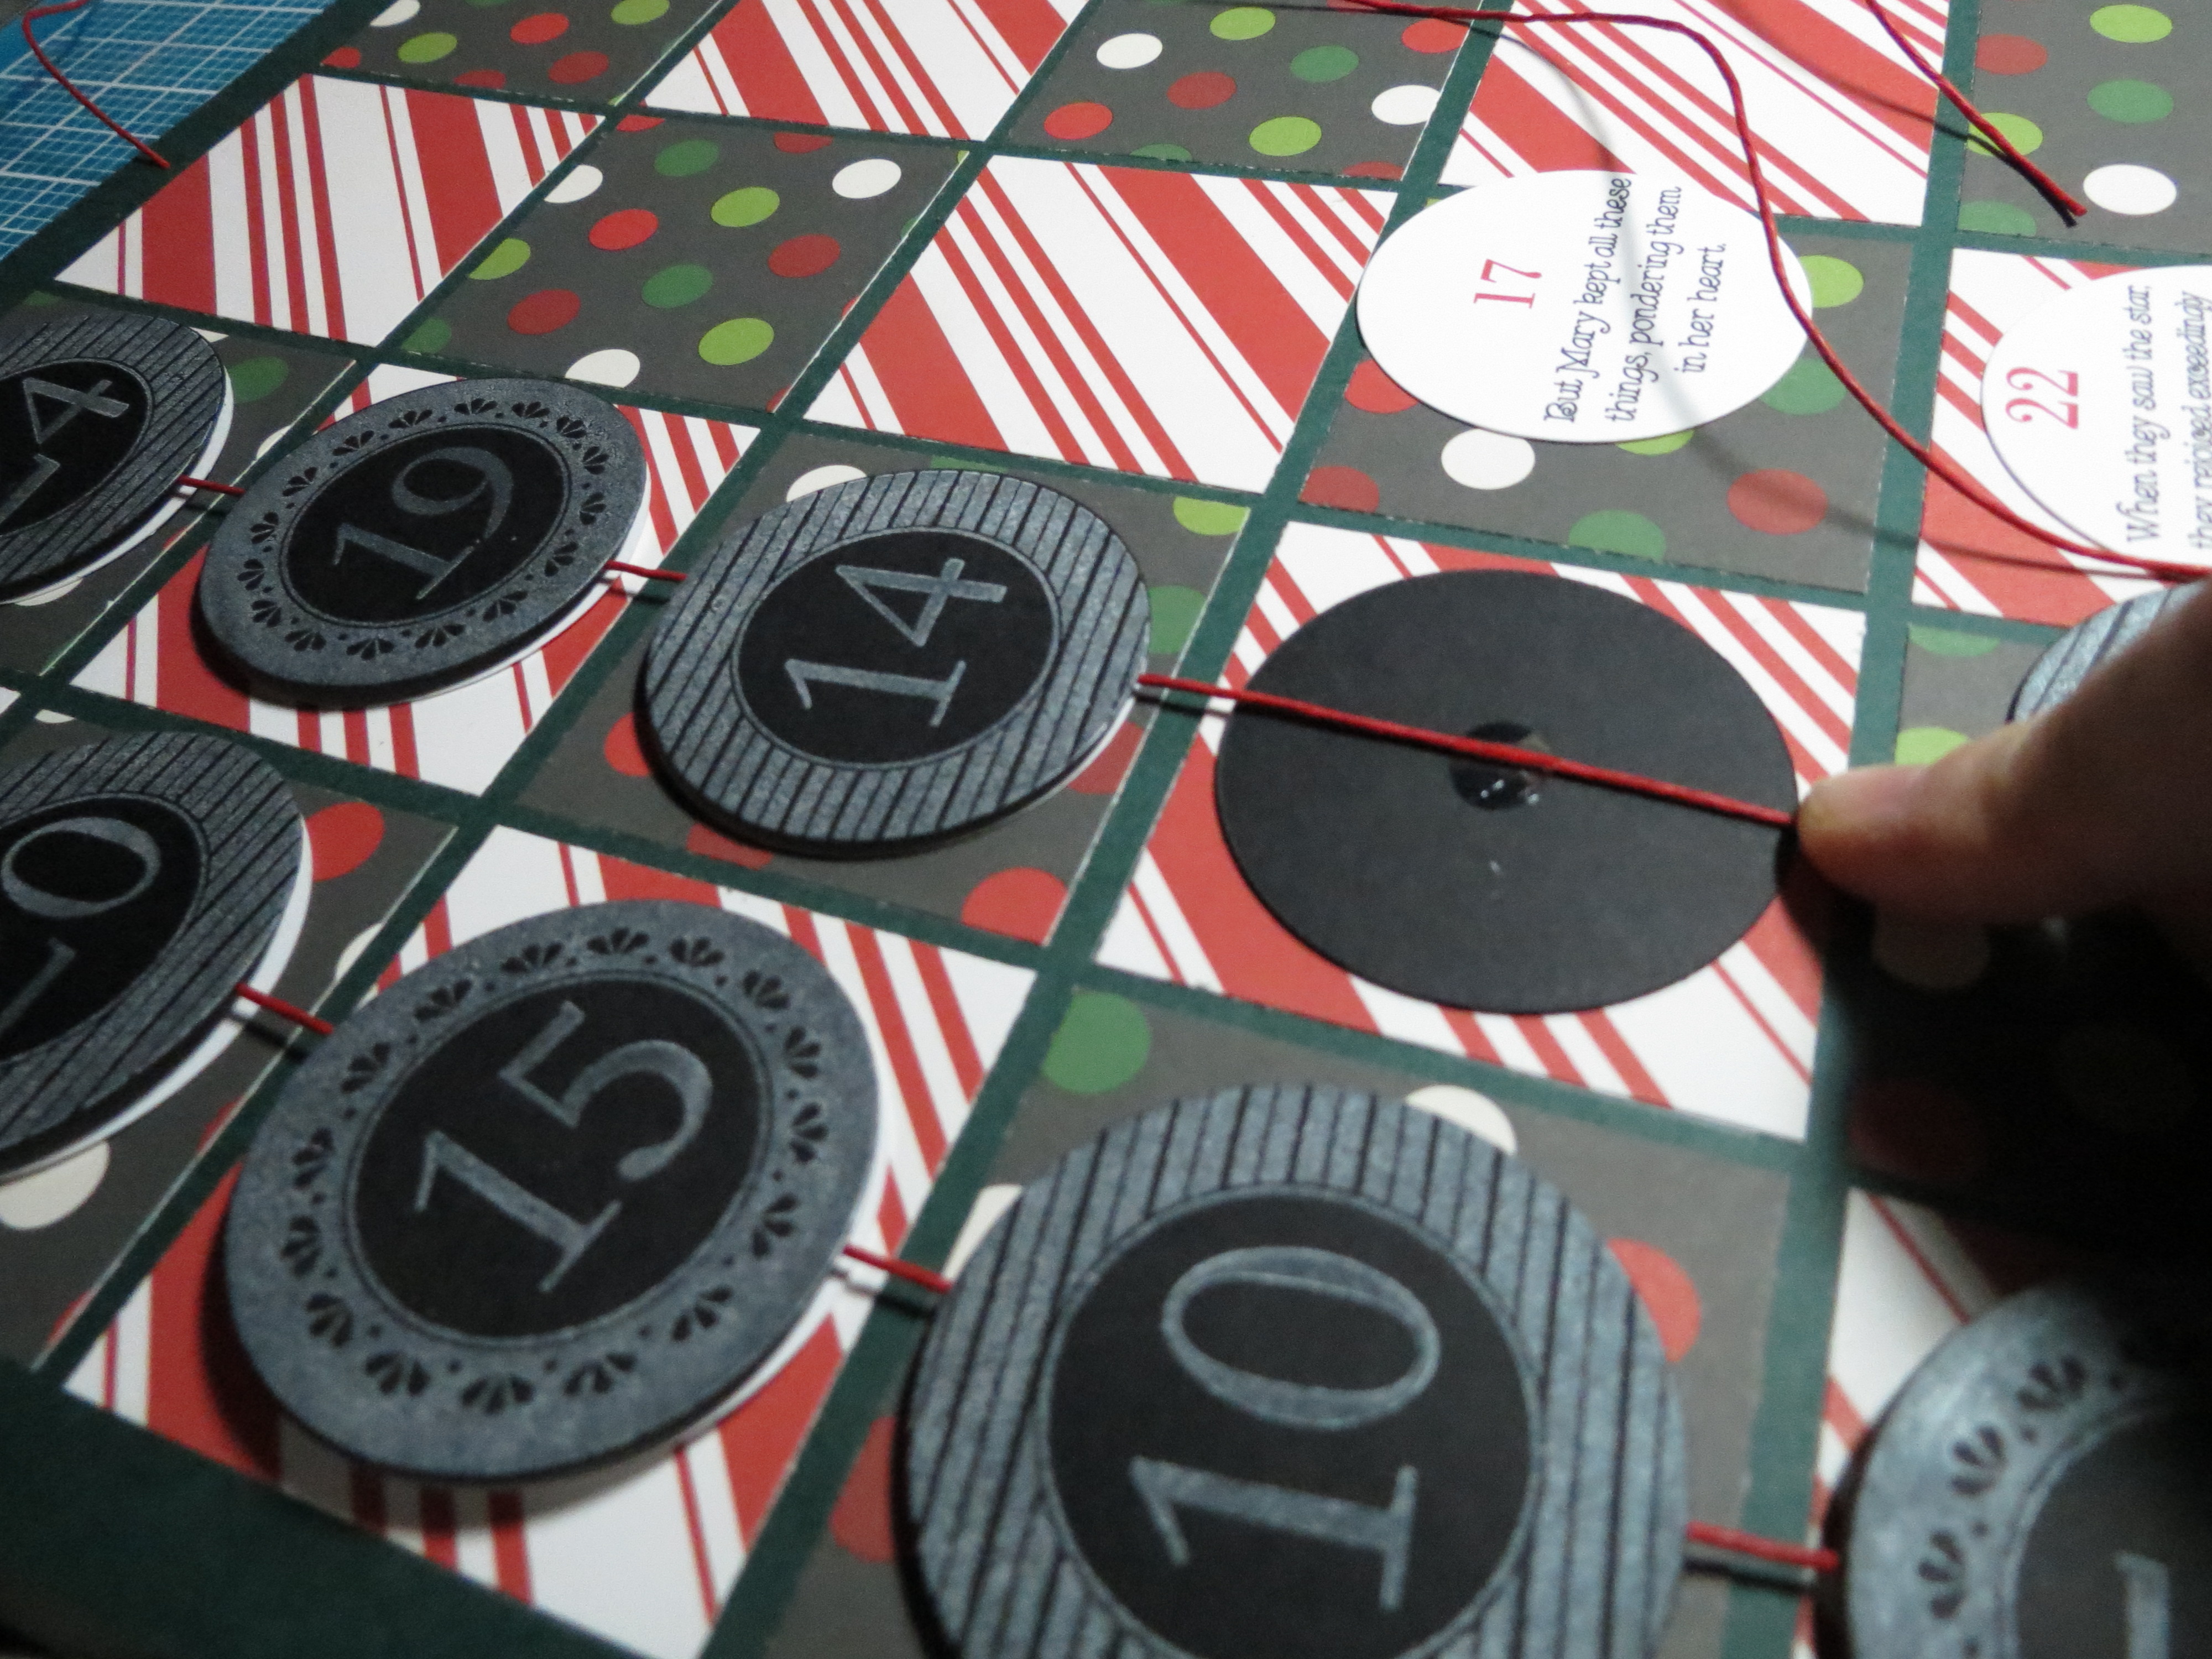
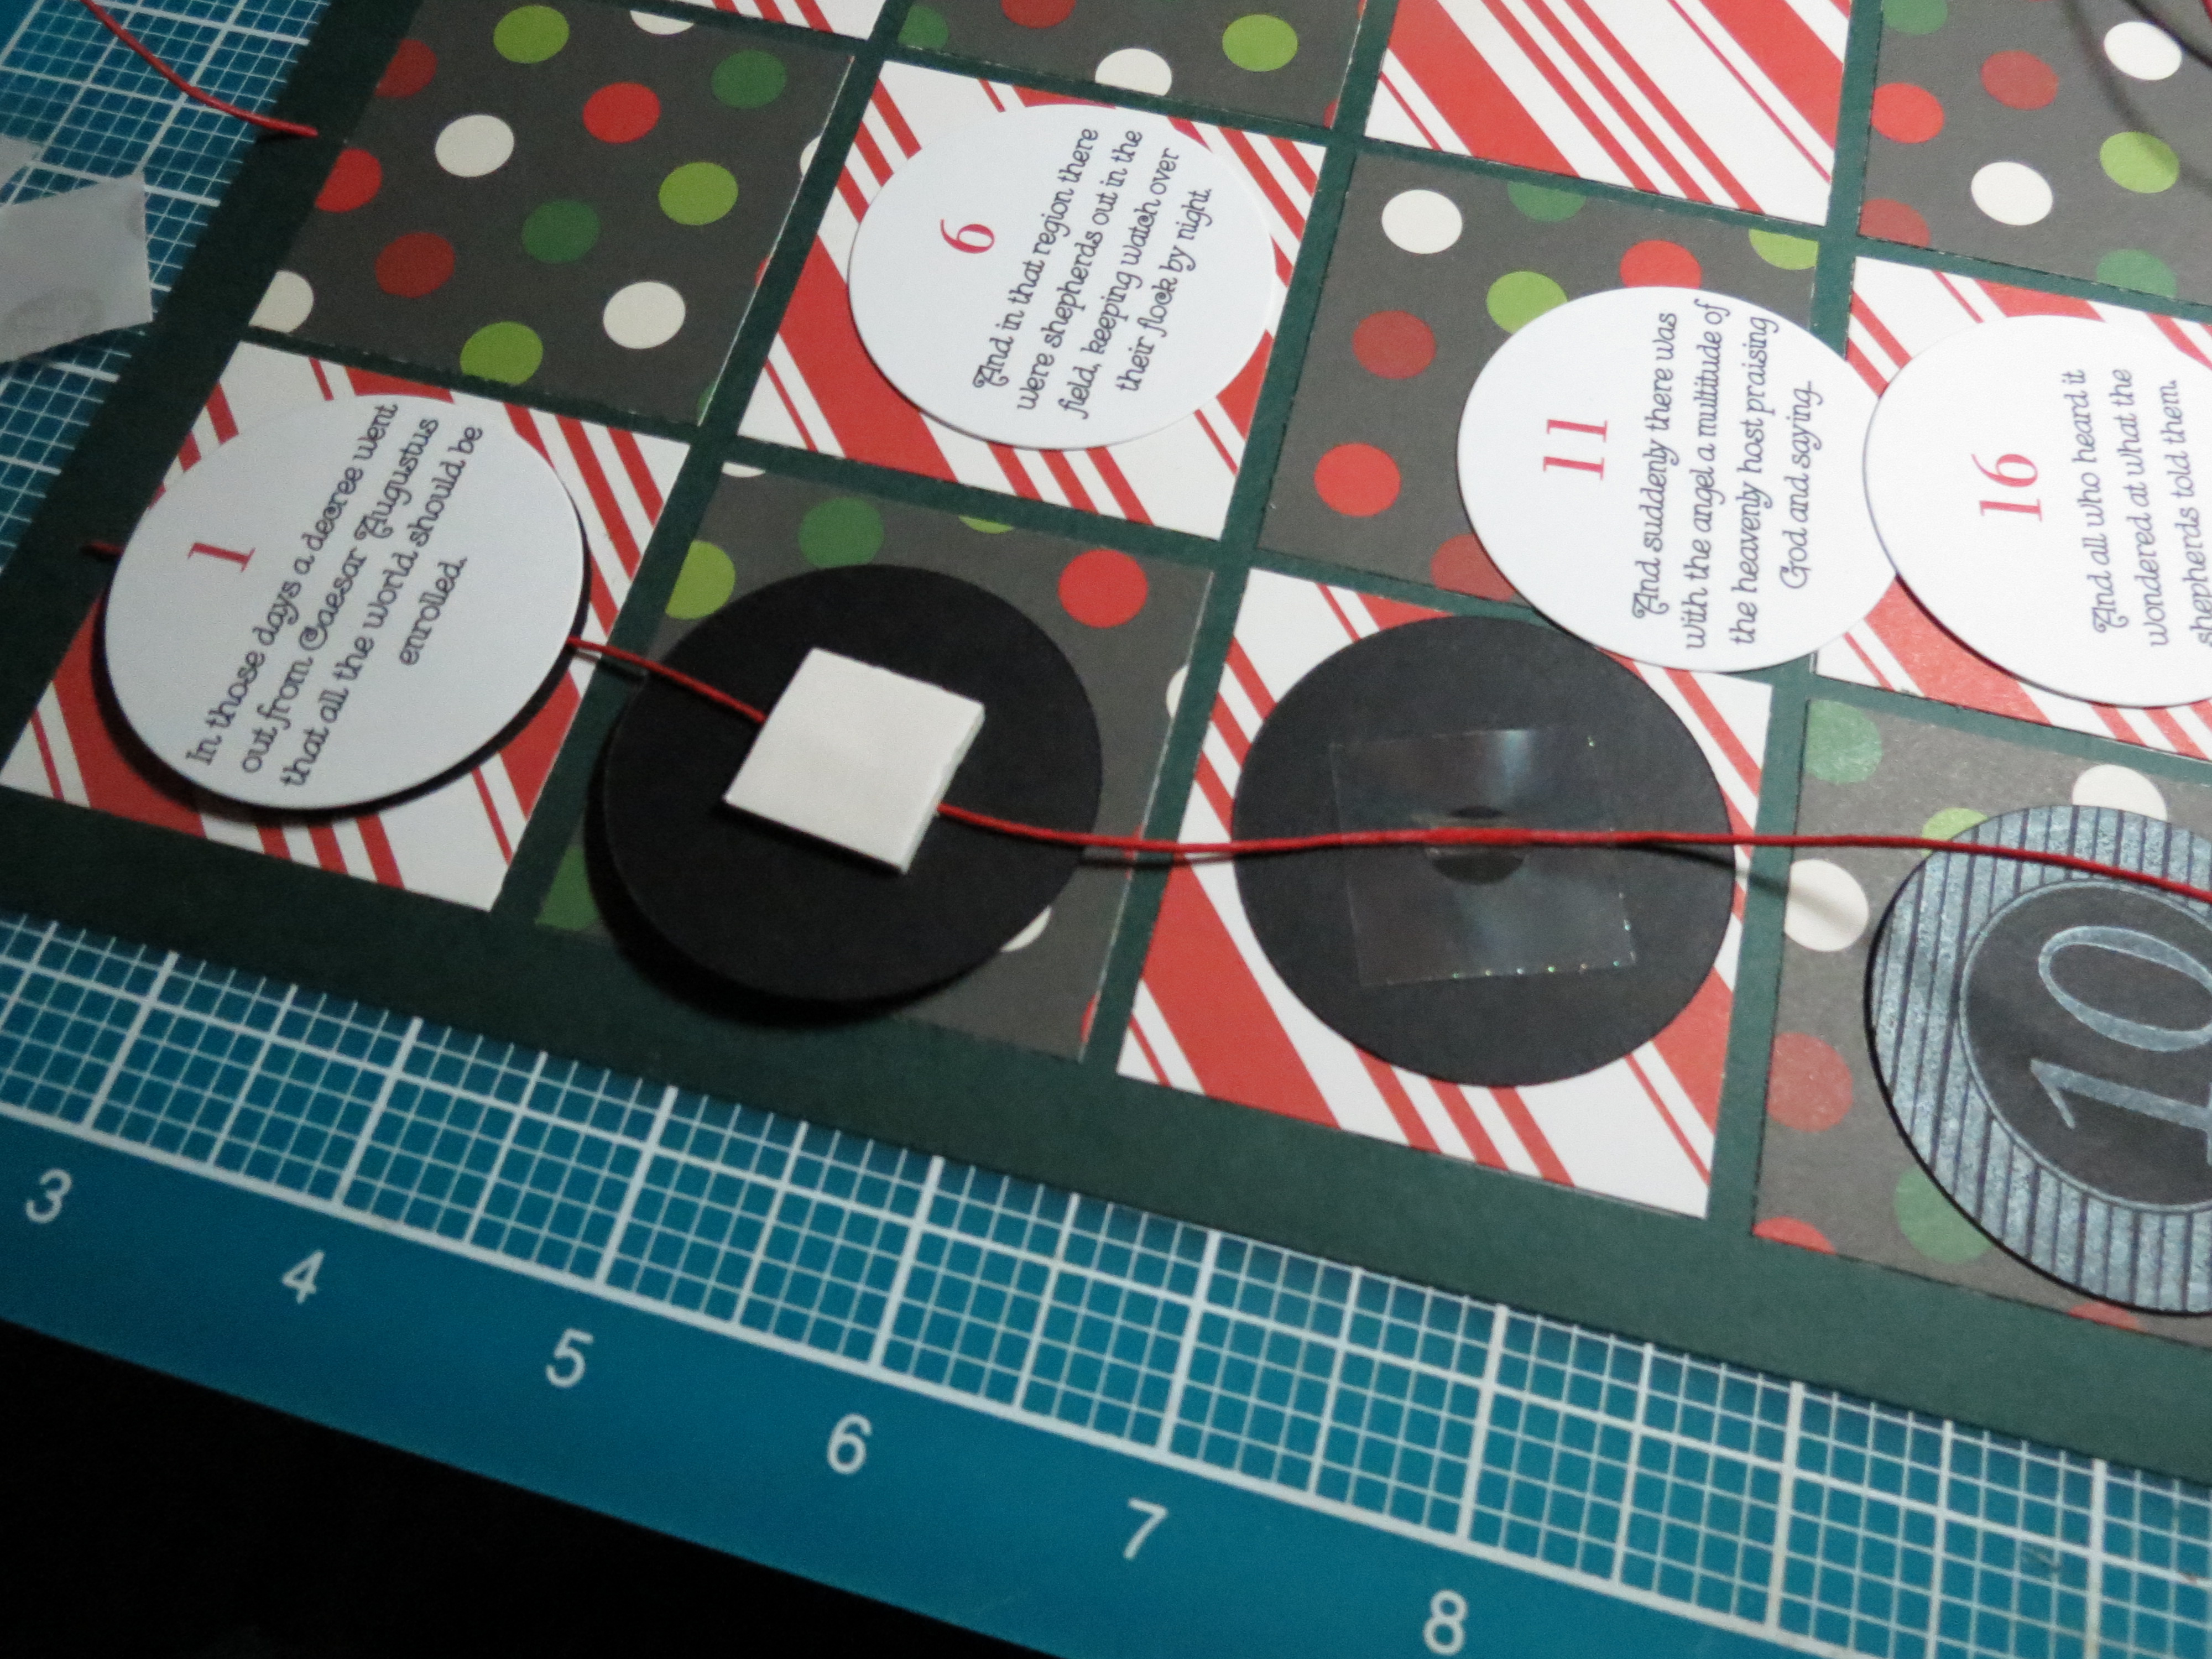
On the backside align the cording and use a glue dot to cove the cord and it will hold it in place. The date discs will all be suspended attached only to the cording!
Countdown to Christmas: Three steps.
Three steps: first, glue dot to secure cording, next, cover with a square of foam mounting tape and finally, cover with the advent story disc and press together.
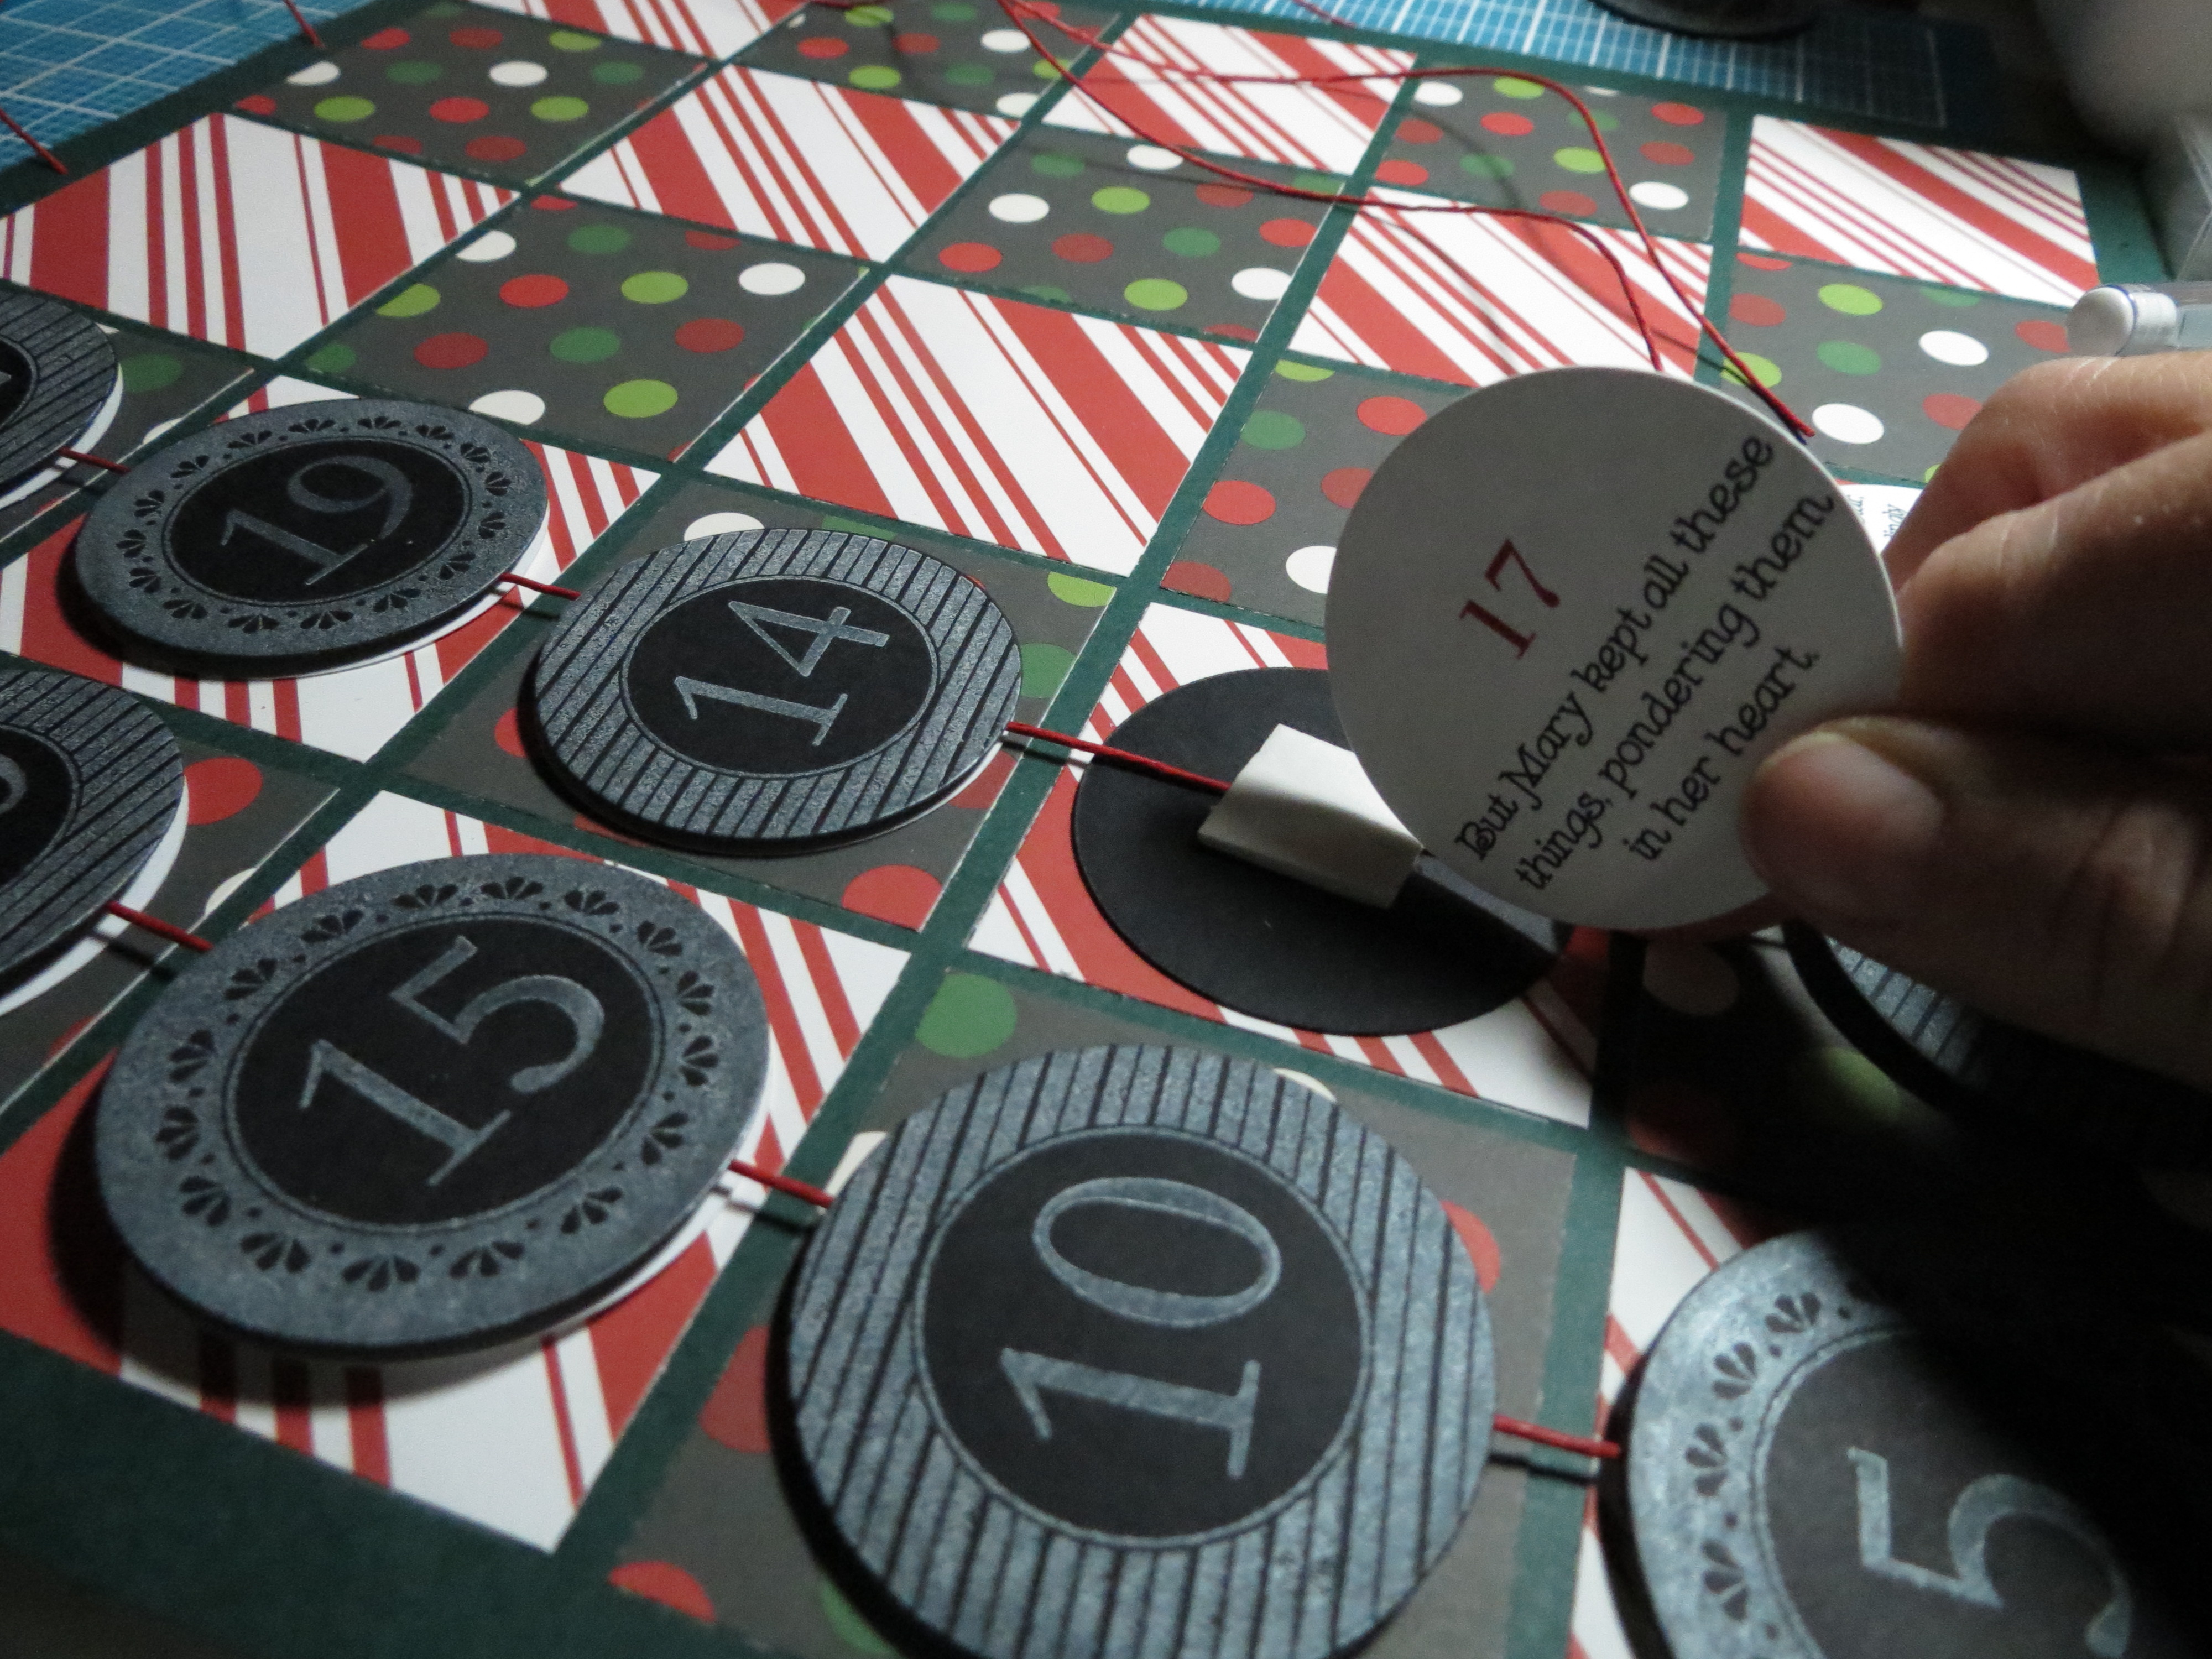
Countdown to Christmas: fitting the story disc to the backside of the date tag.
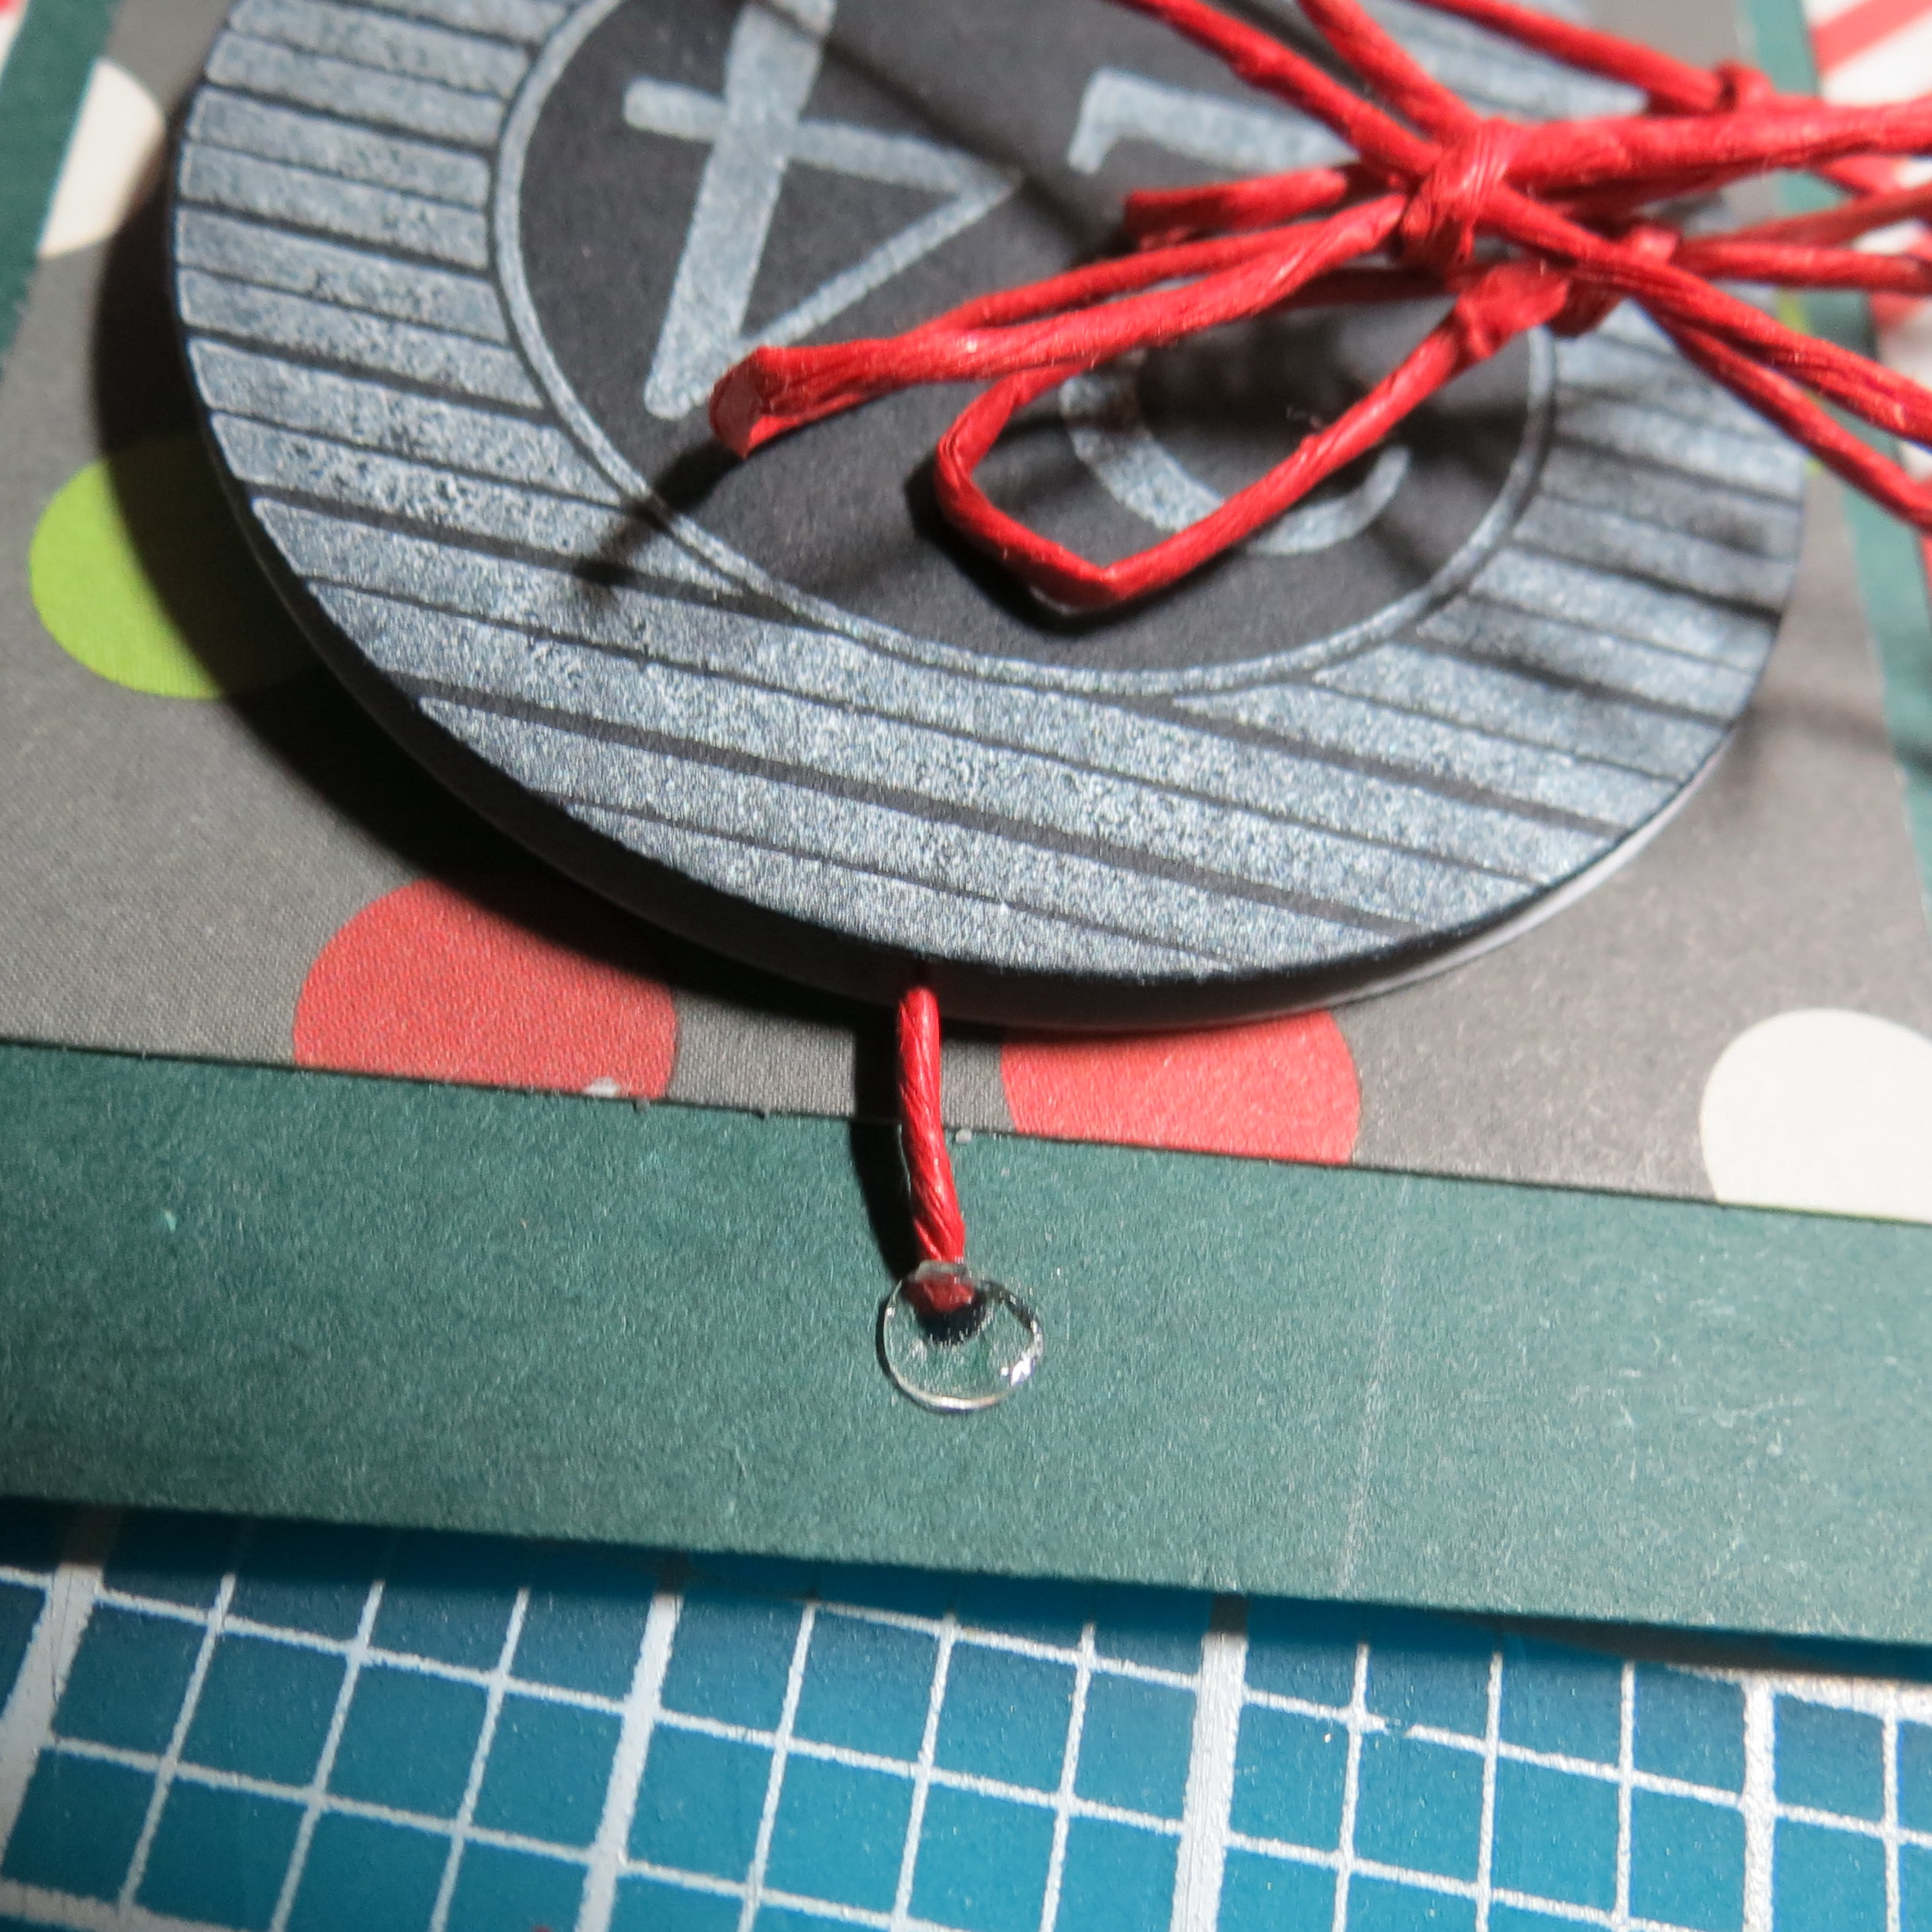
Countdown to Christmas: Hiding the cording. To cover the hole at the top I used a micro glue dot and a cord bow.
Cording is strung top to bottom through holes at each end. To cover the hole at the top I used a micro glue dot and a cord bow.
Countdown to Christmas: Bow secured with a glue dot place directly over the hole.
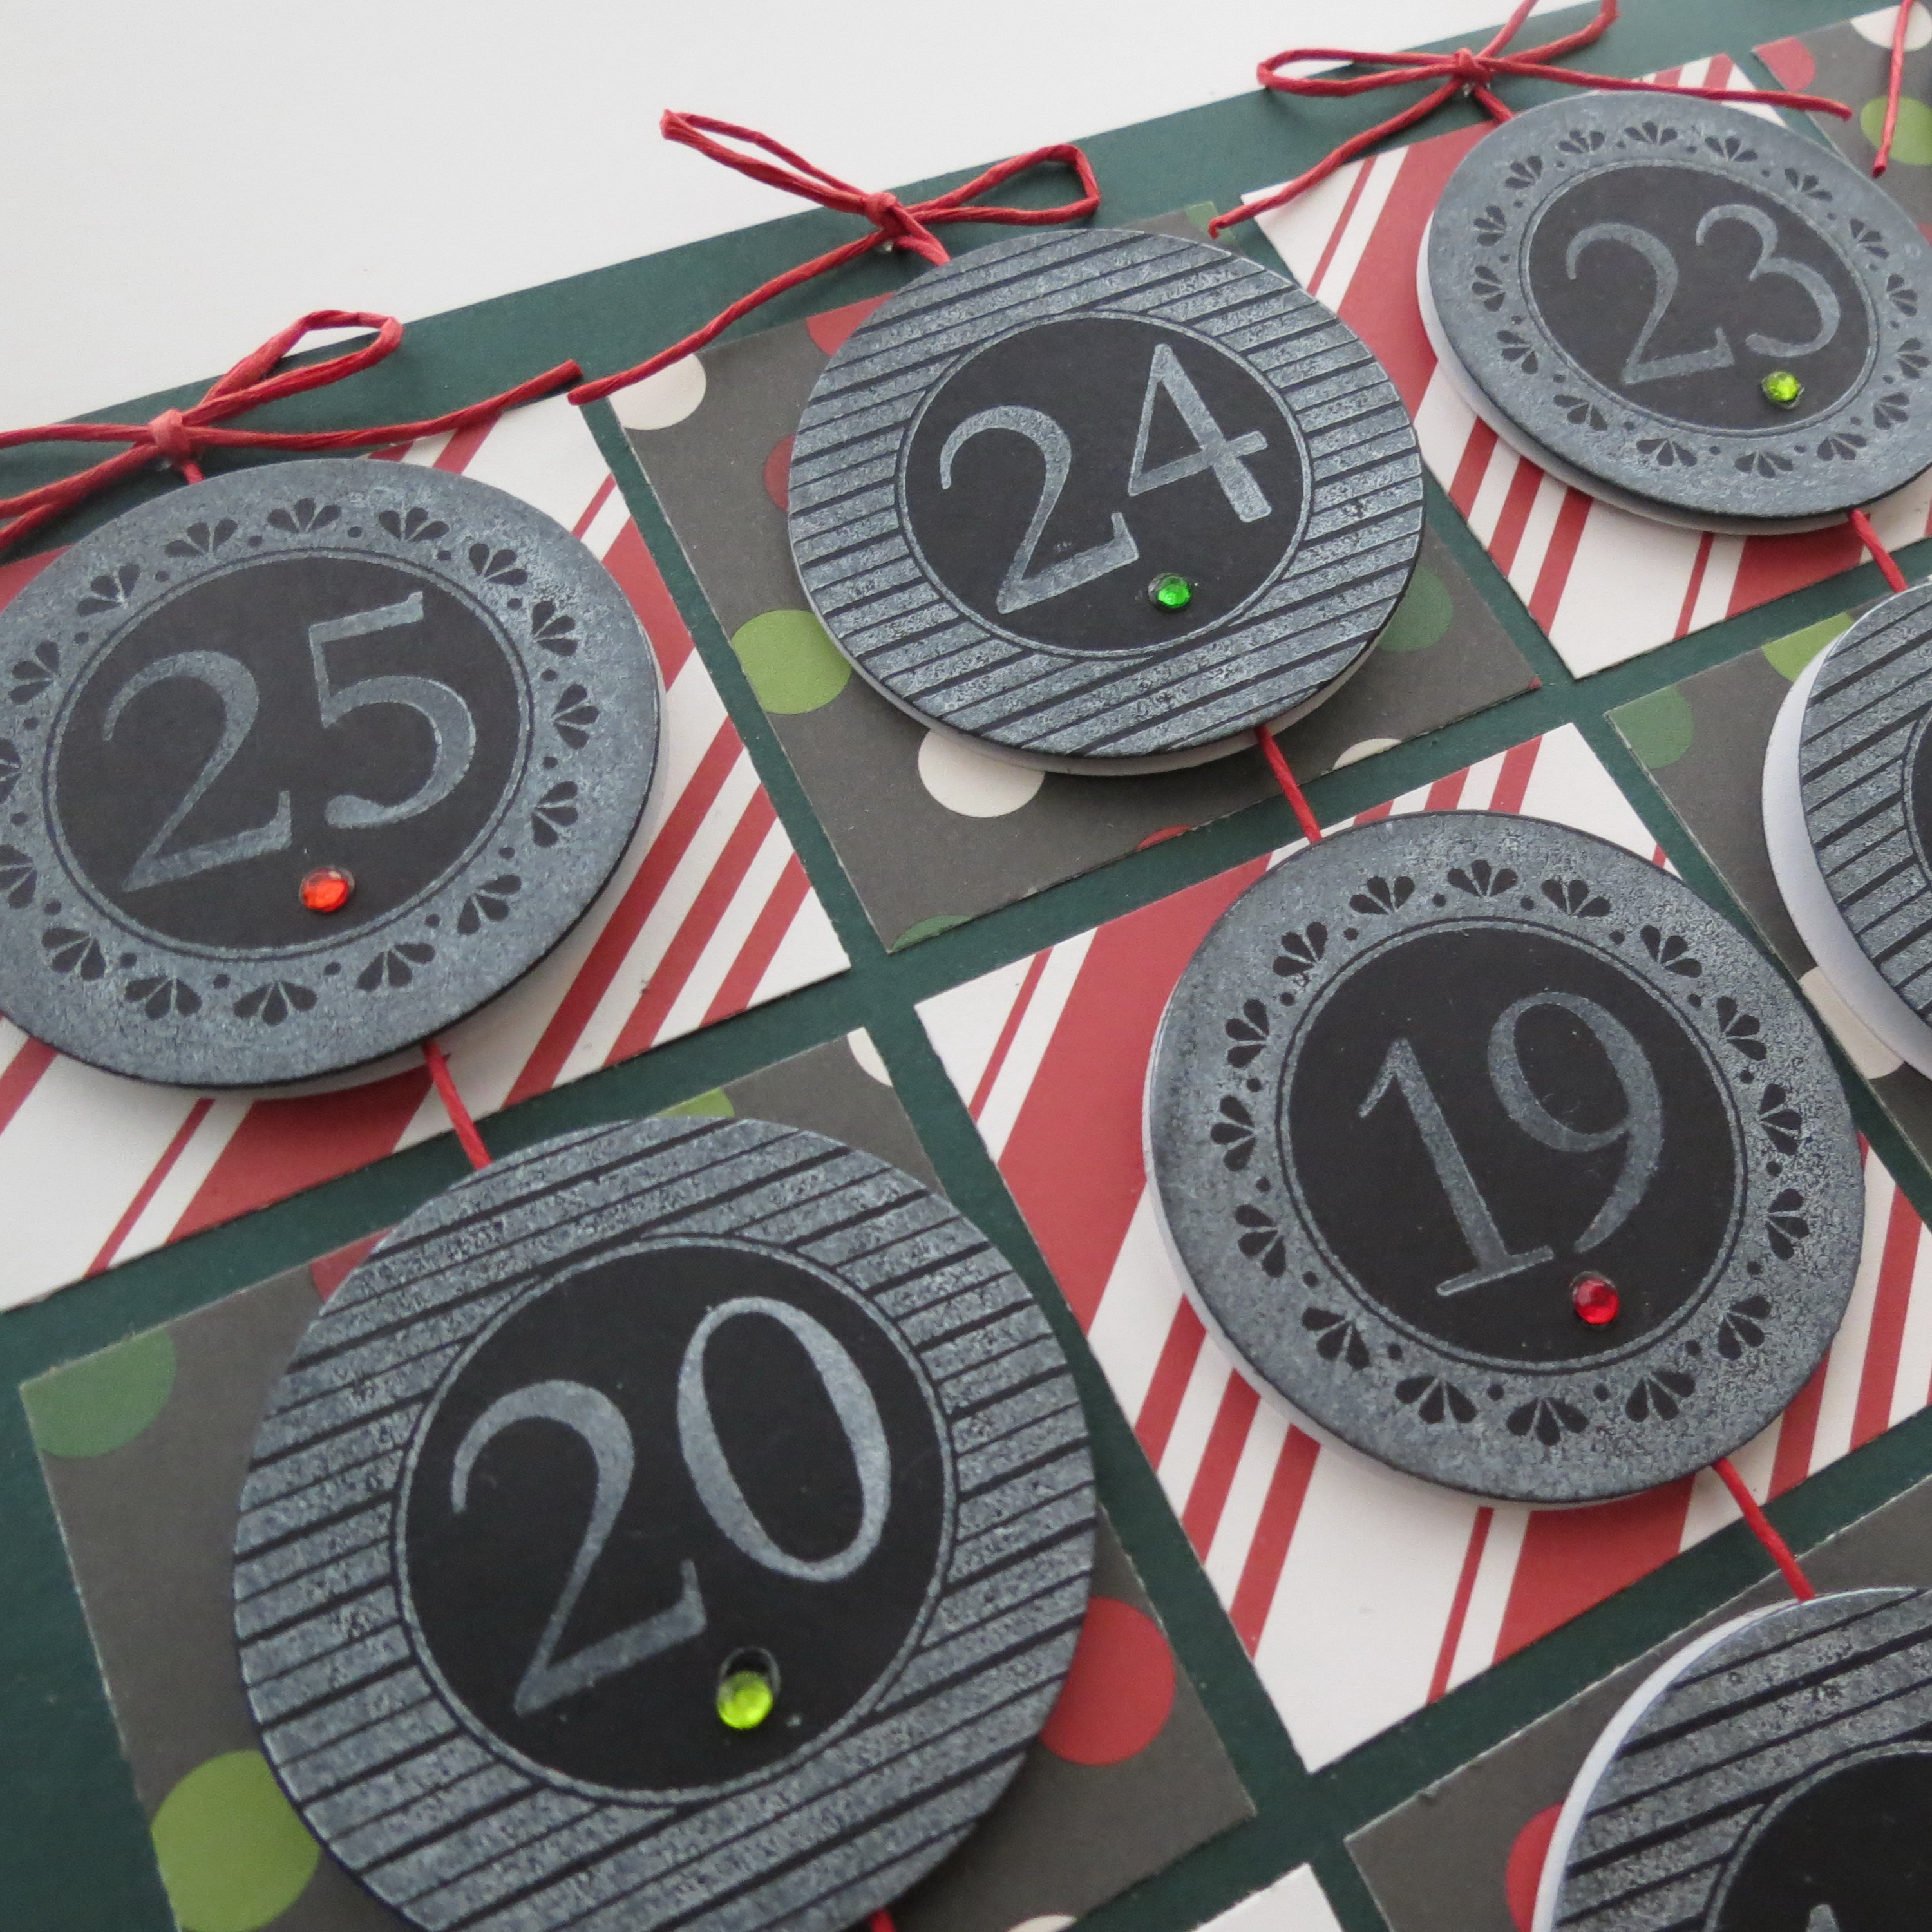
Countdown to Christmas: Gemstones in three colors to add a little sparkle.
Vertical rows of dates will flip easily to count down and reveal the story a portion at a time. Gemstones in three colors to add a little sparkle.
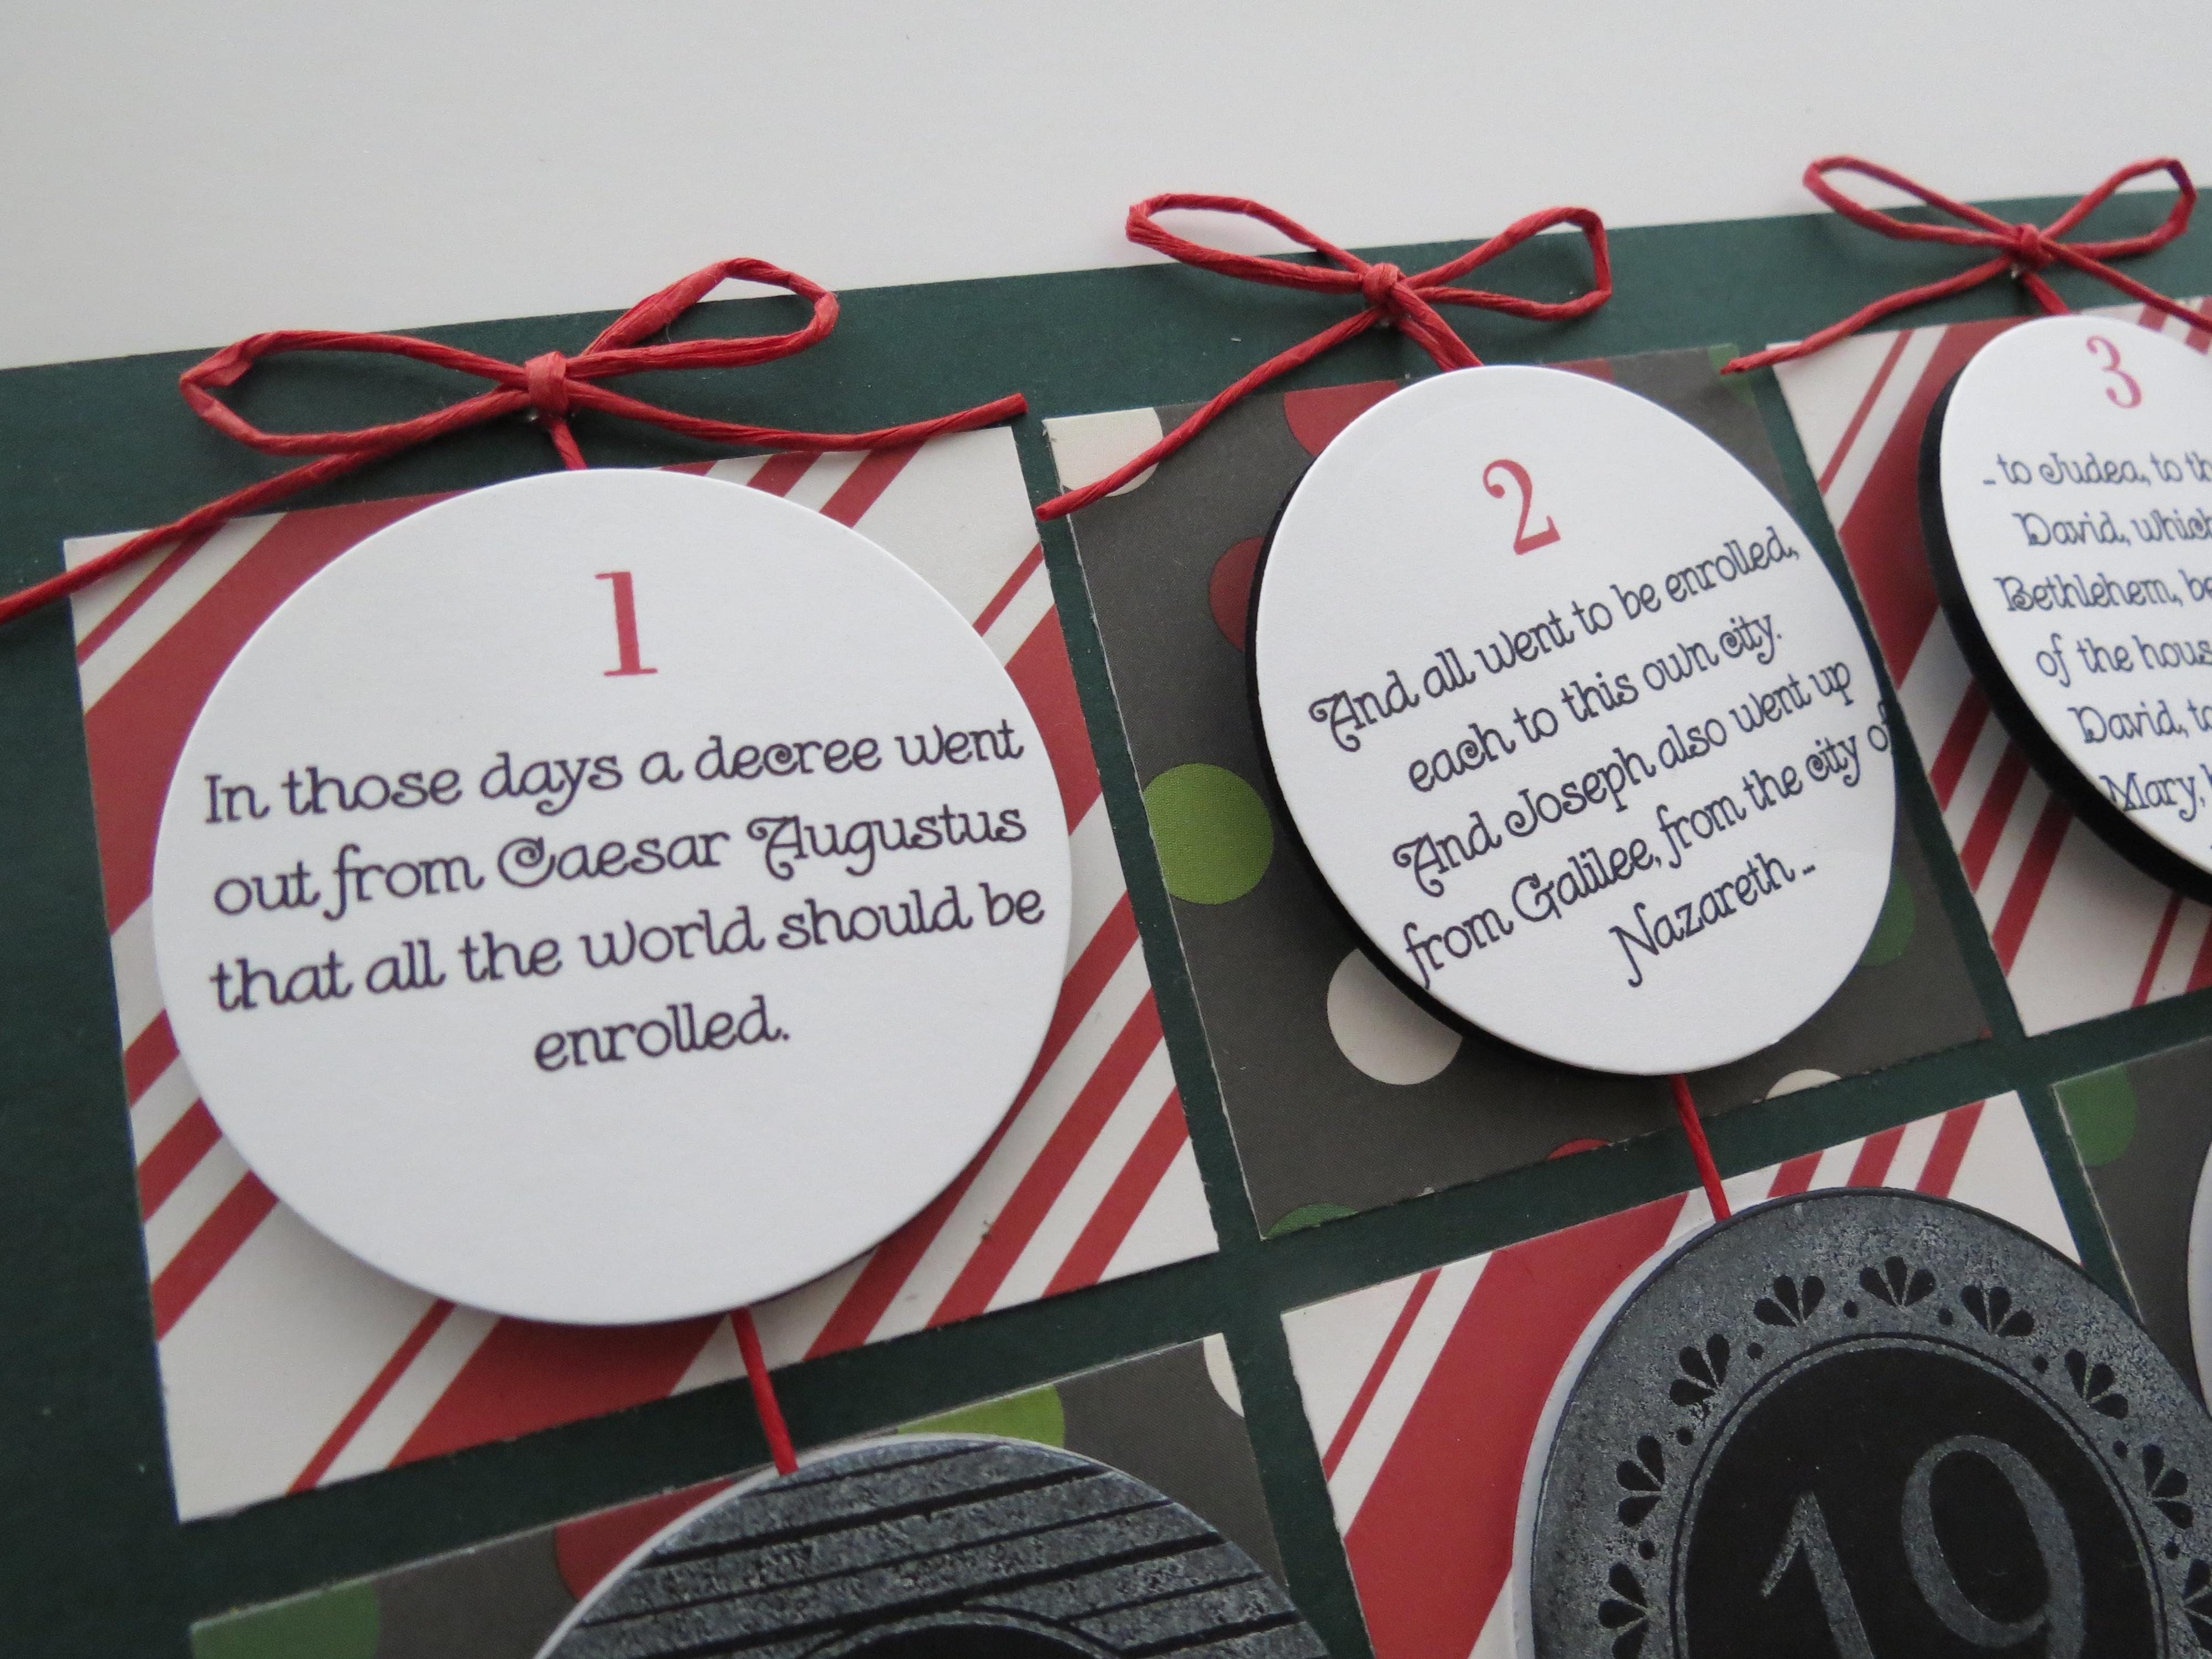
Countdown to Christmas: The Christmas story in small portions for each day.
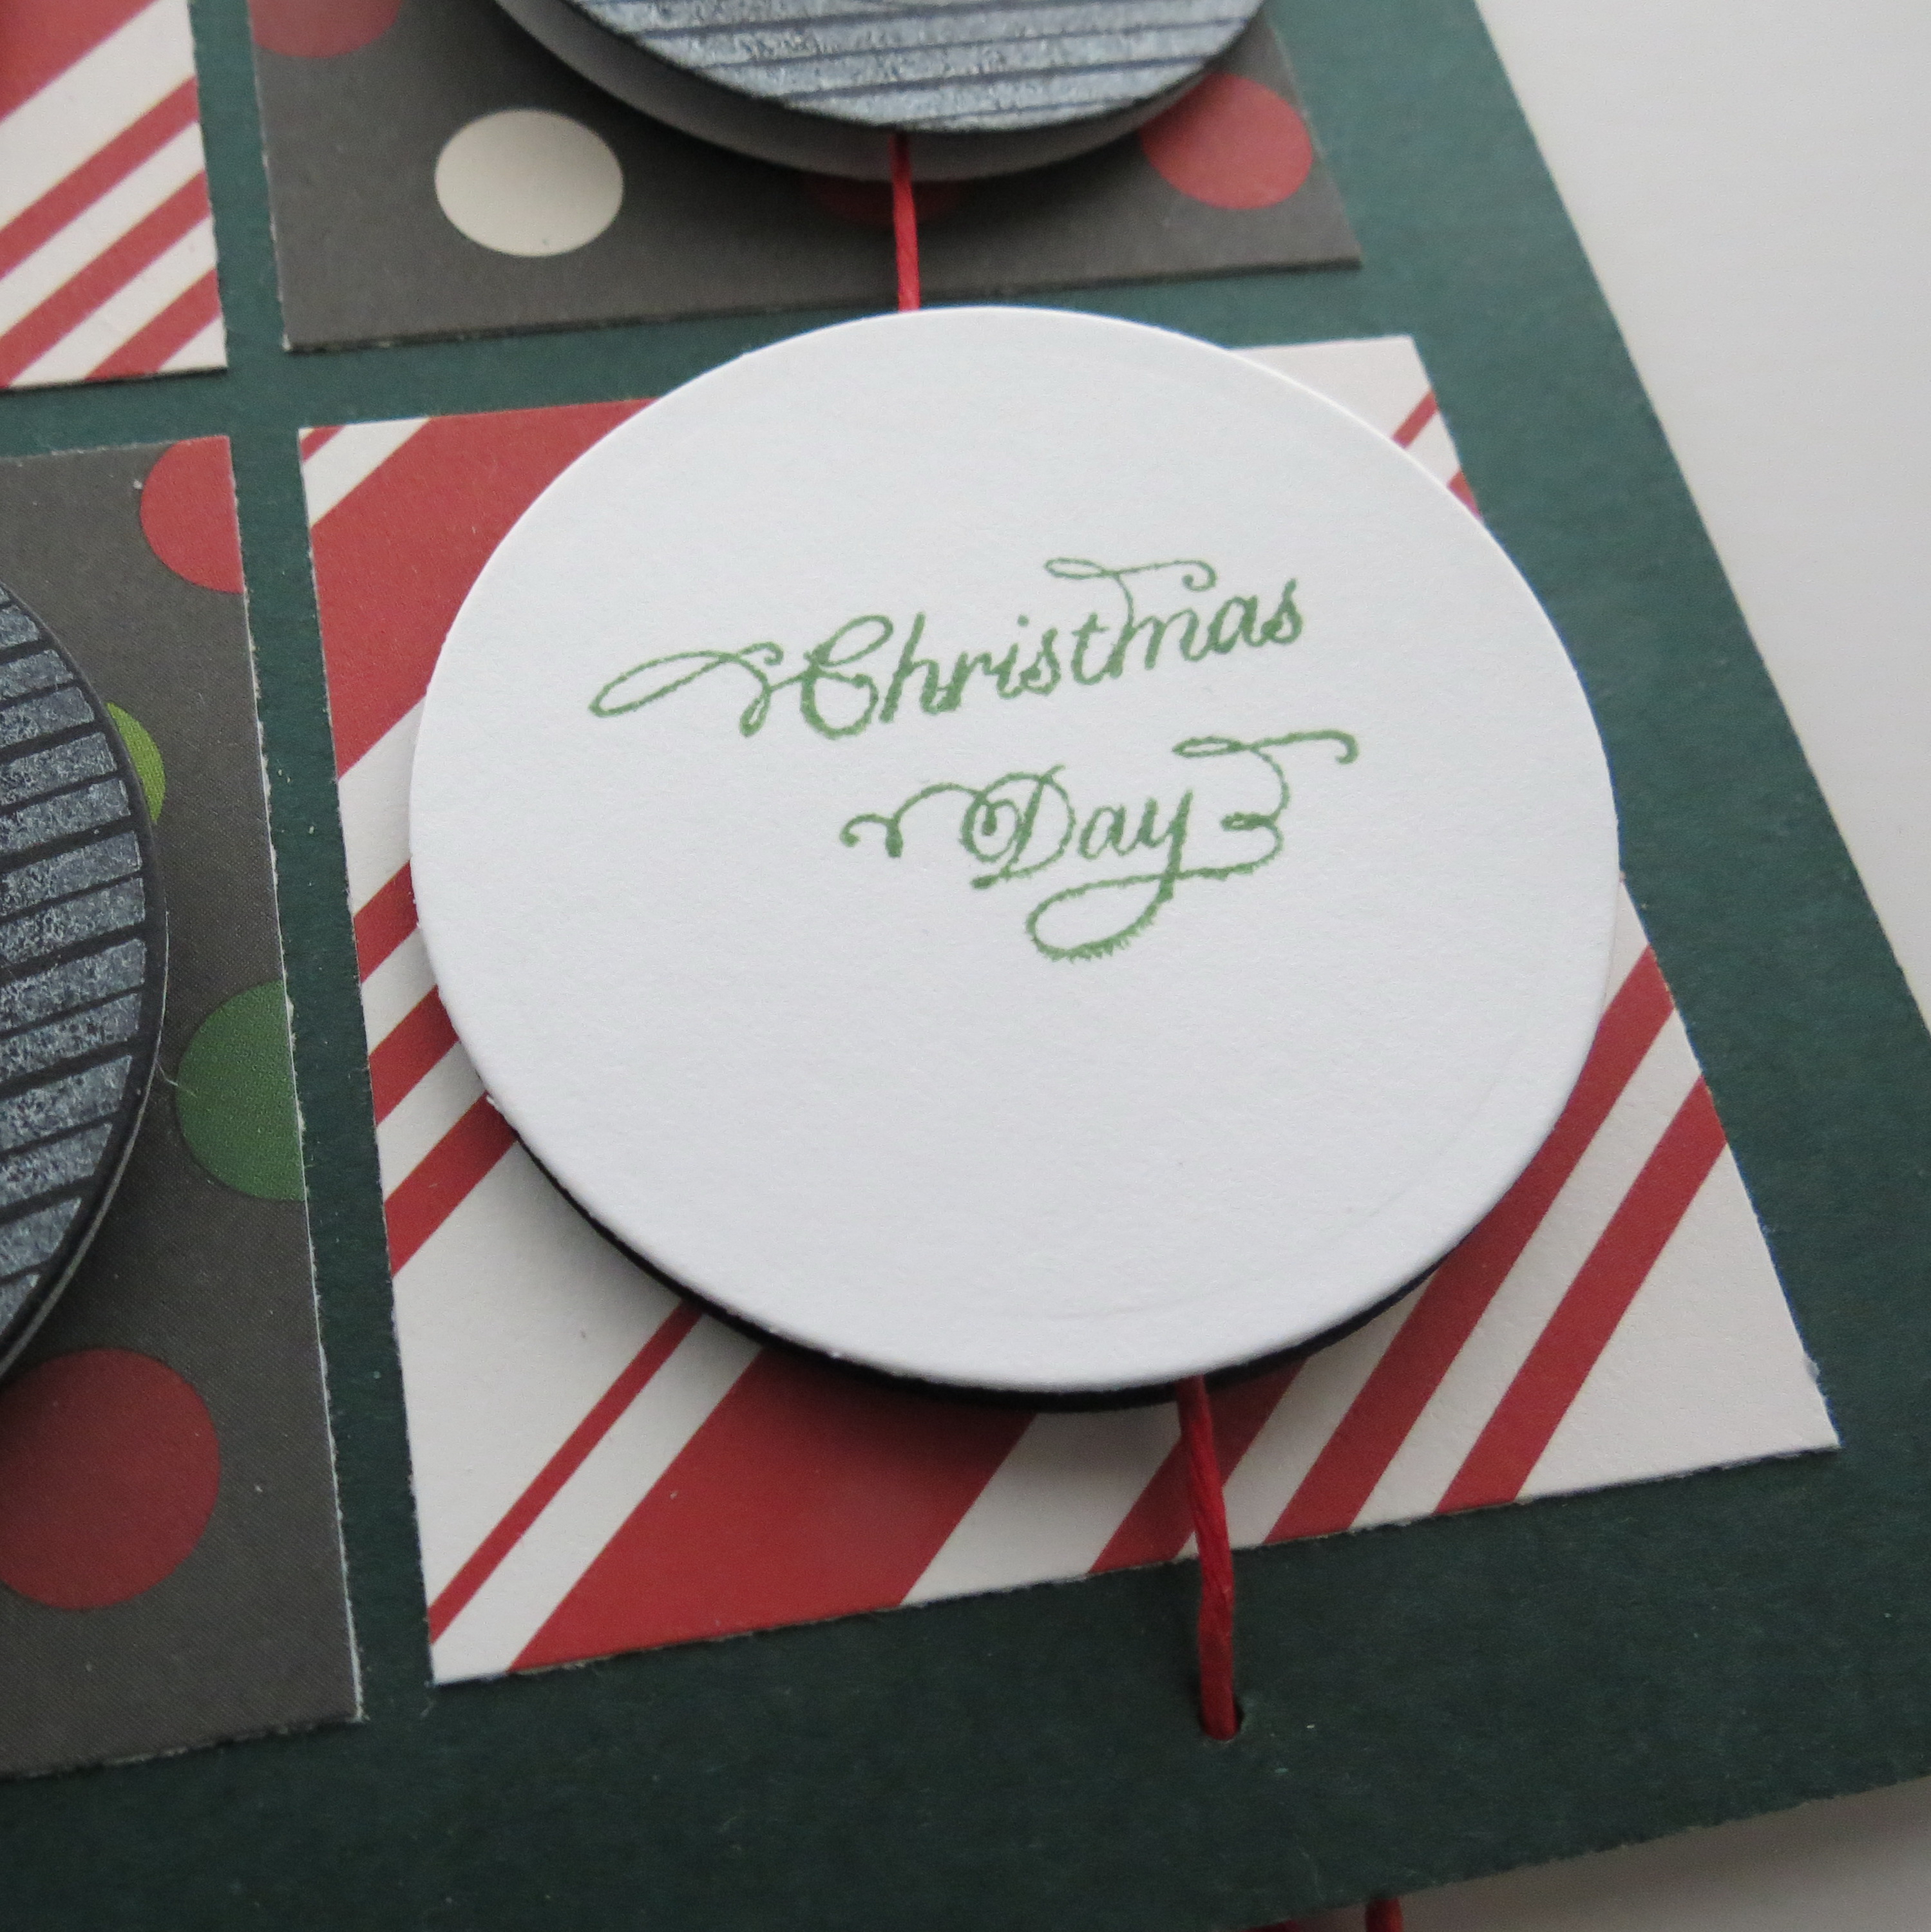
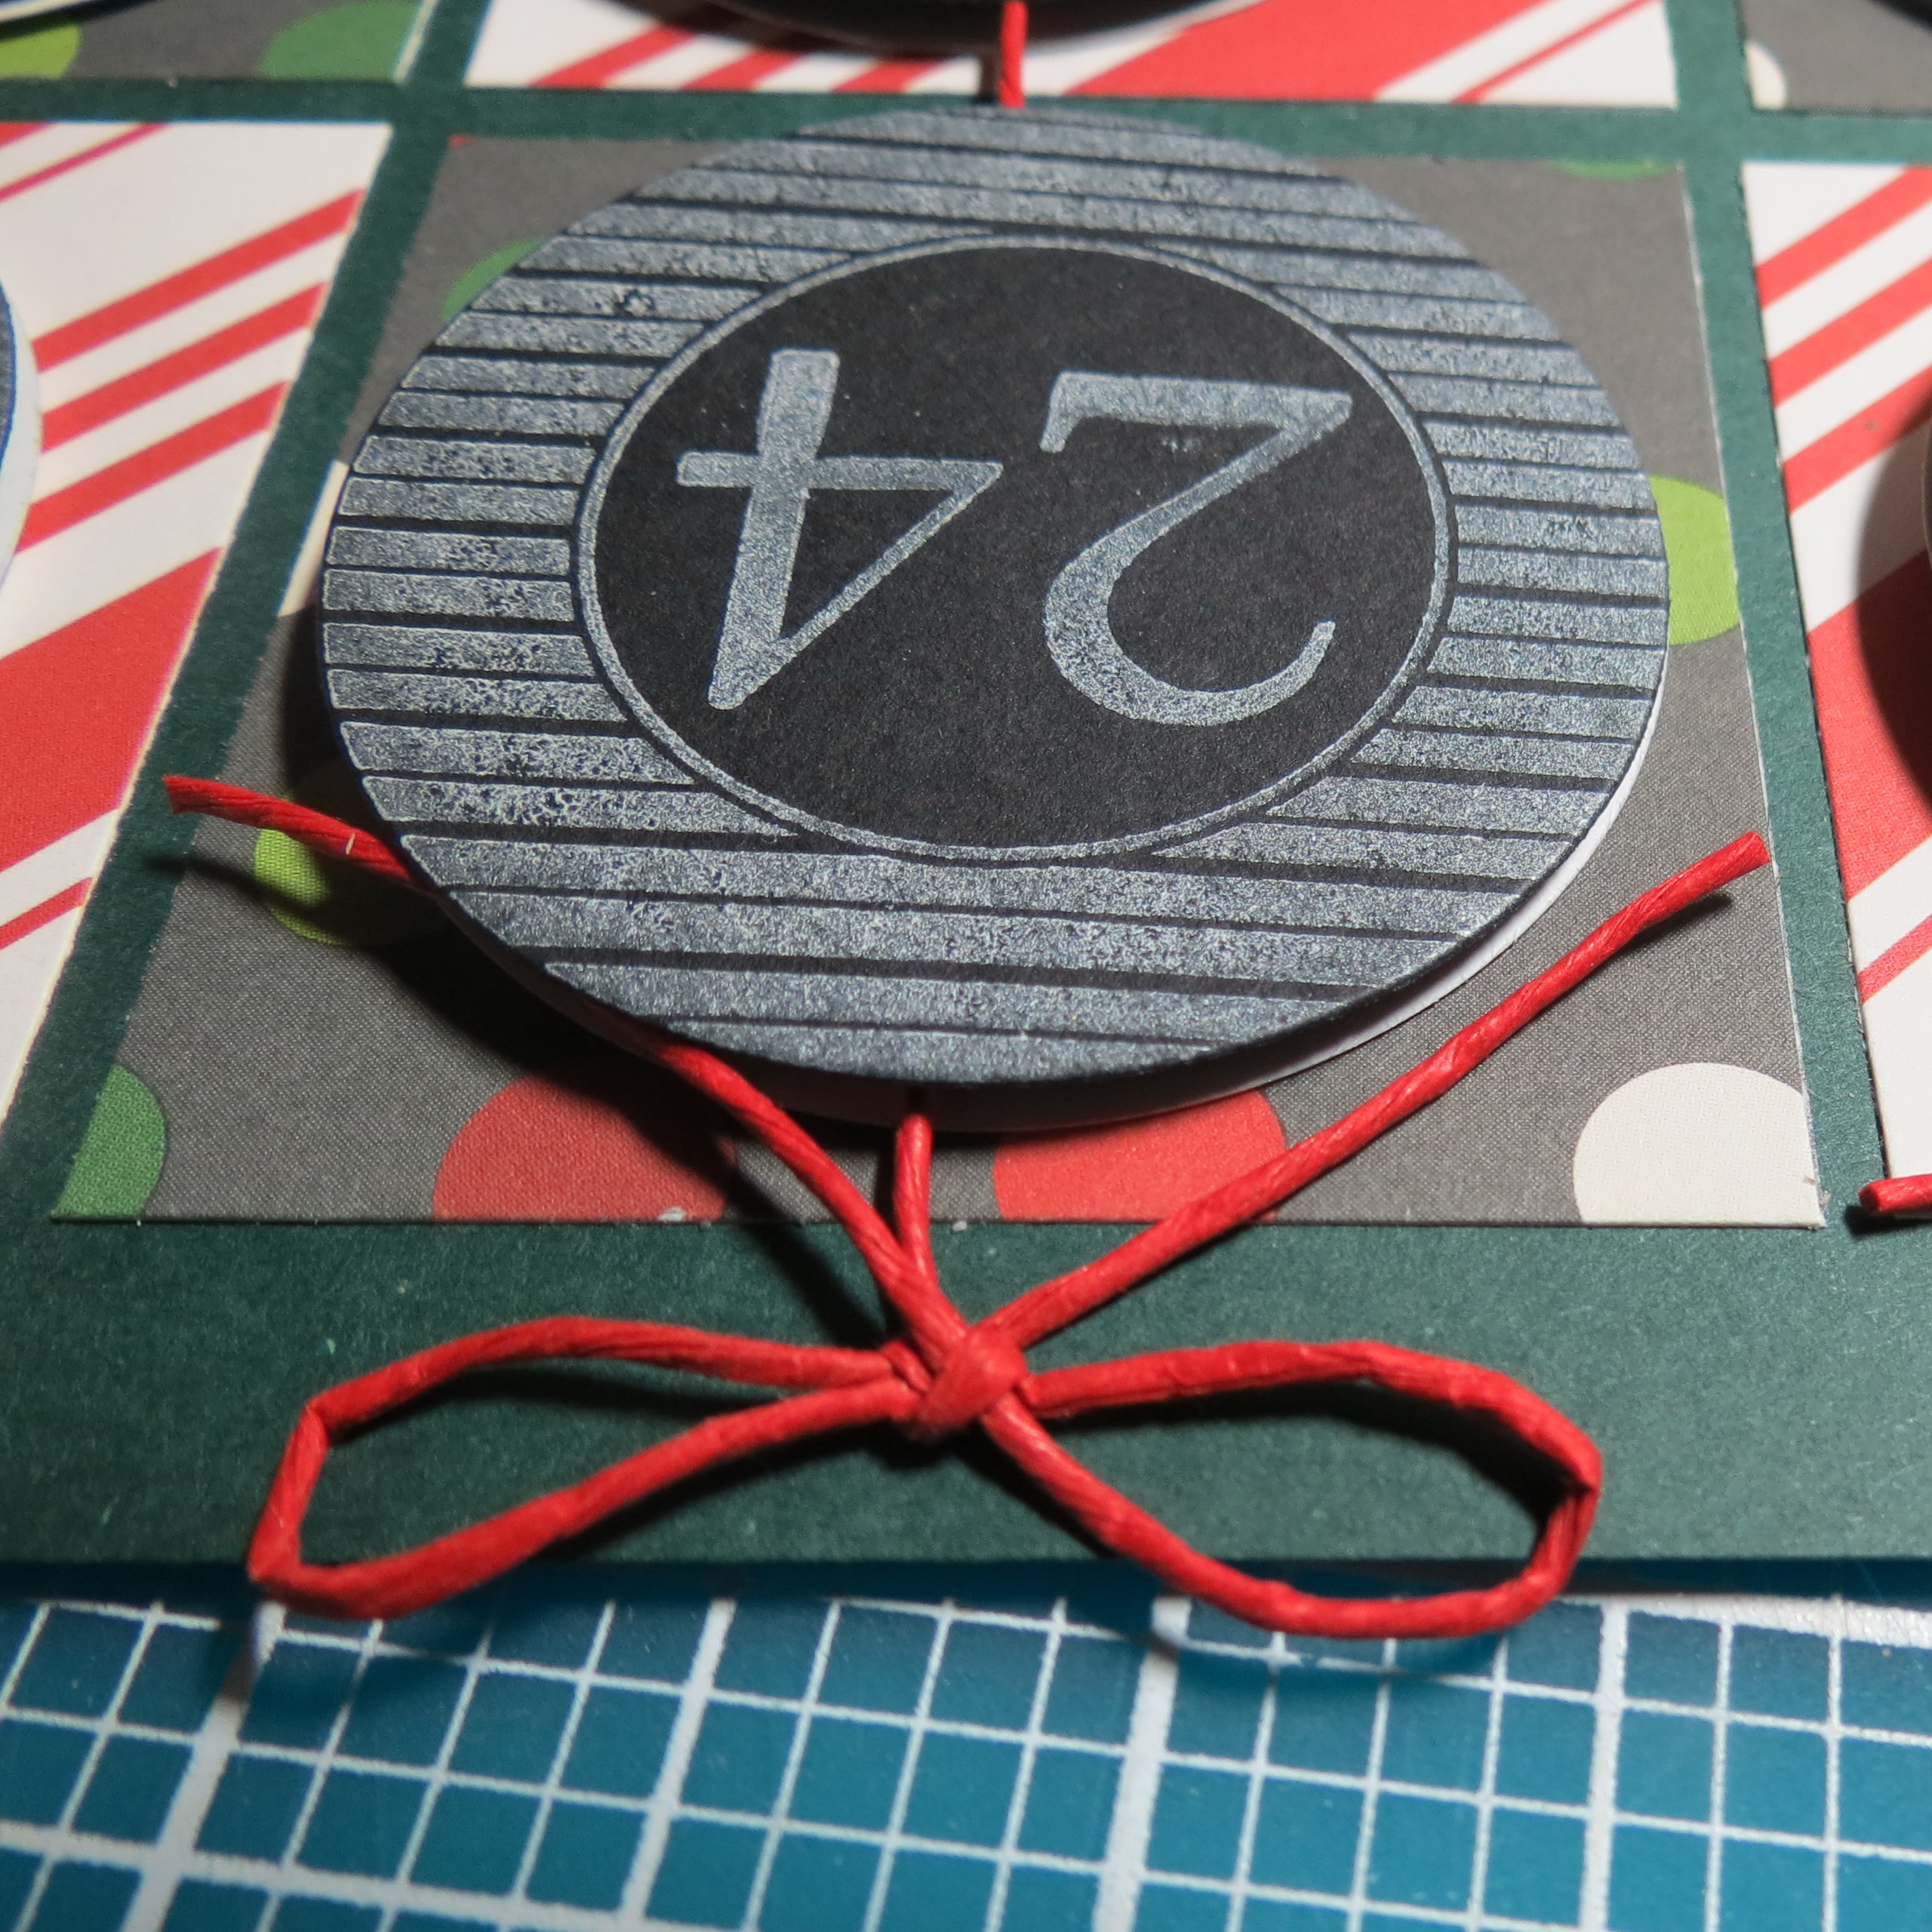
Countdown to Christmas: The Final day add your own touch here!

Countdown to Christmas: Rows hang straight with a little weight.
I used 18″ of cording to attach the tags. At the bottom, you need to leave a little slack to be able to turn the tags each day. Because you want to have your rows hang straight, you will need to have a little weight. I planned on jingle bells and settled for metal ornaments! You knot them in place and tape the extra to the back or trim off.
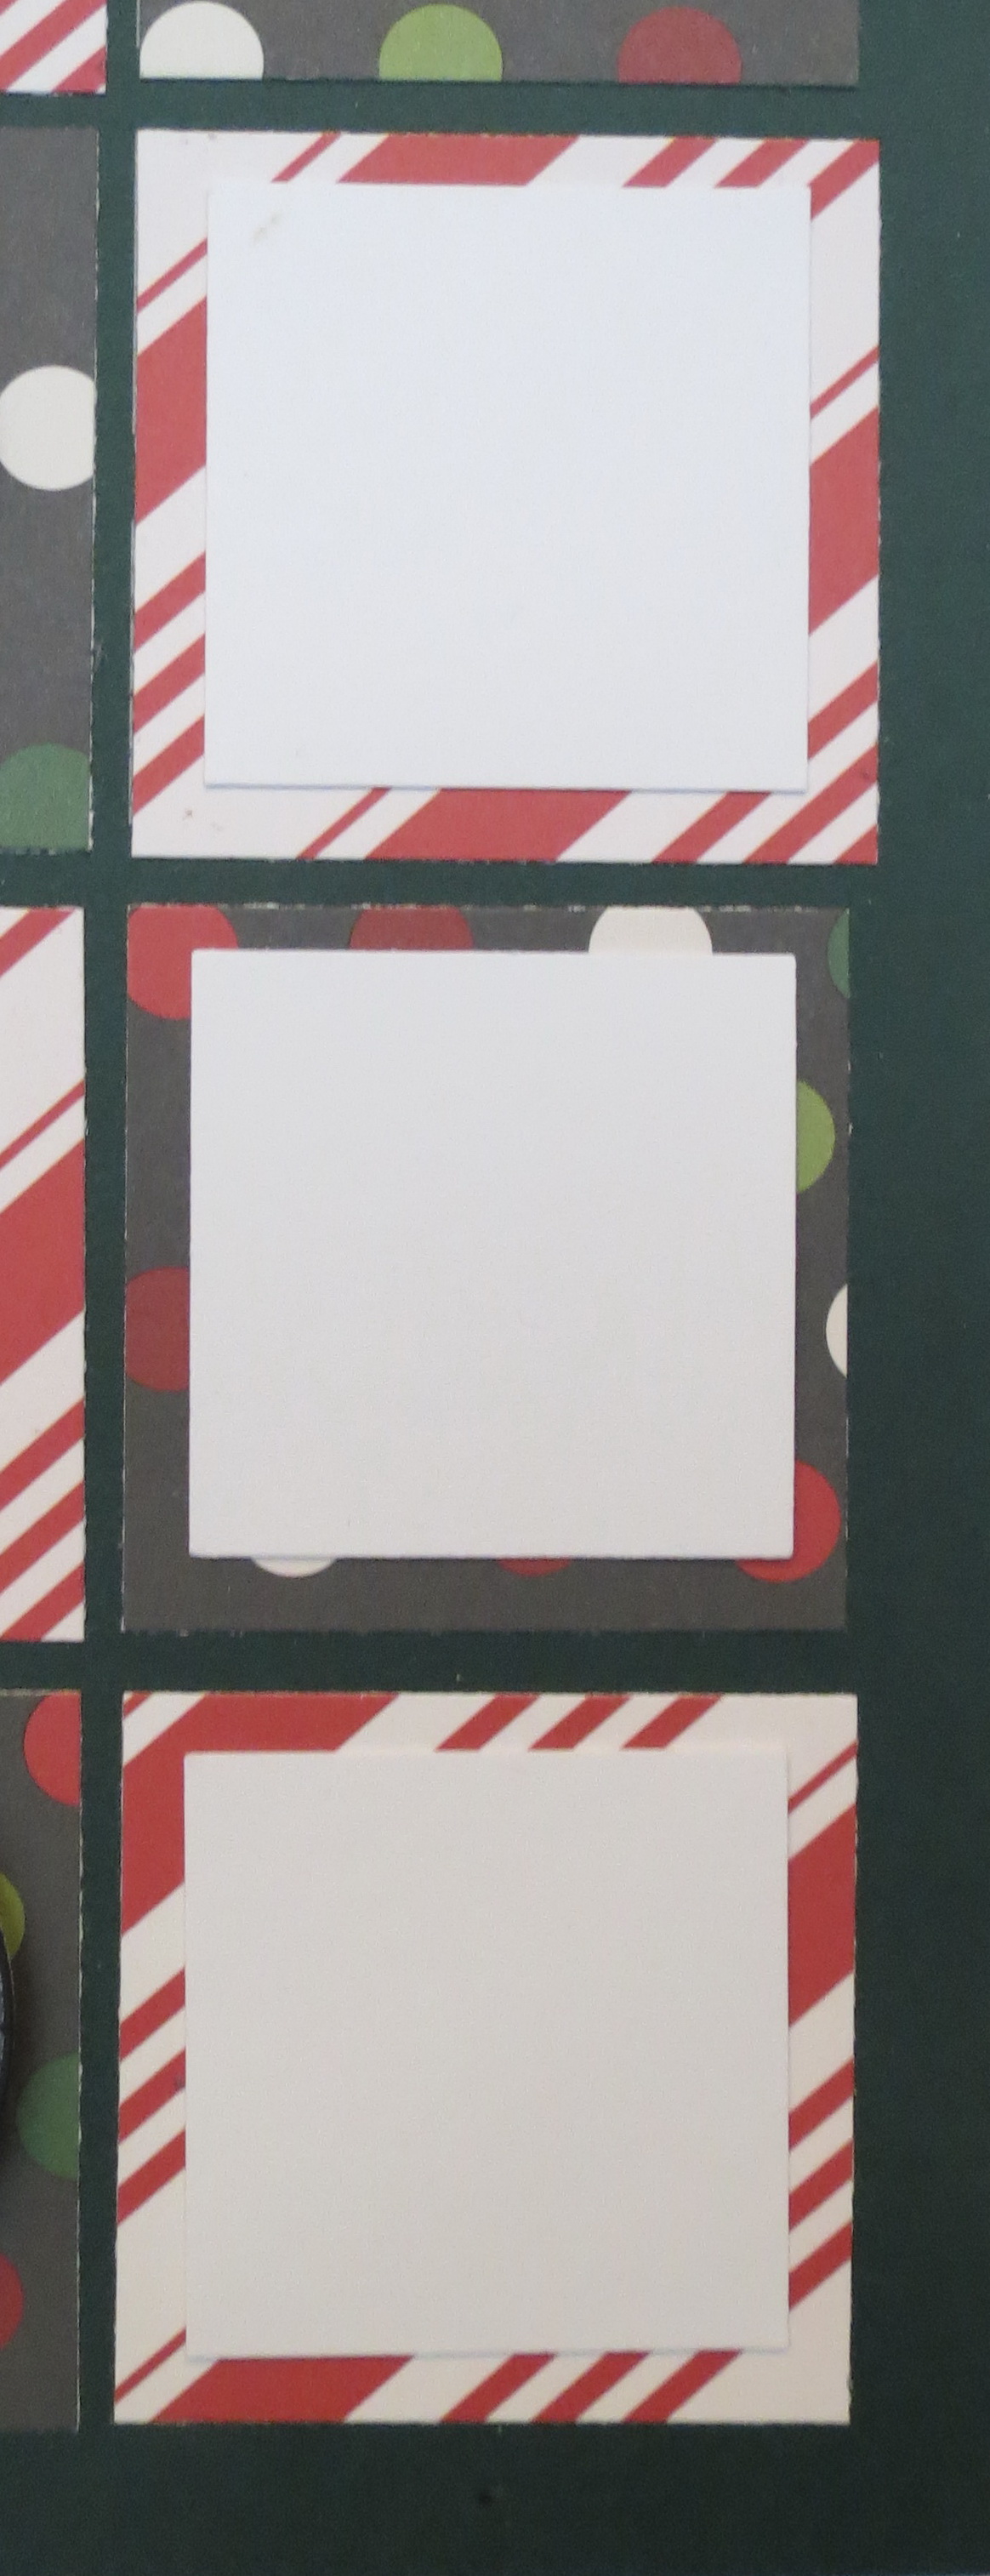
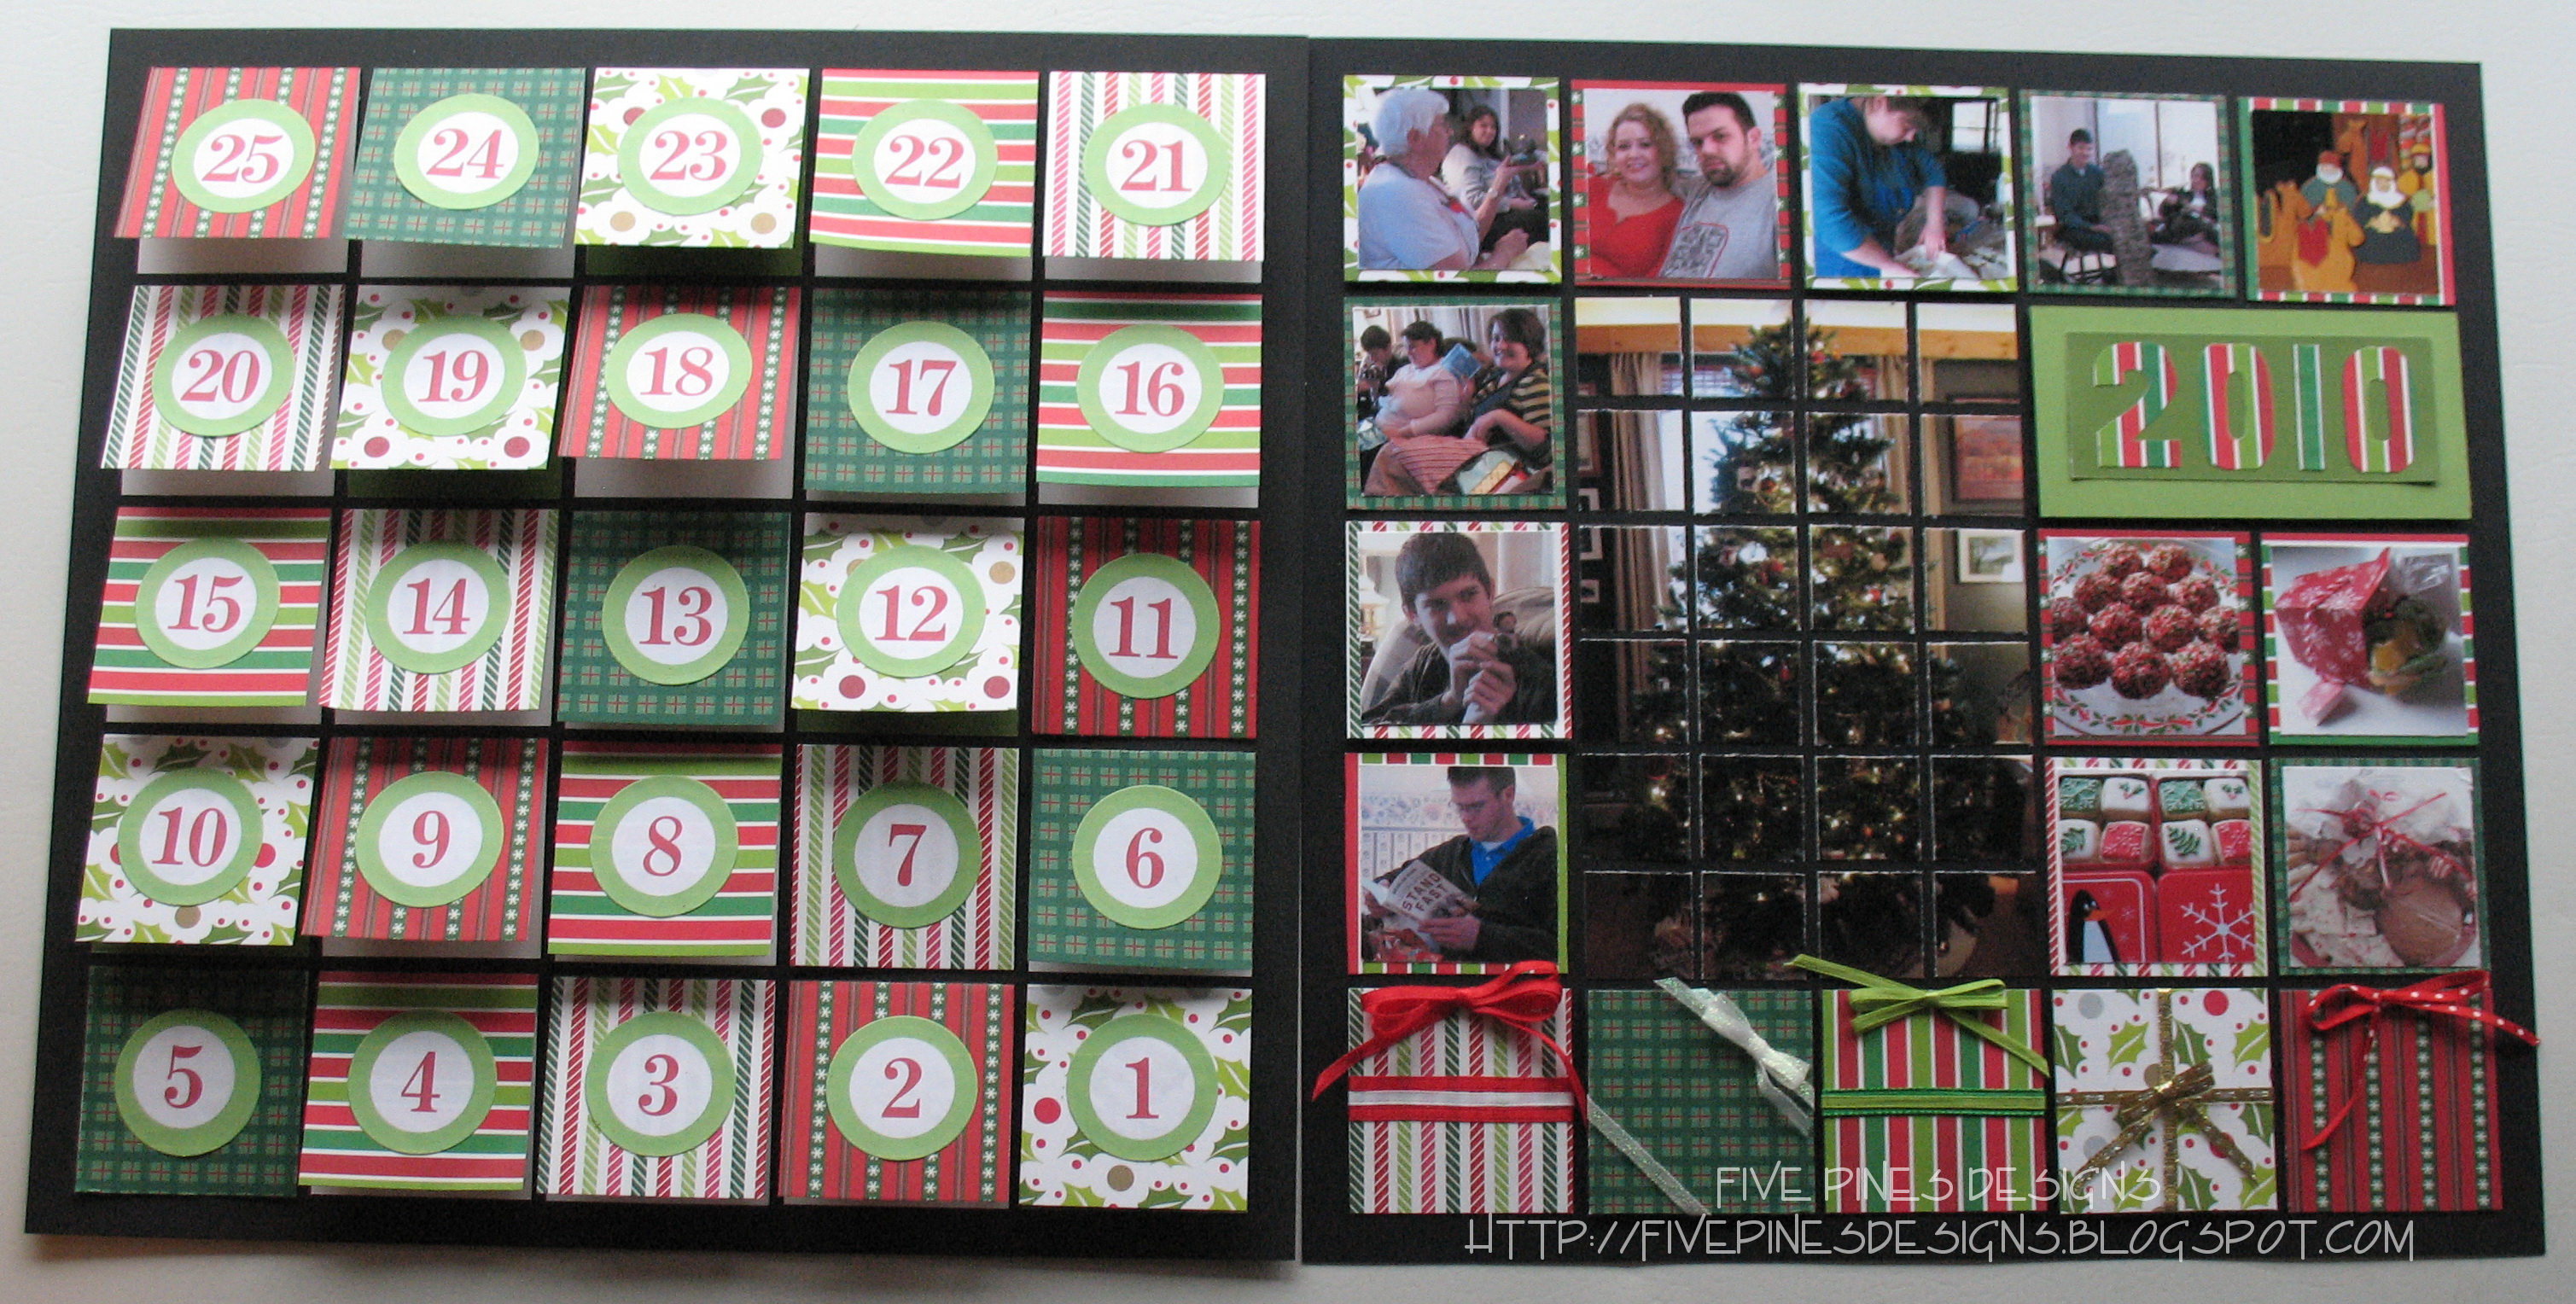
Countdown to Christmas: Photos can be placed on the squares for a finished page after Christmas.
After the calendar is all revealed, you can remove the dates and save for another year and then use photos (size of the white squares in the photo) from your month long activities and crop smaller than the 2 x 2 block size leaving a small border of color.
I have several other resources pinned here to help you get started on your search on Pinterest in my Christmas Advent Ideas board.
Trendy Palette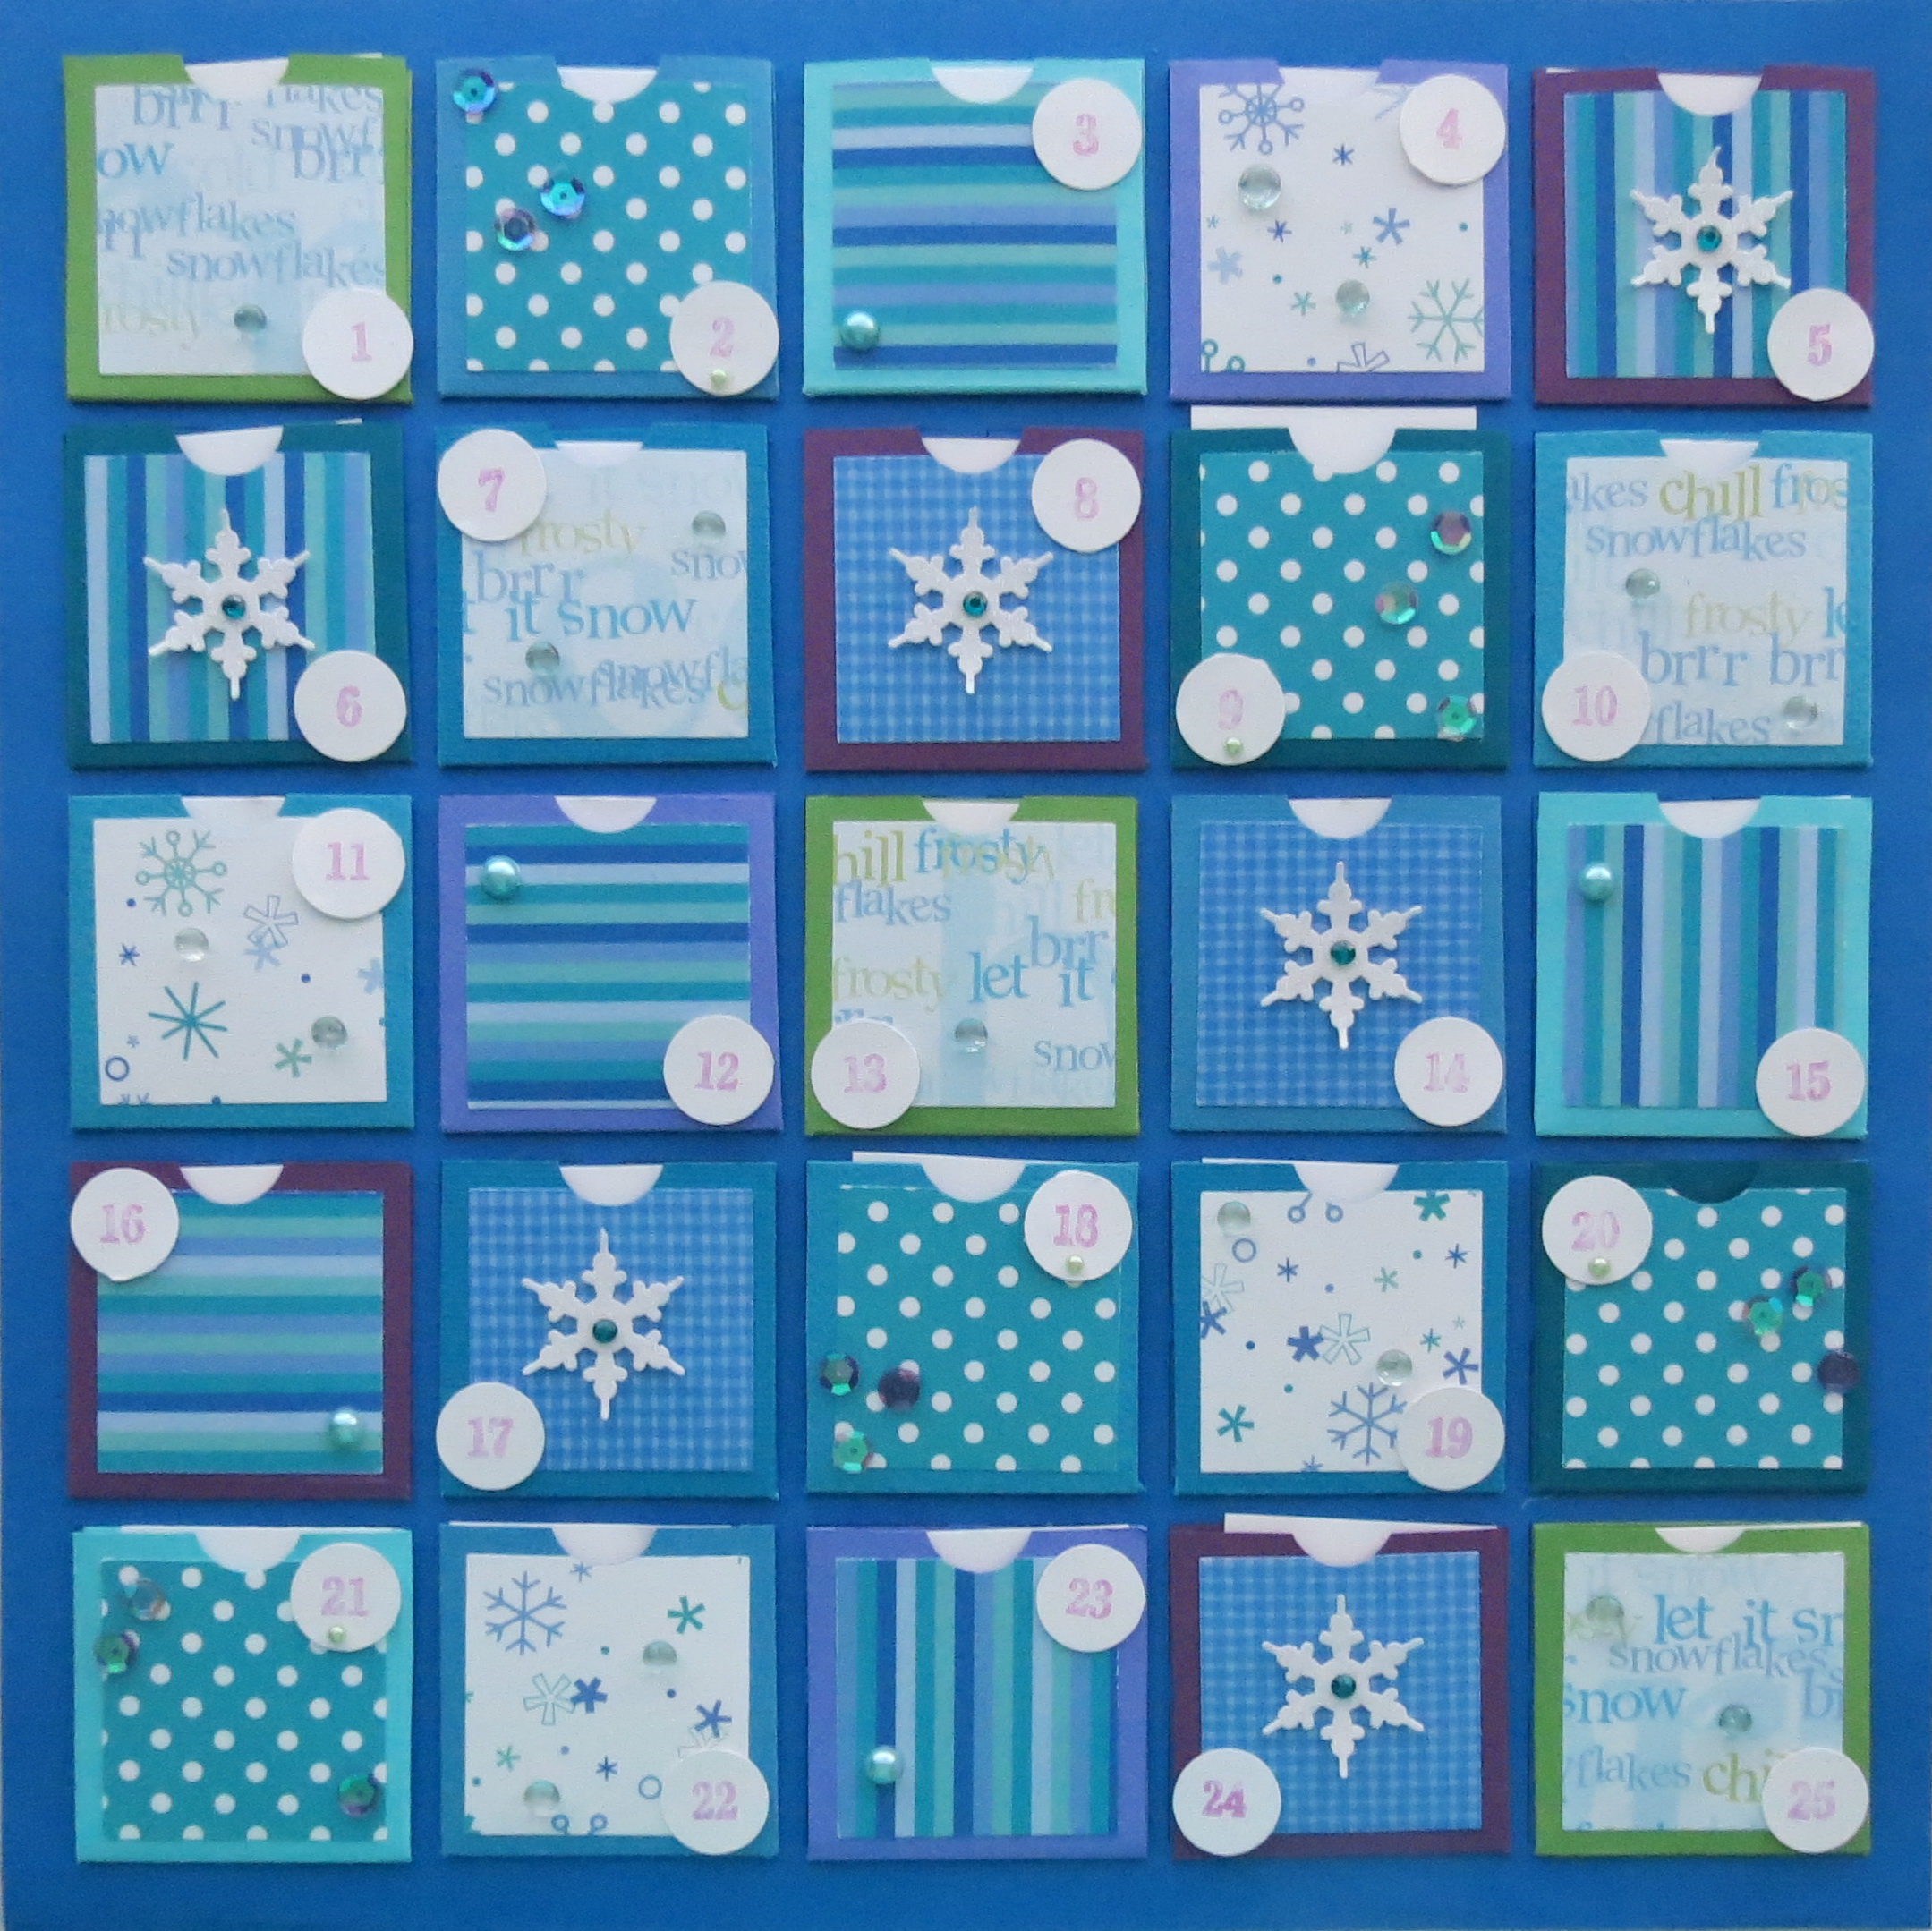
Countdown to Christmas: Trendier version Inspired by Disney’s Frozen color palette and lots of sparkle!
My second trendier Countdown to Christmas Calendar adds a bit of fun to the days leading up to Christmas. I decided to be inspired by the Disney movie, Frozen, and use all the frosty shades of aqua, blue and lavender in pocket on an Ocean Blue 12 x 12 Mosaic Moments Grid Paper. I also included a lot of bling! I’ve got pearls, sequins, glitter paper snowflakes, blue glass pebbles and gem stones. The page pattern is again #101 in the Pattern Gallery.
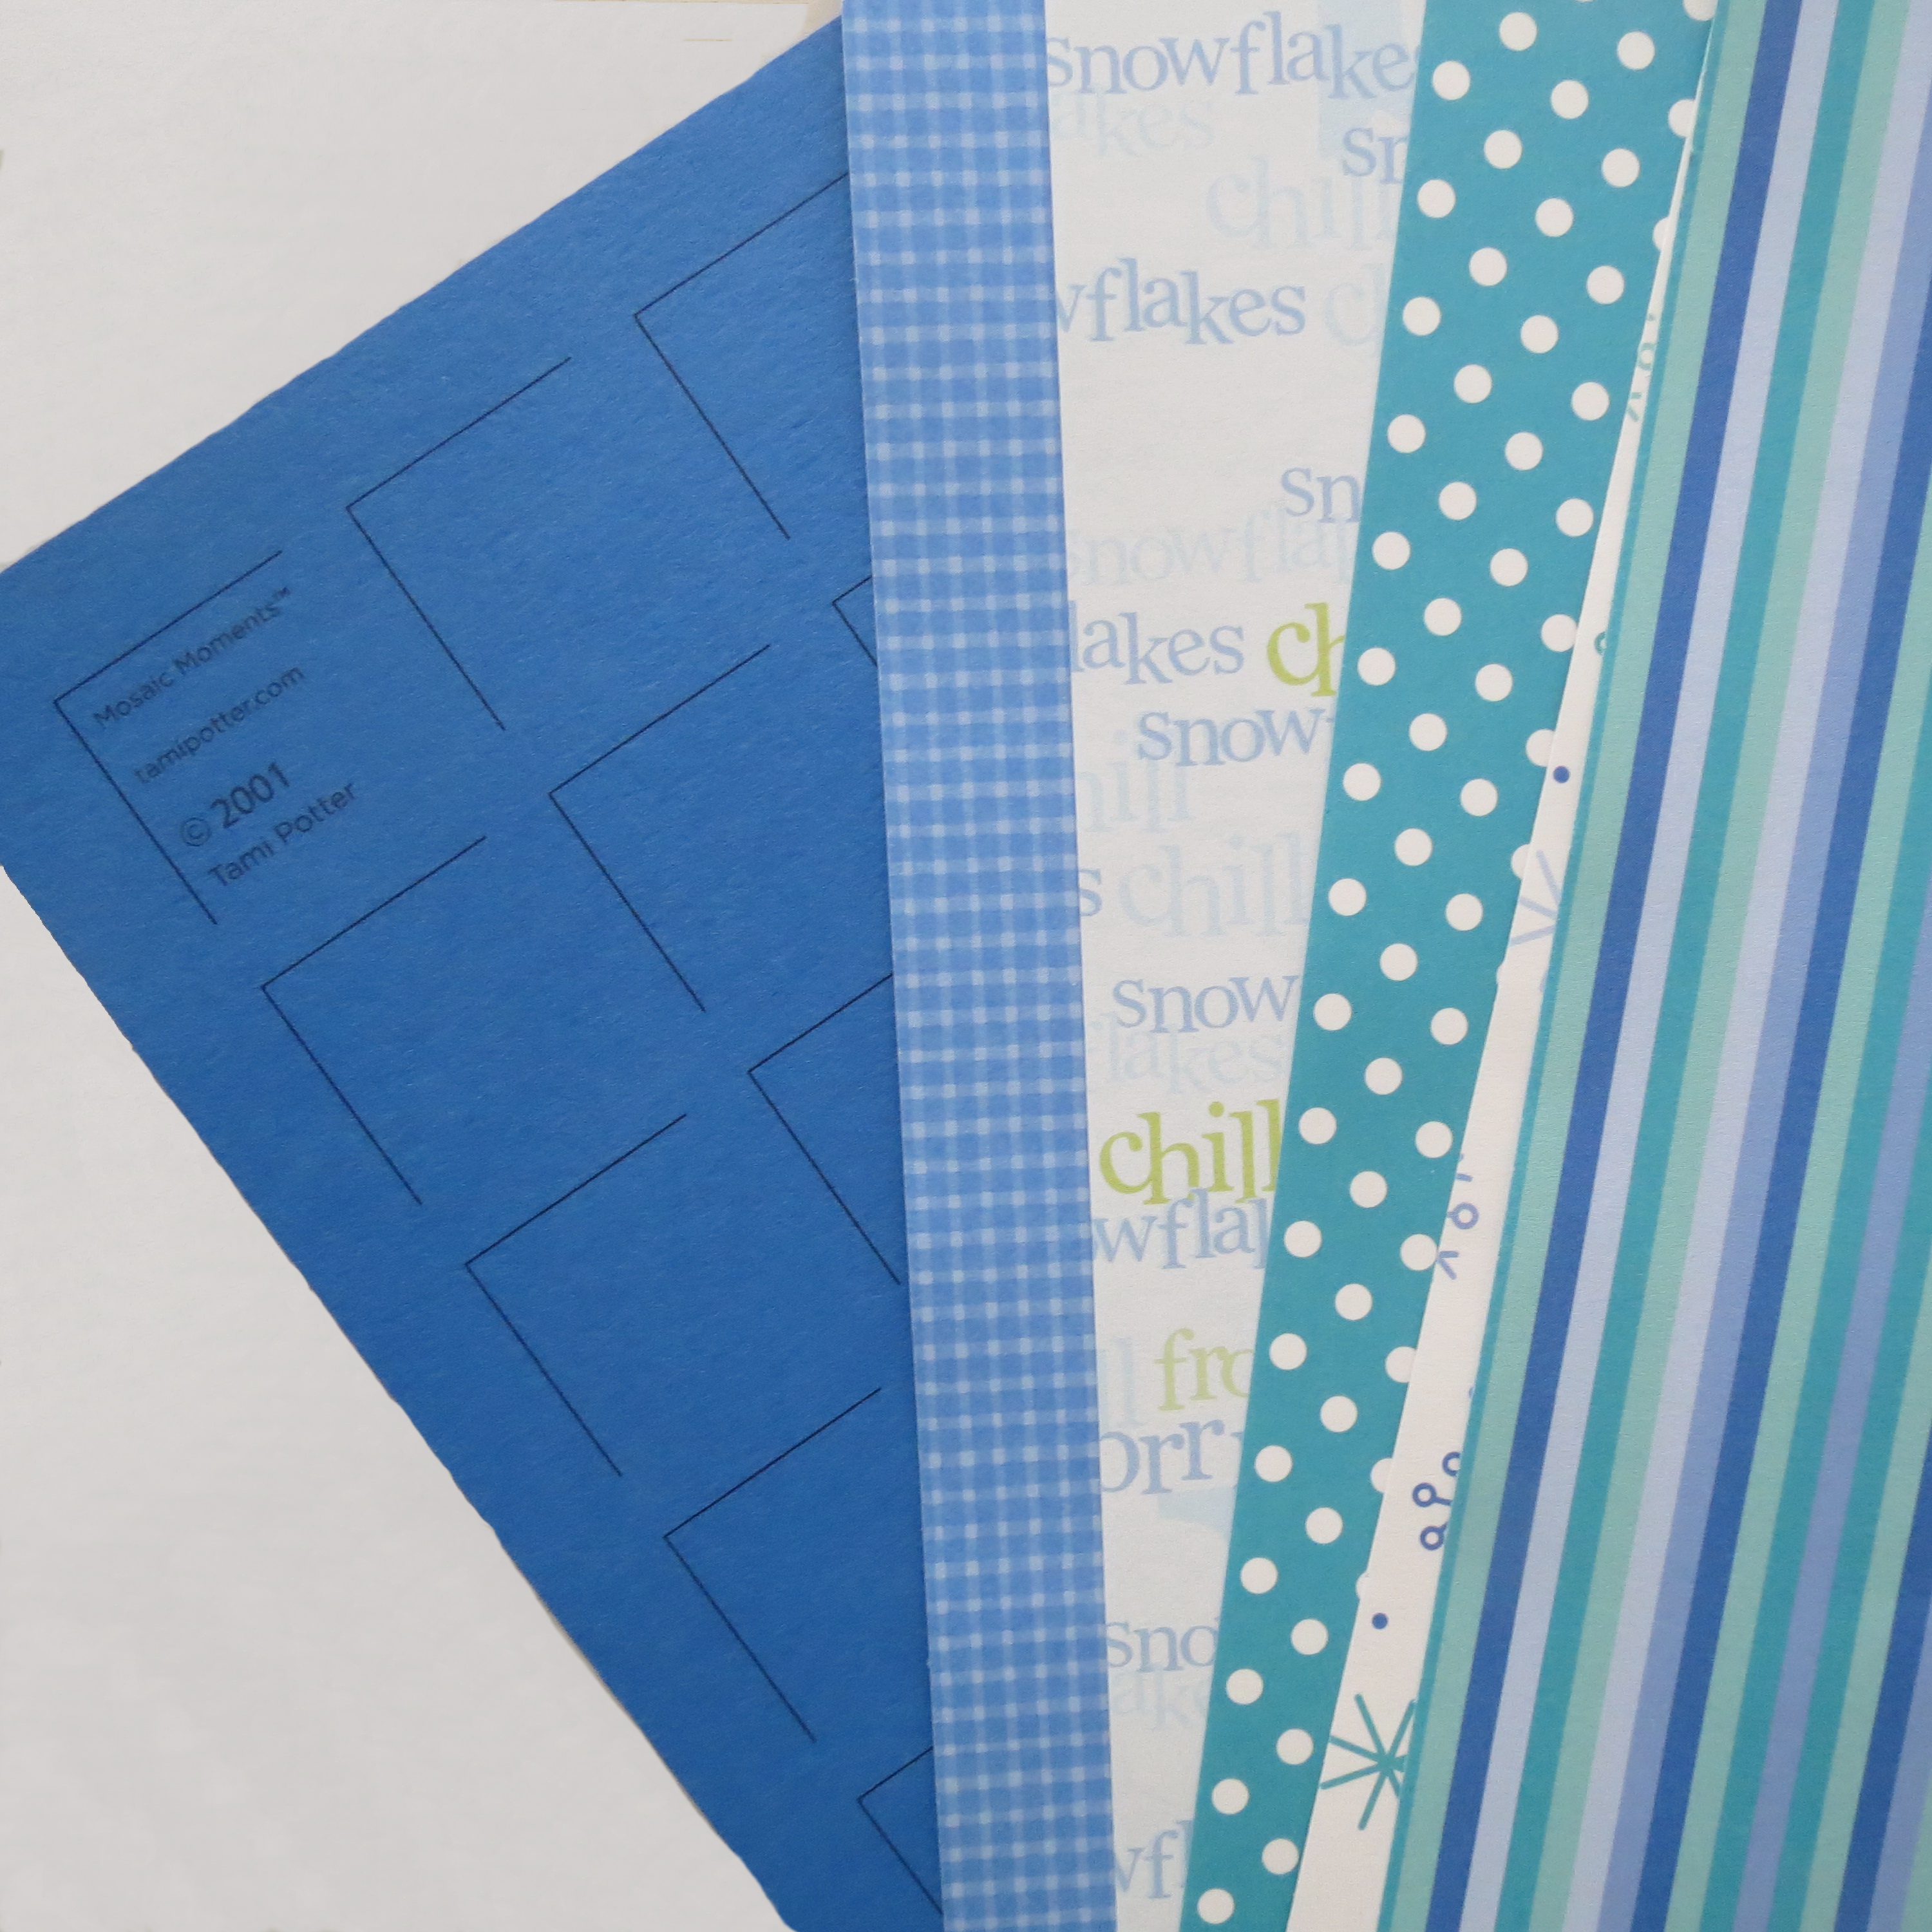
Countdown to Christmas: color palette Ocean Blue Grid Paper and several shades and patterns.
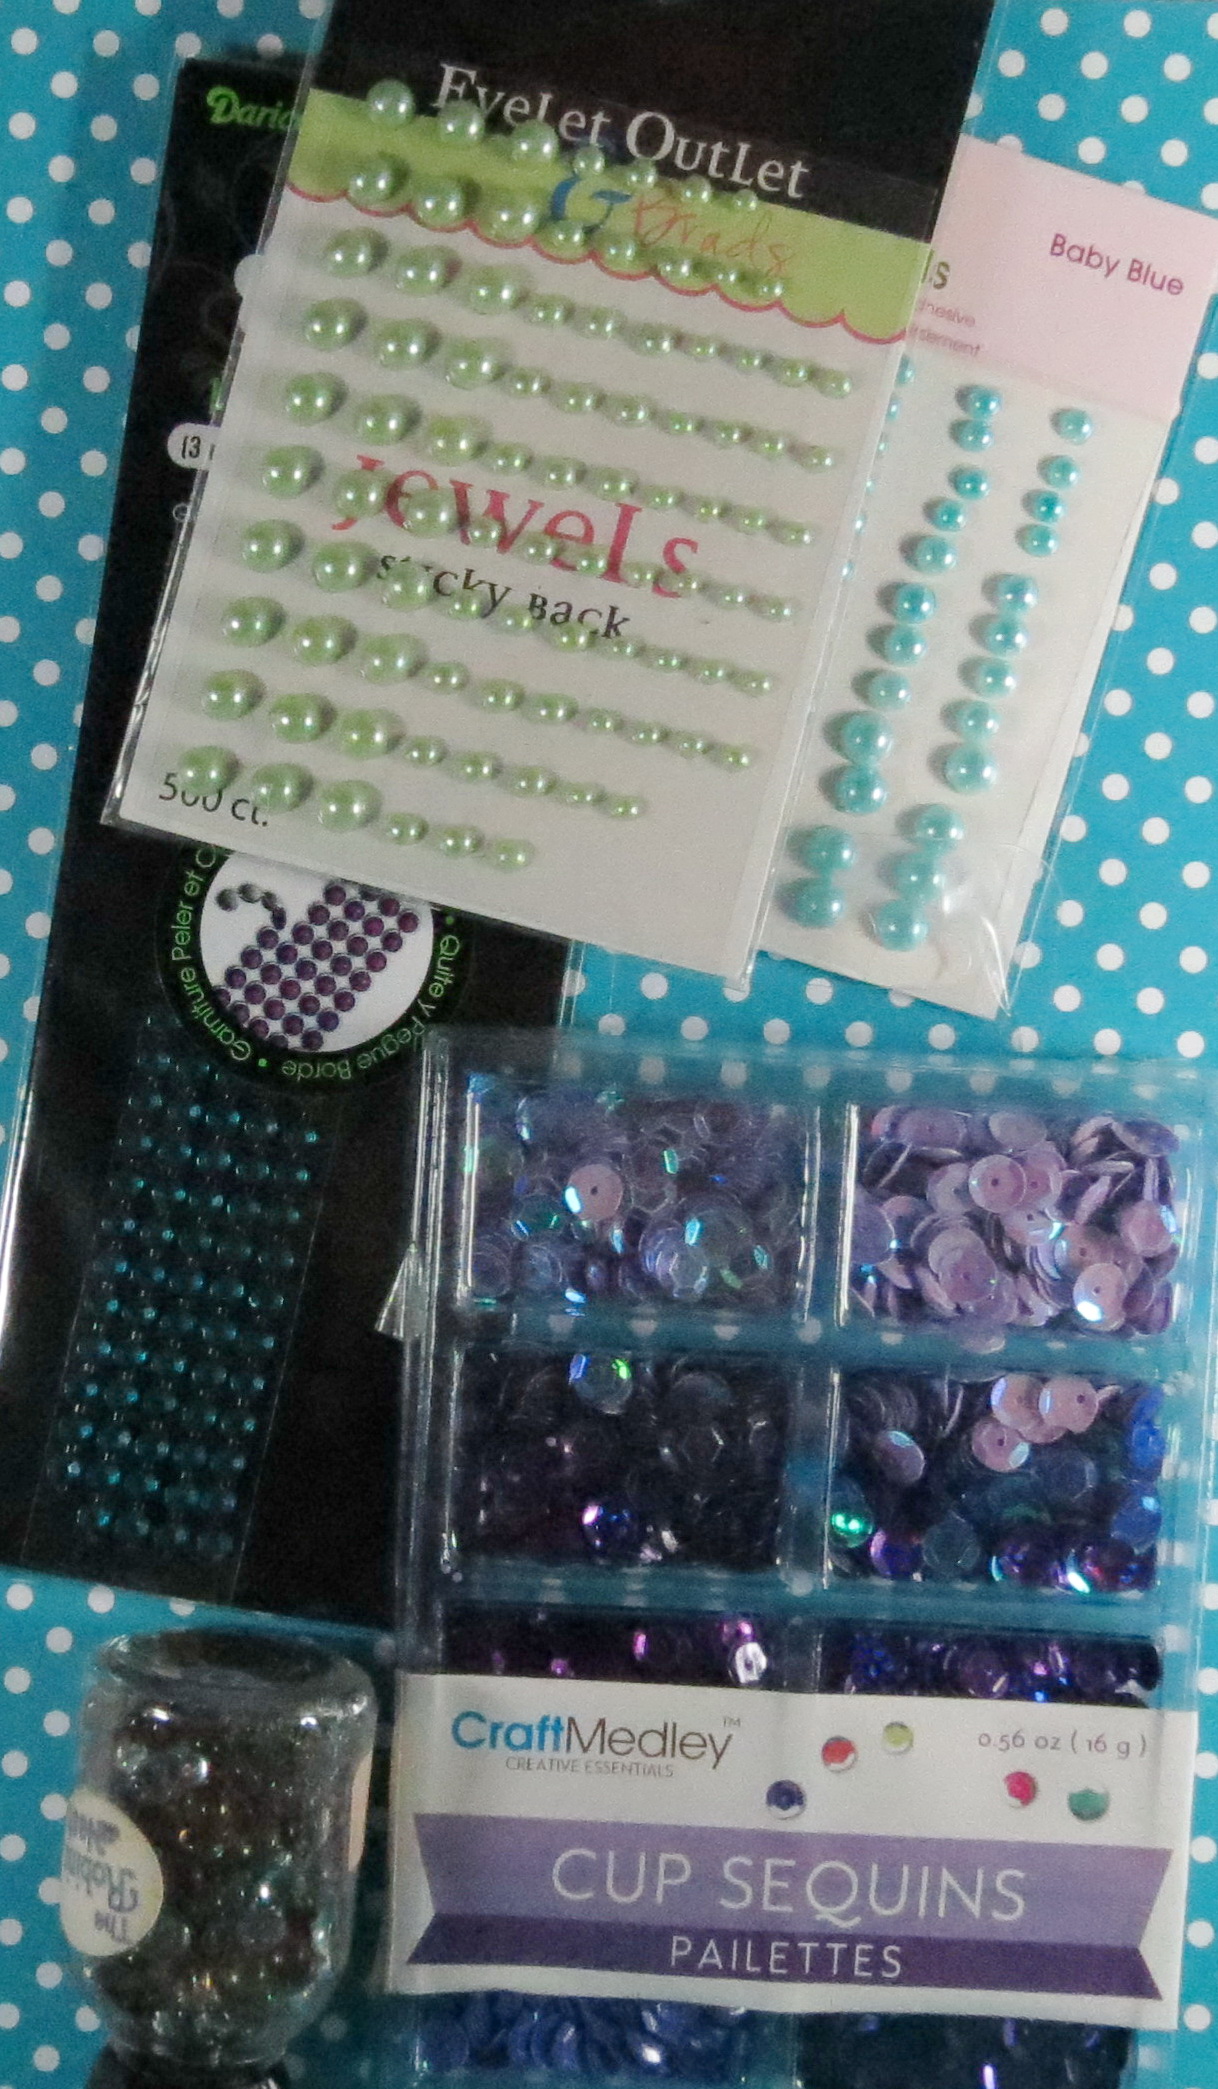
Countdown to Christmas: All the decorations.
I created 25 pockets using our FREE template for pockets and several colors of cardstock. I used an EK Success 1 ¾” square punch to cut 25 smaller squares from several patterned pages to center on each pocket. I punched 25 small circles in white cardstock and stamped each with a number 1-25 using Tami’s Calendar rubber stamp set.
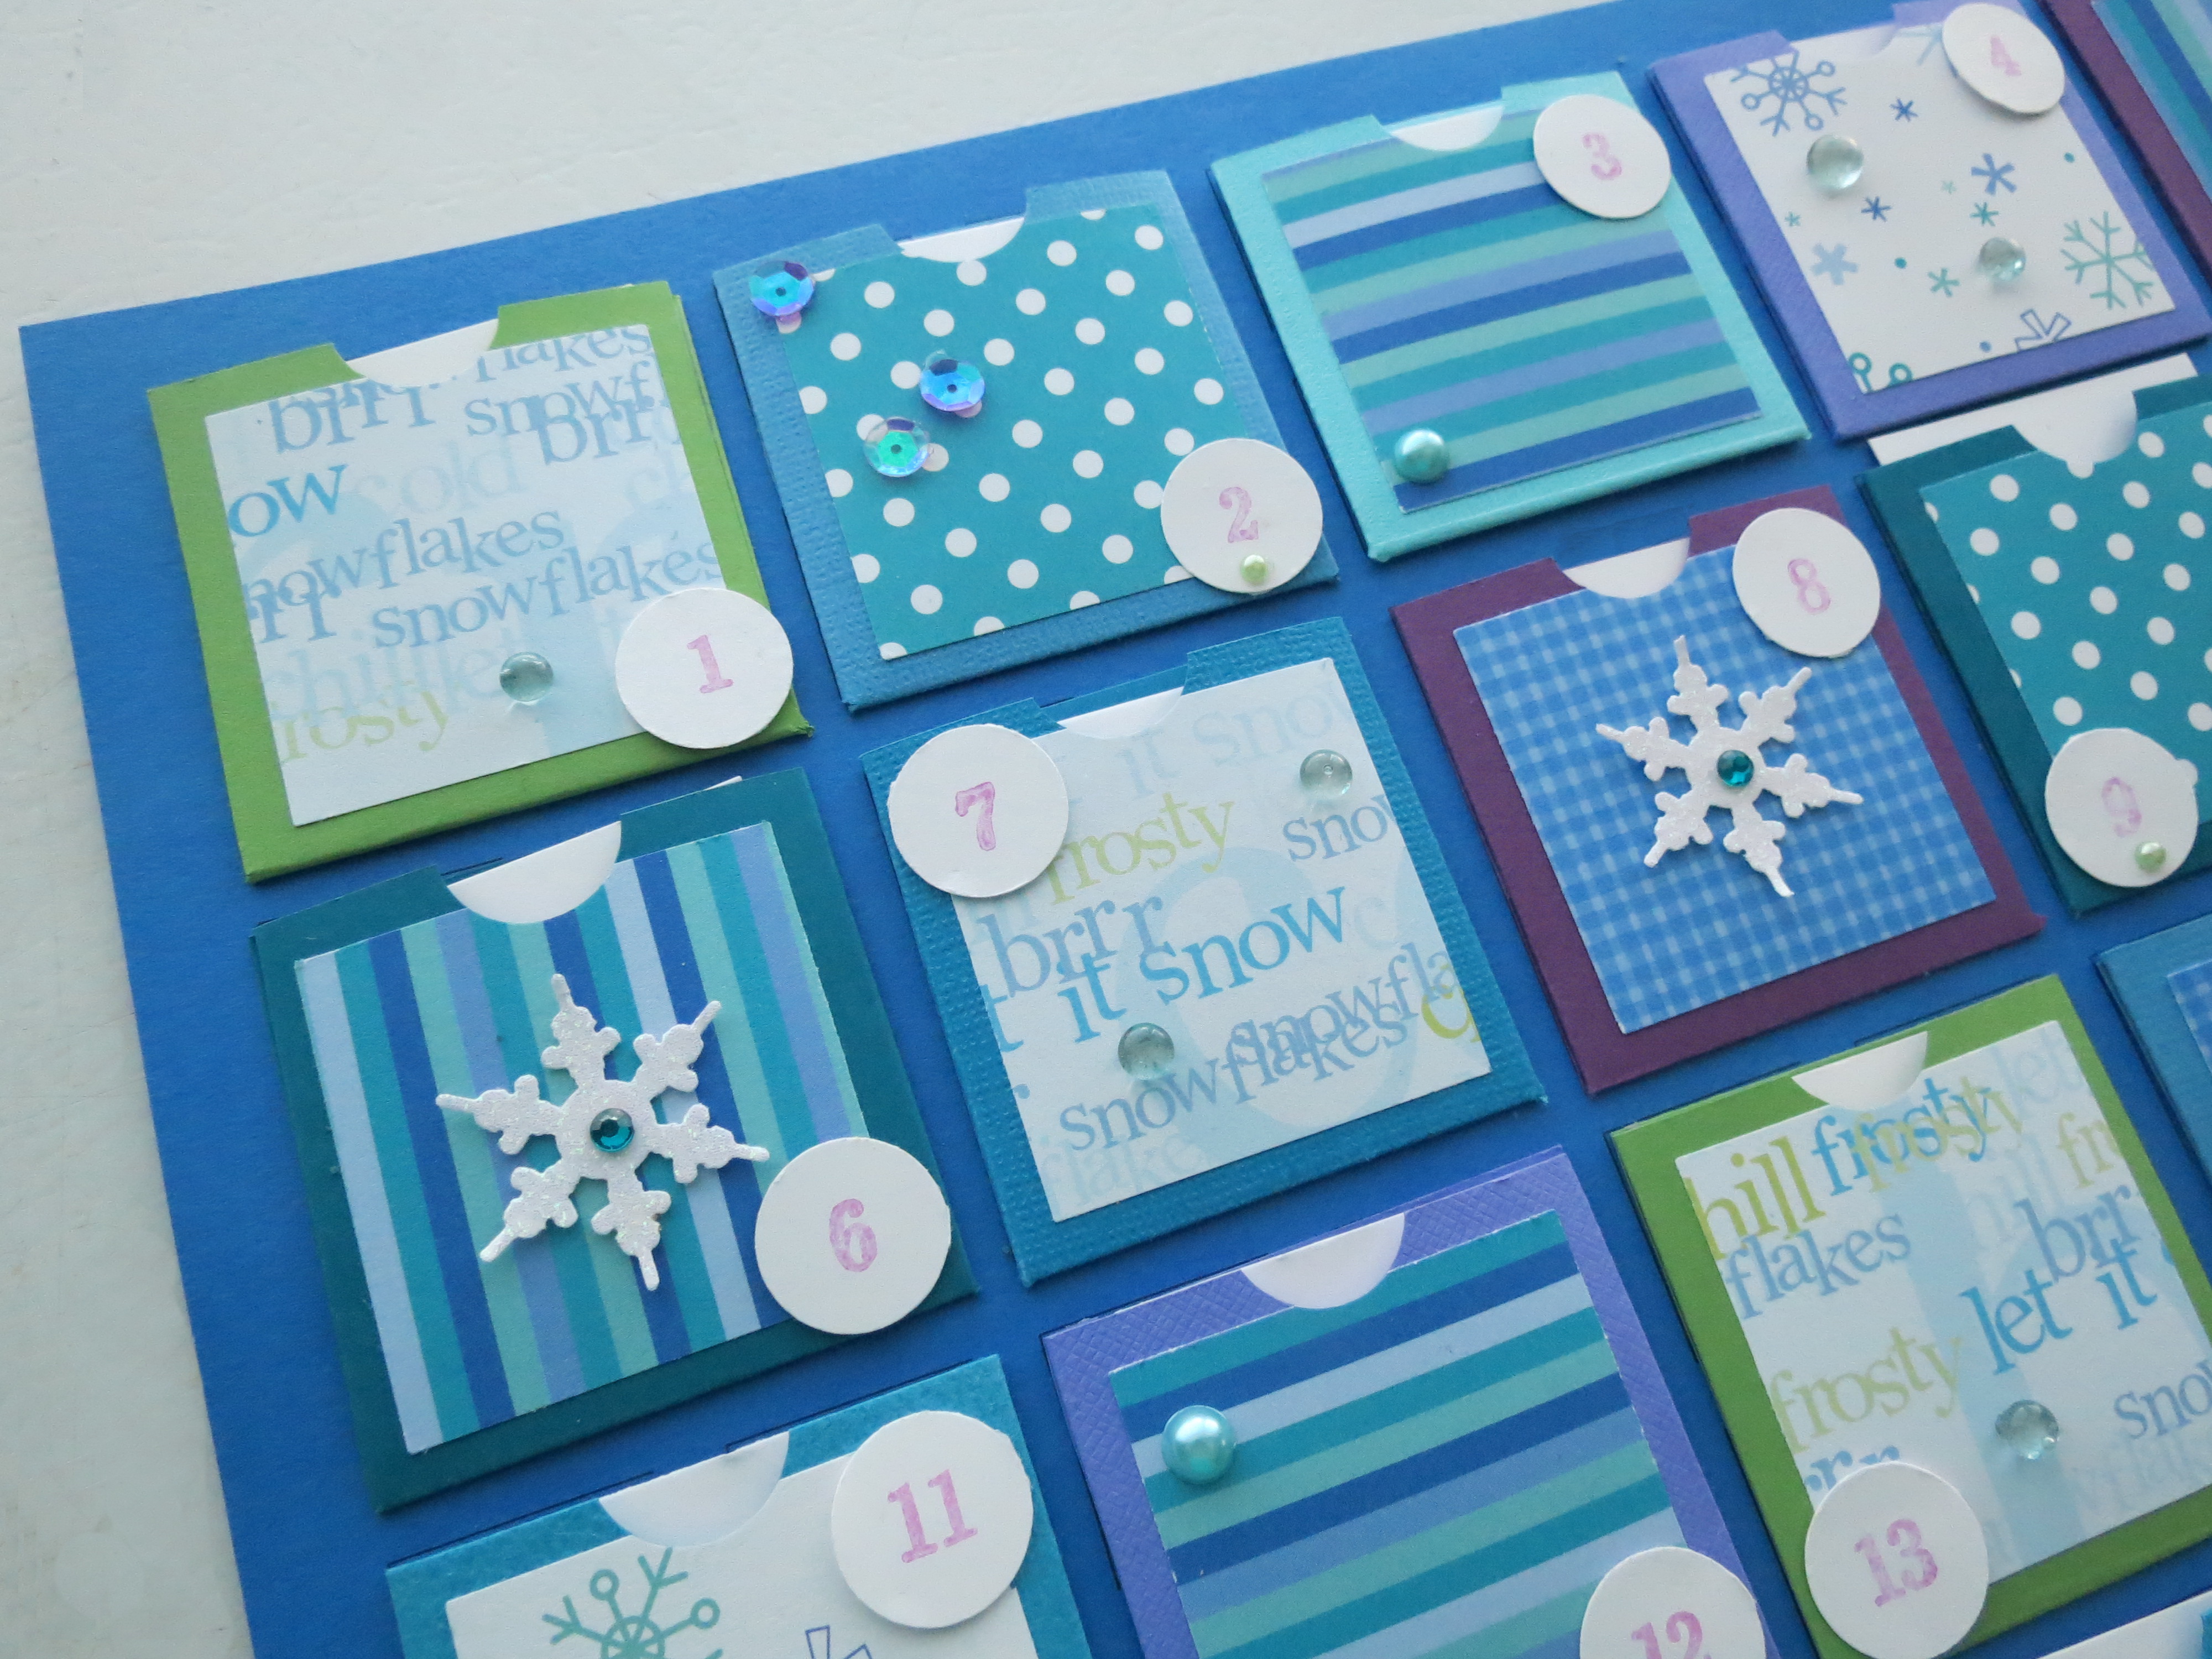
Countdown to Christmas: Decorating the fronts of the pockets with gems, glass pebbles, sequins, glitter paper snowflakes and pearls in a random fashion.
Next, for the inside of each pocket, tags (2”x 1 ¾”) were cut from white cardstock. Each of these tags has a hand written event or activity to be revealed one day at a time. Many of these events reflect some of our favorite things to do each season, and a few added in to be surprises. The idea is not just to do things that your family will expect to do, but do new things that may be ways to bring a little cheer to others lives too. There are suggestions on the Pinterest Board that will get you started.
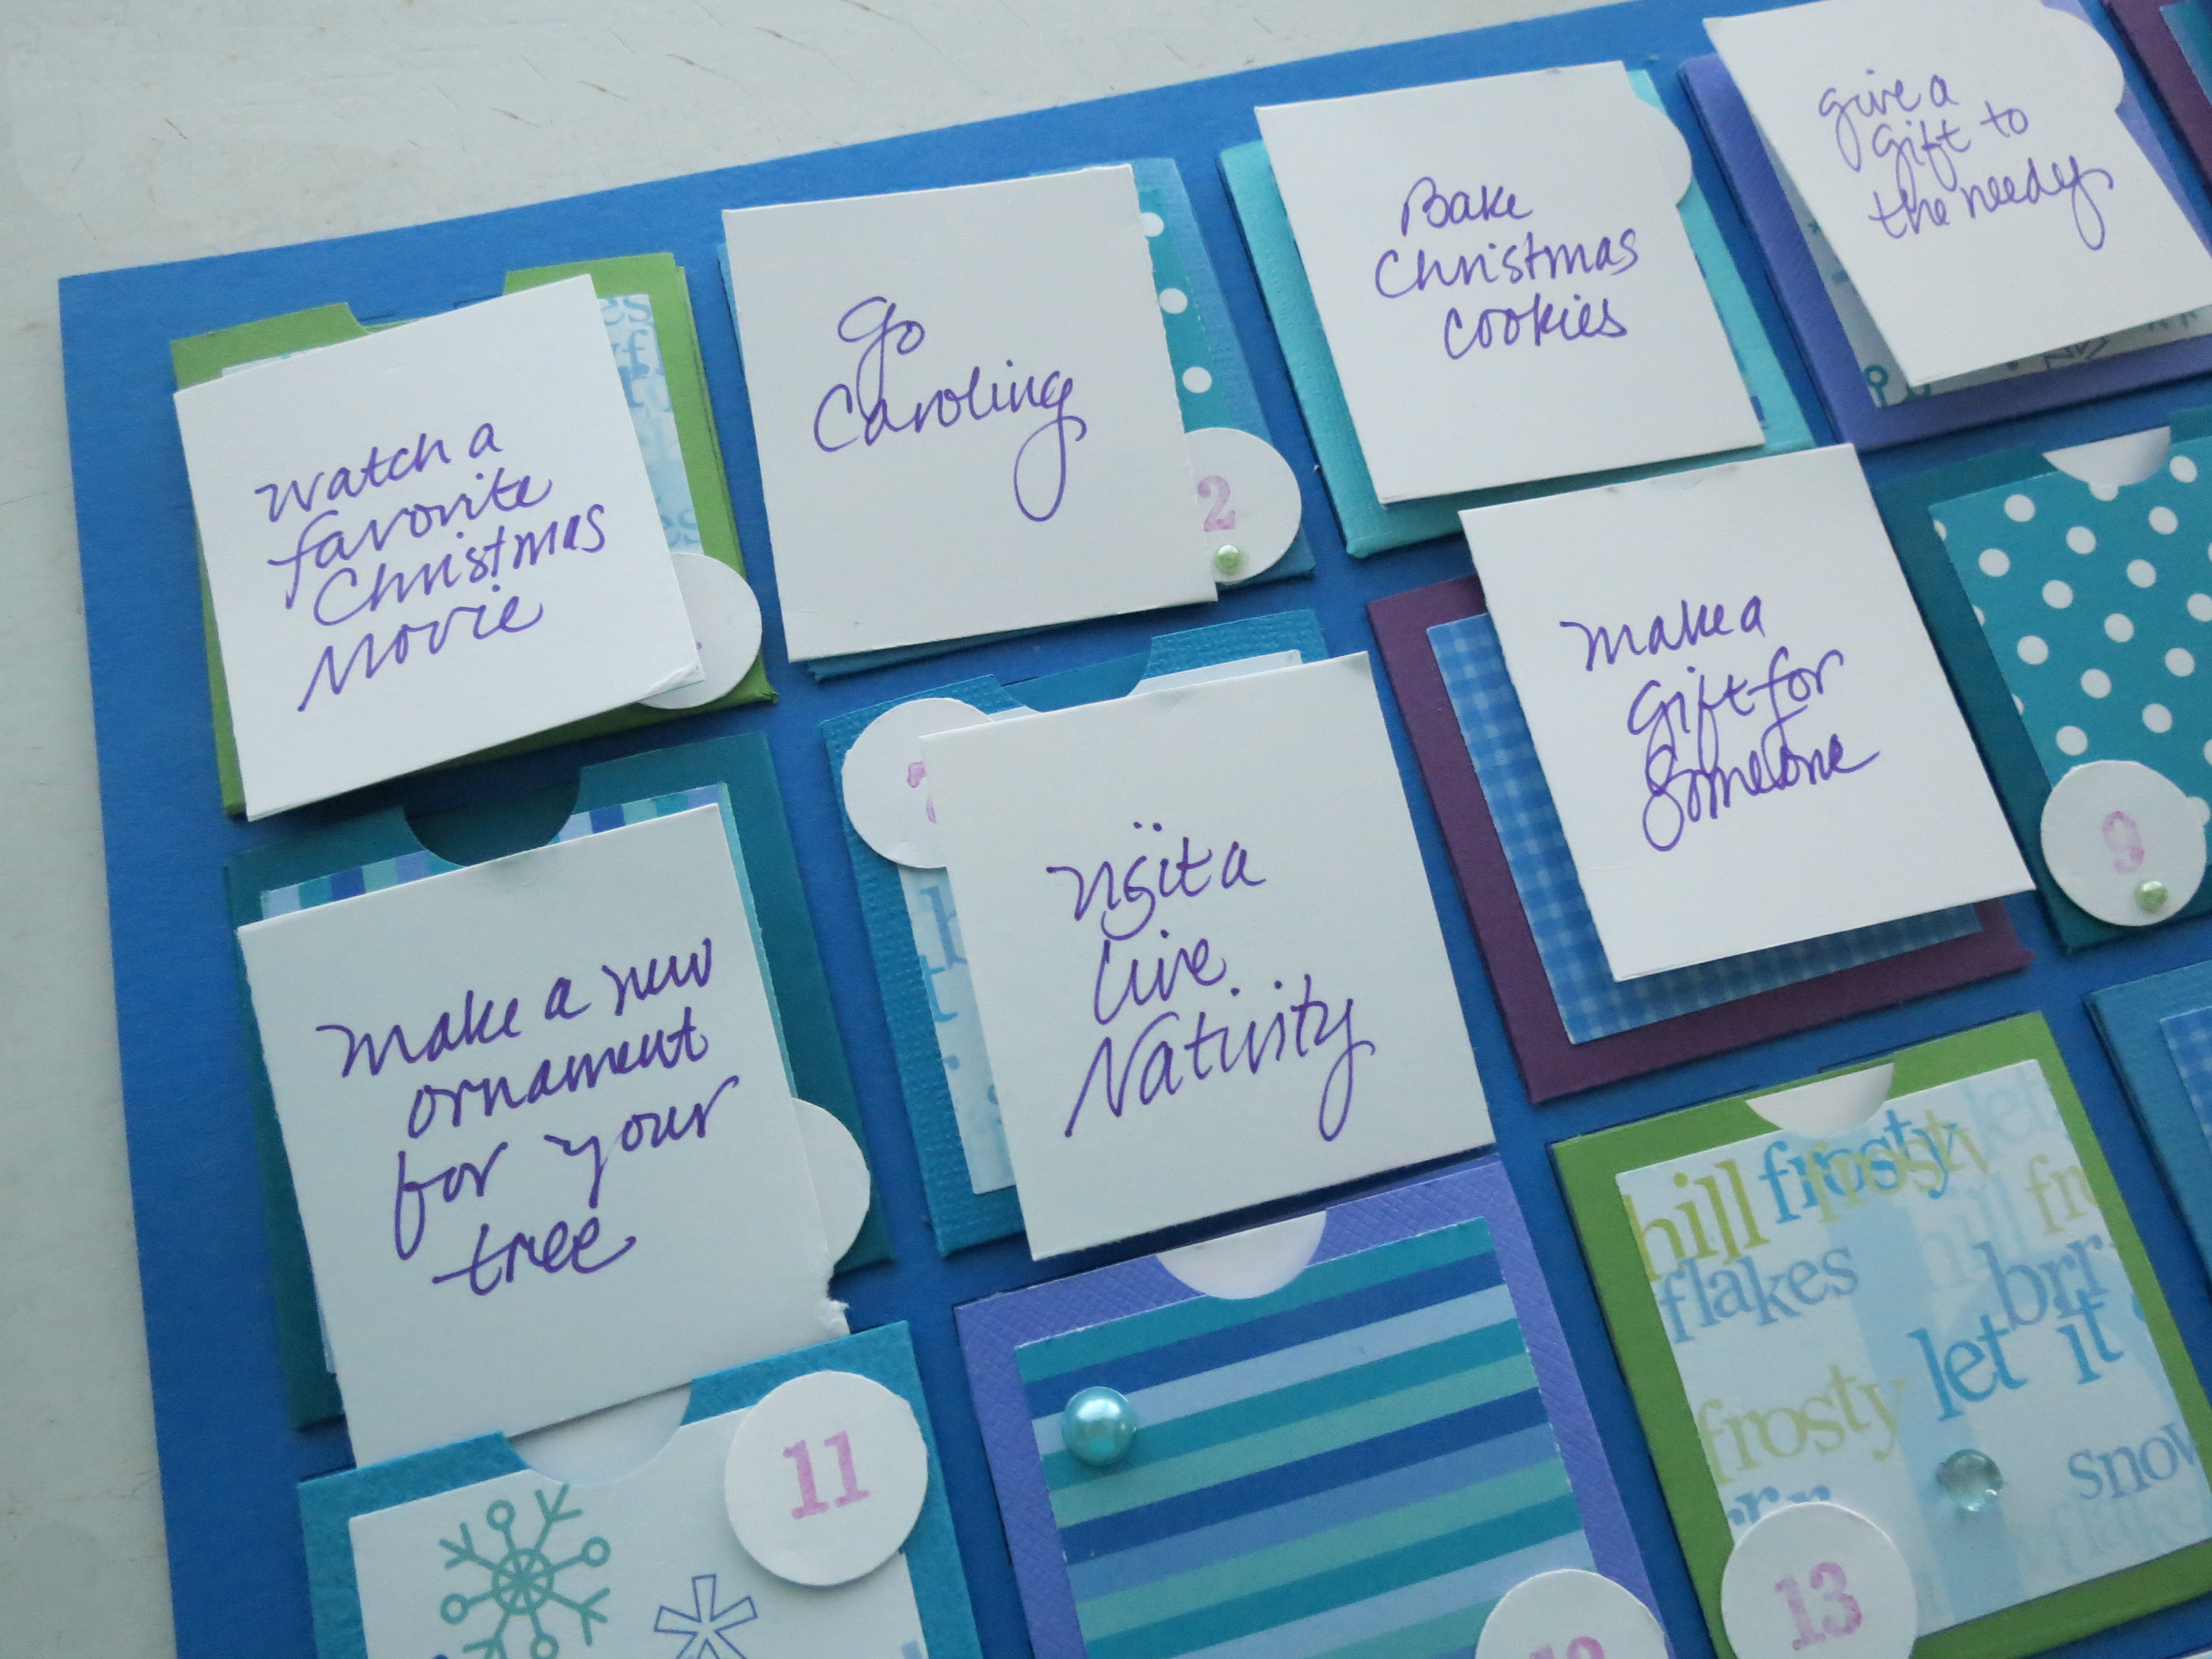
Countdown to Christmas: each pocket will have a tag that has an event, activity or task to complete that day.
This bonus and final countdown to Christmas I’ll show you is just that, a countdown without any extras “to do.” It’s small enough to put just about anywhere, a bulletin board, a kitchen cabinet, or even on your desk at work! Now if you want to keep a jar full of sweets to treat yourself each day, that’s up to you!
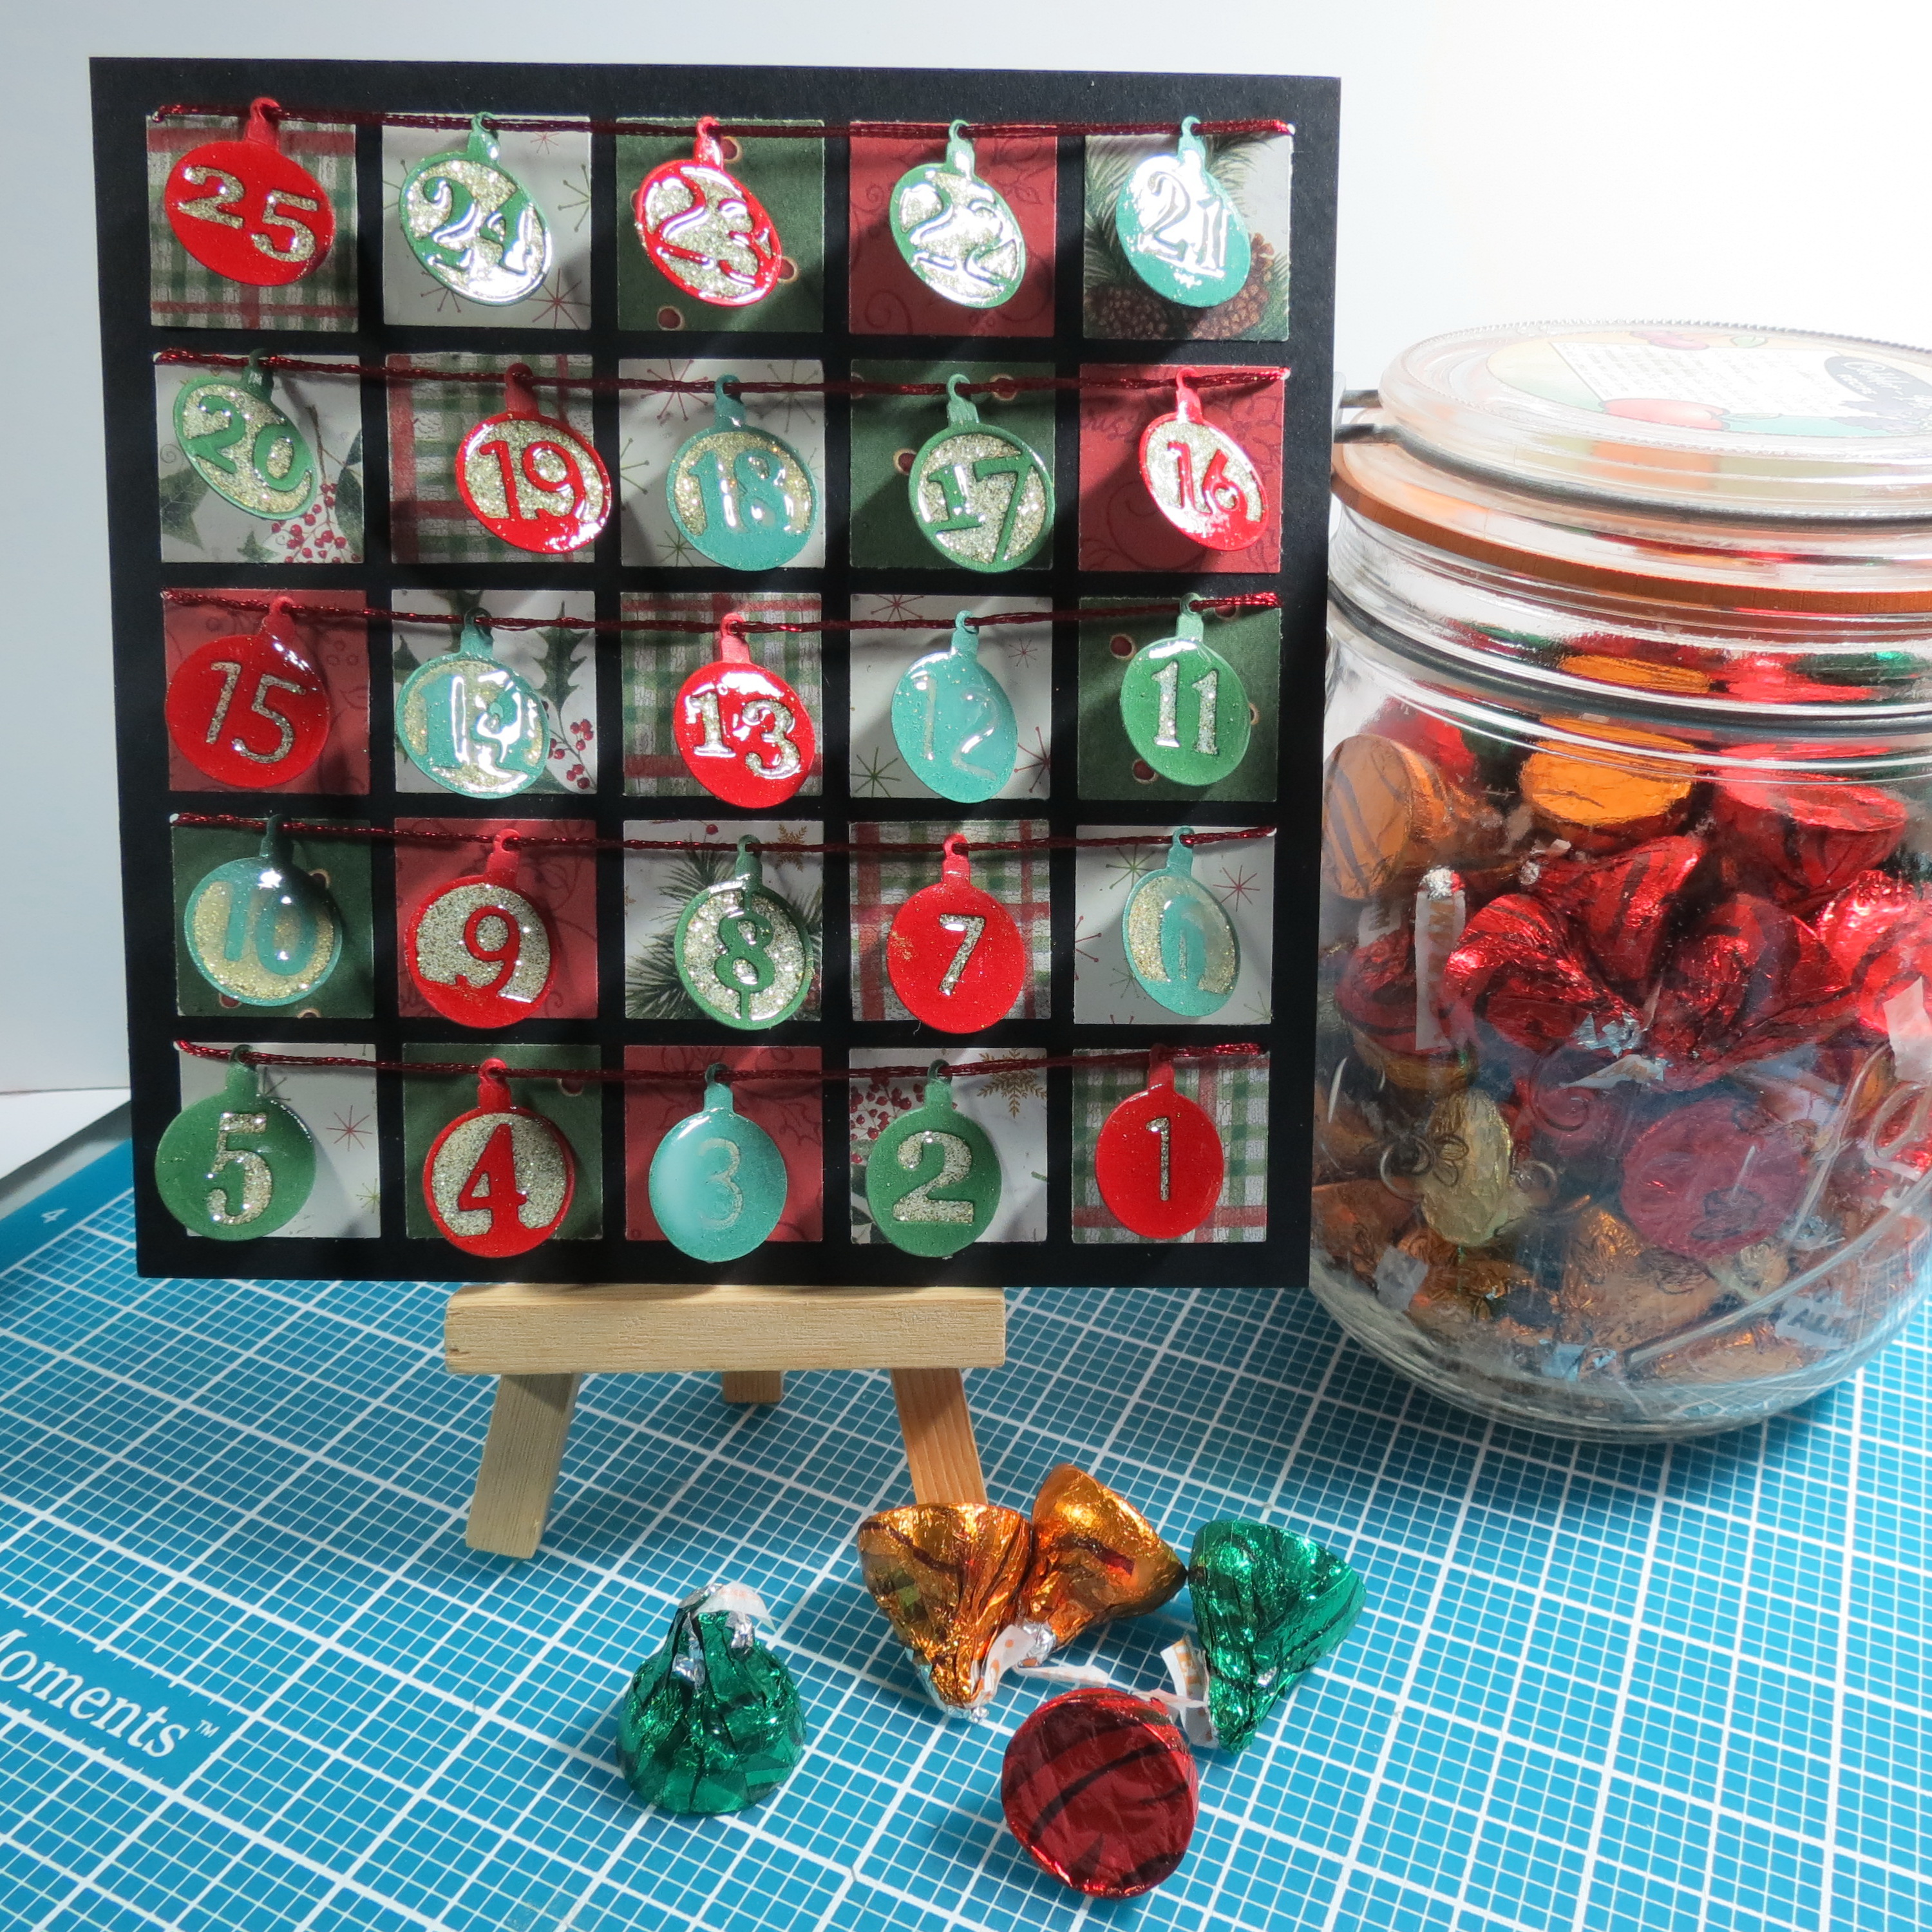
Countdown to Christmas: small enough to sit on a mini easel.
This Countdown to Christmas begins with:
- a 6×6 Mosaic Moments Black grid paper
- 5 one inch squares from each of 5 Christmas papers
- Glitter paper in red, white and silver but you can use more or less
- A small circle punch
- Fine gold glitter
- Red metallic DMC embroidery floss (you may prefer to use a twine that matches your colors)
- A needle, a 1/16” punch, some tape to secure the threads
- And most important of all, 25 numbers either stamped on small punched circles or as I used a die to cut tiny ornaments with numbers (Advent Calendar Set from Memory Box.)
Here’s how I put it together:
- I arranged the Christmas patterned paper squares in a traditional Trip Around the World (at least a quarter of one!) Quilt pattern.
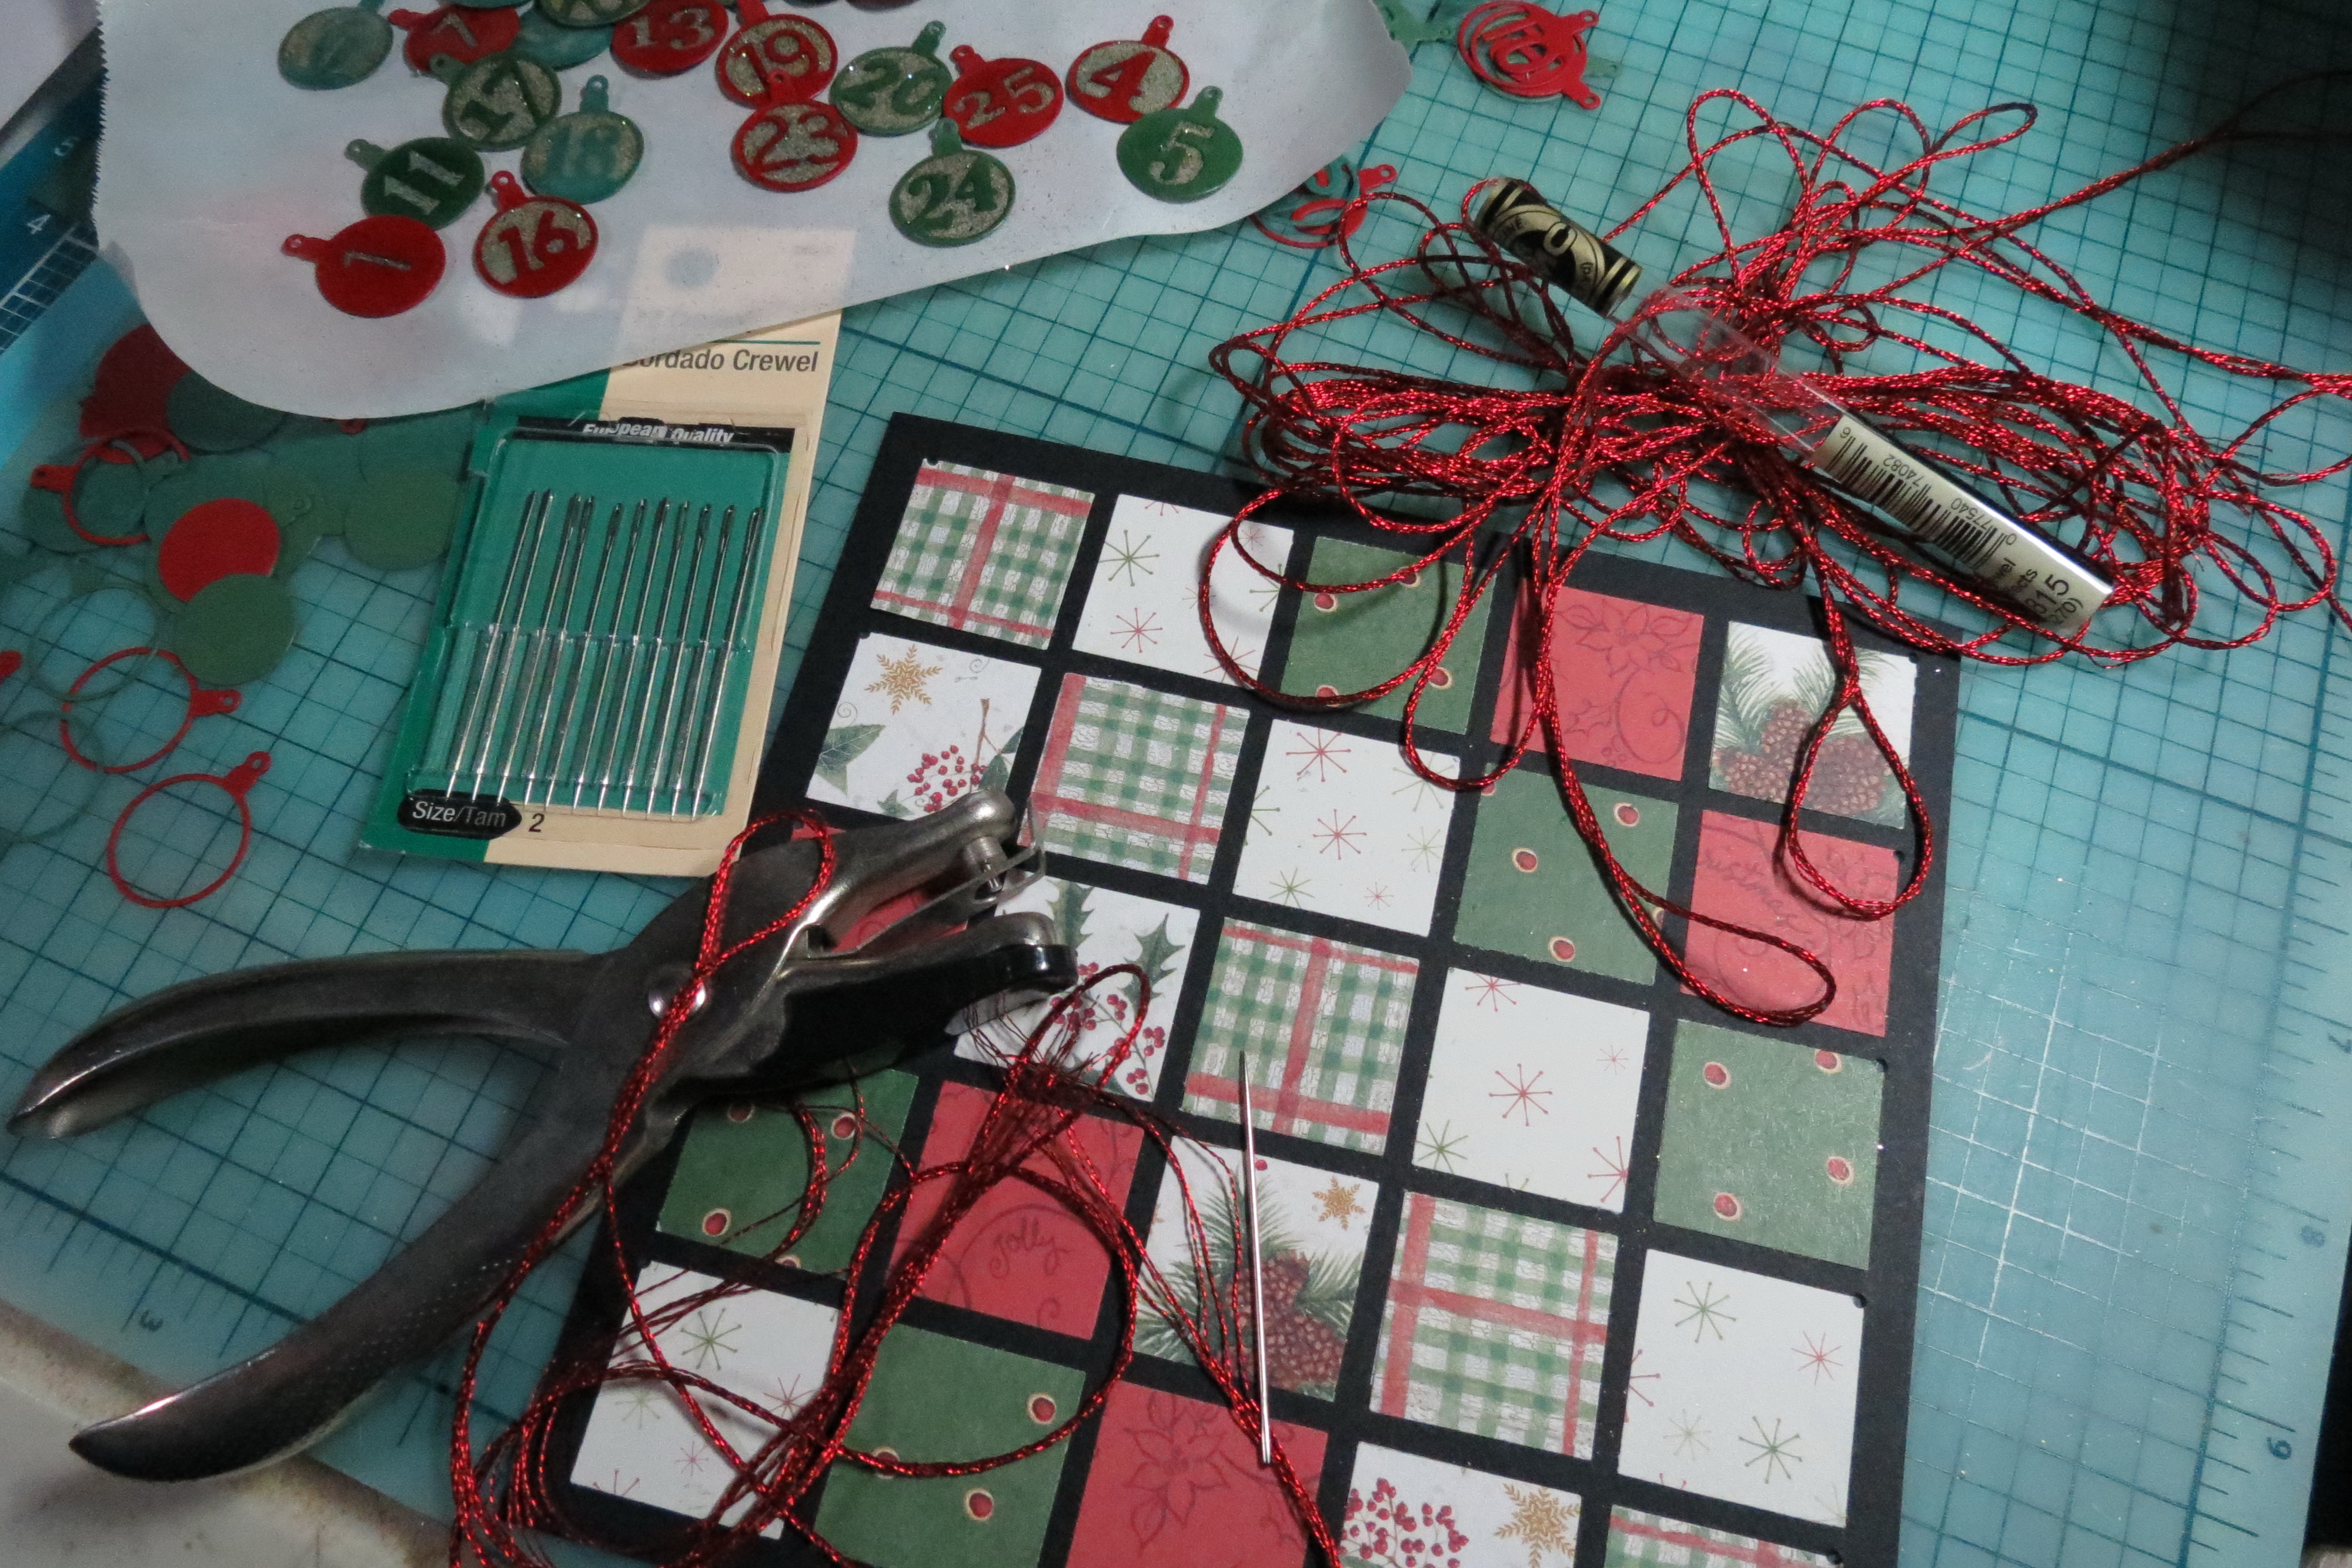
Countdown to Christmas: quilt pattern inspired.
- Then I prepared the backing for the ornaments by punching out the glitter circles. What I recommend you do is to take a strip of glitter paper and send it through your Xyron to cover the back with a nice even layer of adhesive. It’s much easier than sending 25 tiny circles through, trust me! Anyway, once punched adhere to the backside of the numbers. This will leave exposed sticky stuff around the letters. This is where you will use the glitter to fill in the spaces.
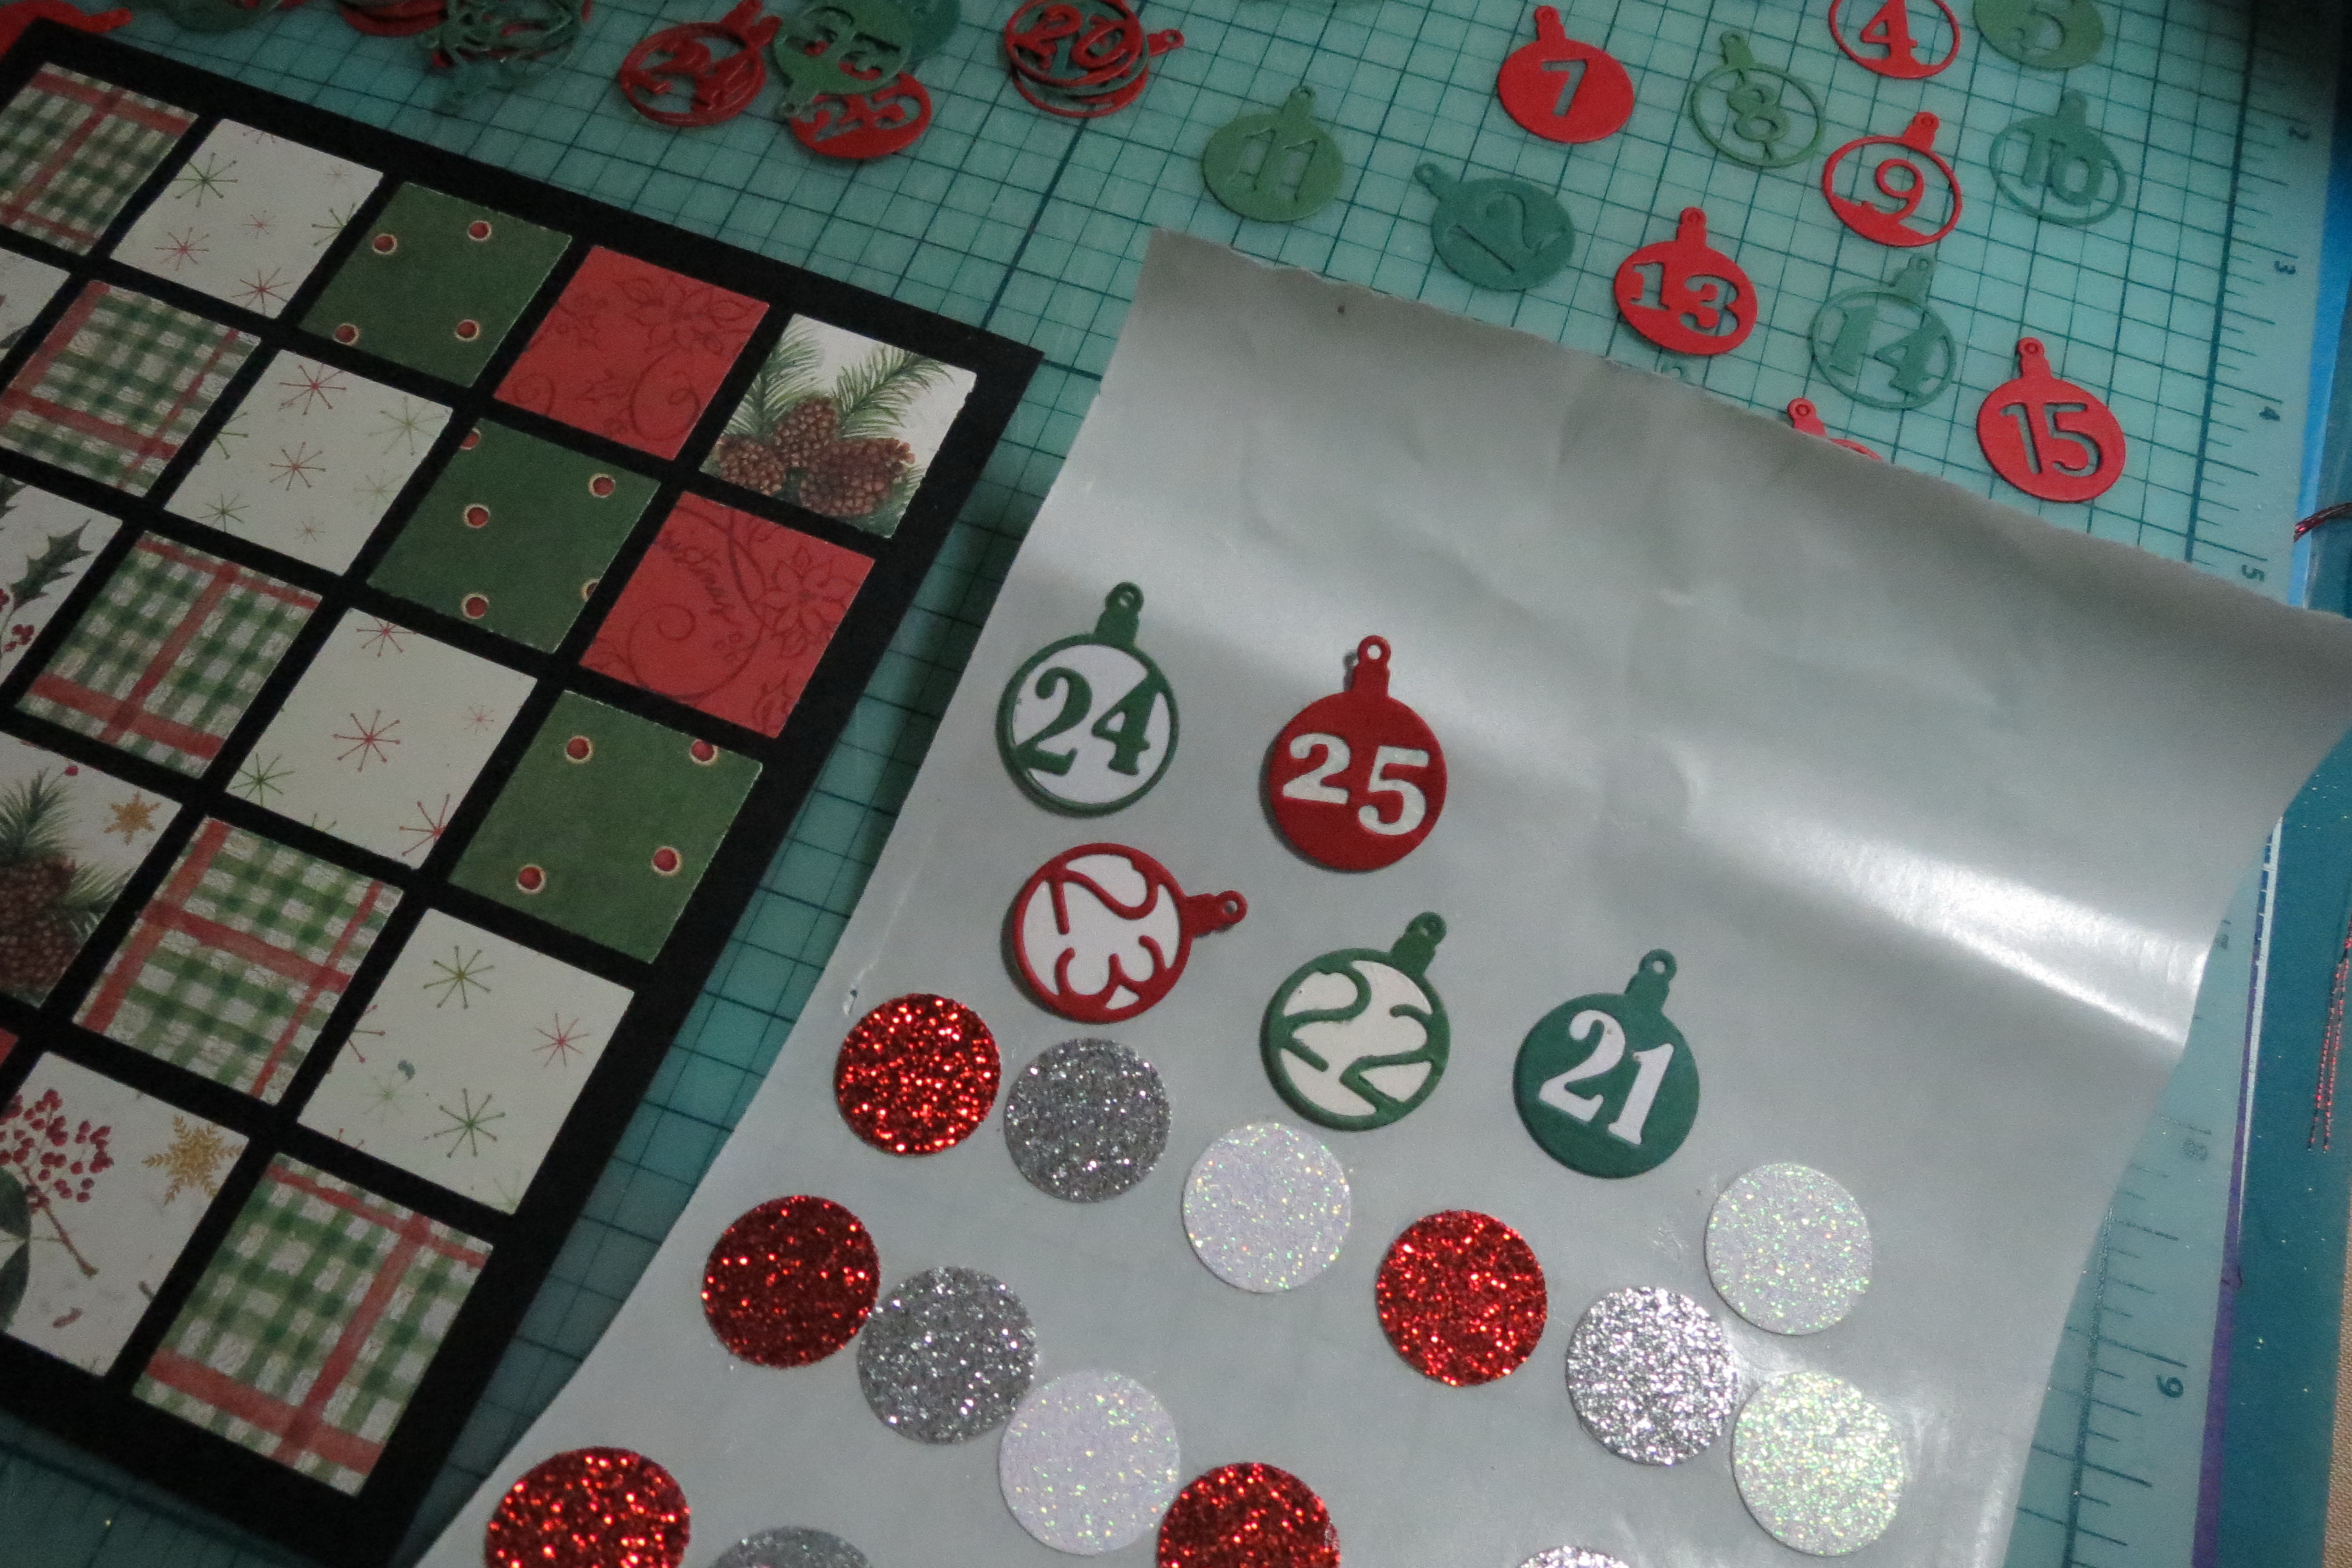
Countdown to Christmas: Xyron backed circles for reverse side of numbers.
- Next I used Crystal Acrylic to cover the ornaments, fill in the gaps in the numbers and give it a nice shiny look of real ornaments. This takes time to dry so plan ahead. I used the Xyron sheet to set up the pour stage, because some of the ornaments totally miss the glitter backing (look at the numbers 4, 6, 8, 9, 10, 14 etc.) By placing in a layer of acrylic it also acts as a seal.
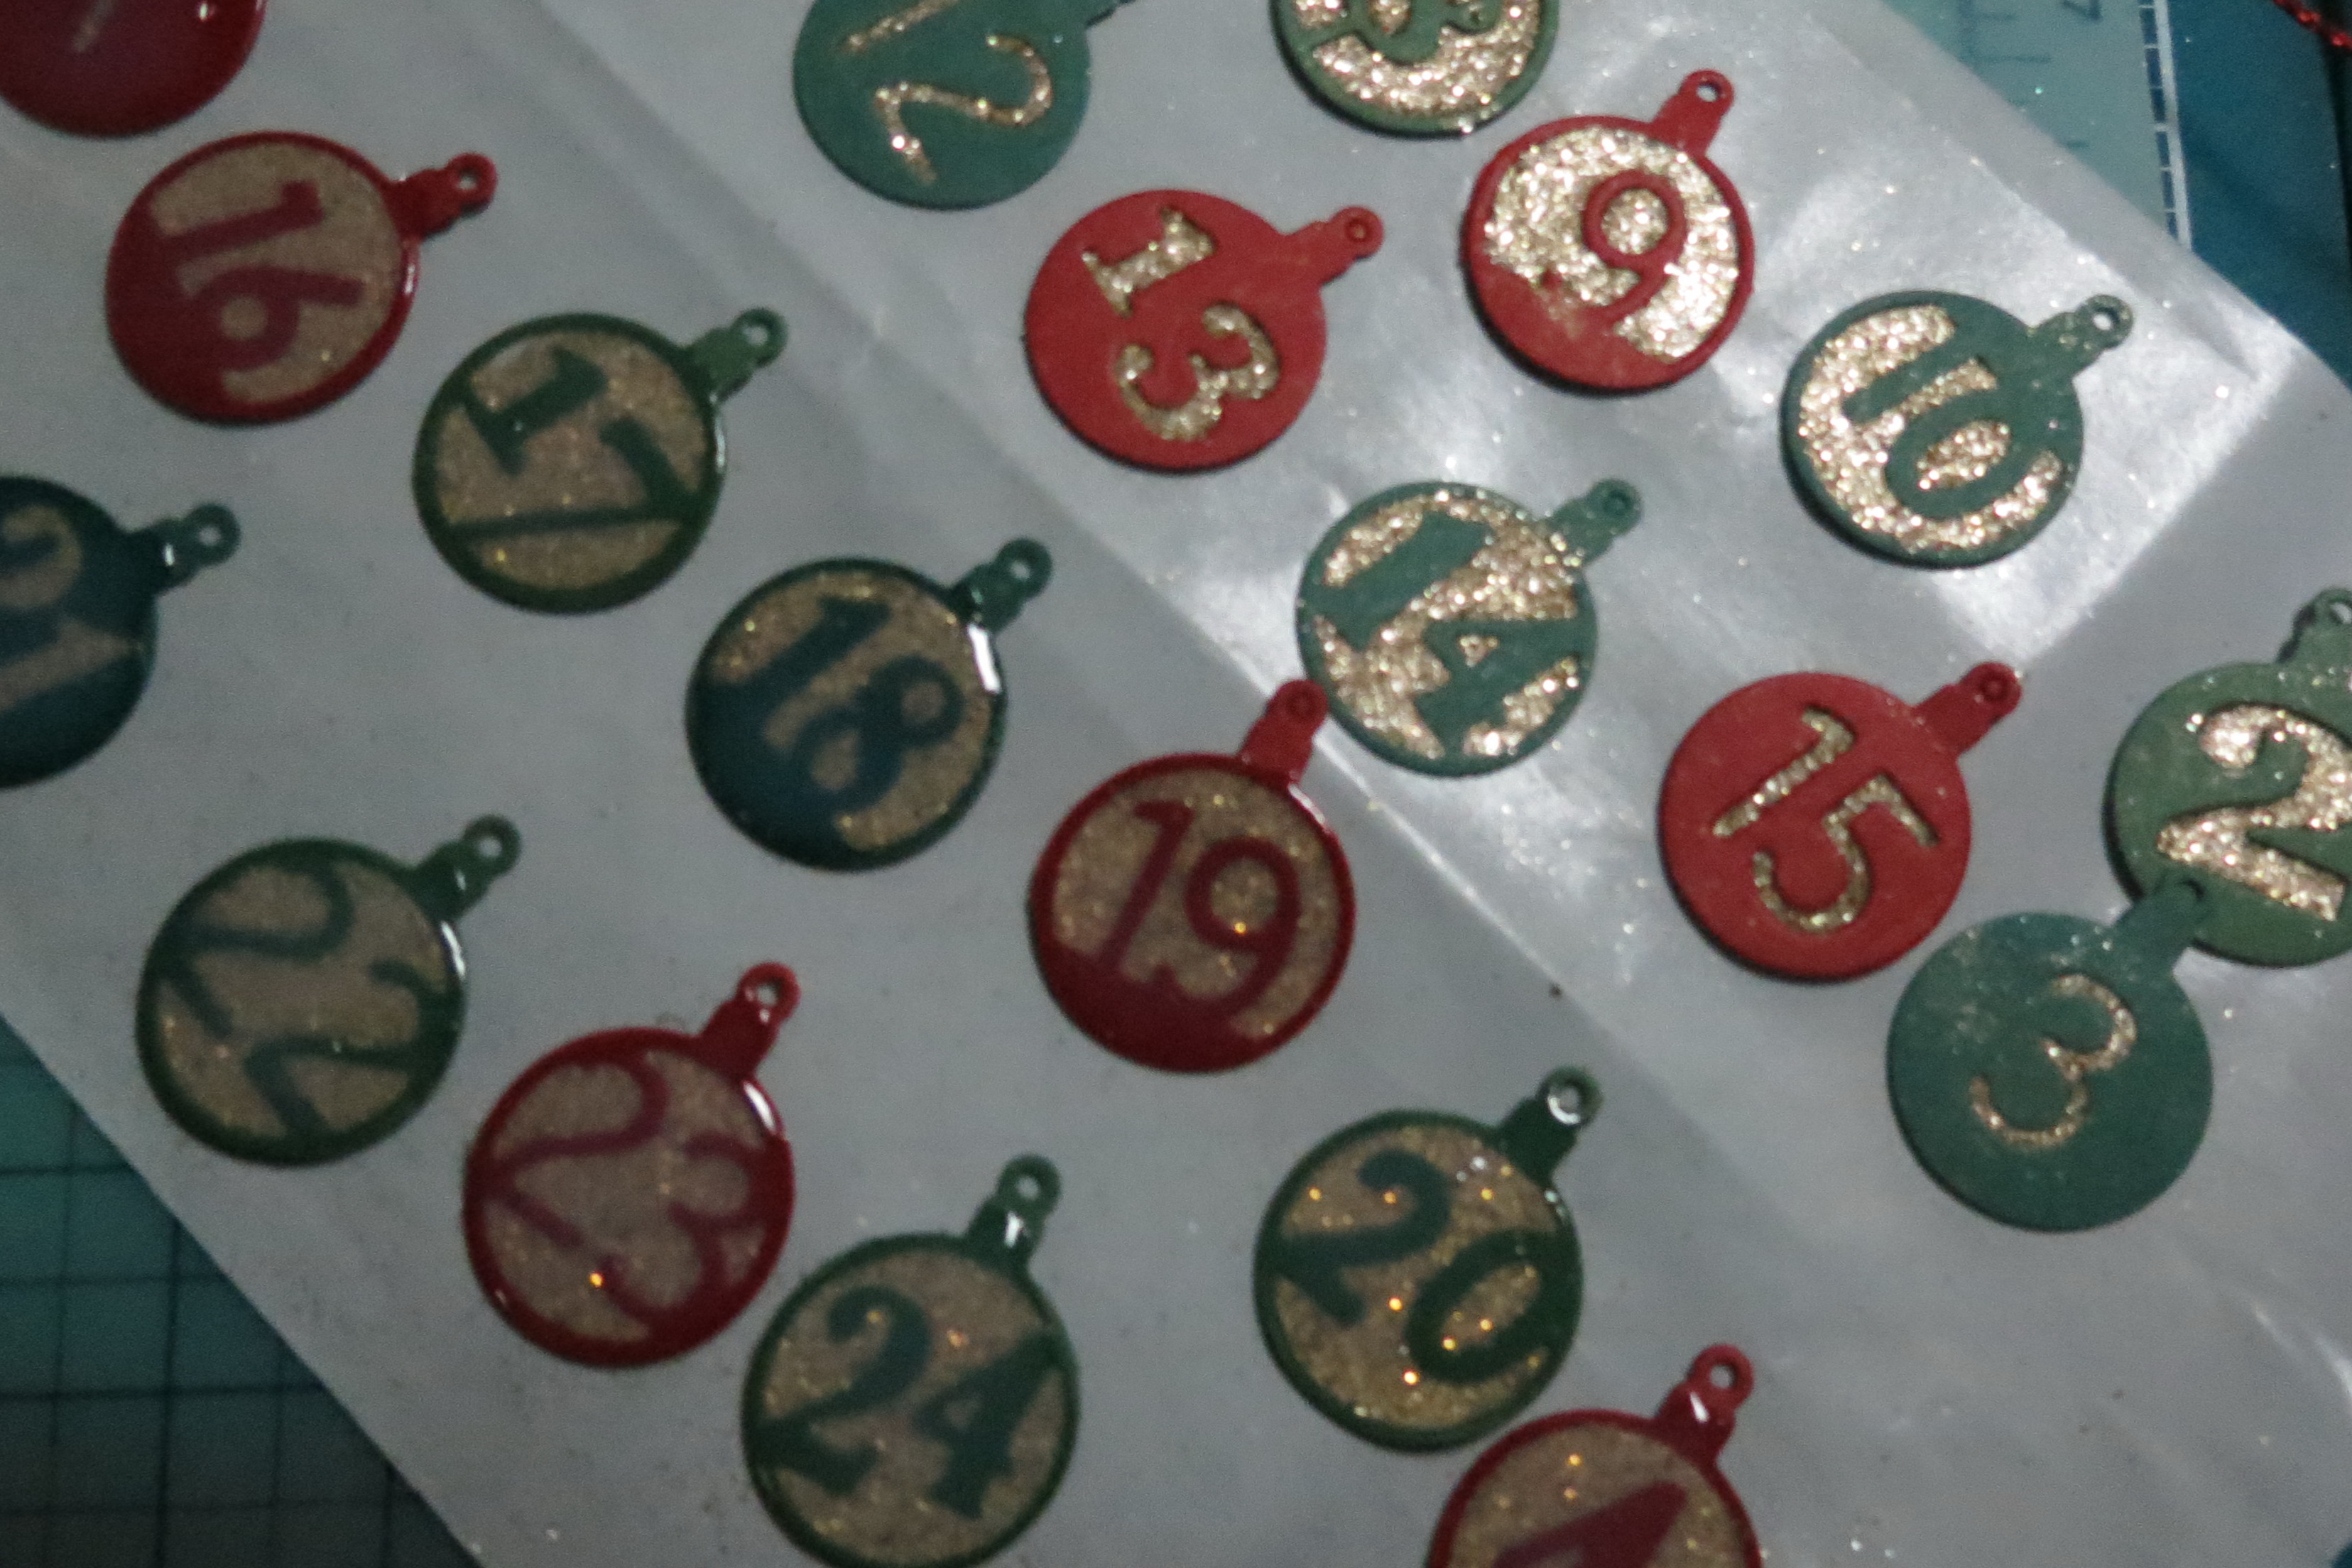
Countdown to Christmas: stage one: add glitter, stage two: add acrylic, stage three: allow time to dry.
- To string the numbers I used the 1/16” punch in the corner of the squares at the end of each row. I roughly measured the floss by using the paper grid as a measurement. I took five widths, a length and a tad bit more to allow a knot at the beginning and end. Using a needle with the floss (I used all threads) I began at the top left to right and then dropped down to the row below and worked my way back again, and then repeated until the end. I pulled it taut as the weight of the ornaments will allow a bit of sag, and that’s okay. The holes that the die cut into each of the number ornaments are tiny, but the needle fit through each by being careful. You may chose a larger opening if you are making your own. Then arrange them in front of the blocks of color.
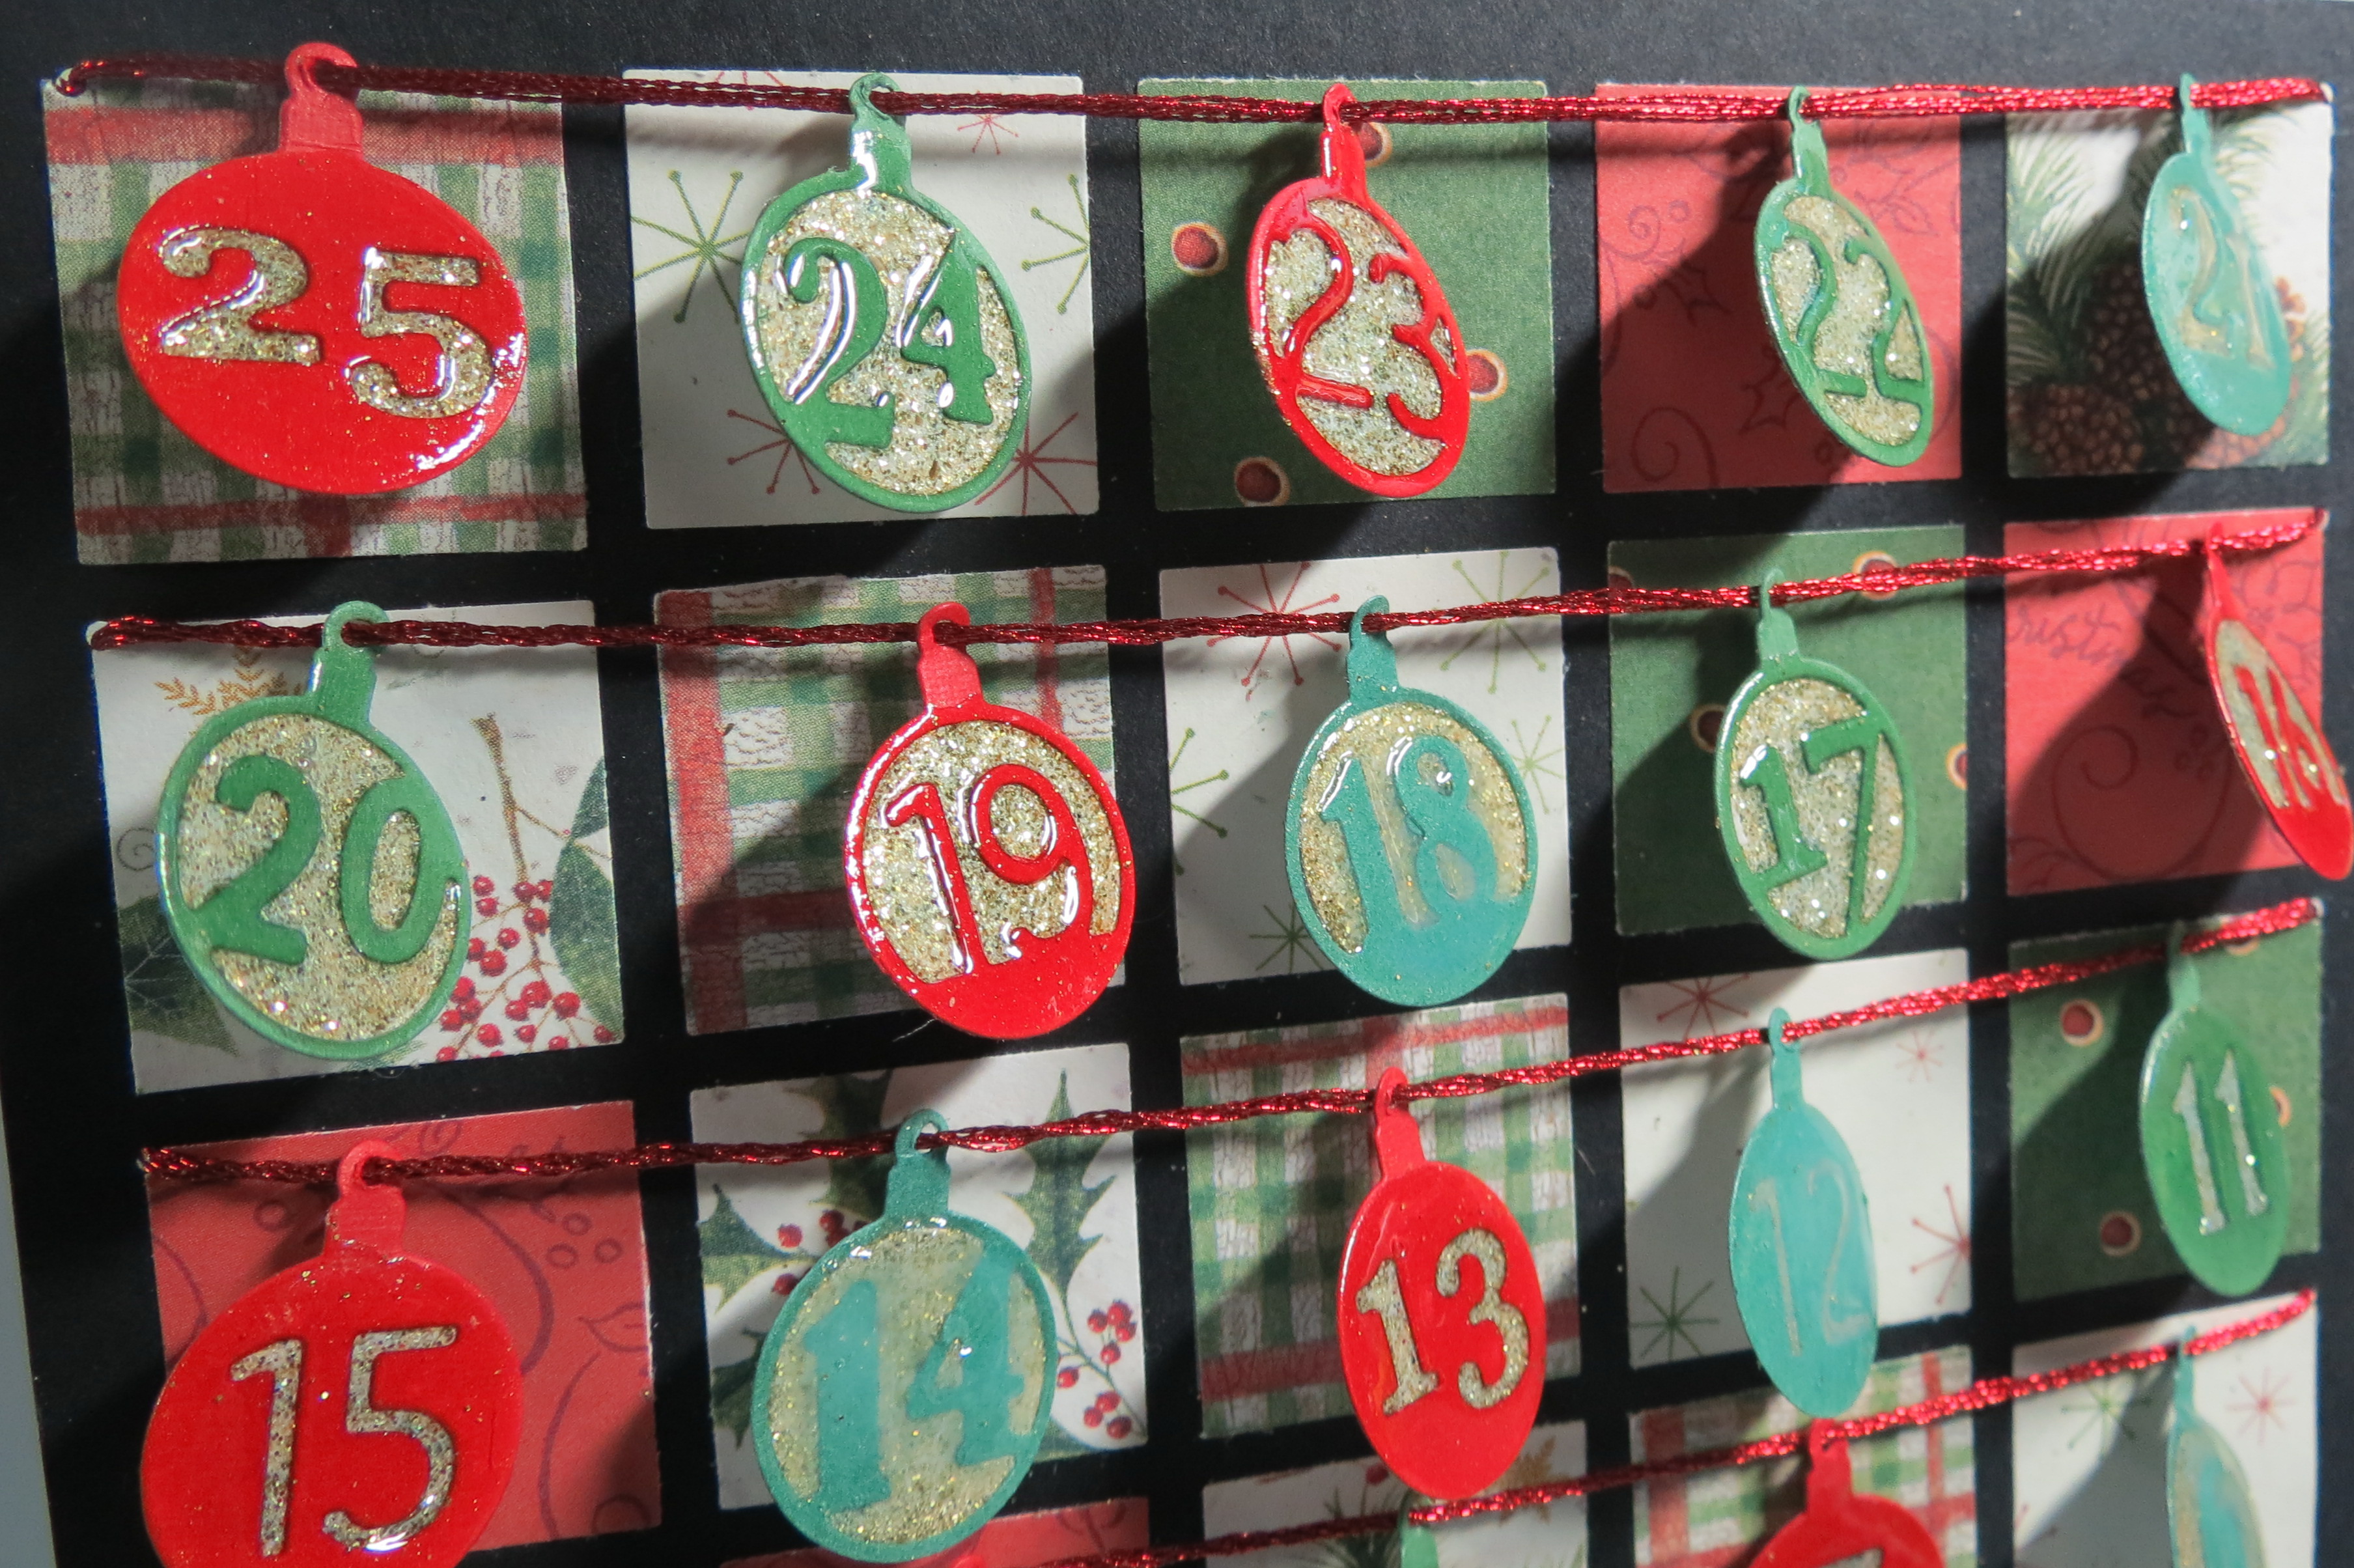
Countdown to Christmas: String them along!
- As each day dawns turn over a number to reveal one of the glitter circles that will form rows of ornaments as you countdown to Christmas.
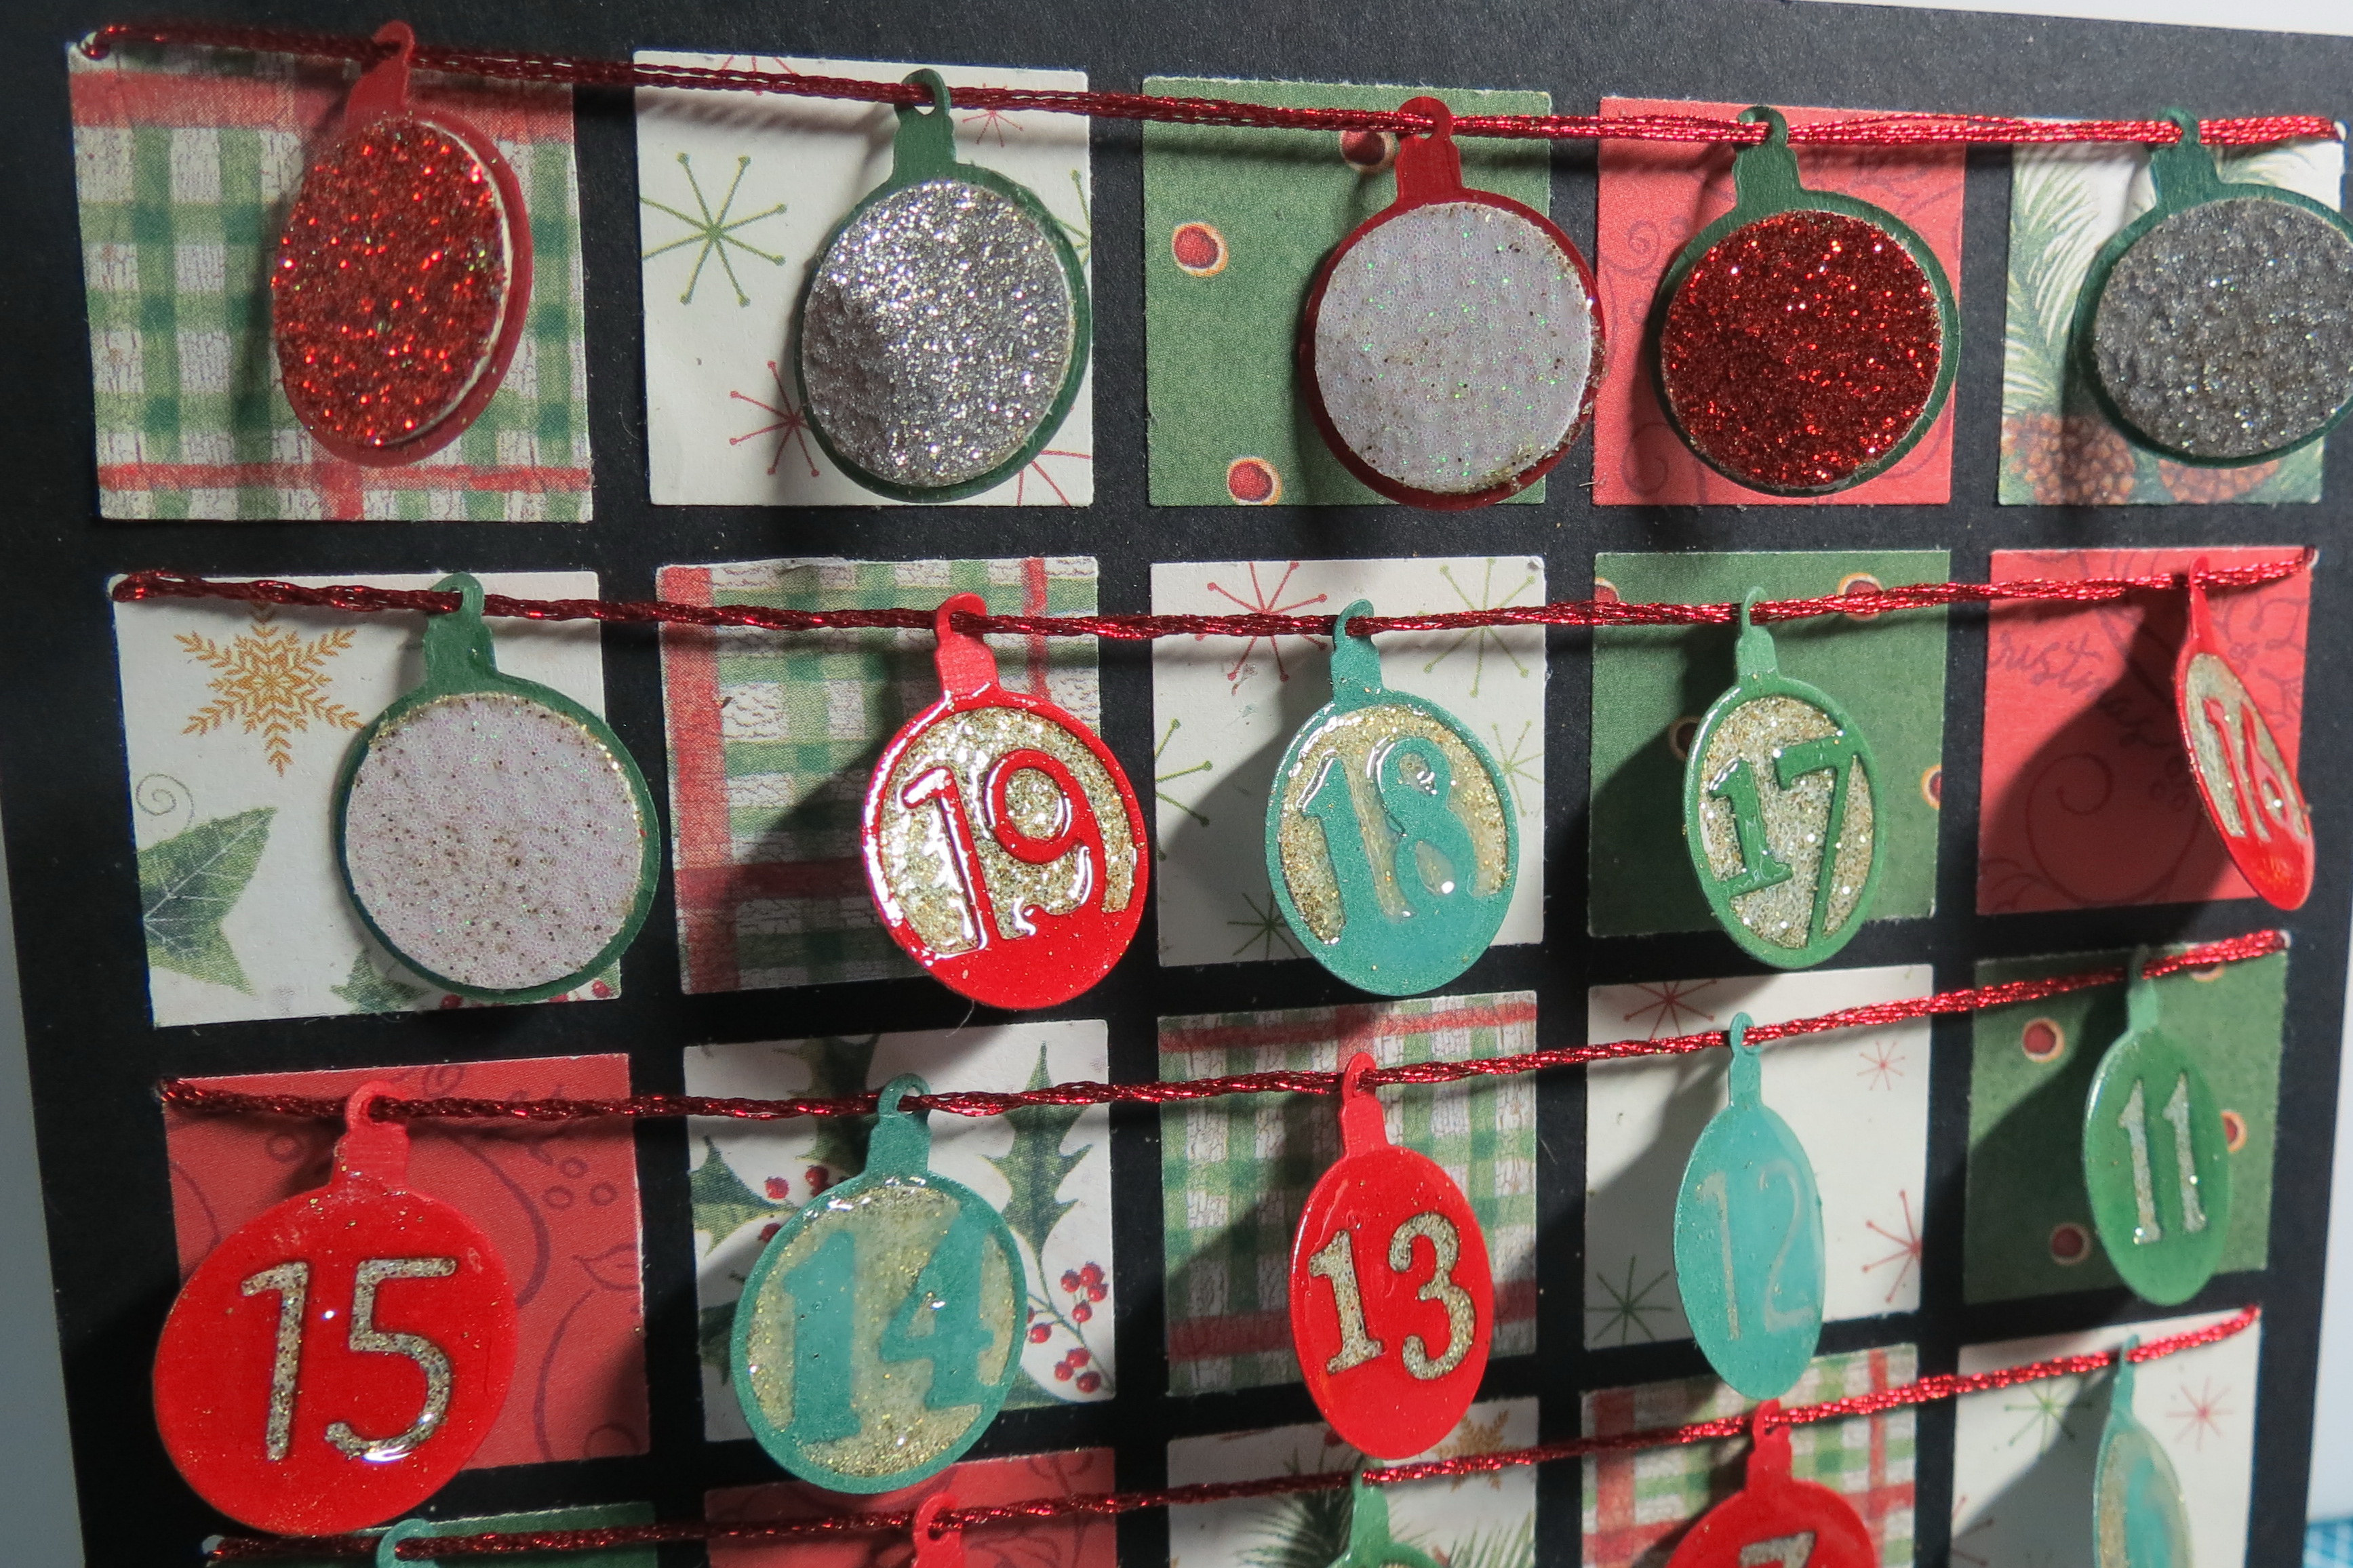
Countdown to Christmas: showing flip side
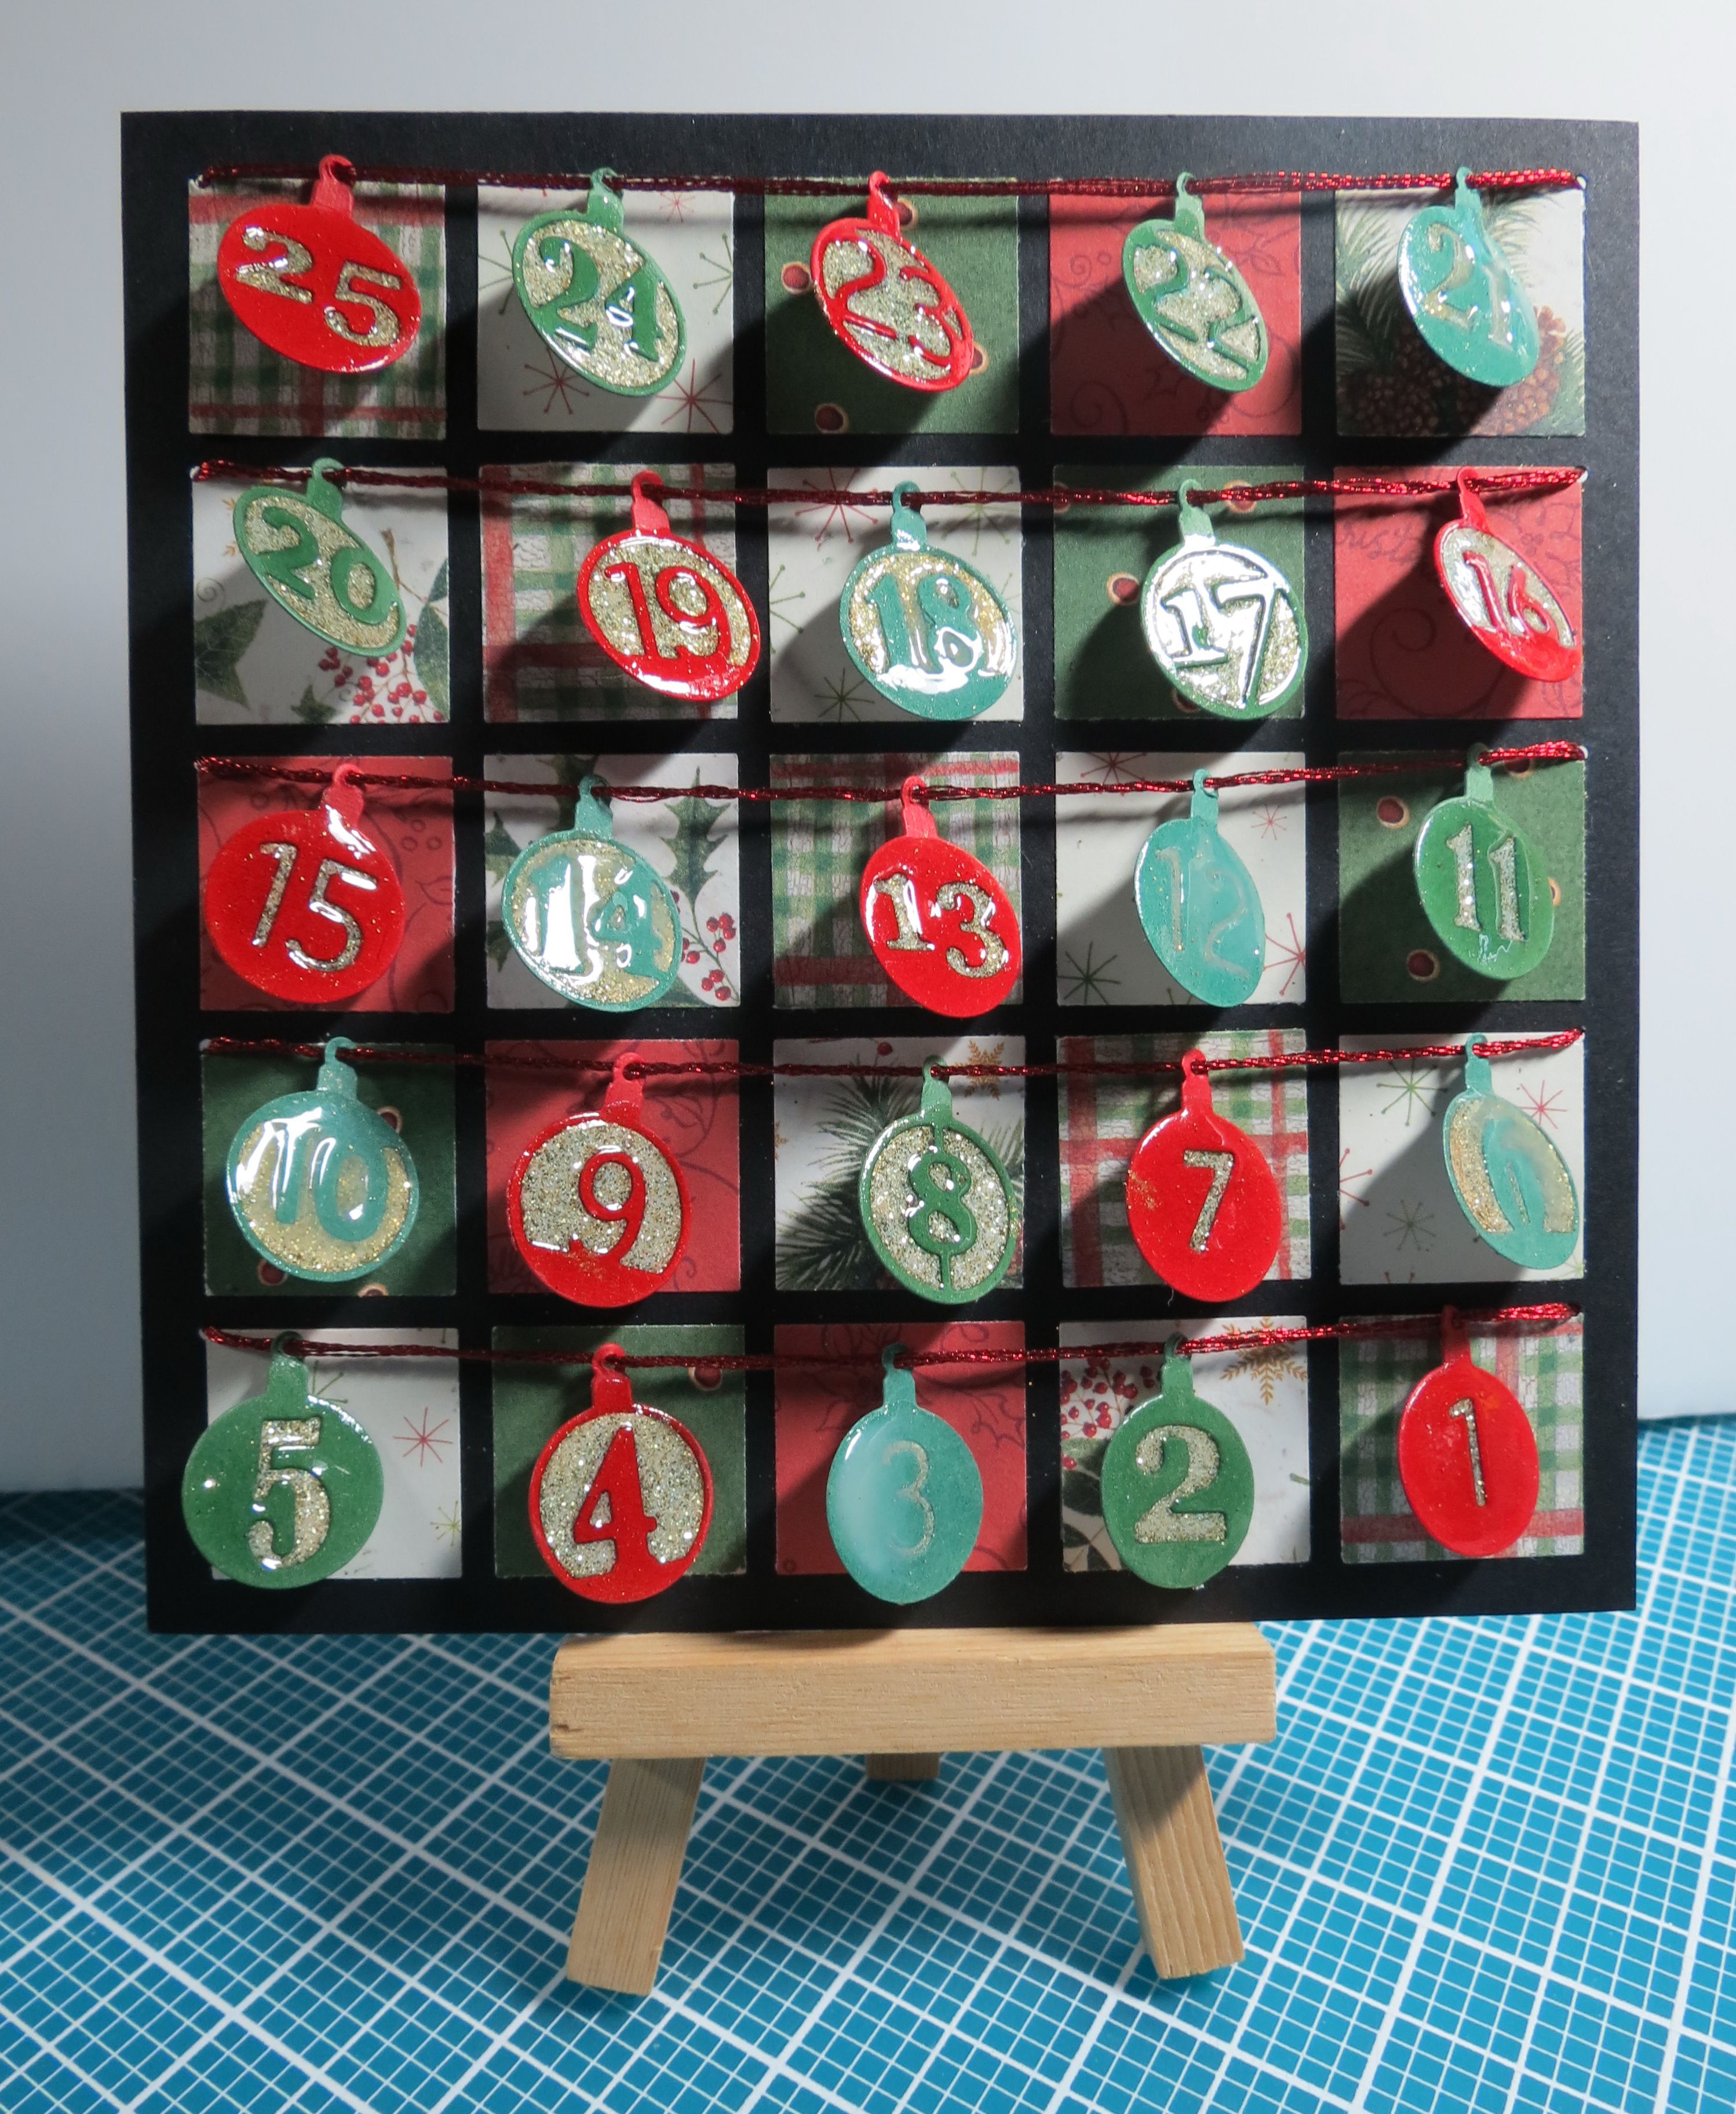
Countdown to Christmas: final calendar
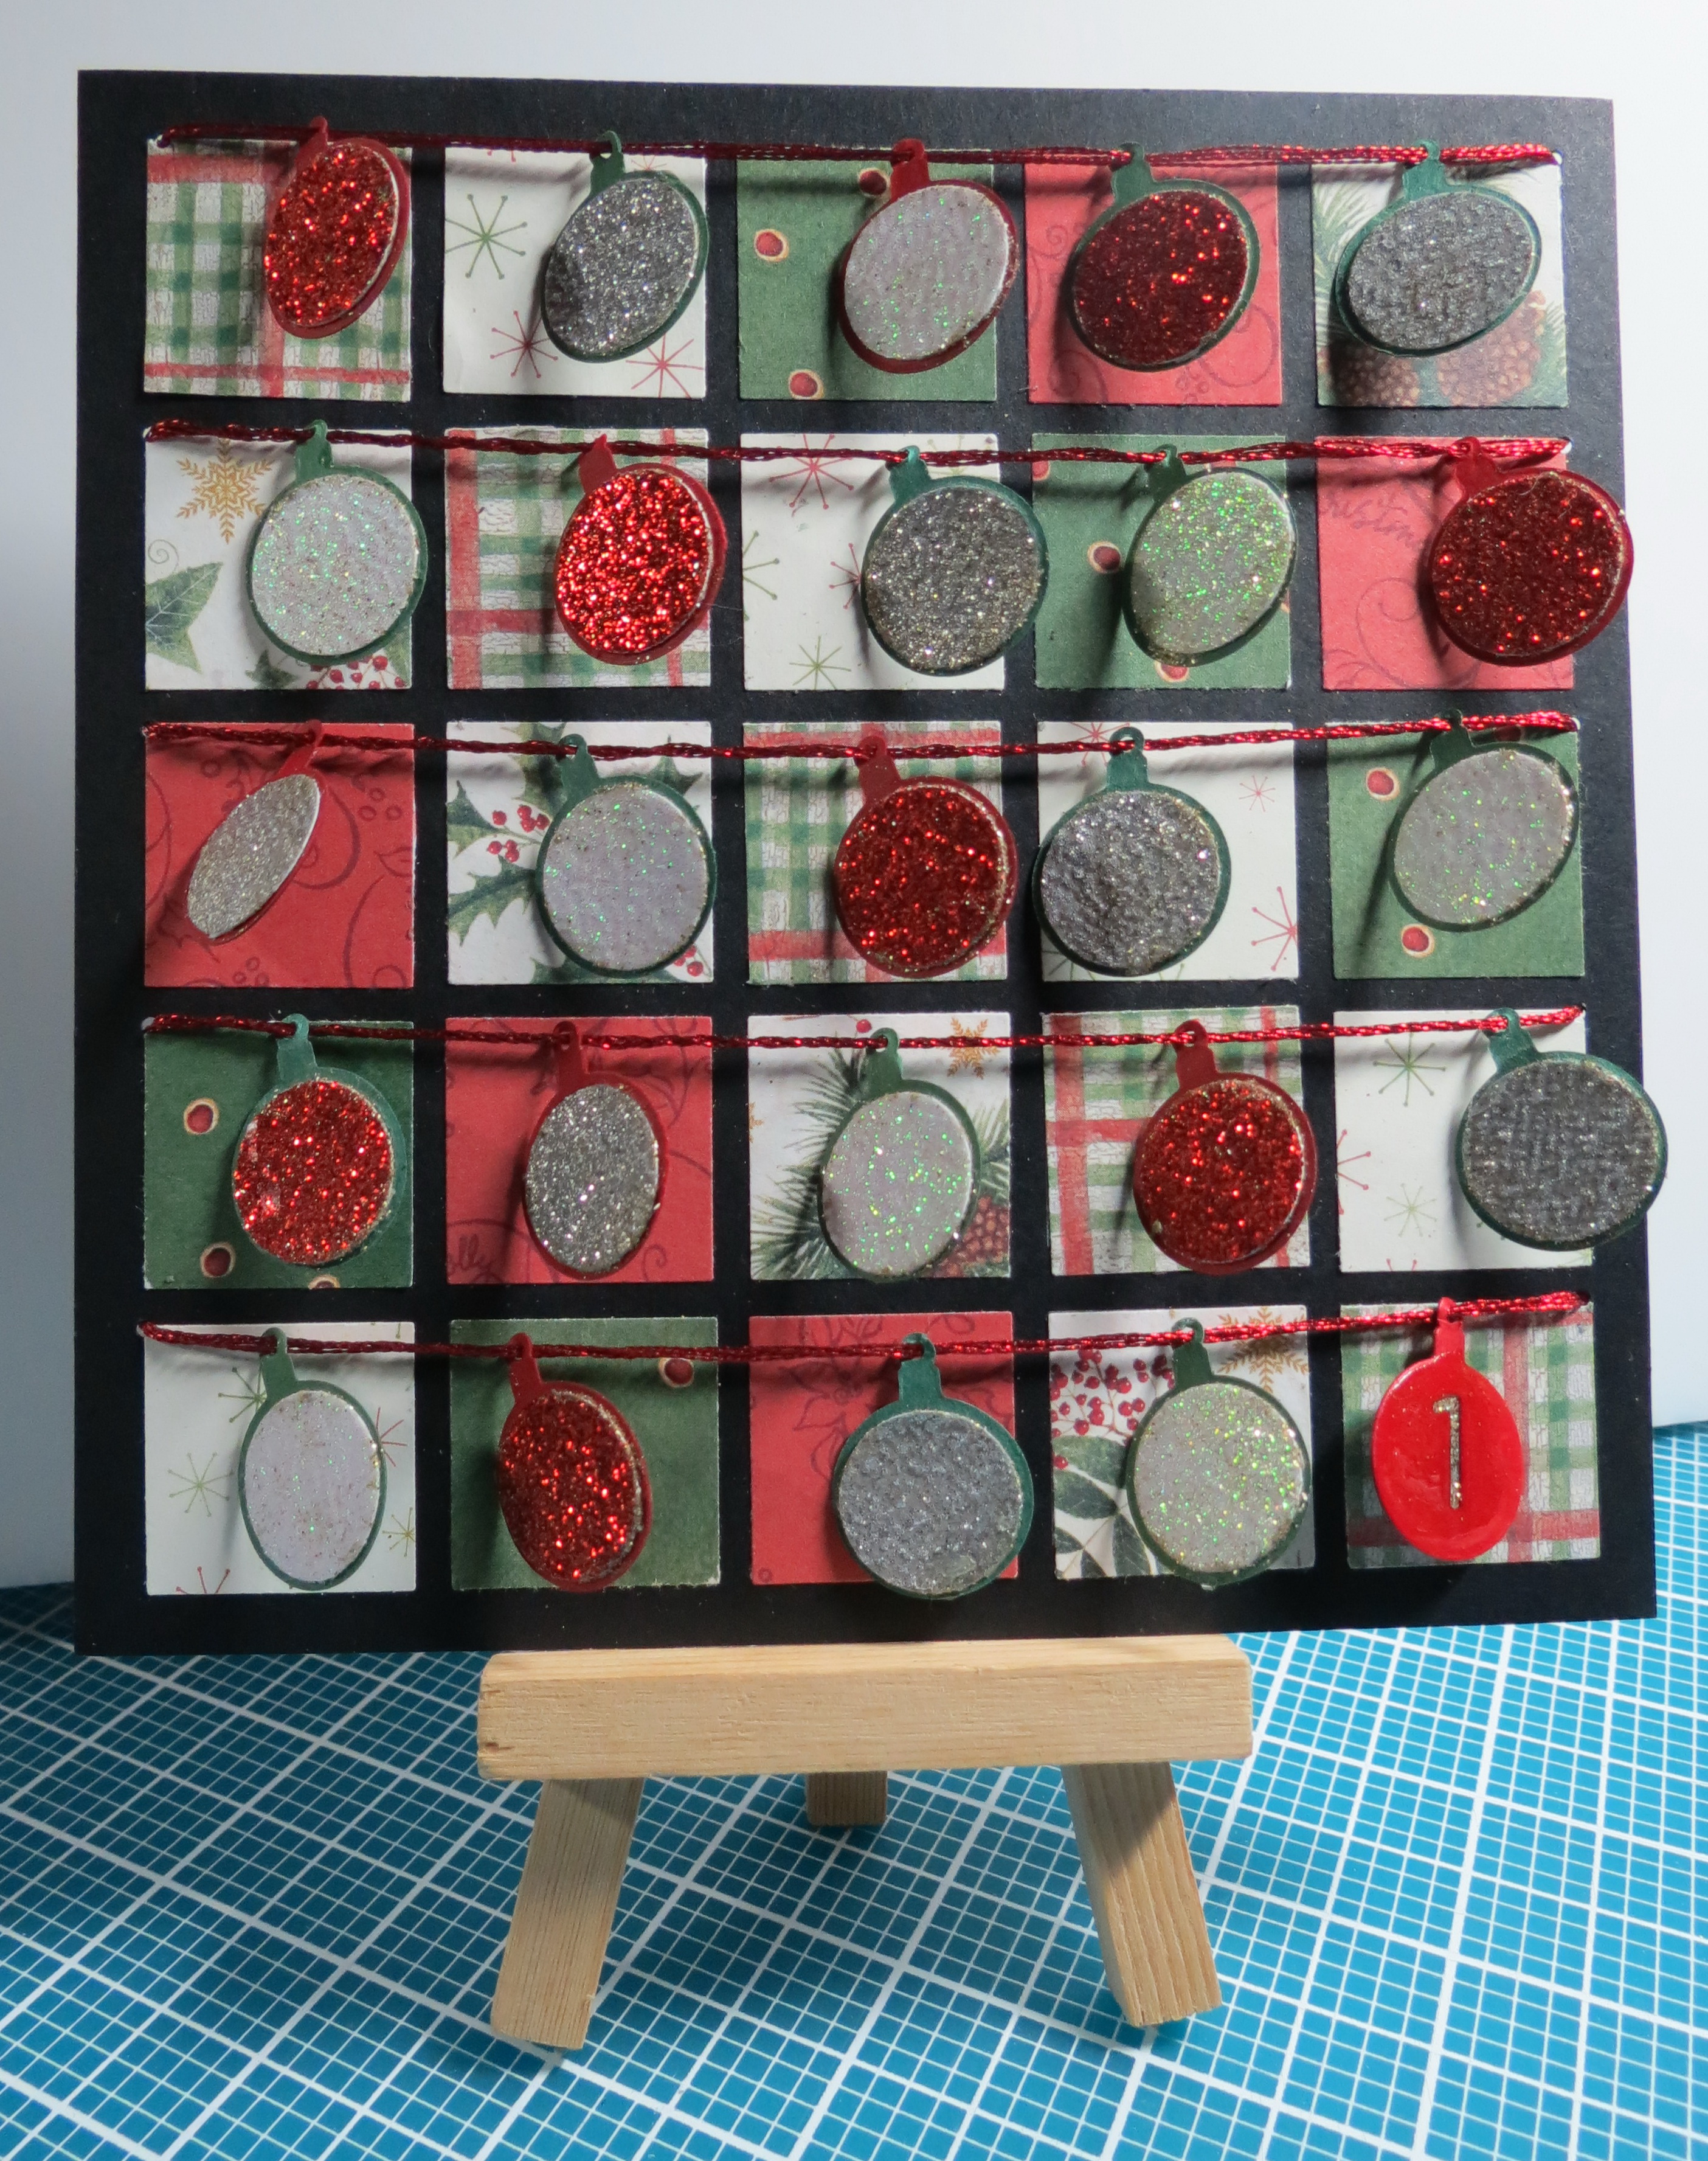
Countdown to Christmas: nearly all are flipped showing rows of glittery ornaments
Will you join the fun and make one of these calendars to countdown to Christmas?
Timeless ThrowbacksIf you’d like a few more Advent Calendar ideas you can see two previous posts…
Countdown to Christmas: Two page layout to make after the holiday countdown has finished. See the unique flip version.
This one flips for the verses and a place to put photos too! See it HERE. This one uses our free download dates that you can pick up HERE.
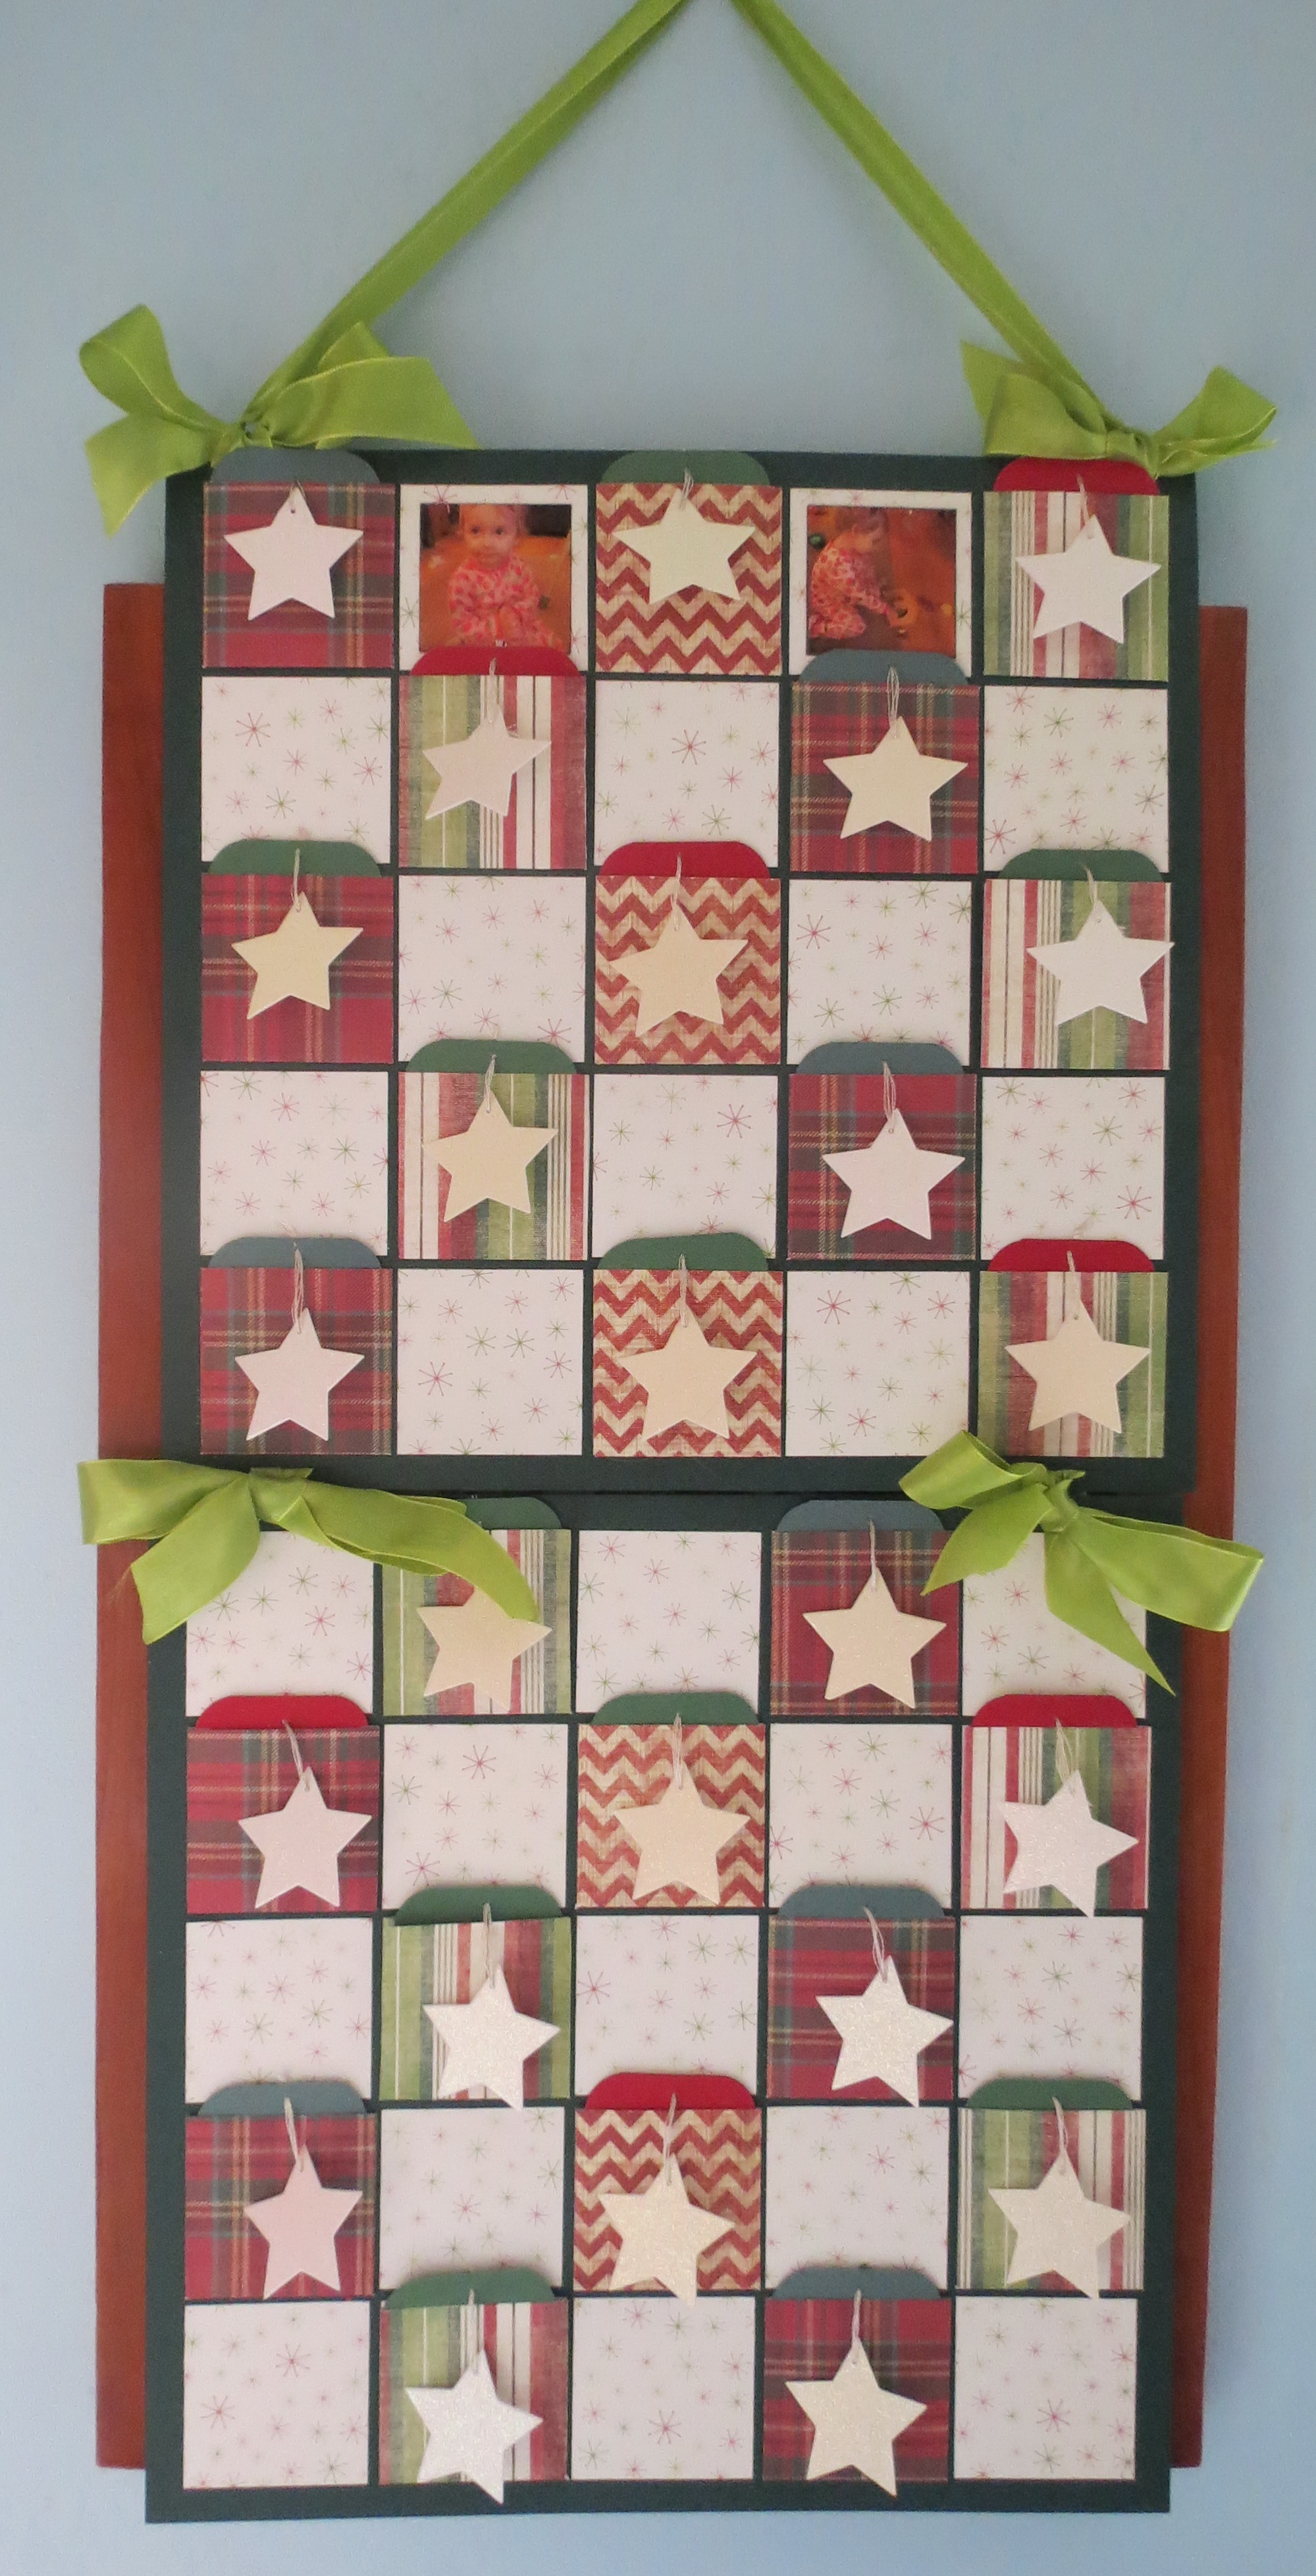
Countdown to Christmas: This banner Advent Calendar with spots for photos , pockets for tags and stars to decorate.
See this one HERE.
Both are also on the Pinterest board and linked there.
Enjoy the Christmas Season!
Andrea Fisher