
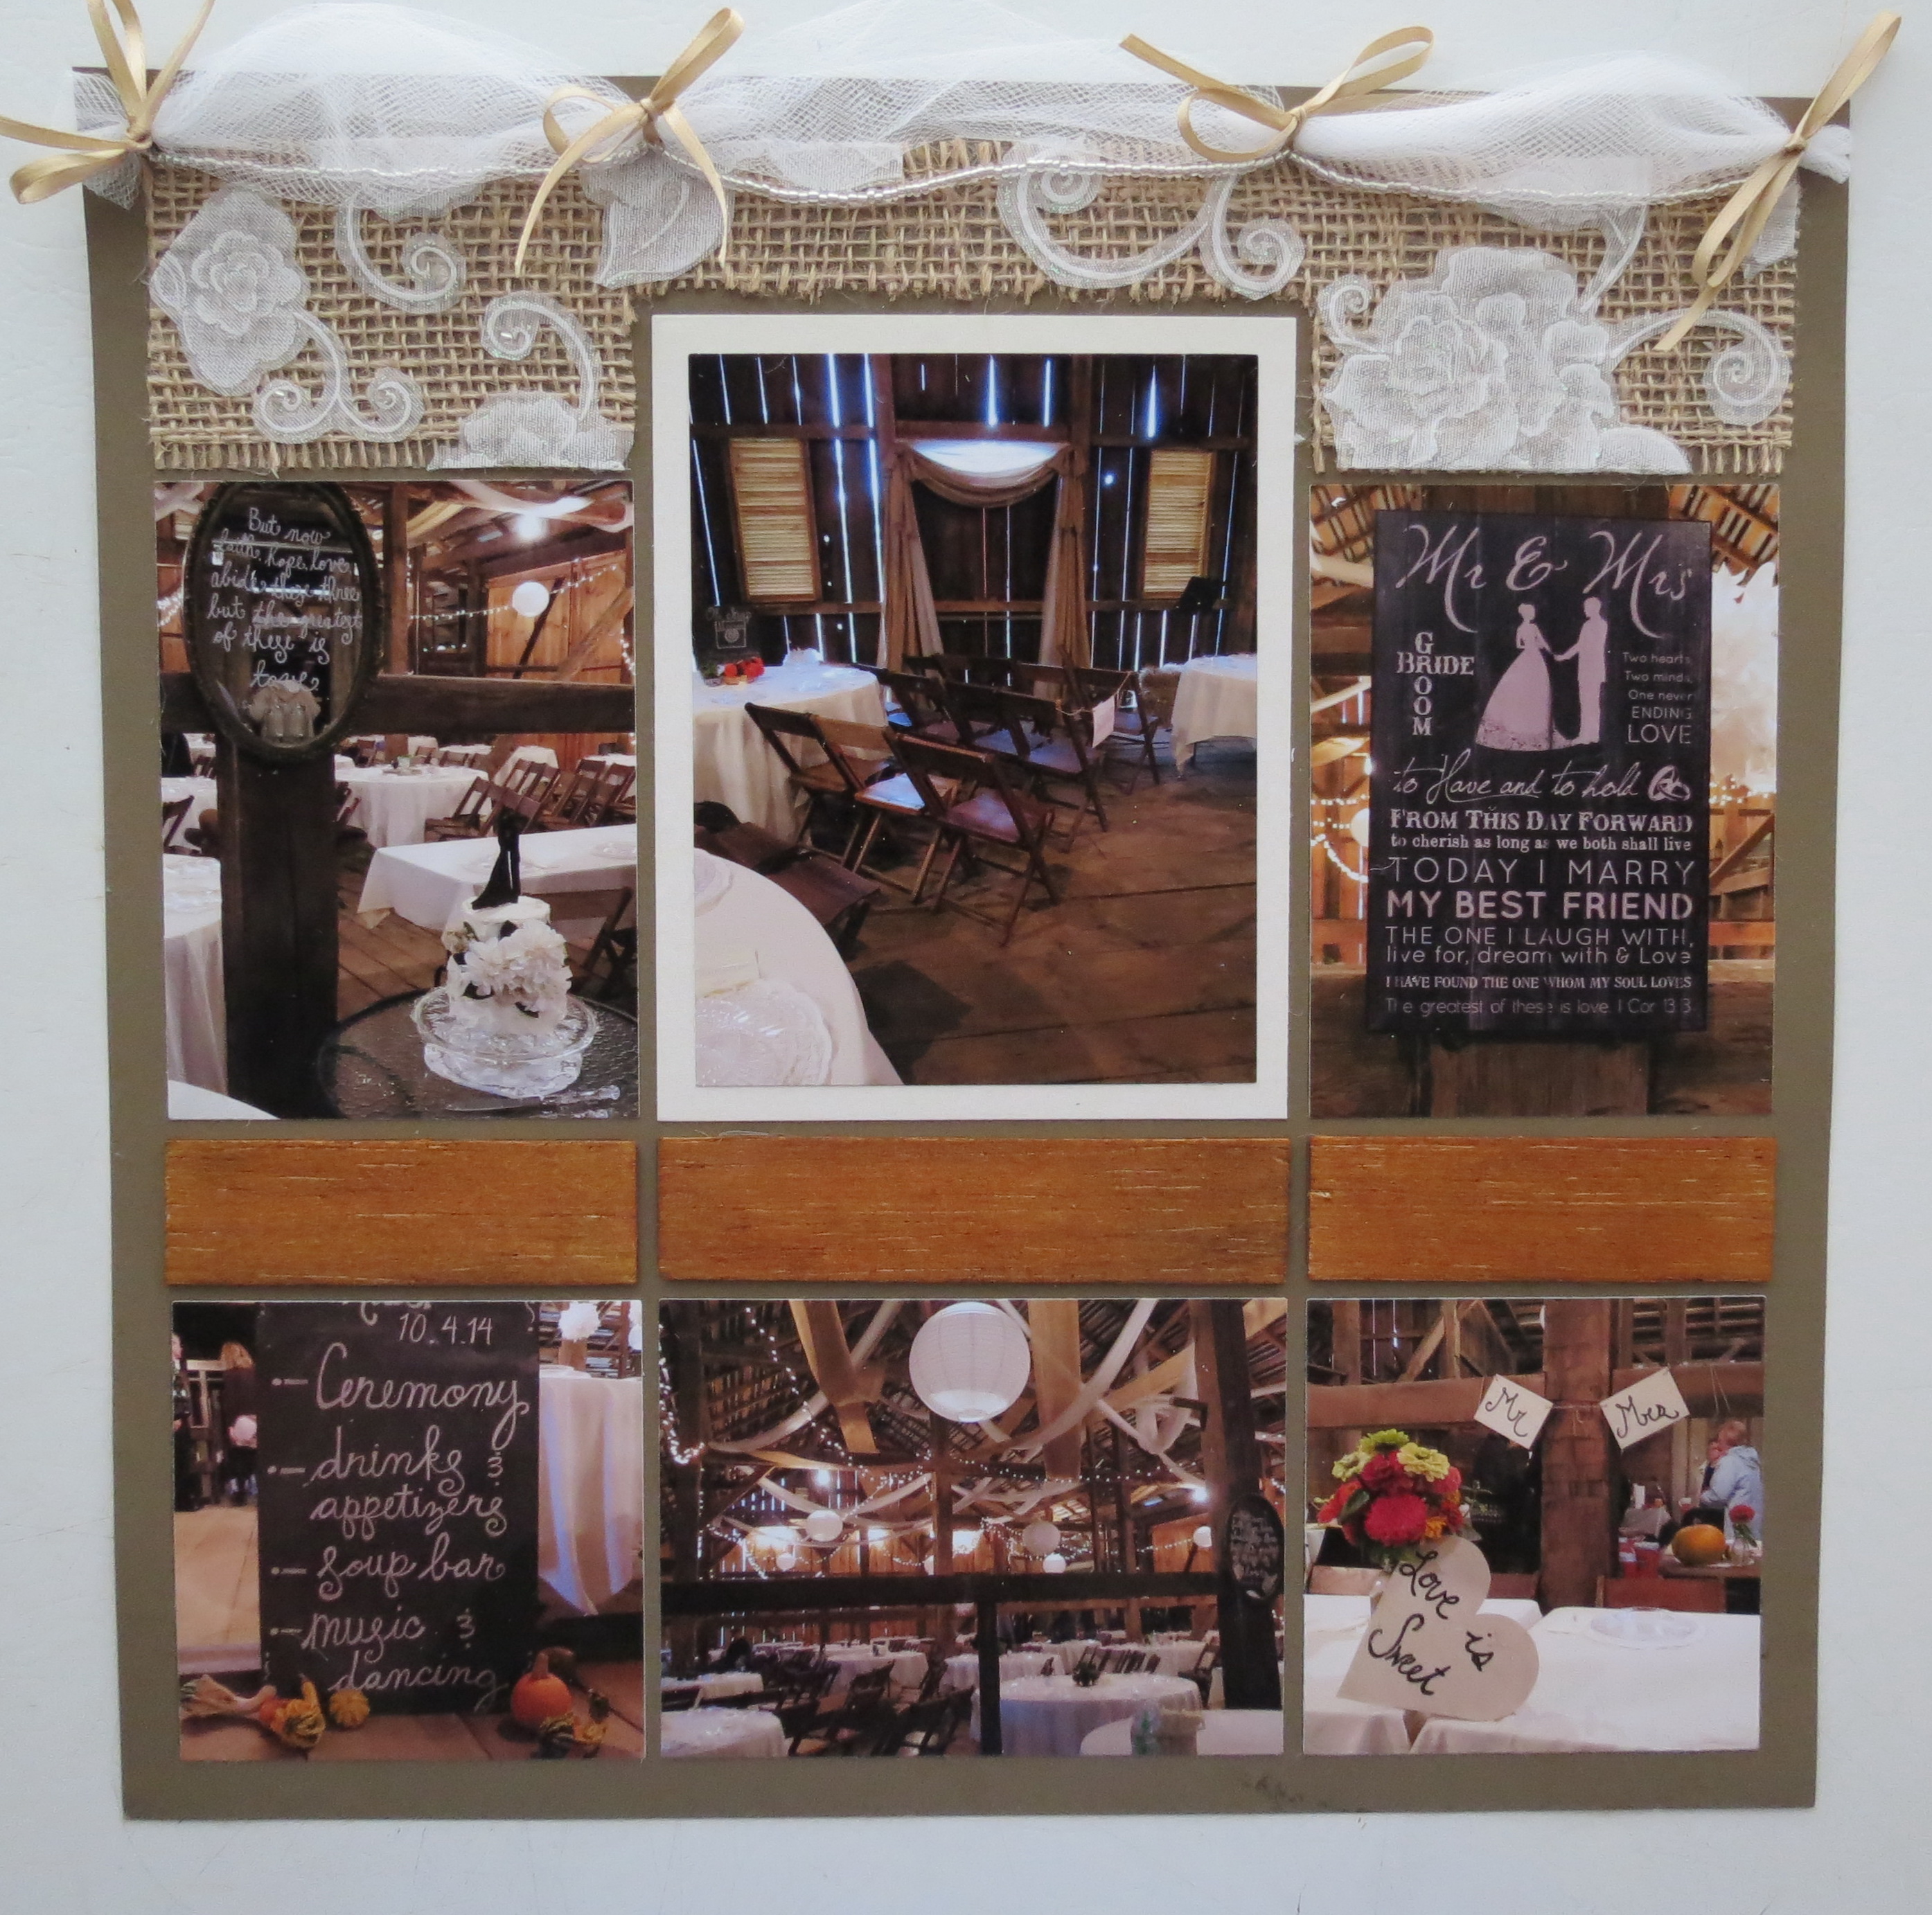
My daughter, Hannah, is in the wedding business. So we see a lot of wedding set ups when we deliver the wedding cakes. This wedding was extra special as it was for one of her friends. They had talked at length about her “style” for the wedding and when it all came together the eclectic vintage look was beautiful.
The wedding was held at the restored Gish Barn where the rafters were filled with yards of burlap, tulle and tiny white lights. These were the items I wanted to capture in this layout.
My First Wedding Scrapbook Tip…is to take photos of all the elements that the bride has used to set the theme and mood for her special day. Rachel had a beautiful collection of eclectic items for her vintage theme. Chalkboard signs and old trunks, tubs of apples for caramel apple appetizers, crock-pots full of chili and soups to warm the guests filled the barn for this festive event. Tables were covered in lovely white table clothes and were adorned with pedestal bowls, lanterns and wrapped bundles of bread. Even bales of hay were scattered around the space.
I took pictures of the tables, the decorations, the cake, the appetizer set up, the gift trunk and guest book area, also photos of the various signs she had displayed and the rafters filled with the burlap, tulle and lights, they were a must!
My Second Wedding Scrapbook Tip…is to incorporate the invitation on your page. It will make a nice title and a good place to save your invite if you like to hold on to that type of memorabilia. (for another example of a wedding invitation in a wedding layout)
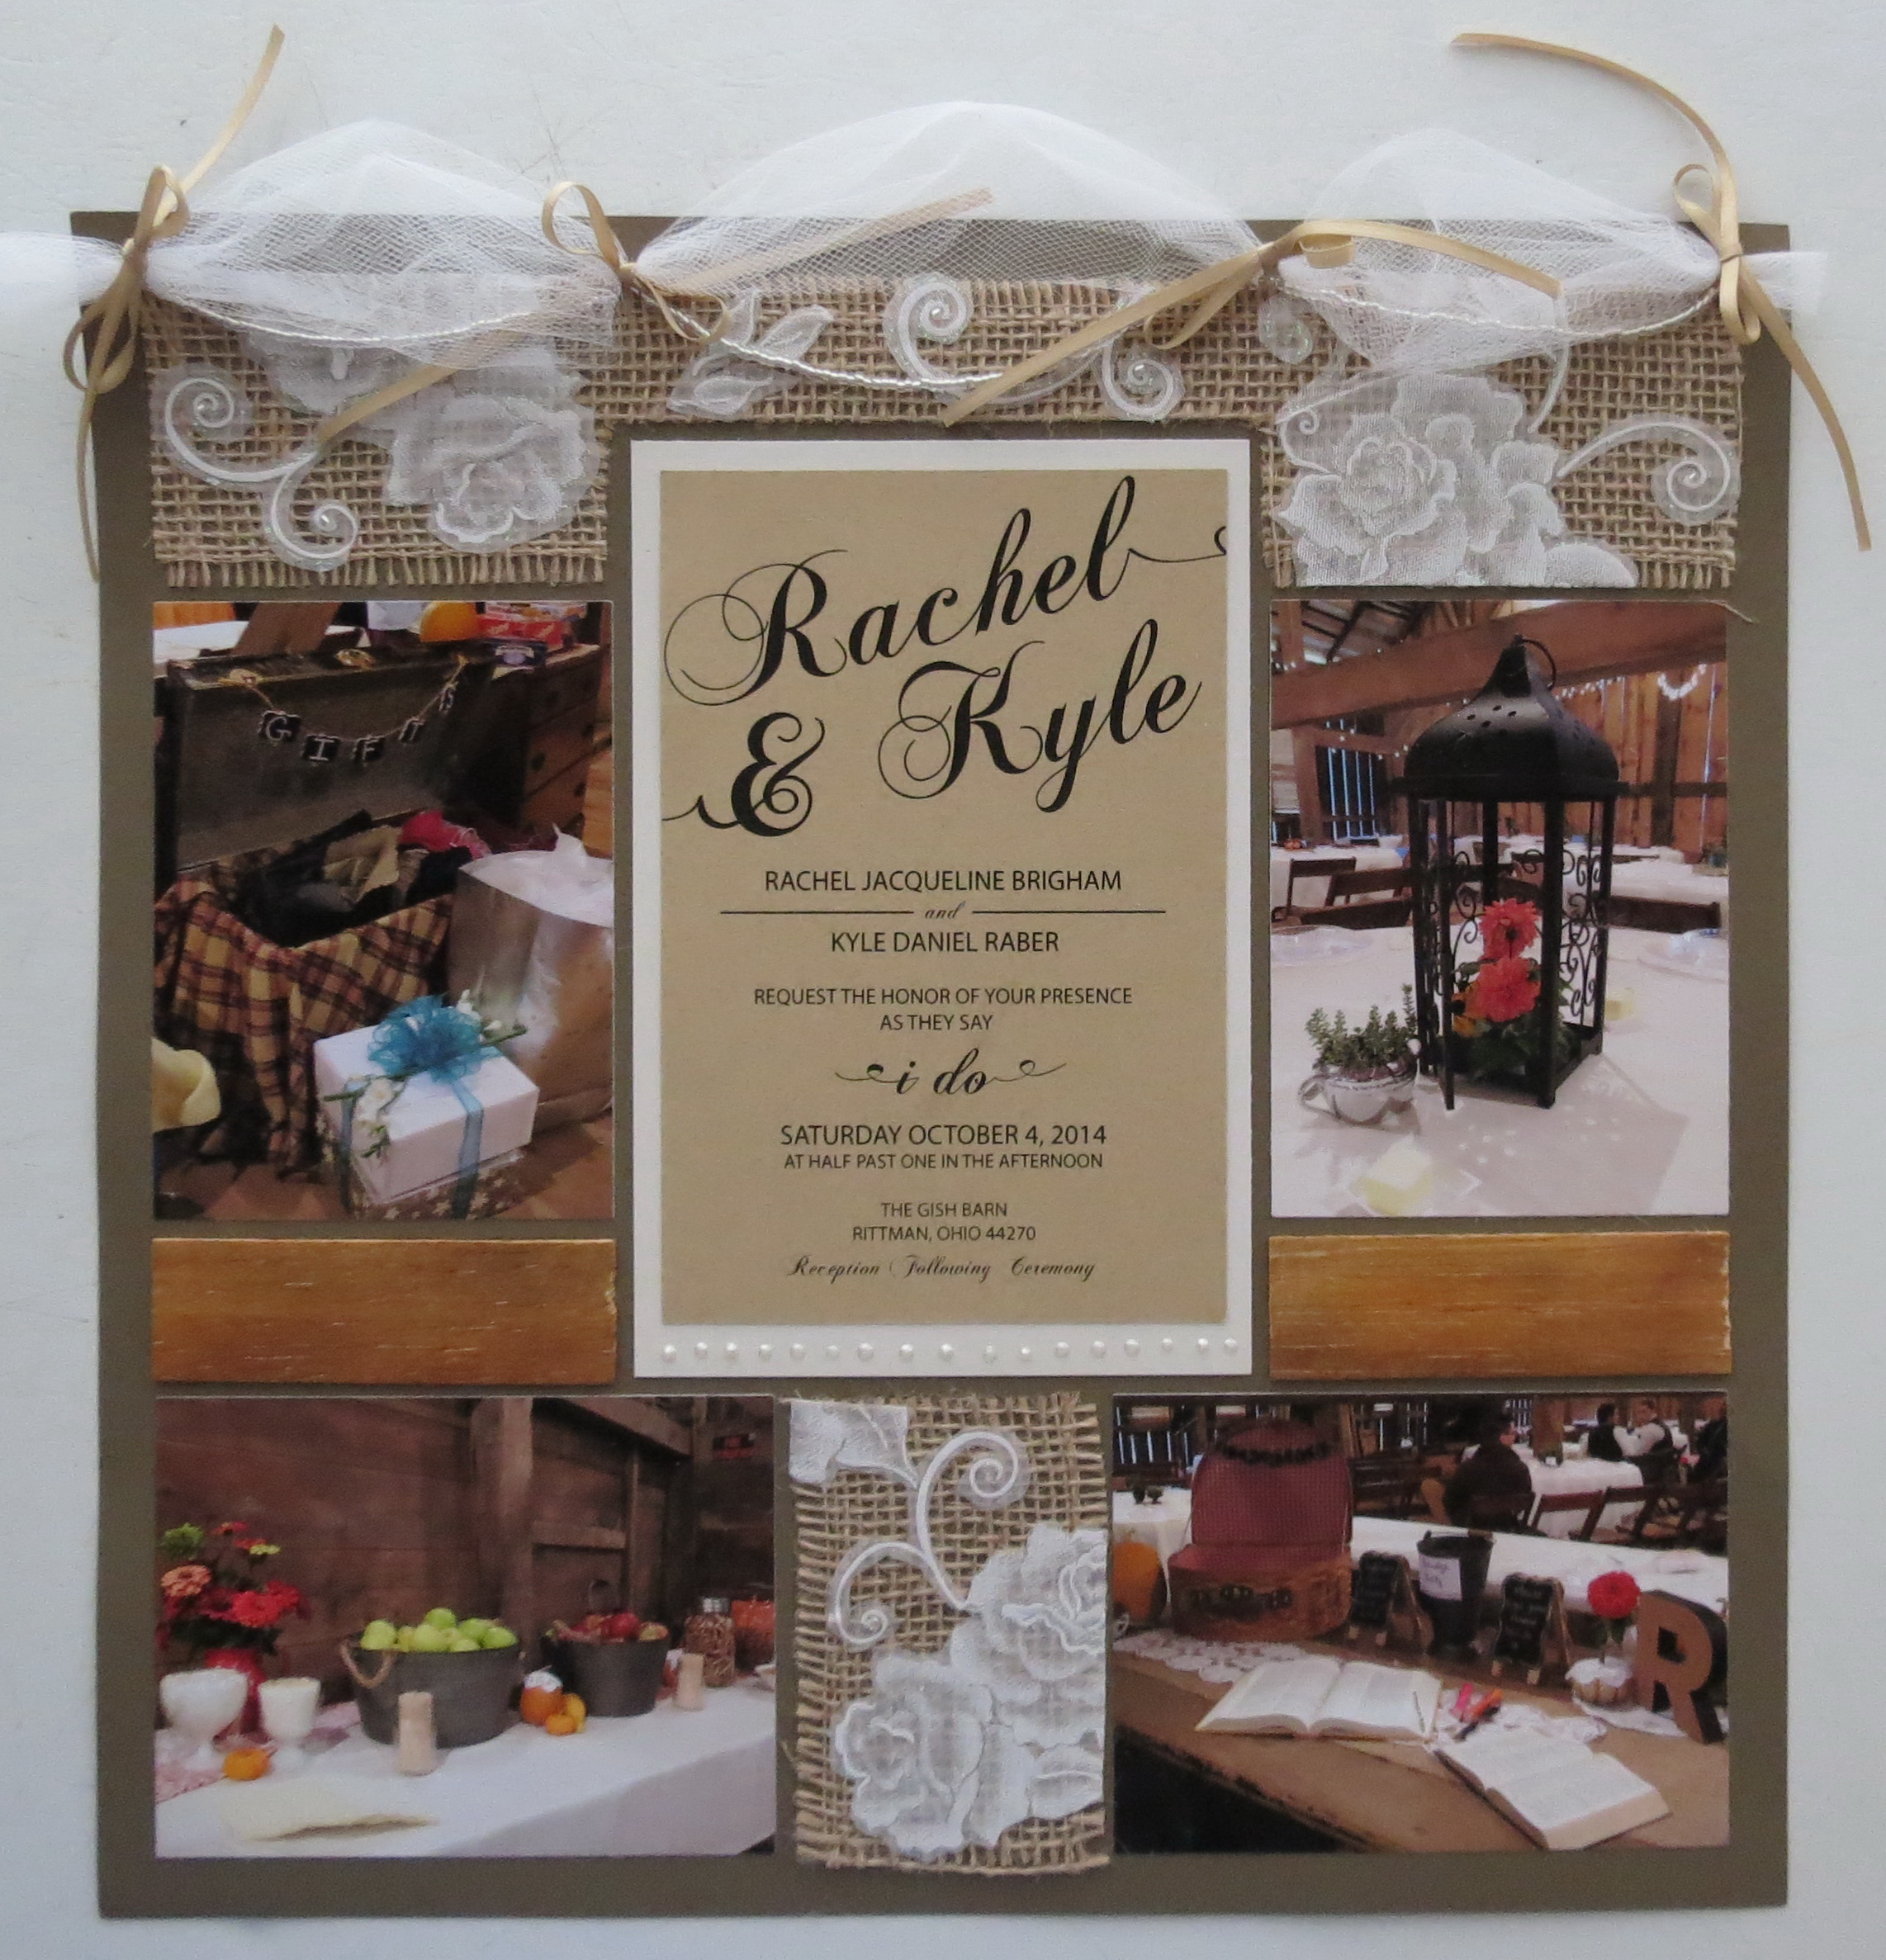
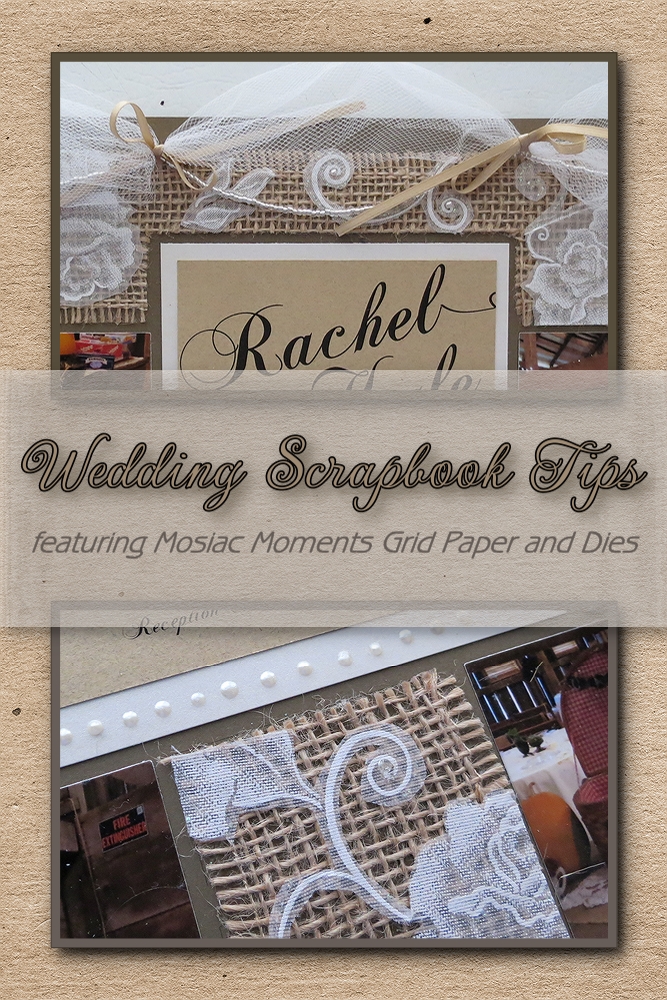
Wedding Scrapbook Tips. Wedding Invitation incorporated into the layout as a title.
…is to include some of those same textures and colors, from the wedding theme, into your layout. I’ve used wood, burlap, beading, tulle and lace accents for this page. I’ve used sage Mosaic Moments Grid paper; Core’dinations pearlized white cardstock, lace ribbon, burlap ribbon, 1/8” narrow beige ribbon, glass beads, crystal acrylic and Viva Pearl Pen (cream) to create the liquid pearl accents.
Because the invitation was on Kraft cardstock I wanted a shade that would work with that nice earthy feel and Sage did just that. Burlap added to the rustic feel while lace, pearl paper and beads bring it back to the bridal.

Wedding Scrapbook Tips two page layout.
- TECHNIQUE: Rachel’s vintage wedding dress had layers of lace, so I found a ribbon to cut out floral motifs to fit that bill. It also had a touch of iridescent glitter outlining the flowers; so a nice subtle glimmer was added!I ran the strips of lace ribbon through the Xyron for full adhesive coverage, but it also made cutting the motif out so much easier. Then just peel the backing off and apply.Burlap ribbon for the border background became a good spot for the lace motifs to be placed. It still has that rustic feel, but softened up a wee bit by the lace.
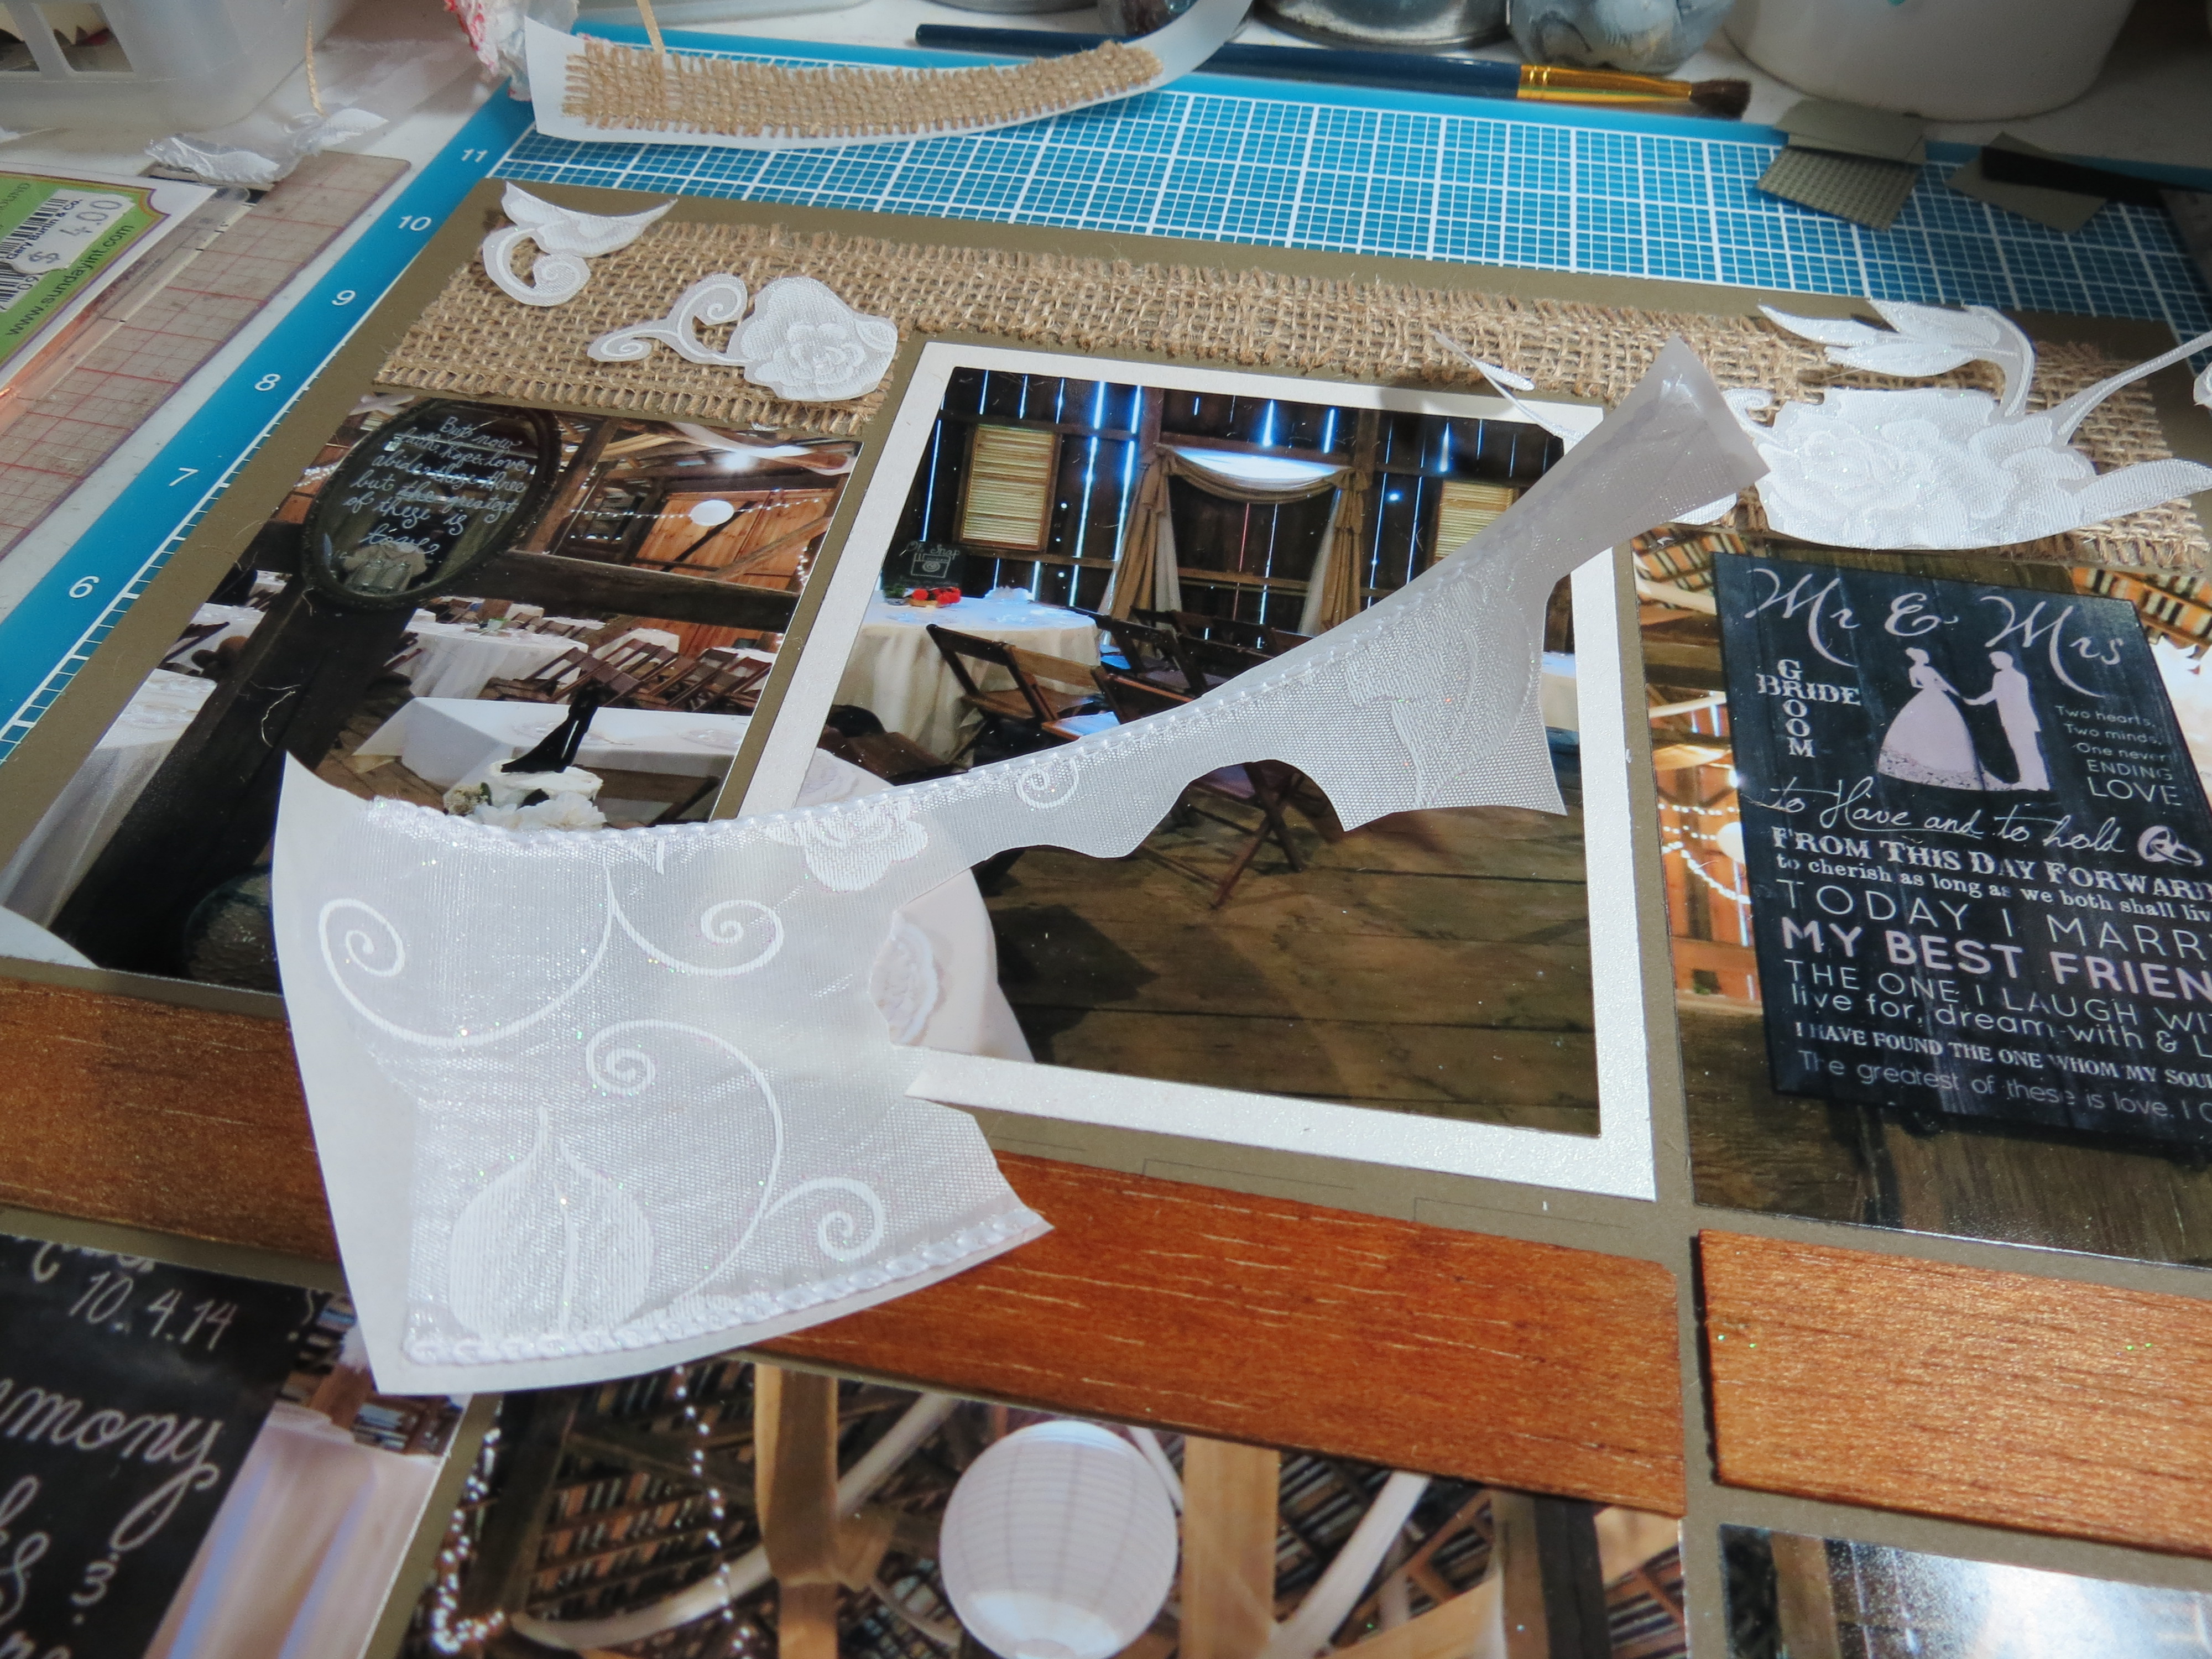
Wedding Scrapbook Tips. Strips of ribbon with Xyron adhesive.
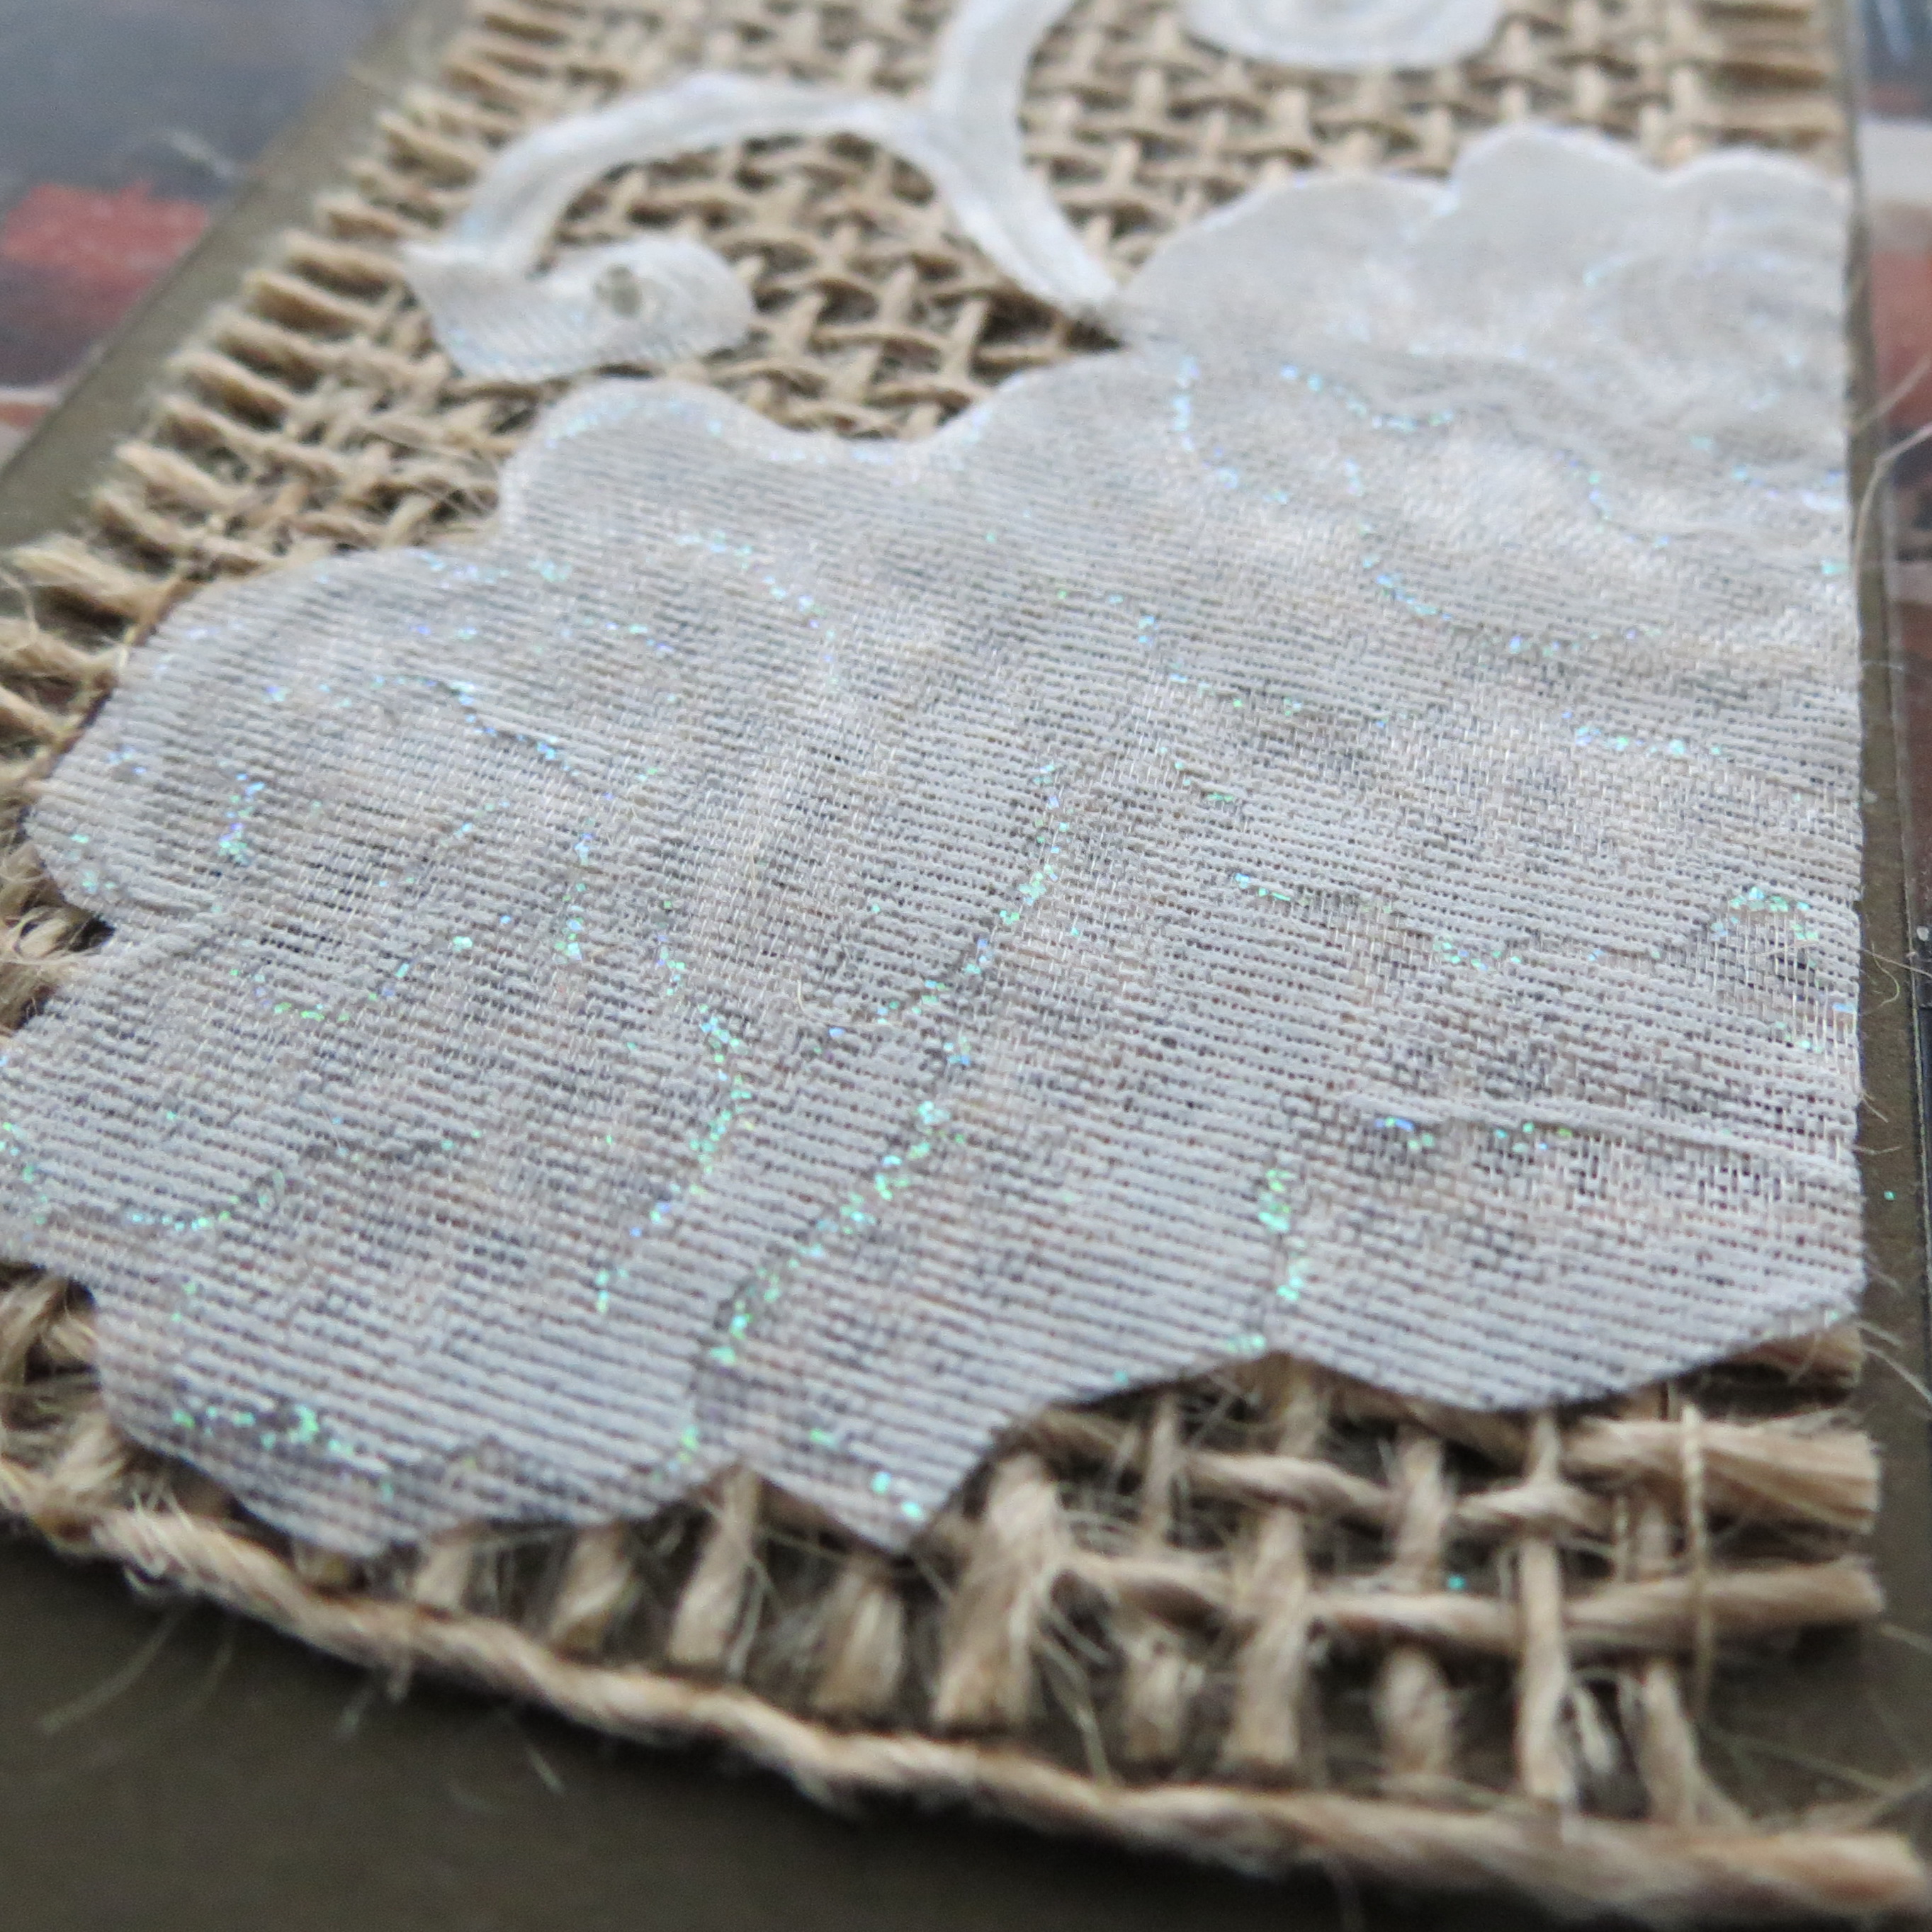
Wedding Scrapbook Tips. Lace adhered to burlap. See the glimmer?
- TECHNIQUE: Tulle just wider than the page and about 3” wide, folded and gathered in spots along the top in a banner look was anchored with thread fed through a tiny hole at measured intervals to the backside and secured with tape. On the front the beige ribbon was tied into bows and placed to hide the thread ties. Although the tulle is puffy right now, once in the scrapbook album it will flatten out and sit quite nicely without adding too much bulk.
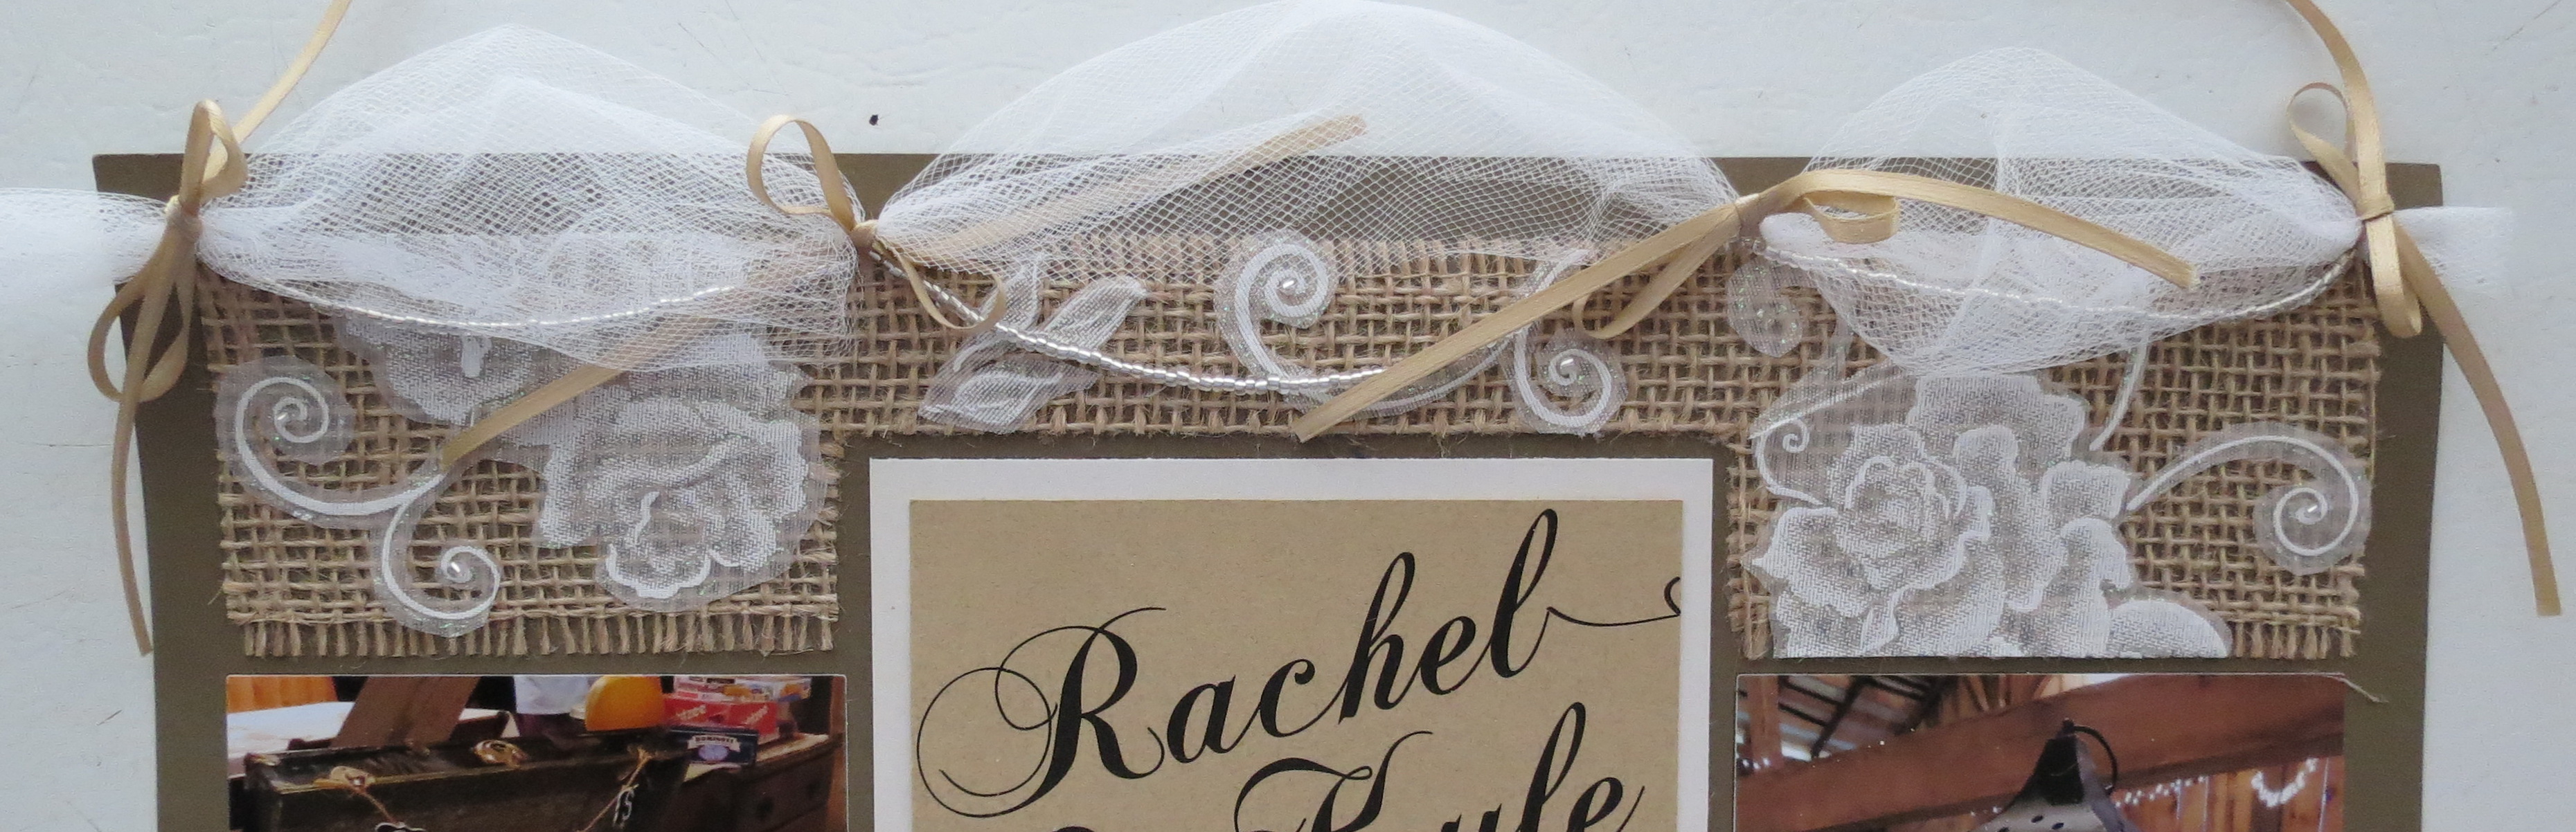
Wedding Scrapbooking Tips. Tulle topper with beading and ribbons.
- TECHNIQUE: Bead work. What is a wedding without some beadwork? In this case I have strung tiny (11/0) clear seed beads ($1.50 for a 40g tube at Walmart) on transparent thread using a small needle to give me the look of the tiny white lights strung around the barn. To create a swag effect at the top of the page I used the wire removed from the inside of my wired lace ribbon to catch the thread and hold it in place, threading it through the same hole where the tulle is anchored. After twisting this off in the back and taping in place, I placed a small drop of clear crystal acrylic on the front side to fill the hole and cover a bead or two so they will stay in place.
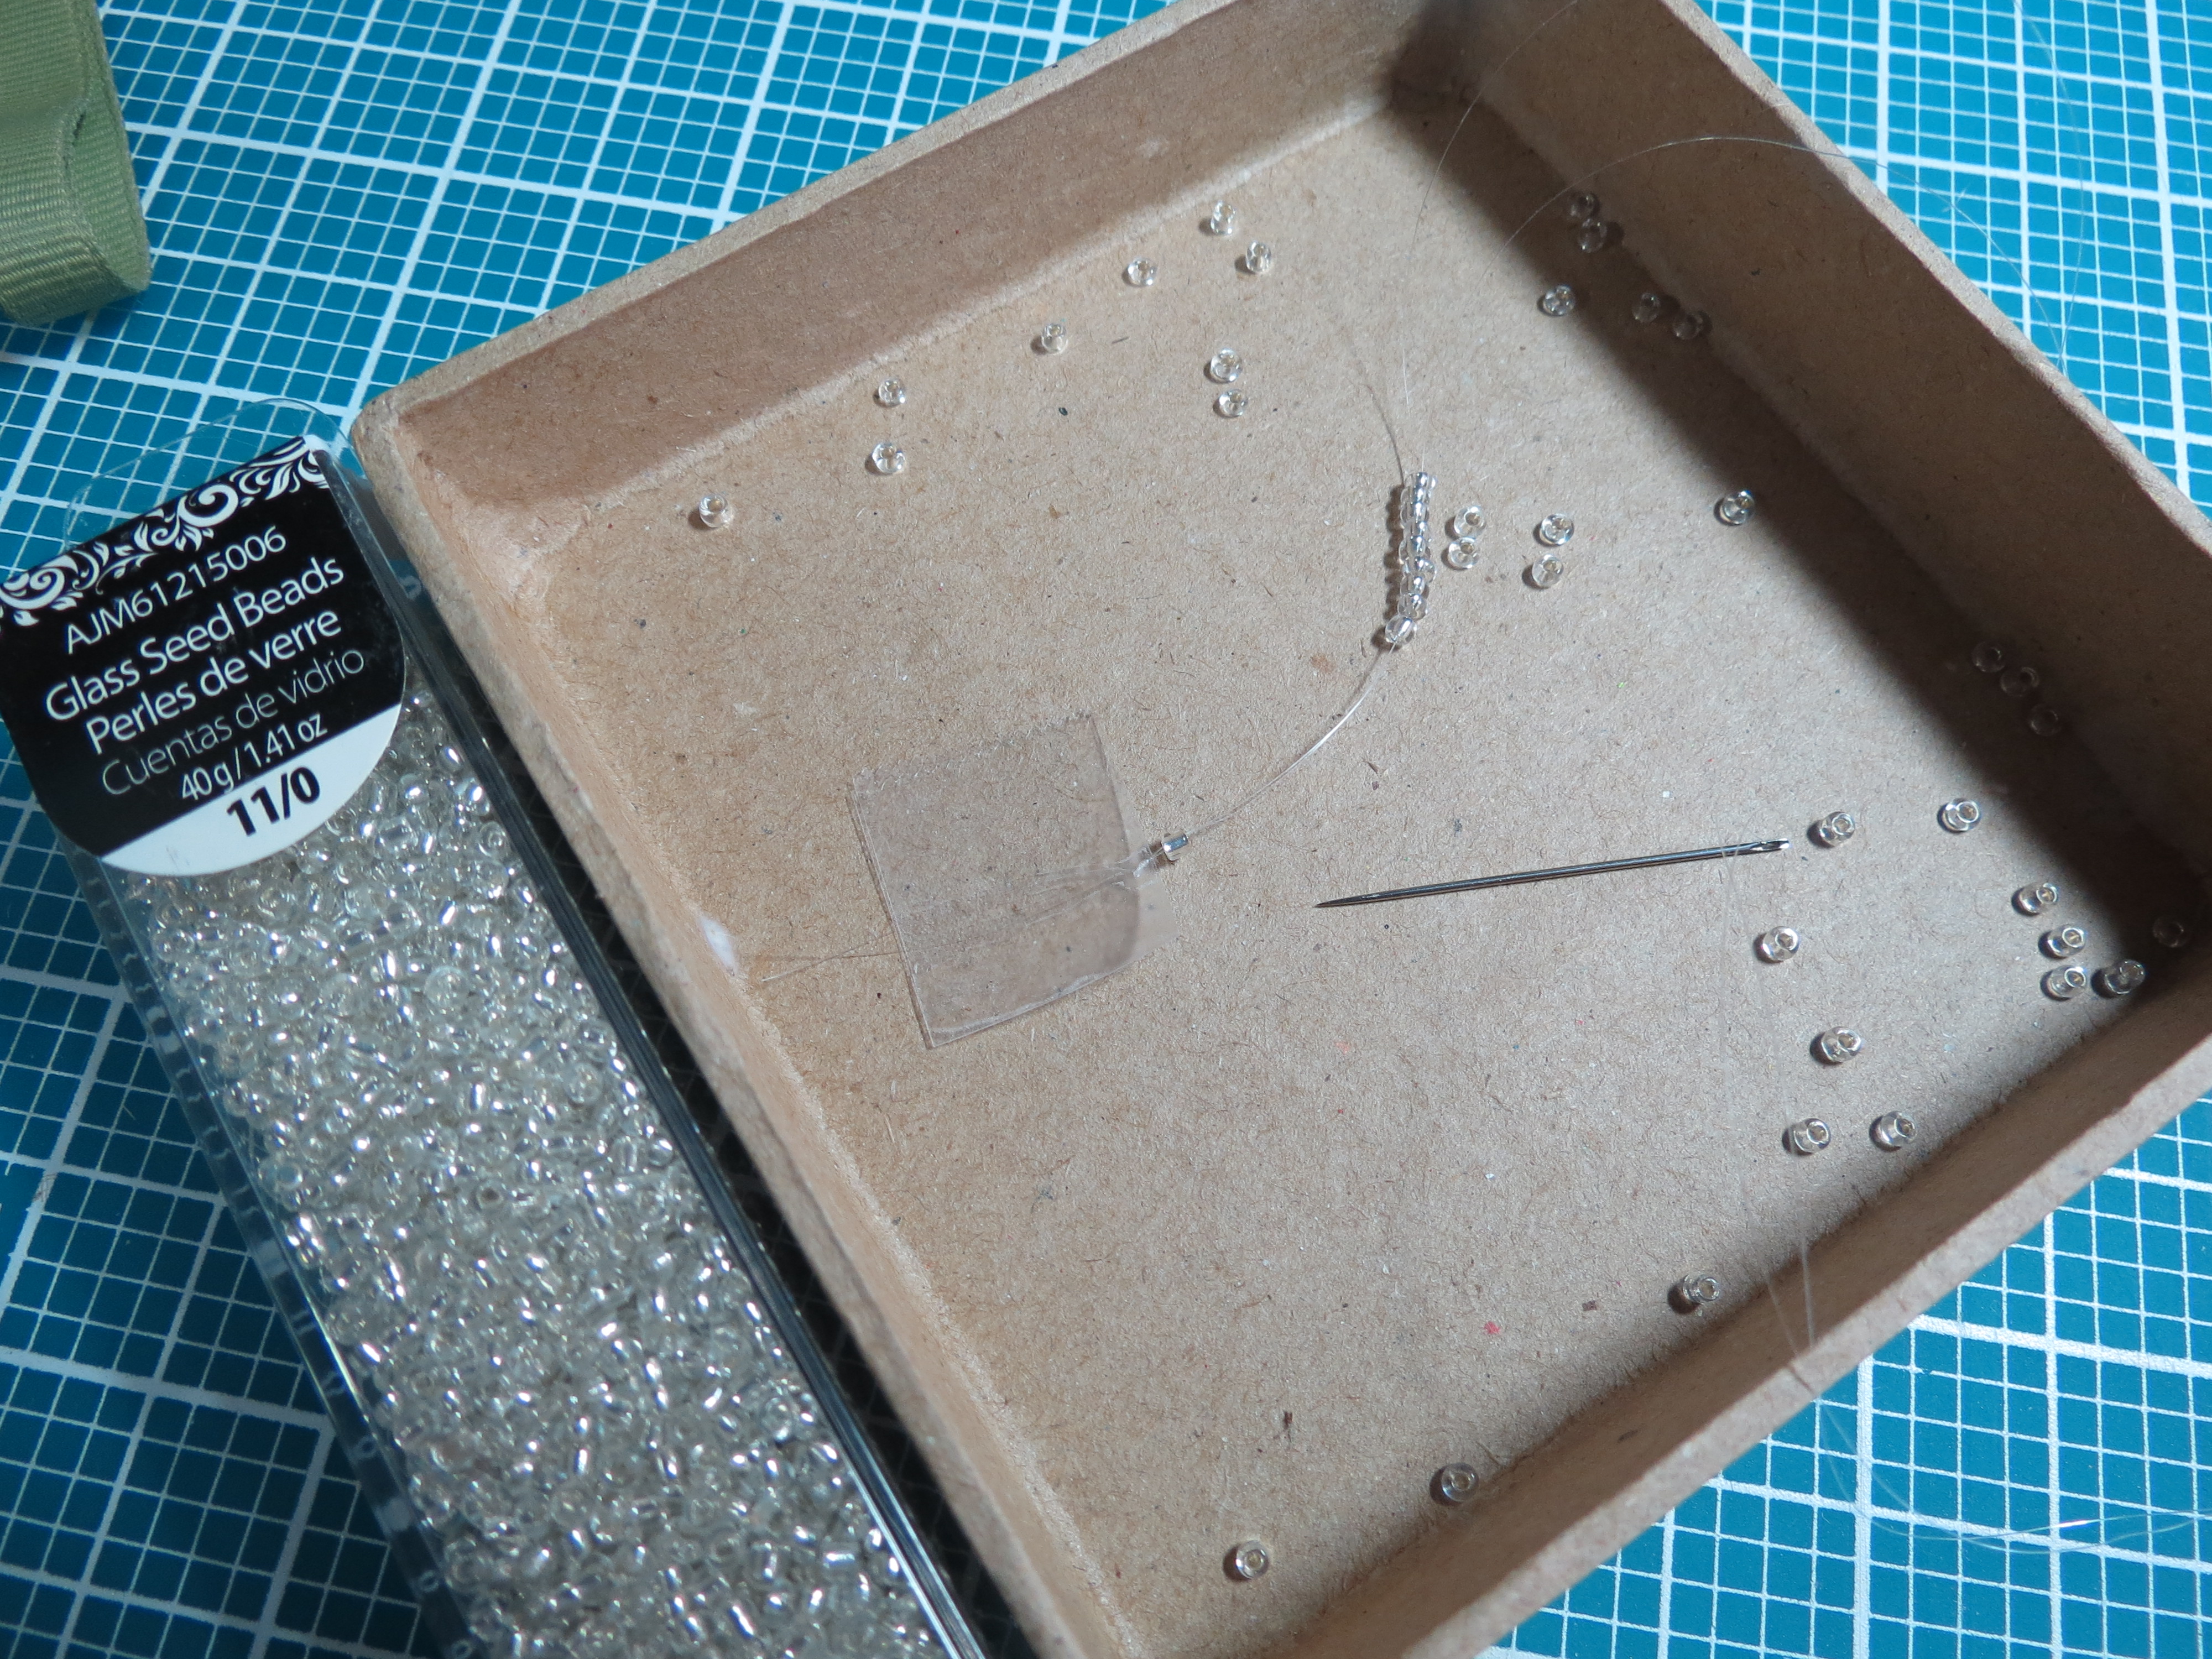
Wedding Scrapbook Tips. Threading small glass beads onto transparent thread to create strands of ‘light’ on the page.

Scrapbook Wedding Tips. Beading is threaded through a small hole and secured in the back and taped. On the front side a small bead of Crystal Acrylic is used to hold them in place.
- TECHNIQUE: Liquid Pearls along the bottom edge of the title block helps to add a little extra and fill the gap on the mat because the invitation doesn’t fit exactly inside. By applying different amounts of pressure you can obtain different sizes of pearls. I used a ruler to try to keep them straight and evenly distributed. Be sure to allow them to dry before handling or risk flattening them out.
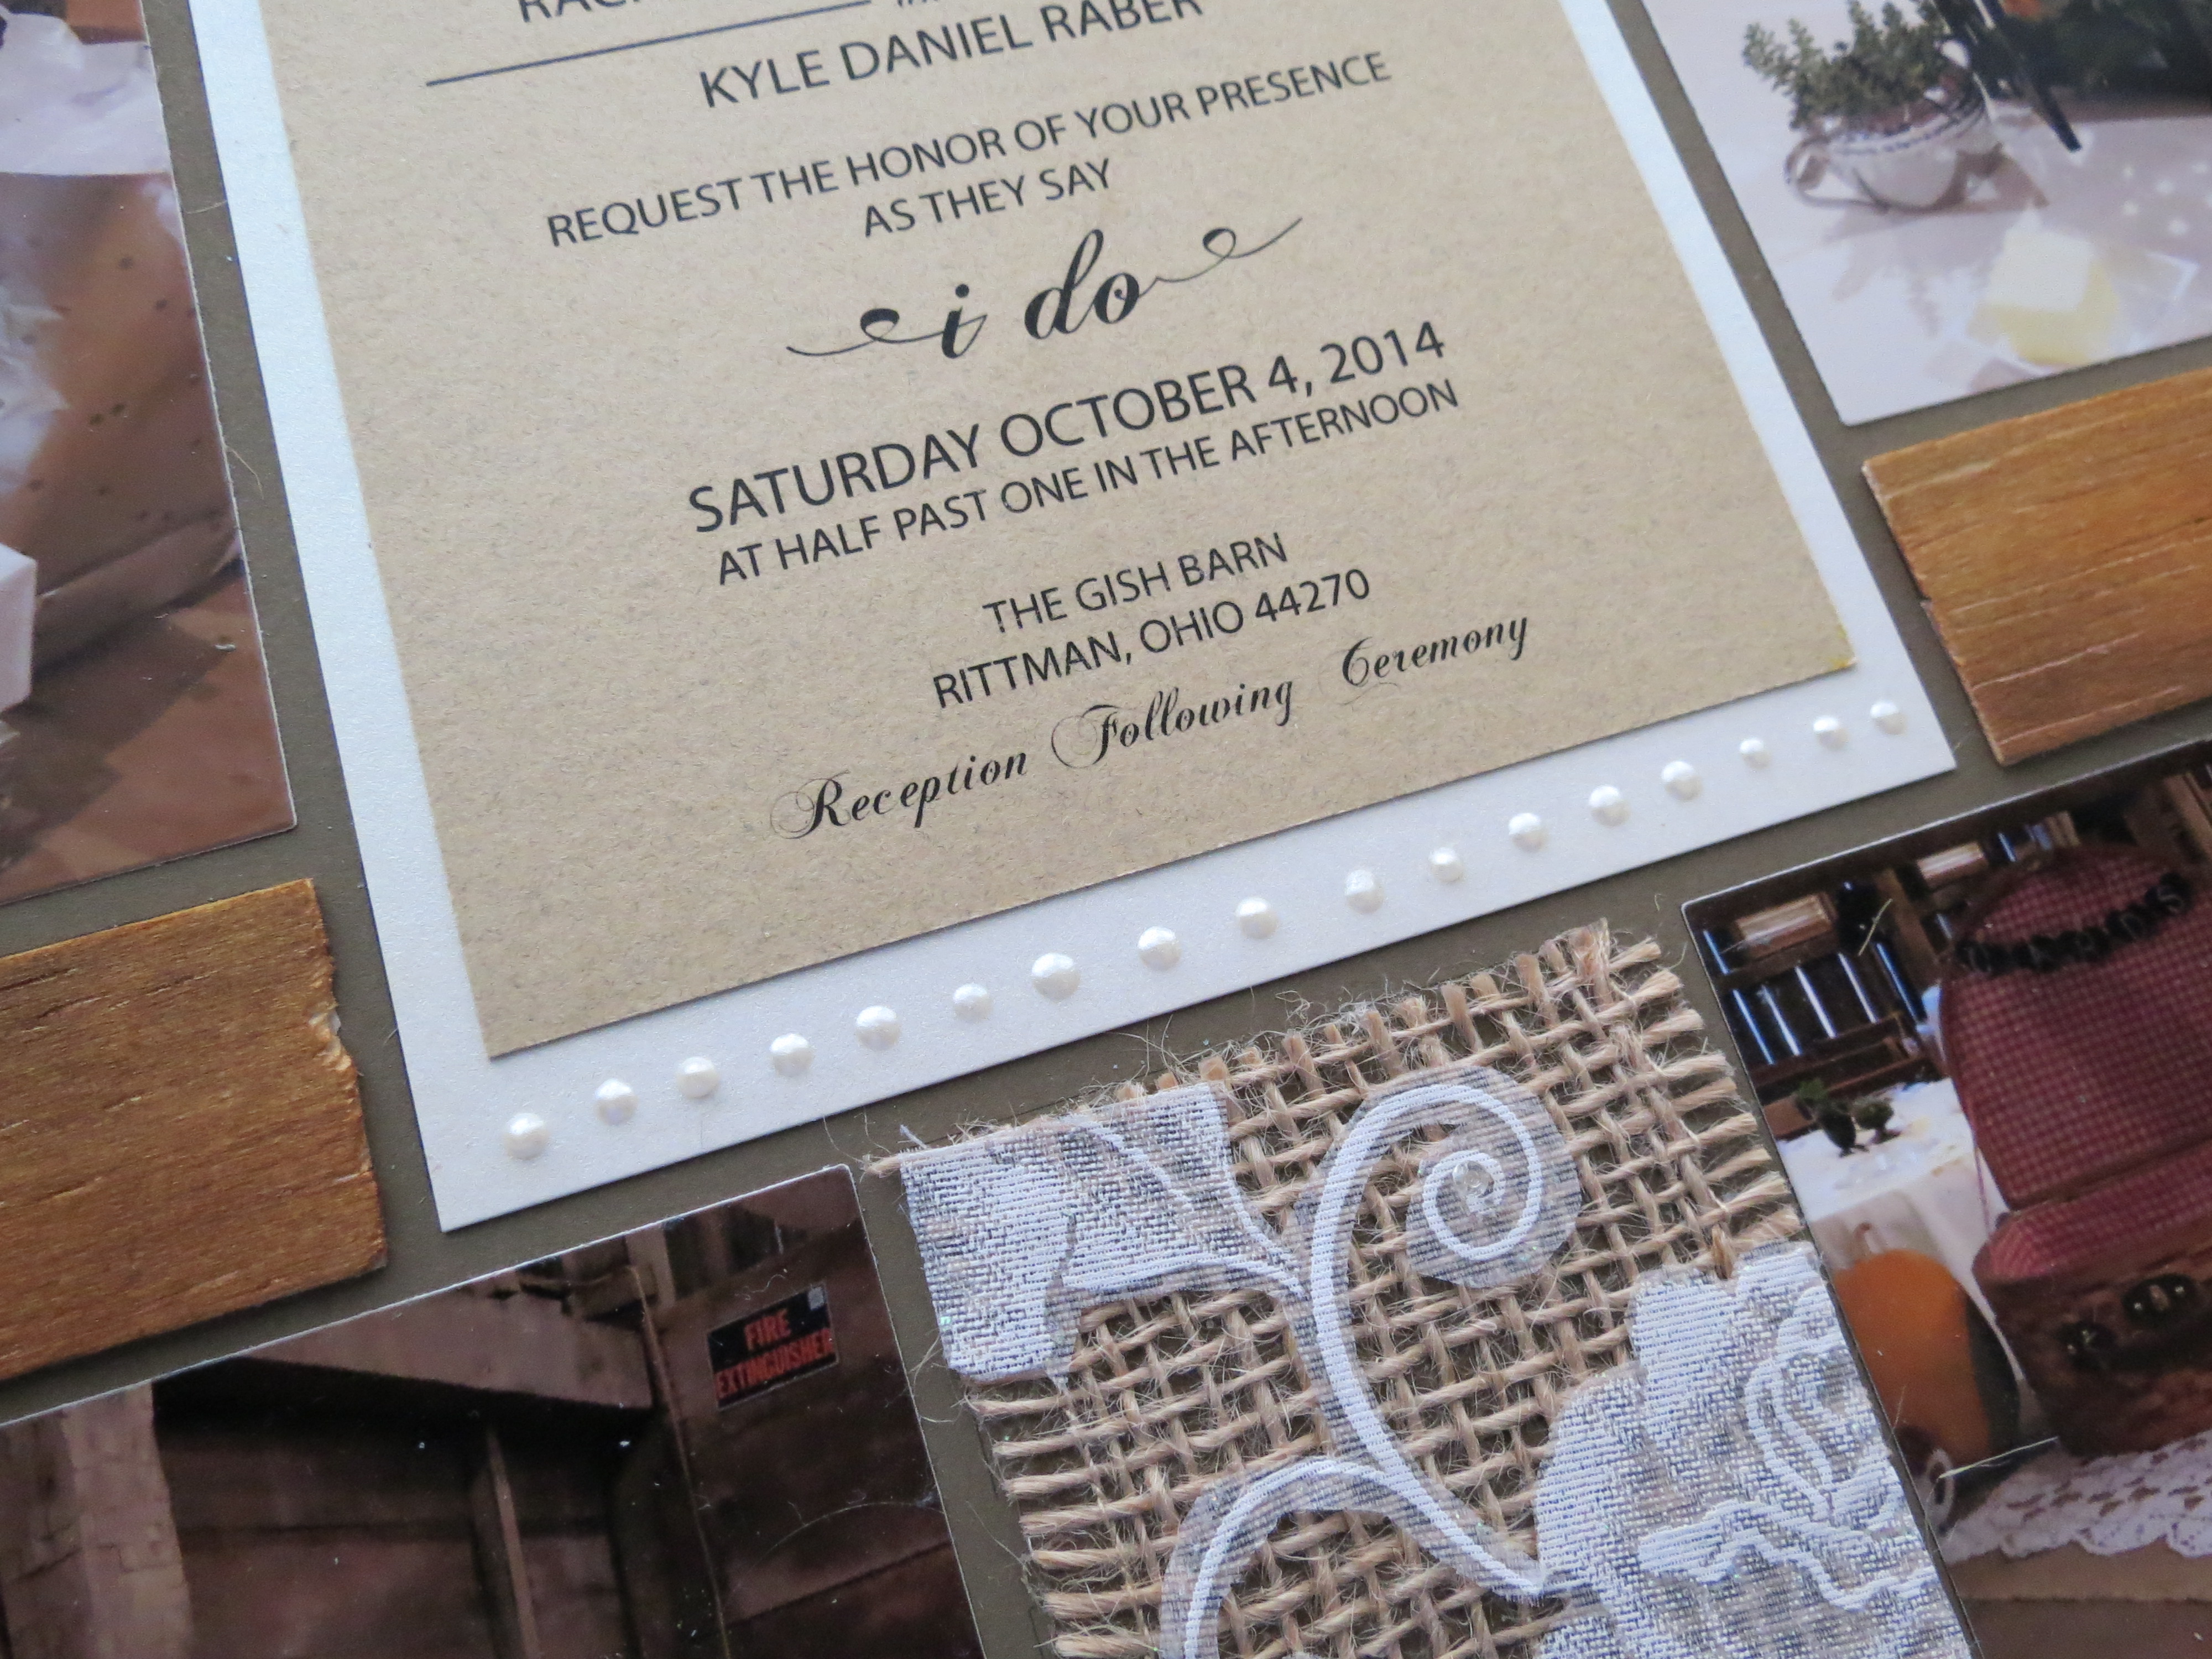
Wedding Scrapbook Tips. Beads of Viva Pearl Pen in Cream edge the bottom of the invitation block.
- TECHNIQUE: Wood tiles. What would a barn wedding layout be without a touch of wood included in the finished piece? I have used the Balsa wood once again, (They Call Me Daddy) it is very lightweight and easy to cut with your craft knife or rotary cutter, like I did. Any chips or irregularities will only add to that rustic feel. This time I used wood tones for a realistic look and imitate the many wood beams. (Distress Ink colors: Wild Honey, Rusty Hinge, Vintage Photo and Walnut Stain) I used a foam dauber to apply a little color at a time and rub into the wood till I achieved the tone I was looking for. My mistake here was doing page one’s bits first and two’s at a later time, so the look is slightly different. Remember, if you don’t quite get it the way you want it to look like, you can flip to the other side and start again. Secure with a heavy duty adhesive.
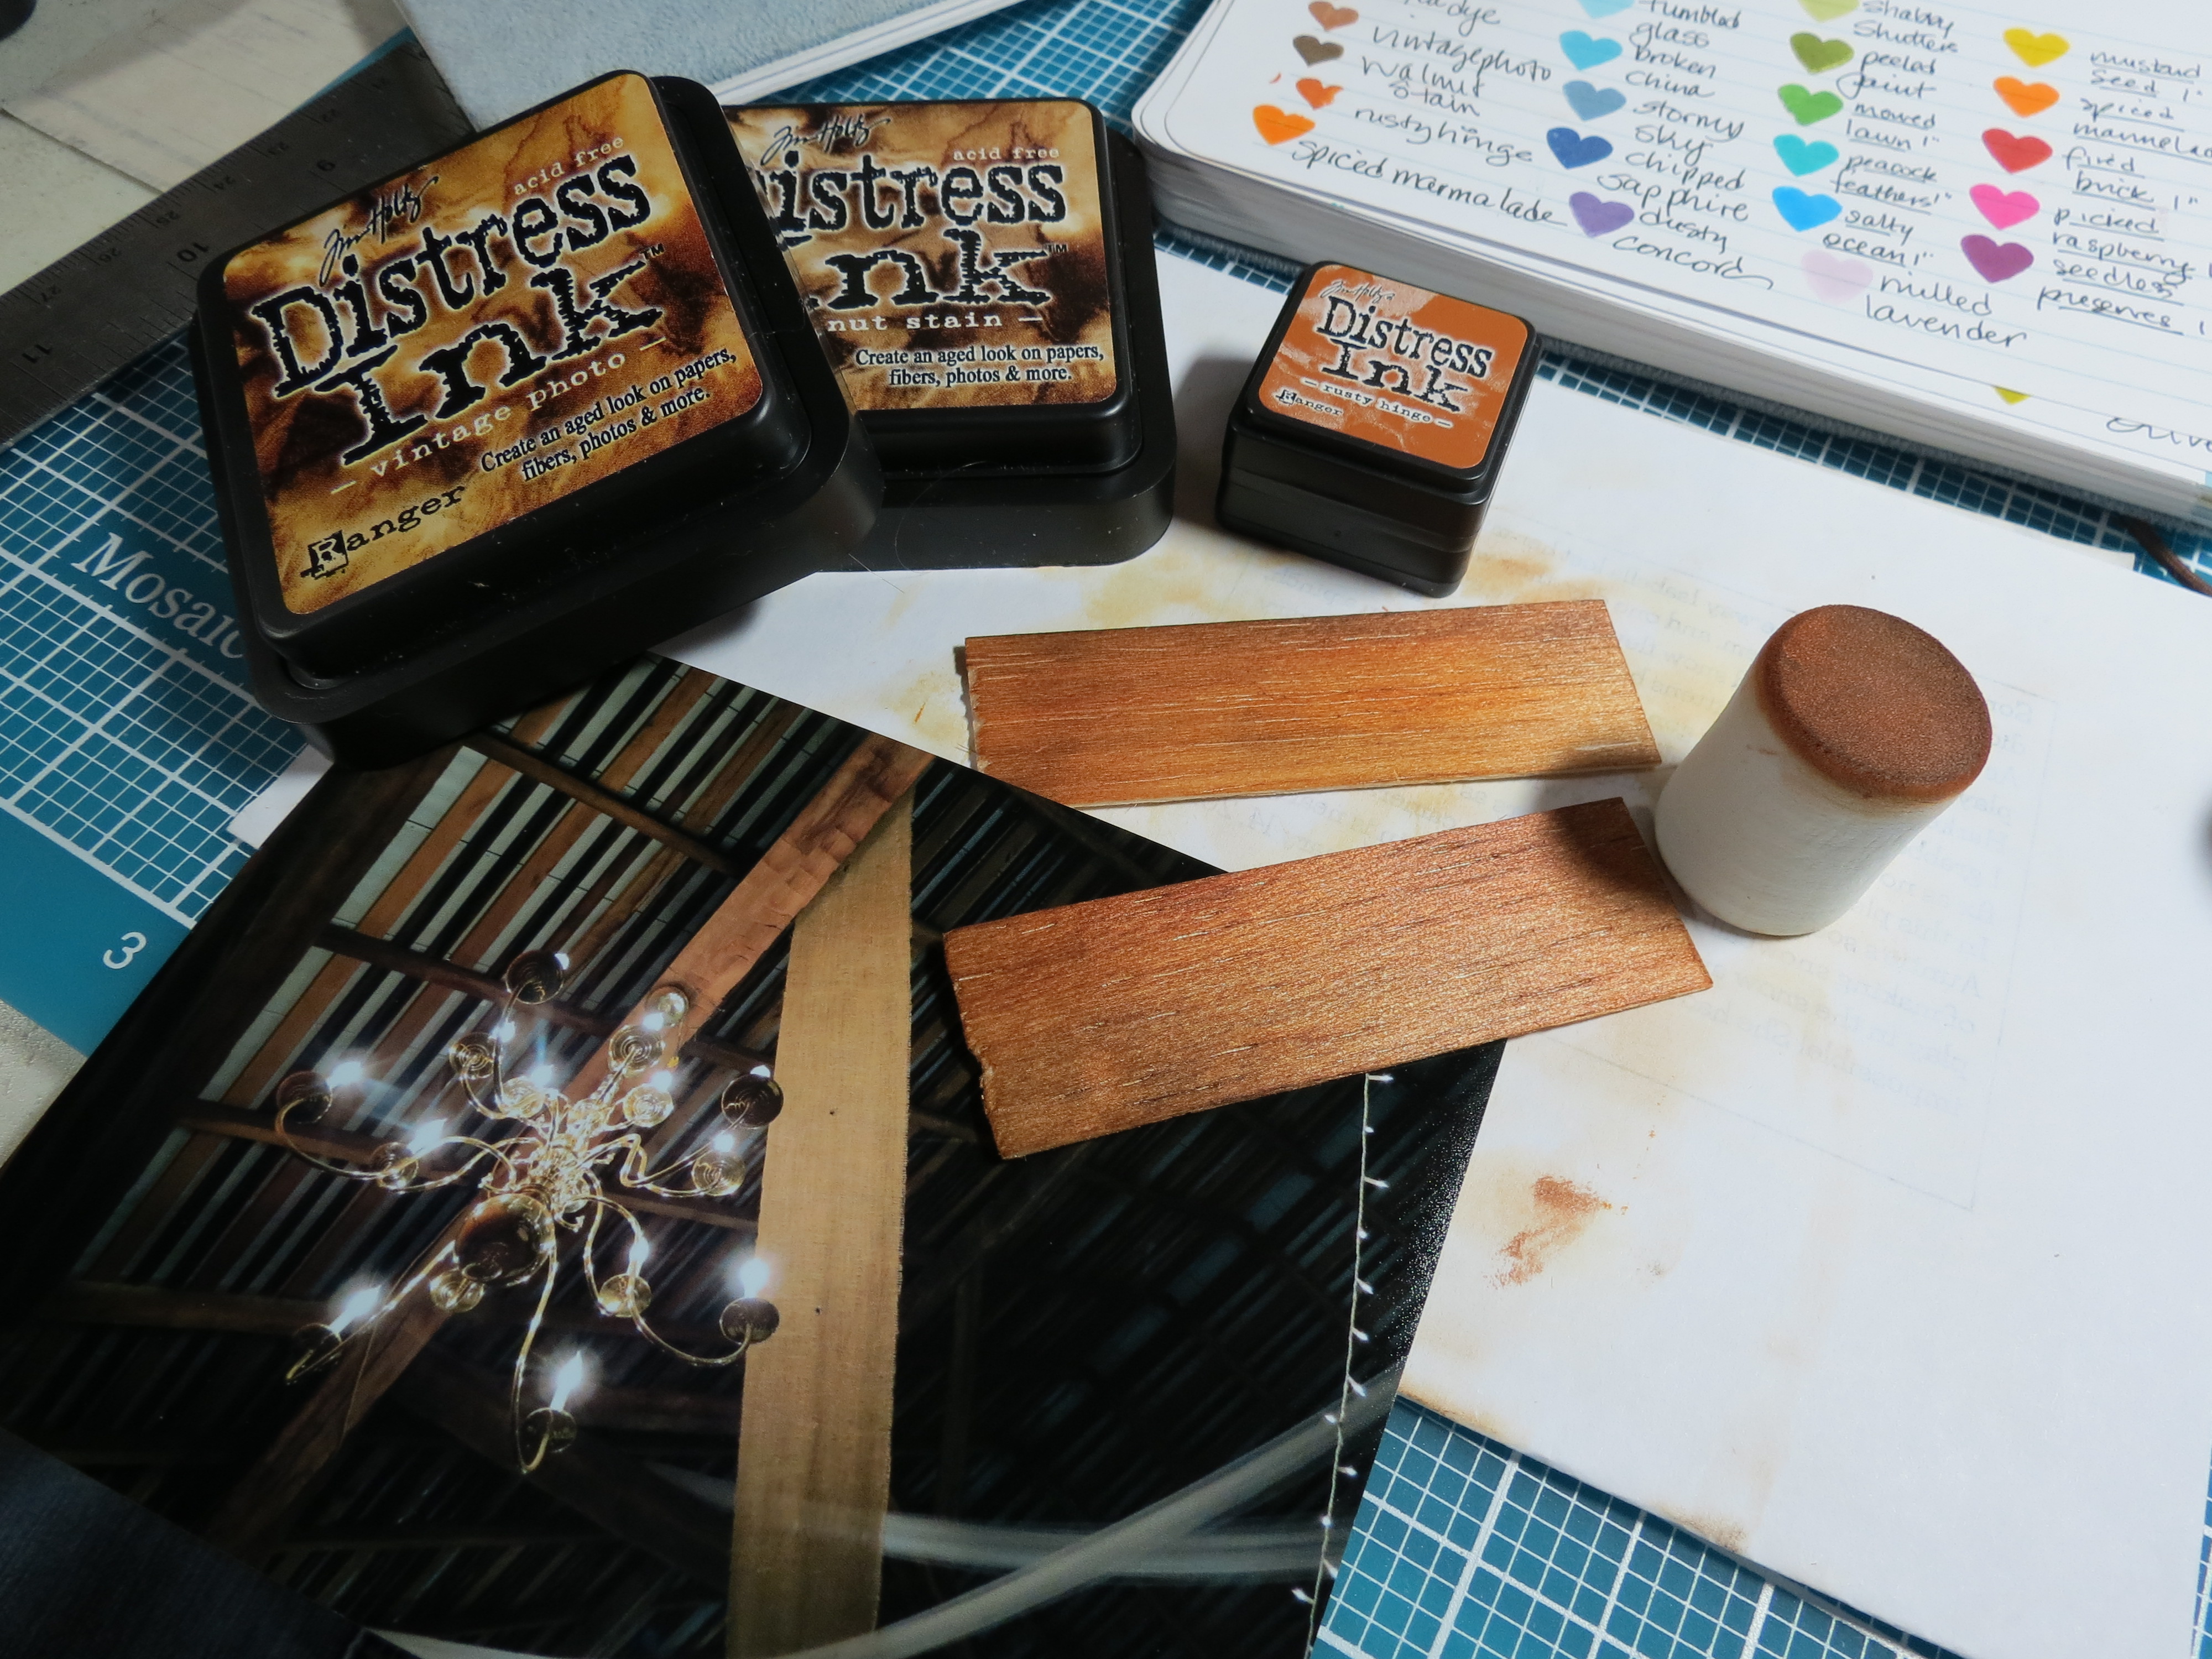
Wedding Scrapbook Tips. Inking the wood tiles, trying for a match to the beams and rafters of the barn.
Wedding Scrapbook Tips. Wood tiles to represent the wood beams of the restored Gish Barn.
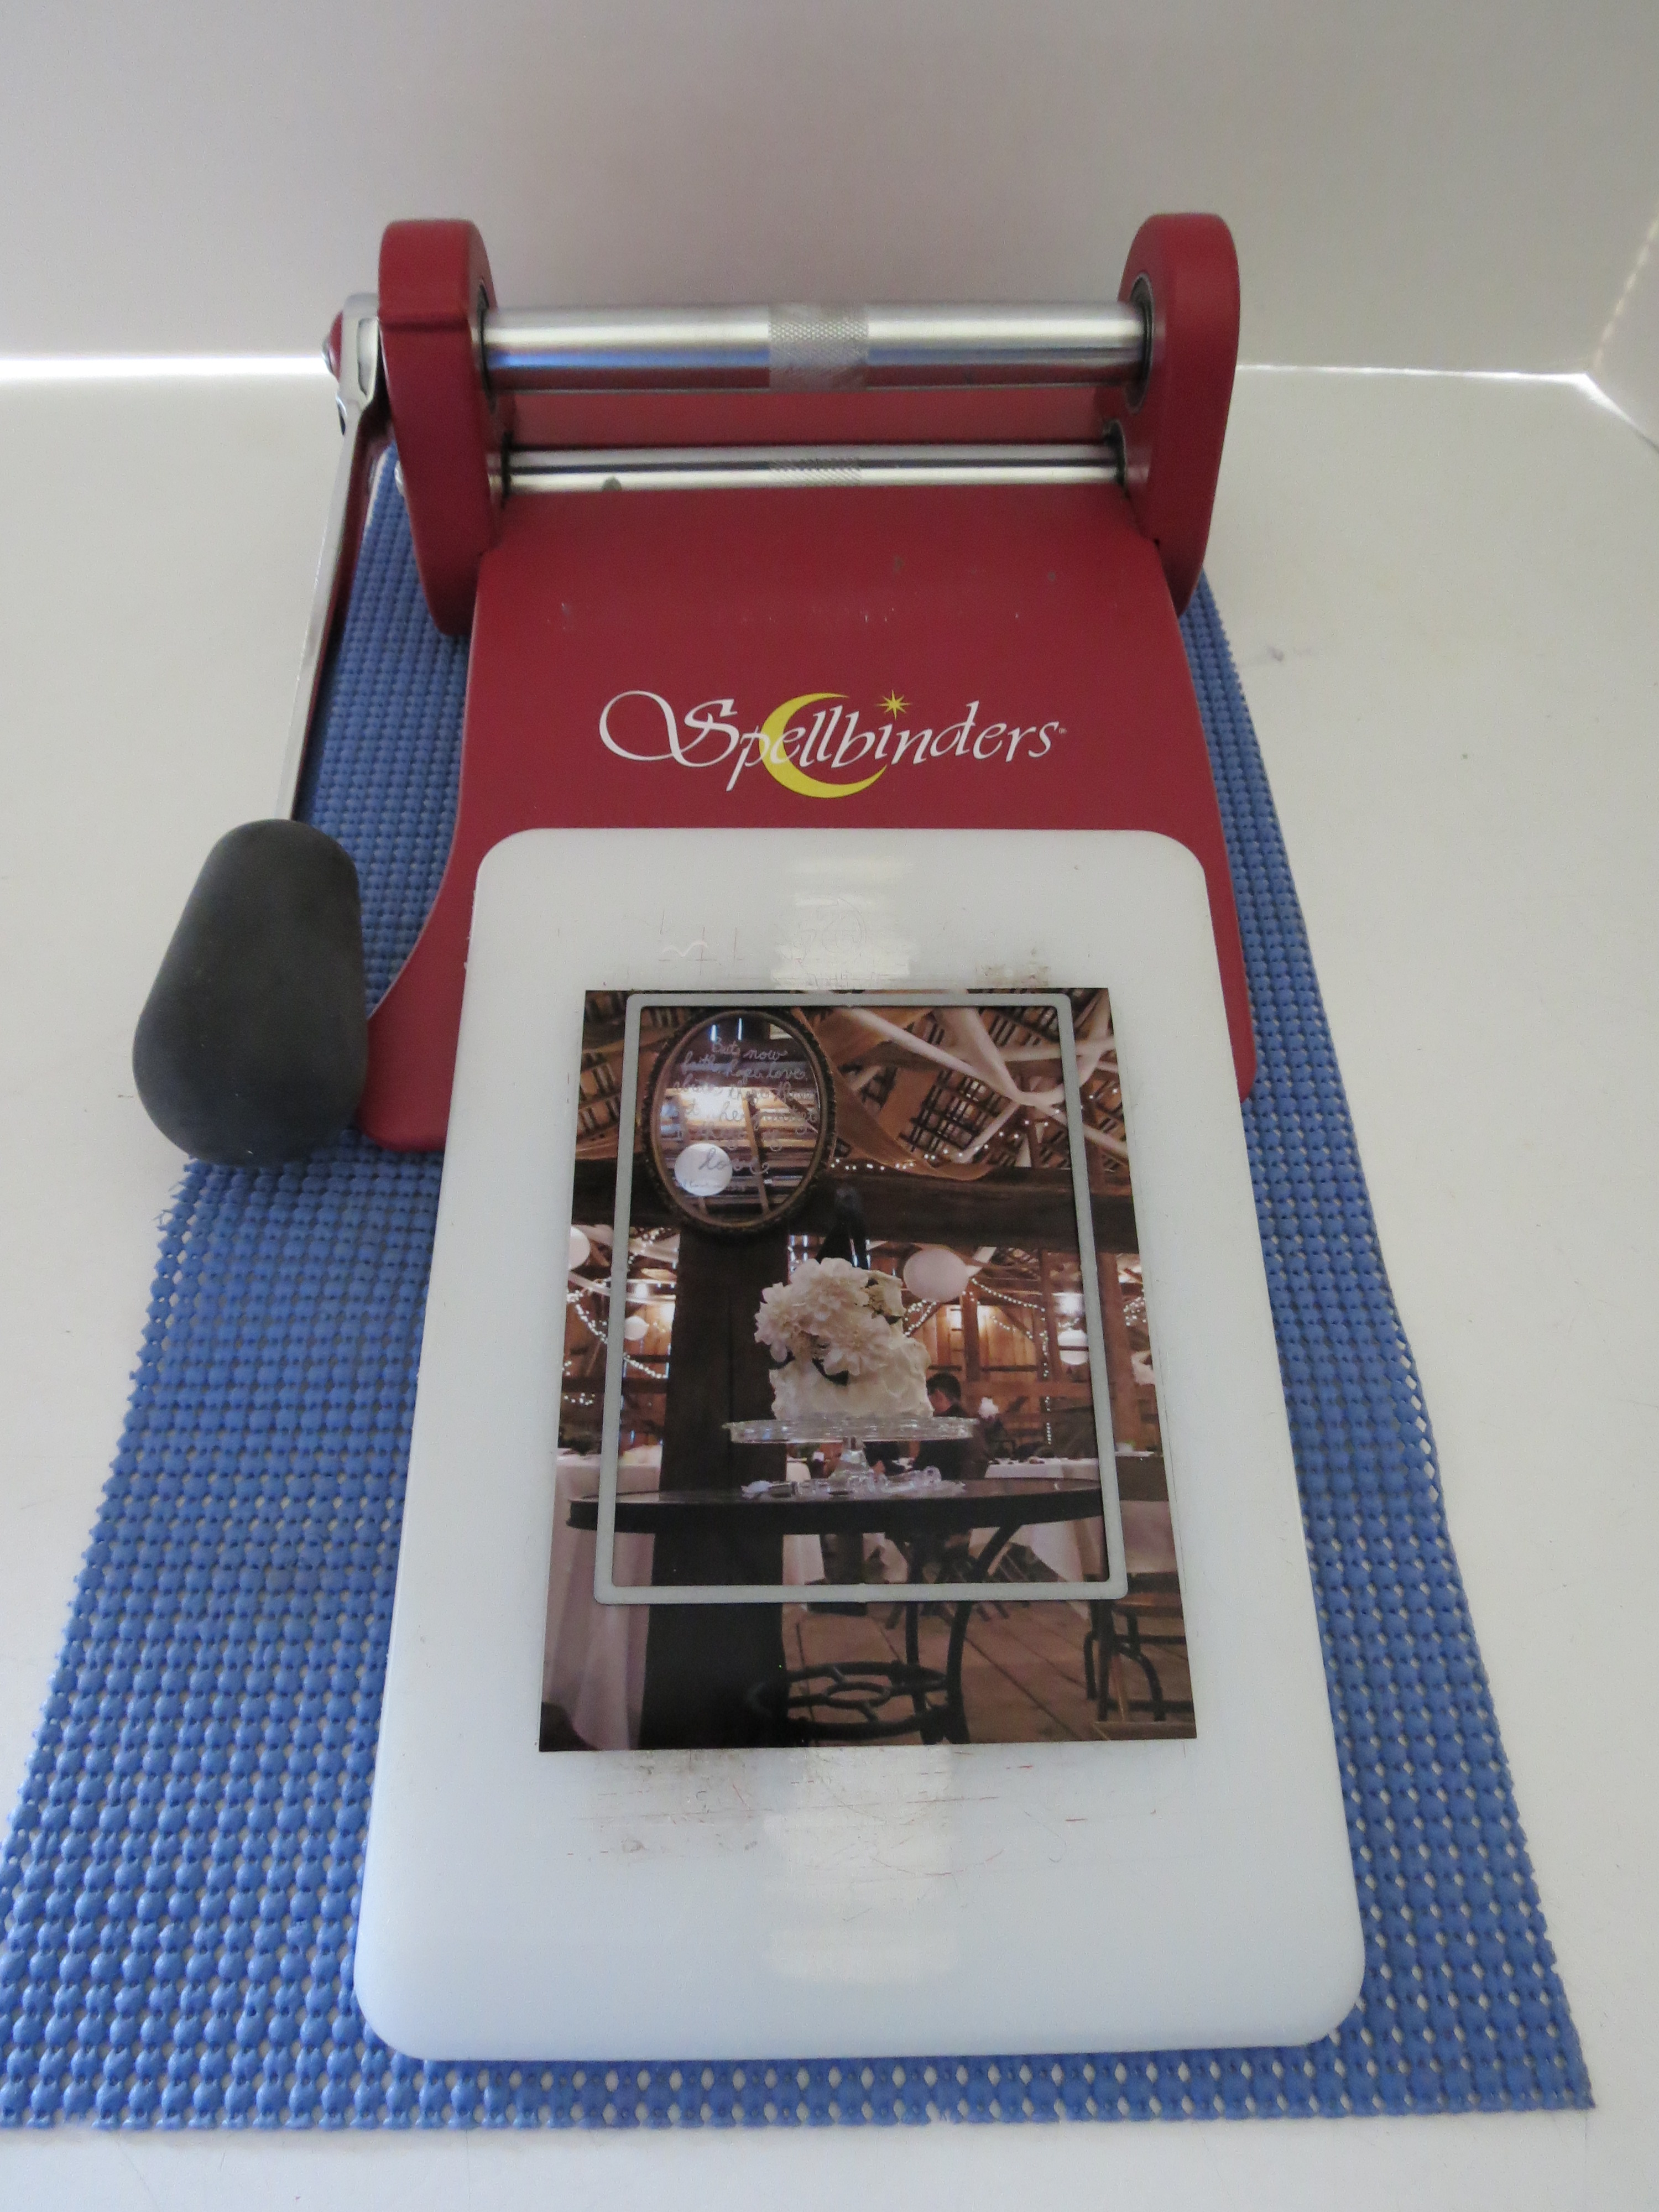
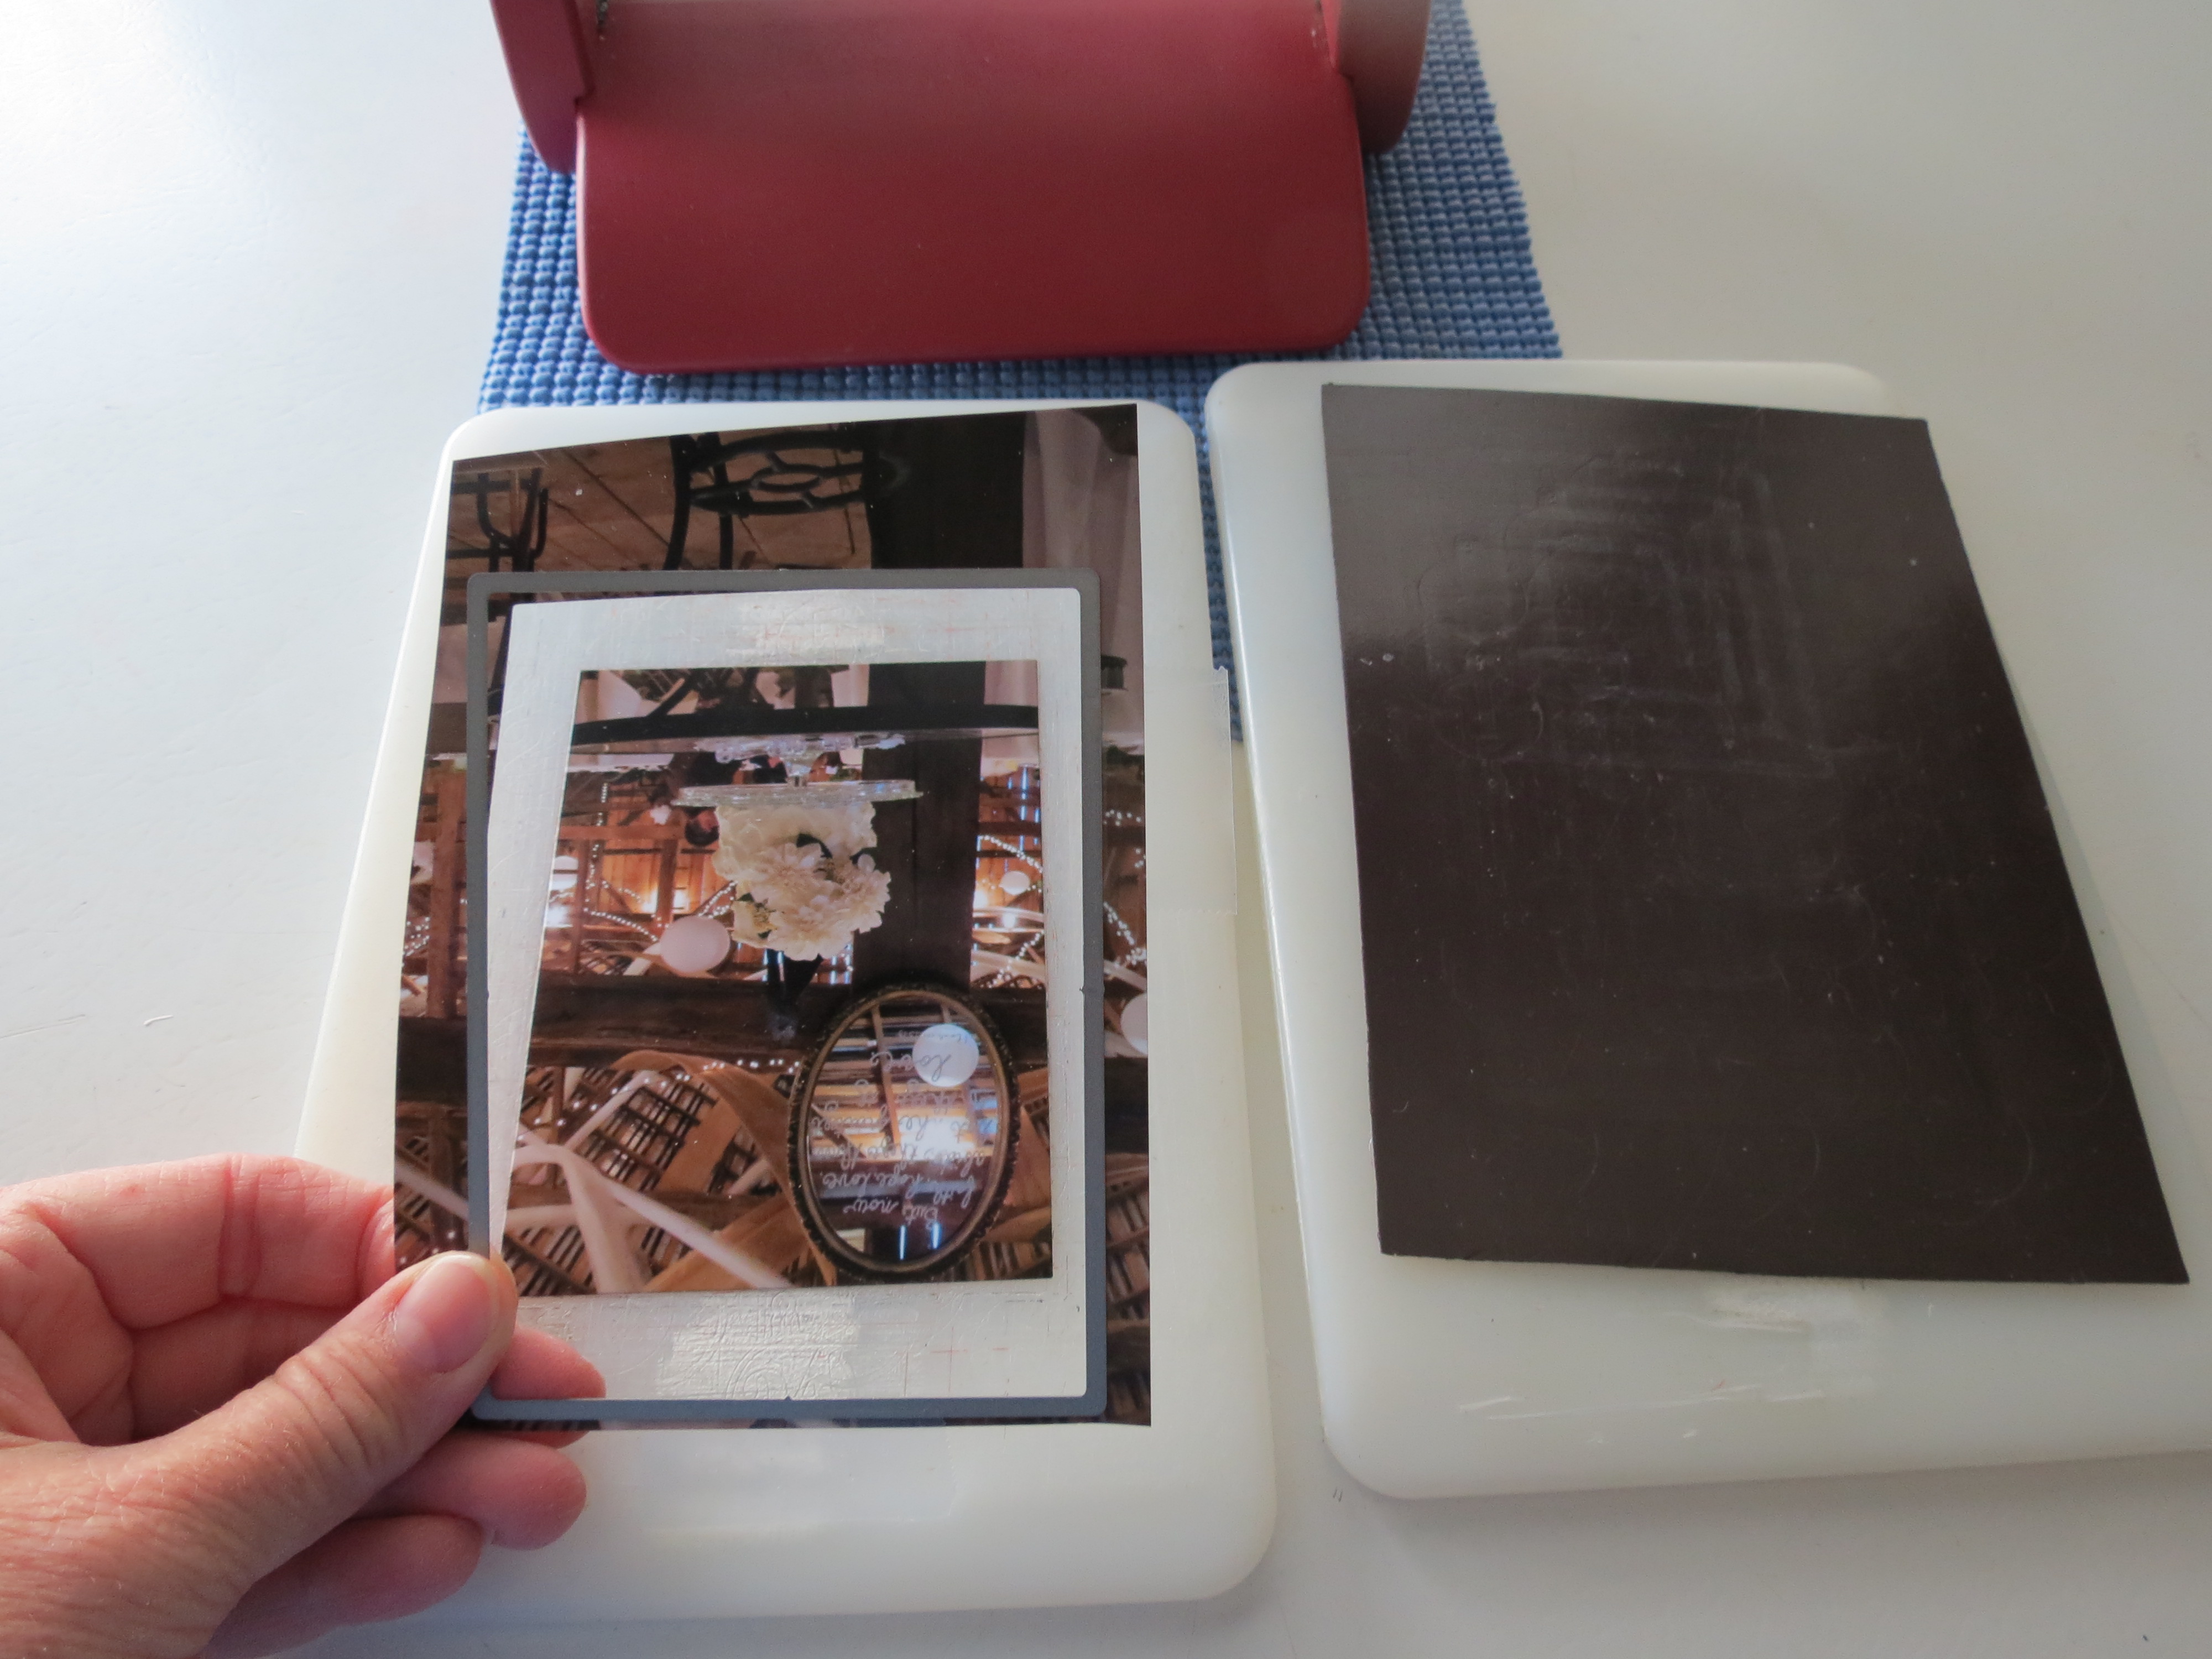
I have used pattern #118 with a few variations to suit the photos and my planned design. I also used our New Dies to make cutting the photos a snap! I used sets C (pink), B (purple) and A (blue). This was the first time I tried a layout using the dies for all the photos and the mat for another. I have to say how quick and easy they were to use! Being able to center the die over the photo and place it exactly where you want it and then run it through the die cutting machine to have all your photos (on this page there were 10) cut in no time flat was a huge time saver!! To see a few of the steps I took to do this see below!
I am using a Spellbinder’s Wizard to cut my photos using the new die sets A, B and C. It’s a bit older machine but still performing well.
Using the dies made cutting the photos to size extremely quick. That allowed me to spend more time fussing about with the embellishments!! Let me show you just how easy it was.
Mosaic Moments Dies. Using my Spellbinders Die Cutter to frame photo and cut.
I took a photo and placed a strip of double stick tape on the back to be sure it will stay in place on my base plate. Using the selected size die I centered it over the portion of the photo I wanted to use then used a bit of regular tape on the die catching the outside of the photo (what will be scrap) and the base. This secures things until I get it cut out.
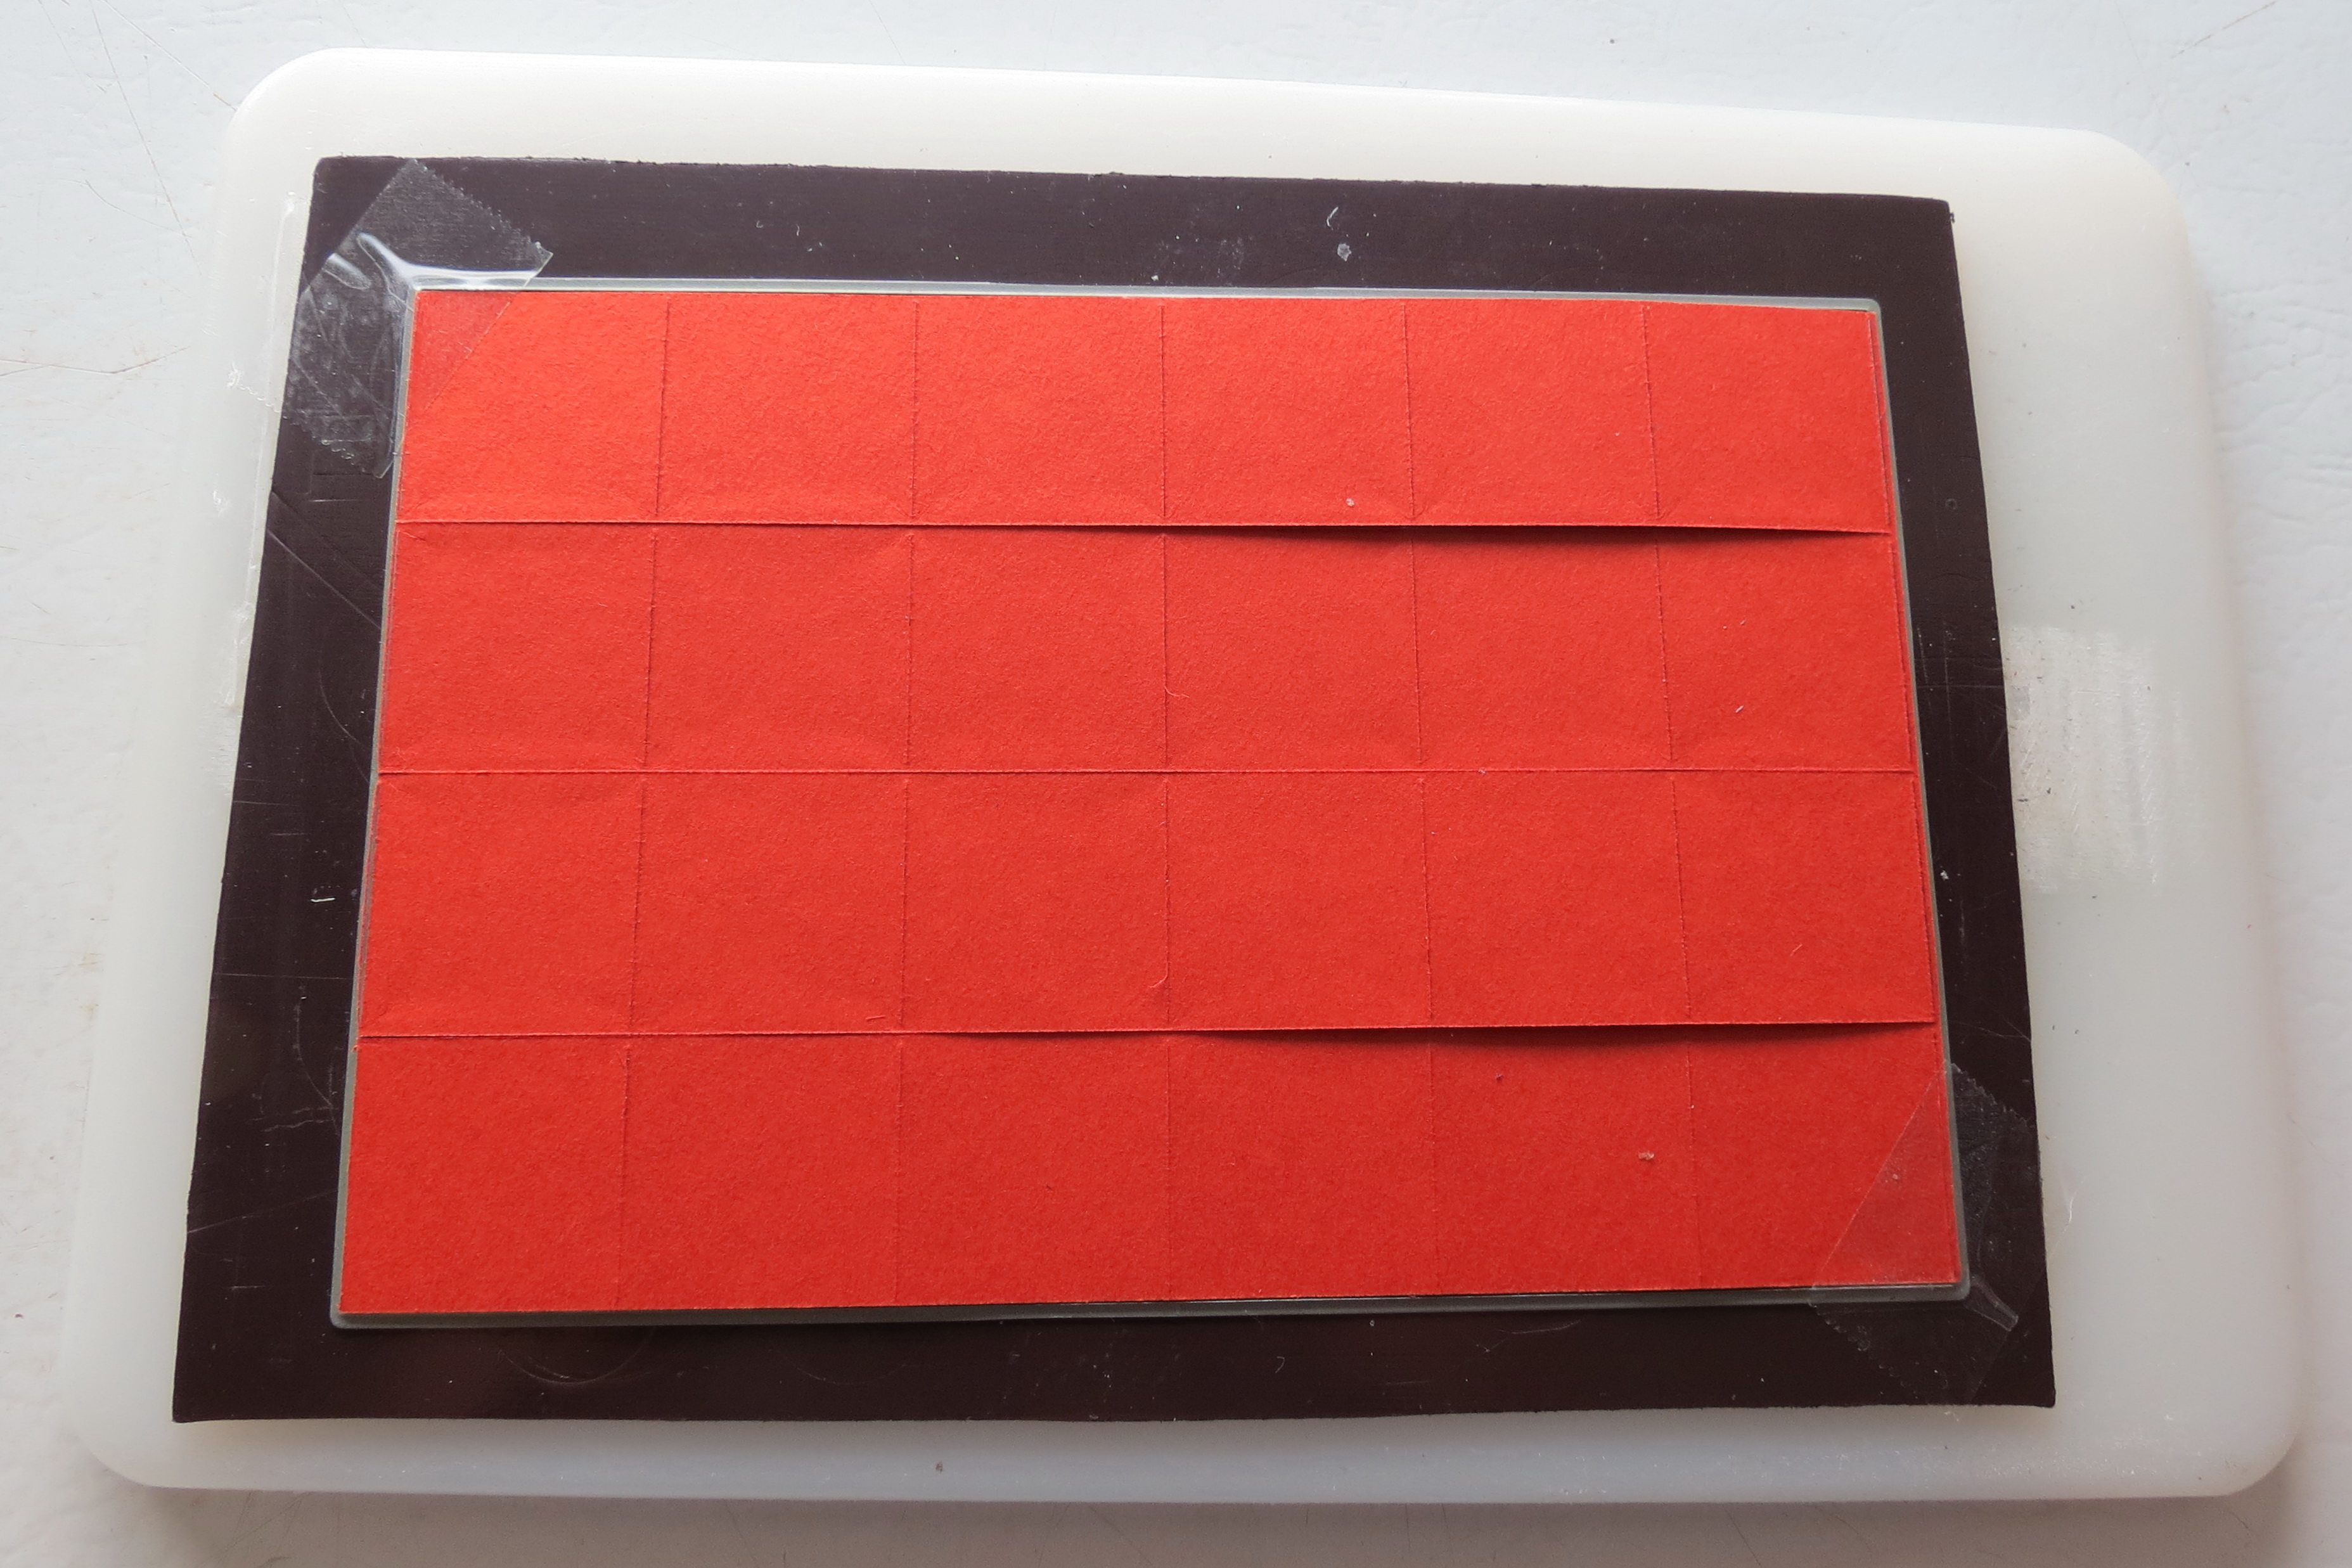
I have a magnetic spacer plate that holds the die in place while you run it through the machine. Top it with the other white plate. It did not require any shimming like some of my other dies have. It was also only run through once. I used three other sizes and they all went through as easy and successful as this one. Some may find they need to run it though a second time for an even cut, particularly on the 4 x 6 die, or add a shim. (I should have run the 4 x 6 a second time as I had a few spots that needed a little extra help to come apart. This may depend on the shape your base plates may be in, the photo paper or cardstock you are using or a variety of other conditions. Adjust what you do to the conditions you have.) You’ll know how to best adjust your machine with a bit of trial and error.
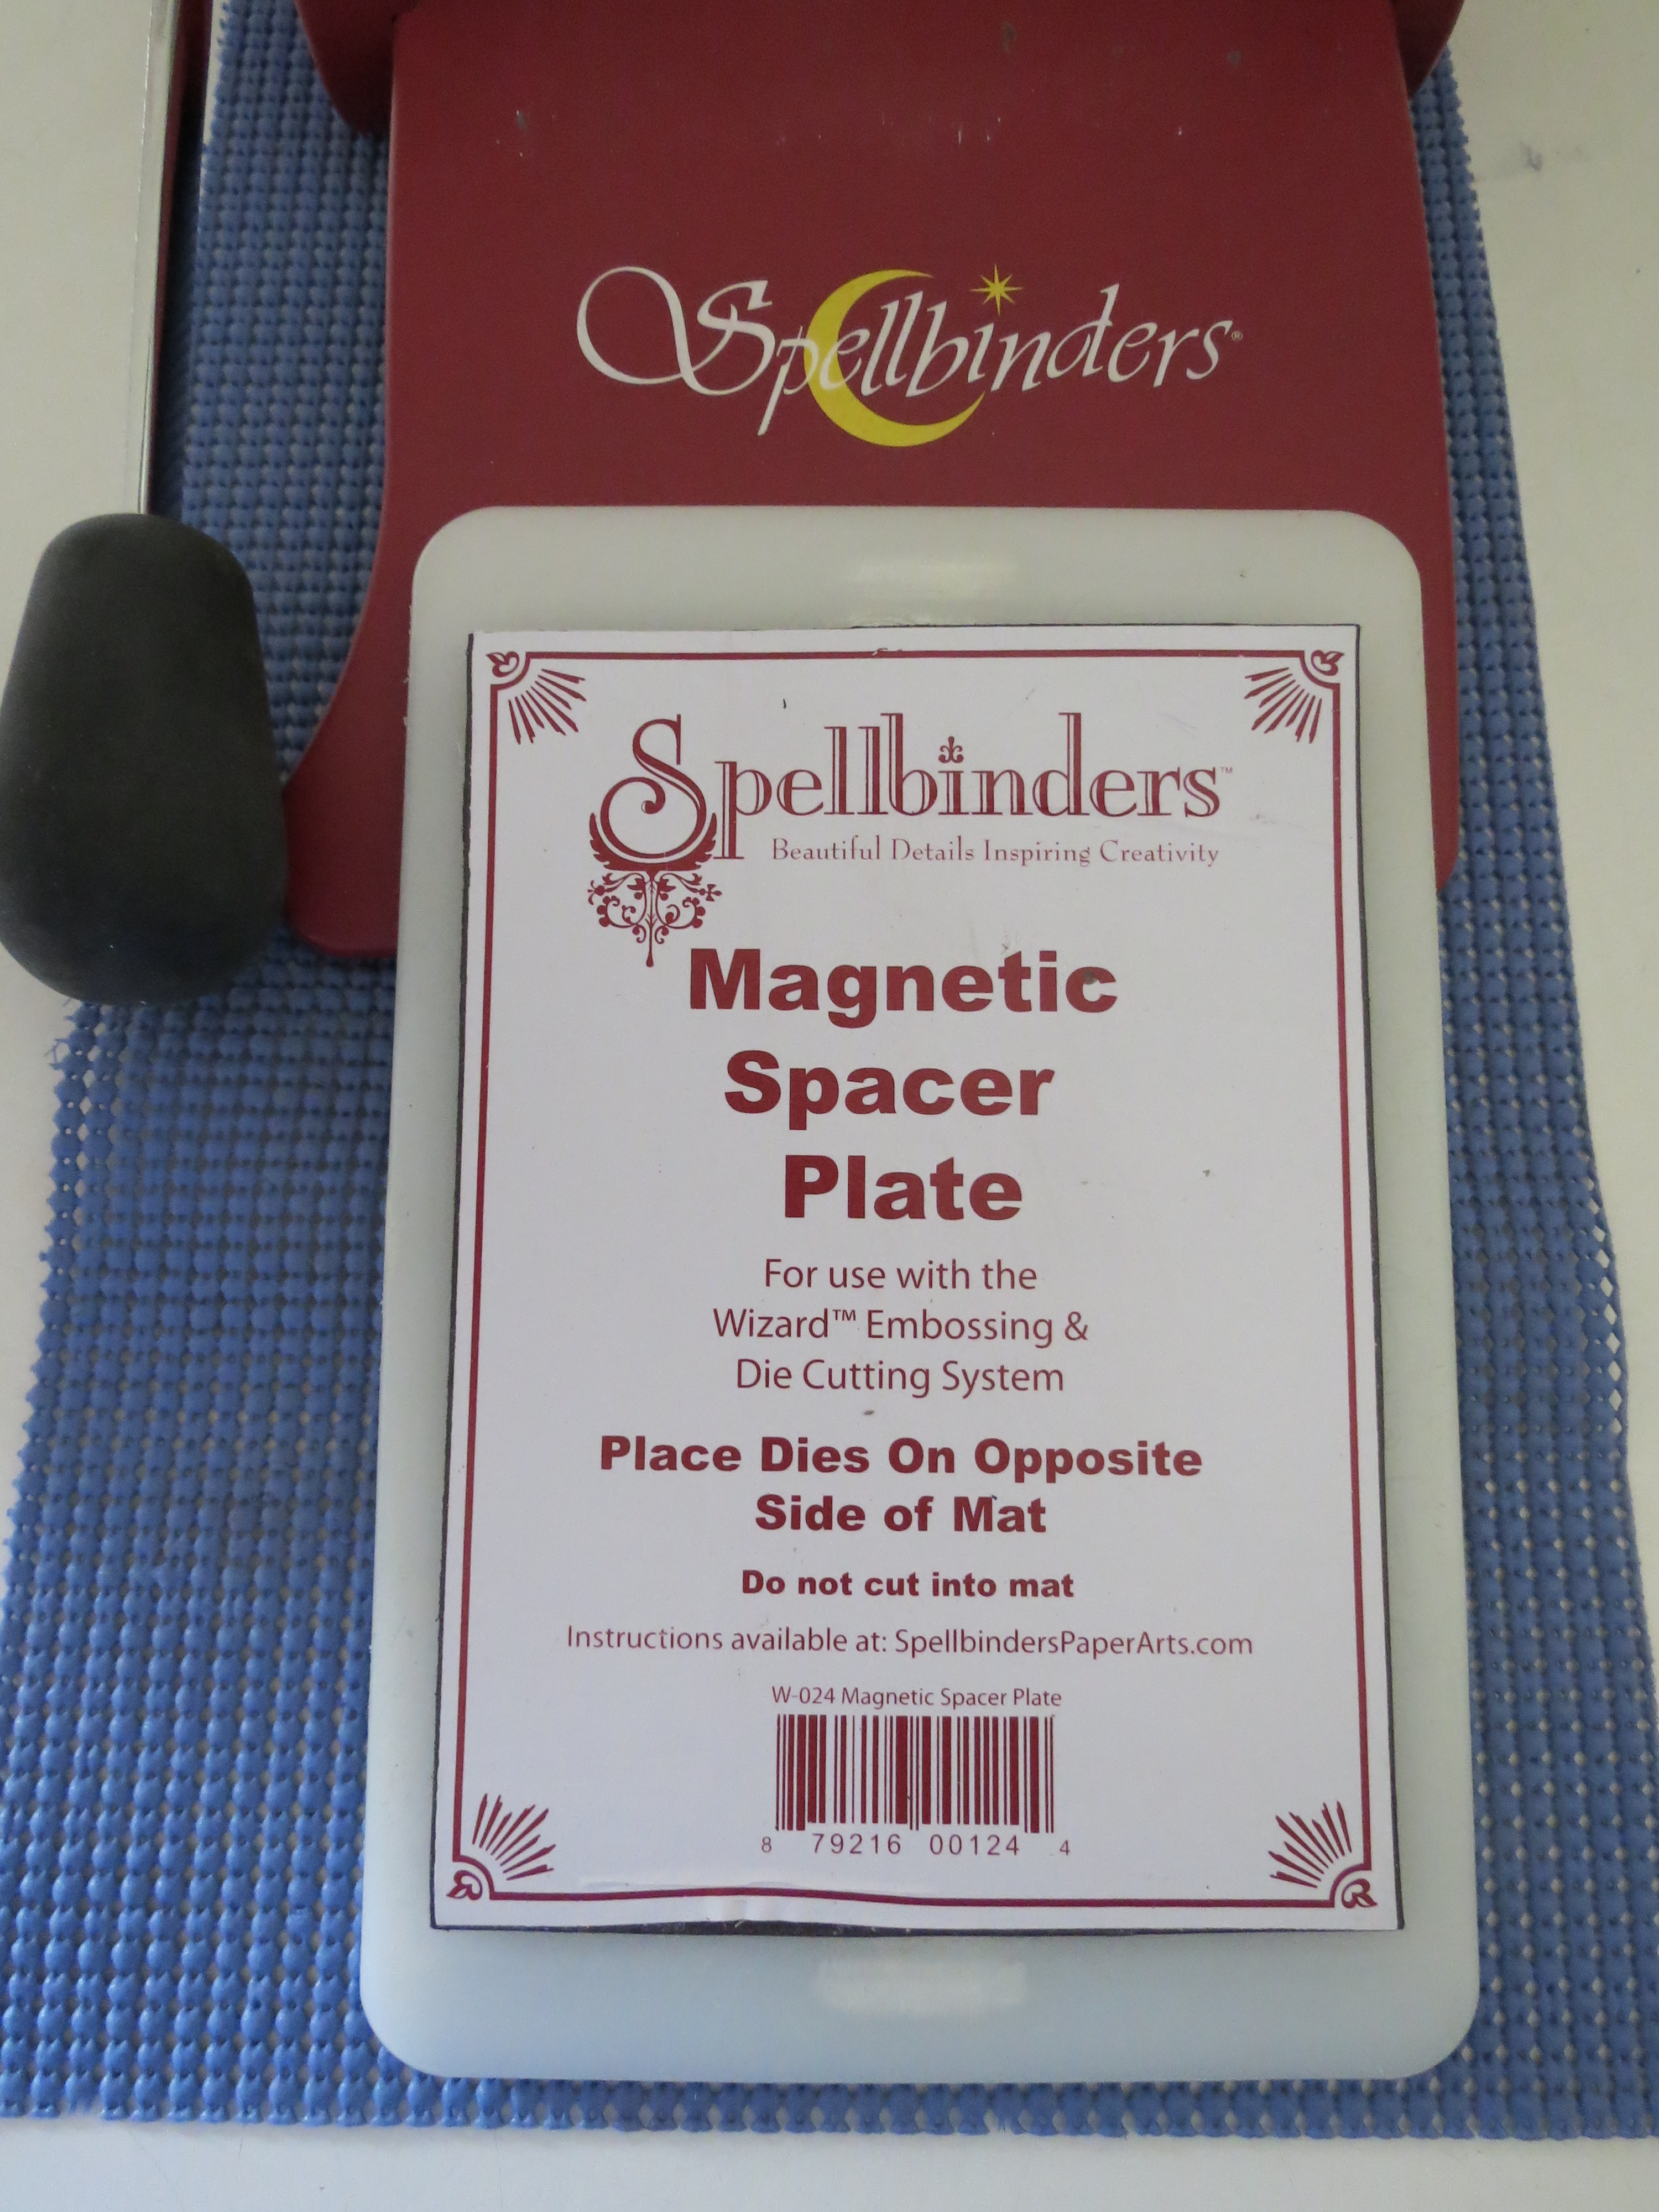
Mosaic Moments Dies. Cover photo and die with magnetic spacer plate to hold in place.
Mosaic Moments Dies. Top it all off with the second white plate, and run through the machine.
Mosaic Moments Dies. Remove the white plate, magnetic spacer and remove the die with the extra photo pieces. Remove tape from the backside of the photo and it’s ready for your layout.
Then remove the die, the tape and there you have it, the first of your photos ready to be secured to your page!
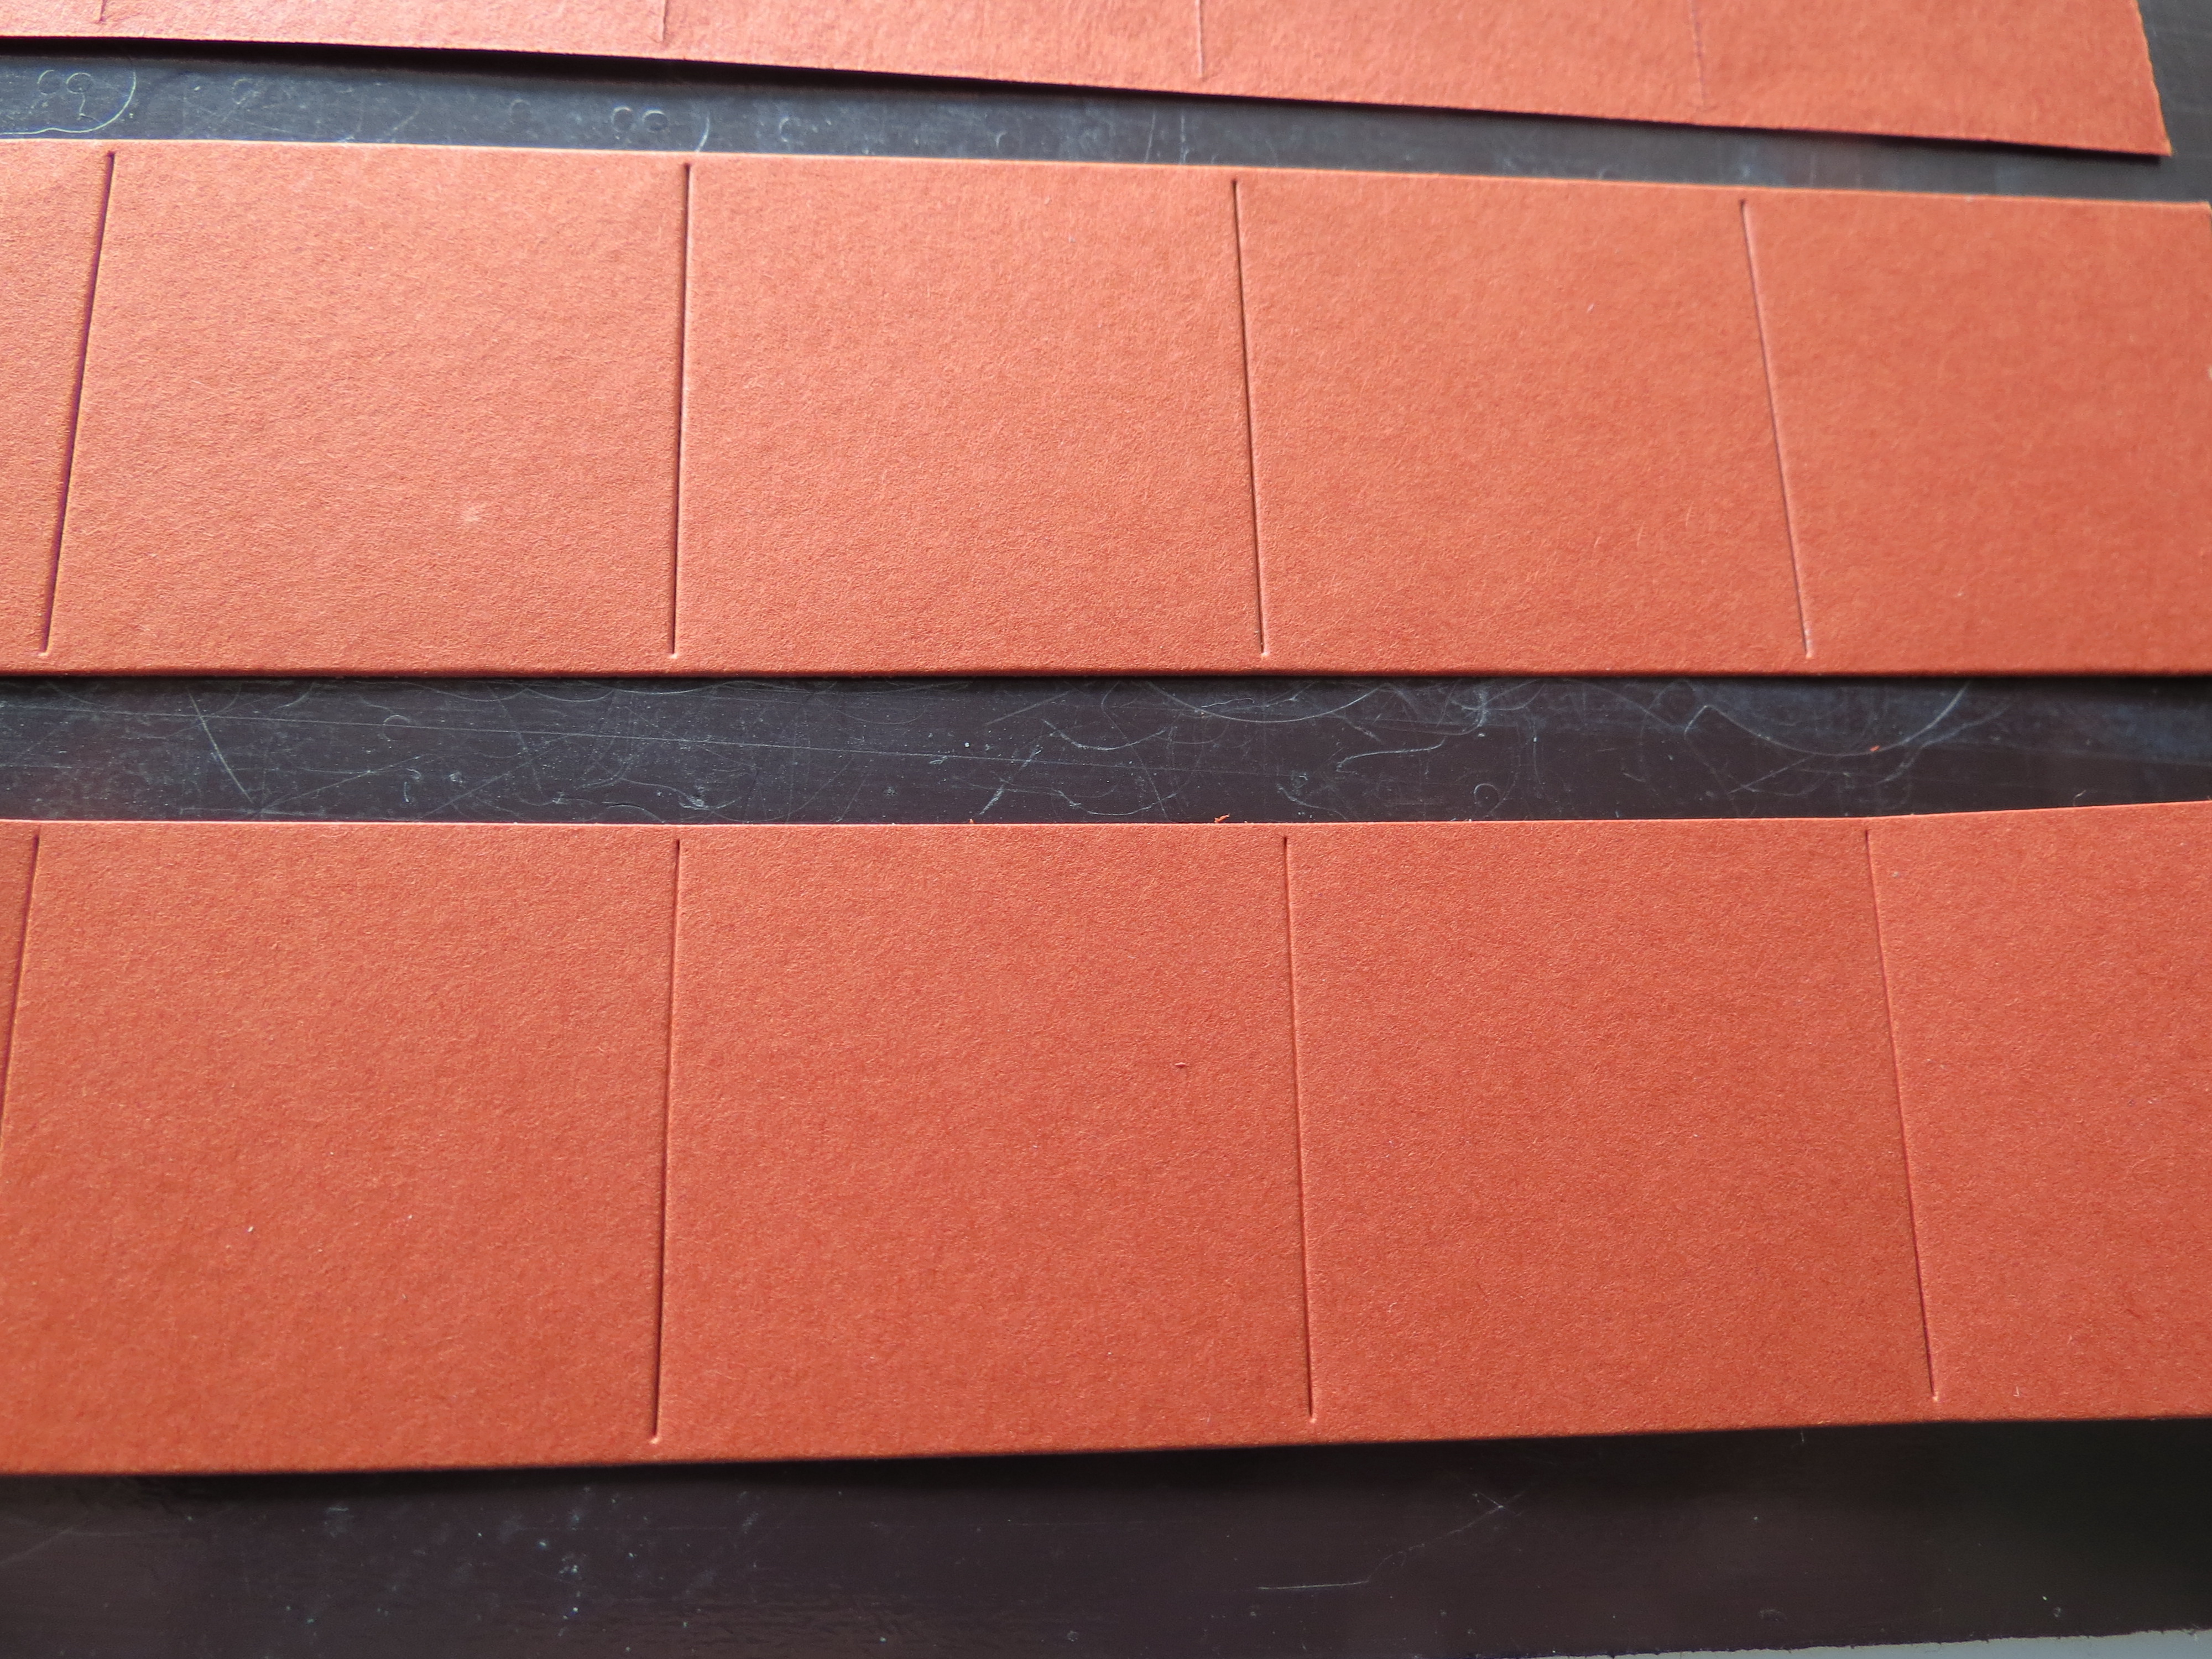
The 4 x 6 die works a little different, cutting your photo into four strips with each 1″ tile needing only to snip a small bit to separate them.
Mosaic Moments Dies. 4 x 6 die.

Mosaic Moments Dies. four row strips.
Mosaic Moments Dies. Notice the very small section that needs to be clipped to separate the tiles.
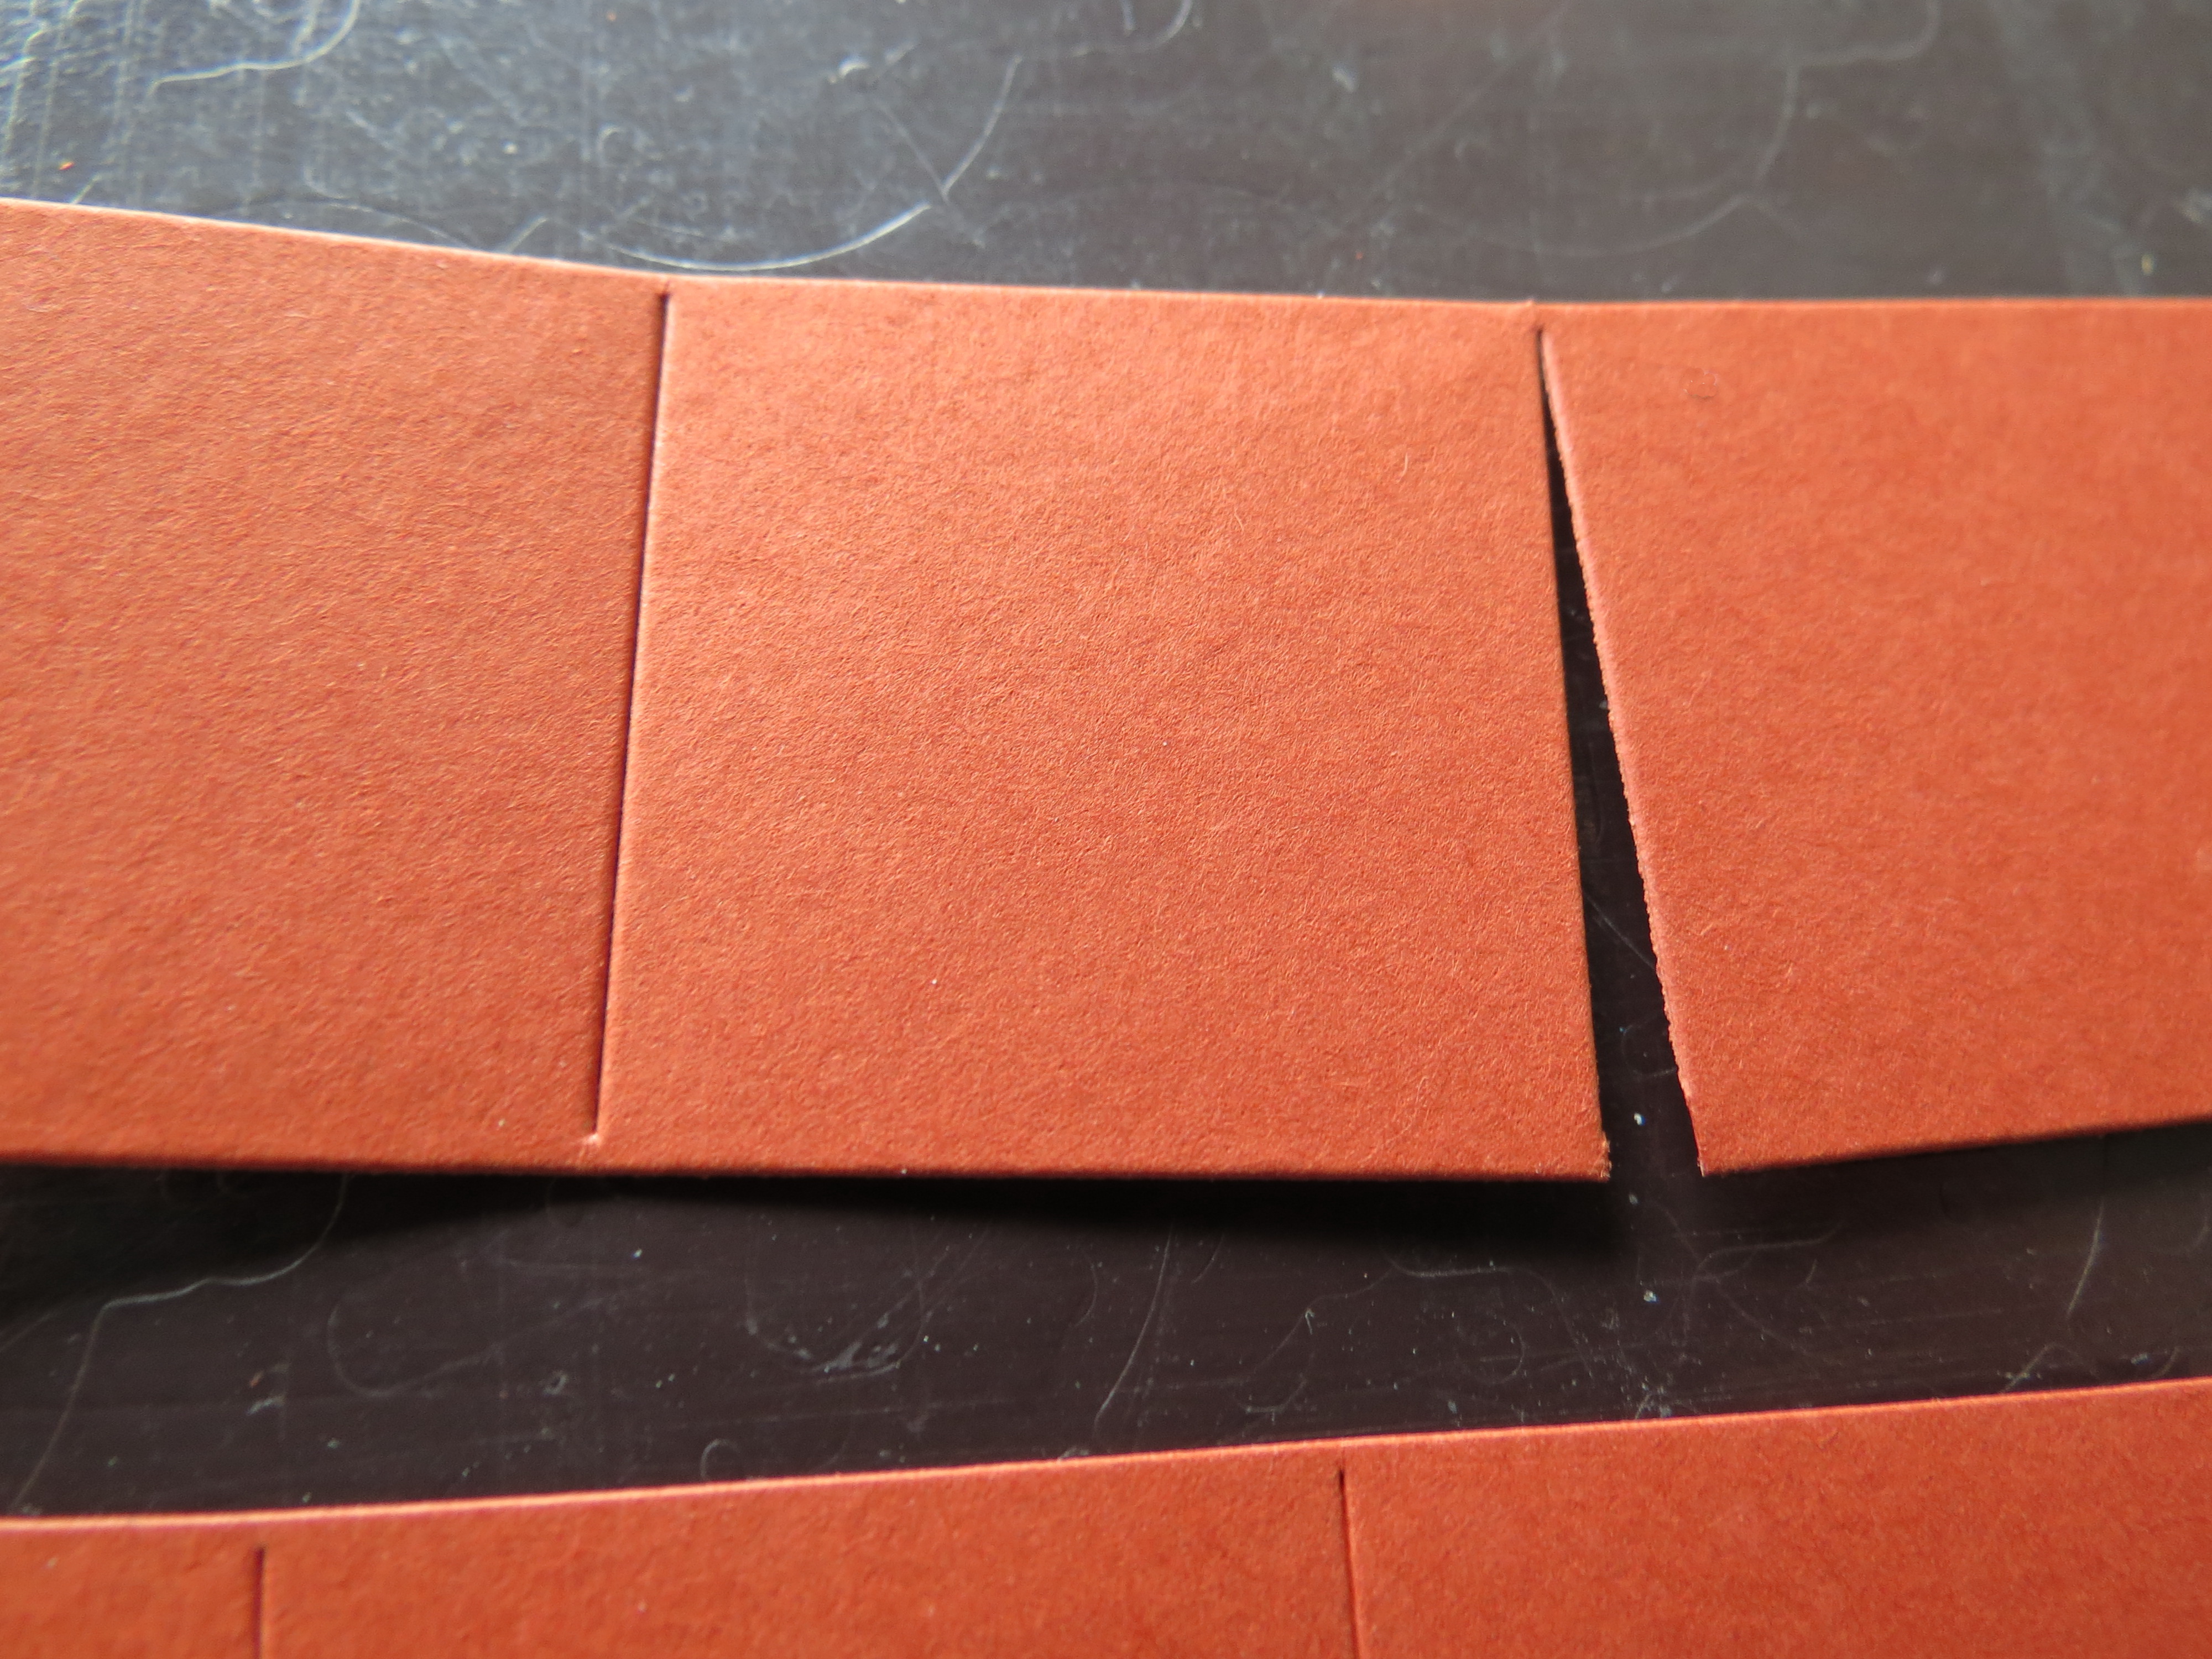
Mosaic Moments Dies. Clipping the sections apart. This keeps all your pieces organized as you place them in order on your grid.
On this die I did have a spot that could have used a second run through the machine, but my X-Acto knife caught the spots without a lot of tugging.
Well, I hope you’ve found the tips to be helpful and I hope that you can see how the New Die System for Mosaic Moments can really help you to stream line your scrapping! Show us what you are creating on Journella or our Mosaic Moments Facebook page.
Andrea Fisher