
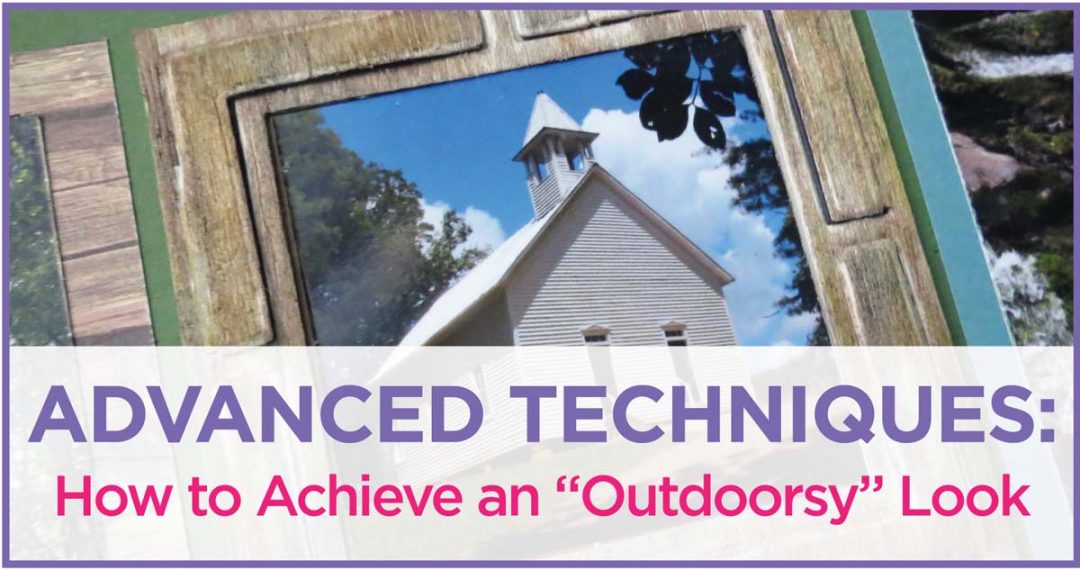
 Advanced Techniques for Achieving an Outdoorsy Look
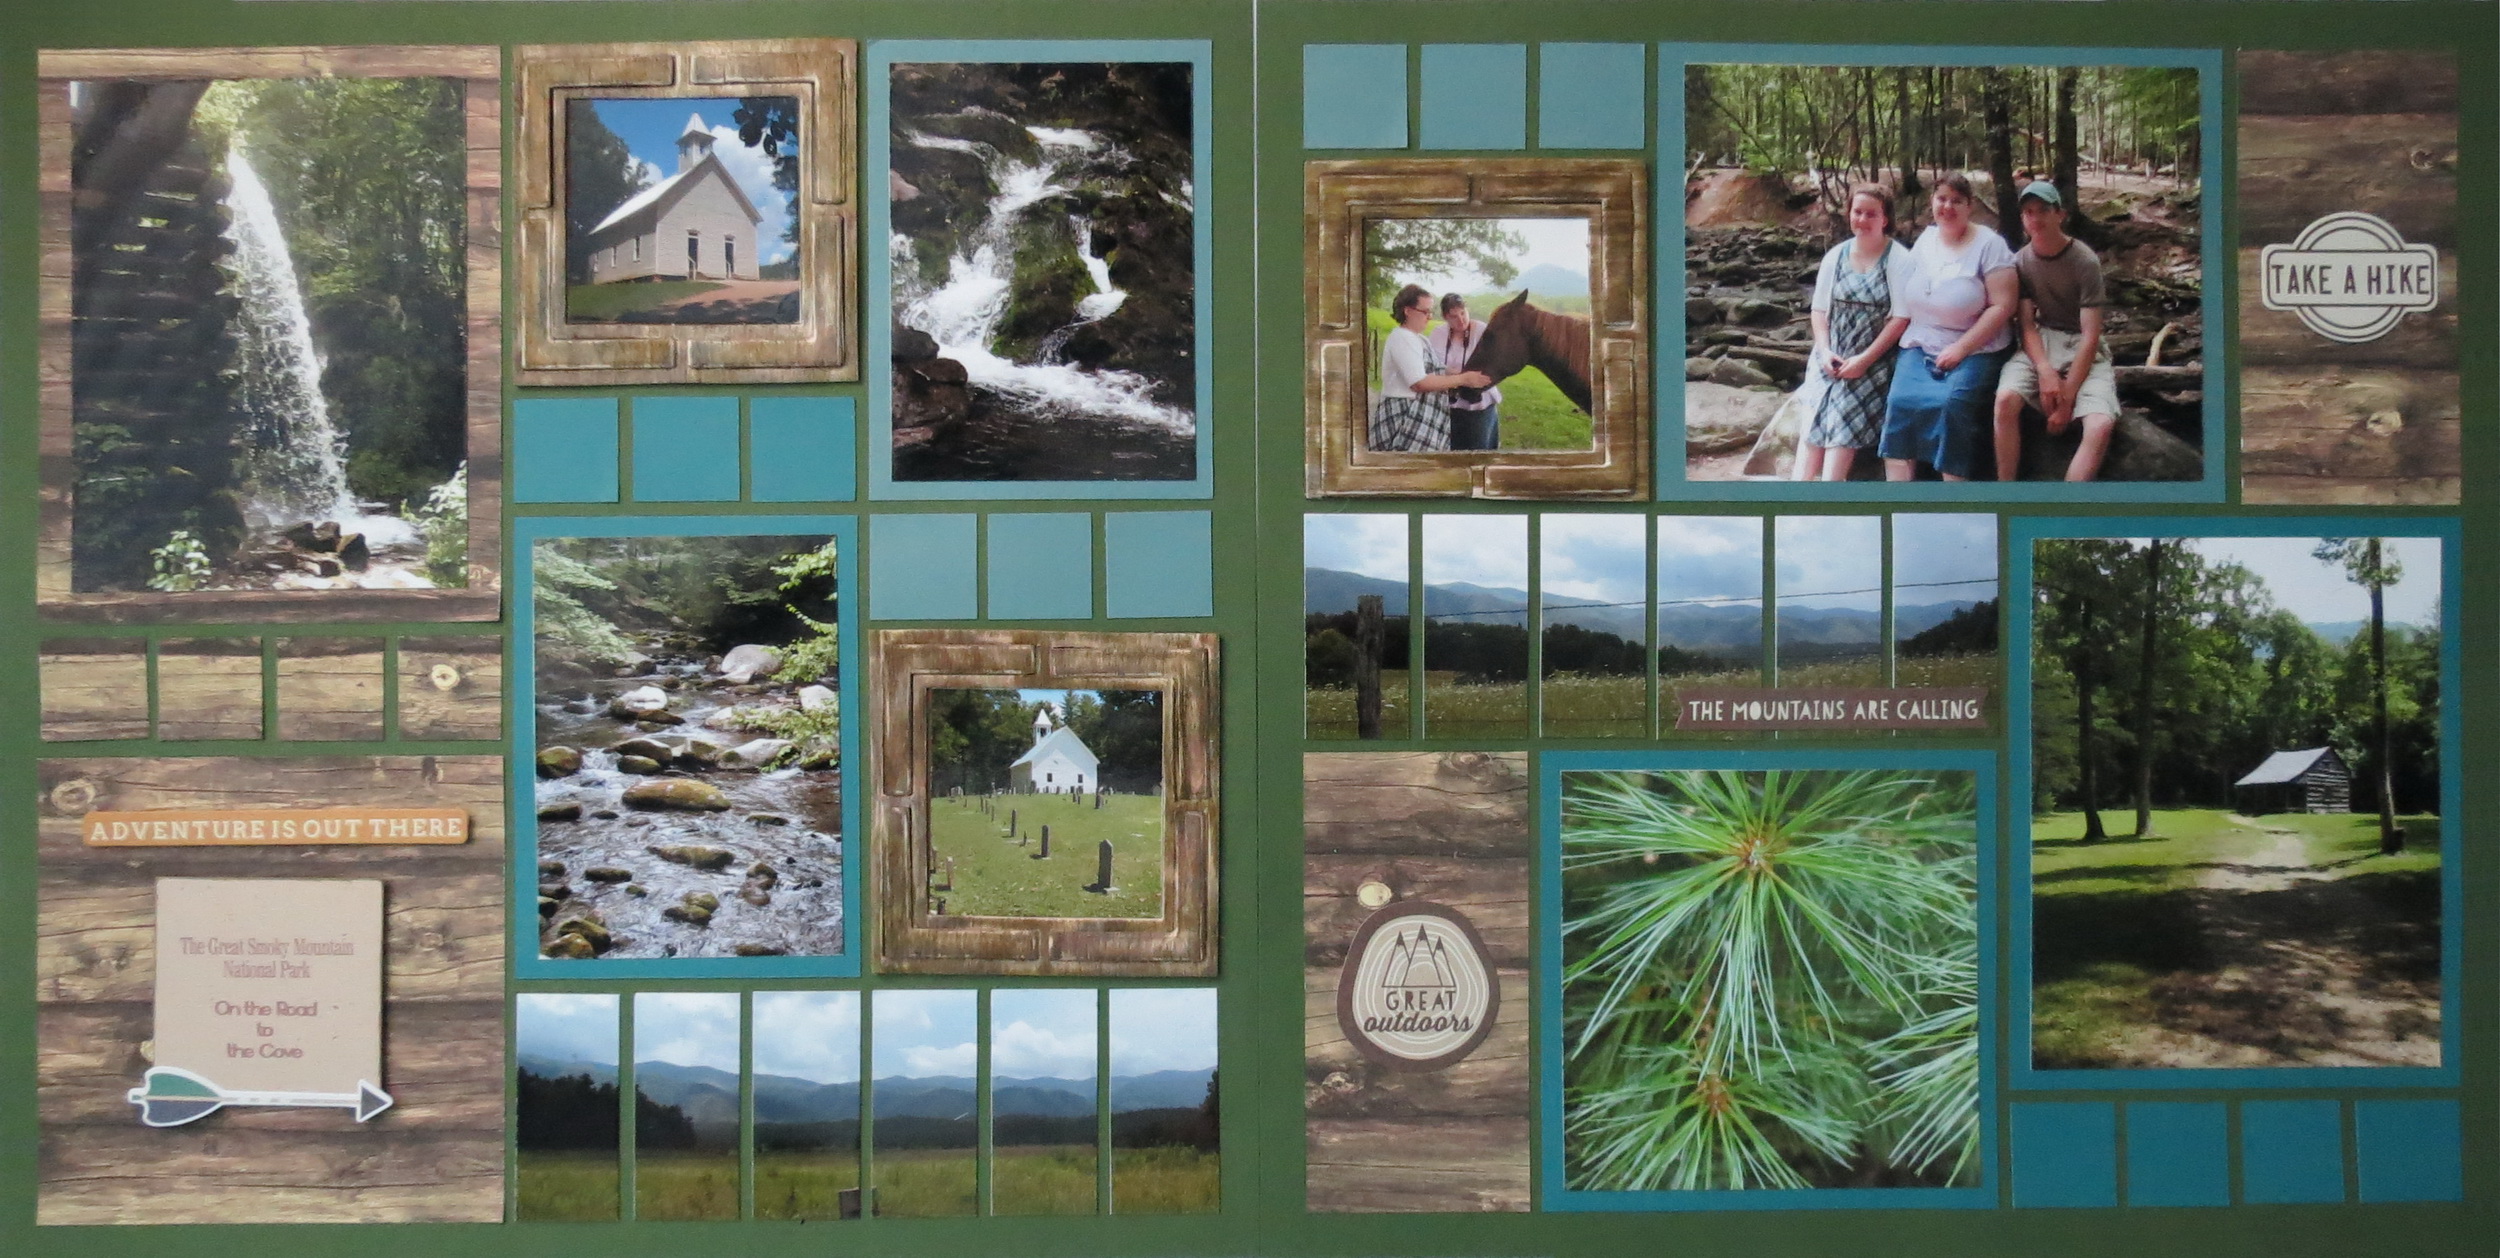
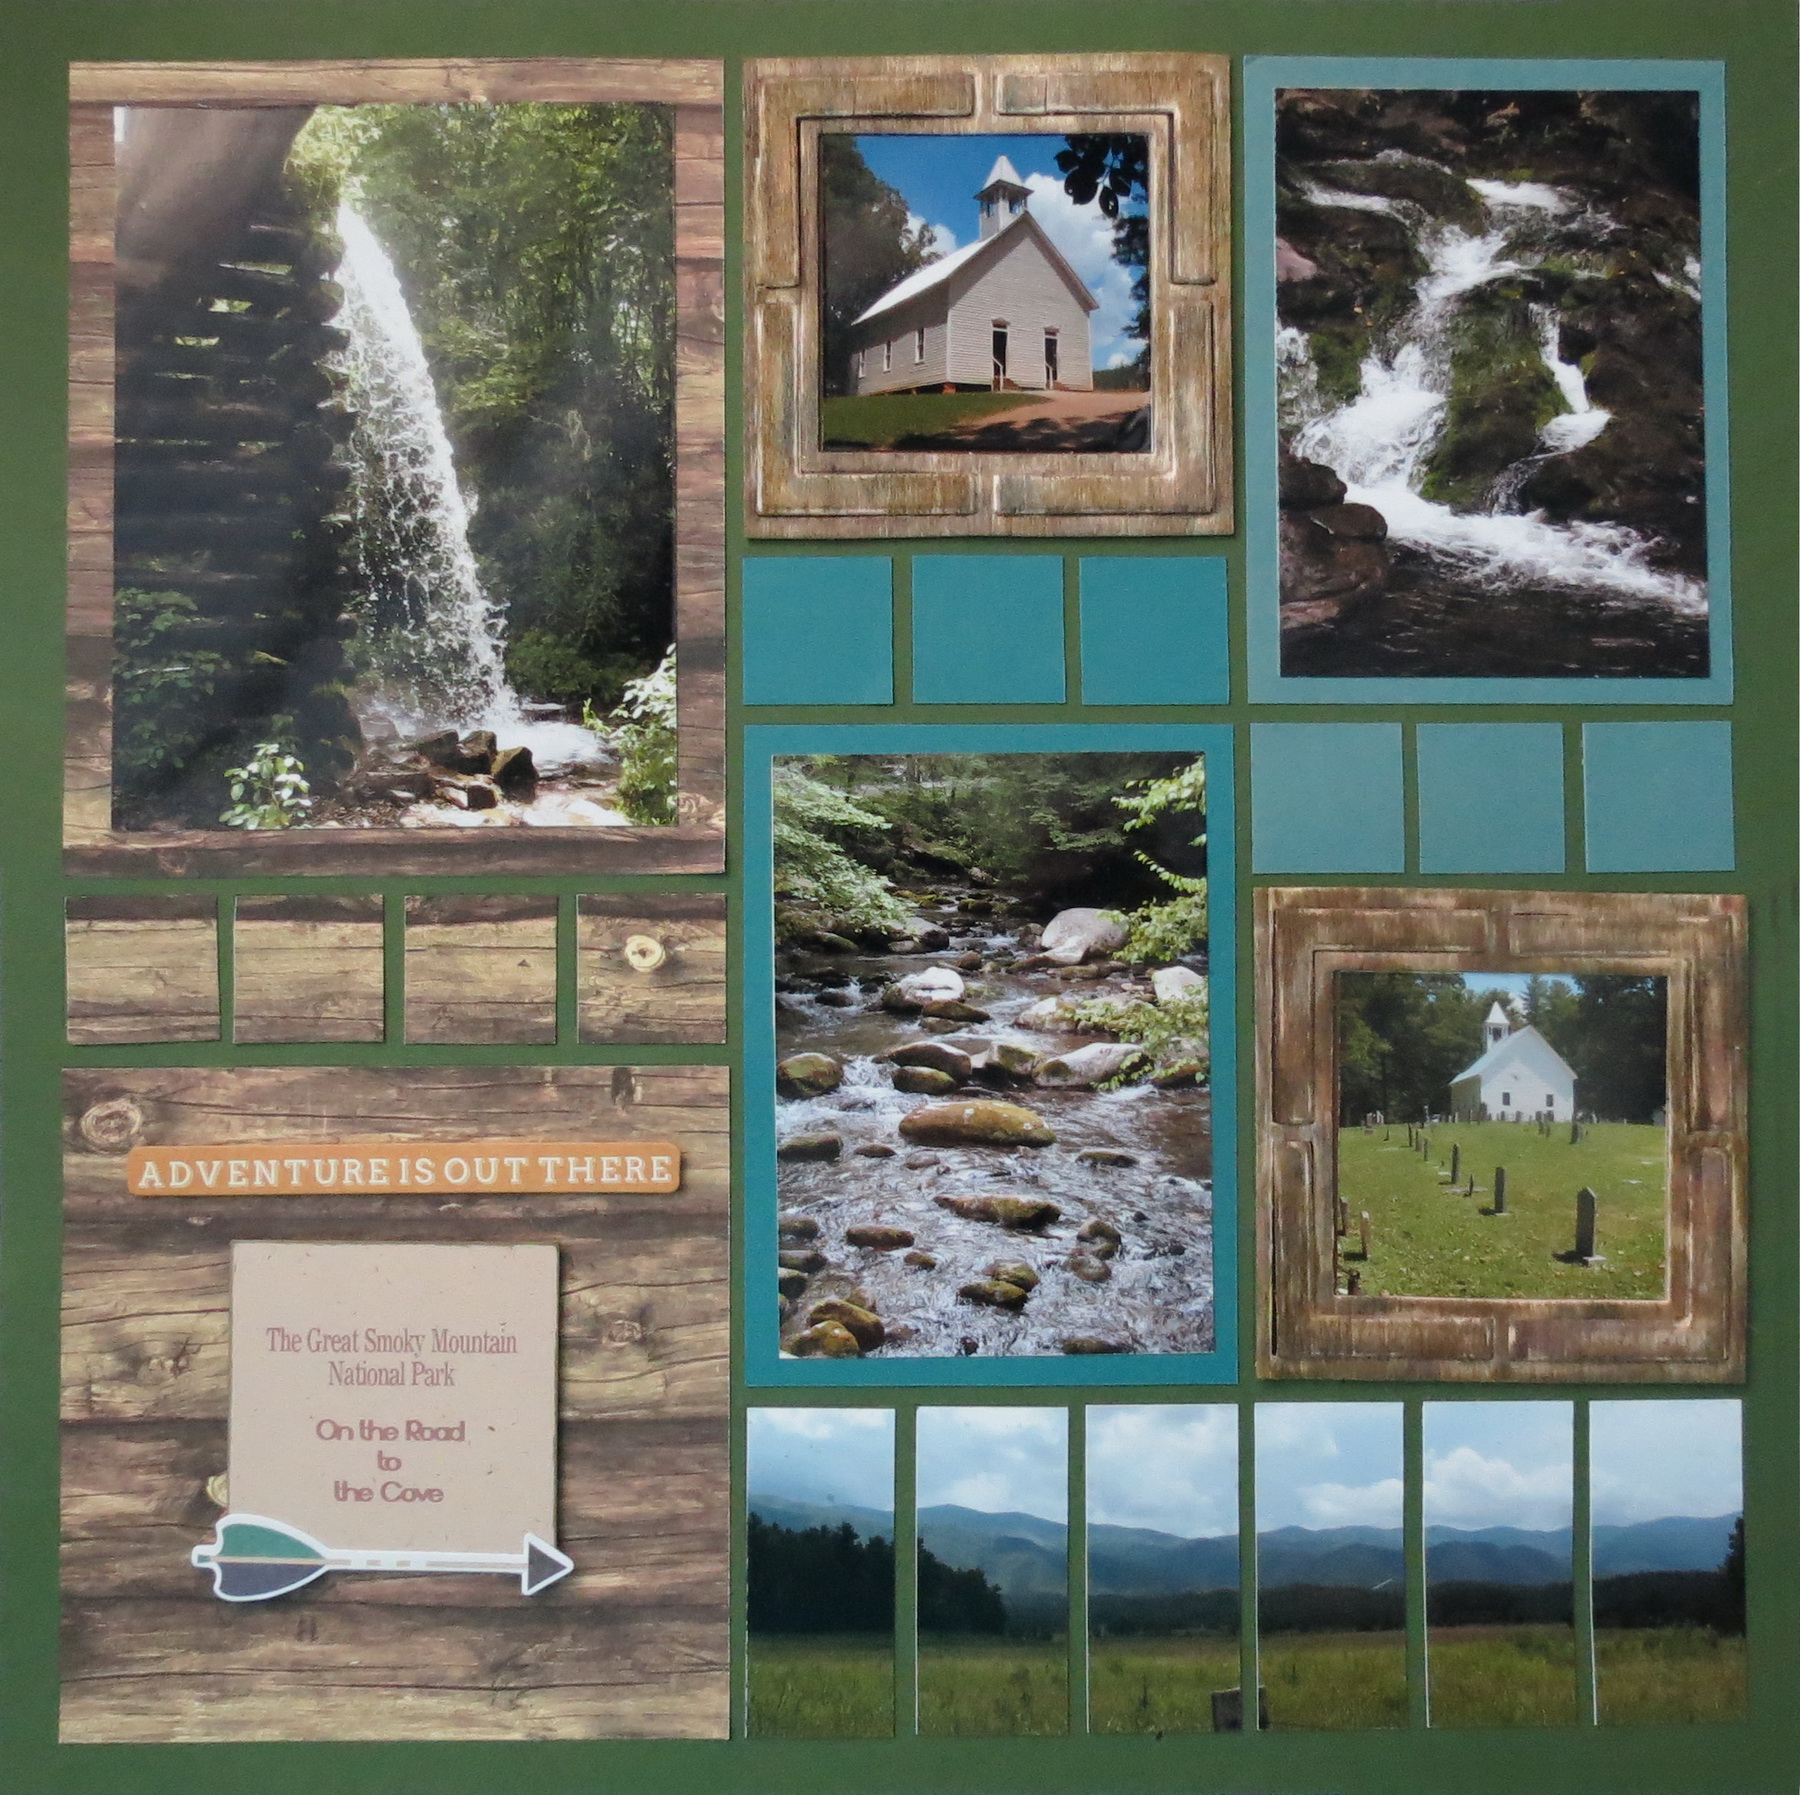
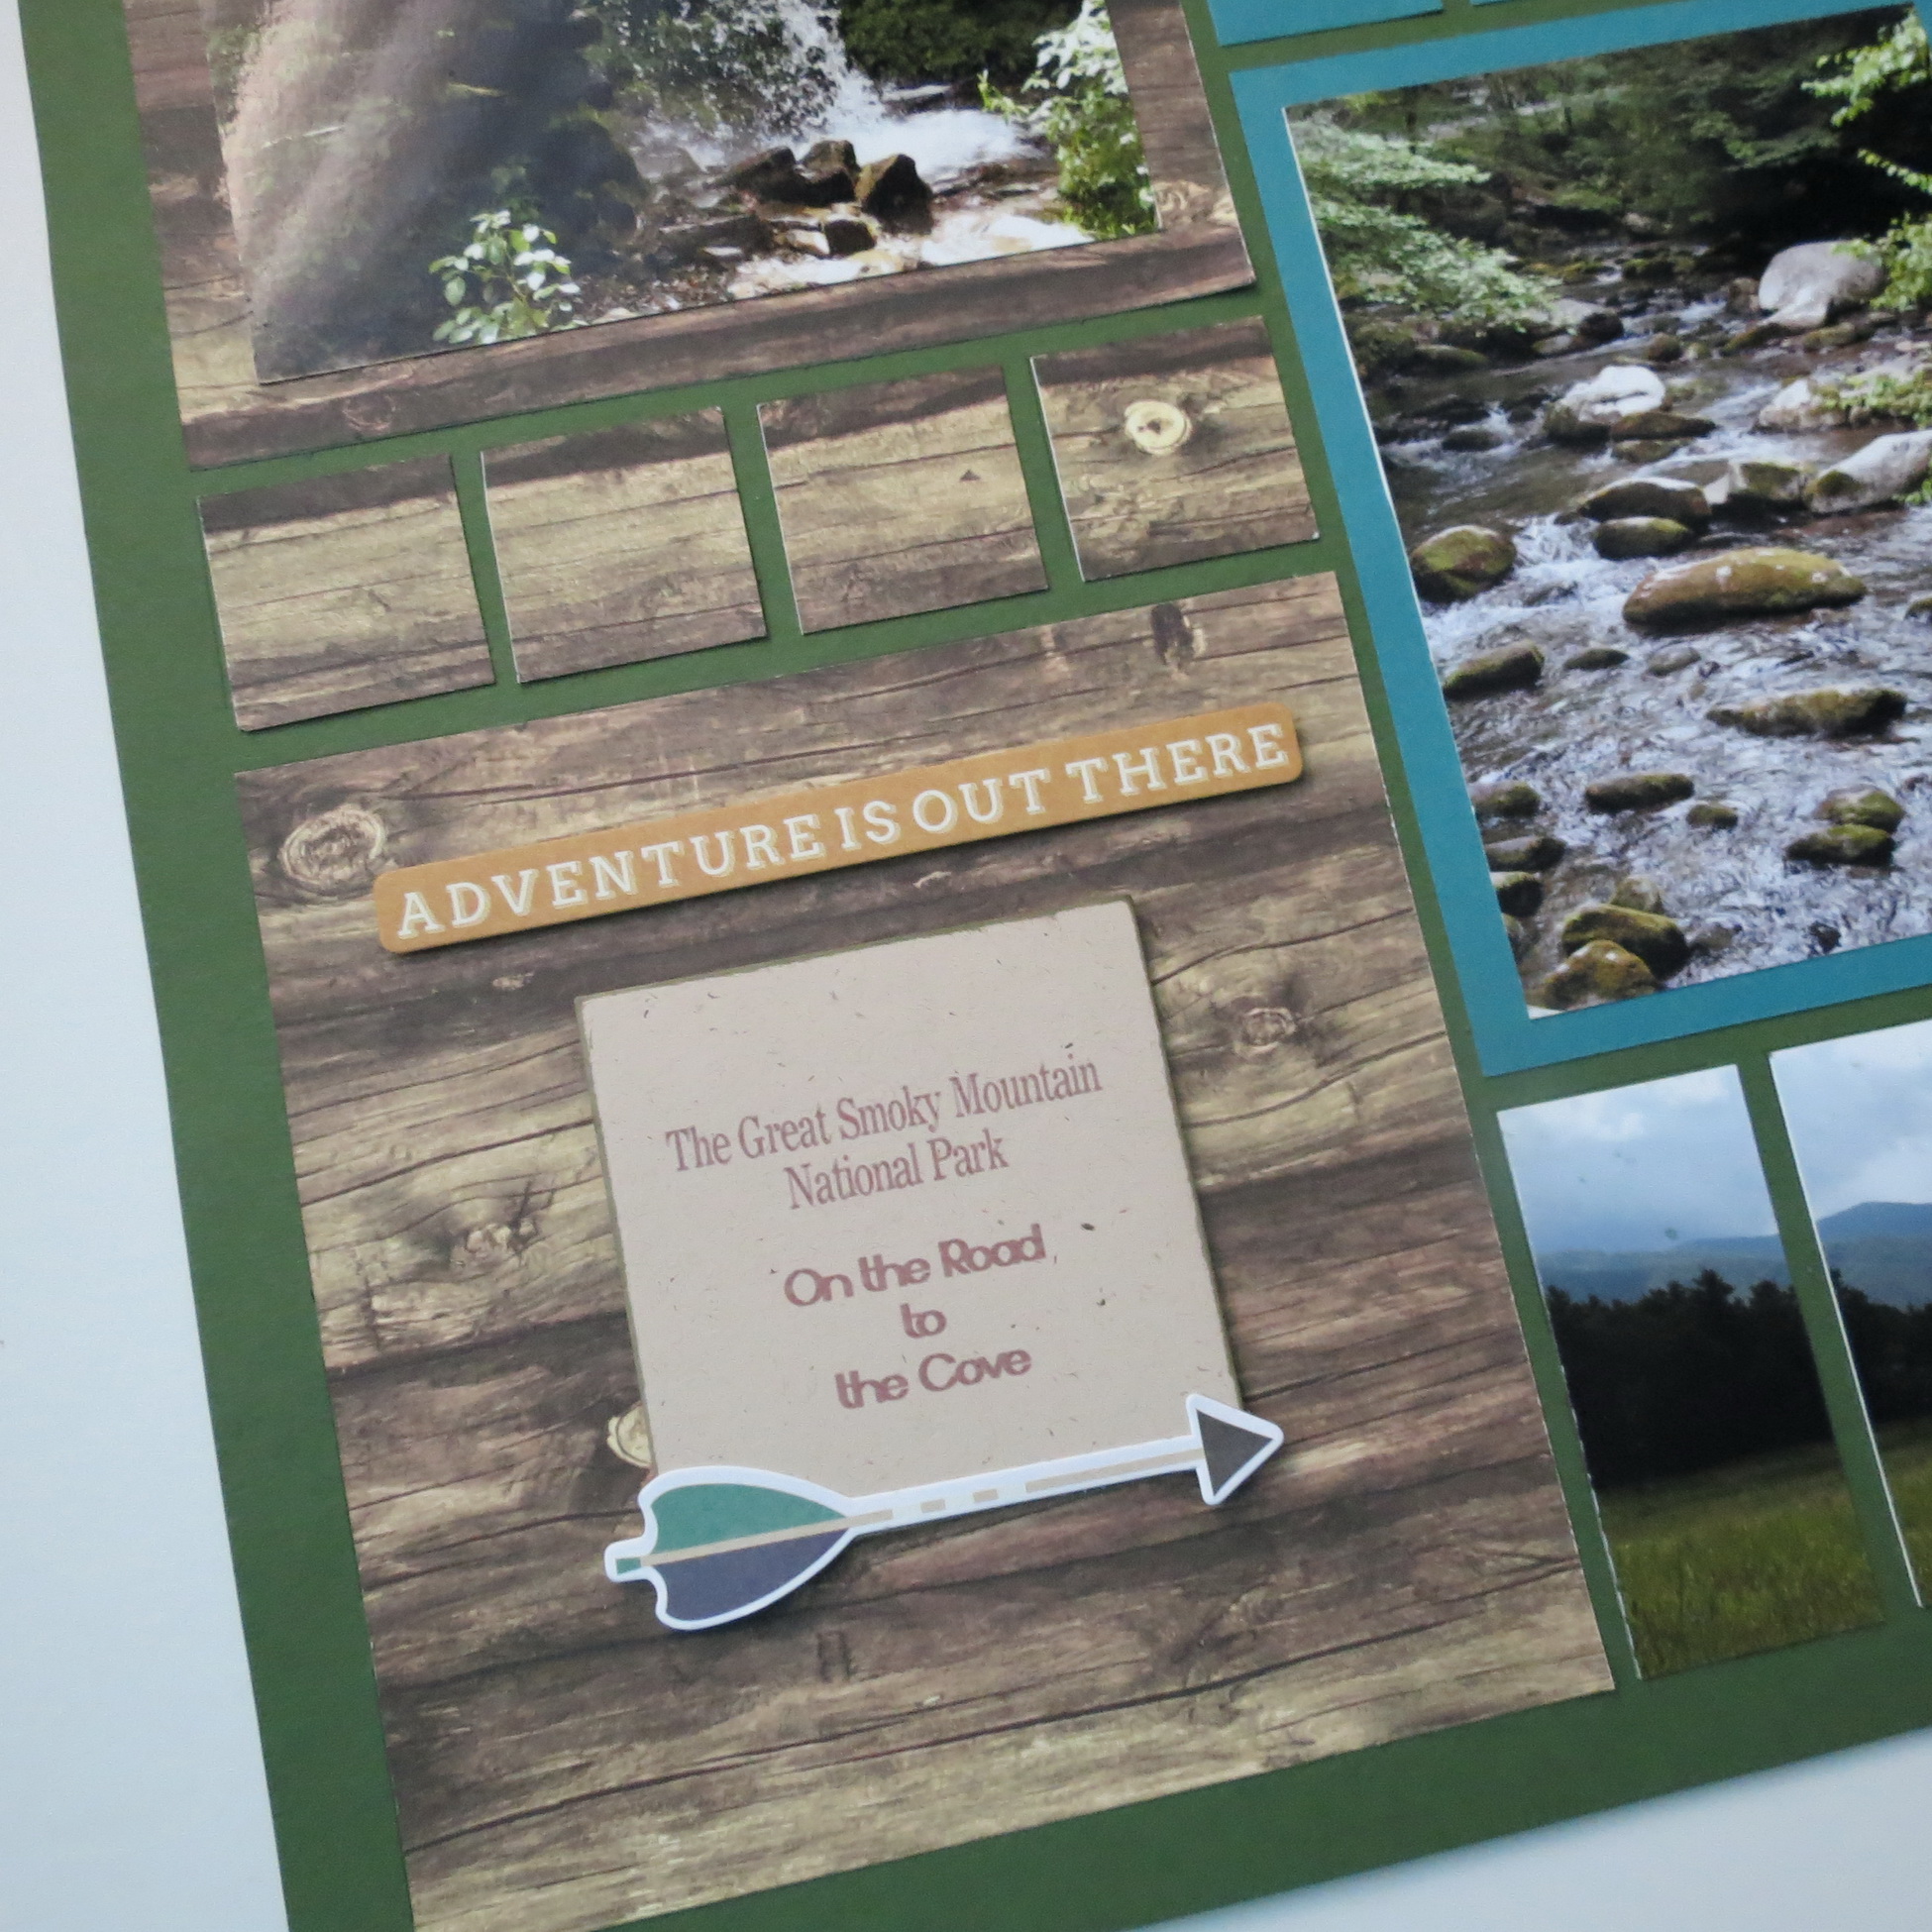
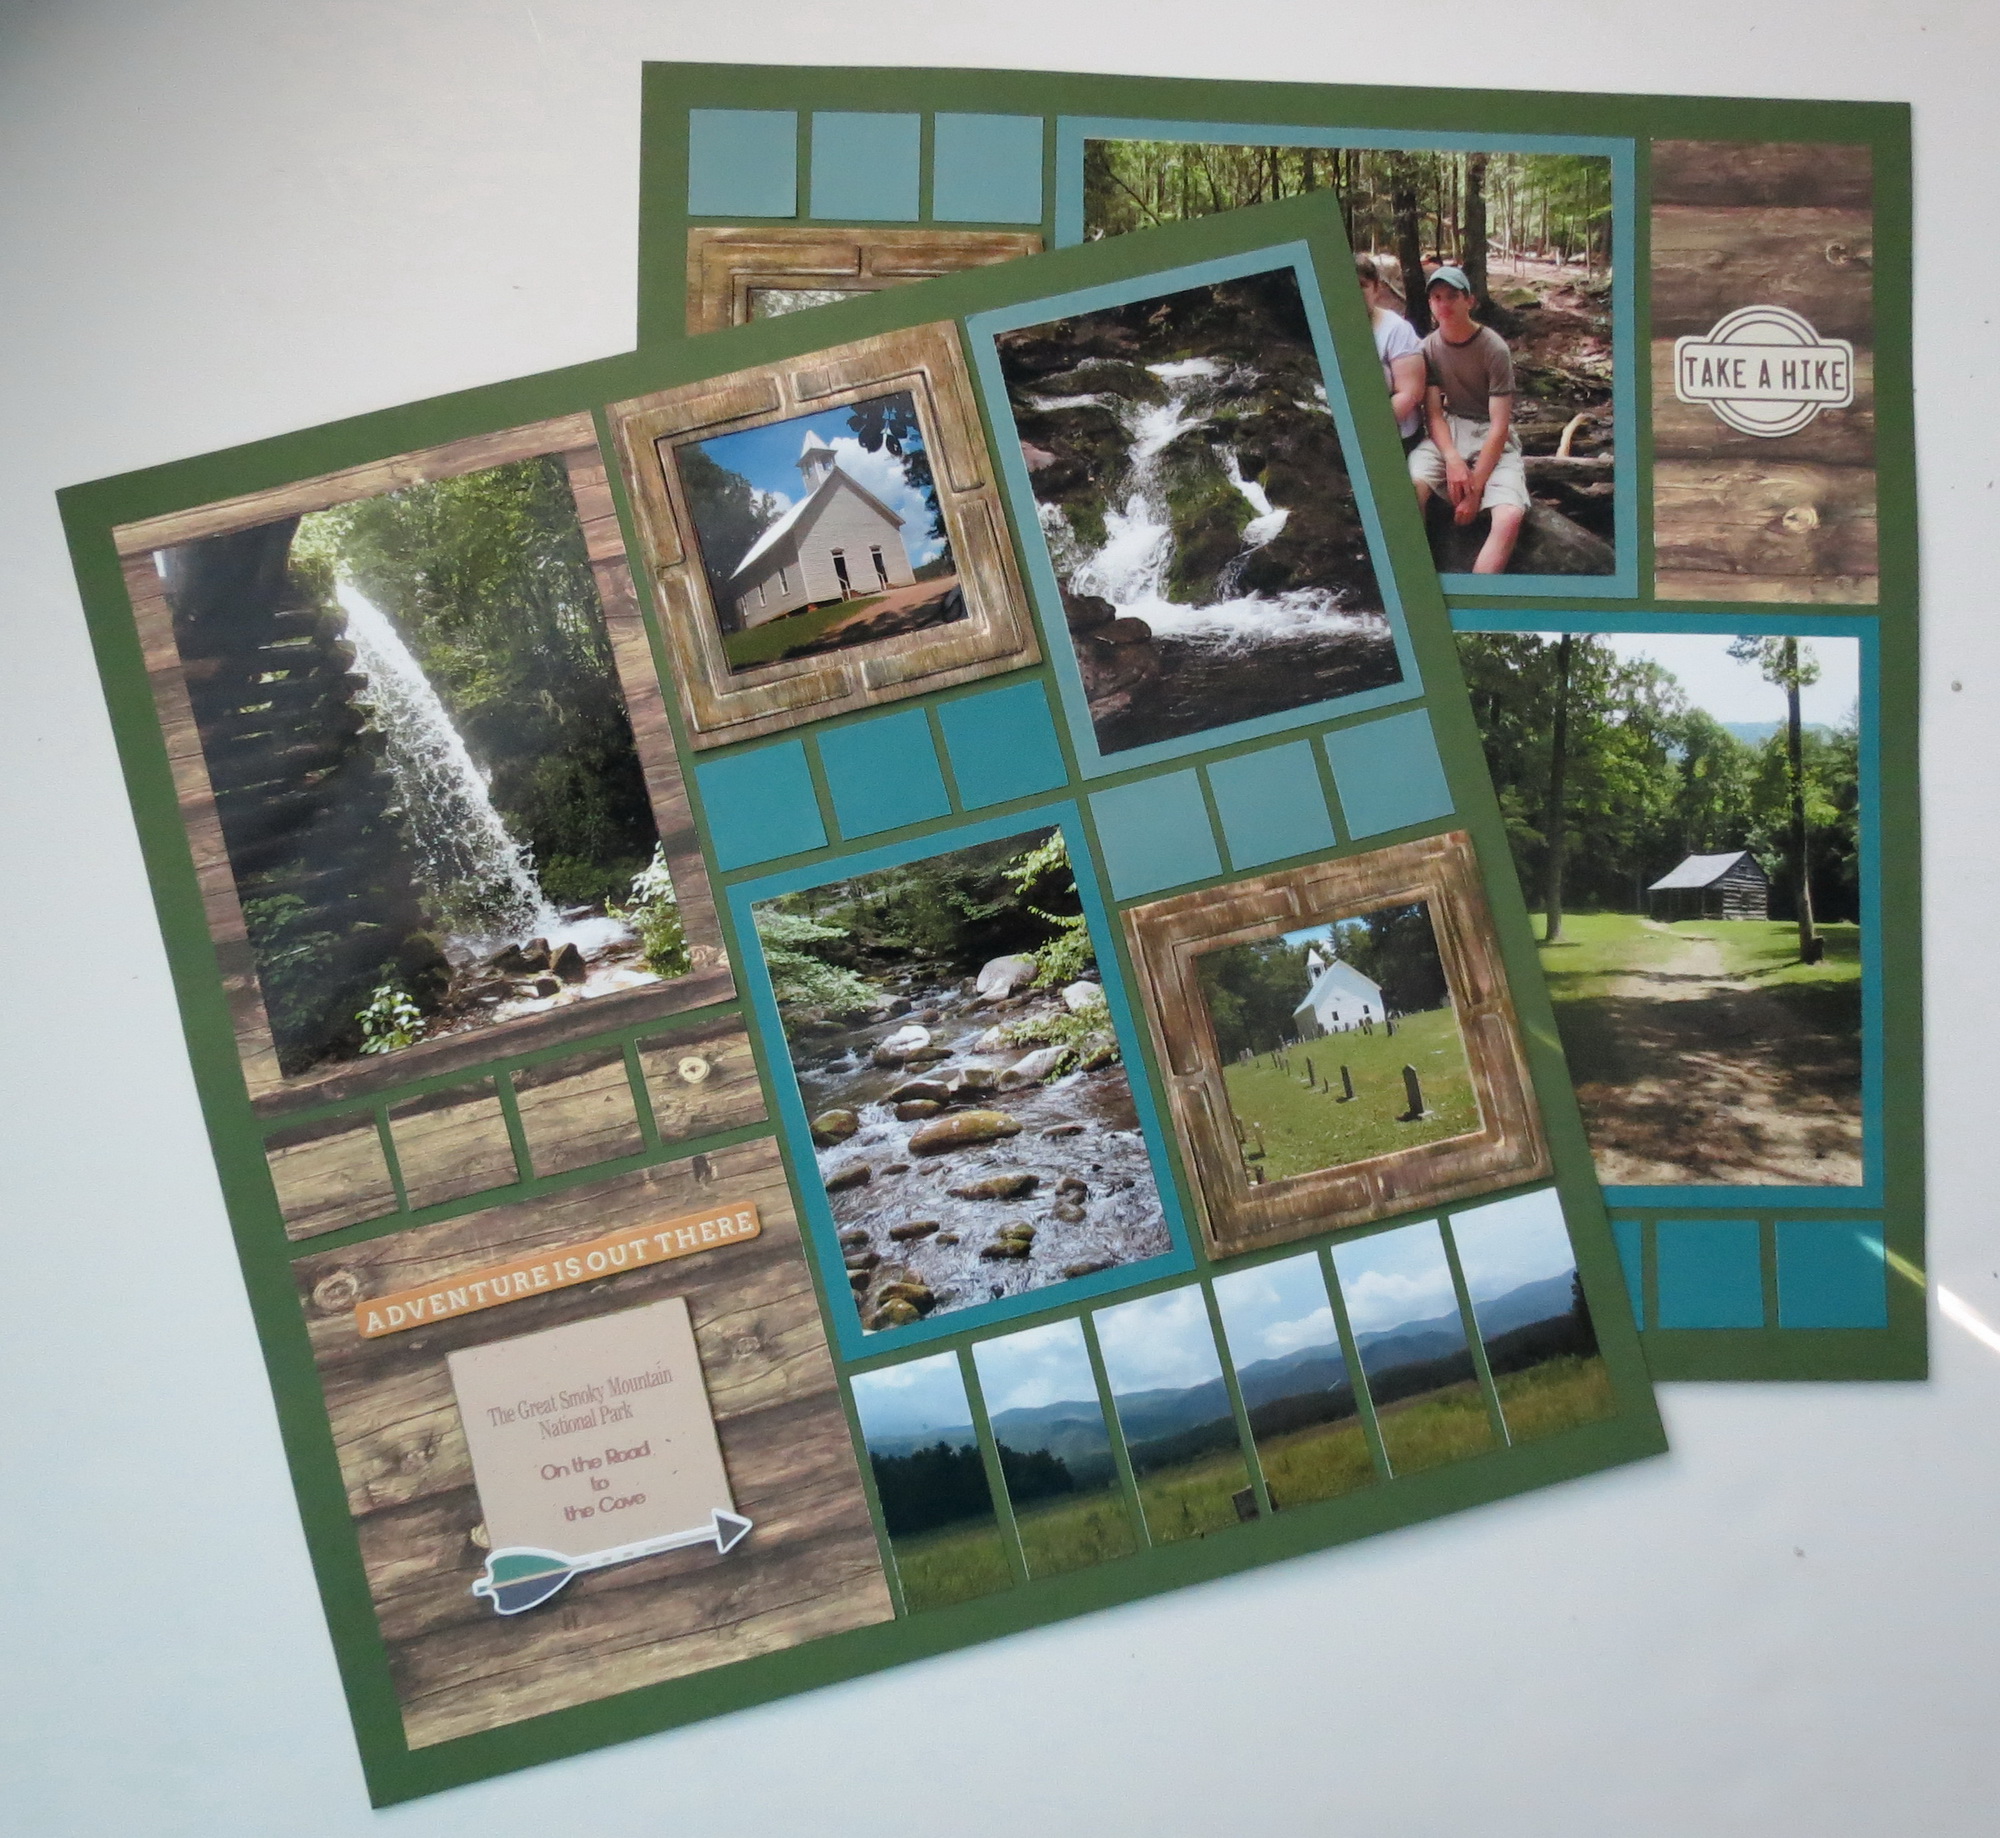
The Great Smoky Mountain National Park
Our Advanced Techniques this week are geared to achieve an outdoorsy look using unusual materials and Patterns #155 & #169.
Mosaic Moments Advanced Techniques for Achieving an Outdoorsy Look
Mosaic Moments Advanced Techniques for Achieving an Outdoorsy Look: Supplies
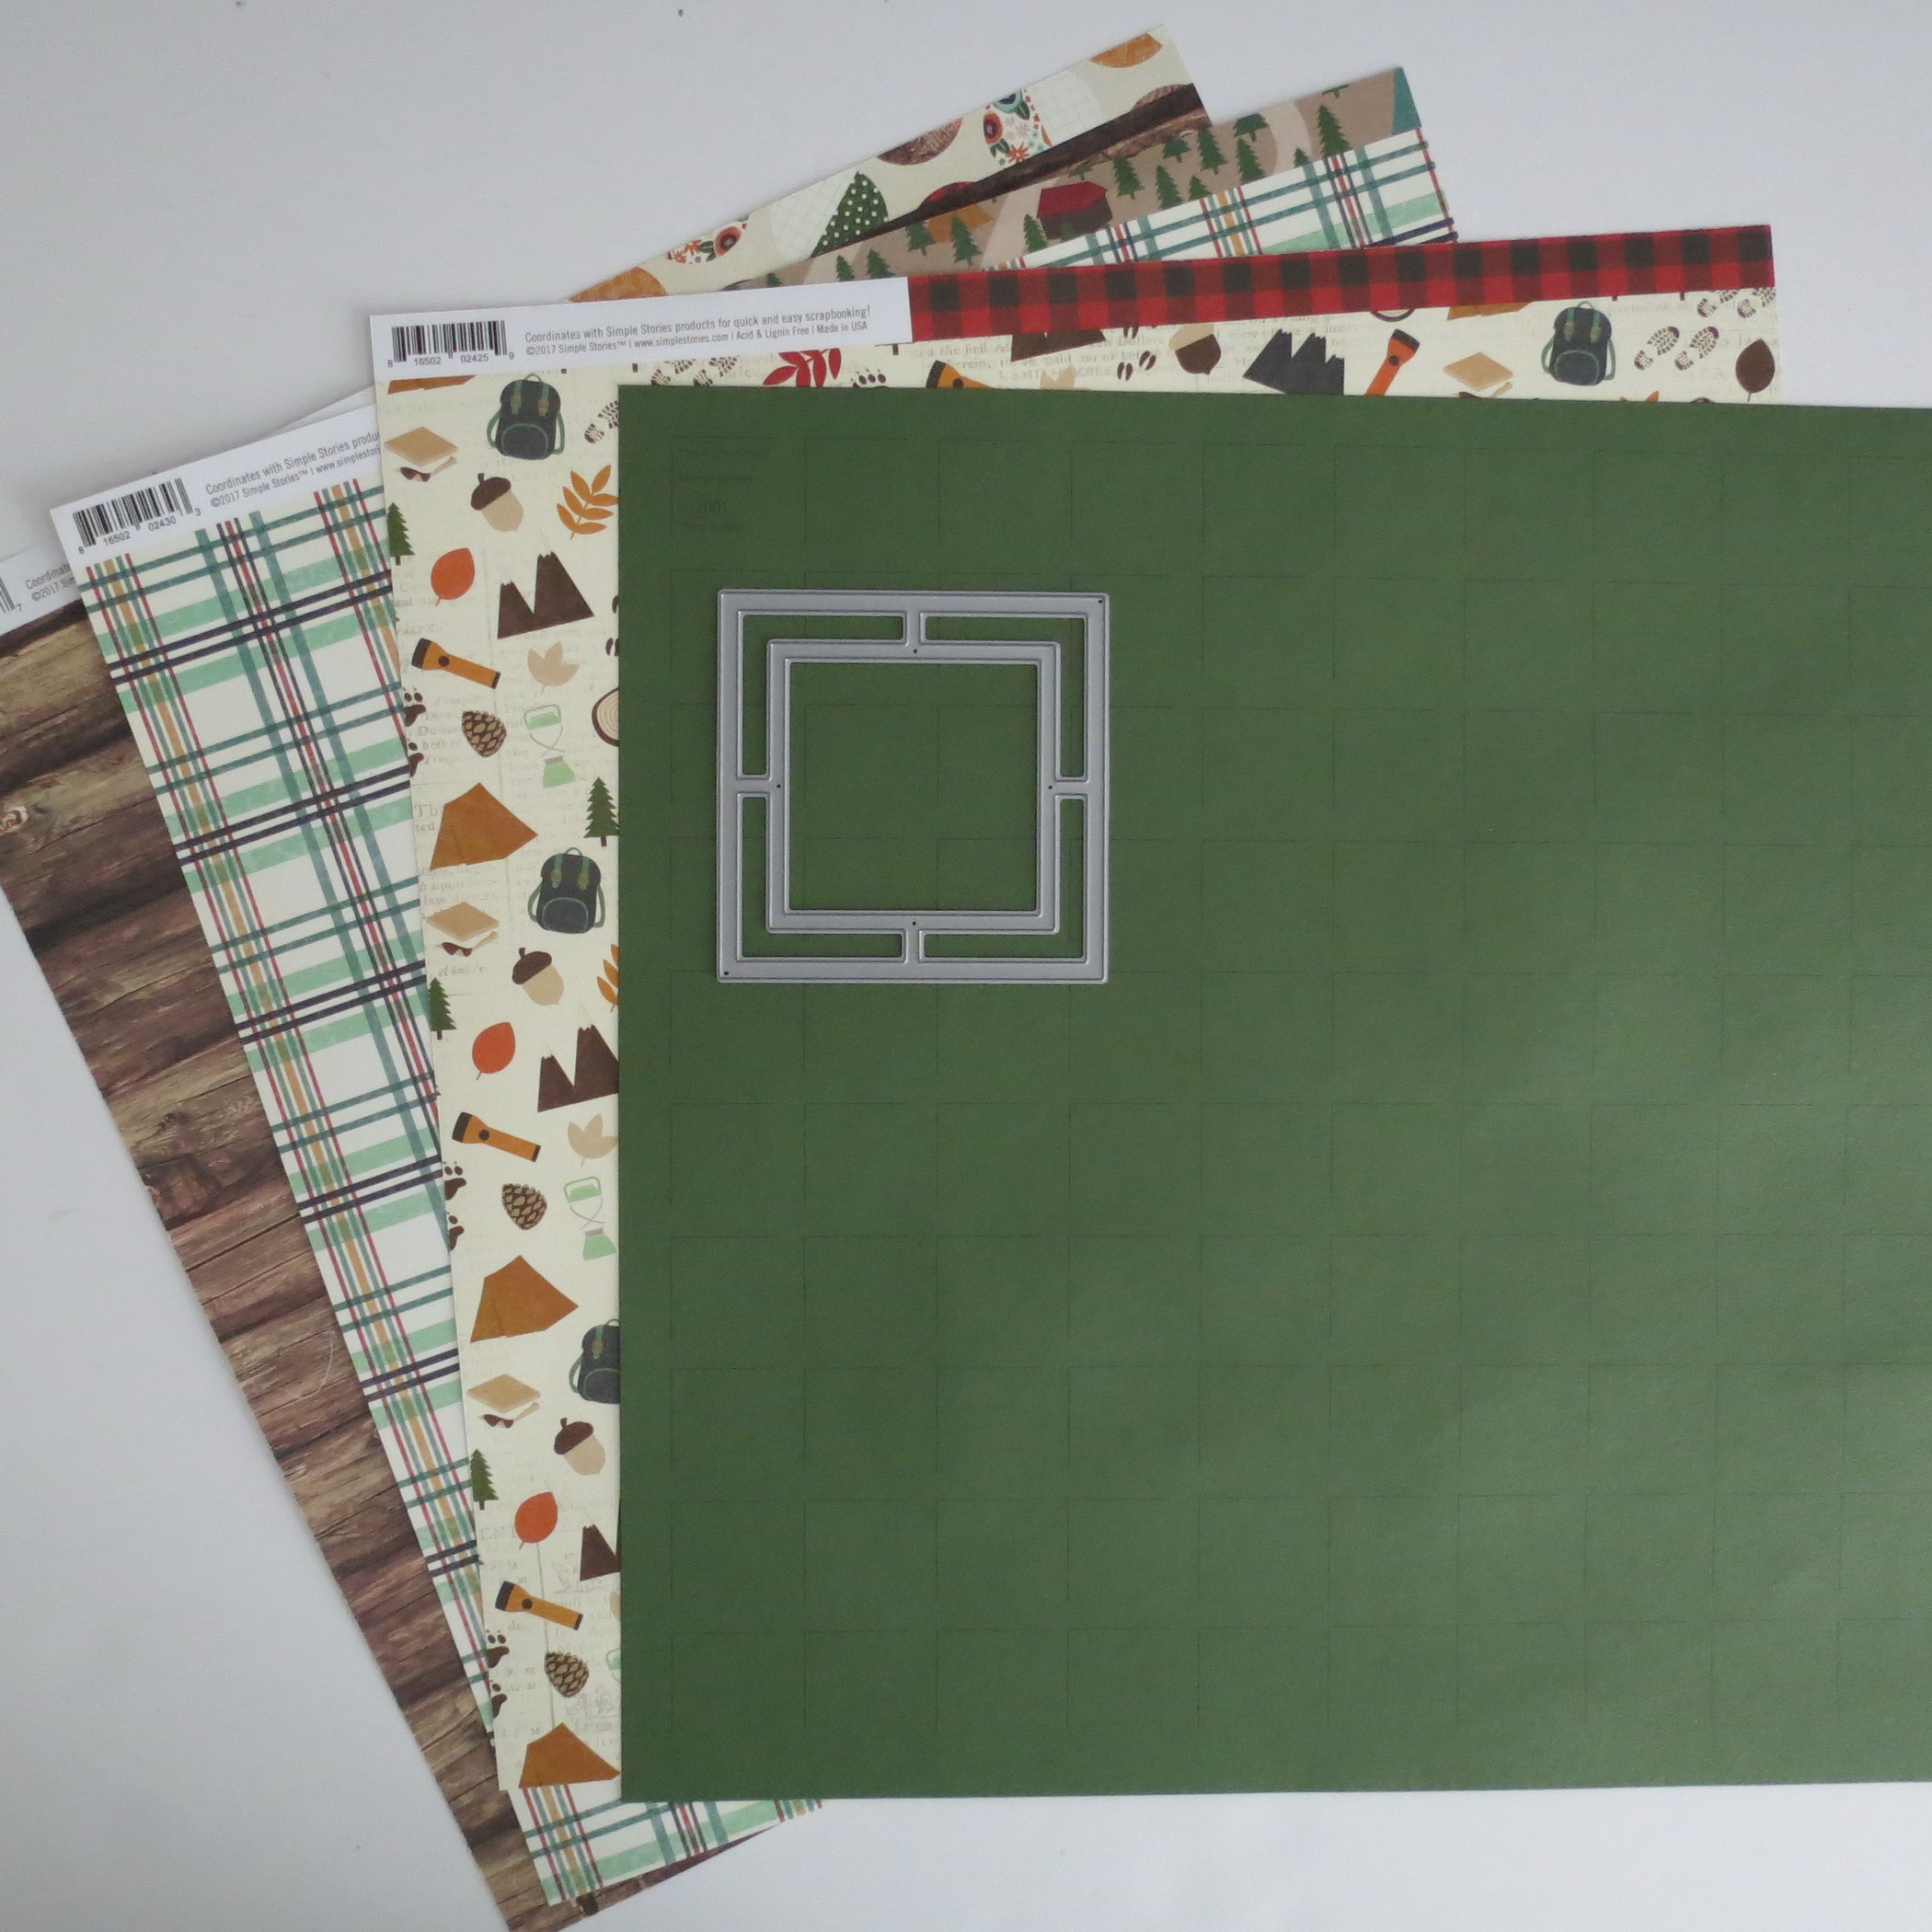
Supplies:
- Mosaic Moments 3×3 Graphic Frame Die
- Mosaic Moments Grid Paper Deep Spring Green 12 x 12
- Cardstock papers From Recollections Earth collection plus black
- Balsa wood 1/16” x 6” x 36”
- Ranger Inks from Tim Holtz Distress Collection: Victorian Velvet, Shabby Shutters, Iced Spruce, Weathered Wood, Pumice Stone, and Frayed Burlap.
- Simple Stories Cabin Fever Collection: Off the Grid 12 x 12 patterned paper

Mosaic Moments Advanced Techniques for Achieving an Outdoorsy Look: Rustic frame
Mosaic Moments Advanced Techniques for Achieving an Outdoorsy Look: Rustic frame
Advanced Techniques: Die Cutting Balsa Wood
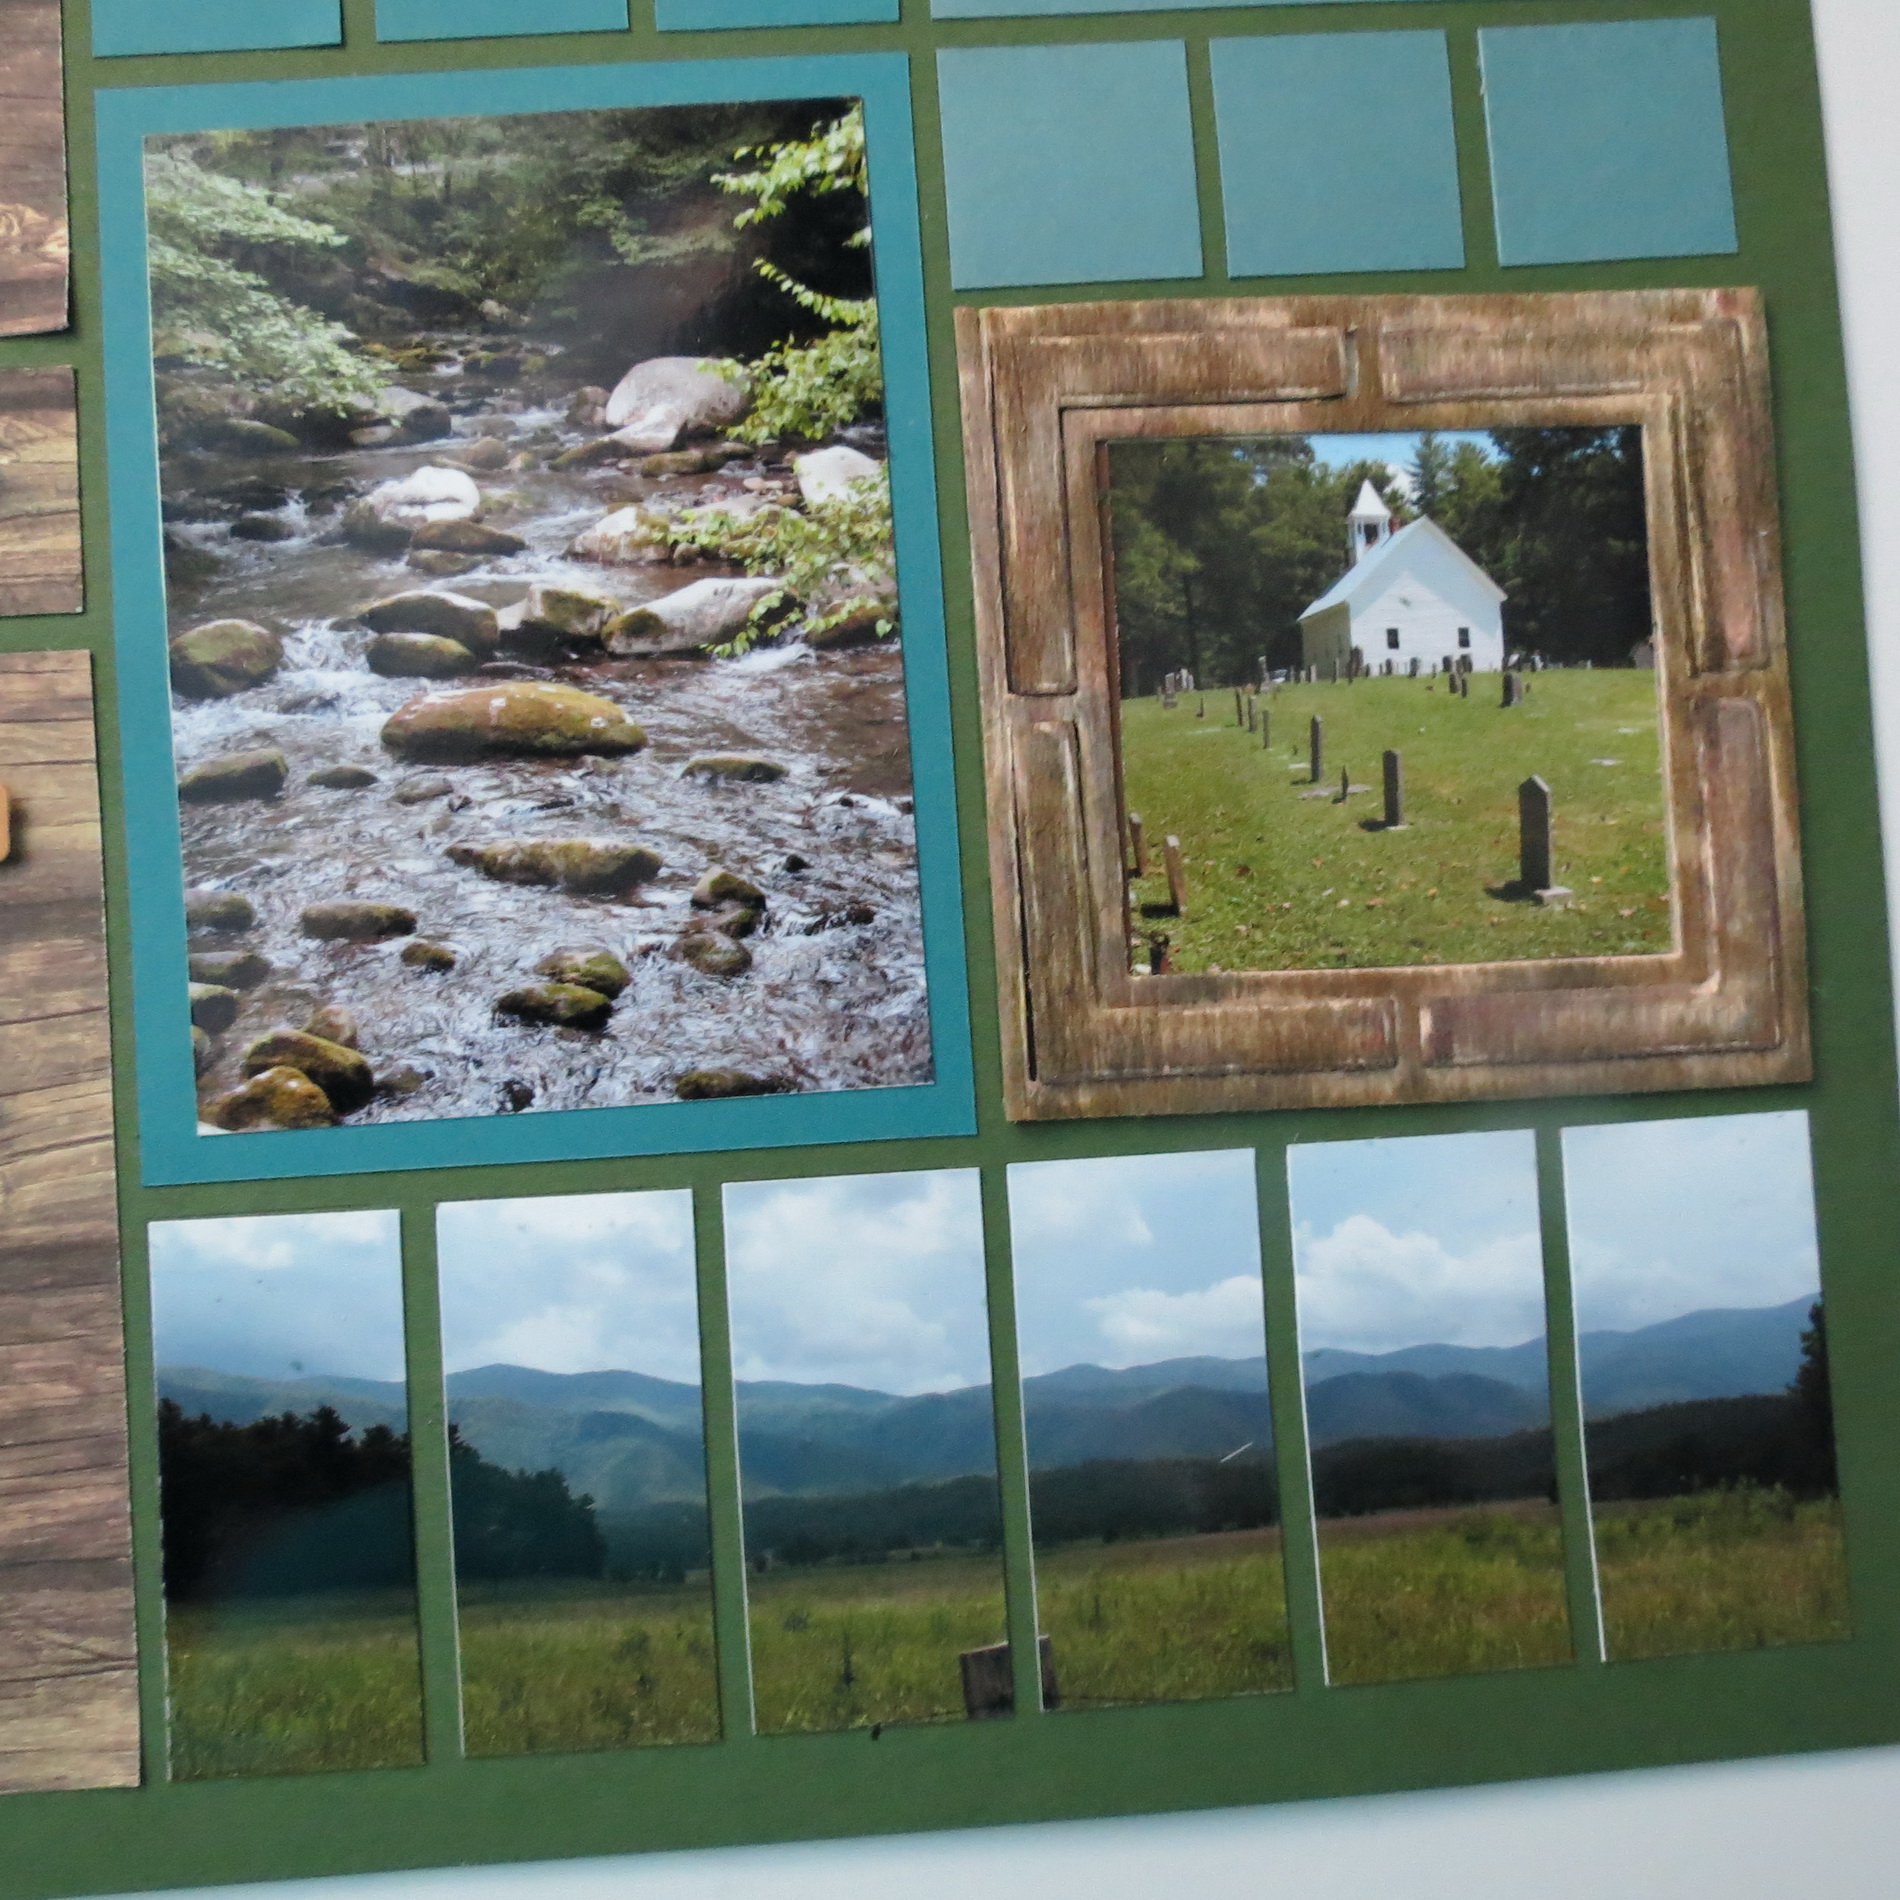
Balsa Wood will be used with our die 3×3 Graphic Frame Die to create three frames for my Smoky Mountain Layout. I’ve used balsa wood before with our dies and it always adds a nice outdoorsy feel for those travel photos to the mountains or a masculine theme for someone special.
It is easy to cut the balsa wood with your X-Acto knife, a rotary cutter or our dies. It is also easy to rip, so it is important to handle the delicate frames as you work with them. If you have rips and tears don’t worry because it’s easy to piece them back together as you assemble them.
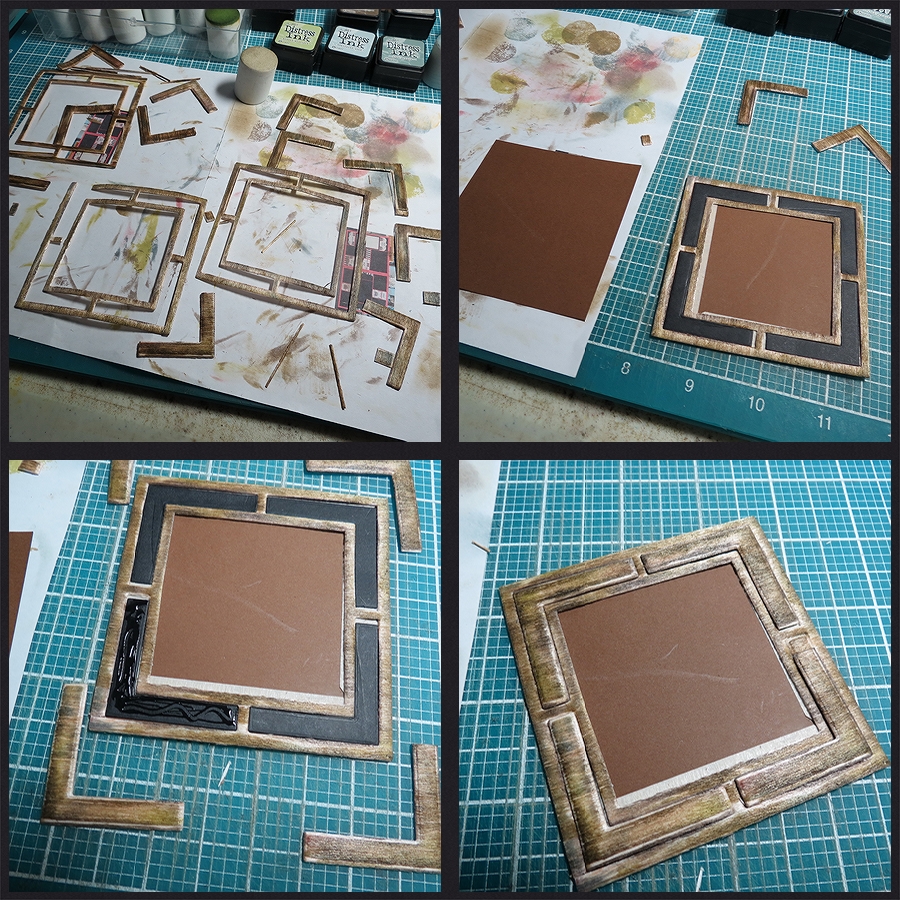
I cut three mats with which to attach the frames and photos. A heavy duty tape applied to the cardstock square allowed me to lay the die section into the adhesive and square up the frame correctly. I removed the “L” shapes of wood and replaced them first with cardstock “L”s. Thinner than the balsa wood these cardstock pieces give just enough lift to the wood to have it stand out on the frame. Once stained/inked they are returned to the frame.
There are many materials beyond paper that can be cut using the dies; balsa is only one type, so try incorporating new things, like cork, fabric or felt, into your layouts to achieve different looks!
MORE OUTDOORSY IDEAS
Ideas for 3×3 Graphics Frame Die
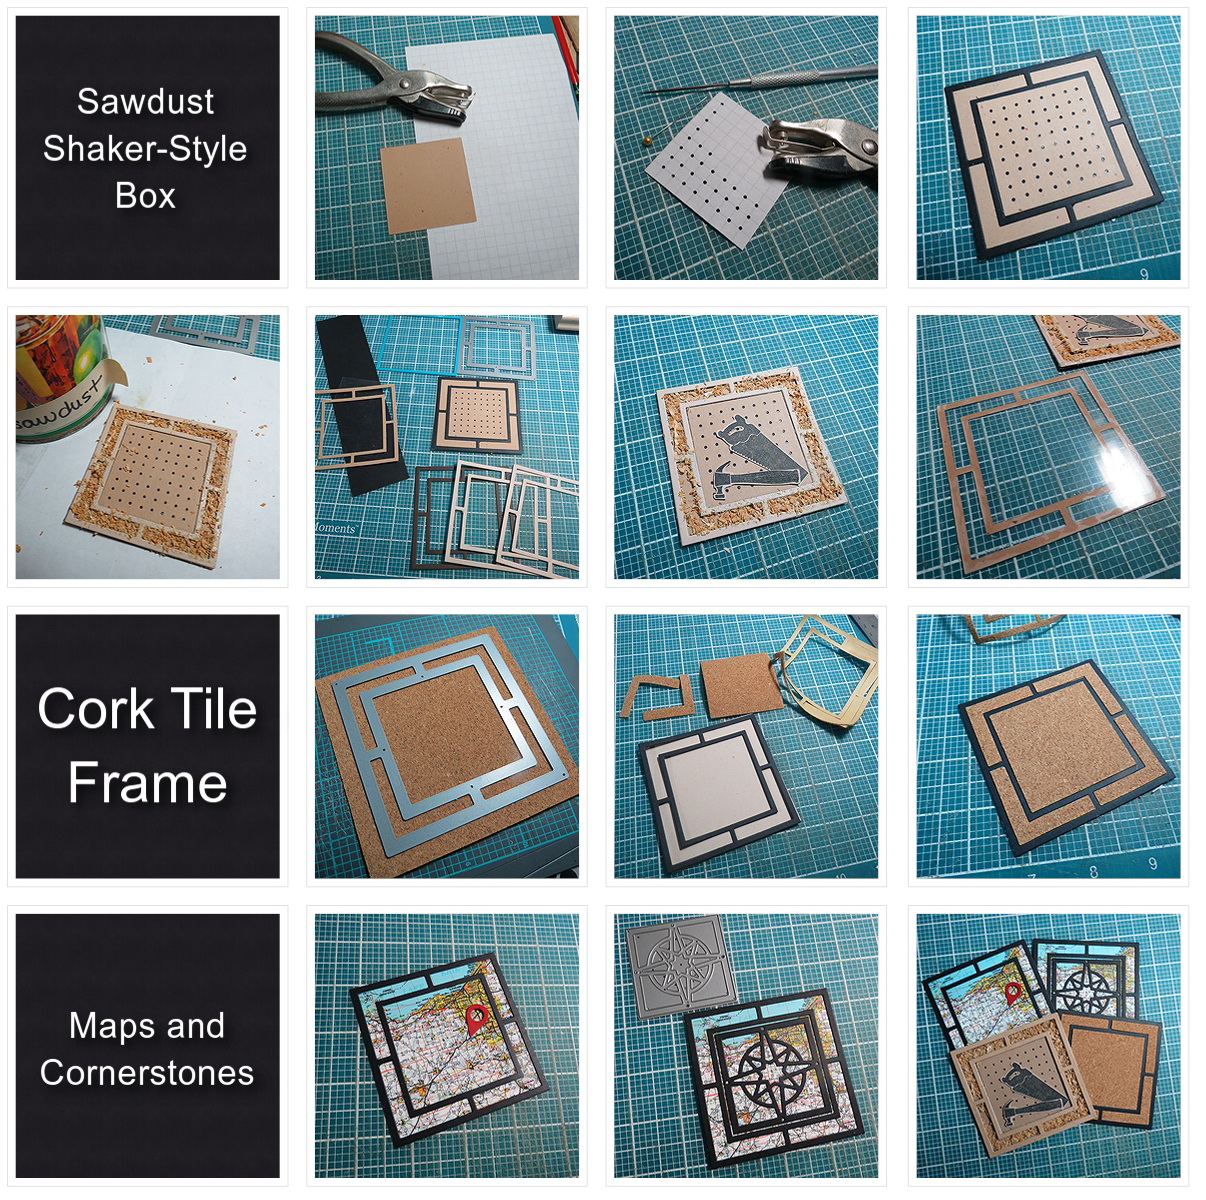
- SHAKER STYLE BOX
There are many ways to use this 3×3 Graphic Frame Die and achieve a masculine touch to your pages. Here are a few samples for your consideration. The first is the Sawdust Shaker-Style box. It can be done with the Balsa wood inked in another color, actual sawdust, and several frames from scraps. I used the center of my top layer to punch holes for a peg board look which I got by attaching a piece of grid paper to the back of my square and using a tiny hole punch.
The layers of the frame pieces create nice wells for any shaker box contents; I added sawdust to the outside frame wells, stamped tools inside with the pegboard and topped the box with a square of acetate and the final frame section.
- CORK TILE FRAME
A thin adhesive backed cork cuts nicely with the die. Black cardstock forms the frame and is filled with the cork pieces. The cork is thicker than the cardstock and will be slightly higher. This makes a perfect spot for a tag, title or journal spot that can be ‘pinned’ to the cork.
- MAPS AND CORNERSTONES
Using a section of a map from your trip with a frame on top or add a frame and a compass point cornerstone for a personalized embellishment unique to you and your trip.
Mosaic Moments Advanced Techniques for Achieving an Outdoorsy Look: Inking for a Rustic Look
Mosaic Moments Advanced Techniques: Die Cutting Balsa Wood
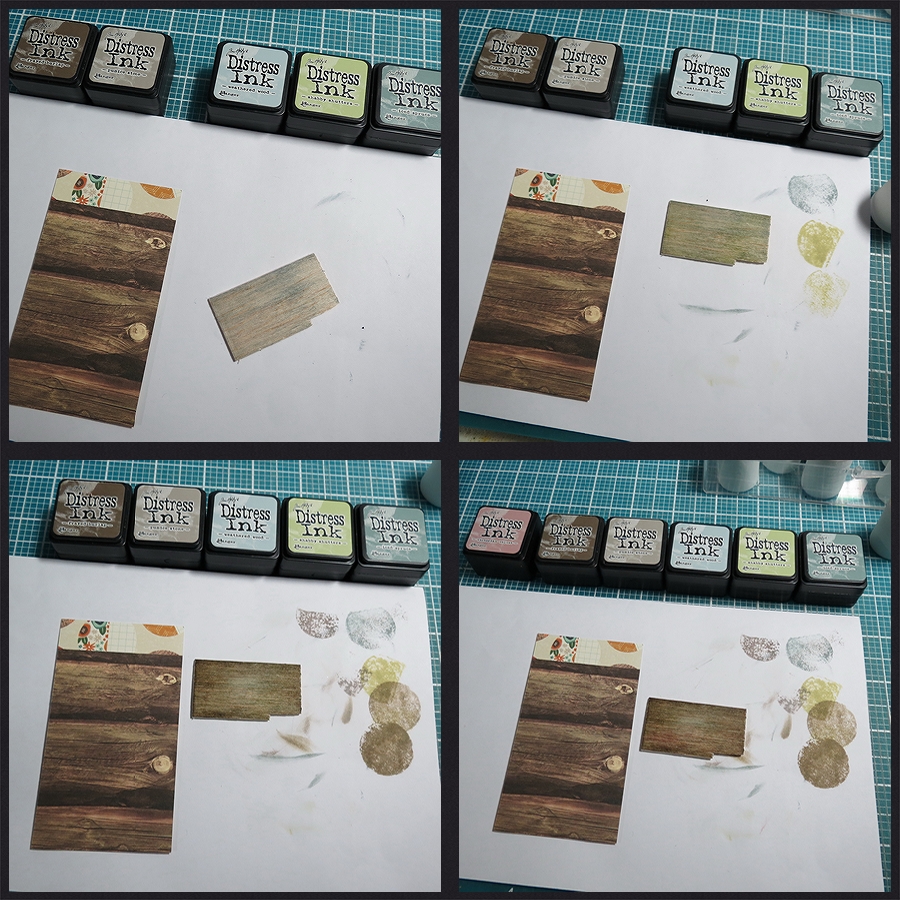
Advanced Techniques: Ink Layering for a Rustic Look
The decision for the colors I would stain the frames came from trying to match the color in the logs of the patterned paper. I layered several inks to achieve a fairly close match. There were some pinks, greens, and blues under the browns of the logs. I began with the lighter colors and randomly spotted each of the frames using an inking sponge. Gradually add the darker colors along the edges of the frame and into the main sections of your frame. It will look darker when it’s wet and will lighten up as it dries, but use caution layering in your colors to avoid making it too dark and losing your undertones.
With this color combo, it’s a very rough, rustic look, a bit of a change from the clean crisp look I’ve done in the past with the smaller 2×2 version. It isn’t for every layout you will try but carries the masculine, outdoorsy theme well.
Mosaic Moments Advanced Techniques for Achieving an Outdoorsy Look:
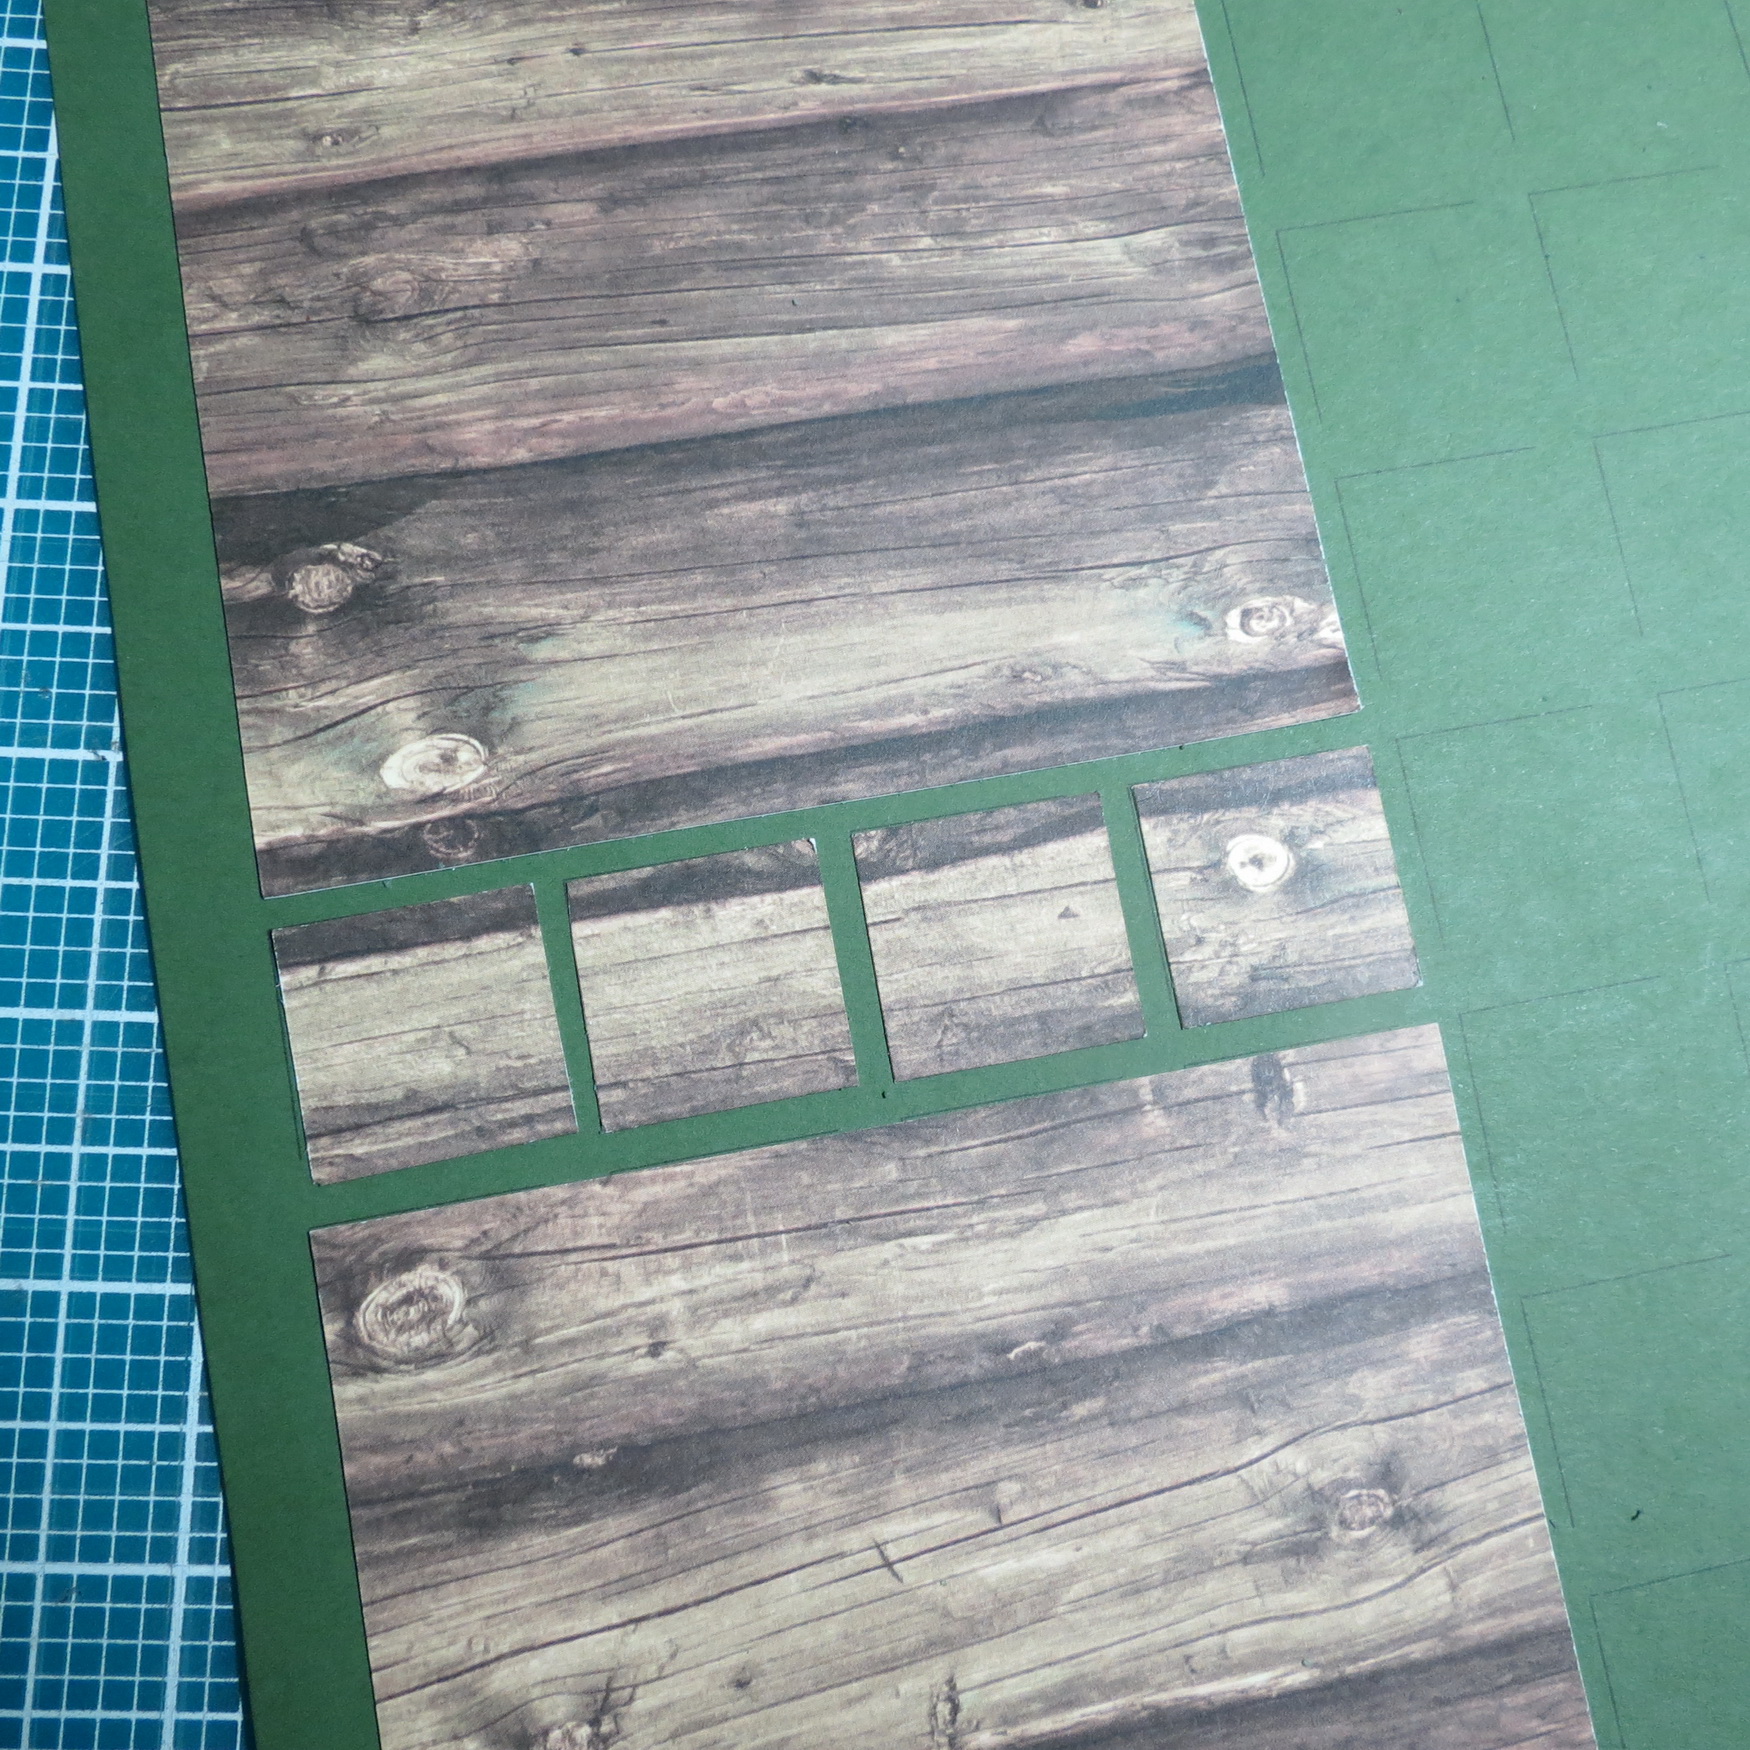
Advanced Techniques: Cropping to Preserve the Pattern
Every once and a while you may use patterned paper to cover several spots and you will find that keeping the pattern in the paper easy to do even if you are cropping a portion away. In this layout, I am covering the entire left column of pattern #169 which is a 4×5, 4×4 and a row of 1” squares between them. The top 4×5 will serve as a mat for a photo with very little showing. The bottom 4×4 is where a small title block and a few embellishments will be featured.
Mosaic Moments Advanced Techniques for Achieving an Outdoorsy Look:
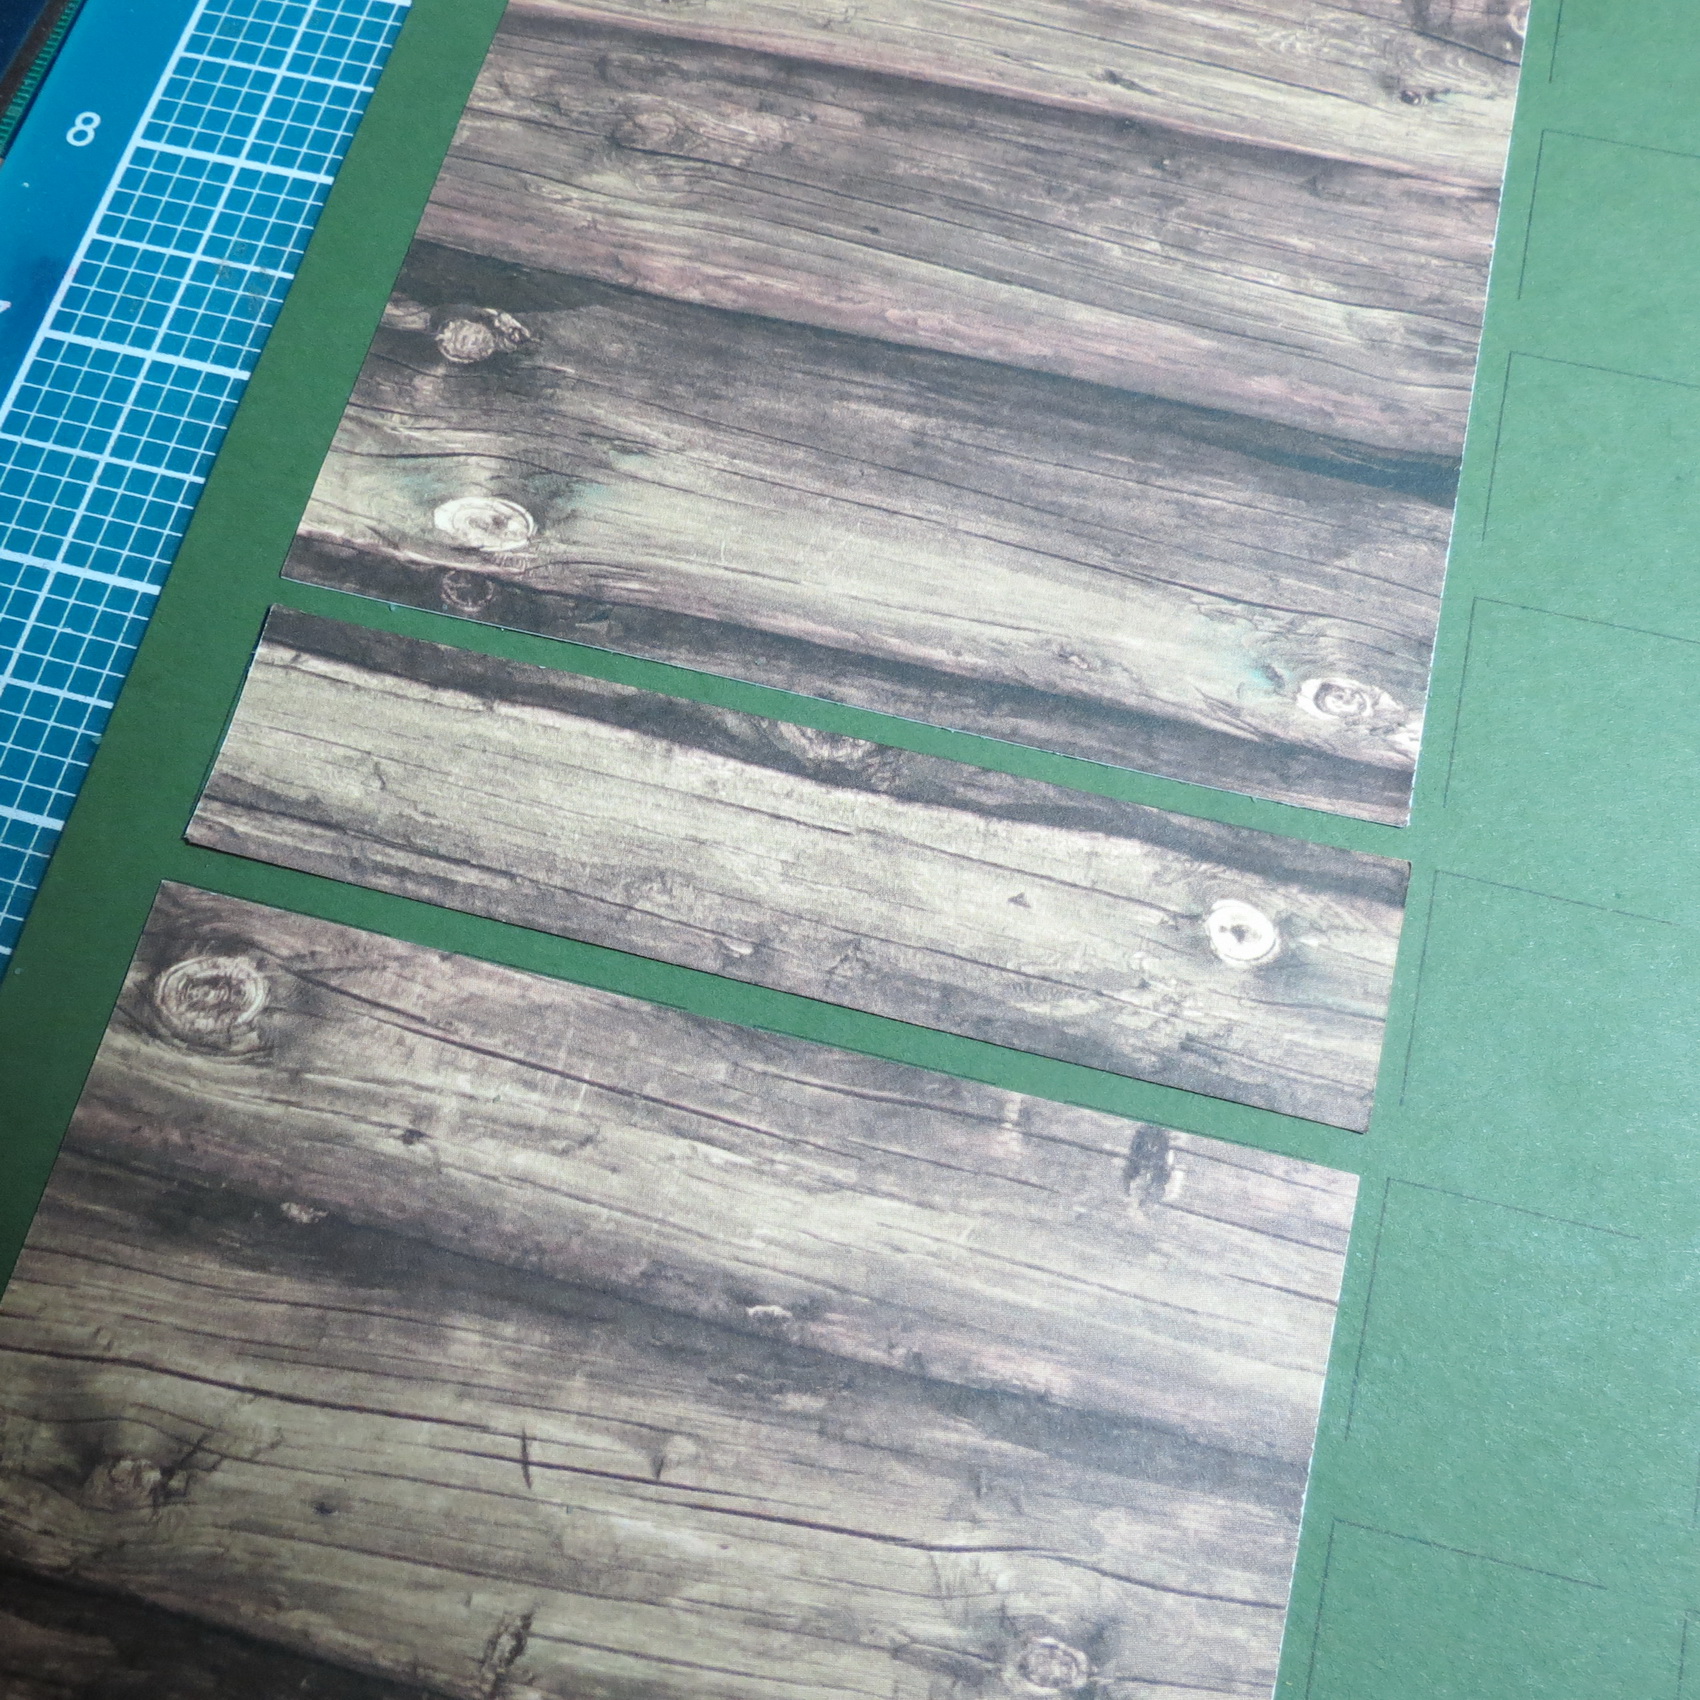
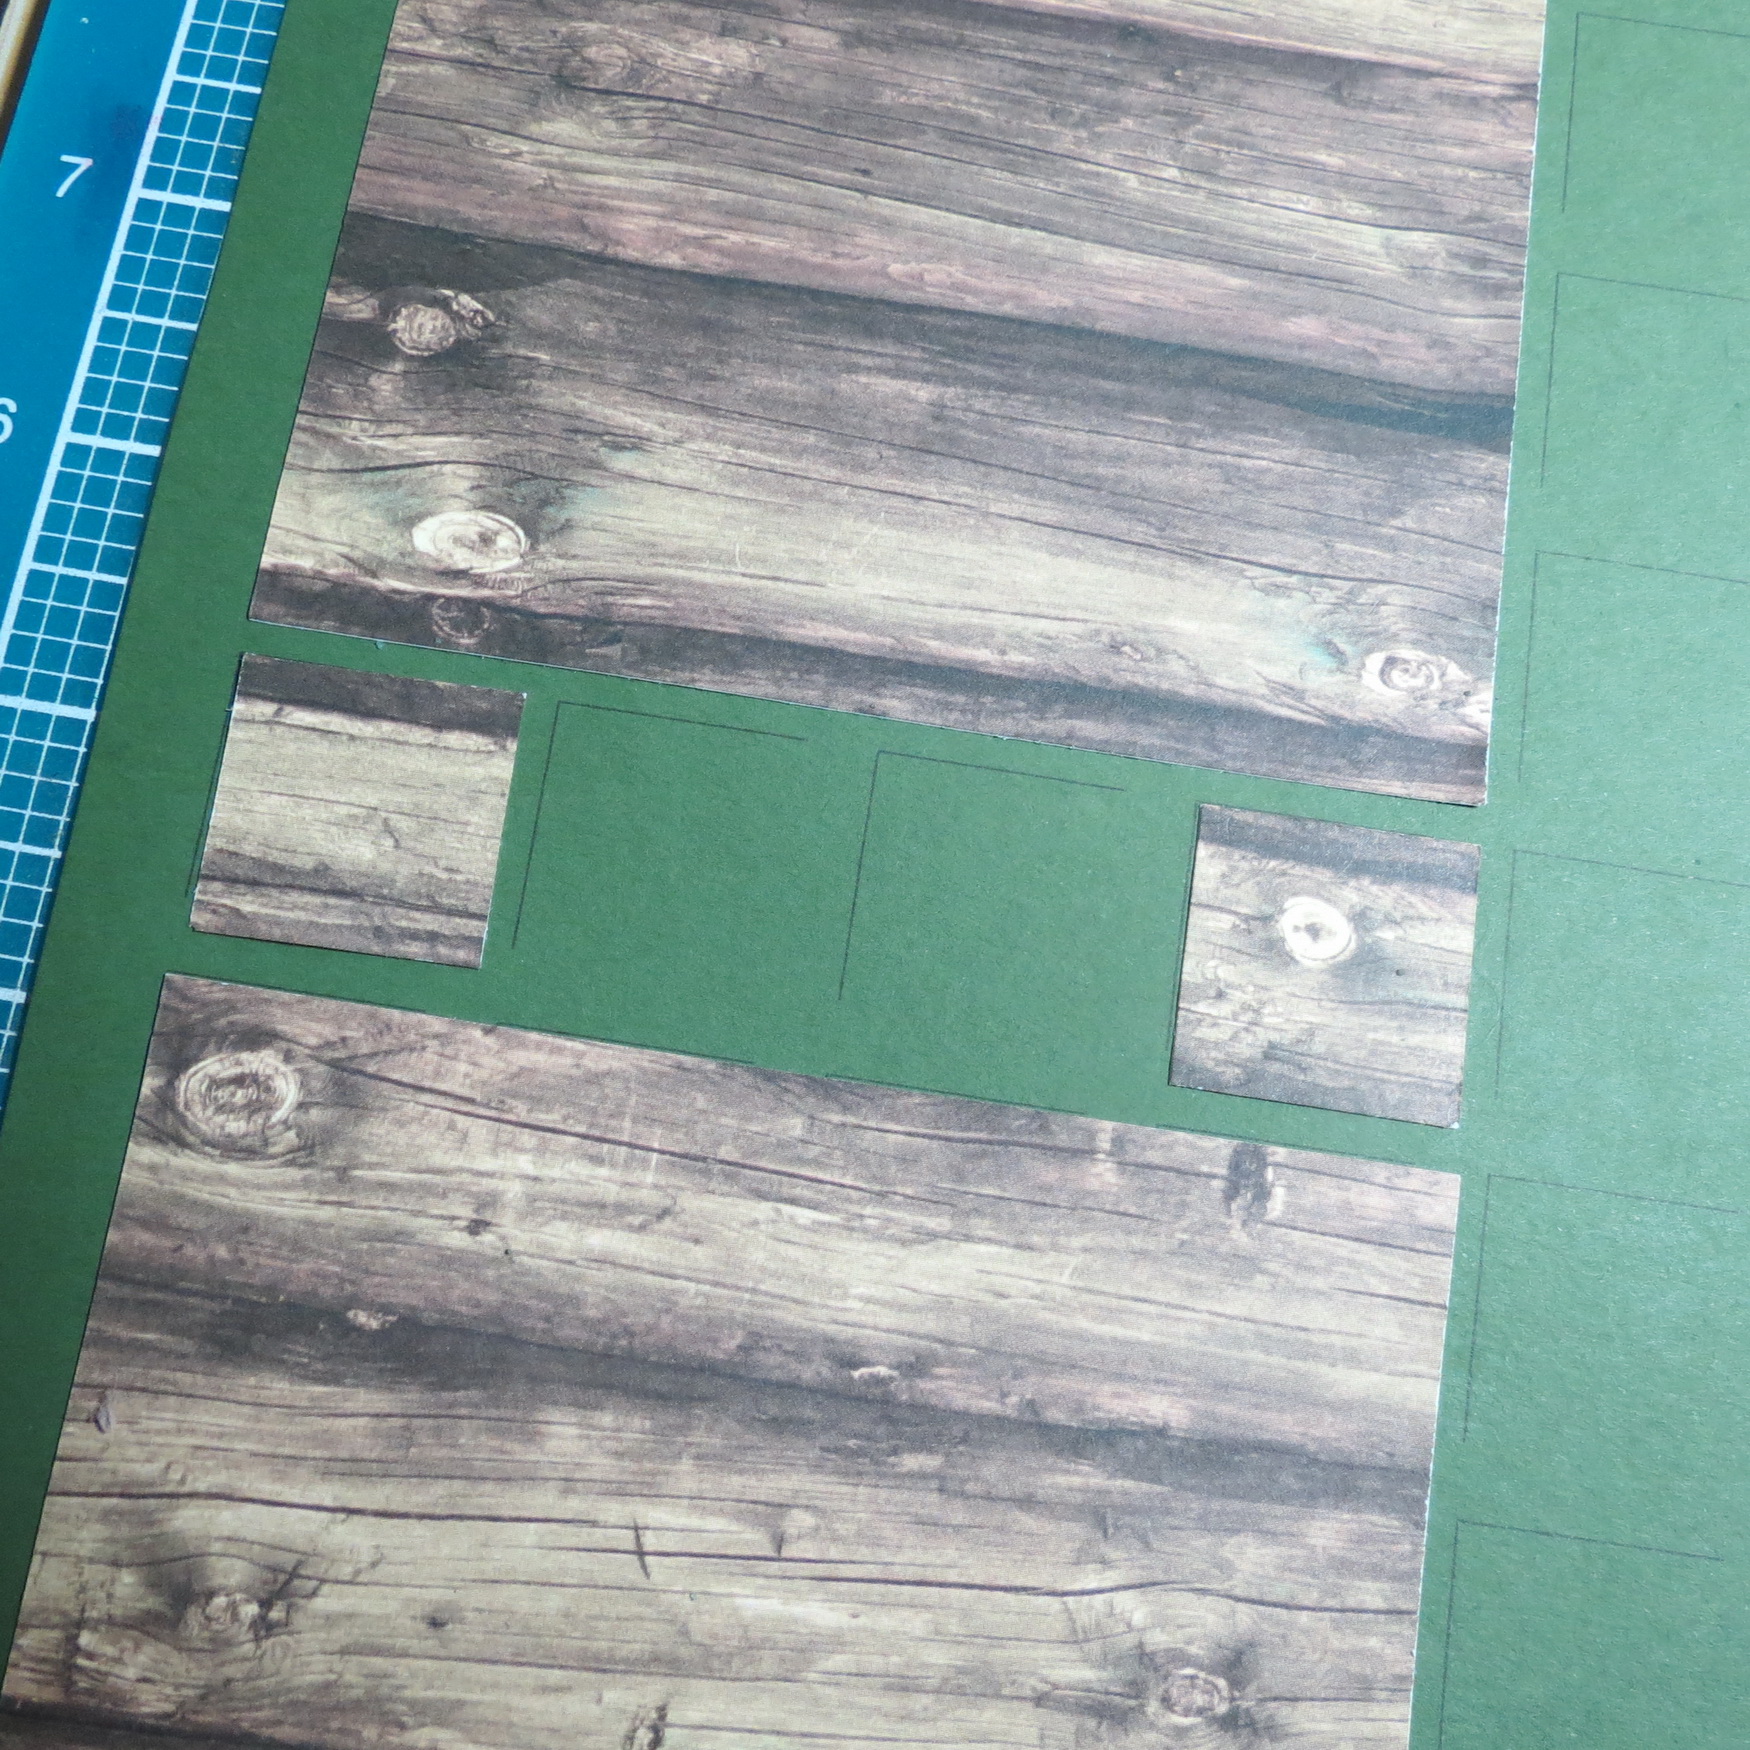
The space in between the two is a row of 4 – 1” squares. I began with a 1” strip. You can see how the pattern flows. Now I could just cut four squares from the strip and pop them into place, and it would be okay. However, if you really want to test your skills try this advanced technique for a seamless look.

Mosaic Moments Advanced Techniques Cropping to preserve the pattern
Mosaic Moments Advanced Techniques: Cropping to preserve the pattern
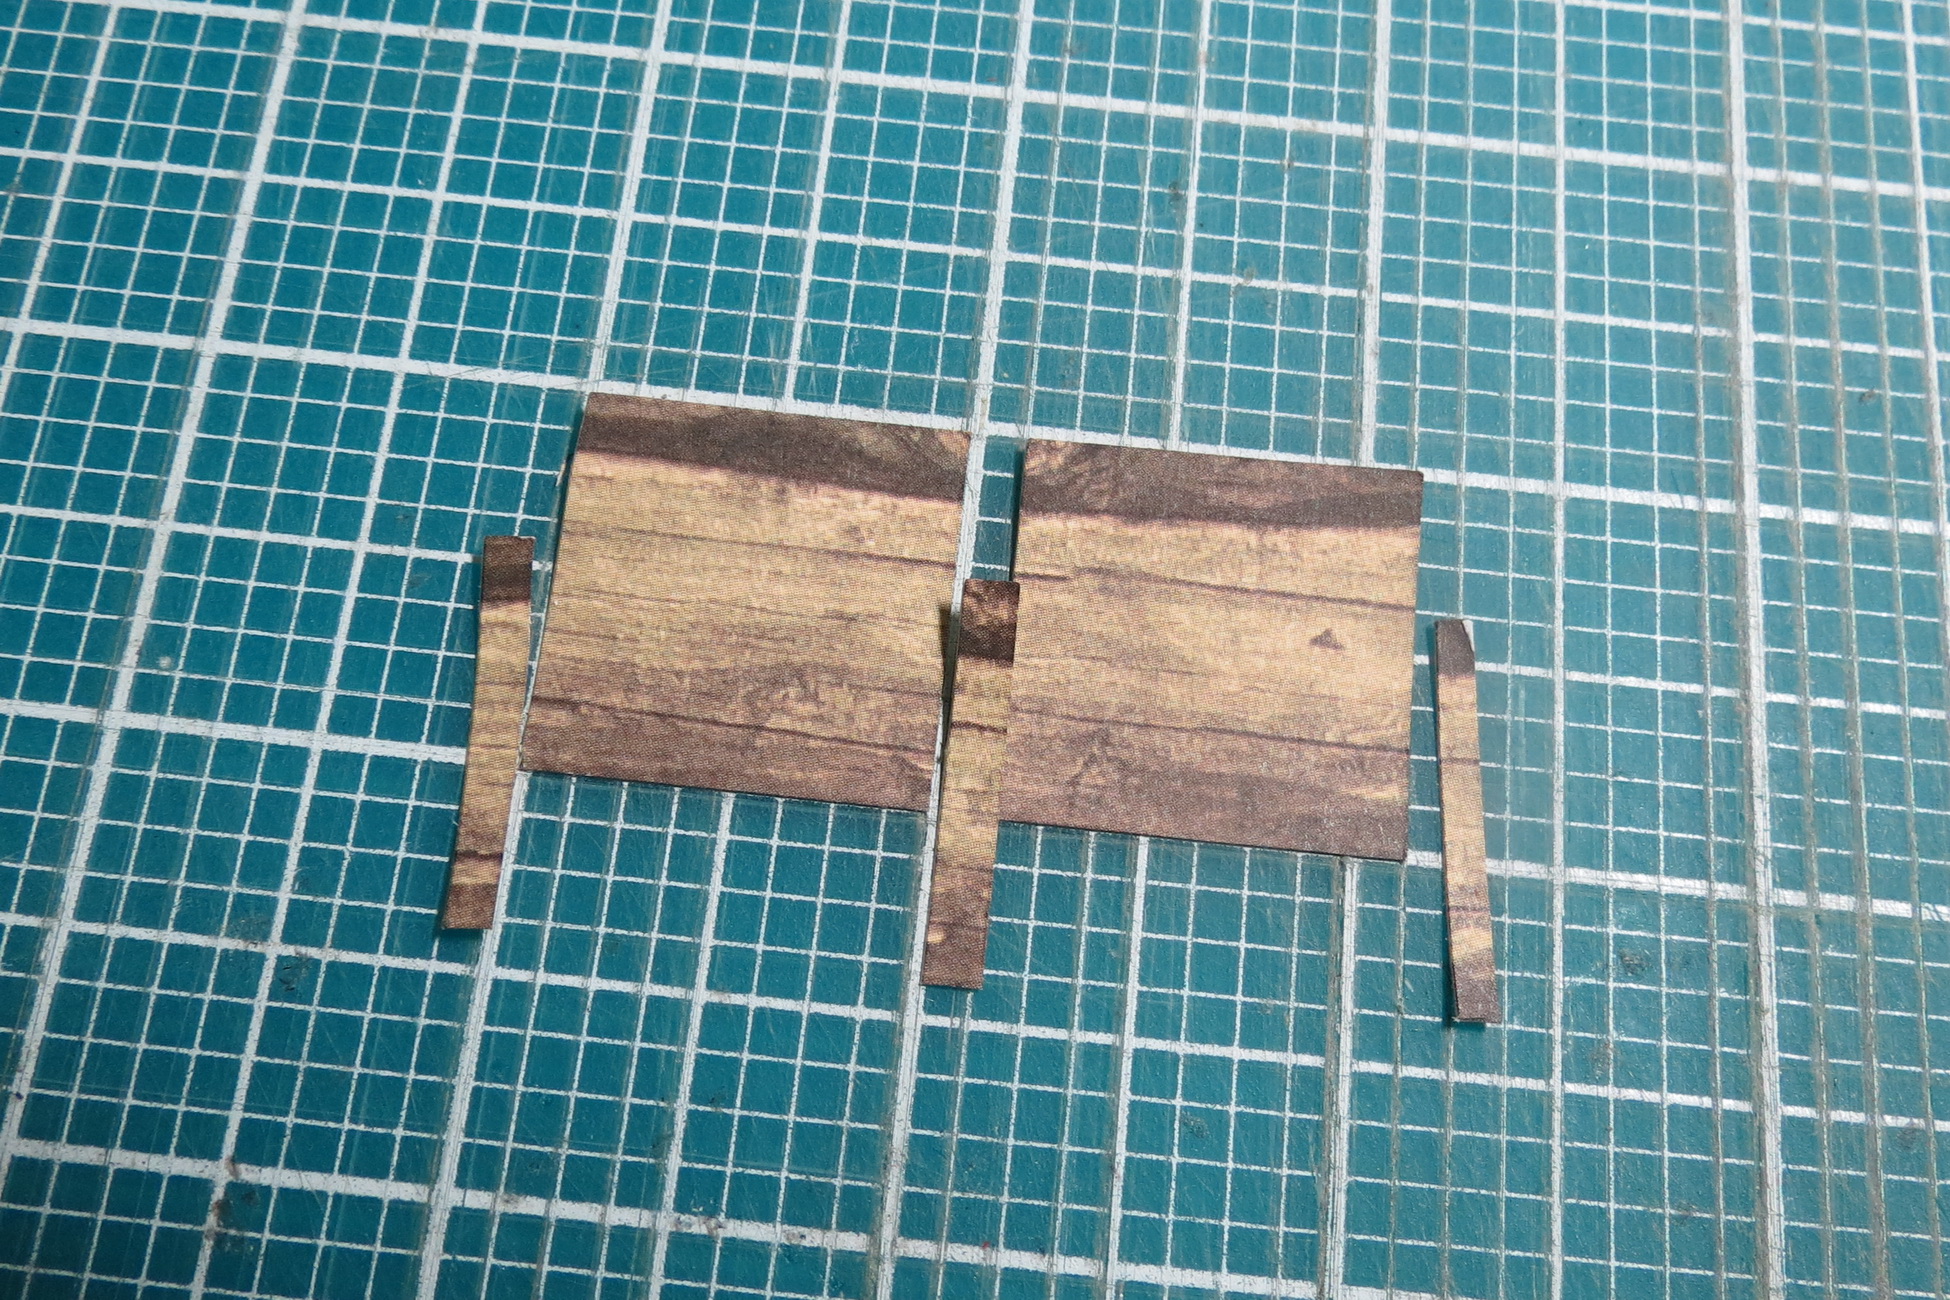
Begin with hand-cutting a 1” square from each end of your pattern strip and place on the grid.
Mosaic Moments Advanced Techniques Trimming to fit the pattern paper
Next, trim a 1/8” off of each end of the remaining section.
Finally, from either end cut a 1” square, trim away 1/8” and have a second 1” square ready to place on the grid paper.
Mosaic Moments Advanced Techniques for Achieving an Outdoorsy Look:
Mosaic Moments Advanced Techniques Embellishments and titles
Now your pattern paper blends nicely with the sections above and below!
Mosaic Moments Advanced Techniques for Achieving an Outdoorsy Look:
Advanced Techniques: Adjusting your pattern
Adjusting your pattern to fit your photos is something that you will likely try as your confidence at designing with Mosaic’s grows. We’ve got a huge collection of patterns in the Pattern Gallery and it’s continuing to grow. That’s great for inspiration and a tried and true result. But what do you do when the pattern is “almost” perfect?
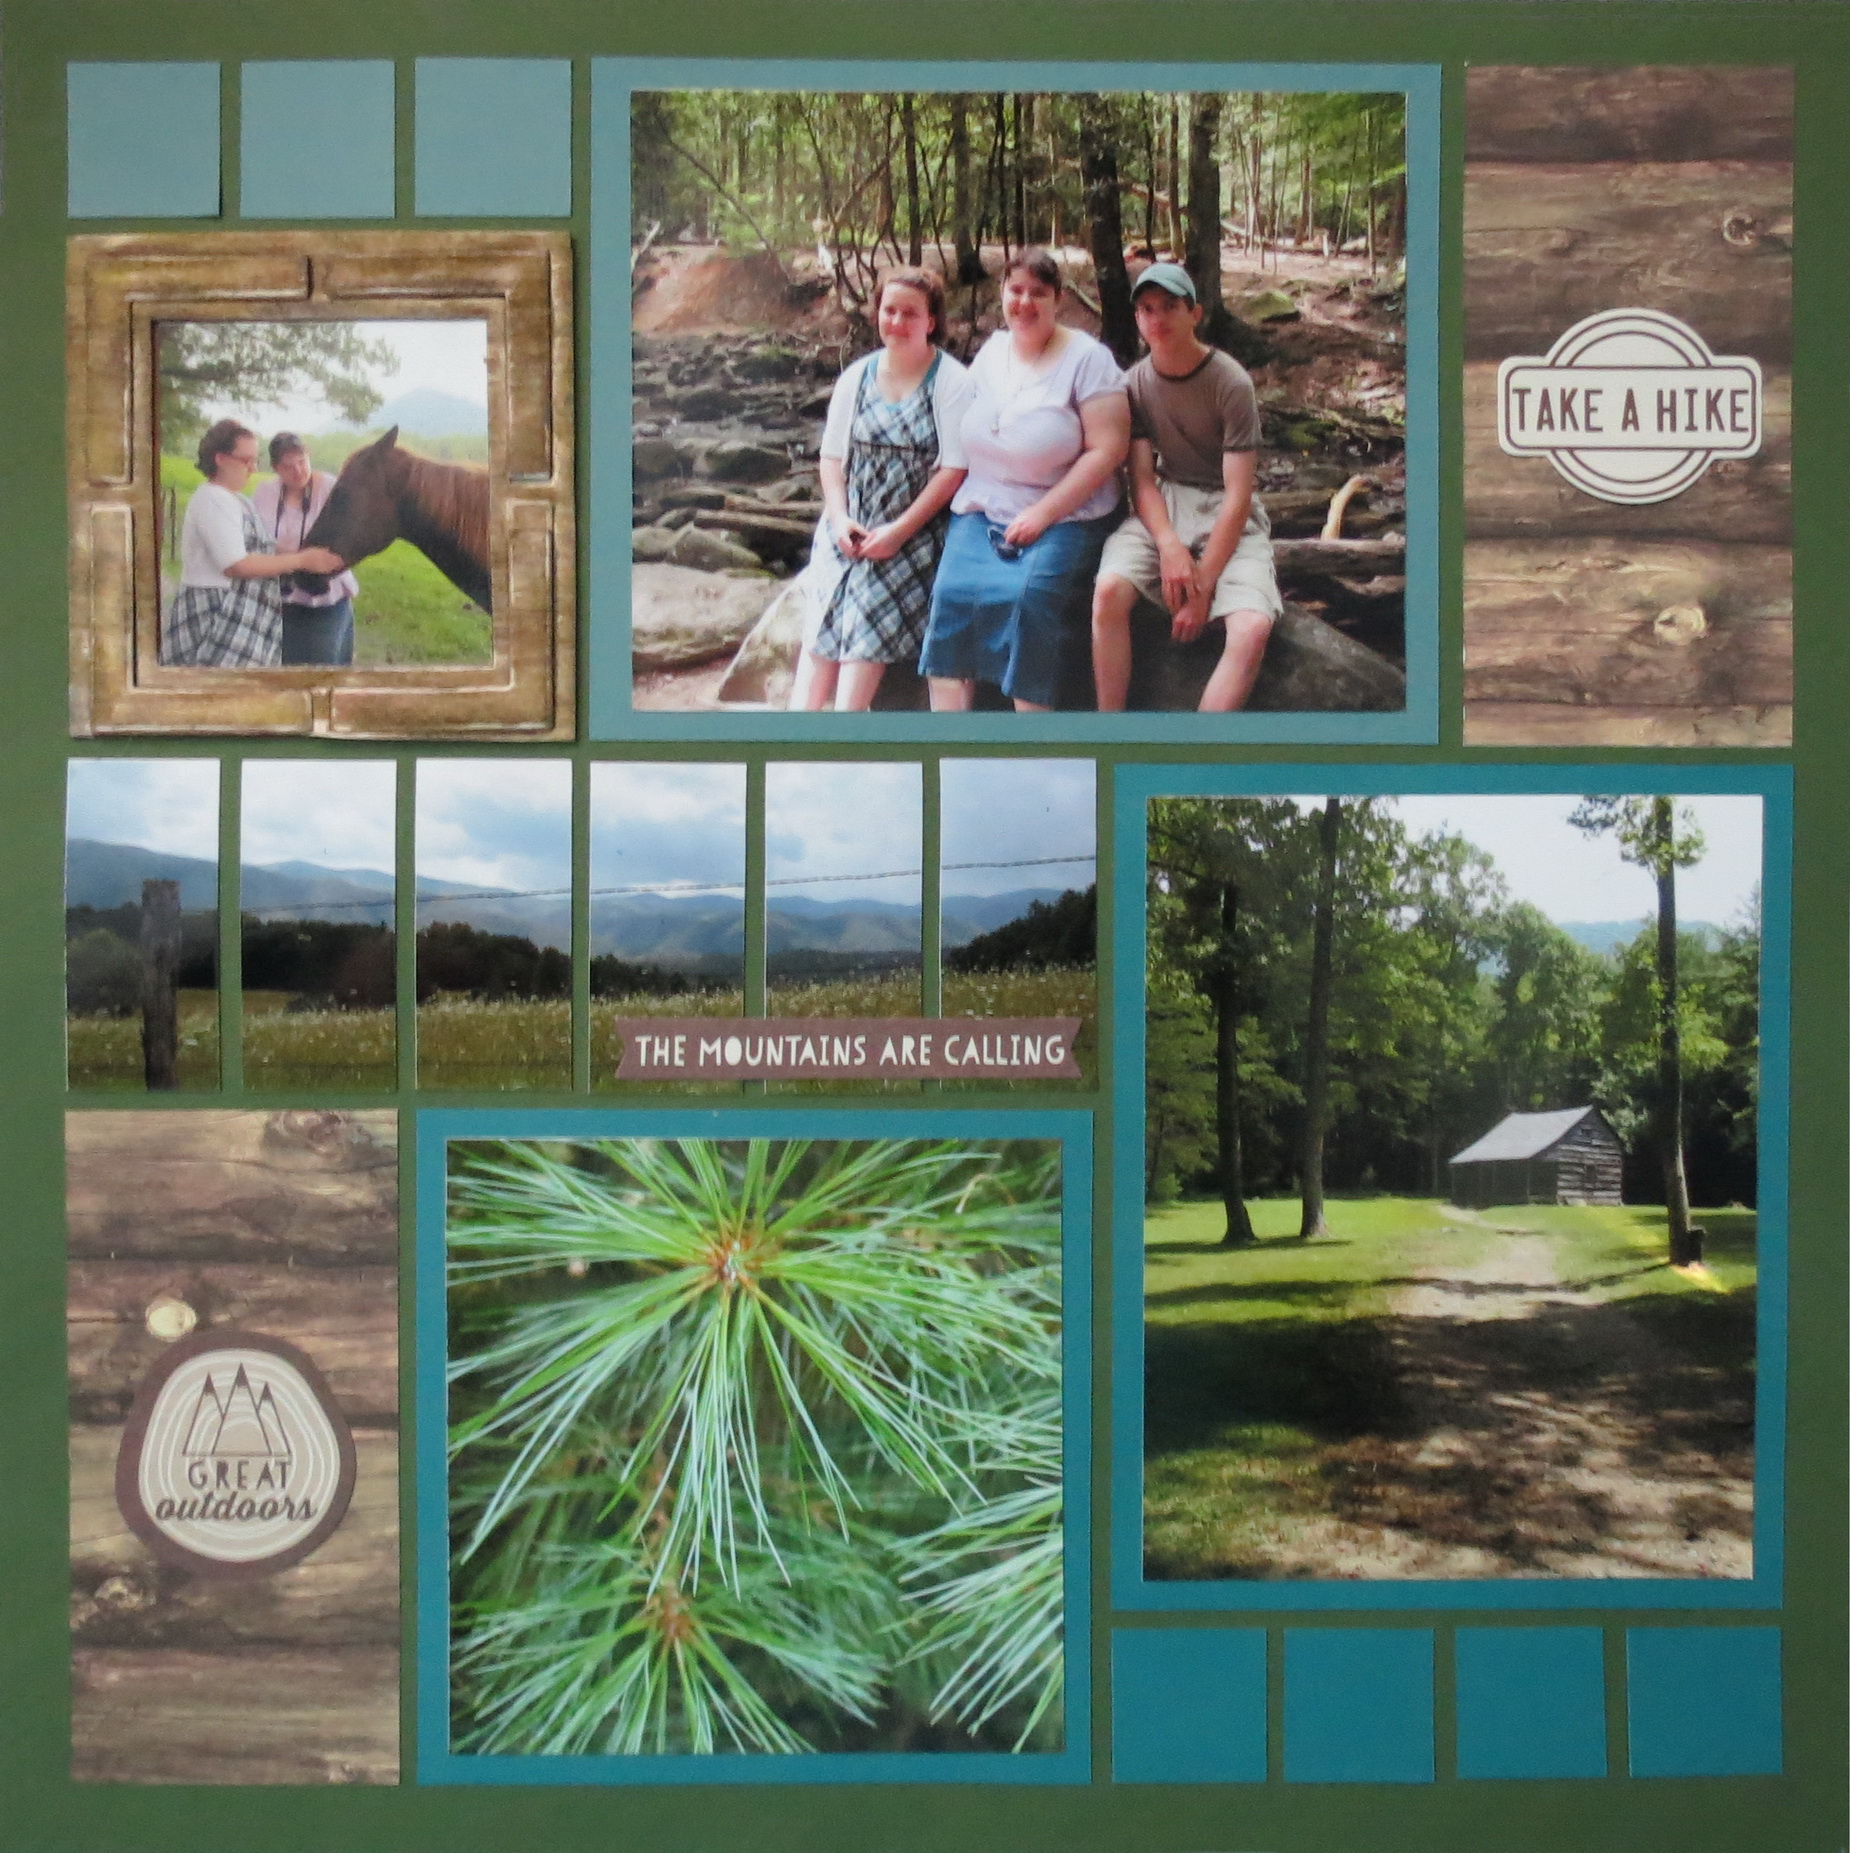
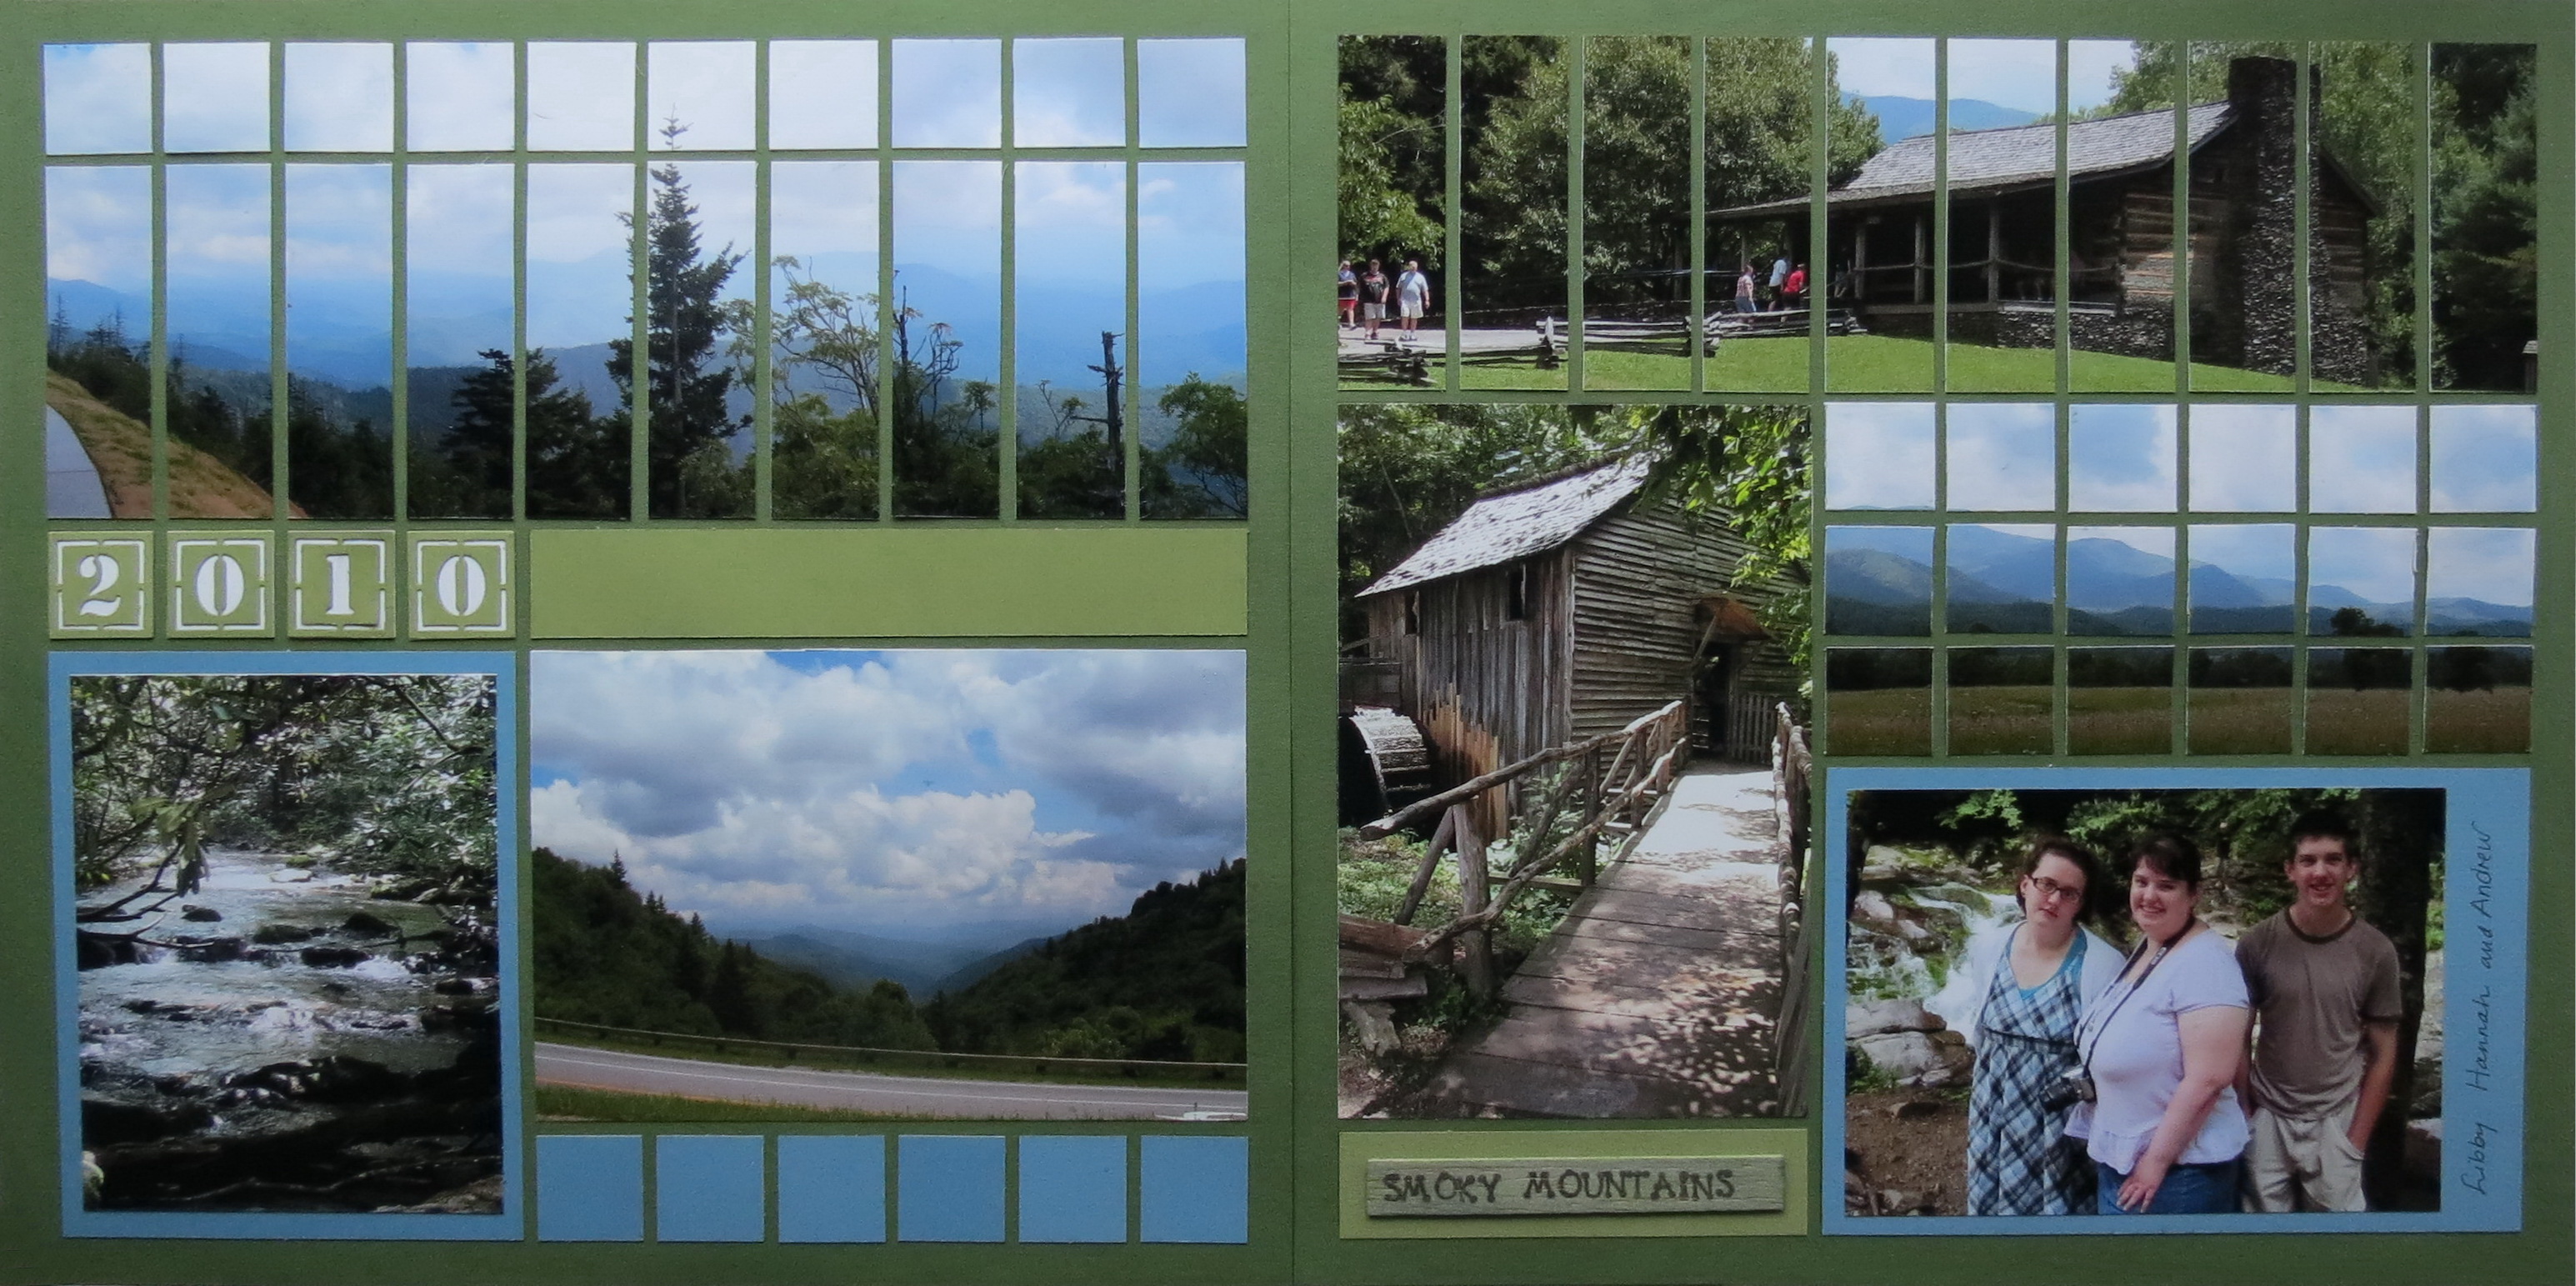
 I’ve used Patterns #155 & #169 for my layout for many of the similarities. Both had 3×3 spaces to show off the new Graphic Frame Die, both had series of 1” spots, and both would take a vertical and horizontal photo. Each pattern also had an area that occupied a 2×6 space, one was a true 2×6 while the second was three 2×2 spots. This is where my problem began.
I found that I was cutting too much off of the view I wanted to see in one photo. After thinking about it for a while I finally decided my best bet was to turn both sections into a strip pattern and take each photo and cut them into 6 – 1”x 2.125” sections. This kept both pages with similar elements, allowed me to use the photos I wanted to in a way that best suited them and as a plus, in previous pages, I’ve done from this trip I also used strip patterns, these pages now relate back to those very nicely. It’s a slight variation of the original patterns, but it’s one you’ll make on occasion.
Mosaic Moments
I think you’ll love the versatility of this 3×3 Graphic Frame die as you may already love the other graphic frames in this family of dies. Be sure to explore the many ways to incorporate this die into your layouts and come up with your own!
Mosaic Moments Advanced Techniques
Andrea Fisher