Have you created a woven scrapbook border before? Next Question – Have you made one with Mosaic Moments? If you answered NO to either question, we have an awesome technique you will love! And the best part – it’s super easy, especially if you have Paper Tiles! A woven border is unique and gorgeous. If you are trying out some new scrapbook techniques during the year – this is a must! Below I listed out the materials you need to create a weaved border with the Mosaic Moments system, plus the 3 simple steps to making one.
Materials Needed to Create Your Woven Scrapbook Border
- Mosaic Moments™ Cutting Mat
- Exacto Knife
- Re-positional Tape
- Ruler
- 12×12 Sheet of patterned paper or card-stock of your choice
- 1×3 Paper Tiles or you can cut them yourself with Card-stock before you begin this project
Step 1: Cut Long Strips
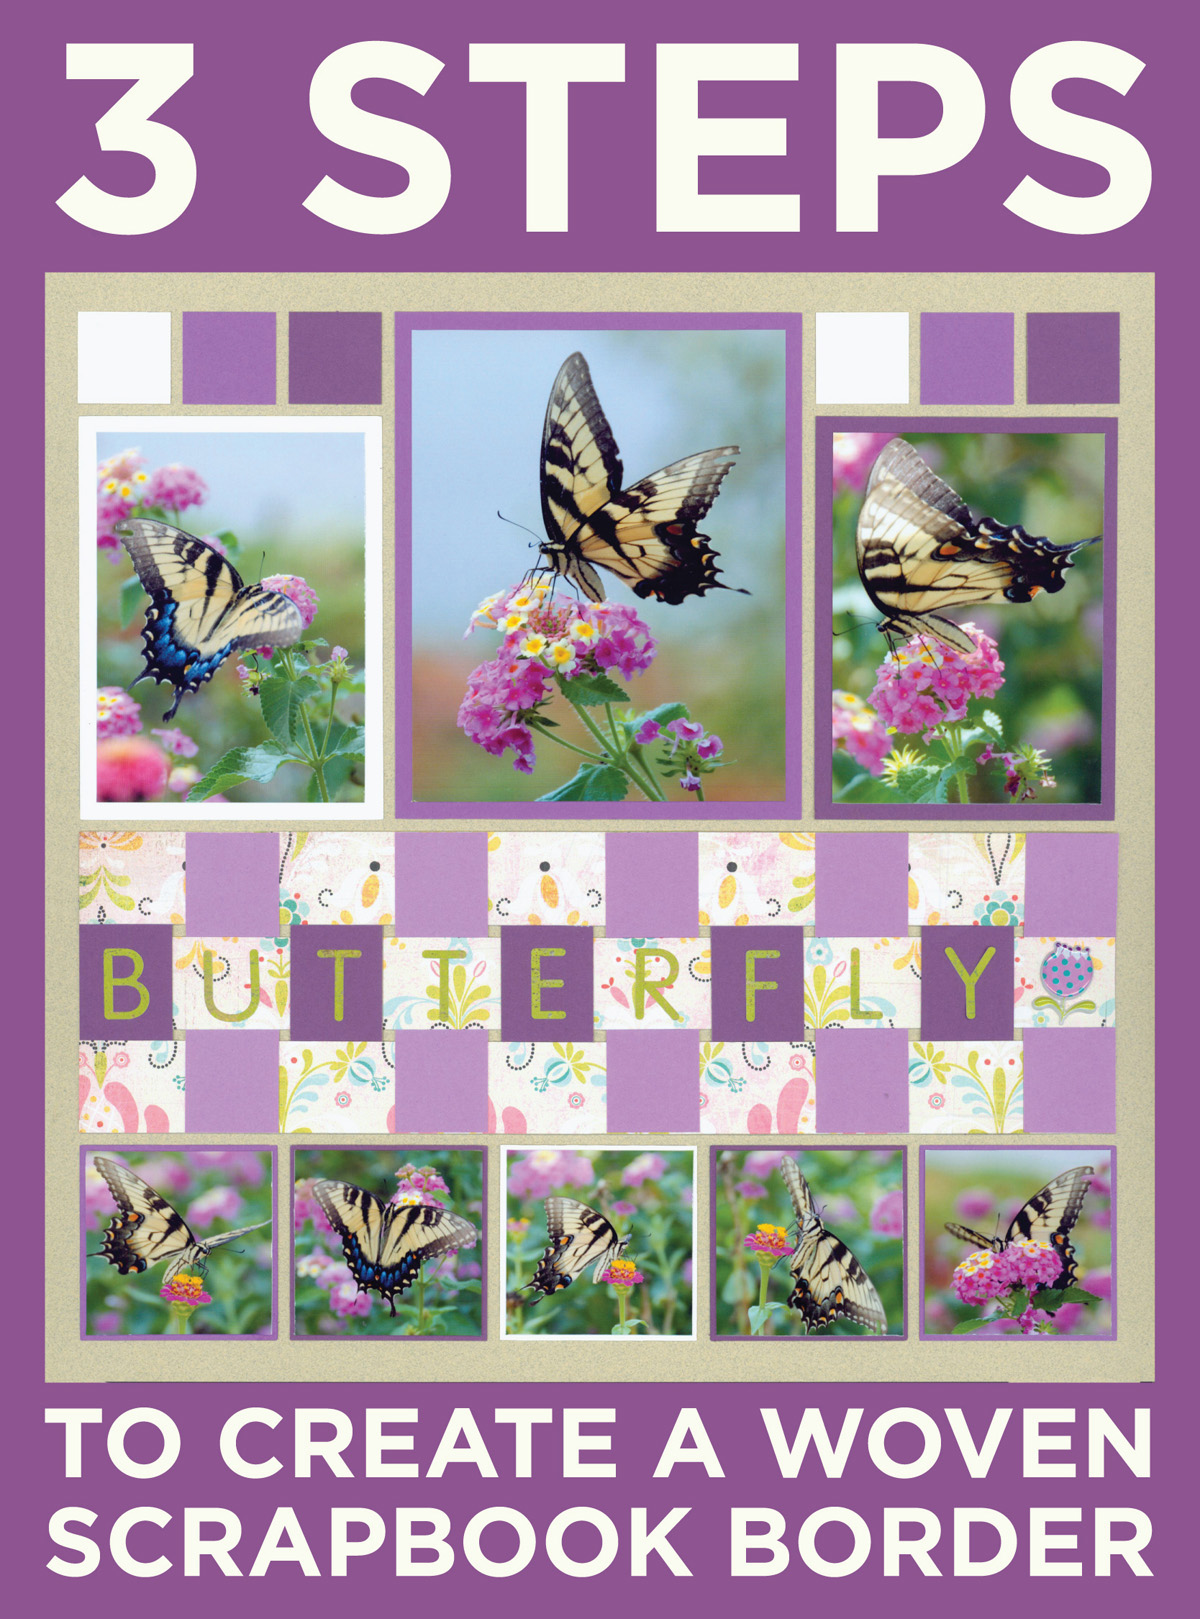
To begin, Cut 3 strips of your chosen 12×12 pattern paper or card stock into 11.125w x 1in. strips. You can measure each strip on the Mosaic Moment™ mat. Make sure you use re-postional tape to keep the paper from moving around. The strips should take up an entire row of squares on the grid paper. I found a lovely patterned paper from BasicGrey™ that I thought would fit with my butterfly photographs.
Step 2: Stick and Position Strips
Next, Glue the the edges of each strip with your re-positional tape. DO NOT put glue in the middle. This will help the 1×3 Paper Tiles™ slip through each patterned paper strip easier.
Now, simply place your strips on the grid paper. You can place these strips in 3 adjacent rows wherever you want on the paper. You can have the rows go vertical or horizontal.
Step 3: Weave Your Paper Tiles
Next, take one of your 1 in. x 3.25 Paper Tiles and place it carefully in the long strips as shown above. For this first Paper Tile™ I made sure it went over of the center strip and underneath the top and bottom strips. Line it up carefully with the grid lines. Don’t forget to add glue on the back of the Paper Tile before placing it.
It should look like this when you are done.
Next, take a second Paper Tile™ (it can be the same color or a different color) and slip into the strips as shown in the picture. Align with the grid as best you can. Repeat these last few steps to make a woven pattern. You should have ten Paper Tiles™ in a row.
The final result looks fantastic! Wasn’t that easy? This is a great project if you have a lot of 1 x 2.125 in. Paper Tiles left over.
Materials for My Butterfly Page:
- Mosaic Moments™ 12×12 Sandstone grid paper (Love This for Summer and Spring pages)
- White, Boysenberry, Grape Delight, and Plum Delight Paper Tiles
- BasicGrey™ patterned paper
- Flower Sticker
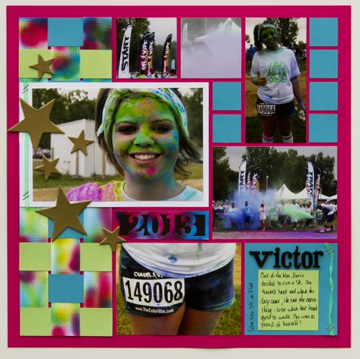
Below is another page with a woven border created by Candy Spiegel (2013 & 2014 Design Team Member). You can read more about her page on Journella.com.