
As a scrapbooker, you likely want to tell the whole story (or close to it) on your pages - right?
Below, we share seven different tips on how you can tell more of the story with two page spreads. A full layout, of course, will give you more space to add various photos, embellishments, and even journaling. In the layouts below, the designers did not use every photo from their stash, but they were able to fill in enough to tell the whole story about the day or event.
So, keep scrolling to see our seven tips and ideas on how you can tell the entire (or most) of your story:
1. Show A Little Bit of Everything
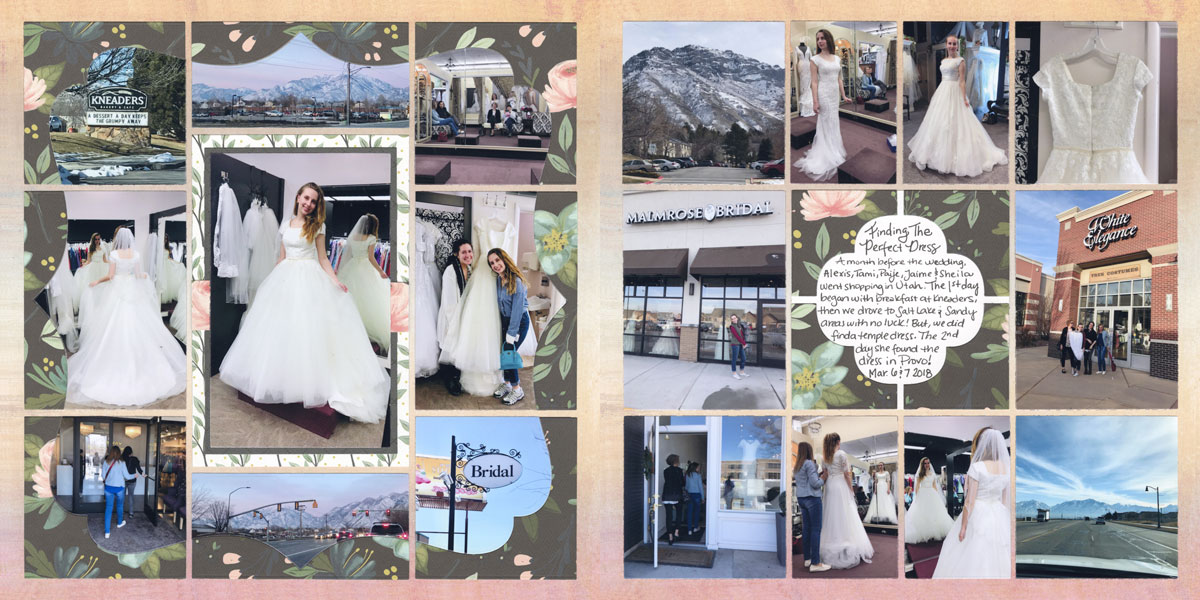
The layout above shows a two day wedding dress shopping experience. If you have done this, you likely know how many hours or days it takes!
Paije created this layout to show the entire experience of searching for the perfect dress. Her solution was to add at least one photo to represent each part of the two days. So, she has several photos of her sister trying different dresses, but she also included photos of the actual stores and of the scenery they drove by. The end result is that the full story is shown.
So, if you cannot fit in literally every photo, try finding at least one photo to represent each place visited or different times of the day.
Bonus: Journaling can also be added if you cannot fit all the day's details!
This Layout Features: 12x12 Our Time Grid Paper from the All Season Collection, Whimsy 3x3 & 3x4 Die (L2), Whimsy 4x4 & 2x4 Die (L2), Whimsy 2x2 Die Set (L2), the Layering Die Bundle Colored A-L through E-L (L1), and the Basic Die Bundle A-E & 1" Grid - Colored (L1). Pattern paper from Carta Bella™.
2. Add in the Extra Details
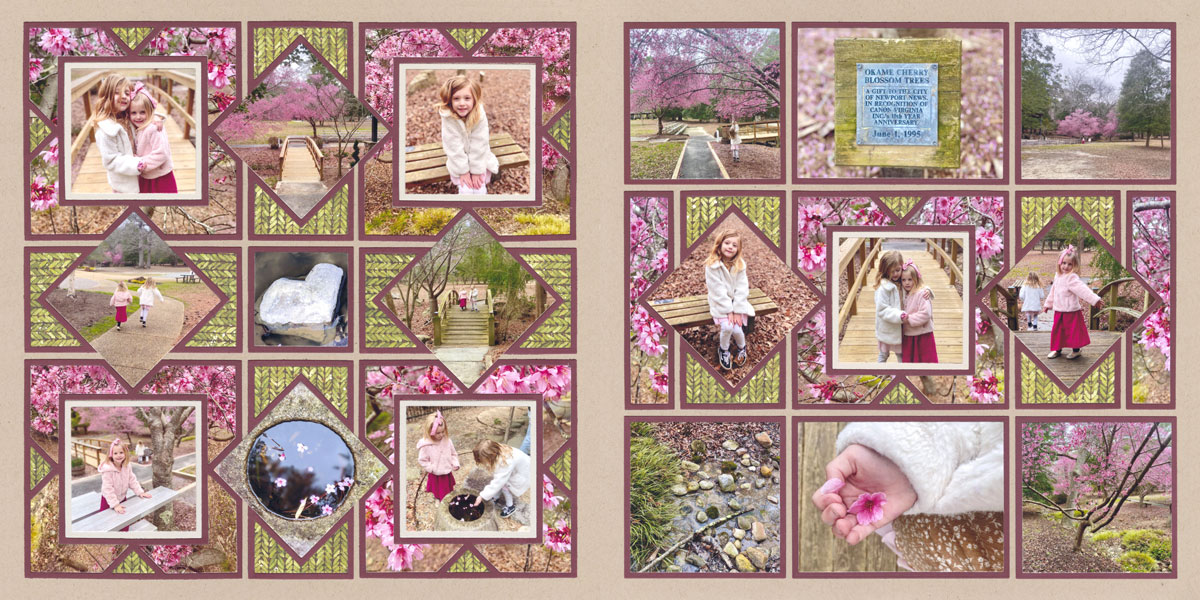
The story of this page may surprise you! This layout was telling the story of Jodi's granddaughters visiting a nature park around Valentine's Day.
To show this story, Jodi needed to add photos of a few extras. While her sweet granddaughters steal the show, more photos were needed to show the full experience. First, Jodi added beautiful pink blossoms throughout the page - pink is fitting for Valentine's Day! If you look at left page, Jodi placed a photo of a rock that looks like a heart. So adorable! As you look at the page, you will find even more sweet surprises from the day.
Before you begin your layout, decide on what story you would like to tell - you may see these little extra details will come in handy!
This Layout Features: 12x12 Fresh Malt Grid Paper, Dynamic Die Set (L3), the Layering Die Bundle Colored A-L through E-L (L1), and the Basic Die Bundle A-E & 1" Grid - Colored (L1). Pattern paper from BoBunny™.
3. Choose the Right Embellishments
What can help tell the story is the dies and/or embellishments you choose.
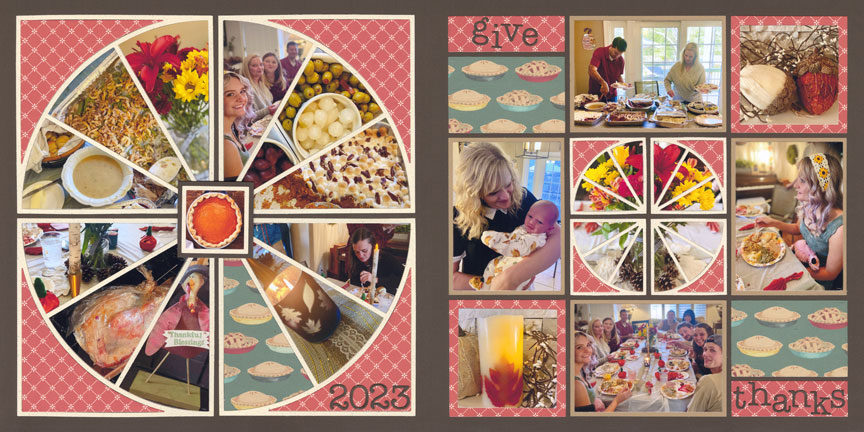
On this layout, Jodi tells the story of her family's Thanksgiving meal. You can see a full pie design on the left page and the right page has the mini pie design. The two pies were clearly a great fit for this story. Both sides show amazing details of food and decor, plus tell the story of all the food - multiple pies and dishes served!
With two page spreads, you have more room for multiple embellishments to help tell your story.
This Layout Features: 12x12 Cocoa Grid Paper, Quarter Pie And Piece Of Pie Die Set (L3), Mini Pie 2x2 Die (L3), Numbers 4 Die Set (L1), Lowercase 4 Die Set (L1), the Layering Die Bundle Colored A-L through E-L (L1), and the Basic Die Bundle A-E & 1" Grid - Colored (L1). Pattern paper from Carta Bella™ and Bella Blvd™.
4. Use a Die Series
For two page spreads, using a particular die series can come in handy!
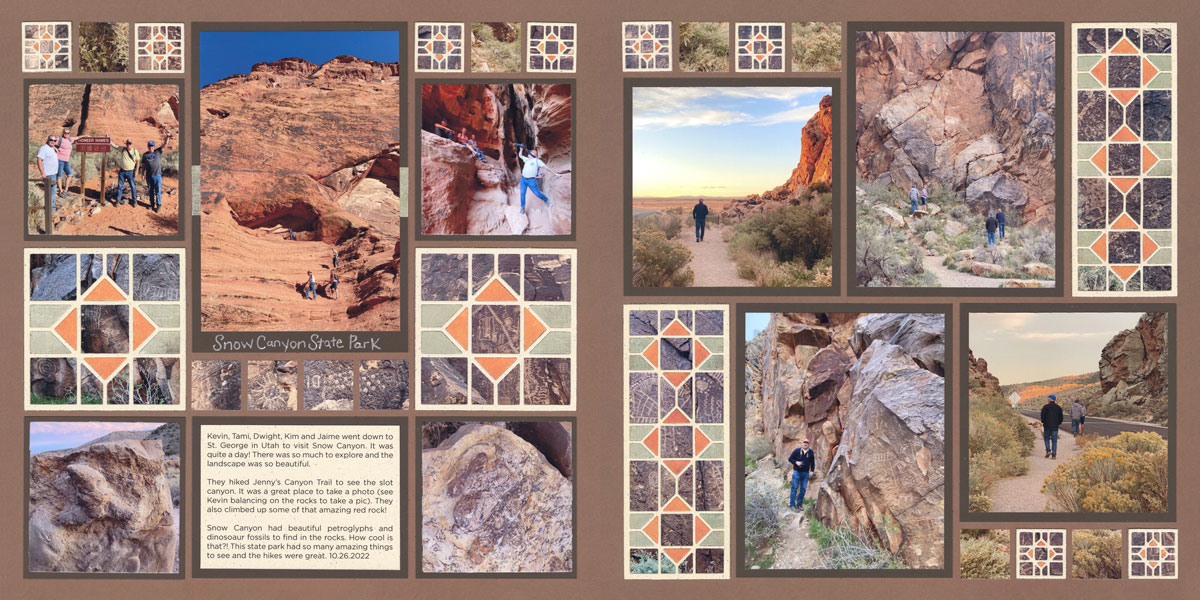
On the layout above, Paije used three different sizes of the Craftsman die series to help tell this story of a state park in Utah. The benefit of a die series is you can repeat the same design, but you will have variety by using multiple sizes. On both sides of the layout, you can see Paije filled all of the dies the same way, but each of them bring something slightly different.
The Craftsman dies also have photos of petroglyphs found in this state park. Because of the die cuts, these amazing photos were displayed in a unique way. Multiple photos of various petroglyphs were used on this page.
What a cool way to tell to the story!
This Layout Features: 12x12 Cloves Grid Paper from the Harvest Collection, Craftsman 3x3 Die (L1), Craftsman 2x5 Die (L1), Craftsman 2x2, 1x1, & 1x3 Die Set (L1), the Layering Die Bundle Colored A-L through E-L (L1), and the Basic Die Bundle A-E & 1" Grid - Colored (L1). Pattern paper from Basic Grey™.
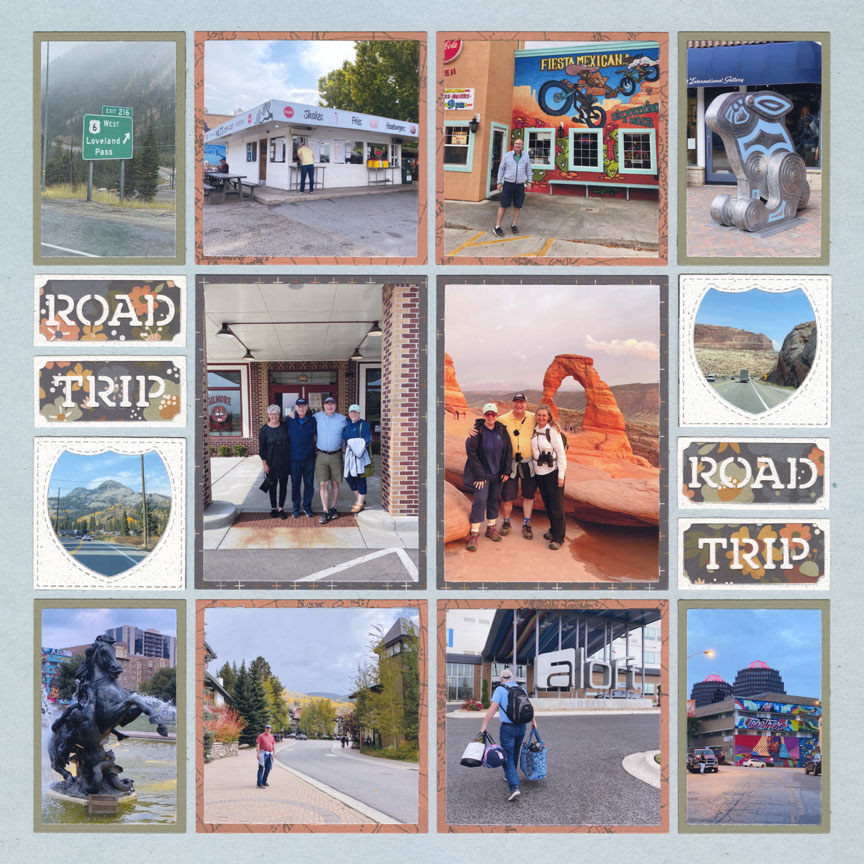
5. Add Smaller Photos
If you have a ton of photos and want to add as many as possible to a two page spread - the key is to use page patterns with smaller design spots.
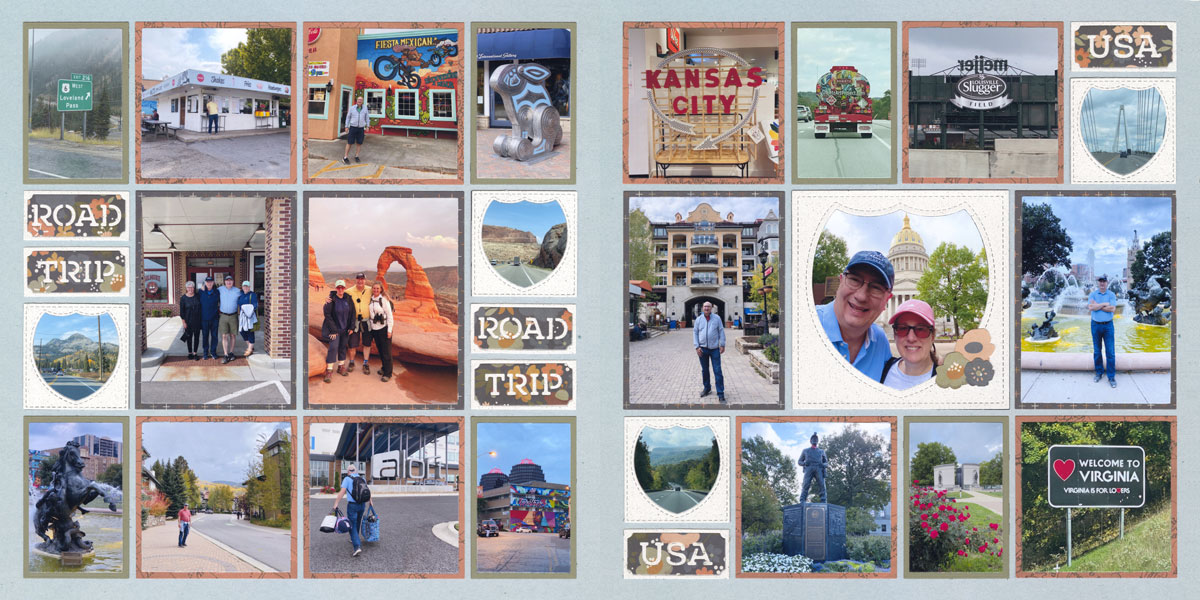
If you look at these two pages, the design spots are mostly small and medium sizes. This allowed Paije to add many photos from this road trip. She was able to fit in at least one photo from each state Tami and Kevin passed through.
Smaller embellishments were also added to tell the story. The Tickets dies say "Road Trip" and "USA". Plus, Paije added mini photos inside the Stitched Interstate die frames - telling even more of this road trip story!
This Layout Features: 12x12 Right as Rain Grid Paper from the In the Garden Collection, Stitched Interstate Frame 4x4 & 2x2 Part 1 & Part 2 Set (L1), USA Tickets Die (L1), Ticket Die Set (L1), the Layering Die Bundle Colored A-L through E-L (L1), and the Basic Die Bundle A-E & 1" Grid - Colored (L1).
6. Panoramas Set the Scene

If you have been to a scenic place, a large panorama can really help show the story!
On the layout above, Paije wanted to add photos taken from the top of a lighthouse. On the left page, the bottom is completely filled with a panorama. Paije could have continued the panorama on the right side as well. Instead, she opted to make the mini panorama to show another spot from her viewpoint.
With a two page spread, you can show more of your point of view of the place you visited.
This Layout Features: 12x12 Our Time Grid Paper from the All Season Collection, Strips Cut 1x3.25 Die (L2), the Layering Die Bundle Colored A-L through E-L (L1), and the Basic Die Bundle A-E & 1" Grid - Colored (L1). Pattern paper from Vicki Boutin™.
7. Use a Die Collection with Smaller Spots
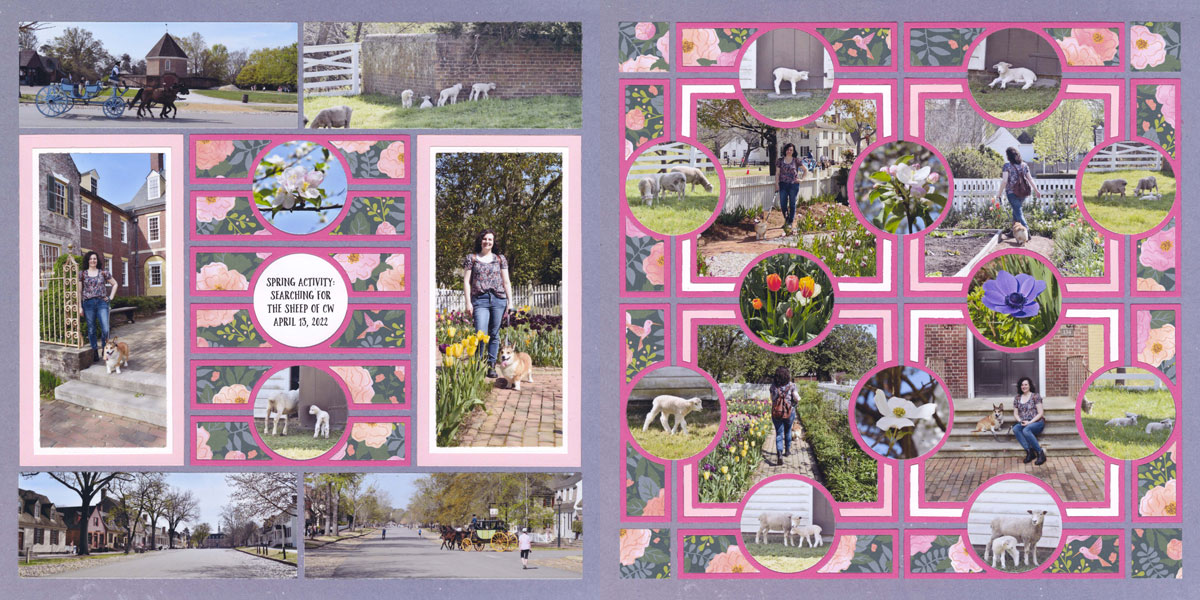
To help tell more of the story, you can choose a die collection with small design spots such as On the Dot.
Each dot on the page shows various items Paije saw on this spring day, and this layout really shows a bit of everything! You can see lovely blossoms and flowers, plus various pics of the adorable sheep. Plus, she still had room to add photos of herself and her loyal pup.
Pick the right die collection and your page will be filled with many of the sites or events of the day!
This Layout Features: 12x12 Plum Grid Paper from the Fresh N Fruity Collection, On the Dot 4x4 Die (L3), On the Dot 2x4 & 1x4 Die (L3), the Layering Die Bundle Colored A-L through E-L (L1), and the Basic Die Bundle A-E & 1" Grid - Colored (L1). Pattern paper from Paige Evans™.