
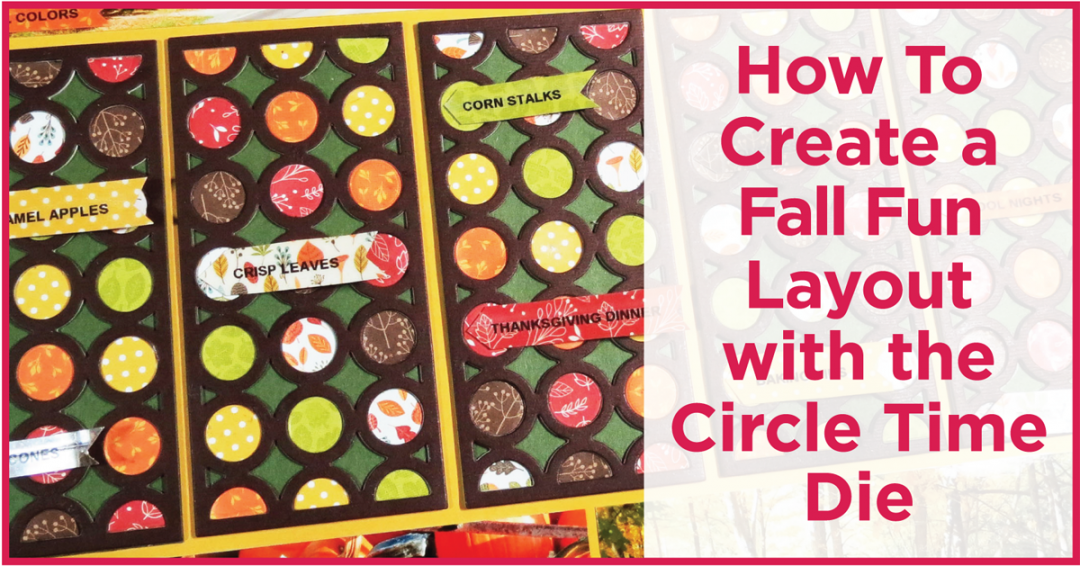
Pattern Gallery Makeover
Featuring Pattern #345 a row pattern and the Circle Time Die
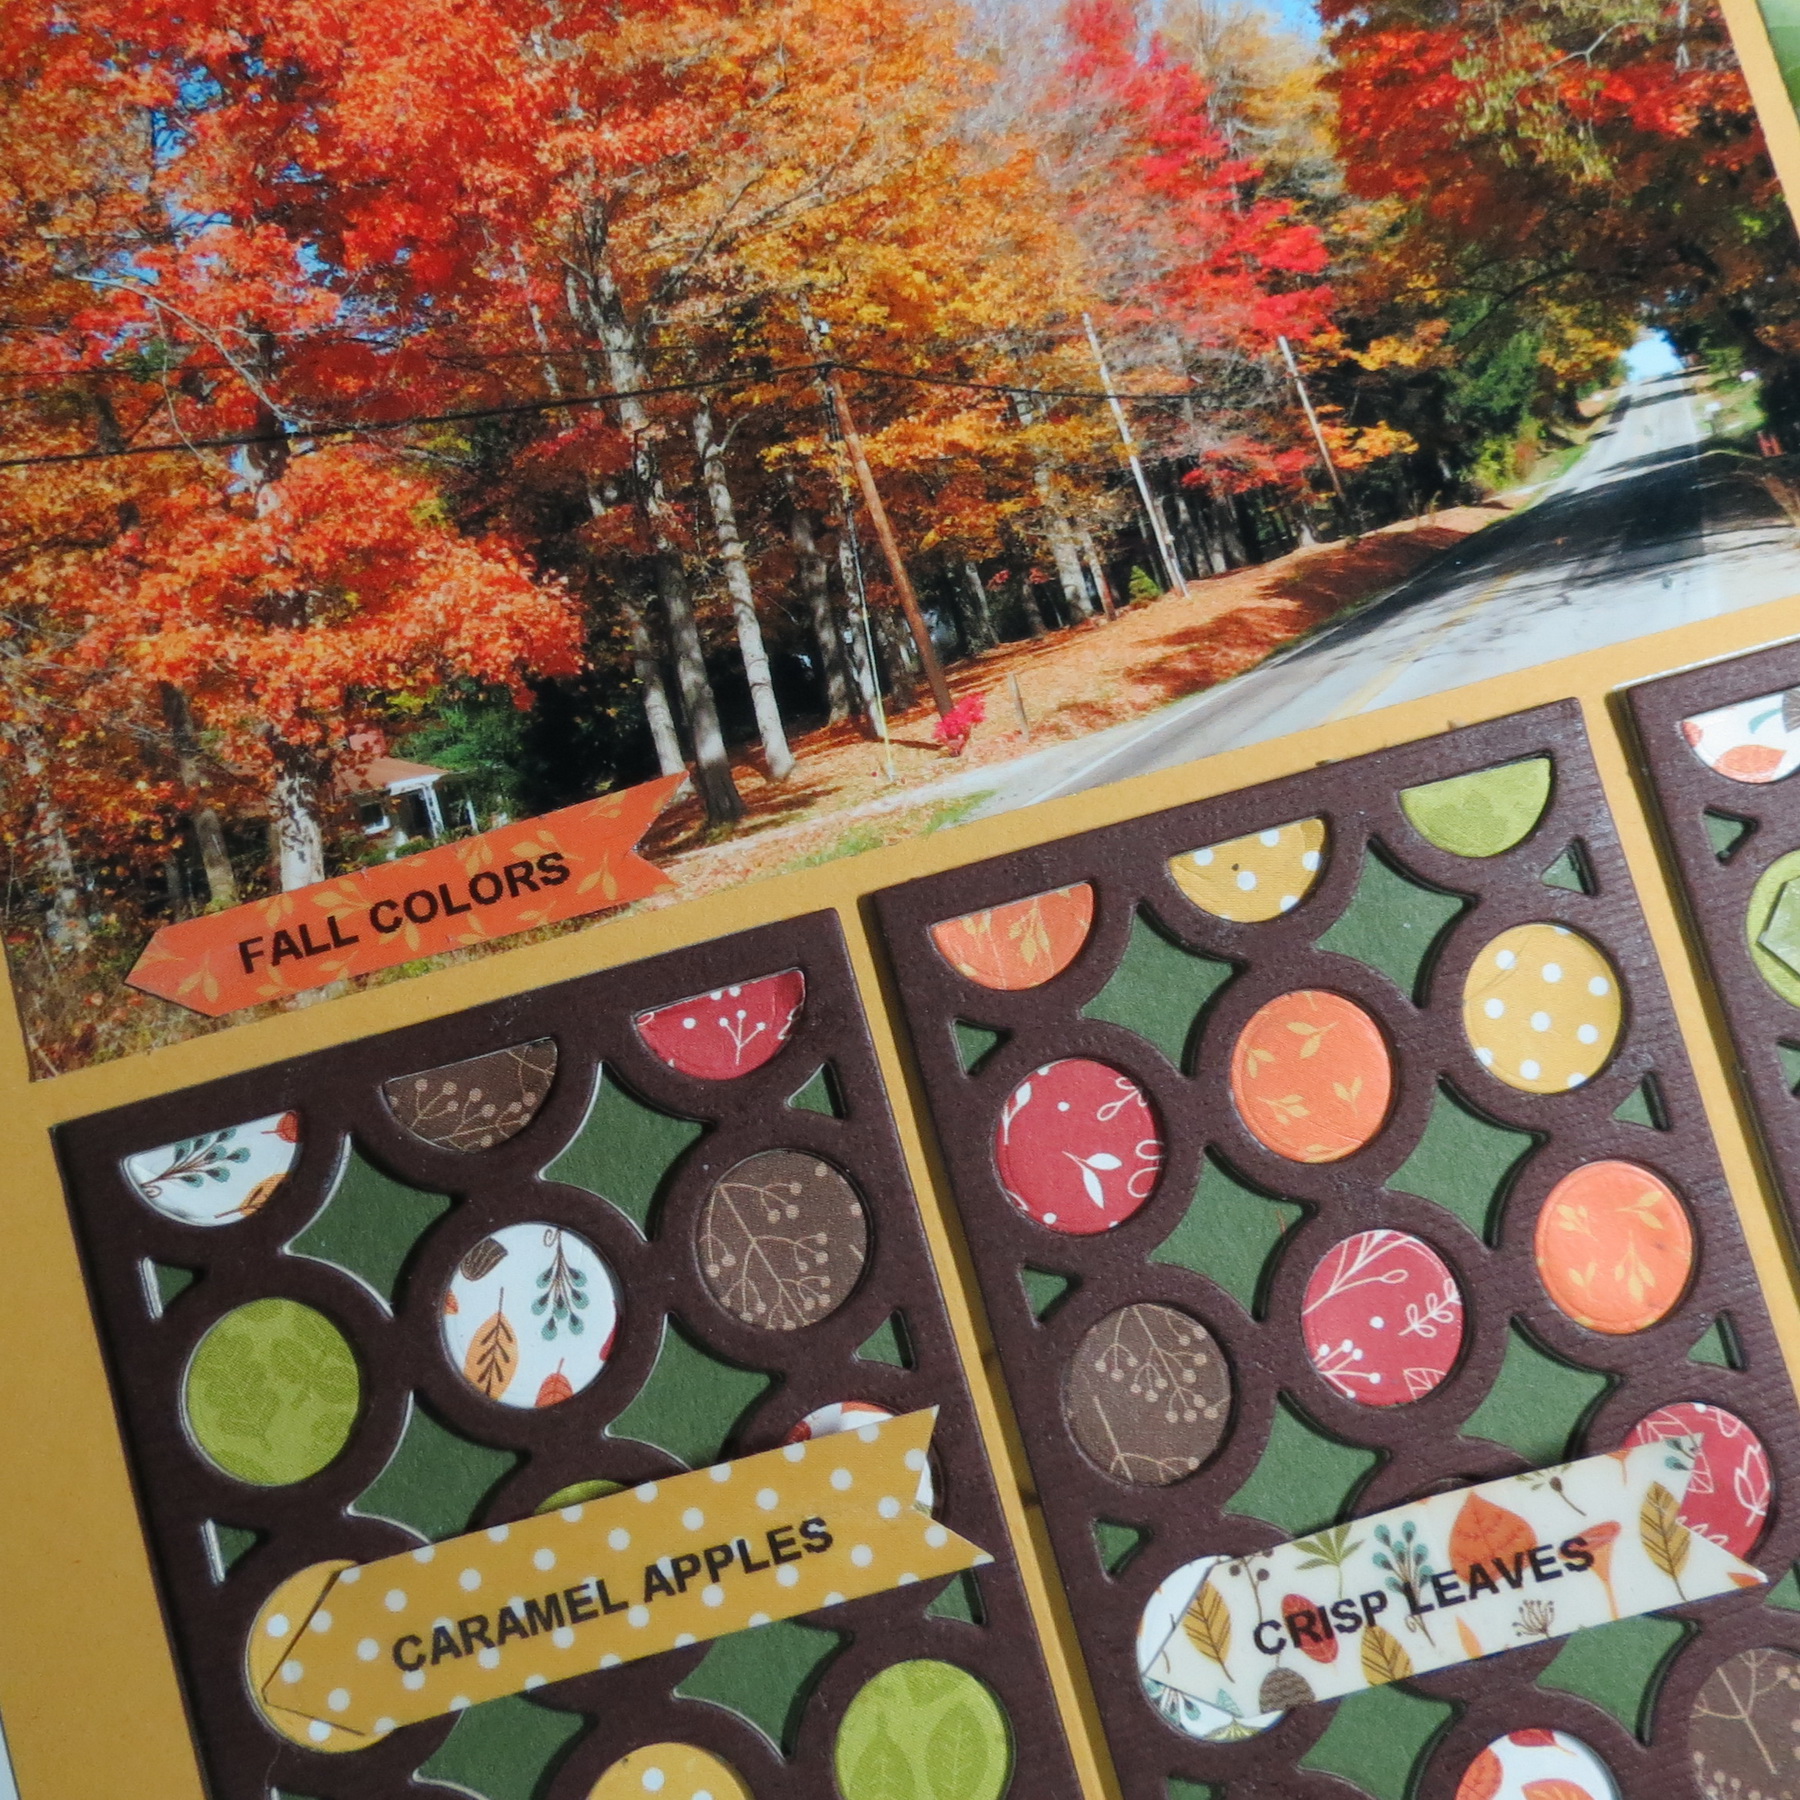
I liked the possibilities using the Circle Time Die in this pattern and decided to go ahead and see what I could do. I’ve chosen the Solid Gold Grid Paper for the base and deep brown called Mud Pie from Bazzill for the contrast. Additionally, green cardstock and several fall patterned papers will be used. The Pattern I’m using today isn’t showing a finished layout in the Pattern Gallery yet. So instead of a remake, this is more of a makeover, from nothing to something!
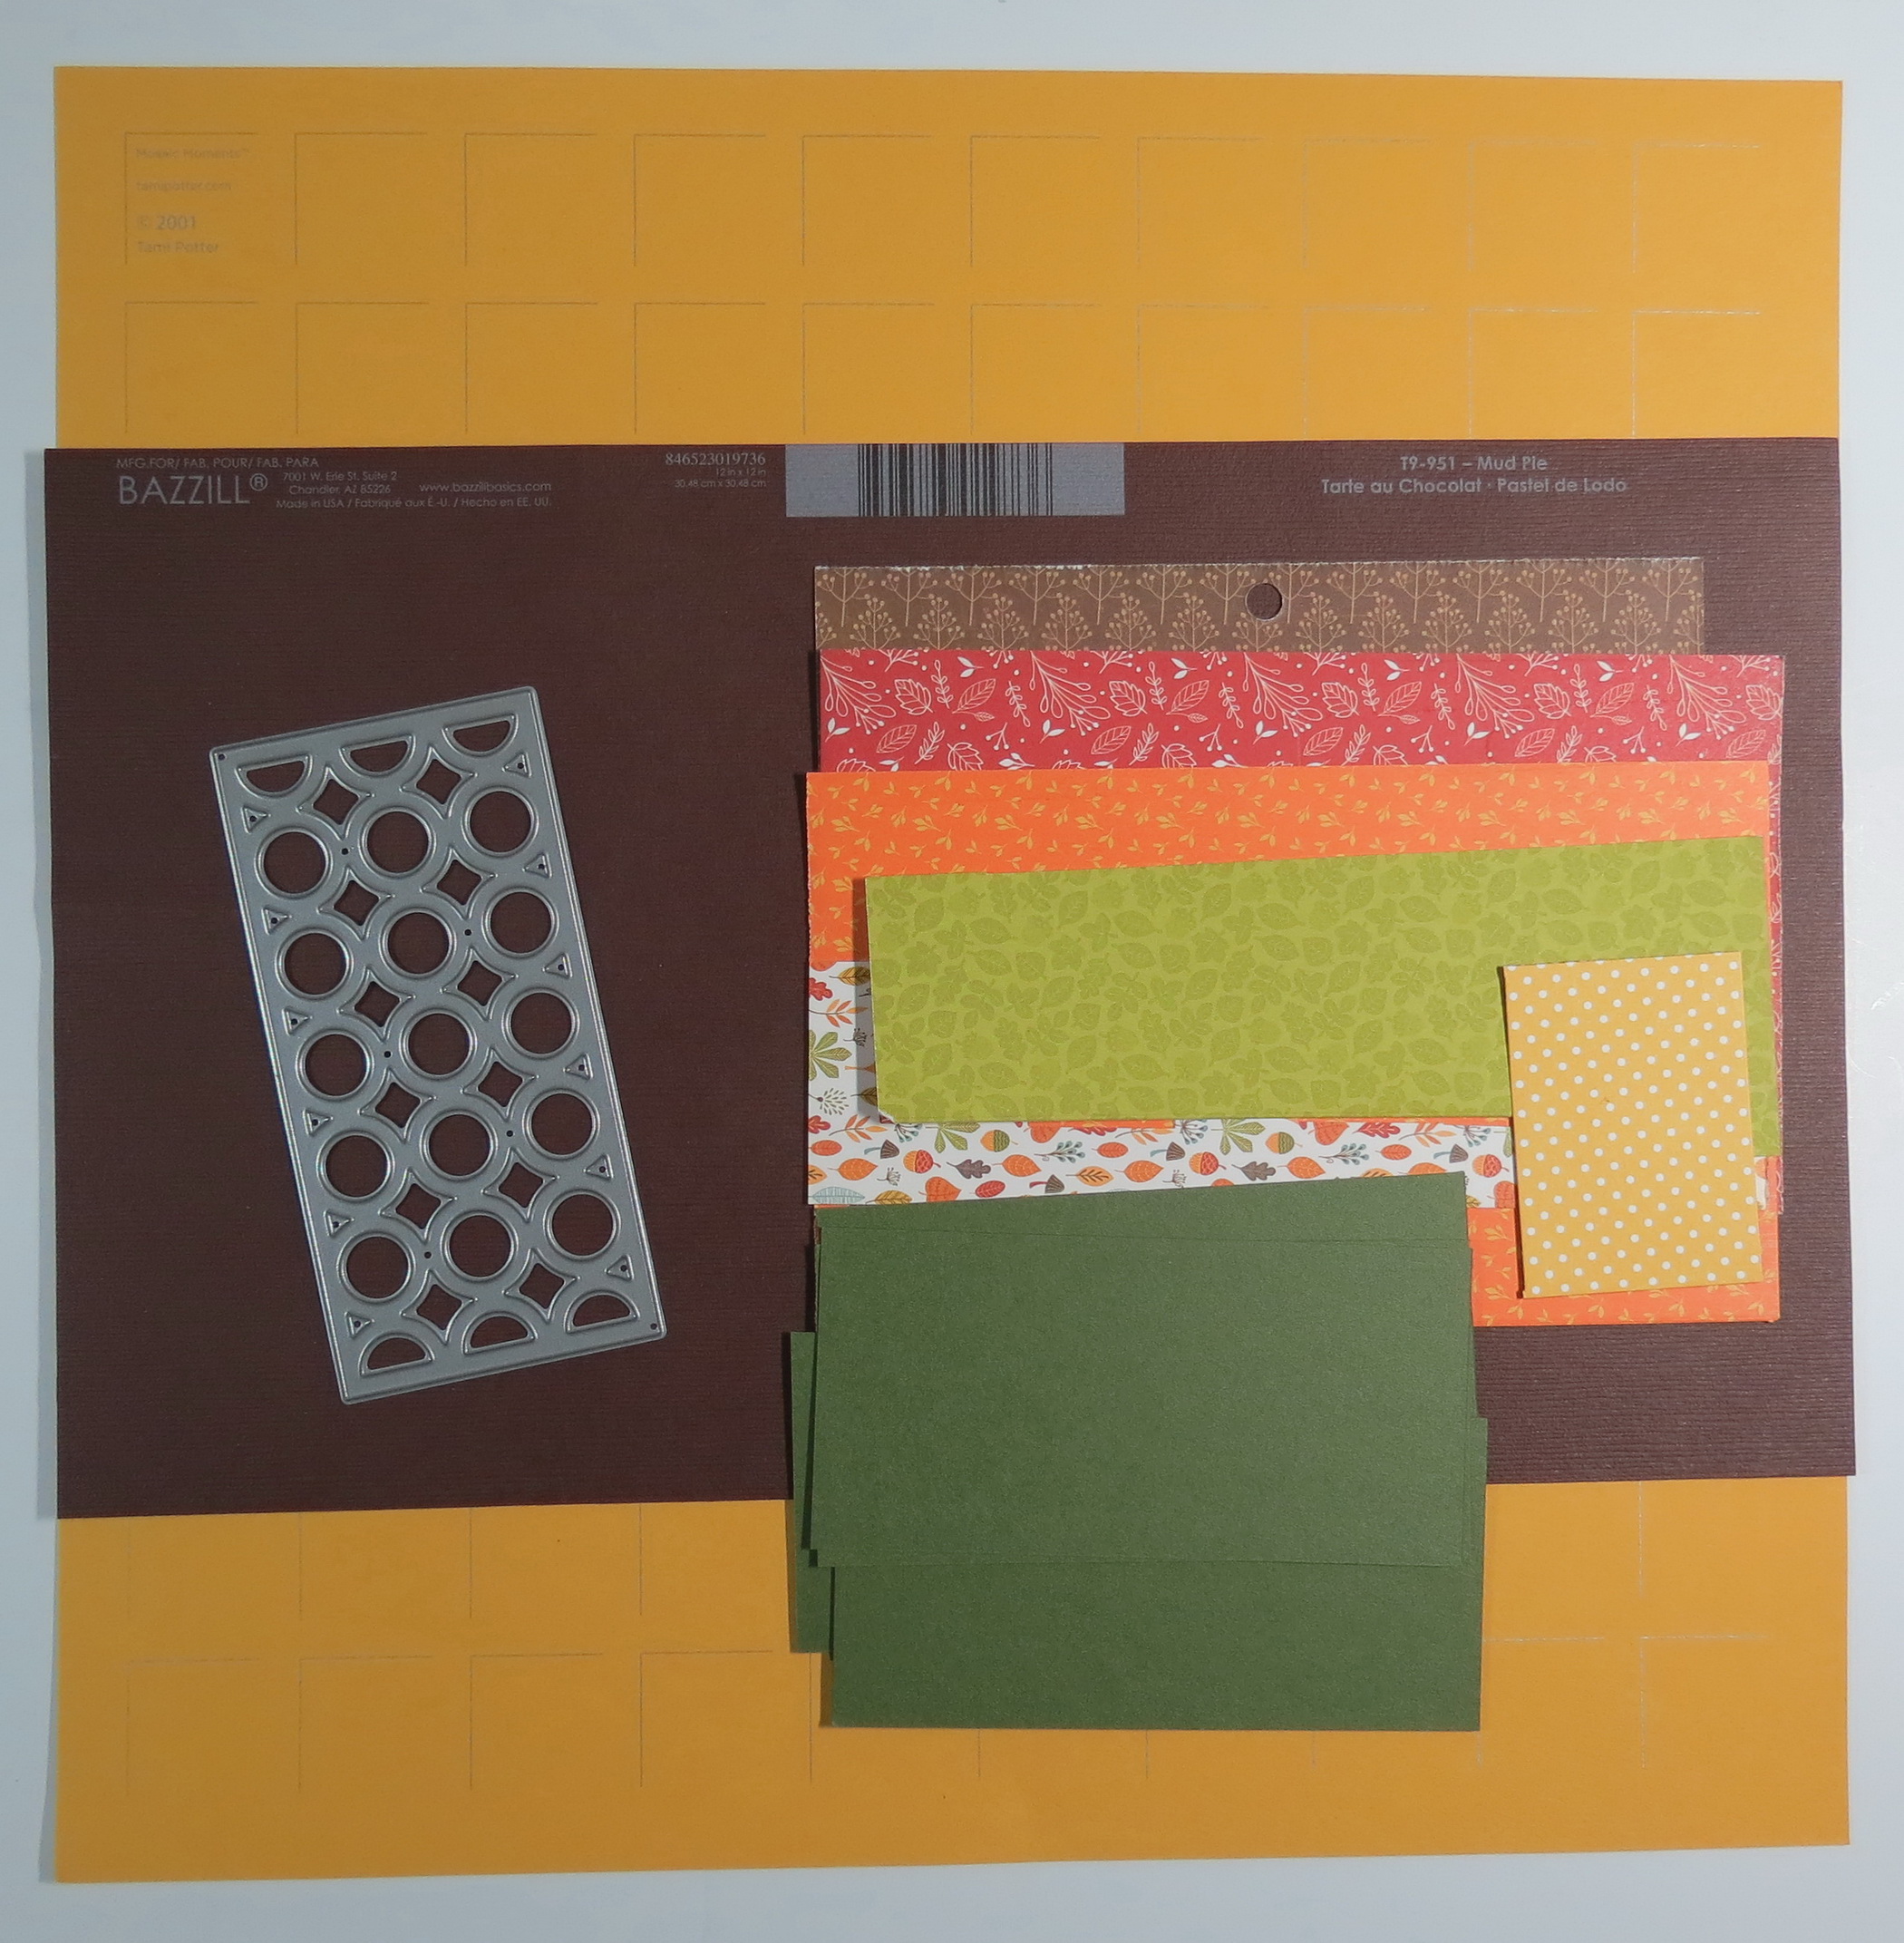
Mosaic Moments Circle Time Die Supplies Solid Gold Grid Paper
Mosaic Moments Pattern #345 a row die
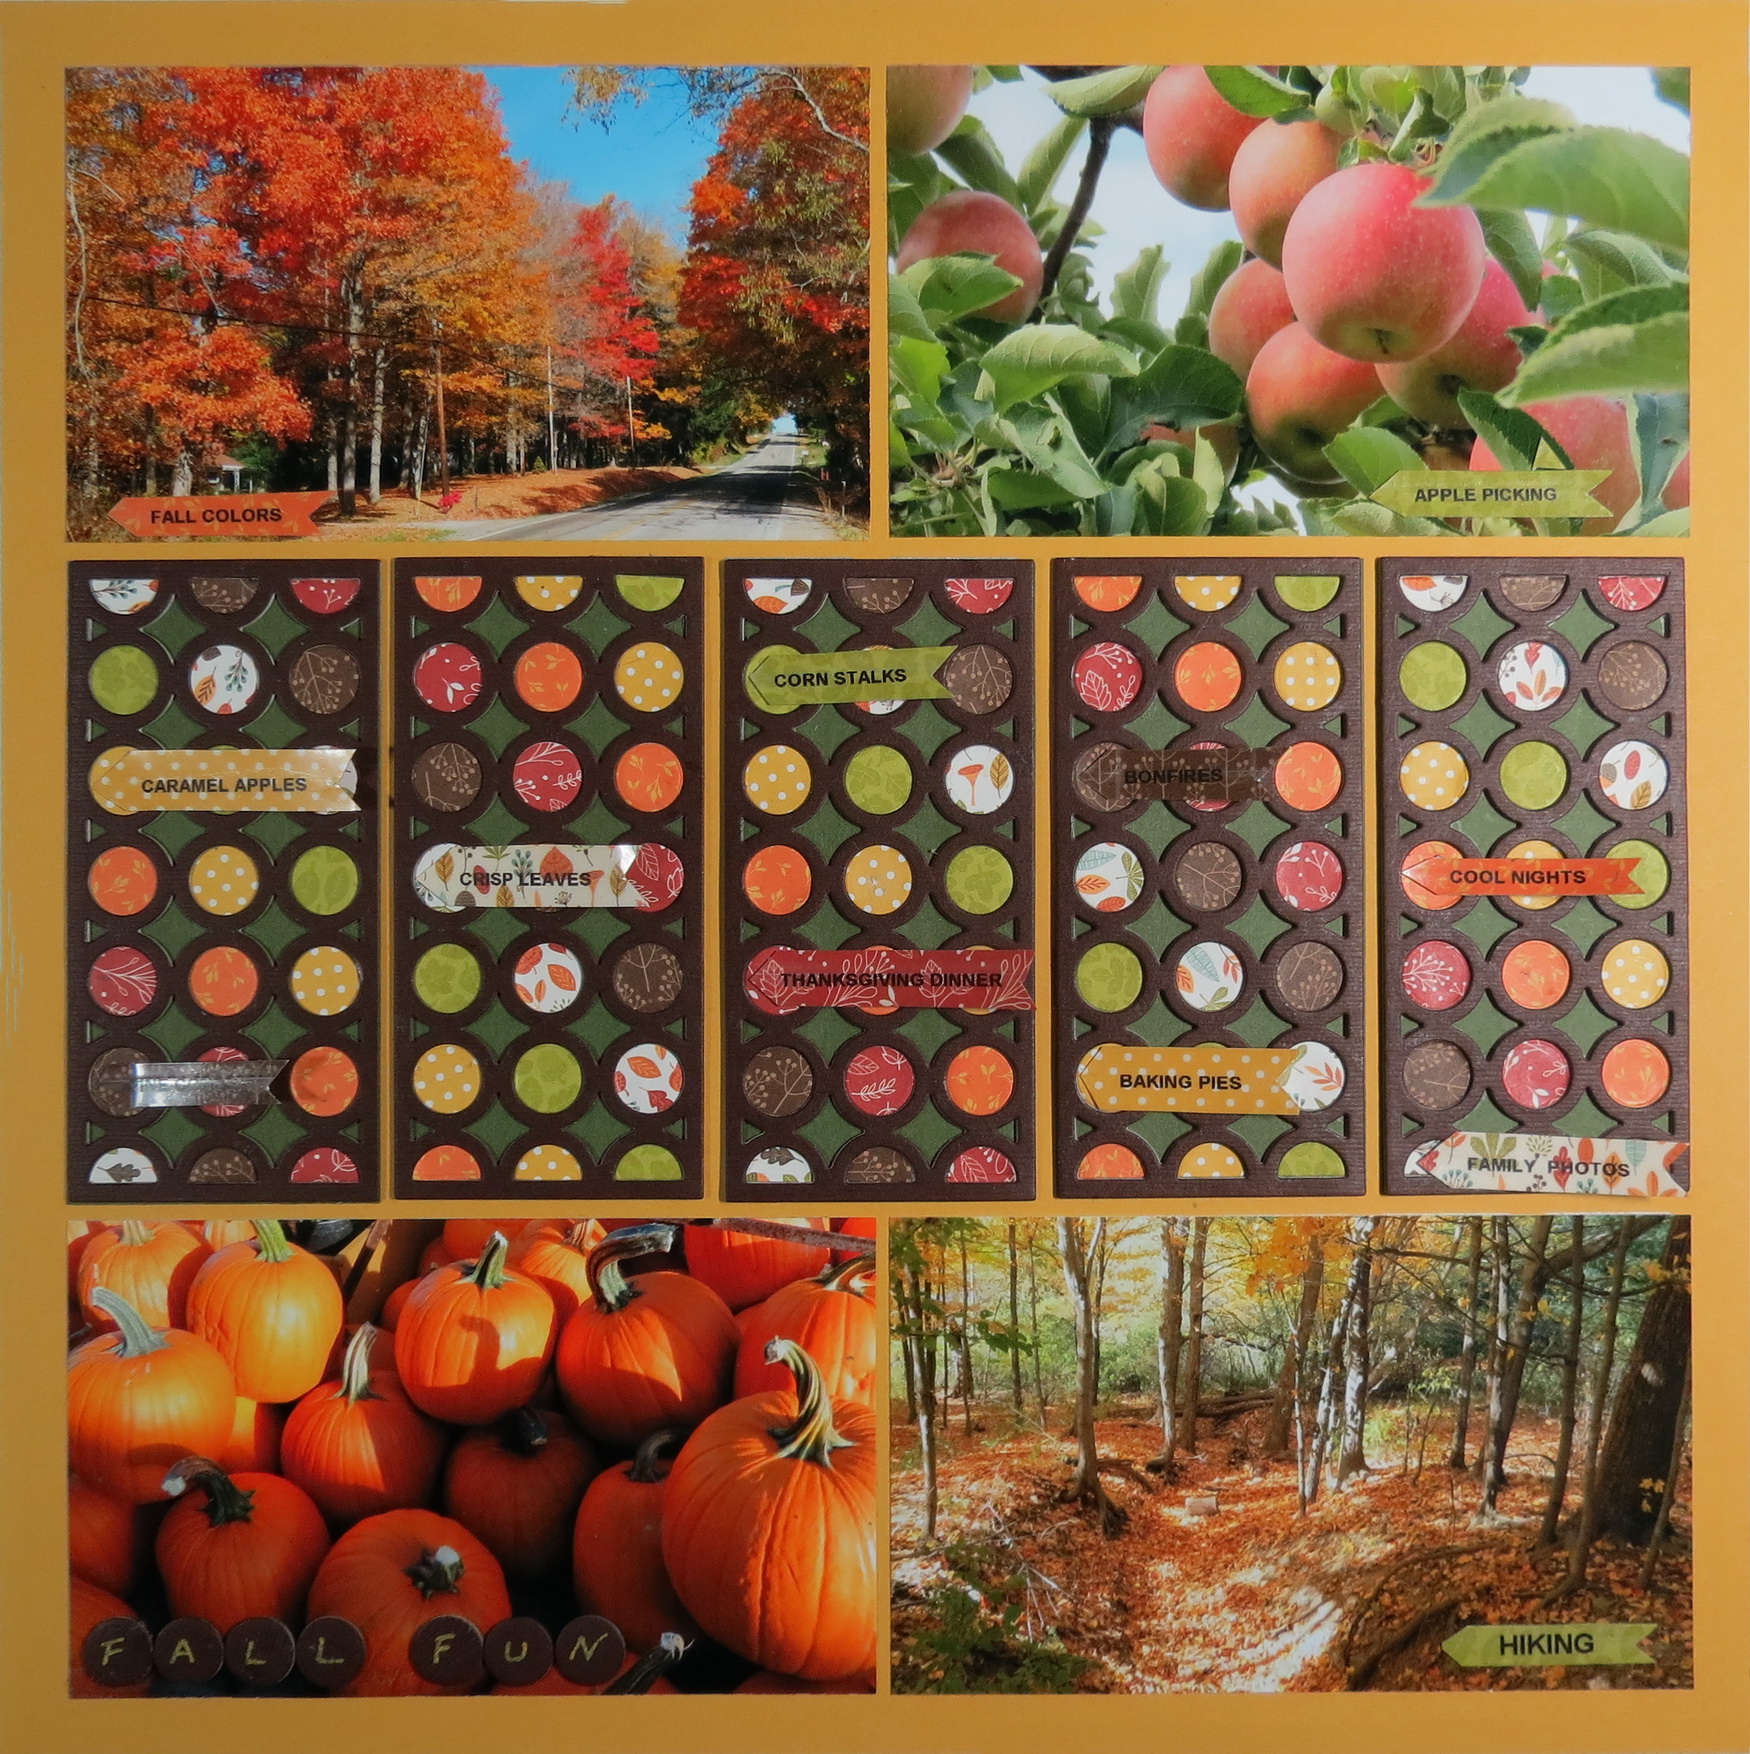
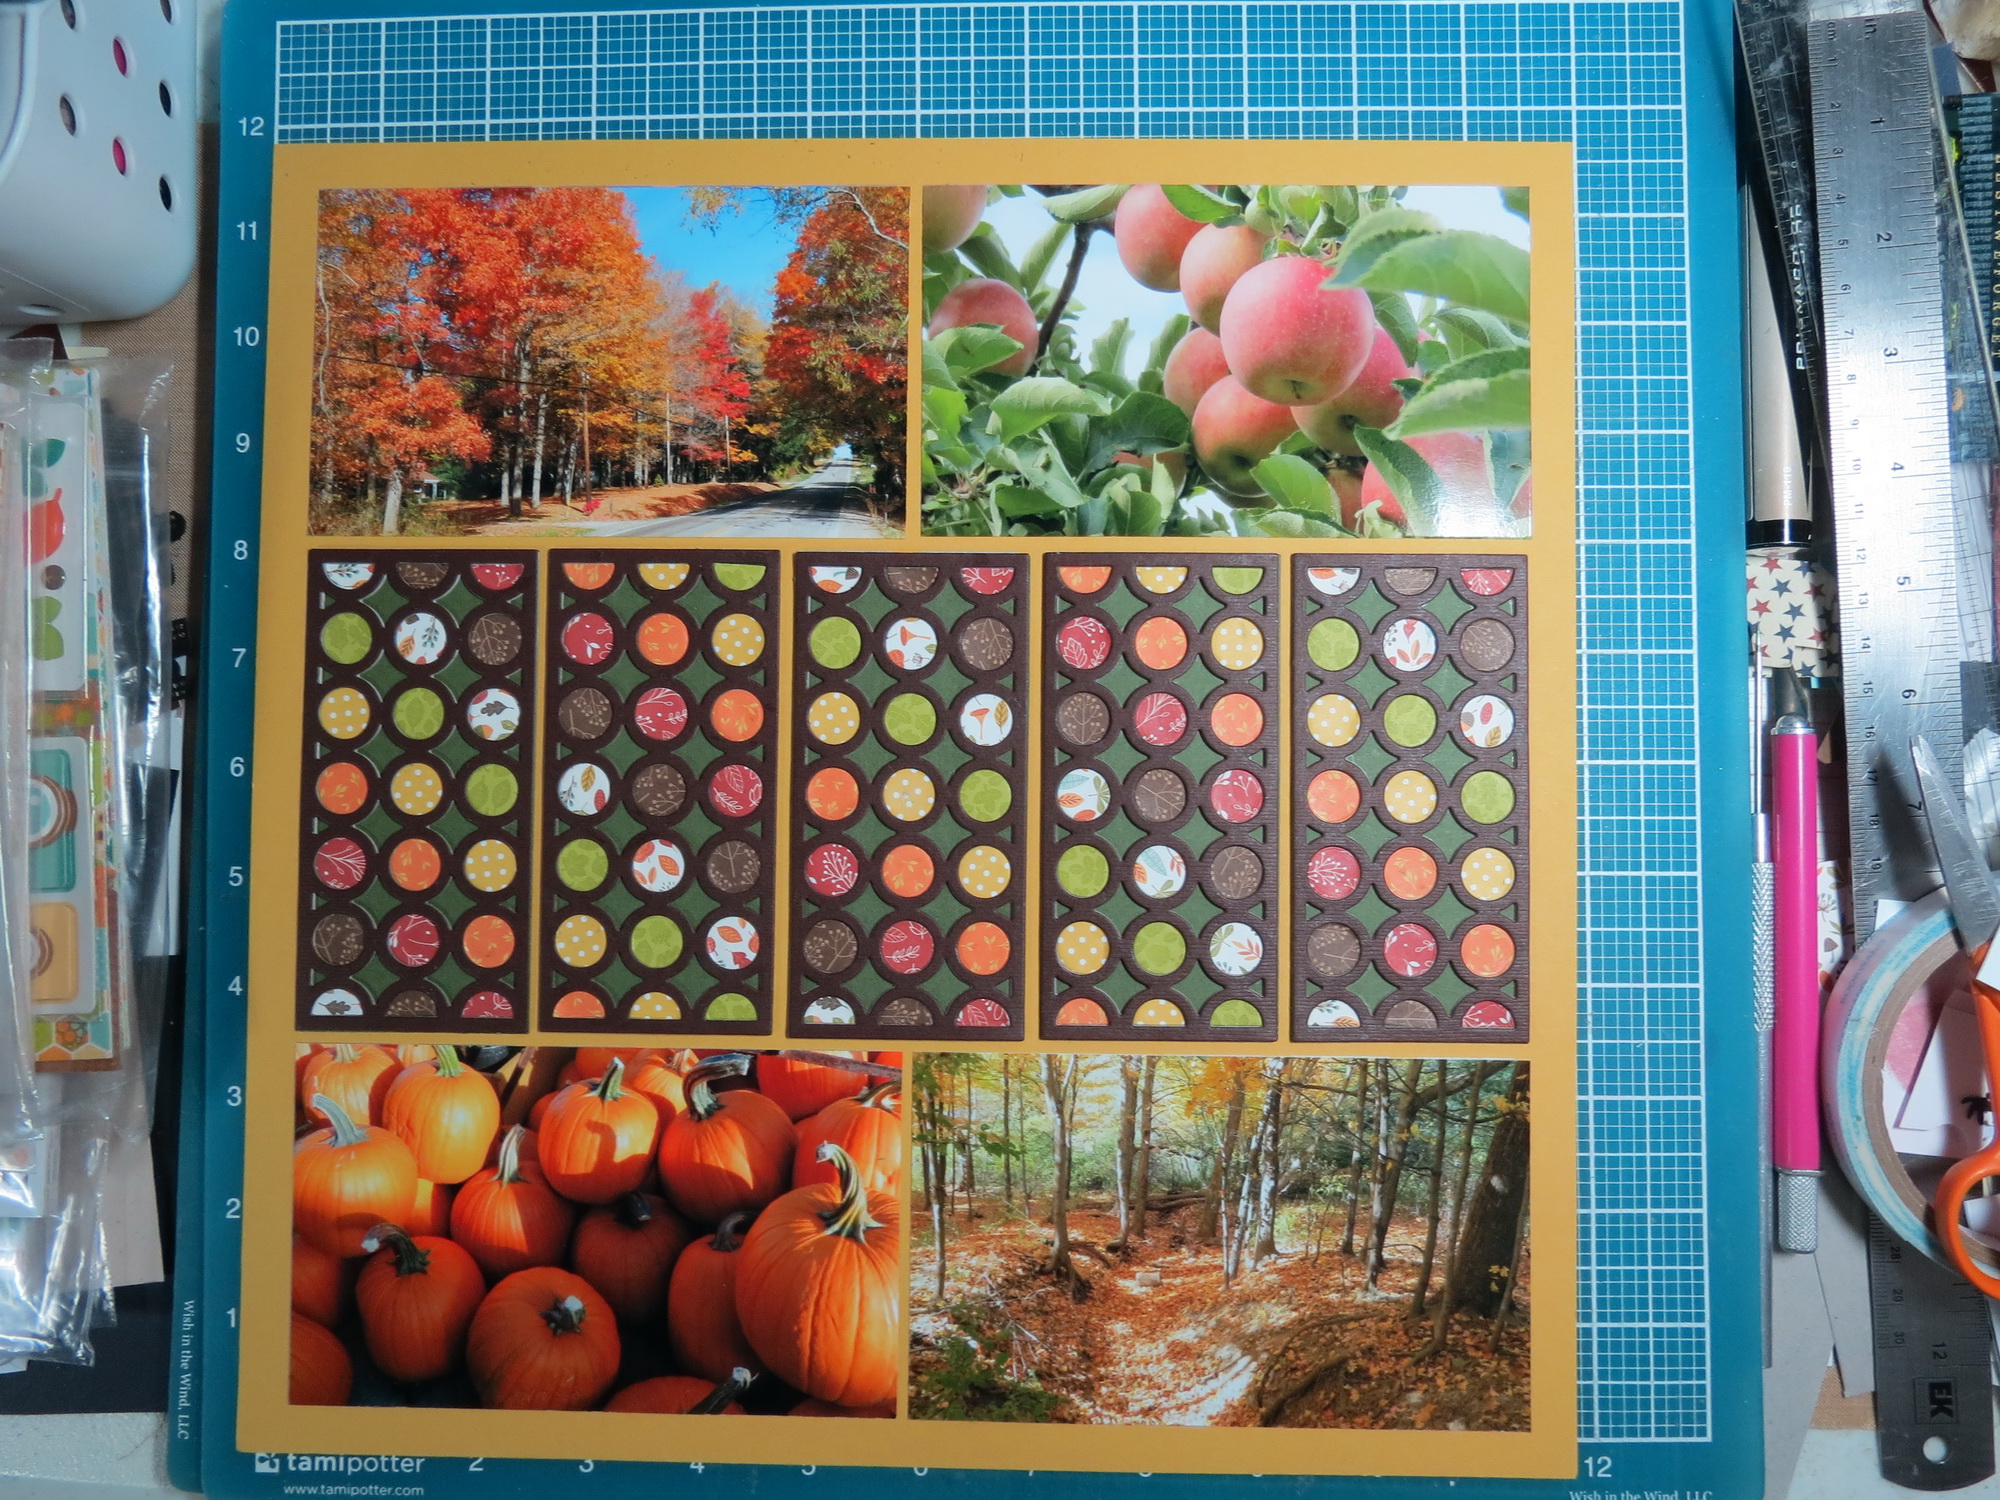
For this pattern there are 4-3×5 spaces for photos with a row of 2×4 that will fit the Circle Time just right.
Mosaic Moments Circle Time Die & Solid Gold Grid
To make this section a colorful pop of interest on the page the Mud Pie gave a dark contrast for the base and all the fall scraps that would fill the smaller circles.
I cut 5 die pieces out of the brown cardstock. I cut 10 out of lightweight chipboard and I cut 5 in a variety of fall pattern papers. You will want to put them all in a small open container so you don’t lose any and you can see to work with them.
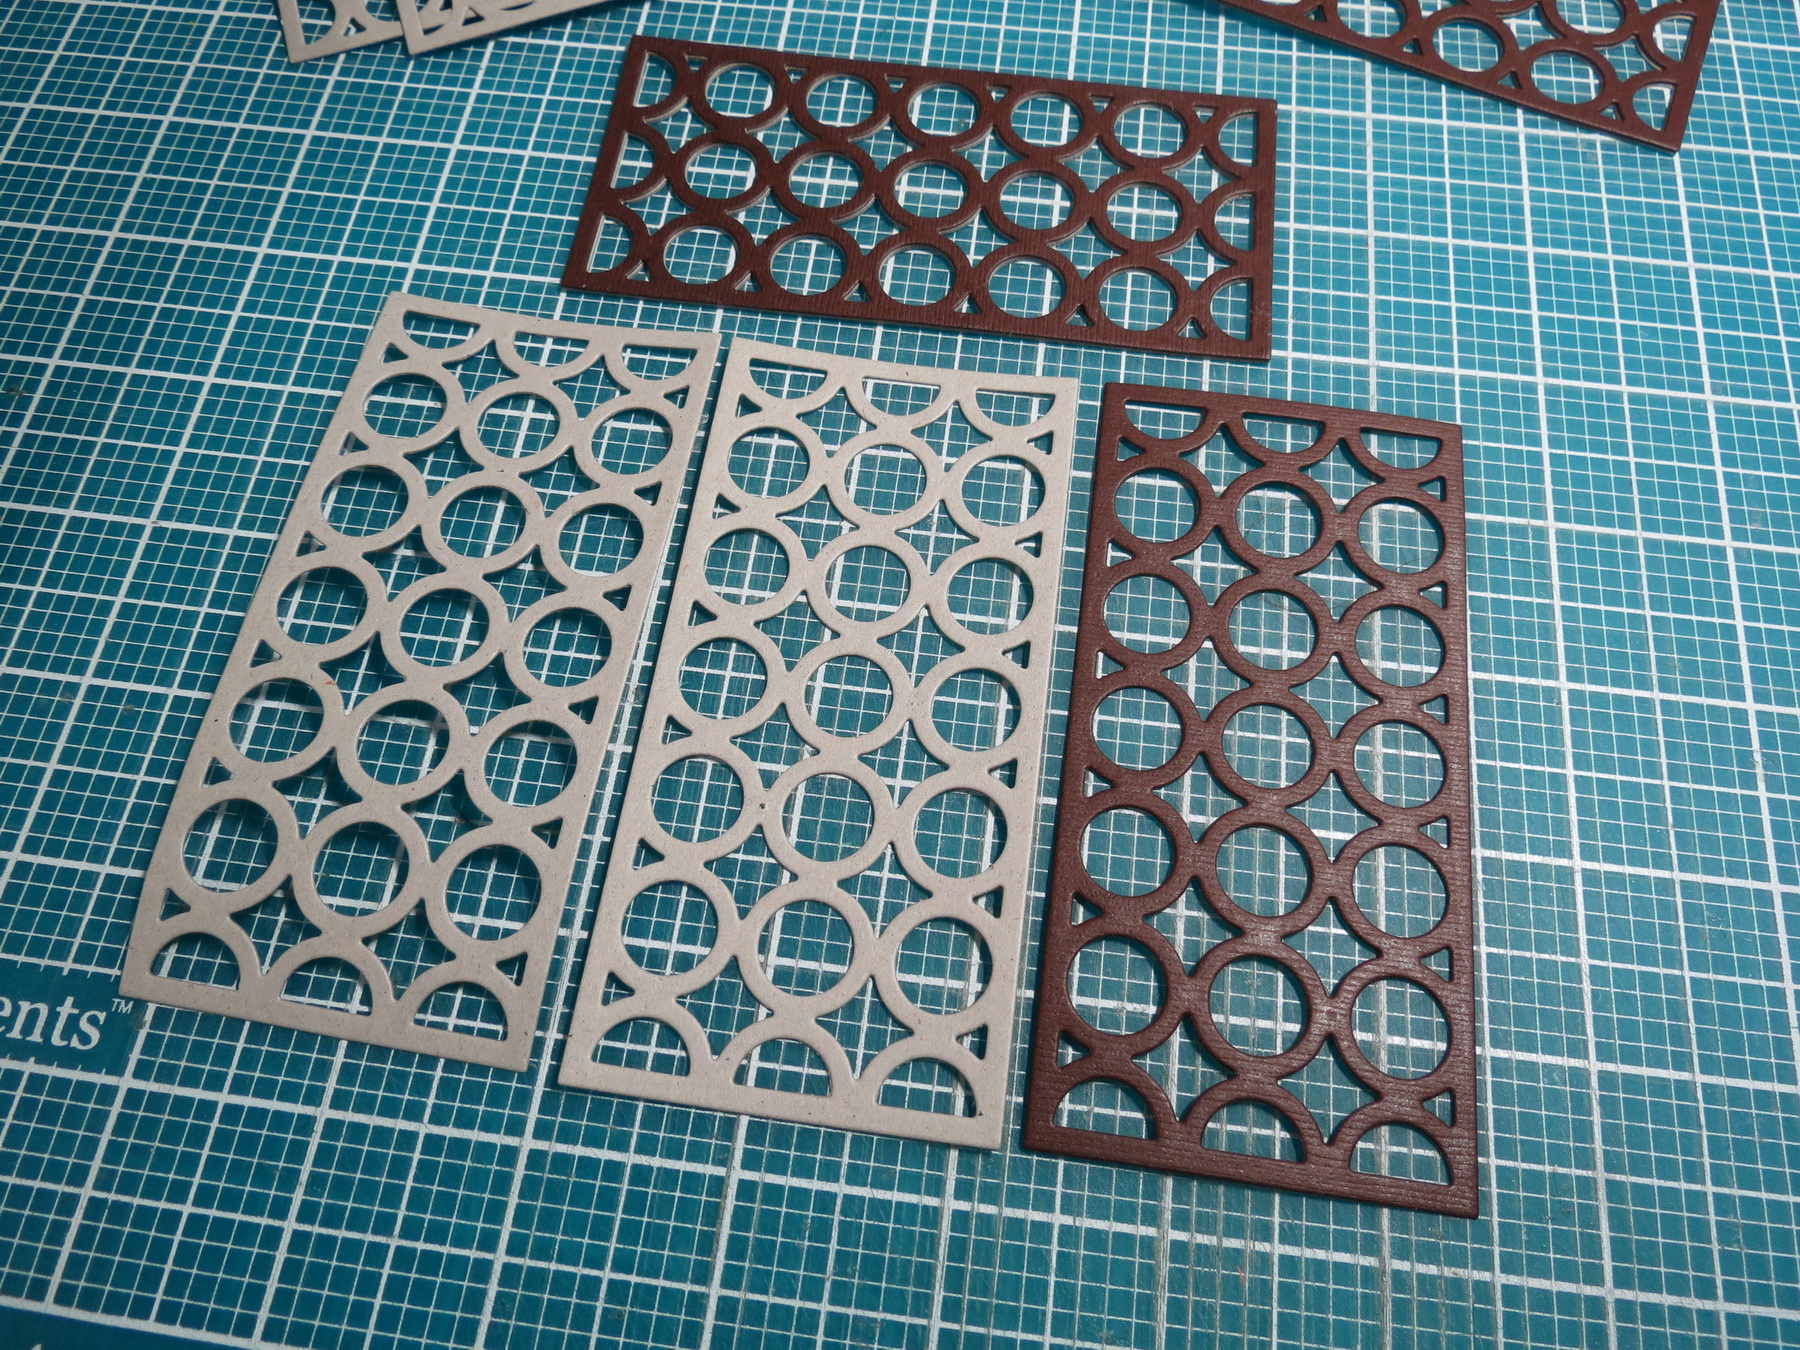
Mosaic Moments Circle Time Die 2 cut in chipboard 1 in cardstock
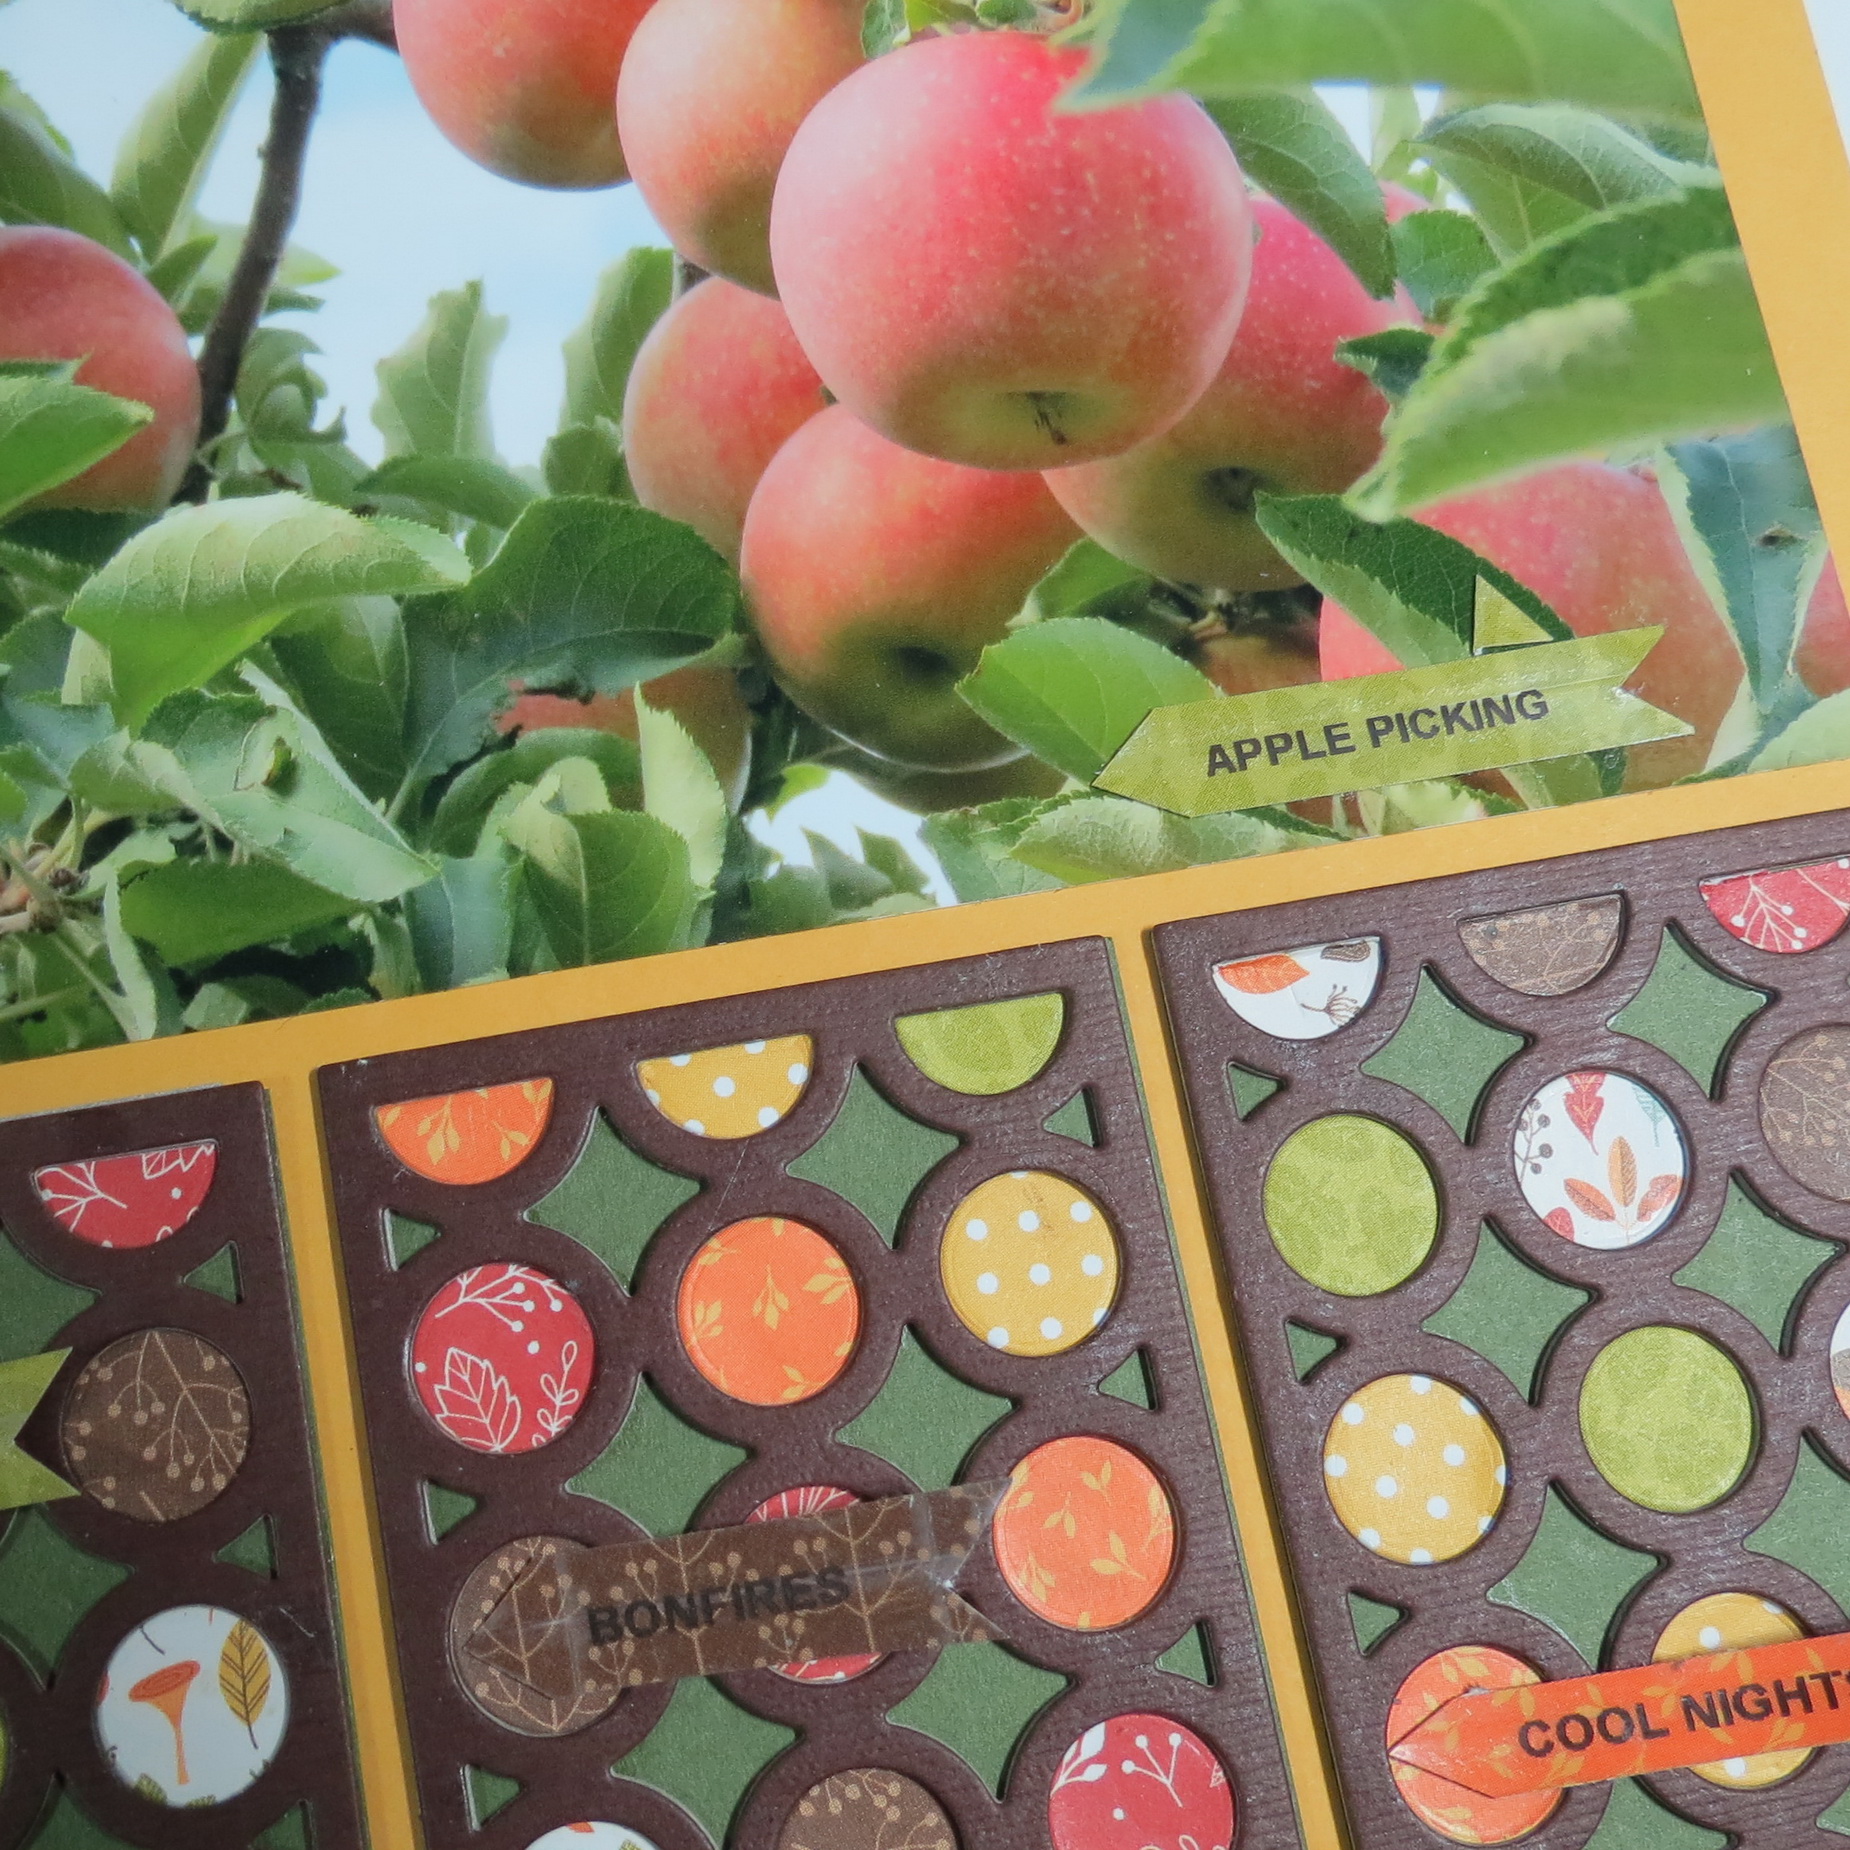
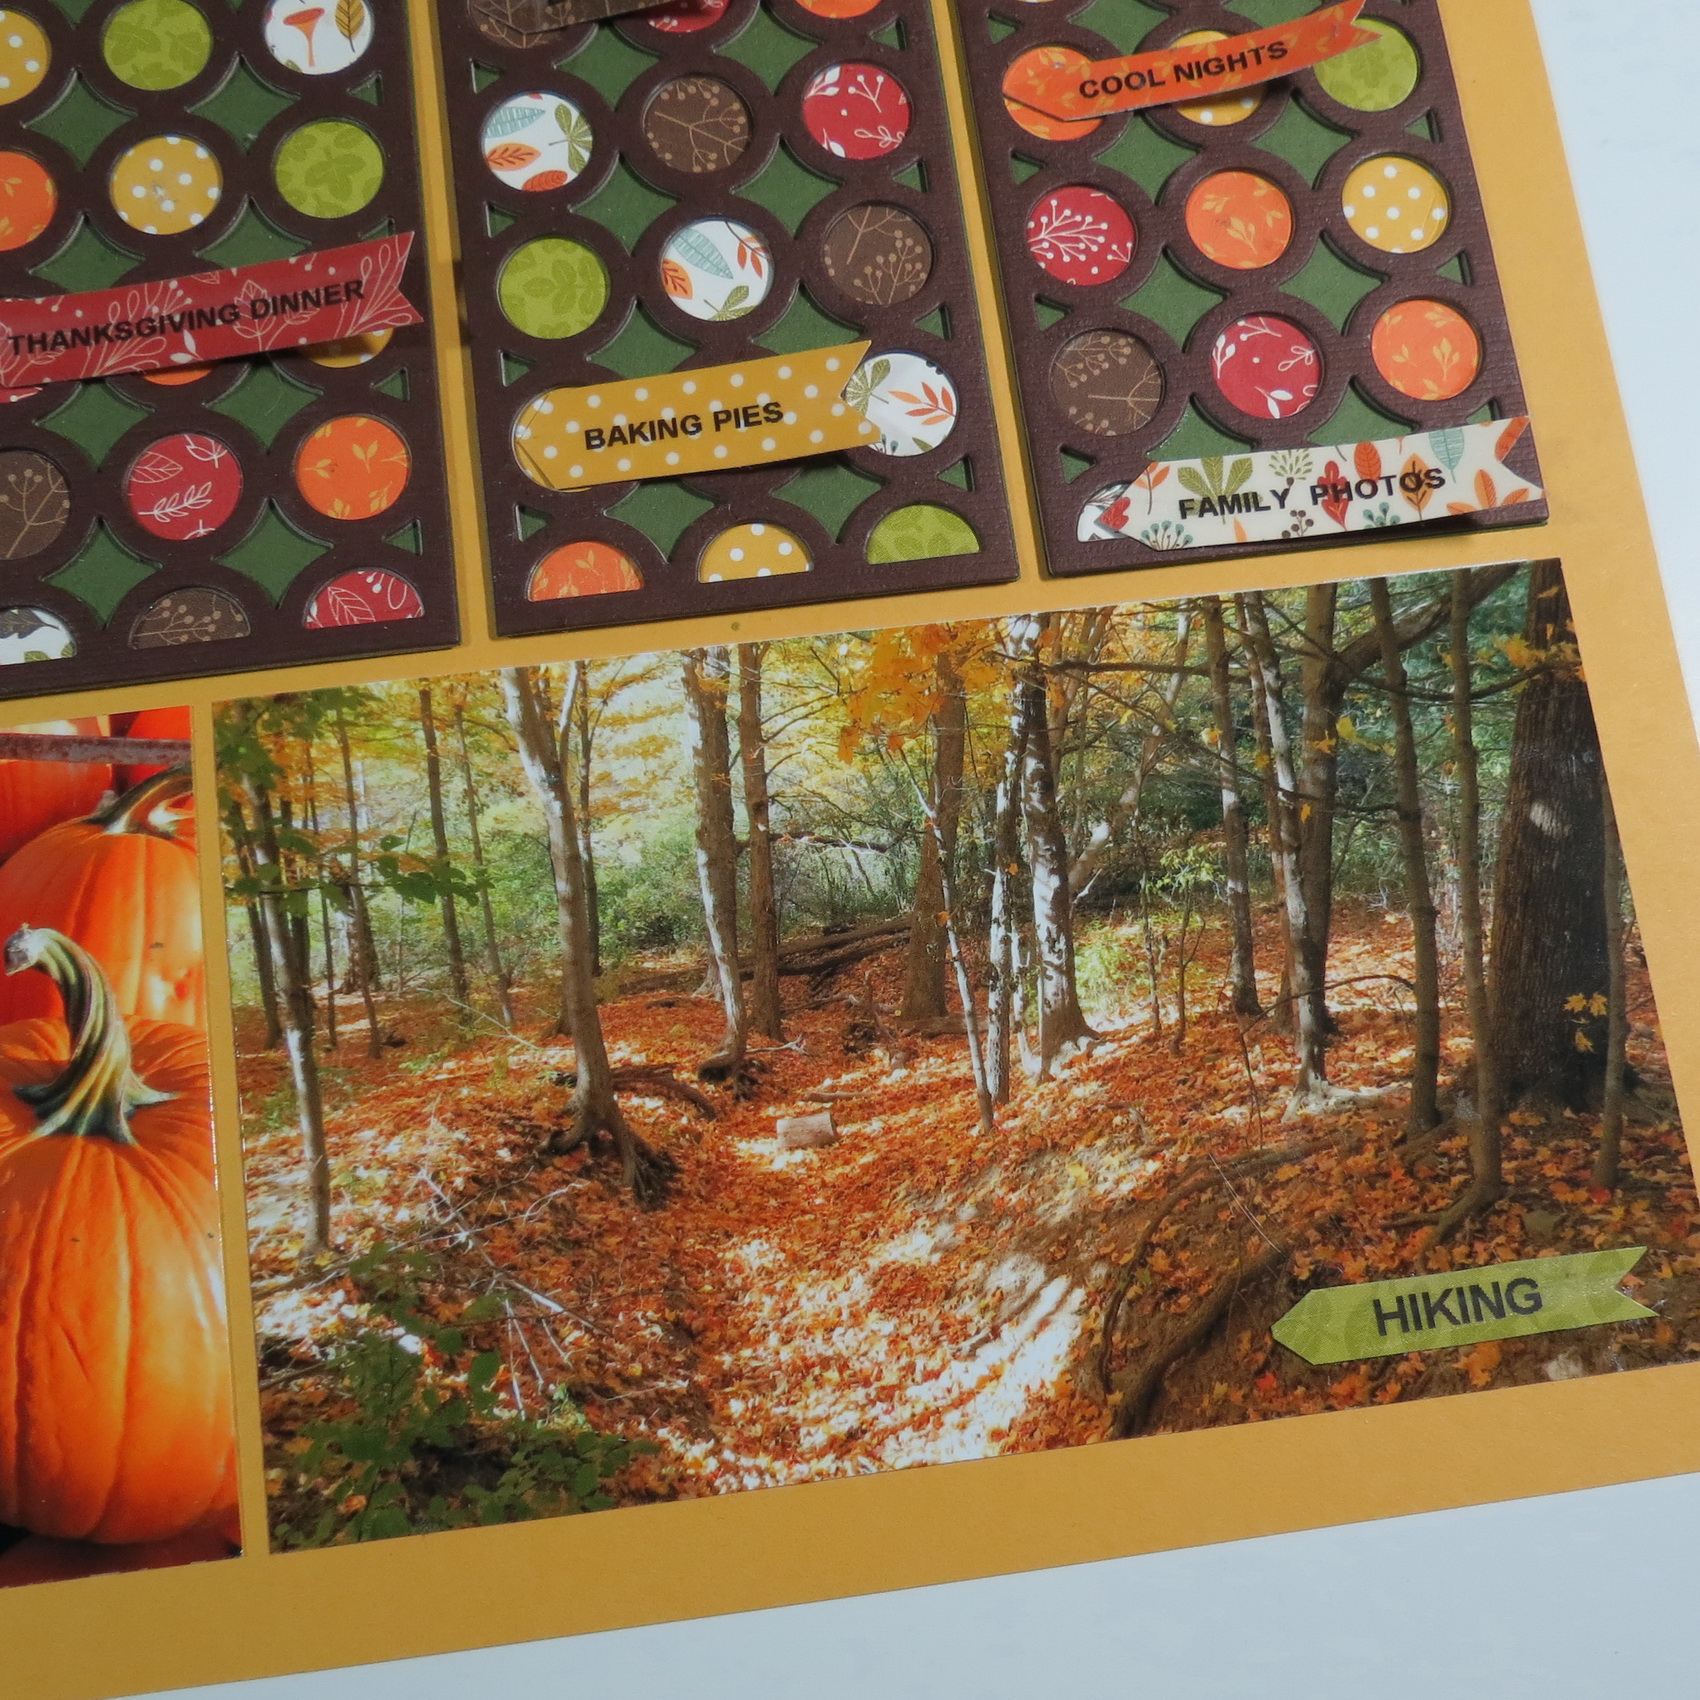
I wanted a section of texture with depth so I began with using a clear liquid glue (like Tombow Mono Aqua) to put two chipboard pieces together with a layer of the brown cardstock to top it off. I attached each to a green cardstock base. Into each of the circles I laid the circle of color and decided on a cascading drop rainbow across the page. (In each hole was laid a bit of clear glue before dropping the circle in.)
Mosaic Moments Circle Time Die planning the colors
Mosaic Moments Circle Time Die center section
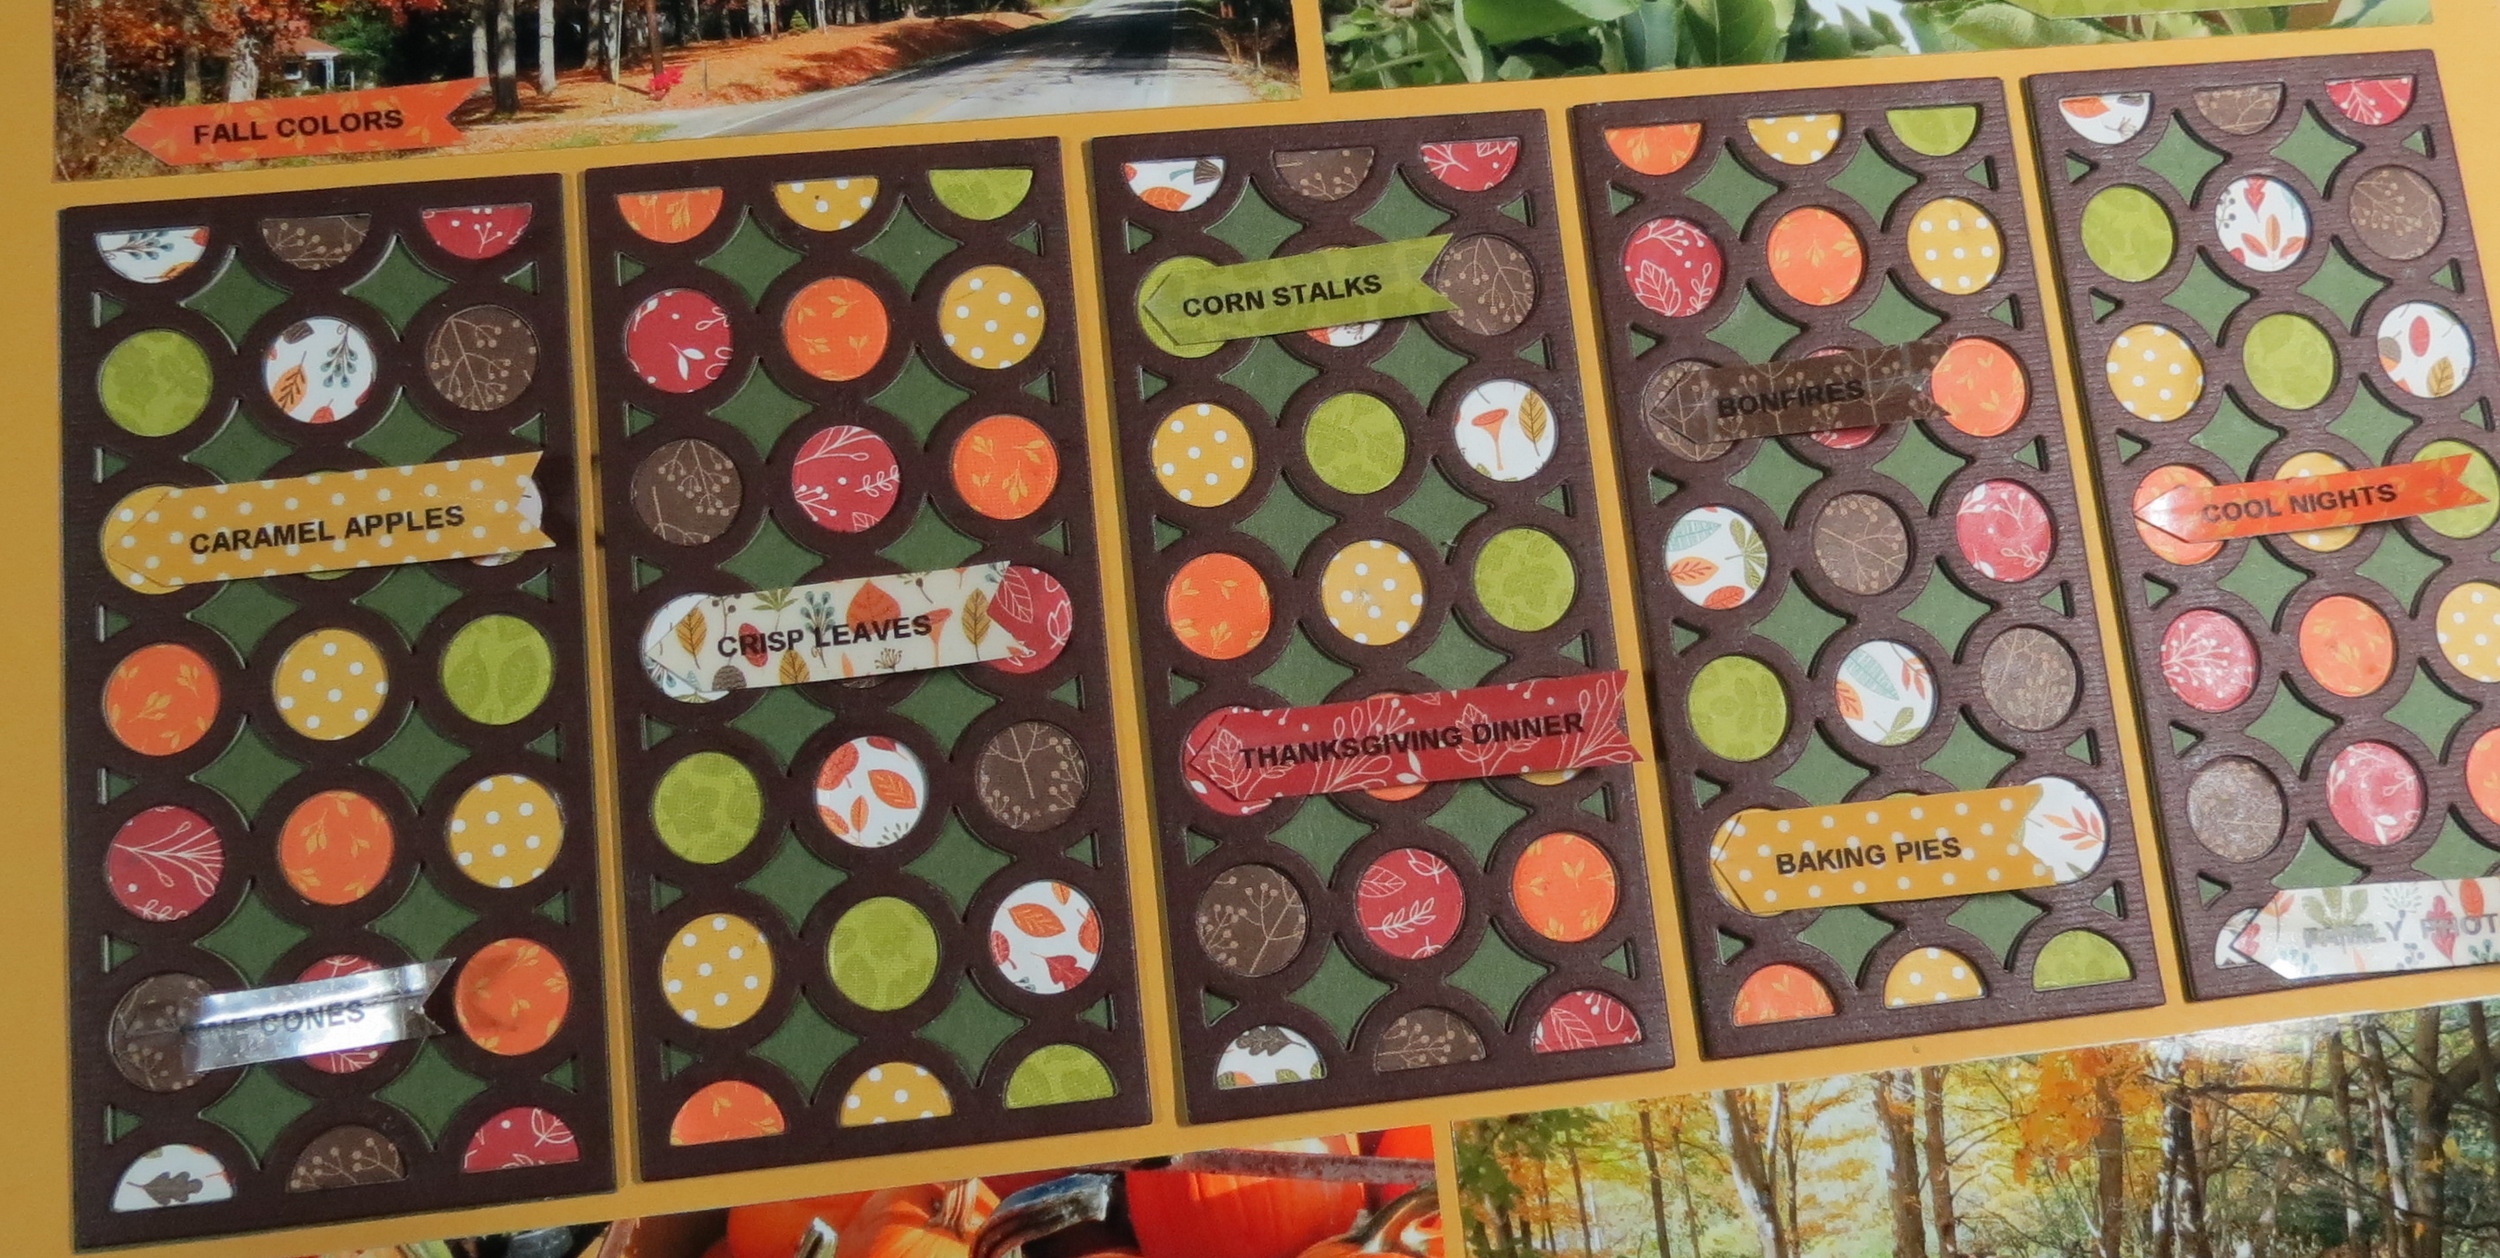
I played around with a few different ways to add some type of tag for the various fall activities I wanted to include on this page. I settled on an idea to use my label maker for the words and attach them to strips of left over patterned paper. These strips were trimmed down to resemble arrow tags and arranged on the colorful grid where the patterns match and then attached them with a glue dot.
TIP: For anyone that doesn’t like their own handwriting this is a quick way to add short word art bits on your page. Use your label maker; choose a font size, and print! I’ve printed on clear tape to allow the pattern paper to create a label, but white could work nicely too.
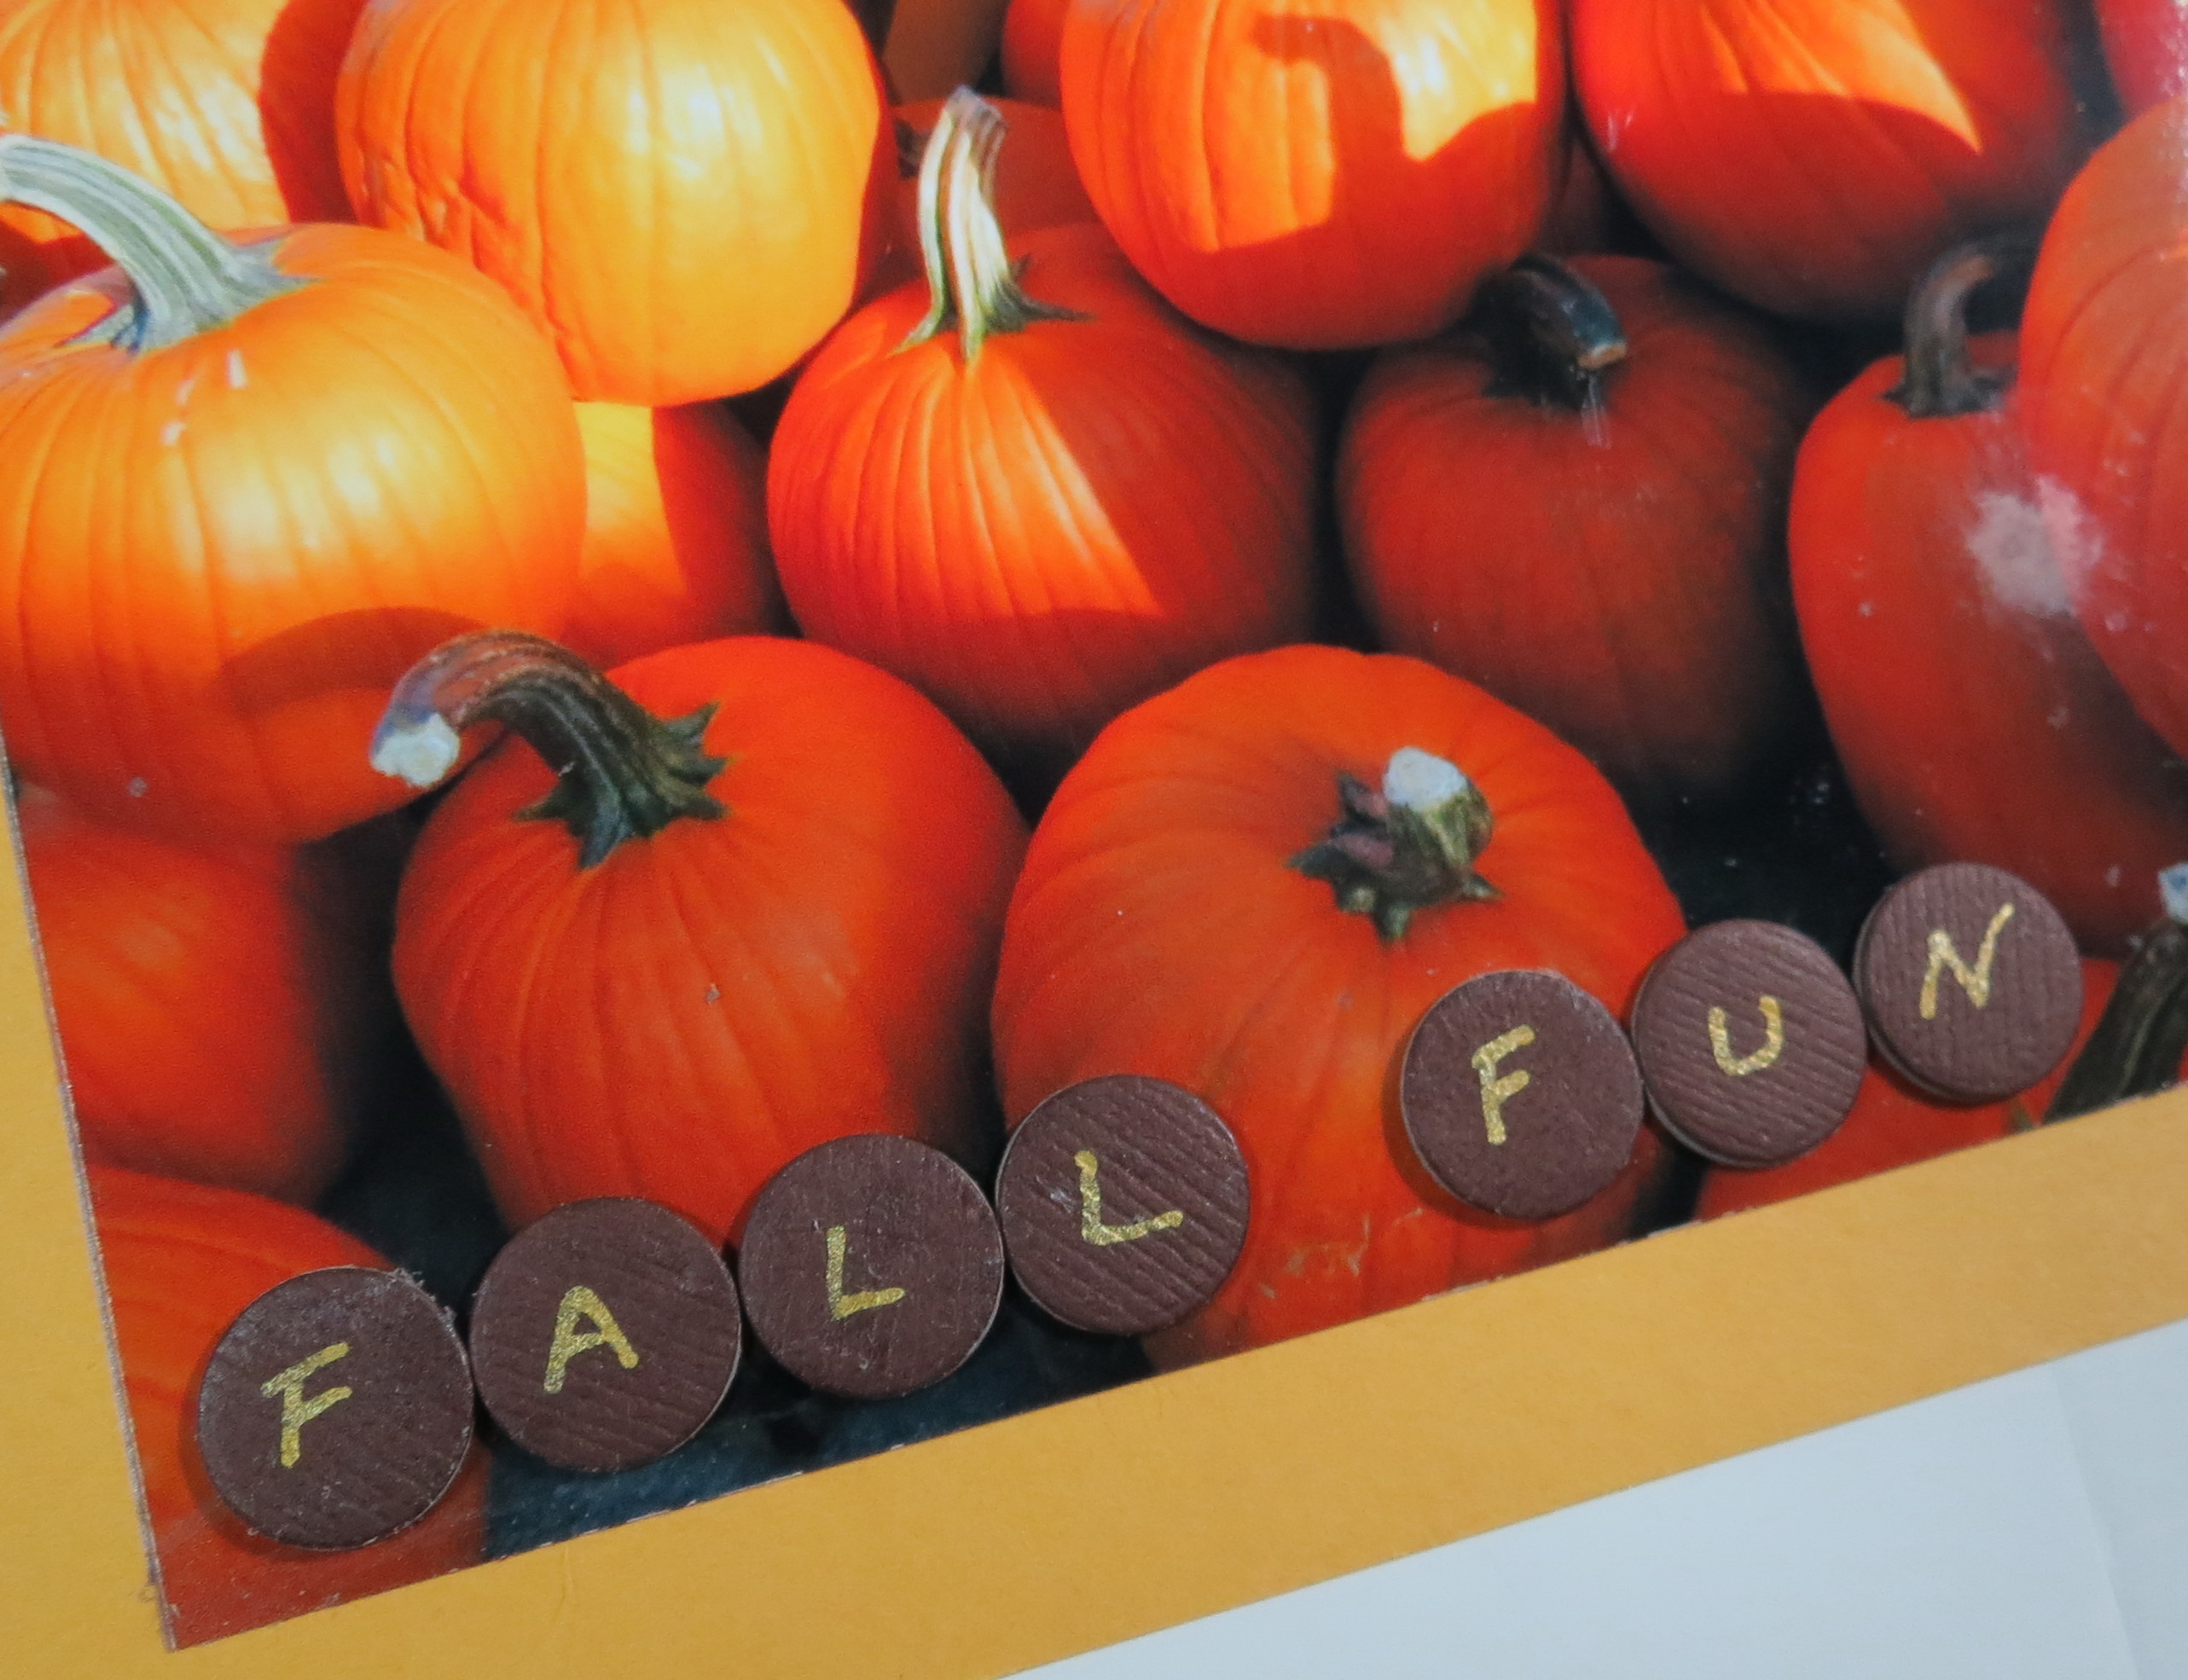
On each of the photos in the picture I added one of the labels, except the pumpkins. For this one I took a brown circle and two chipboard circles for each letter in the title “Fall Fun.” I assembled the dots as before for the Circle Time Die sections. To each I then added letters with a gold Sharpie paint pen and attached to the photo with a glue dot.
Mosaic Moments Circle Time Die
Mosaic Moments Circle Time Die
Mosaic Moments Circle Time Die
Mosaic Moments Circle Time Die
A page like this makes a great stand alone or the first of many with pictures of each of the things on your favorites list from any season. It could be one of four in a yearlong look of your travels and activities marked off in seasons. Have fun exploring the idea of using any of our dies, but the Circle Time die in particular to add lots of color and dimension in any layout.
Andrea Fisher