

Orphan photos. Leftover photos. Random photos.
We all have them. A photo or photos we’ve taken that don’t necessarily relate to enough other photos to put together a whole layout. Over time they could really pile up if we don’t find a way to unify them in a layout. Let me show you a way for scrapbooking your random photos.
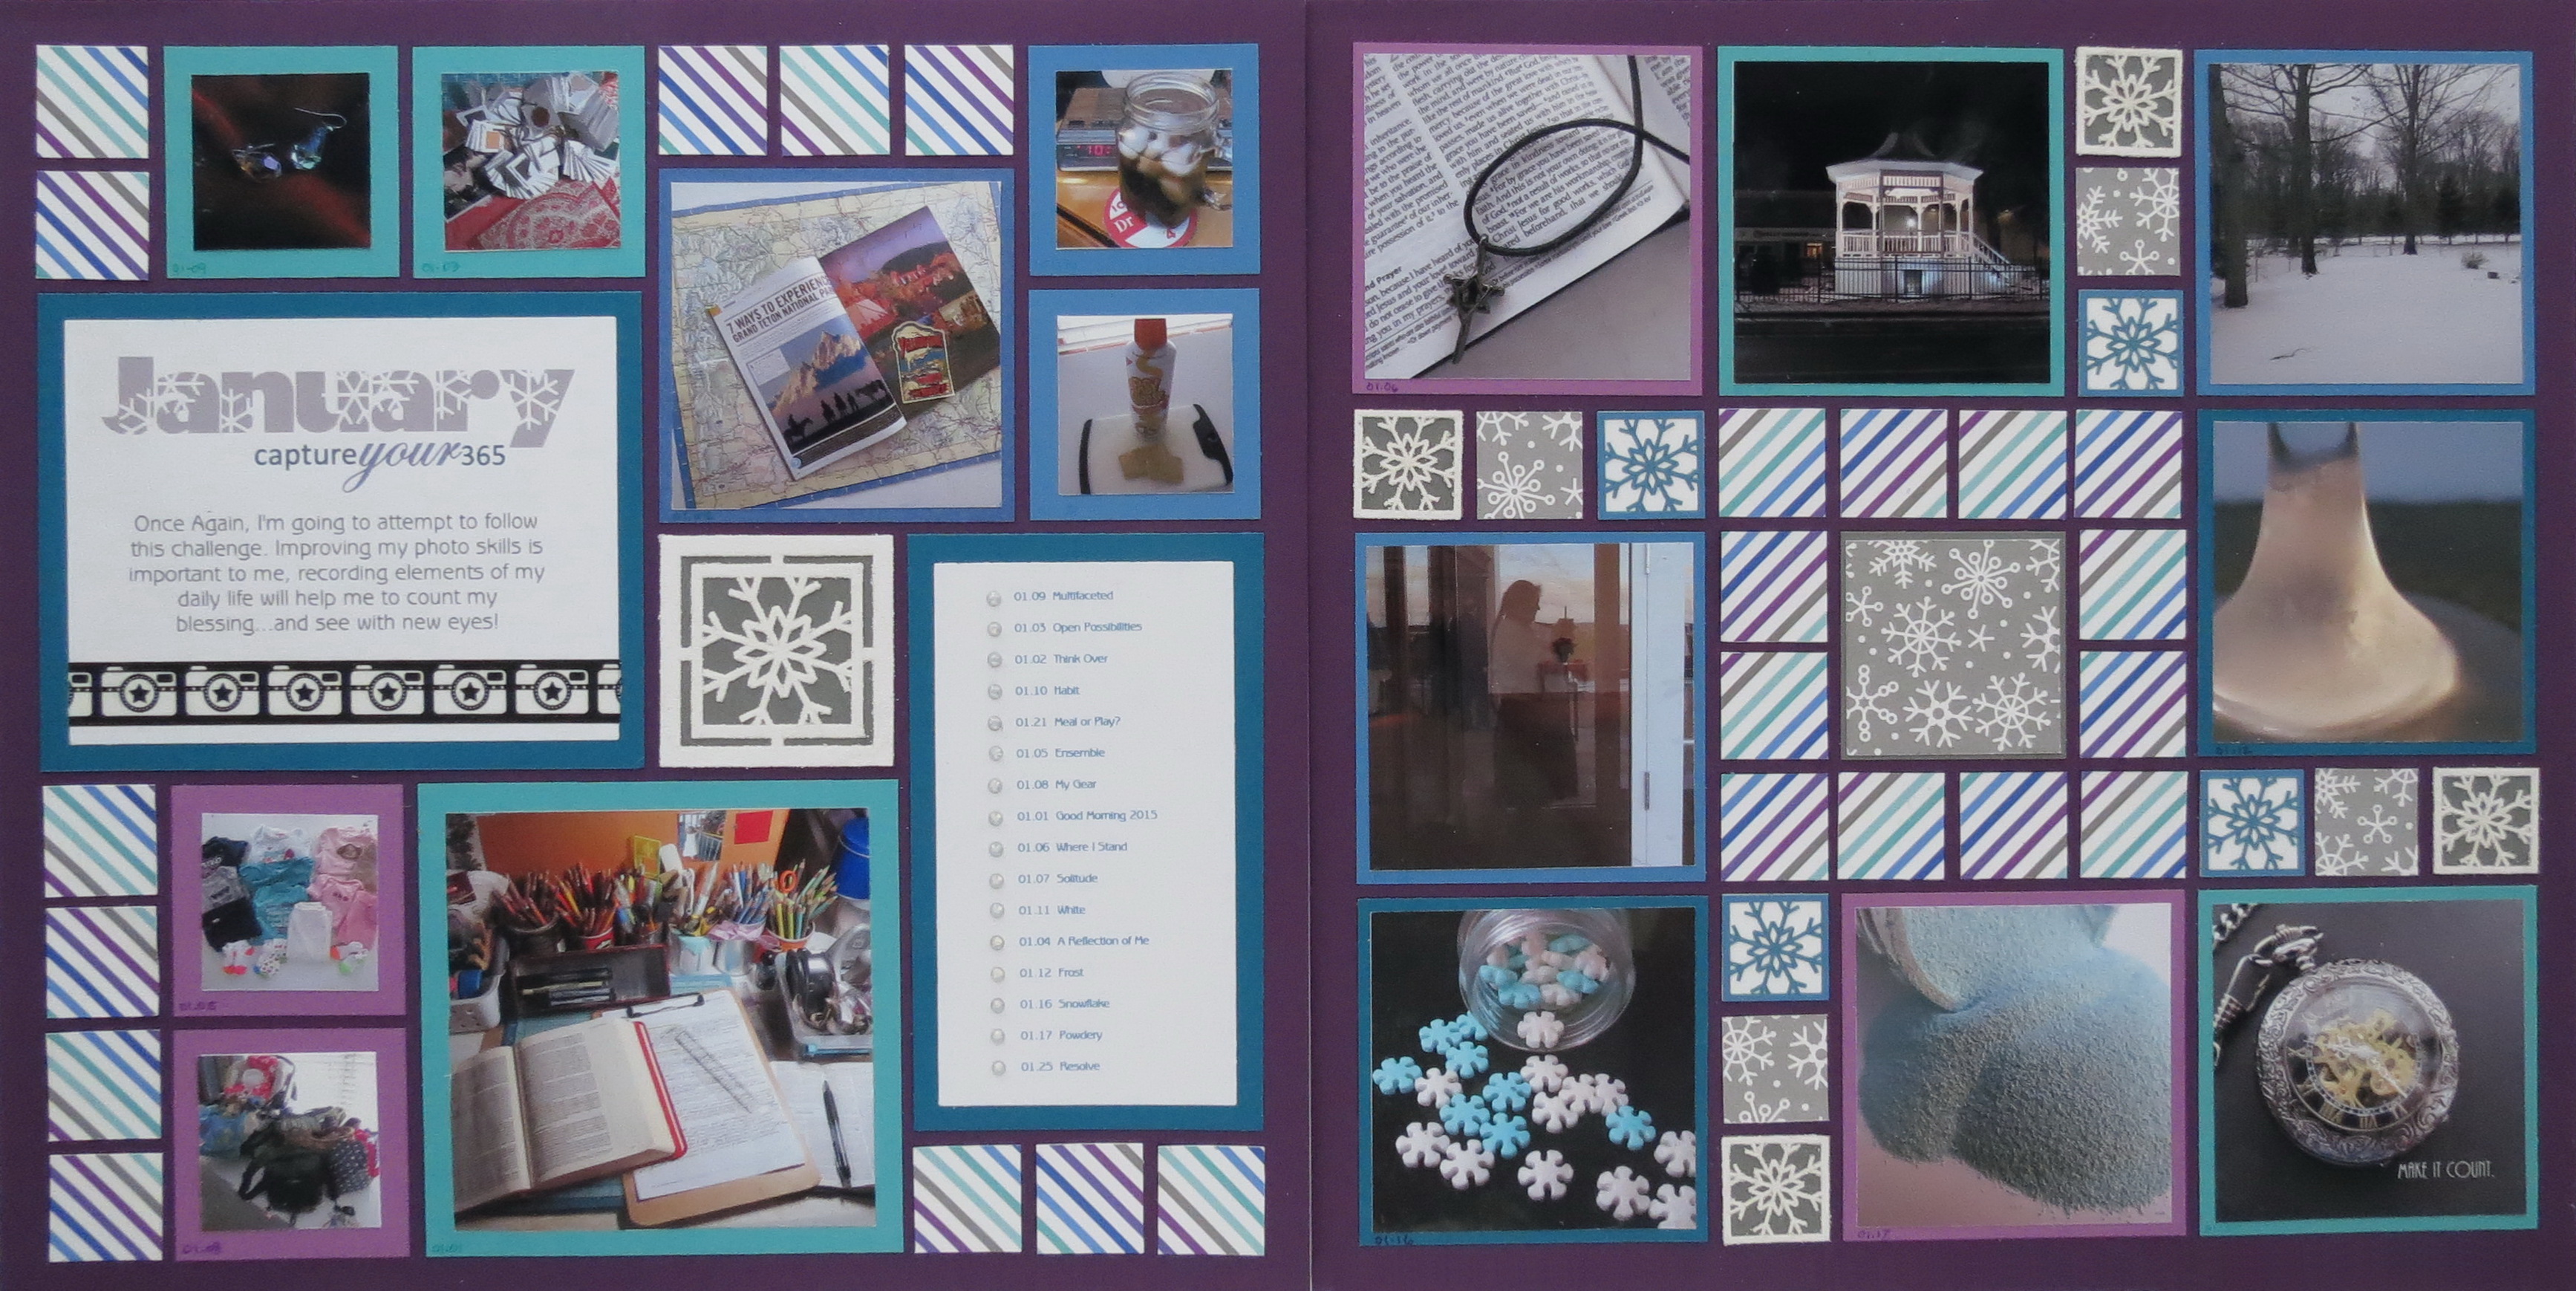
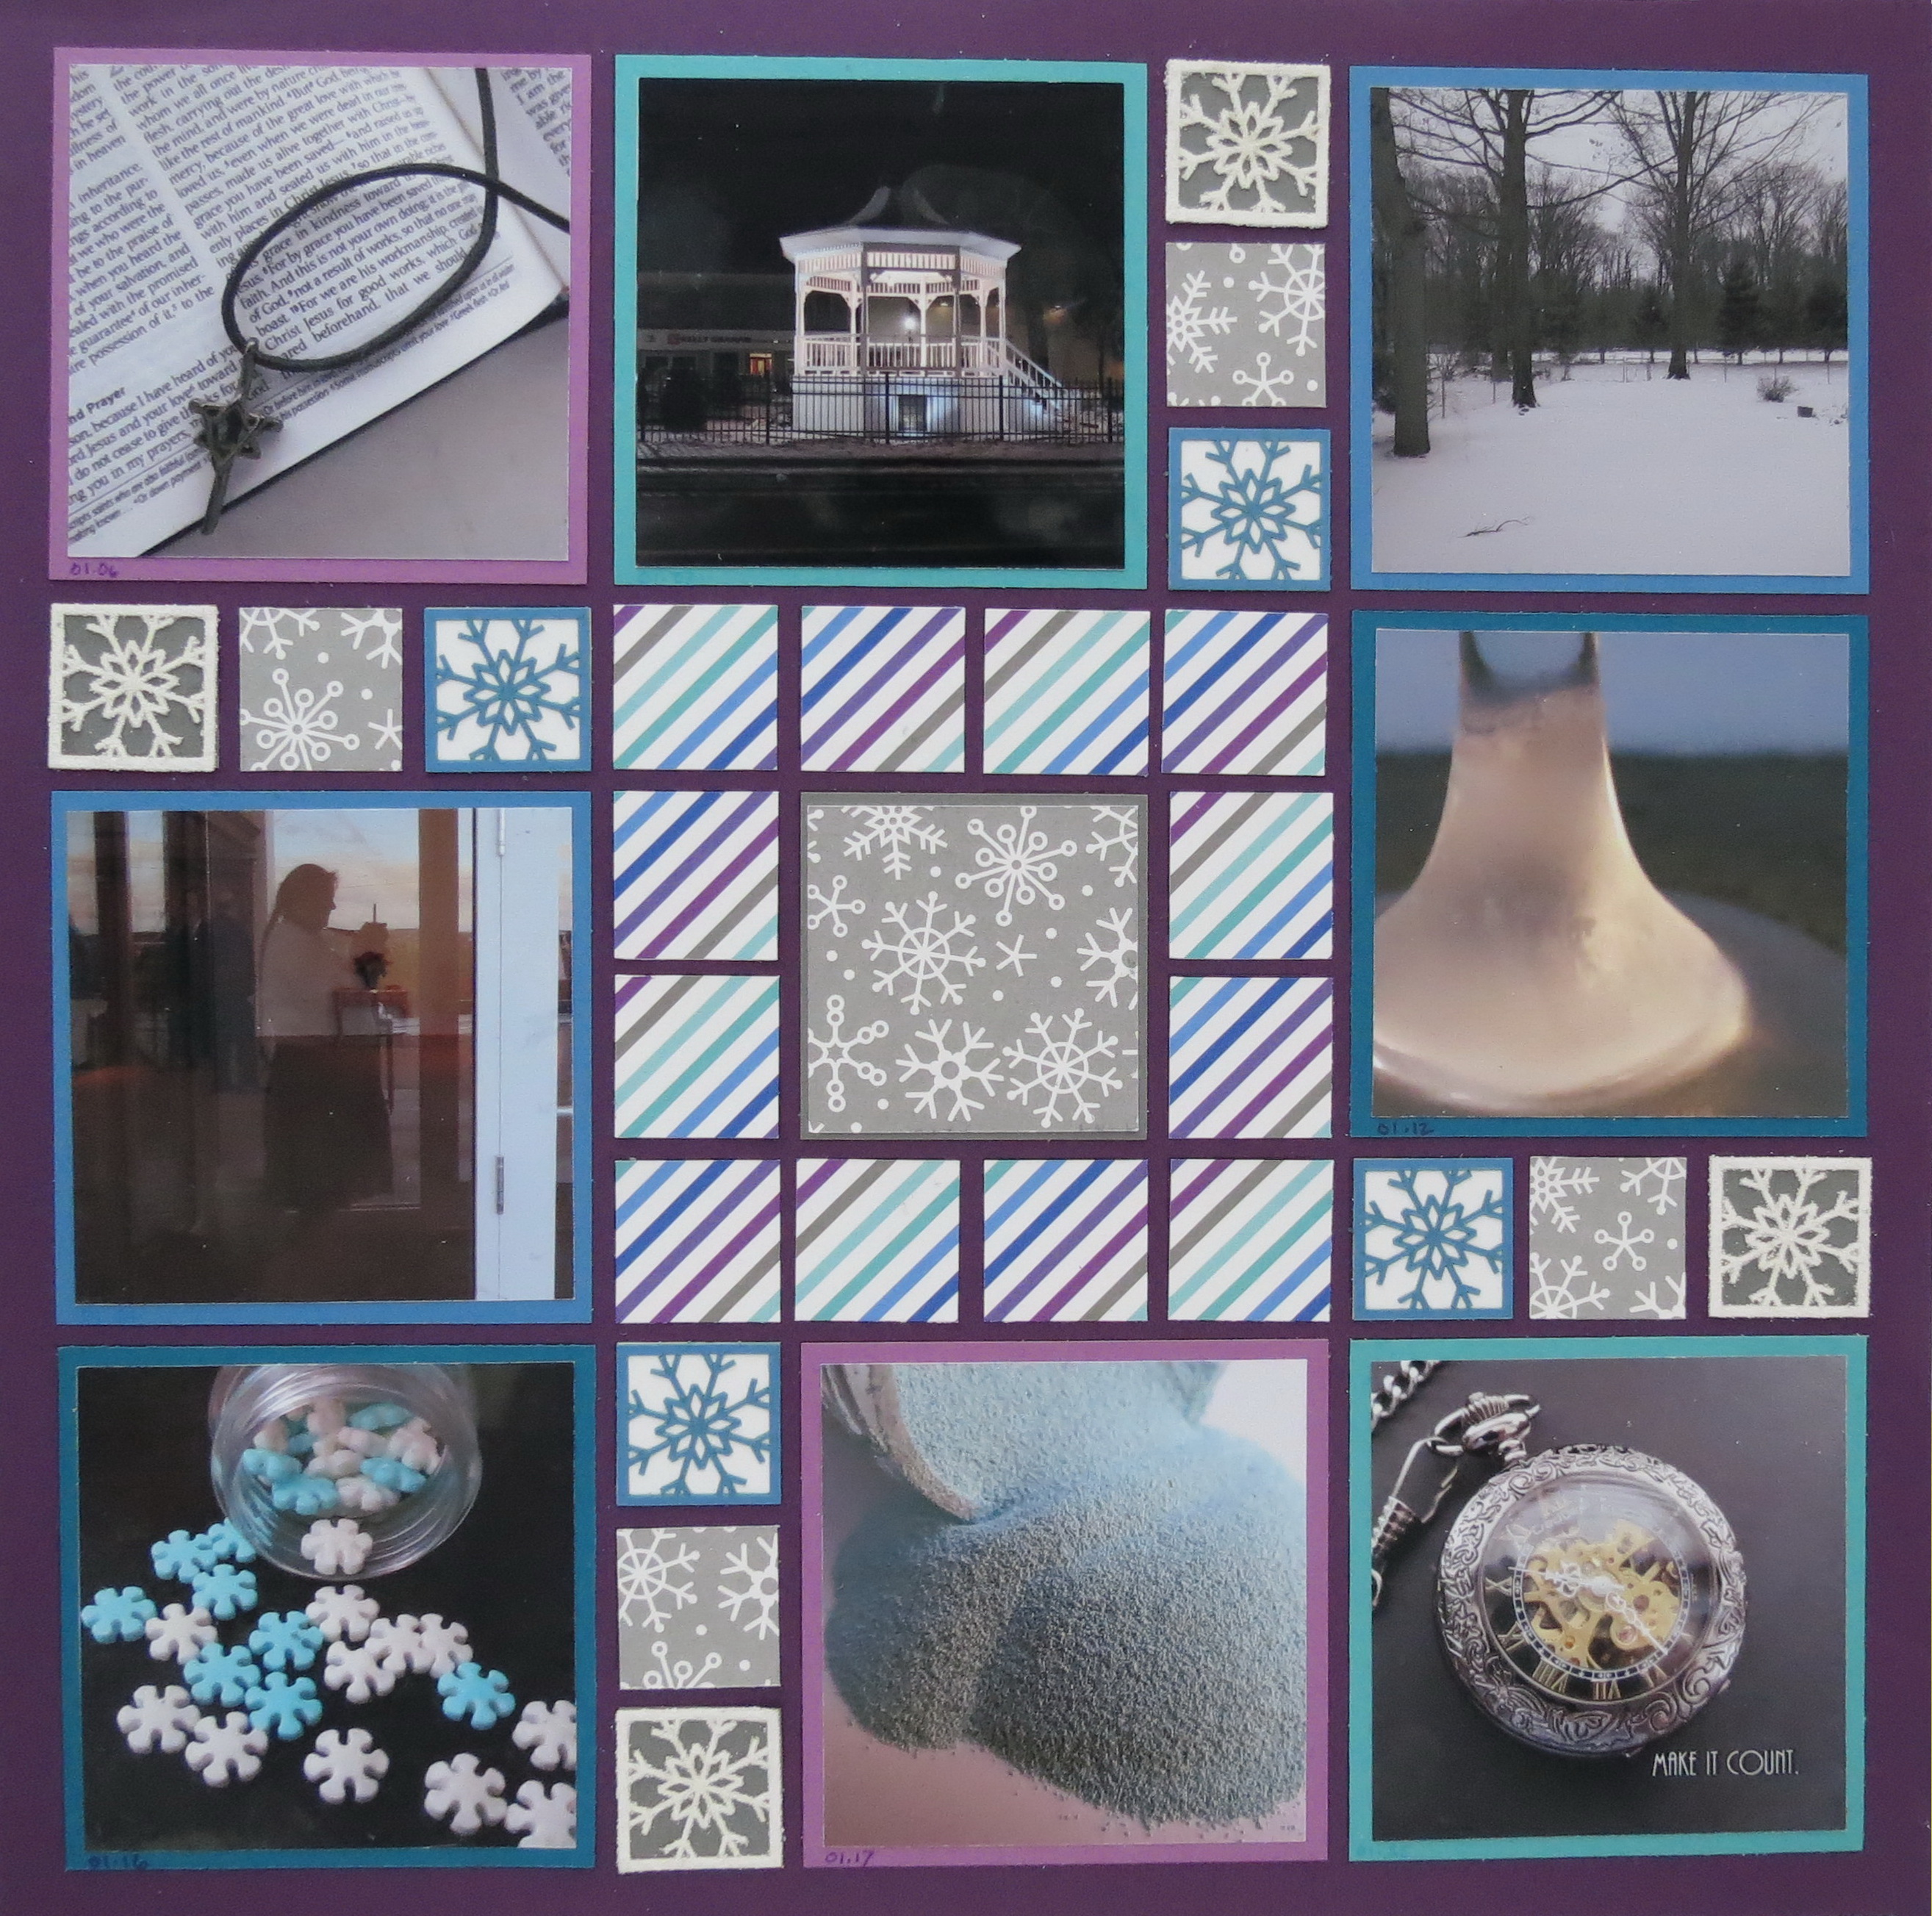
Random Photos two page layout
Finding a theme or a connection will help the process. Here are a few possibilities:
• By the Season: Winter, Spring, Summer, Fall
• By the person: Spouse, child, pet
• By the place: Campgrounds, amusement parks, museums, gardens
• By events: Family birthdays, sunrises/sunsets, picnics/BBQ’s
At first glance you may say that you have tons of a particular item listed above and can do a whole layout on just one. However, if you are like me you may, on occasion, take a lot of photos and have only a few turn out well.
Birthday photos are often a disappointment. I take birthday photos of the person, their cake, the people present and as they open their gifts. Sometimes they are just so…boring. Yep, they become routine. In general the cakes are all going to be the star of the show around here, so a page showing off the birthday cakes for the year might be a spectacular page.
Maybe you have random photos of one of the children that don’t relate, except by it being that person…pull them all together for scrapbook page showing “a year in the life of…” and you just might solve your problem!
For my layout here, I have a group of very random, very unrelated photos that I’m using as they are a part of a photo challenge. (Capture your 365) Each day begins with a photo prompt. Sometimes it’s a word or a phrase to inspire you to take a photo to fit. The challenge is to improve your photo skills and how you look at your subjects.
What unifies these photos for me is the challenge is a month at a time. My plan is to take each month’s photos or maybe just the “best of” and prepare a layout that will reflect something about that month. For this layout I’m using January’s prompts with colors and snowflakes to set a winter theme.
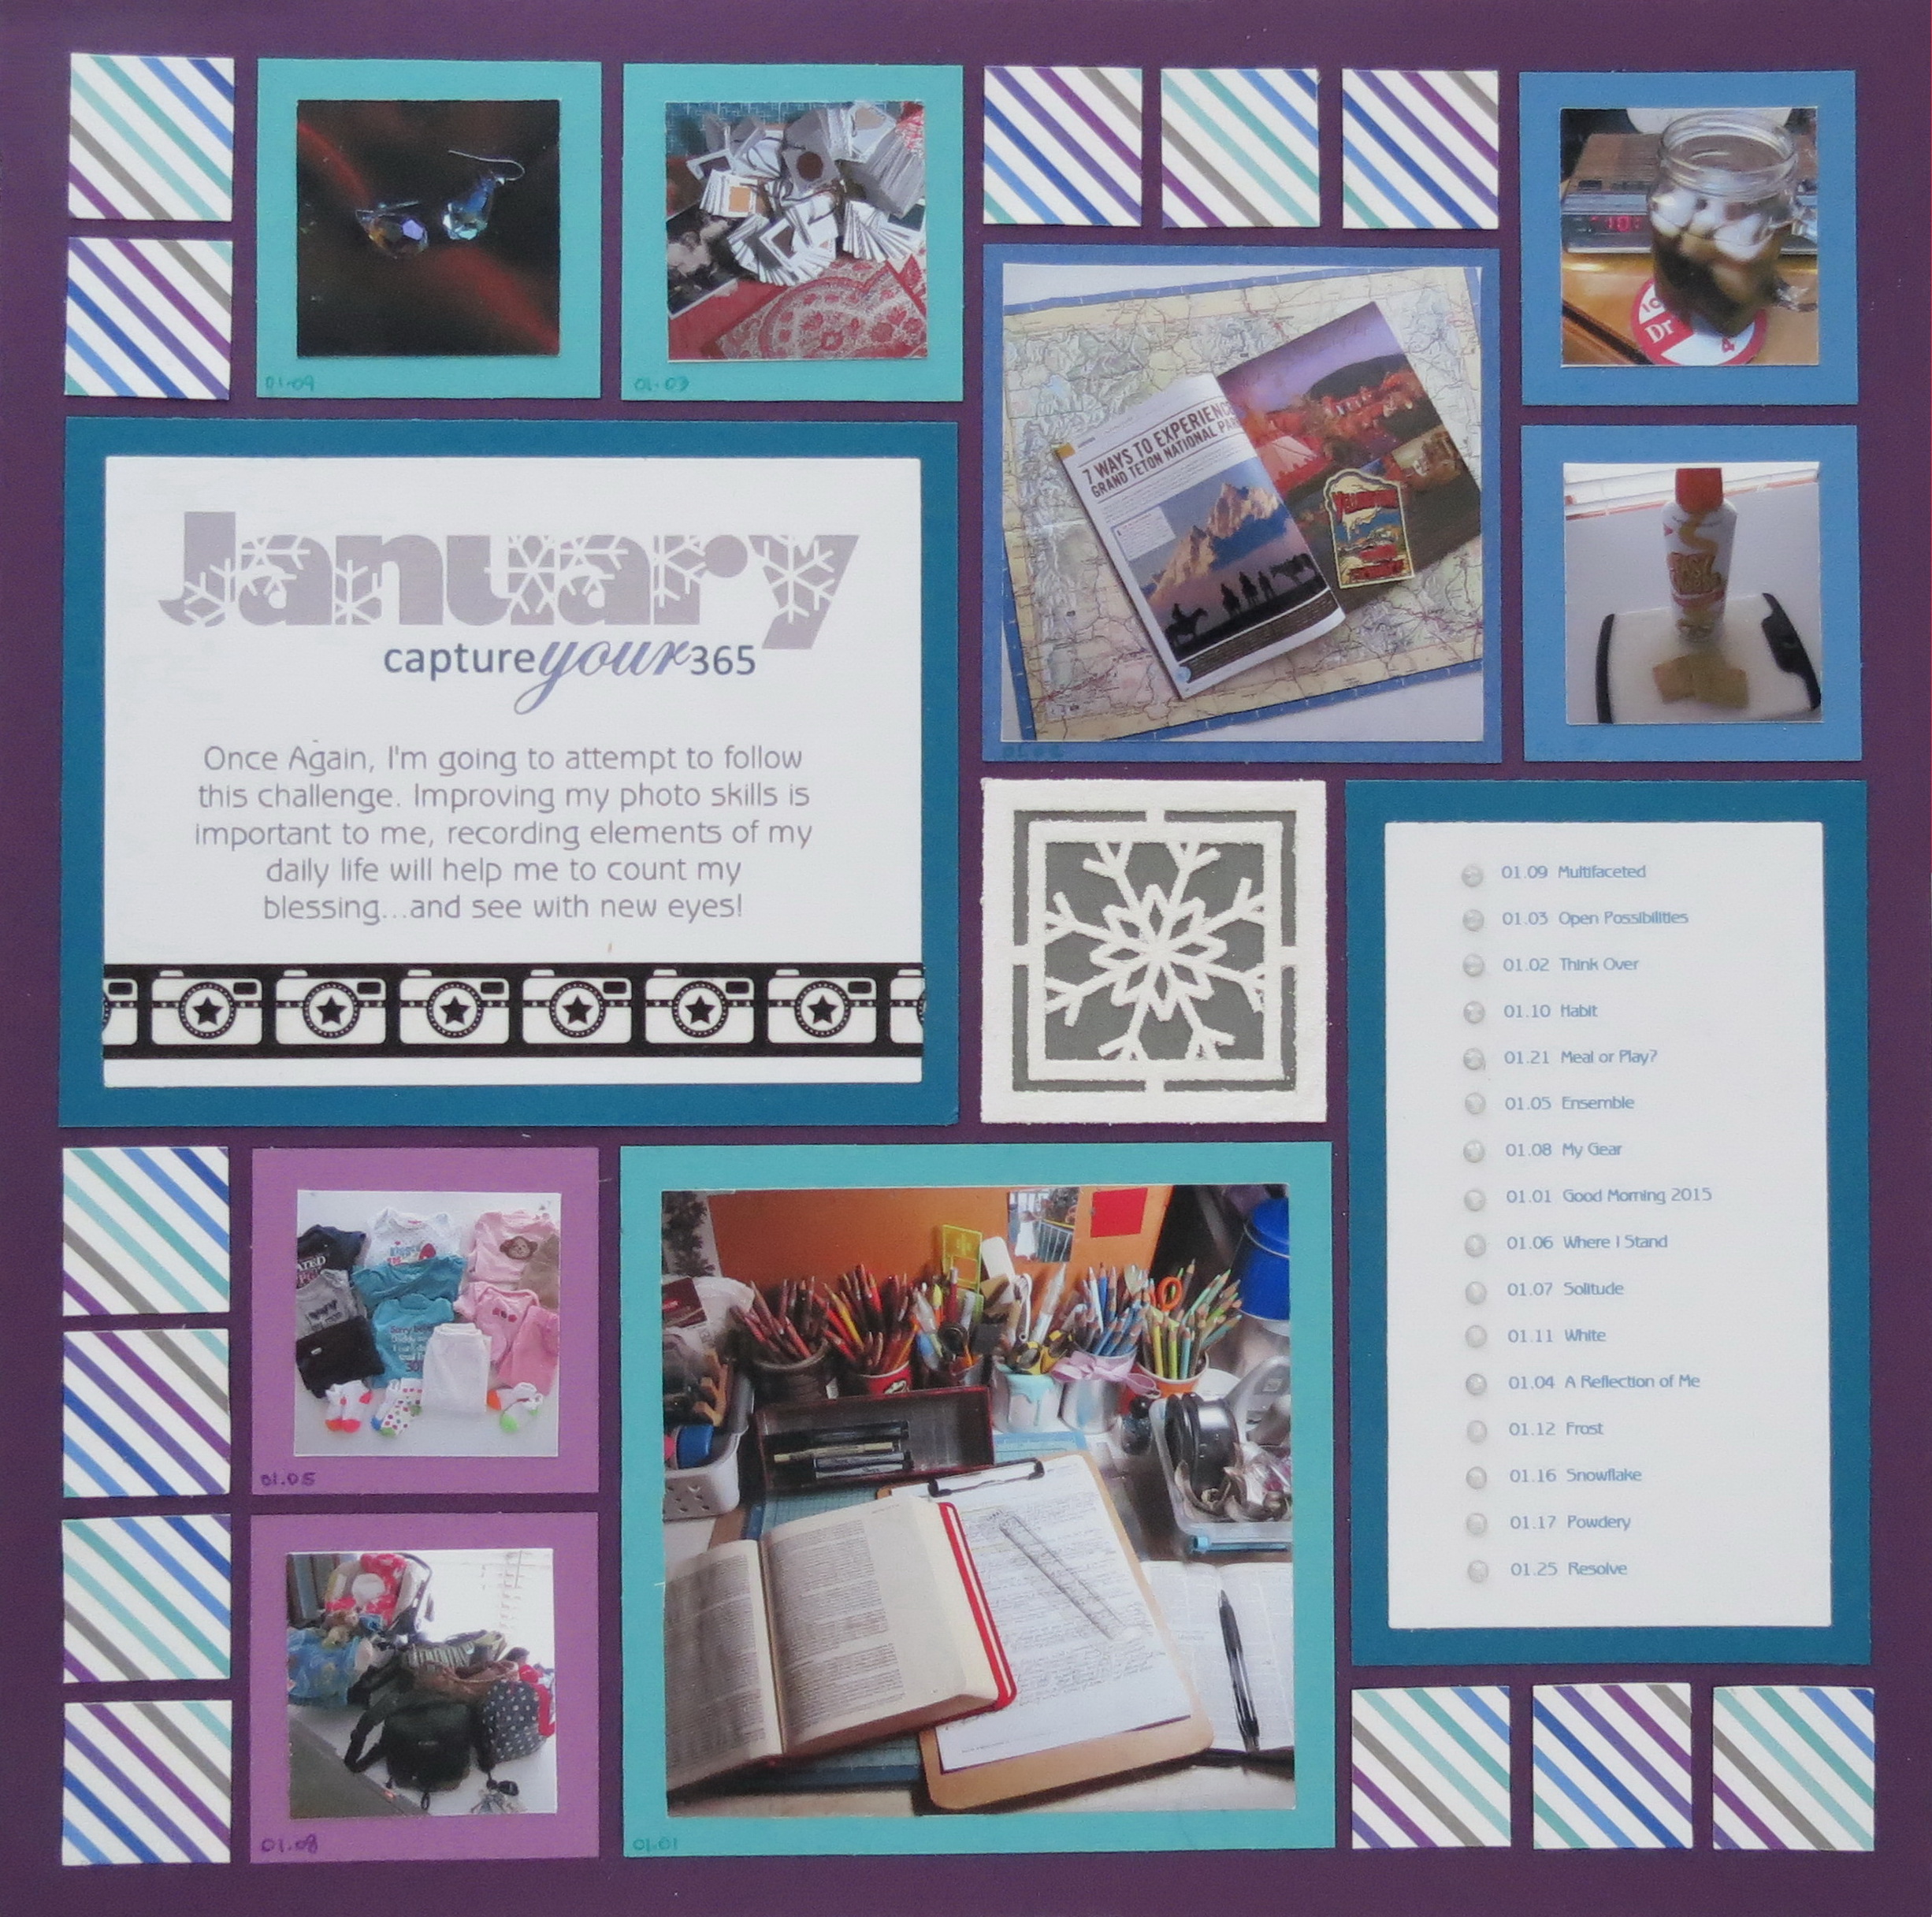
This becomes a perfect way to display a full year one month at a time in one album. You will also have choices for many layouts. As I’m going to be using a square format throughout for an Instagram type look for this group of photos, I’ll be looking for layouts in our gallery that will readily support a multitude of squares. I have used patterns #178 and #124 for January’s layout. I actually turned #178 upside down for a different look; it allowed me to place the title block on the left and my list on the lower right.
Additional patterns that I can pick from to continue this square look are #100, #101, #110, #122, #128, #133, #152, #155, #163 and #175. Many choices! Several of these patterns can be rotated for a different look; several contain spots for 12+ photos which comes in handy when trying to showcase 28-31 photos in a layout. The possibilities are so numerous!
Random Photos group like photos if possible.
In general these photos don’t have a lot unifying elements, but I did find that there were a couple of photos that did have a link. There were two photos that involved heirlooms, two that featured food and two that displayed things related to baby stuff. I paired each set together in the layout of page one. These photos went into spots all the same size. Then in the largest spot I put my first day of the challenge photo and the medium spot one of my favorite photos.
Unifying a Page:
• Colors
• Images
• Elements
• Patterns
What I used:
• Colors: January/Winter theme: Grape Delight, medium aqua, teal, Loganberry, Cobalt, and Pewter Paper Tiles (color inspiration from my patterned paper…and Disney’s “Frozen”)
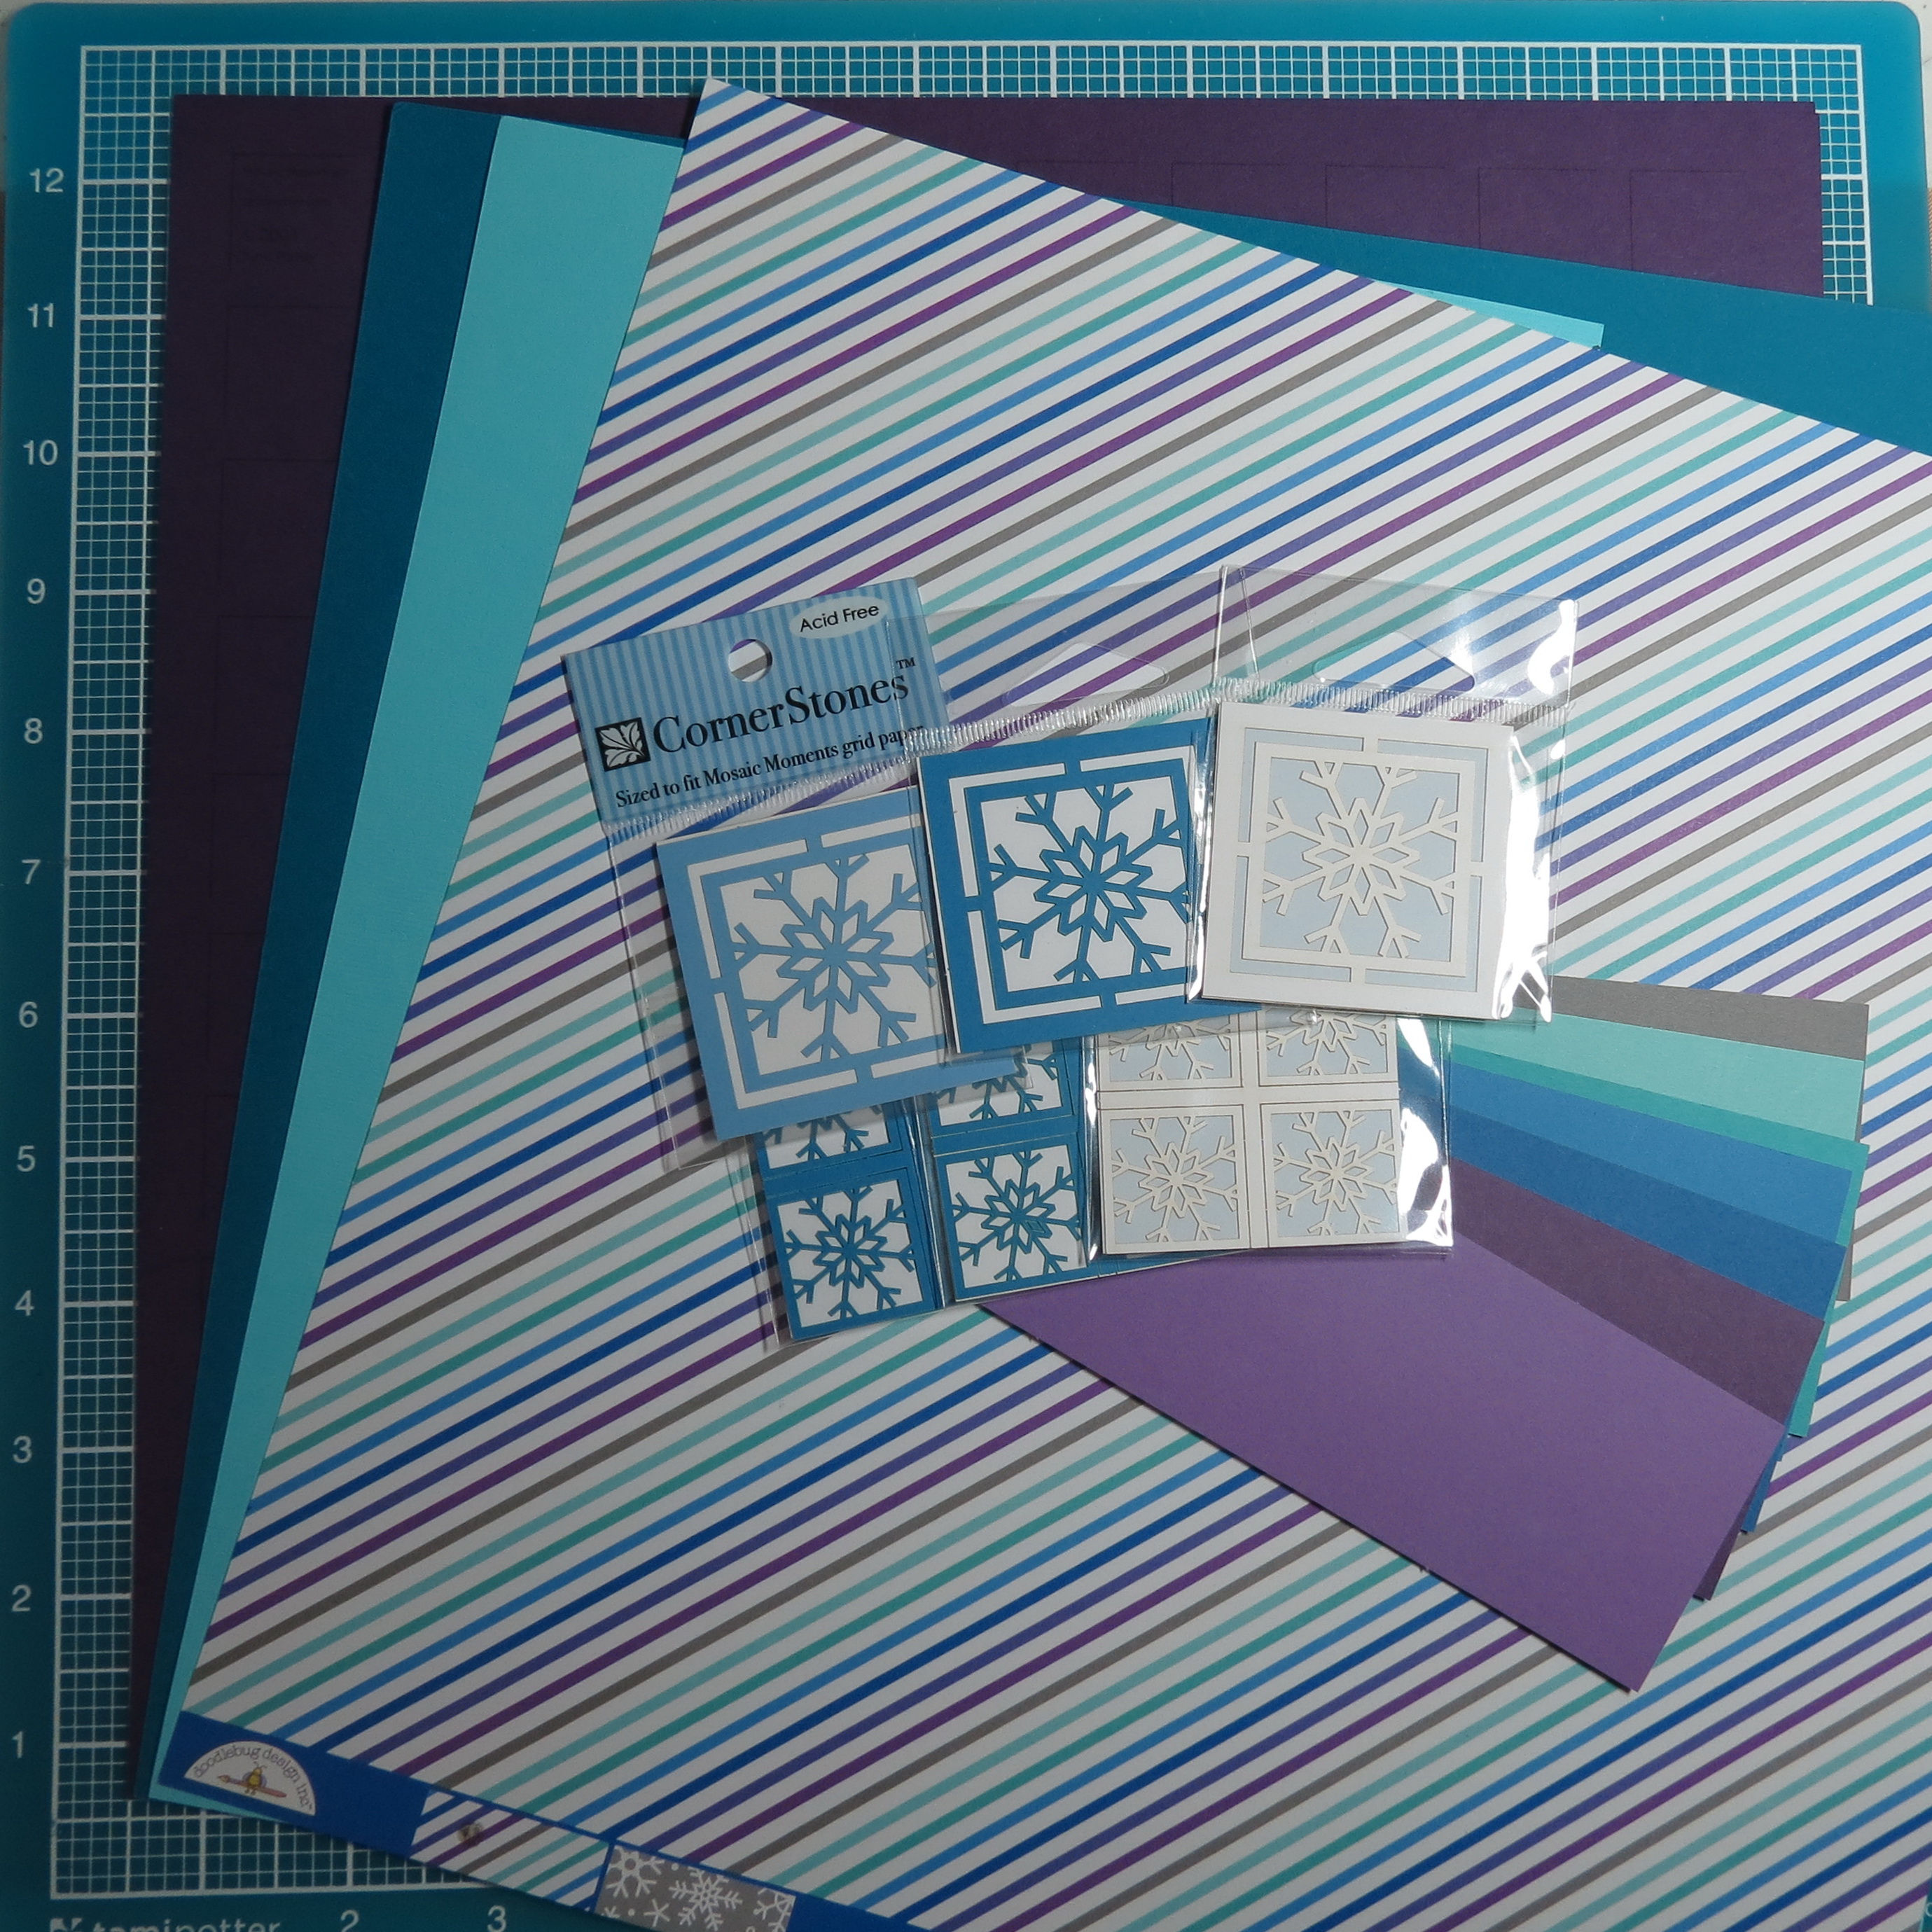
Random Photos patterned paper, grid, cornerstones and paper tiles.
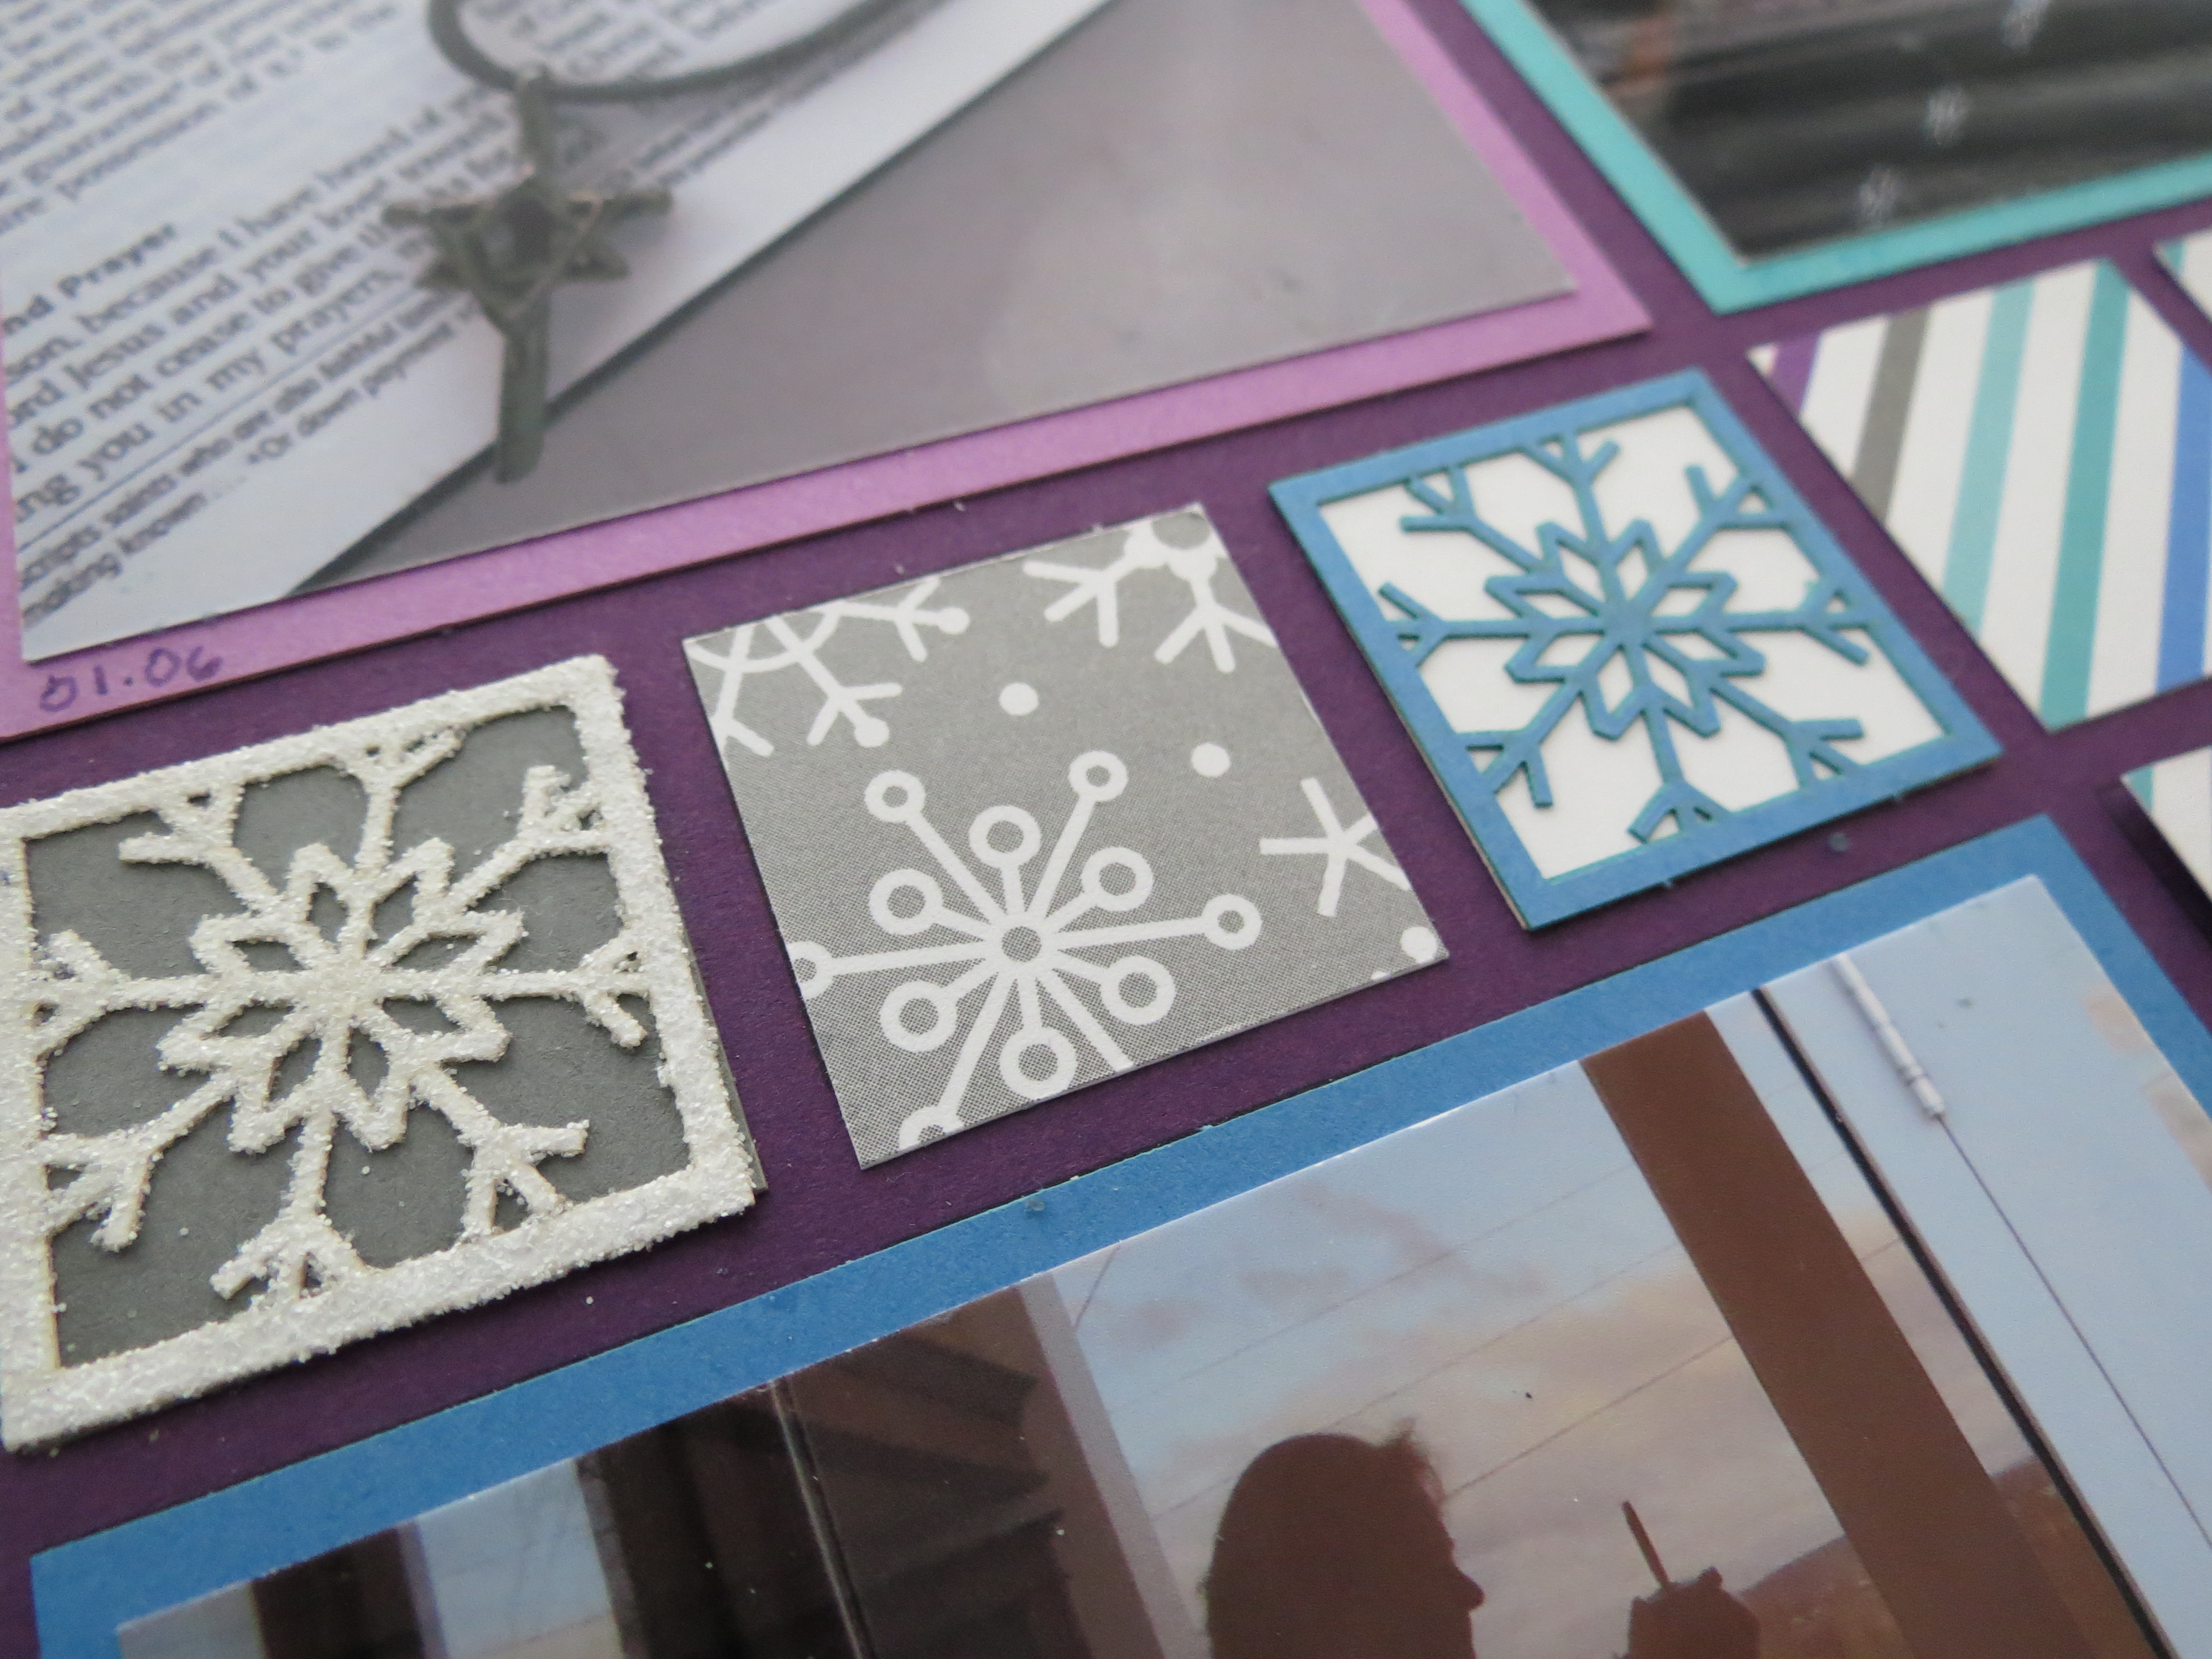
• Images: Snowflakes on paper and in cornerstones, cameras

Random Photos center Cornerstone covered in glitter pewter tile background
• Elements: Sparkle: Opal crystals and Glitter
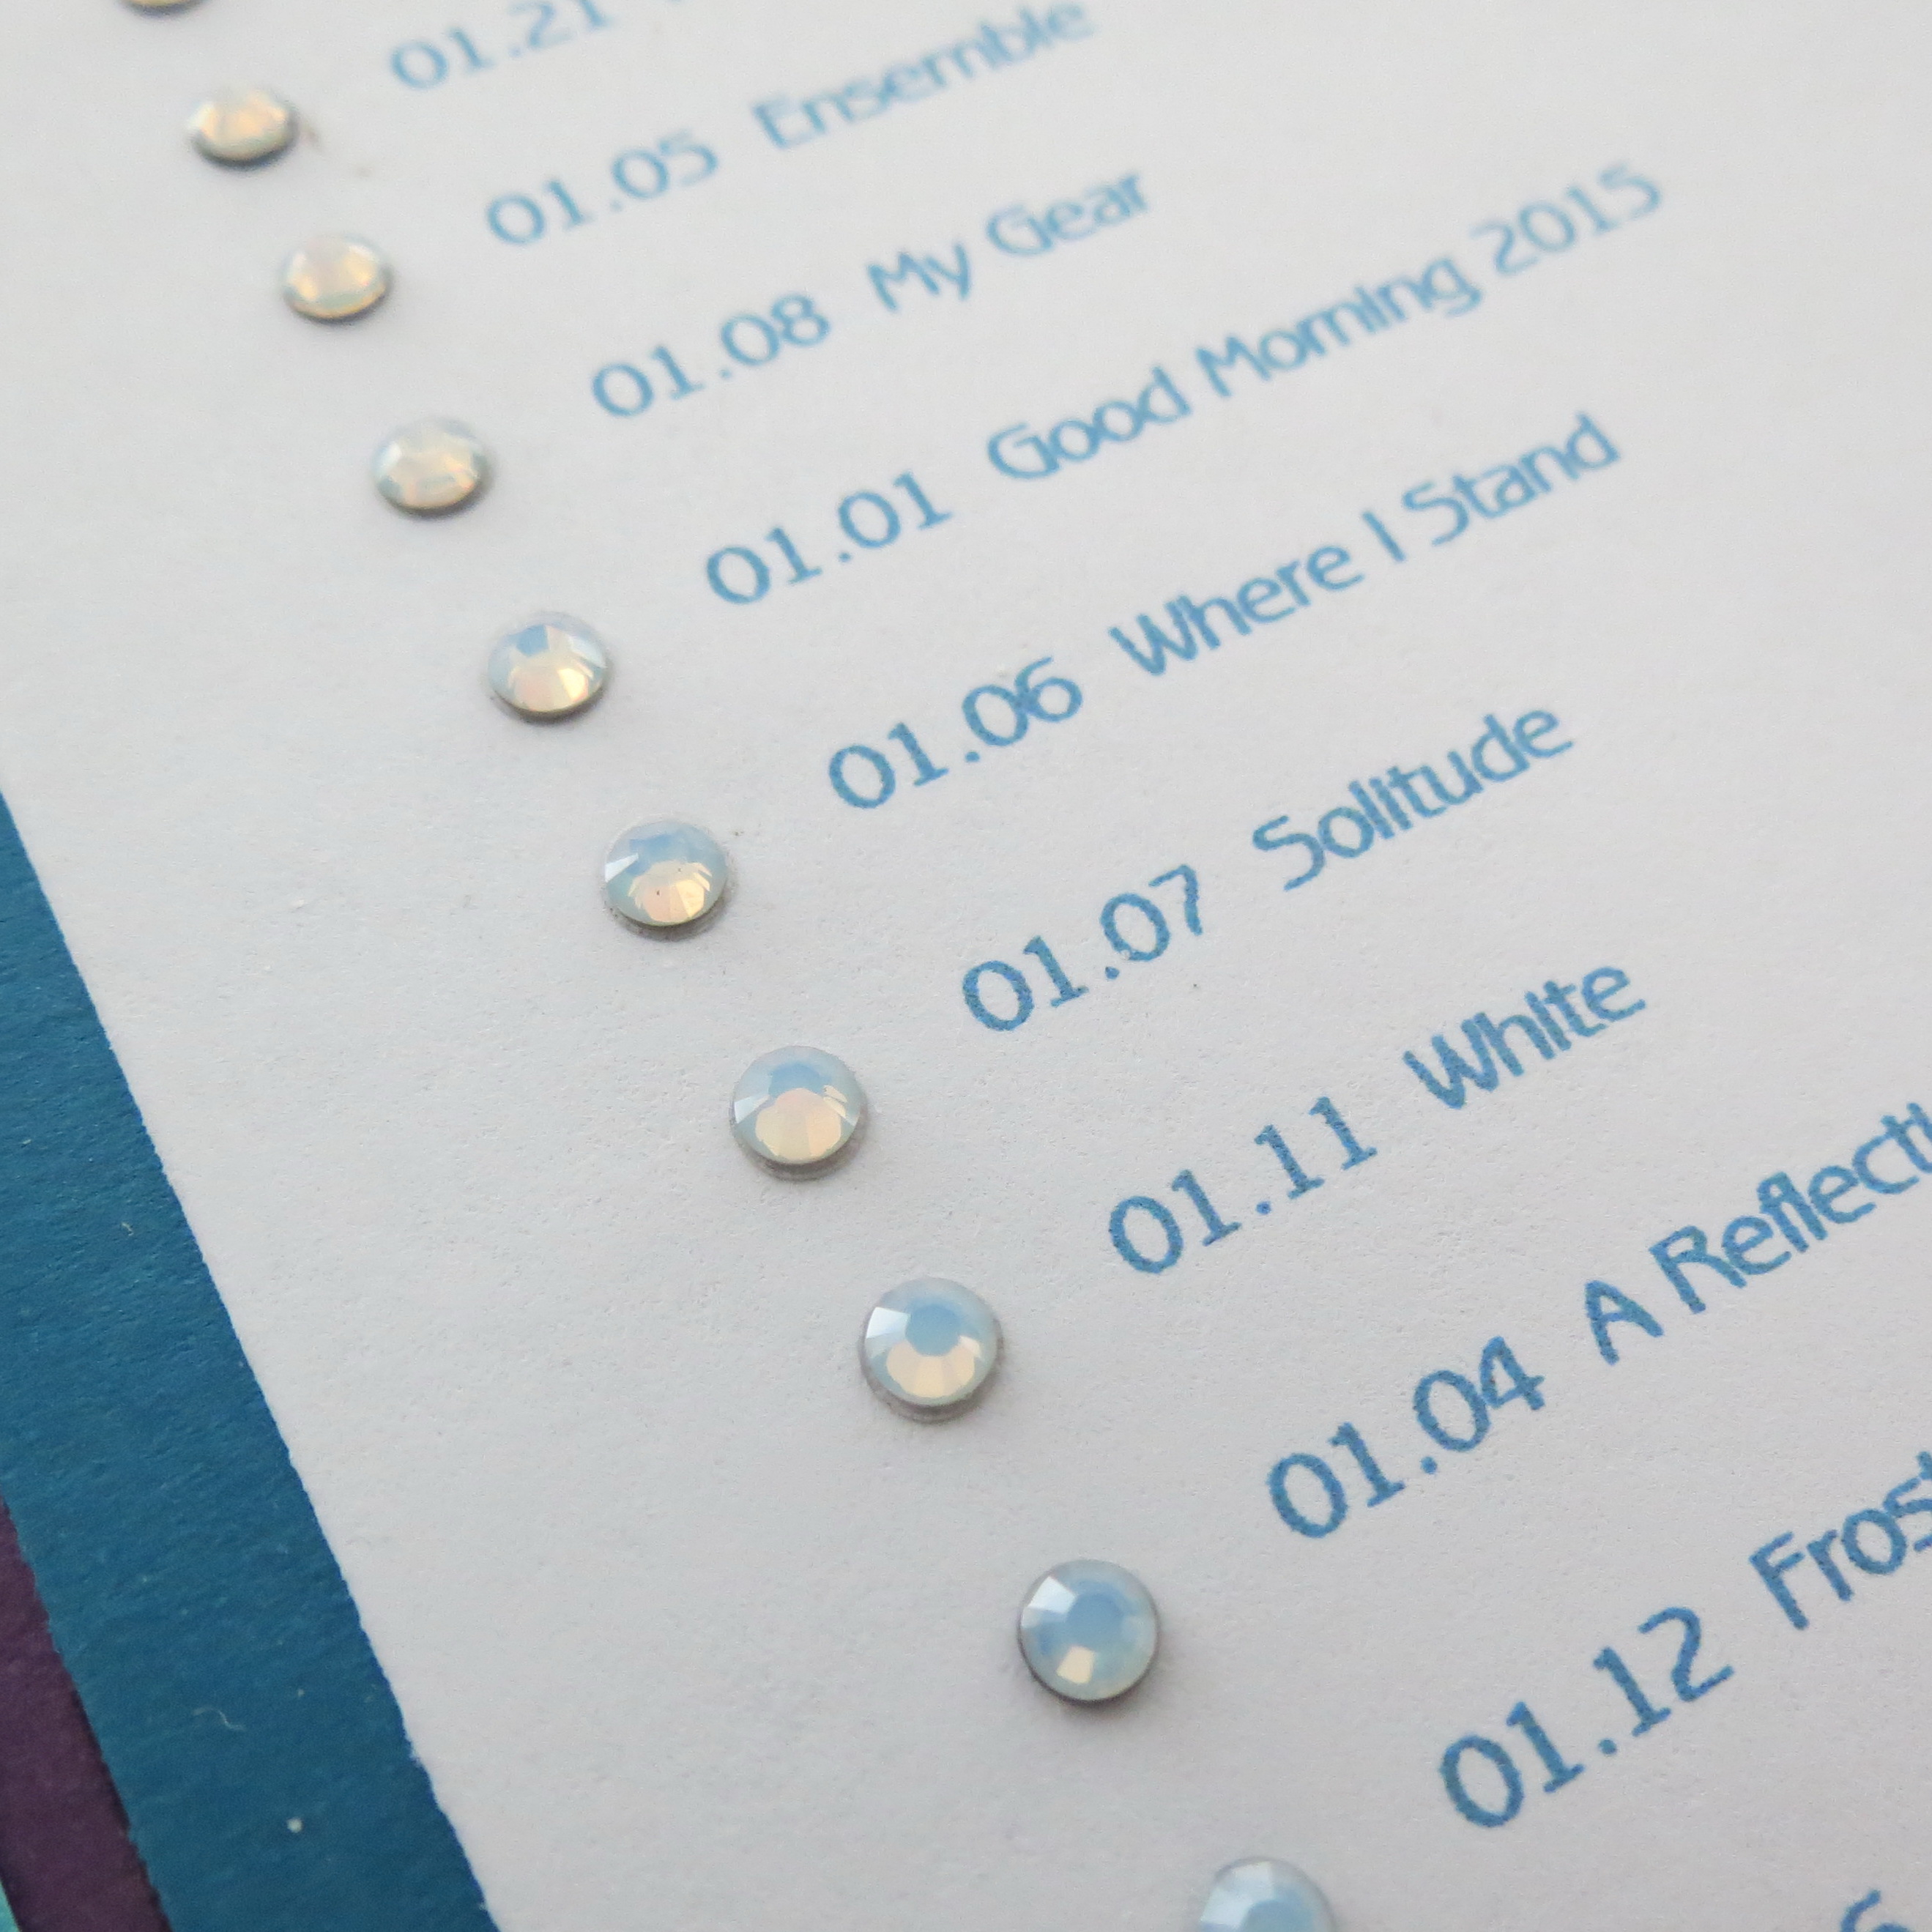
Random Photos using crystals as bullet points adds some sparkle
• Patterns: Squares
How it came together:
Random Photos page 2
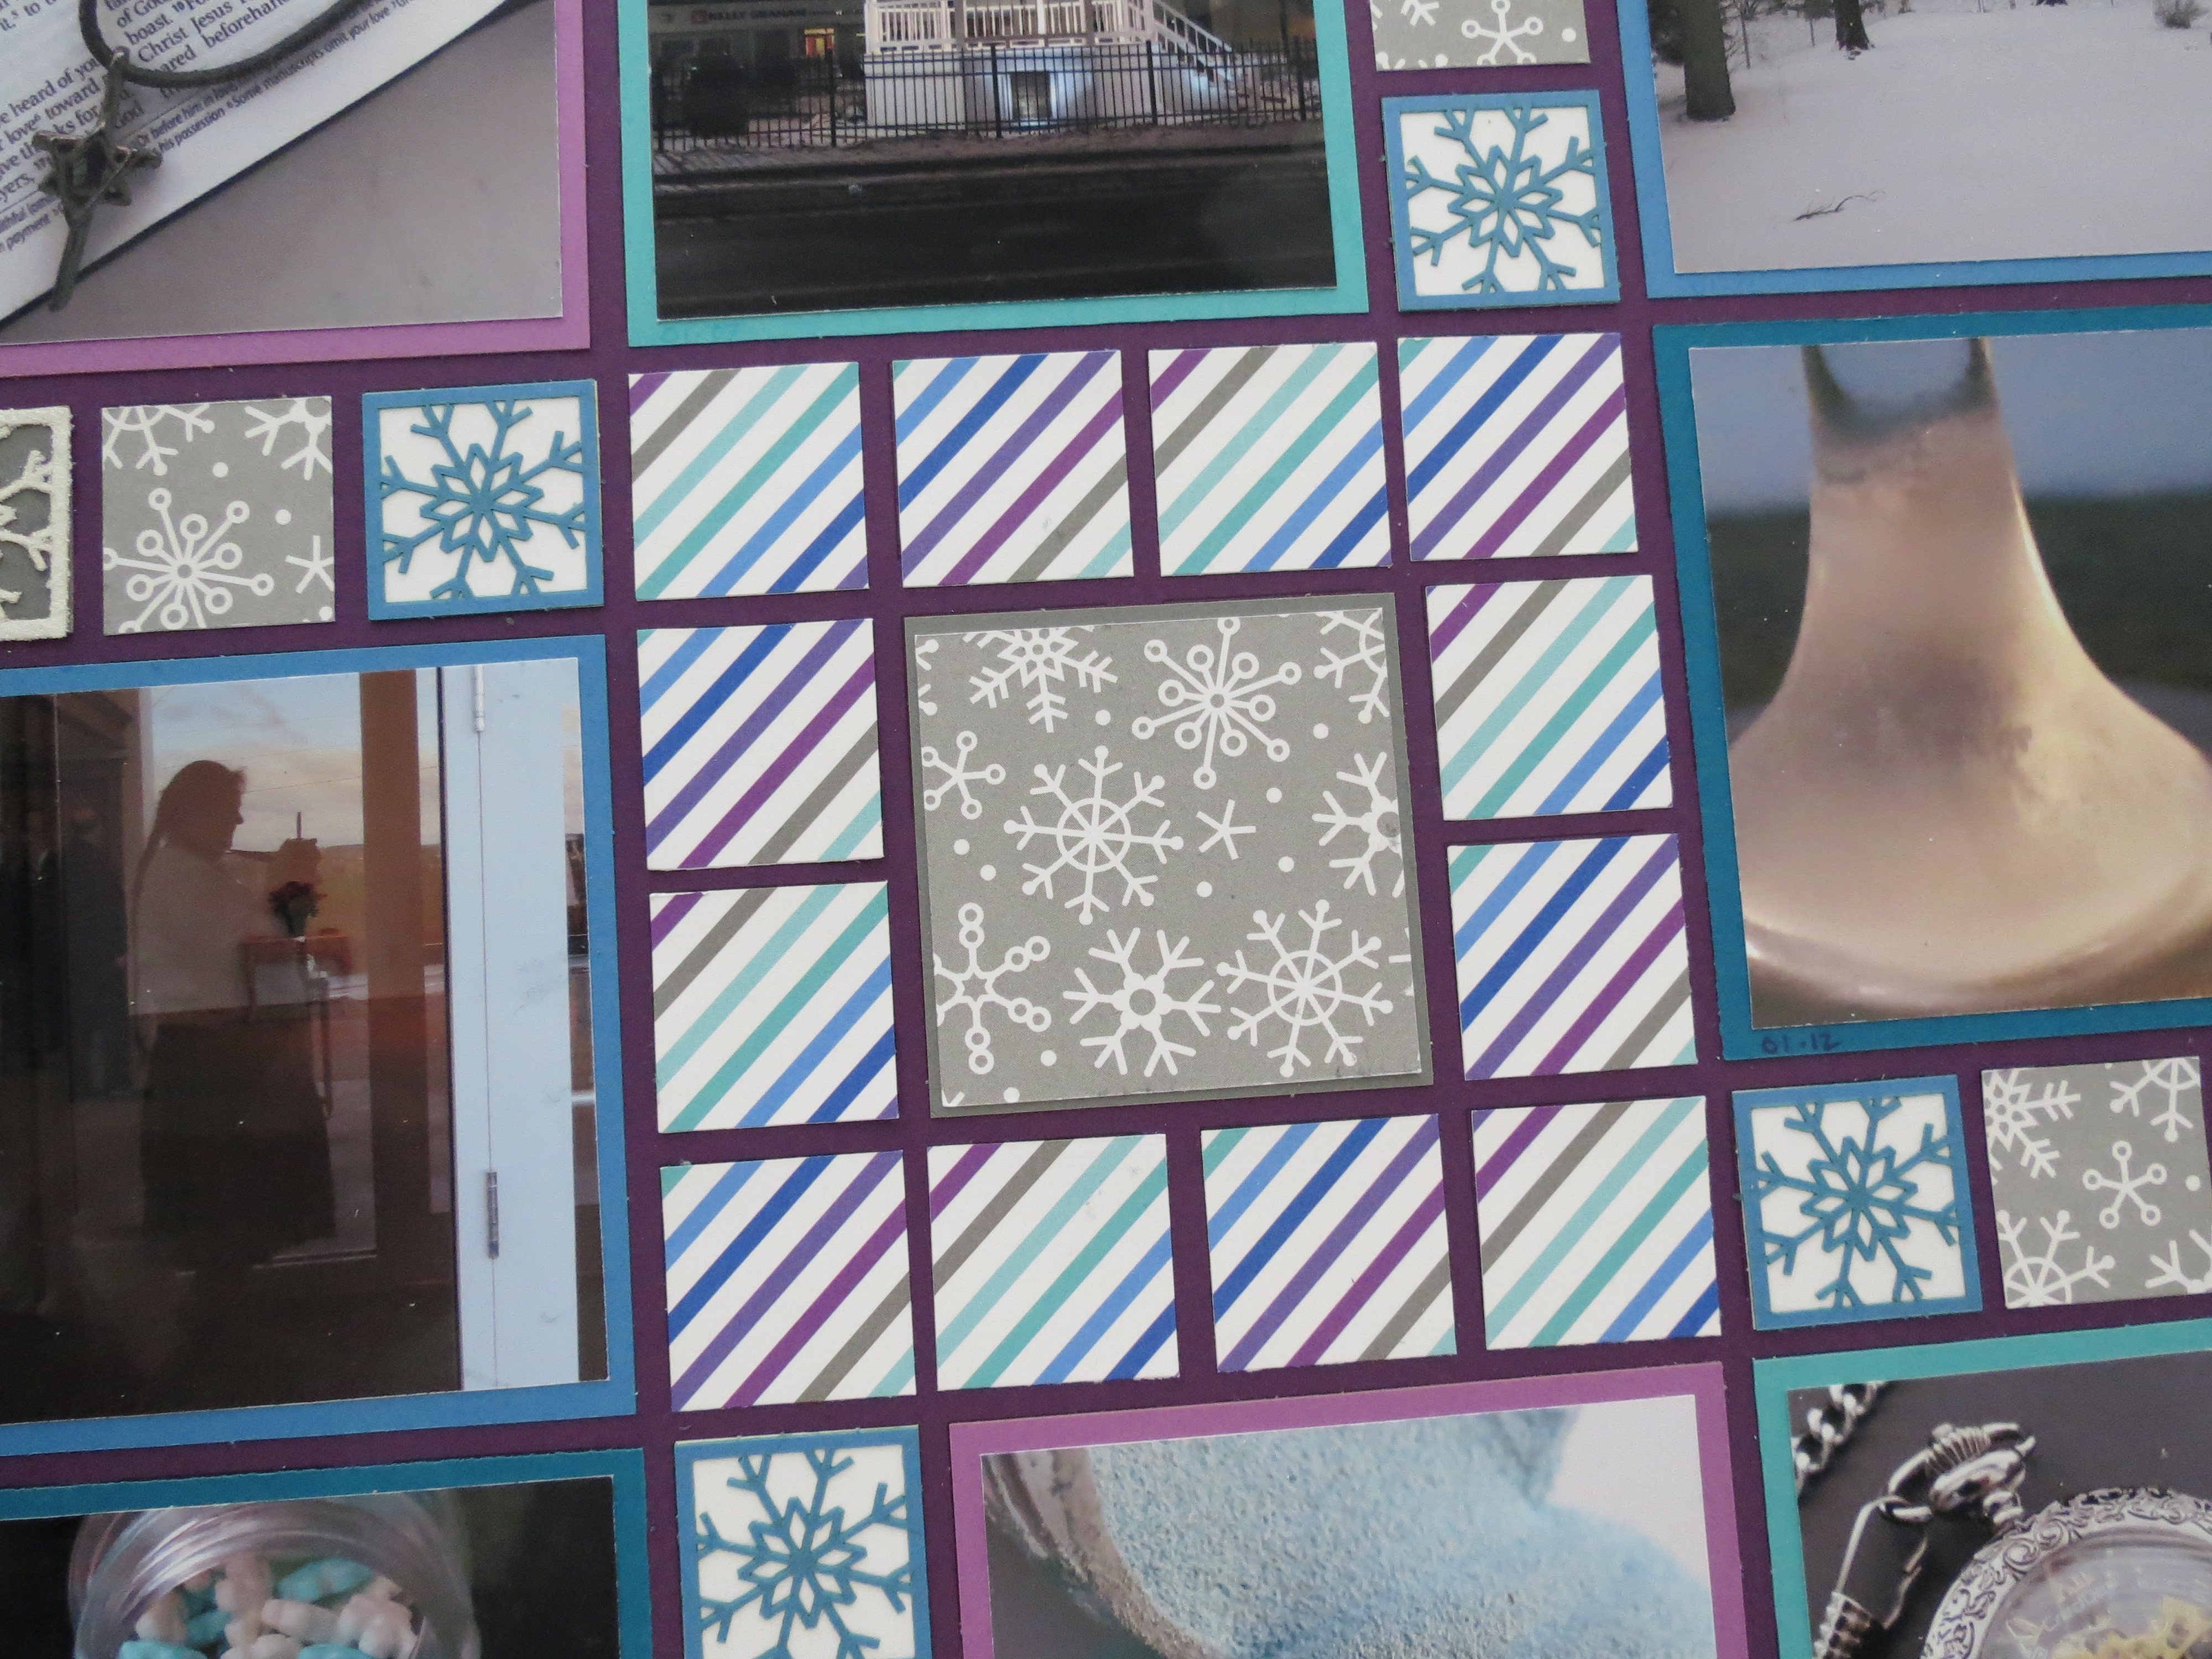
On page two all the photo squares are the same size. I had the opportunity to form two “triangles” one of light (top two corners and bottom center) and one of dark photos (One top center and two bottom corners) this helps to unify and keep the page balanced.
Both pattern pages had rows of one inch squares that were filled with patterned paper from both sides and cornerstone tiles. Similar pattern elements help to unify the pages.
TIP:To get even glitter coverage on the white snowflake cornerstones run them through the Xyron for an edge to edge clear coating of adhesive and then cover with the fine carrara marble glitter.
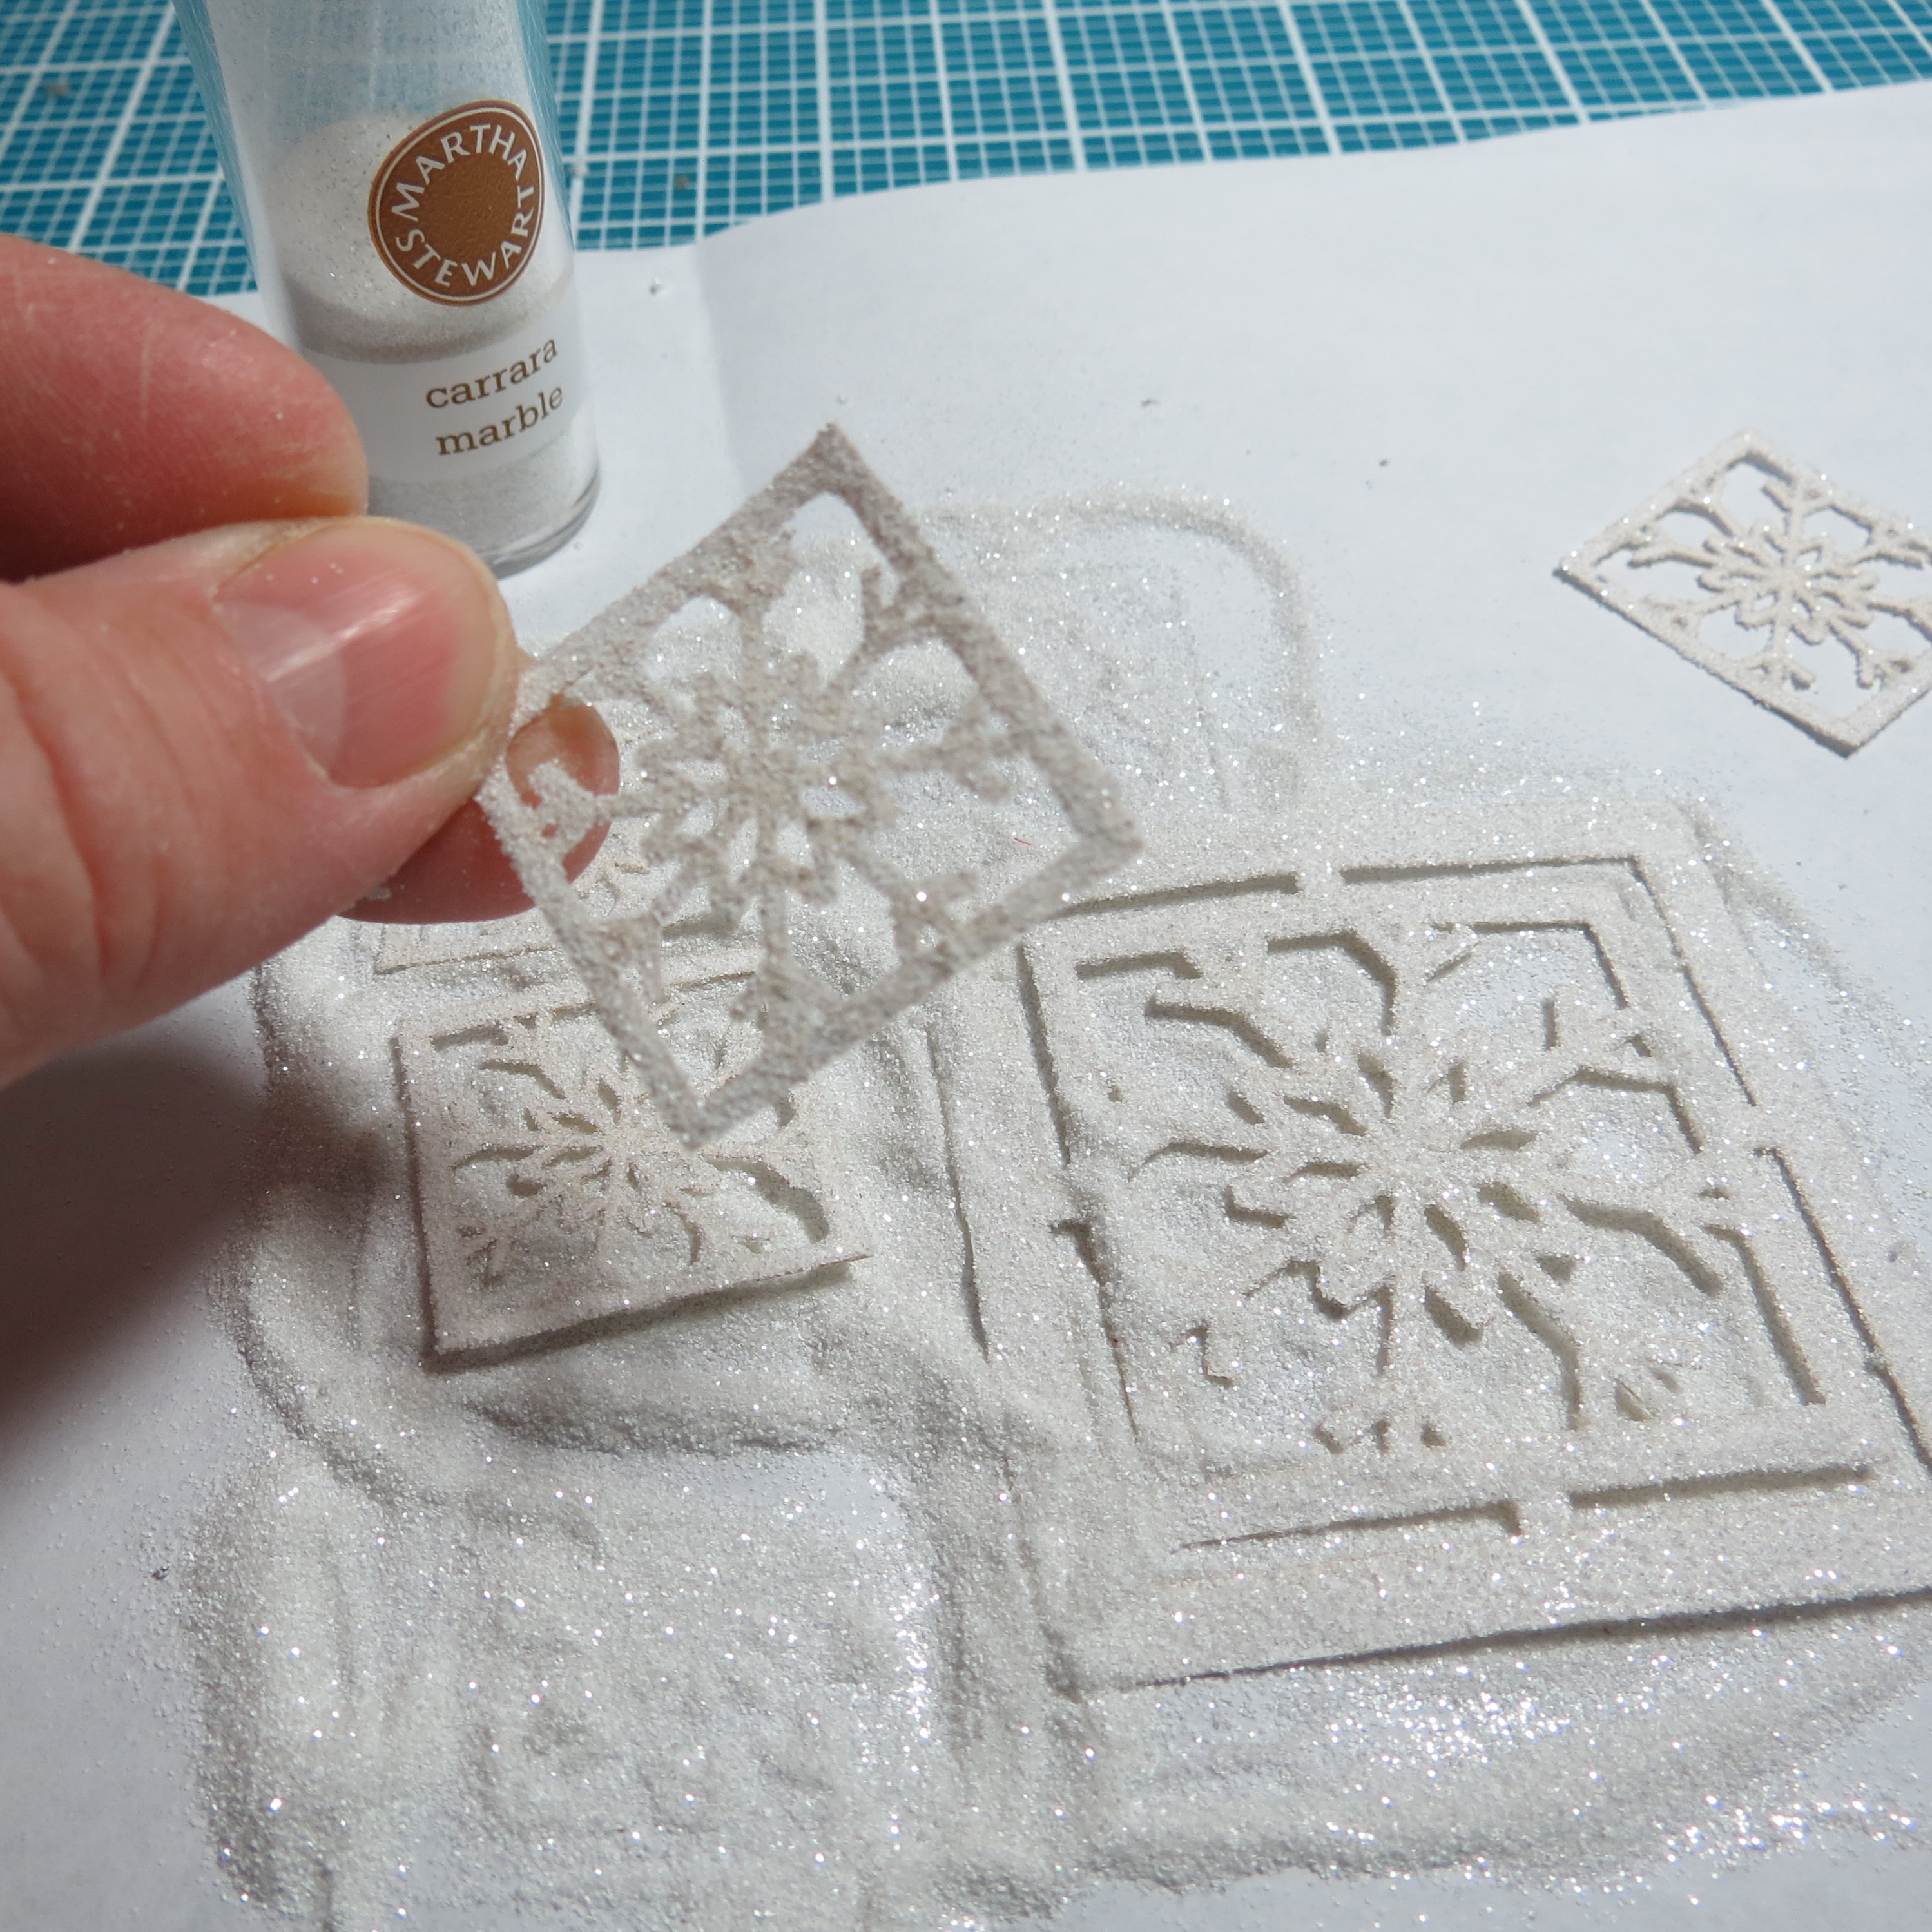
Take time to clean up the edges around the snowflake shape that you may have from the adhesive and glitter it will make a big difference in appearances.
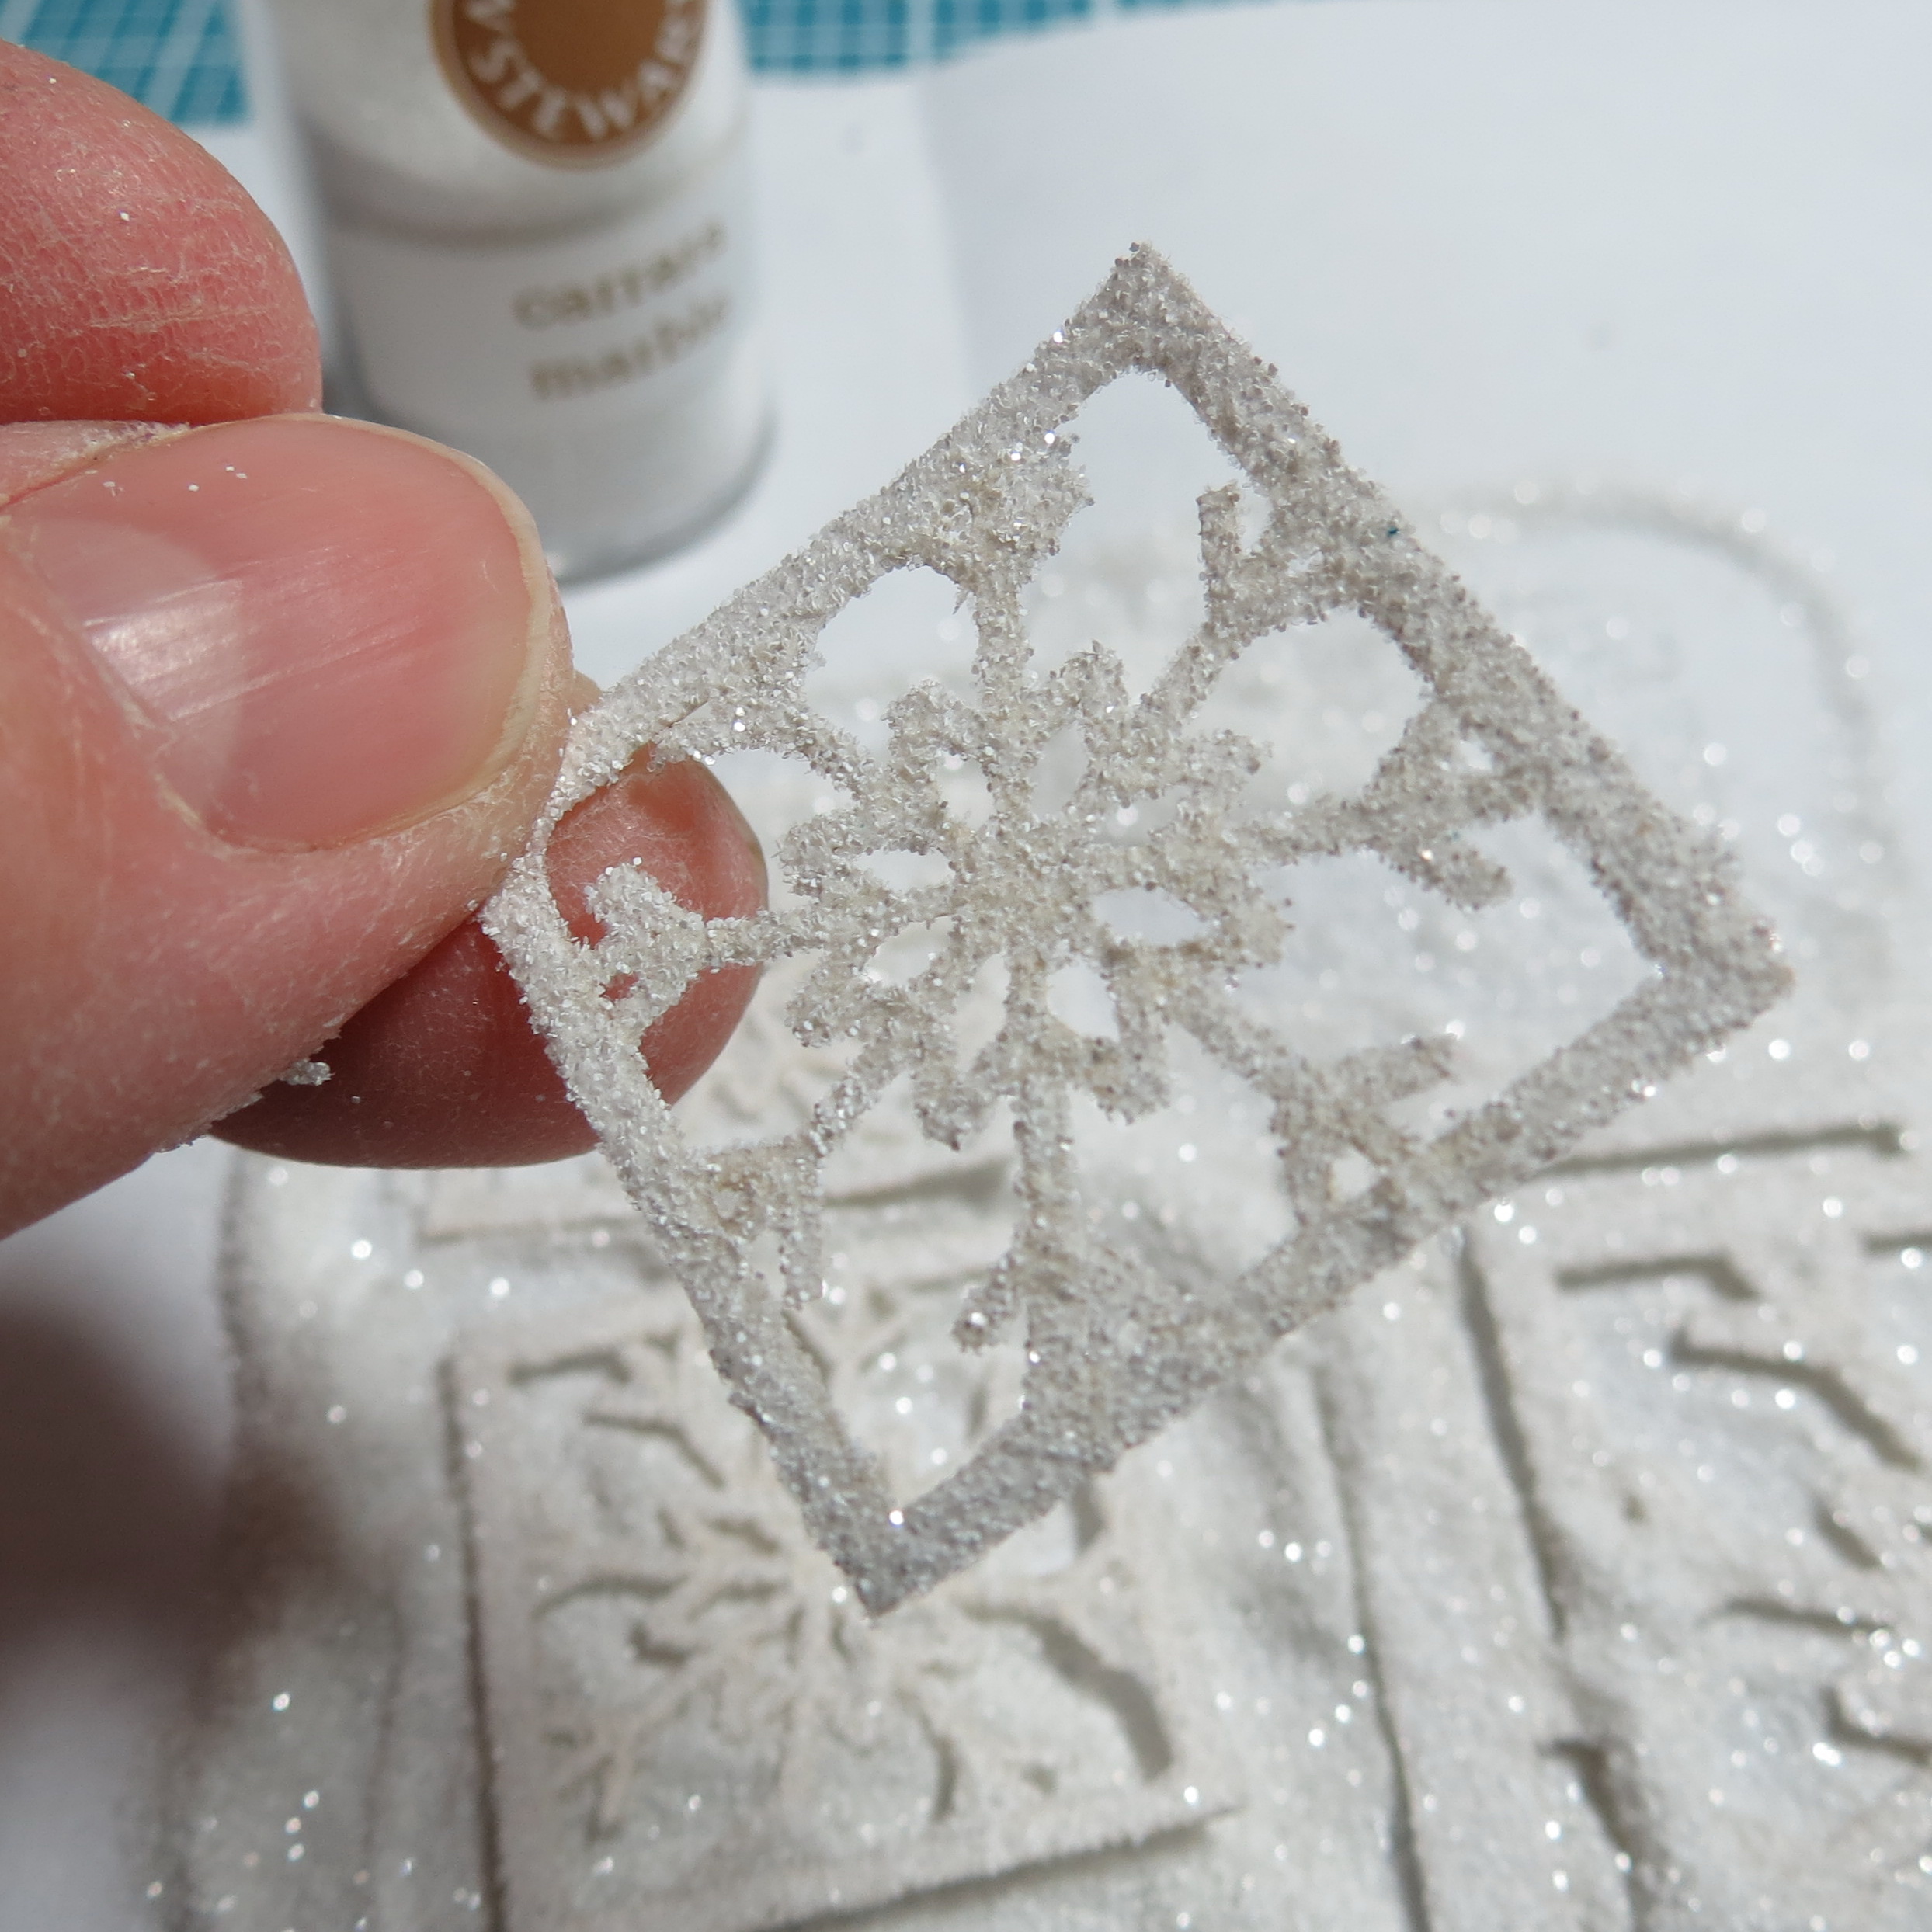
Random Photos glitter will cling to inside corners be sure to clean them up for a finished look.
The patterned paper had rows of multiple color stripes on one side and a nice grey with white snowflakes on the backside. It gave me the inspiration for the coloring of the Krystal font title and to use a Pewter Paper Tile behind the center snowflake cornerstone. Repetition of colors that coordinate will pull even dissimilar photo themes together.

Random Photos double-sided patterned paper
On page two I also made use of the snowflakes on the grey side of the striped pattern paper. From a 4” x 4” section of paper I cut the outer 1” squares first and then lifted the 2”x 2” block out and mounted it on a Pewter tile for a very slight border and to make it fit into the 2×2 block space. Including snowflake images from the patterned paper with the snowflake cornerstones continues to unify the page.
Random Photos smaller 1″ cornerstones and tiles
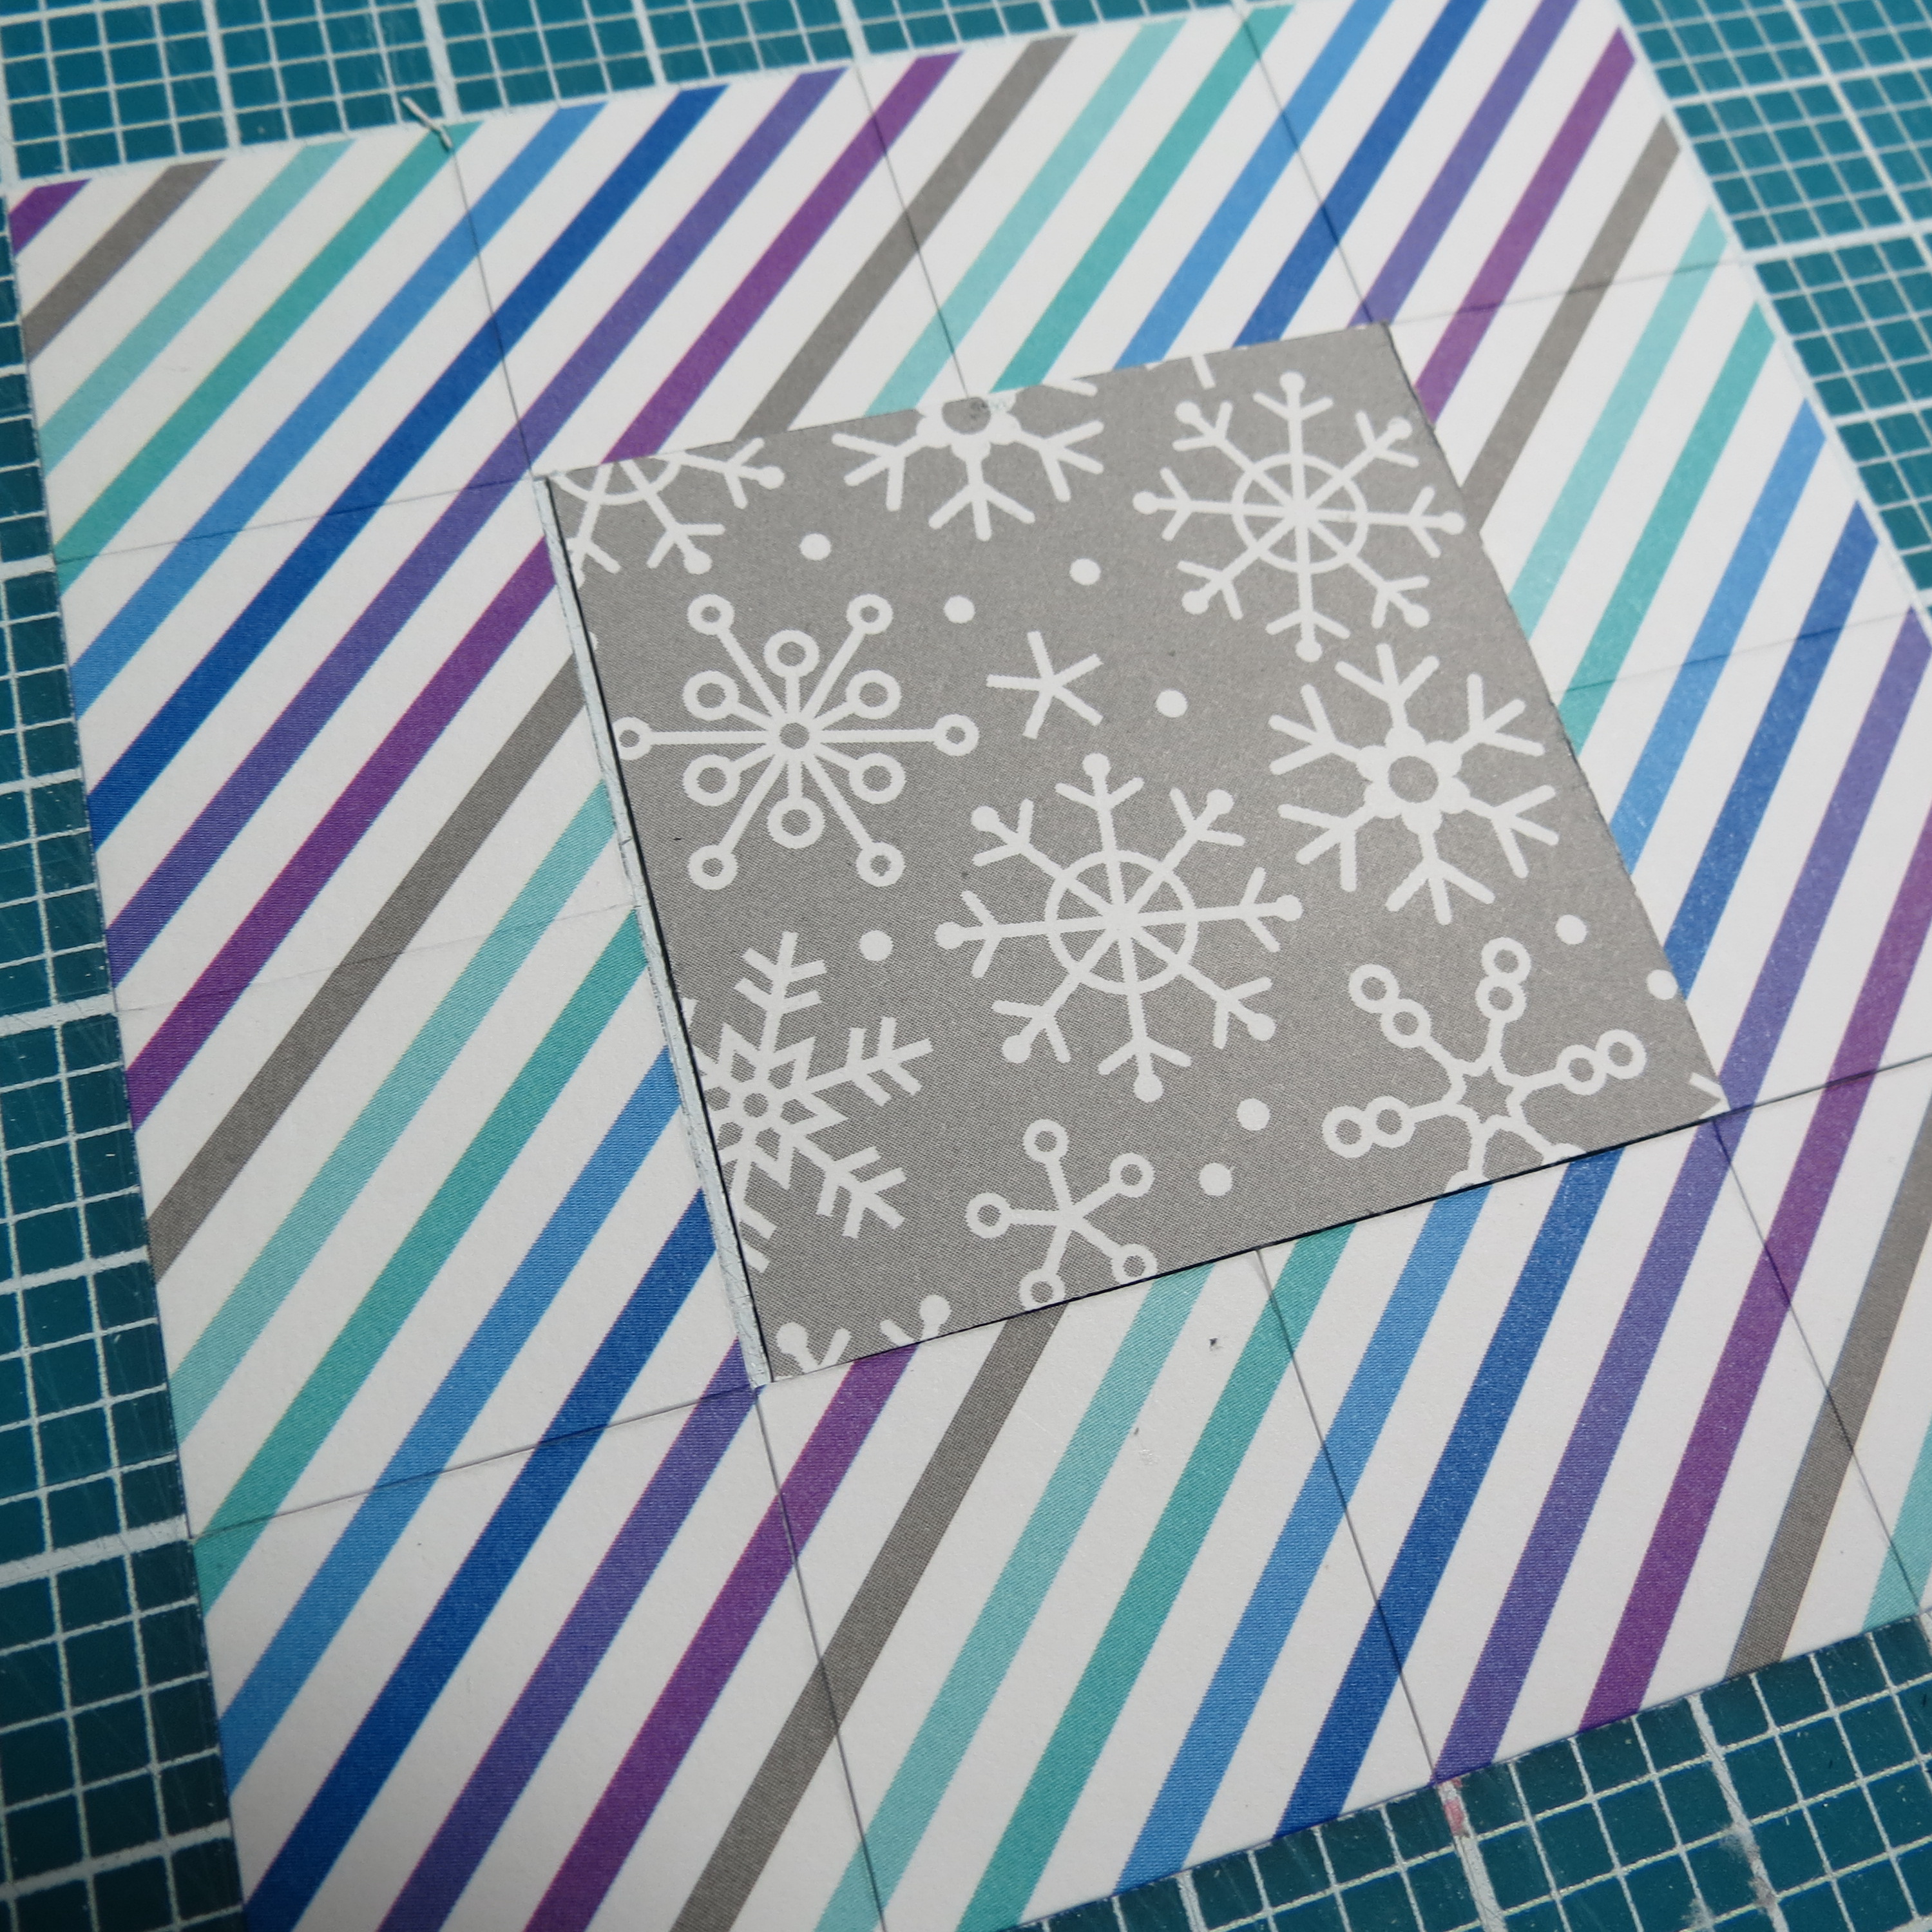
Random Photos cutting section of paper to leave the center open to be used on center square on page two.
Random Photos center tiles as feature
A journaling block will help to explain how all your leftover photos come together…a final way to unify the random photos. In this case my title also includes a sub title about the project and a separate block contains a list of all the prompts with the dates that correspond to the challenge prompt and are written on the narrow mat of each photo as a guide. To add a little more sparkle to the page the opal crystals act as bullet points on the journaling block marking each date and prompt featured.

Random Photos Title block with journaling. Font to coordinate with theme.
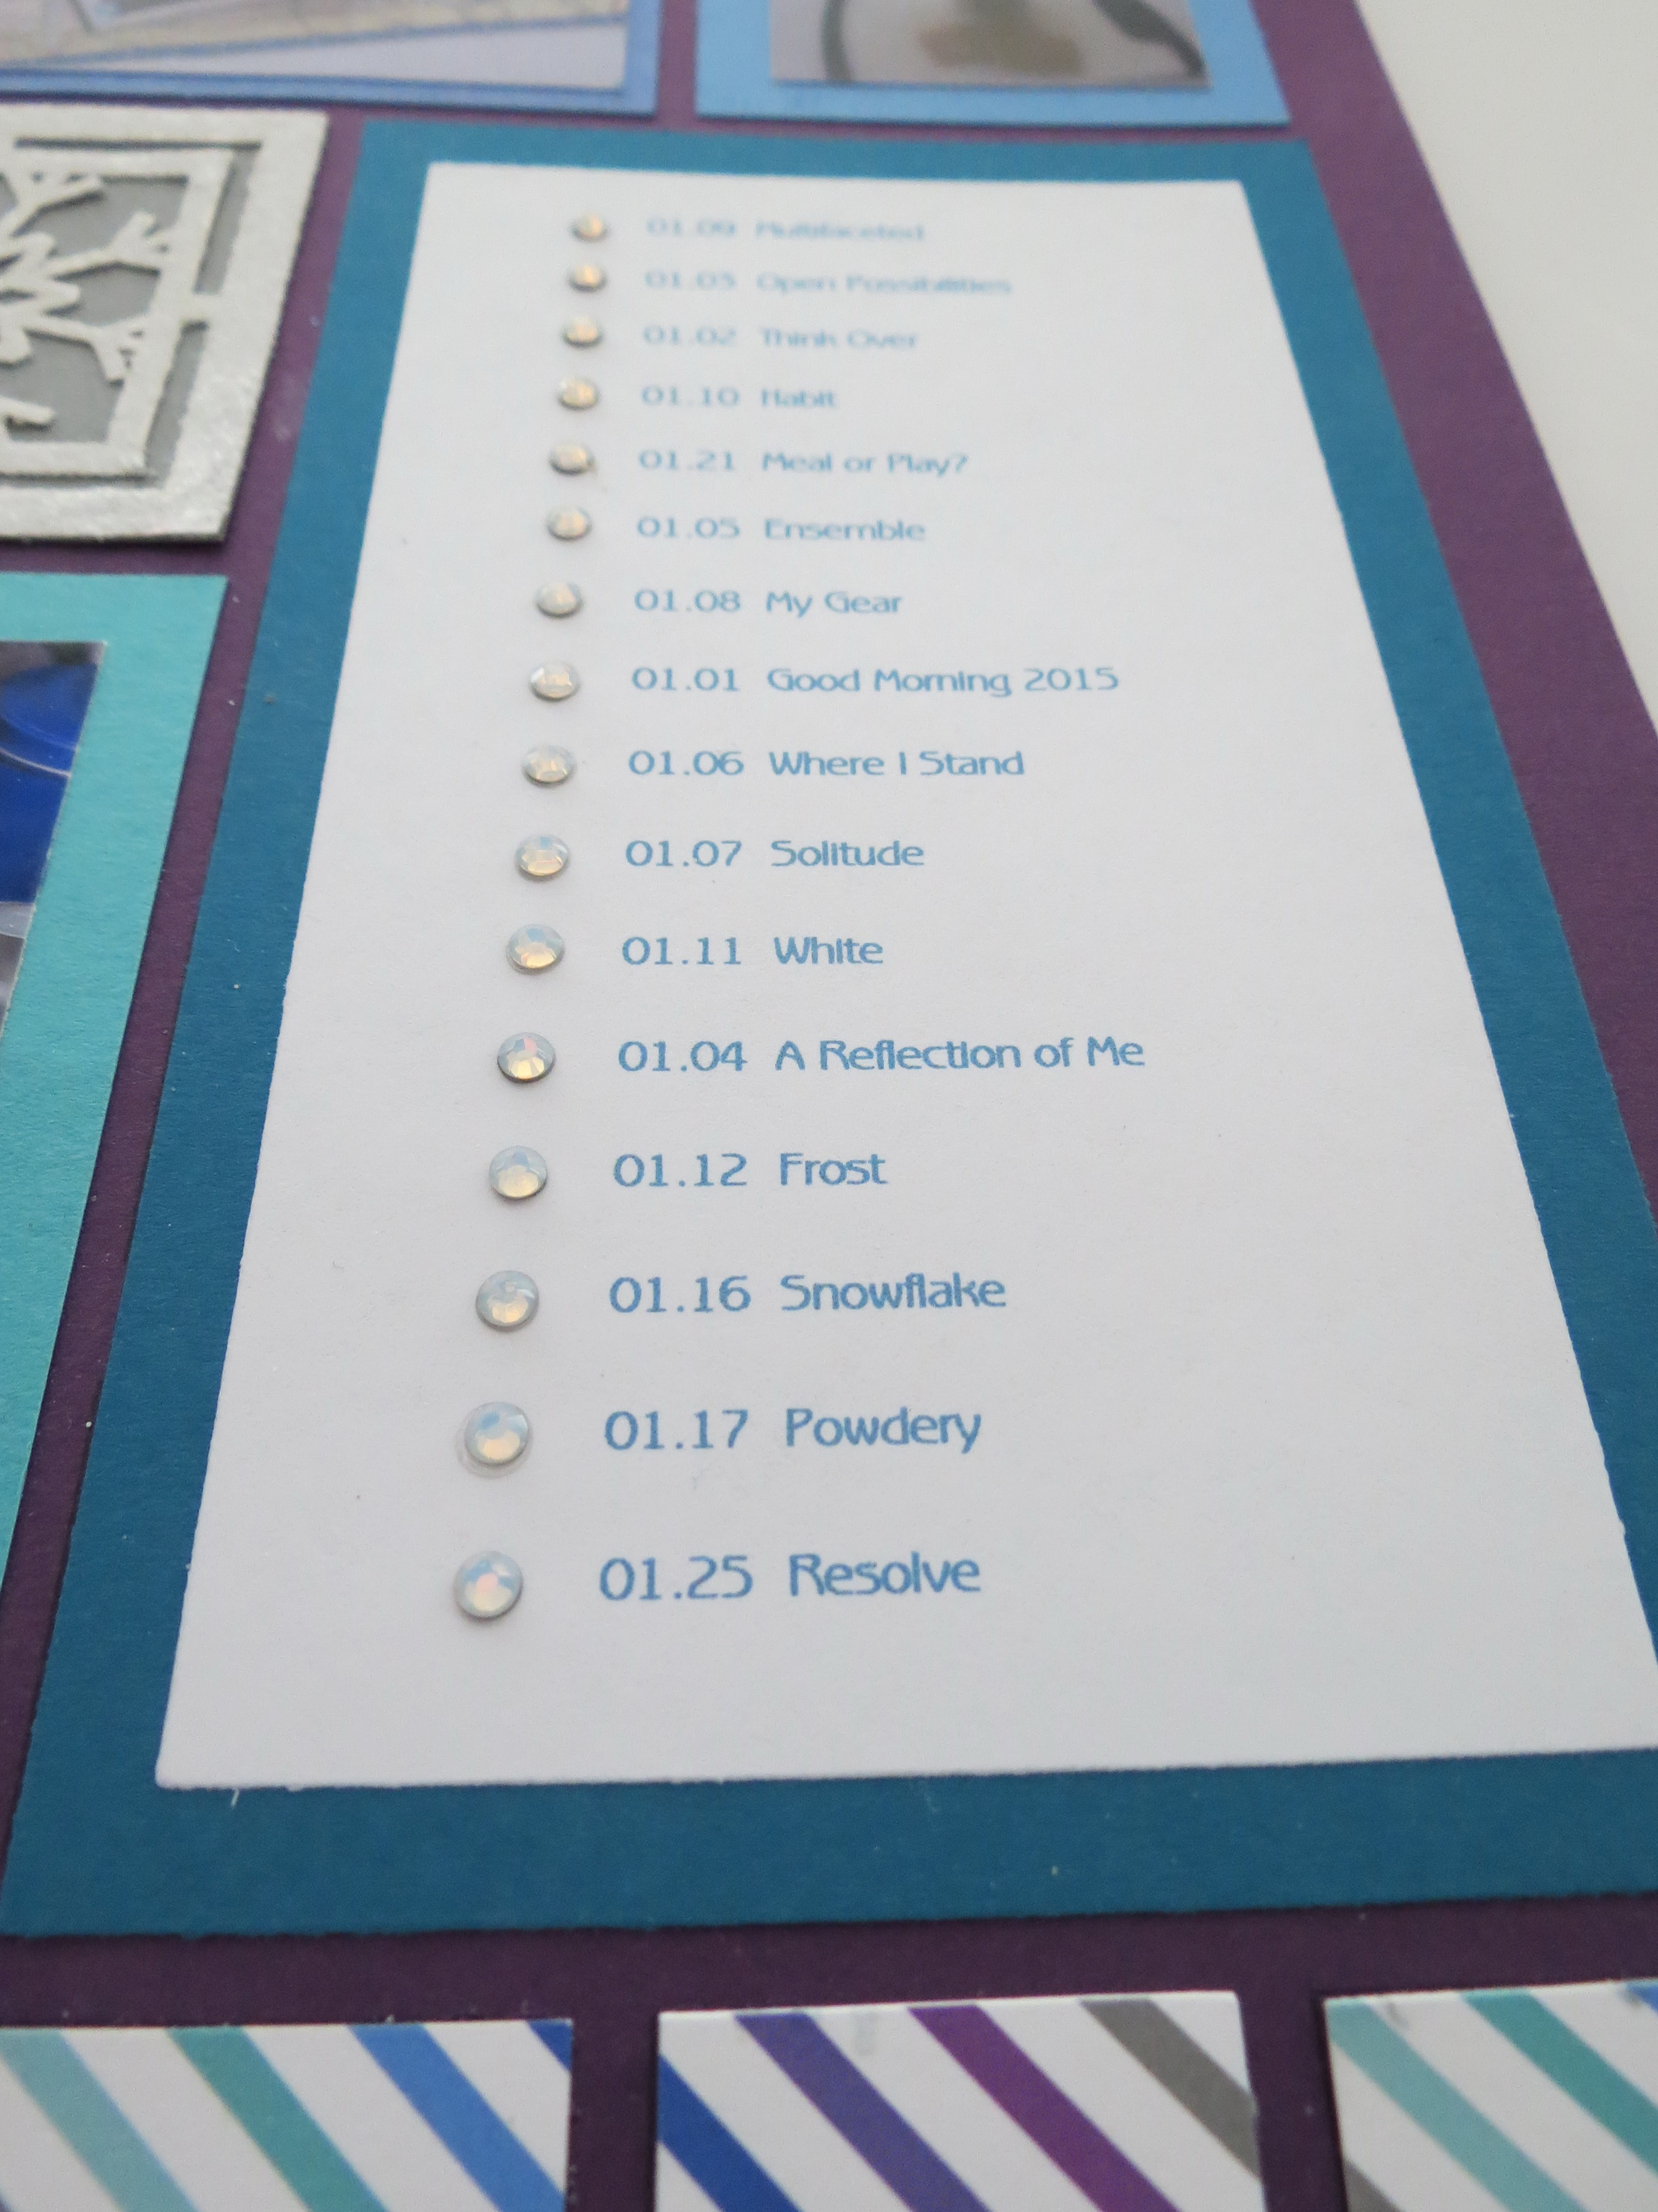
Random Photos journal block with opal crystals as bullet points adding a bit of sparkle
So next time you have some photos that are seemingly unrelated consider finding a way to tell a story that will bring them all together. When you do, we’d love to have you share them with us on Mosaic Moments Facebook page or Journella’s Story Board.
Supplies:
• Mosaic Moments Paper Tiles: Grape Delight, Cobalt, Loganberry, Medium Aqua, Pewter
• Teal cardstock for additional paper tiles
• Mosaic Moments Grid: Royal Purple 12 x 12 Grid
• Embellishments: Snowflake Cornerstones
• Martha Stewart Carrara Marble Glitter
• Queen and Company Camera Washi Tape
• Opal Swarovski Hot Fix Crystals
• Xyron adhesive
• Doodlebug Design pattern paper Frosty Friends Collection: North Pole double-sided paper
Andrea Fisher