

Pattern Gallery Feature: The Column Pattern #229
Featuring the Scallop Dot Mat Die
Creating Illusion pattern #229
Technique: creating illusion
Creating Illusion: sleight of hand for your scrapbook patterns
Every once and a while you need to manipulate a pattern and do a little finger work to make your page to come together just the way you want it to. Let me show you one trick to fool the eye into seeing something other than the pattern with which you began.
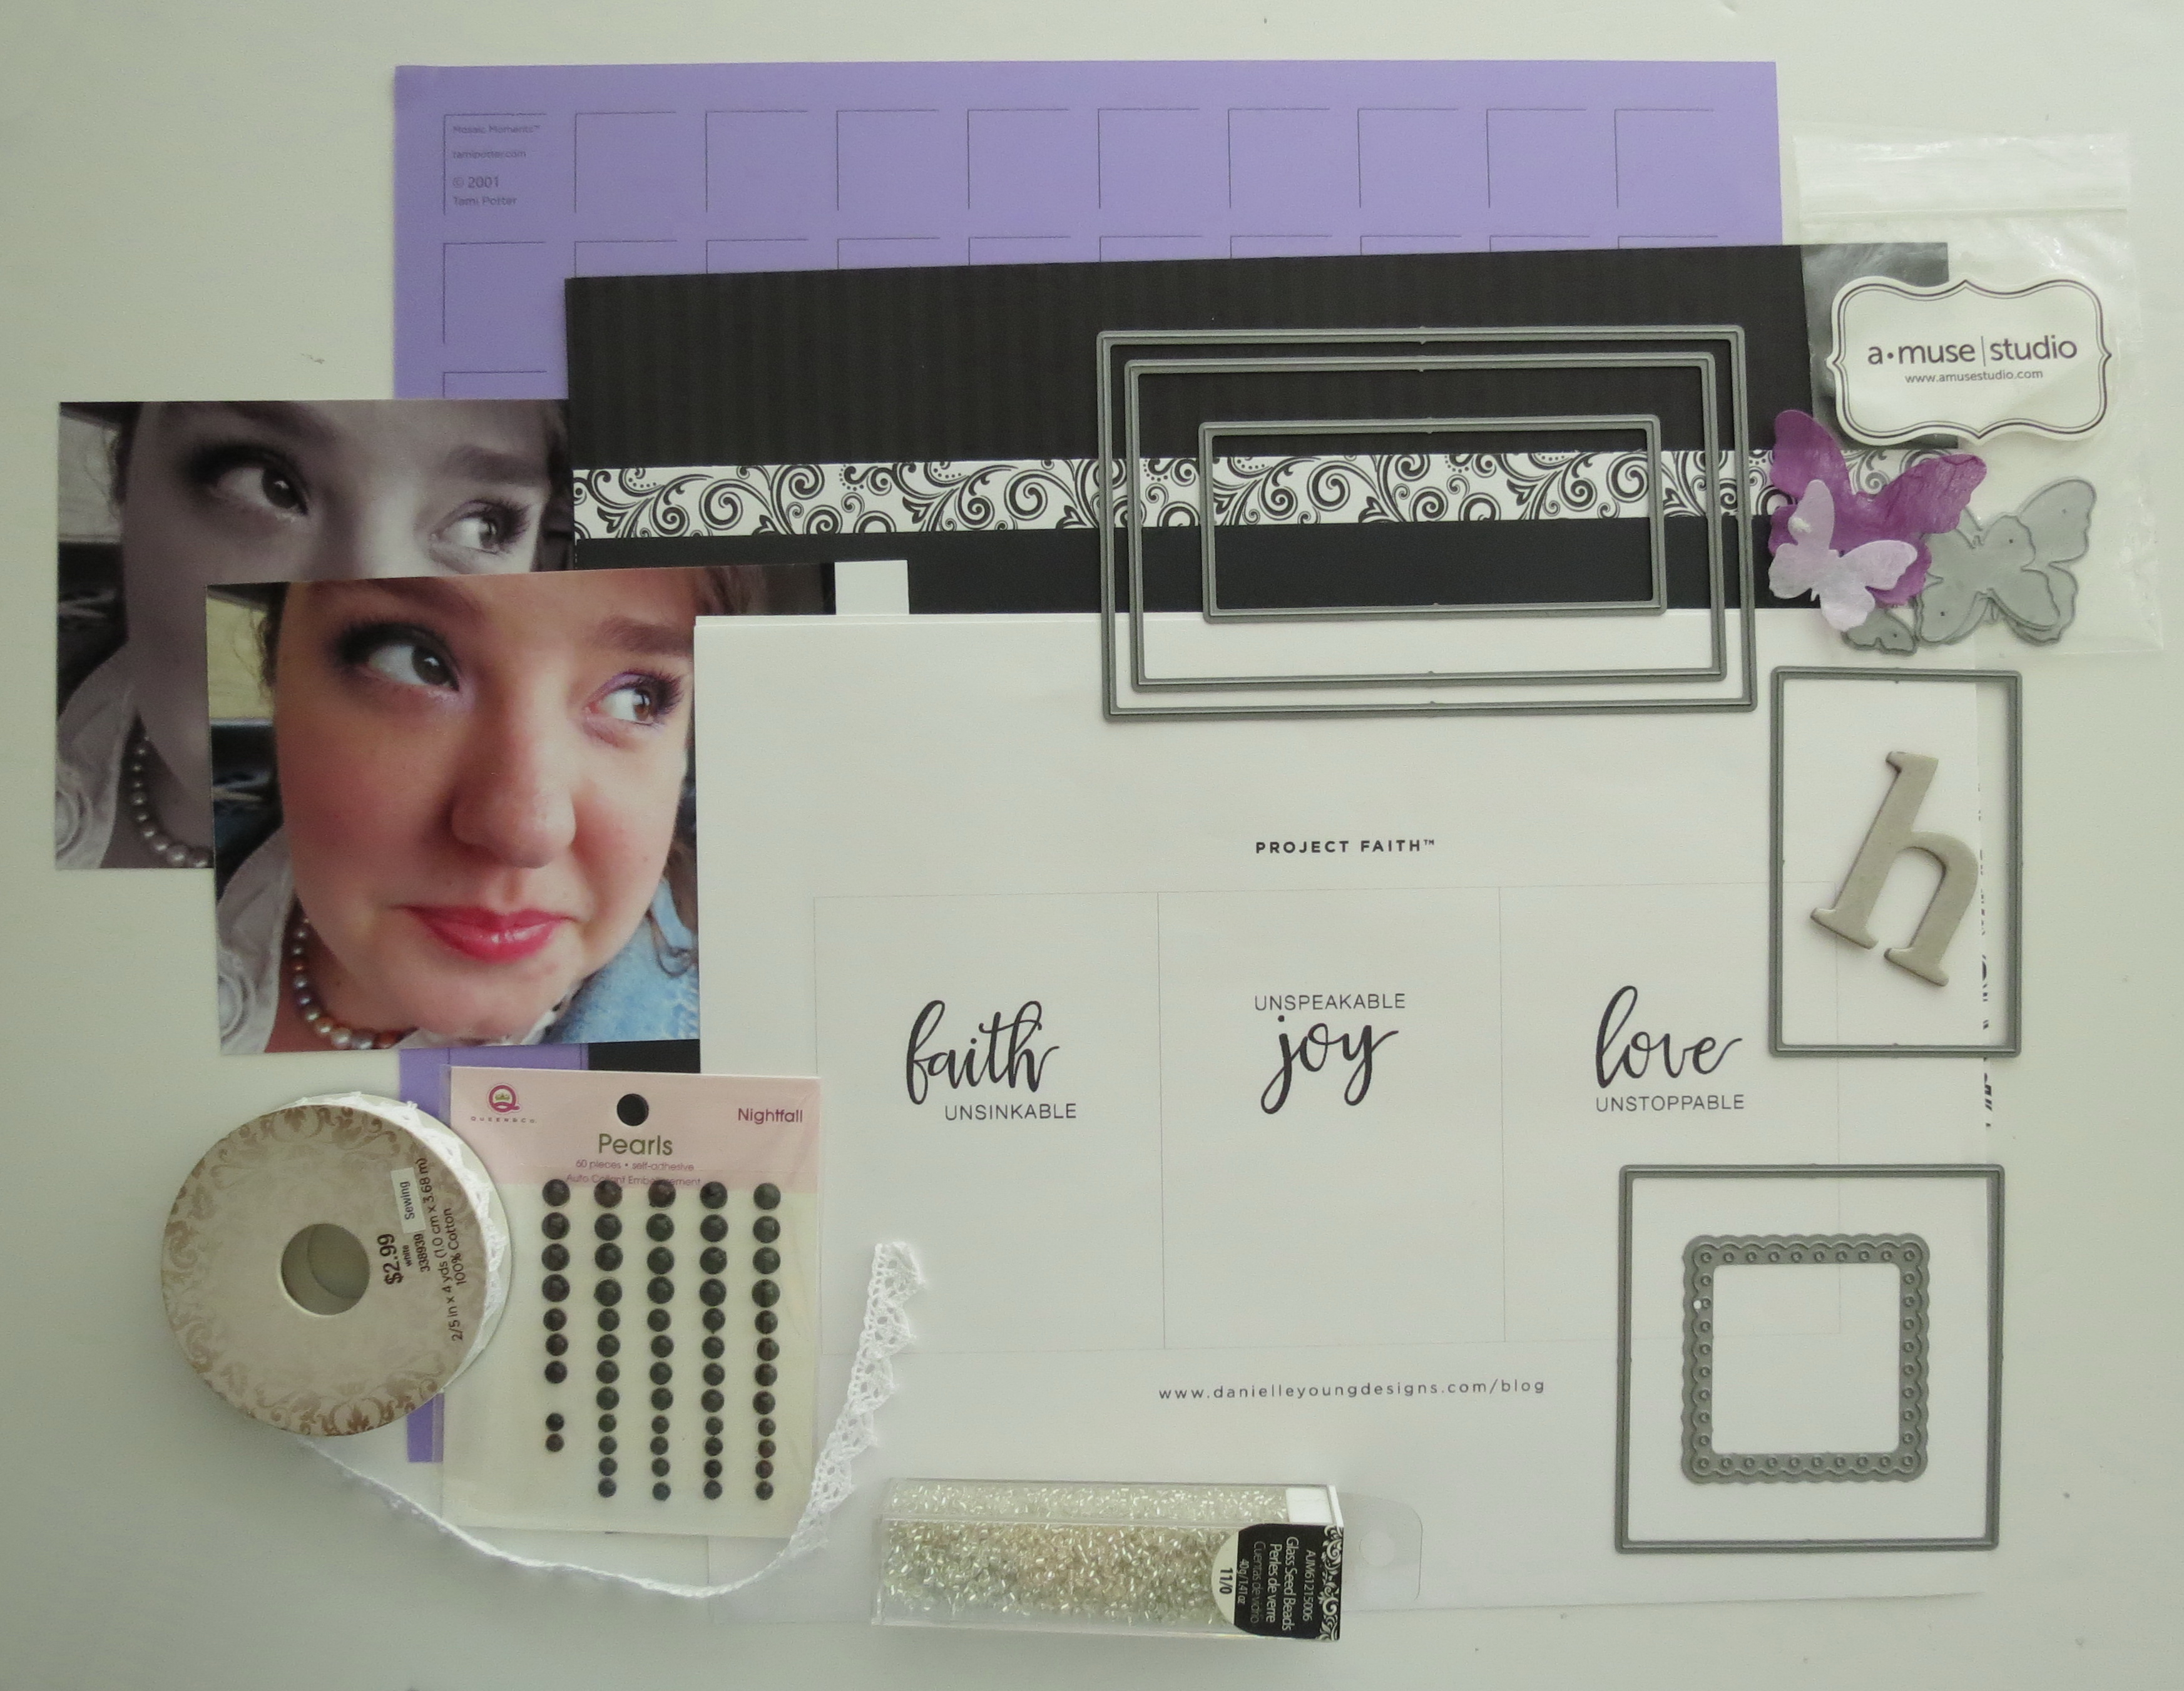
Creating Illusion Mosaic Moments Dies and supplies
The Supplies:
• 12×12 Mosaic Moments Violet Grid,
• Danielle Young journal cards “Project Faith”
• Column Pattern #229
• chipboard letters for title, chalkboard paint, lace and tiny seed pearls
• B&W print, mats, purple mulberry butterfly with black pearls
• Die Sets A, B, C and Scallop Dot Mat Die Set
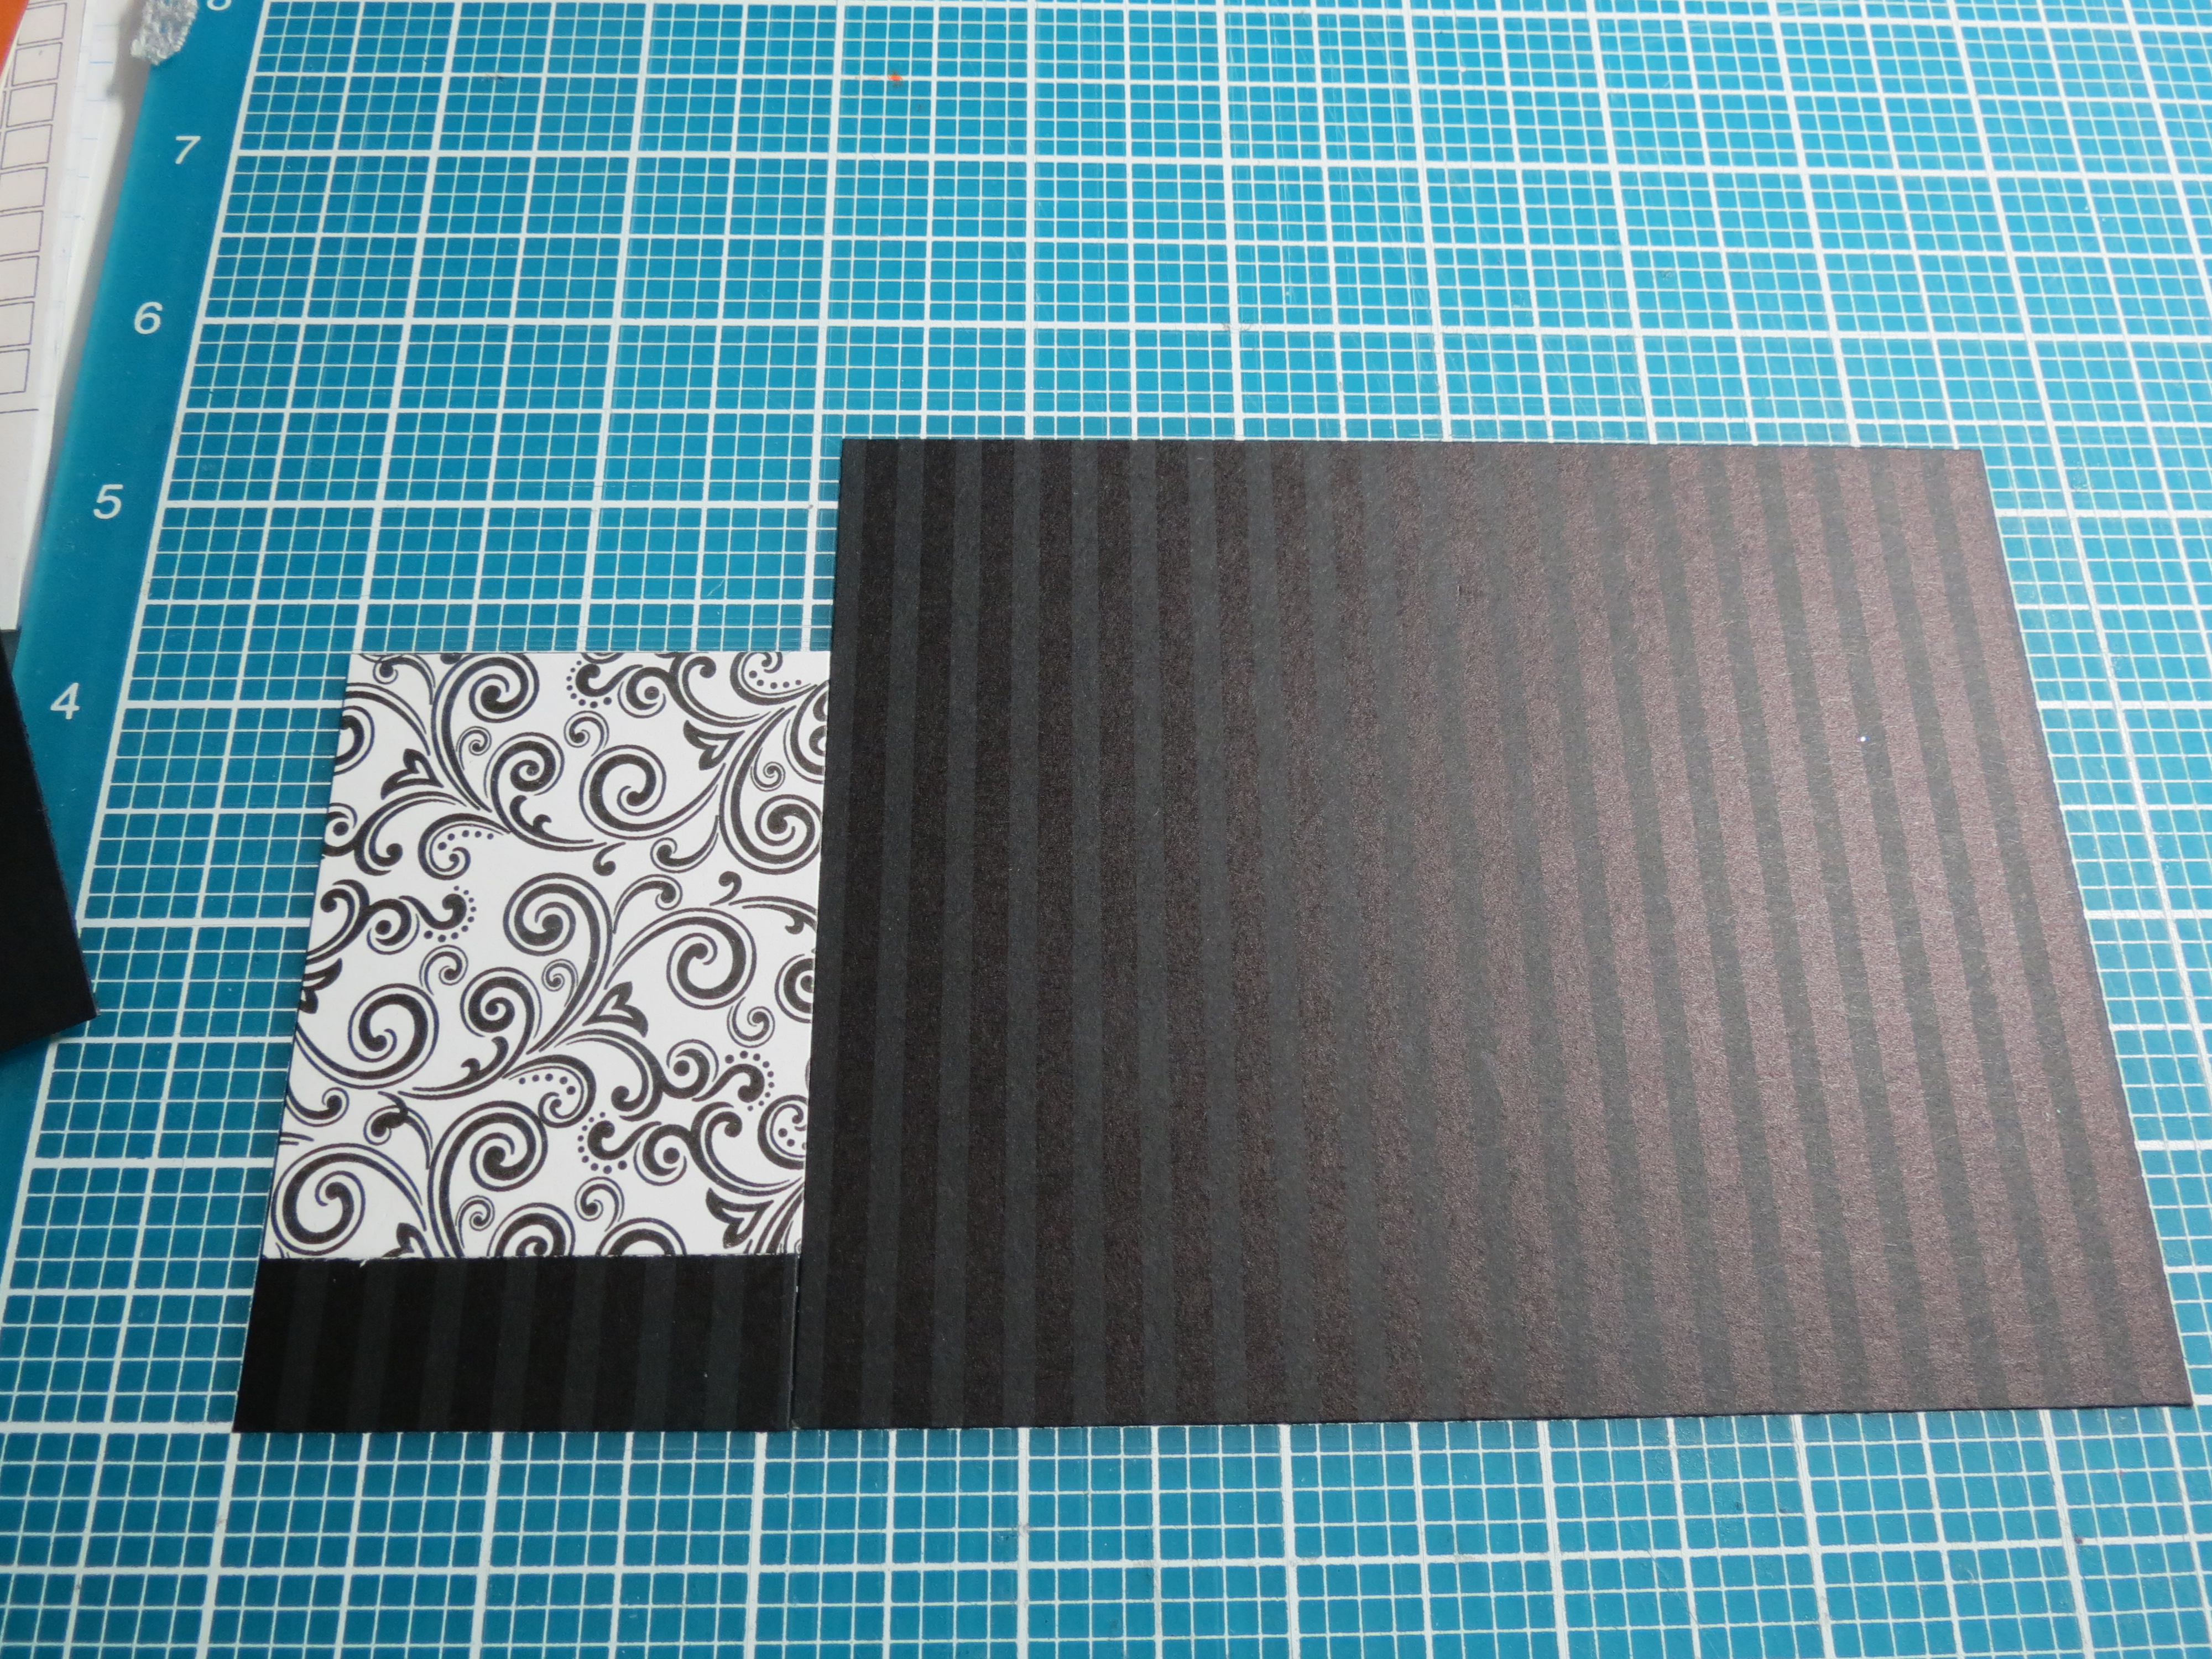
• Color Connect Stripe – Black by The Paper Studio and B&W Intricate Swirls by the Paper Studio
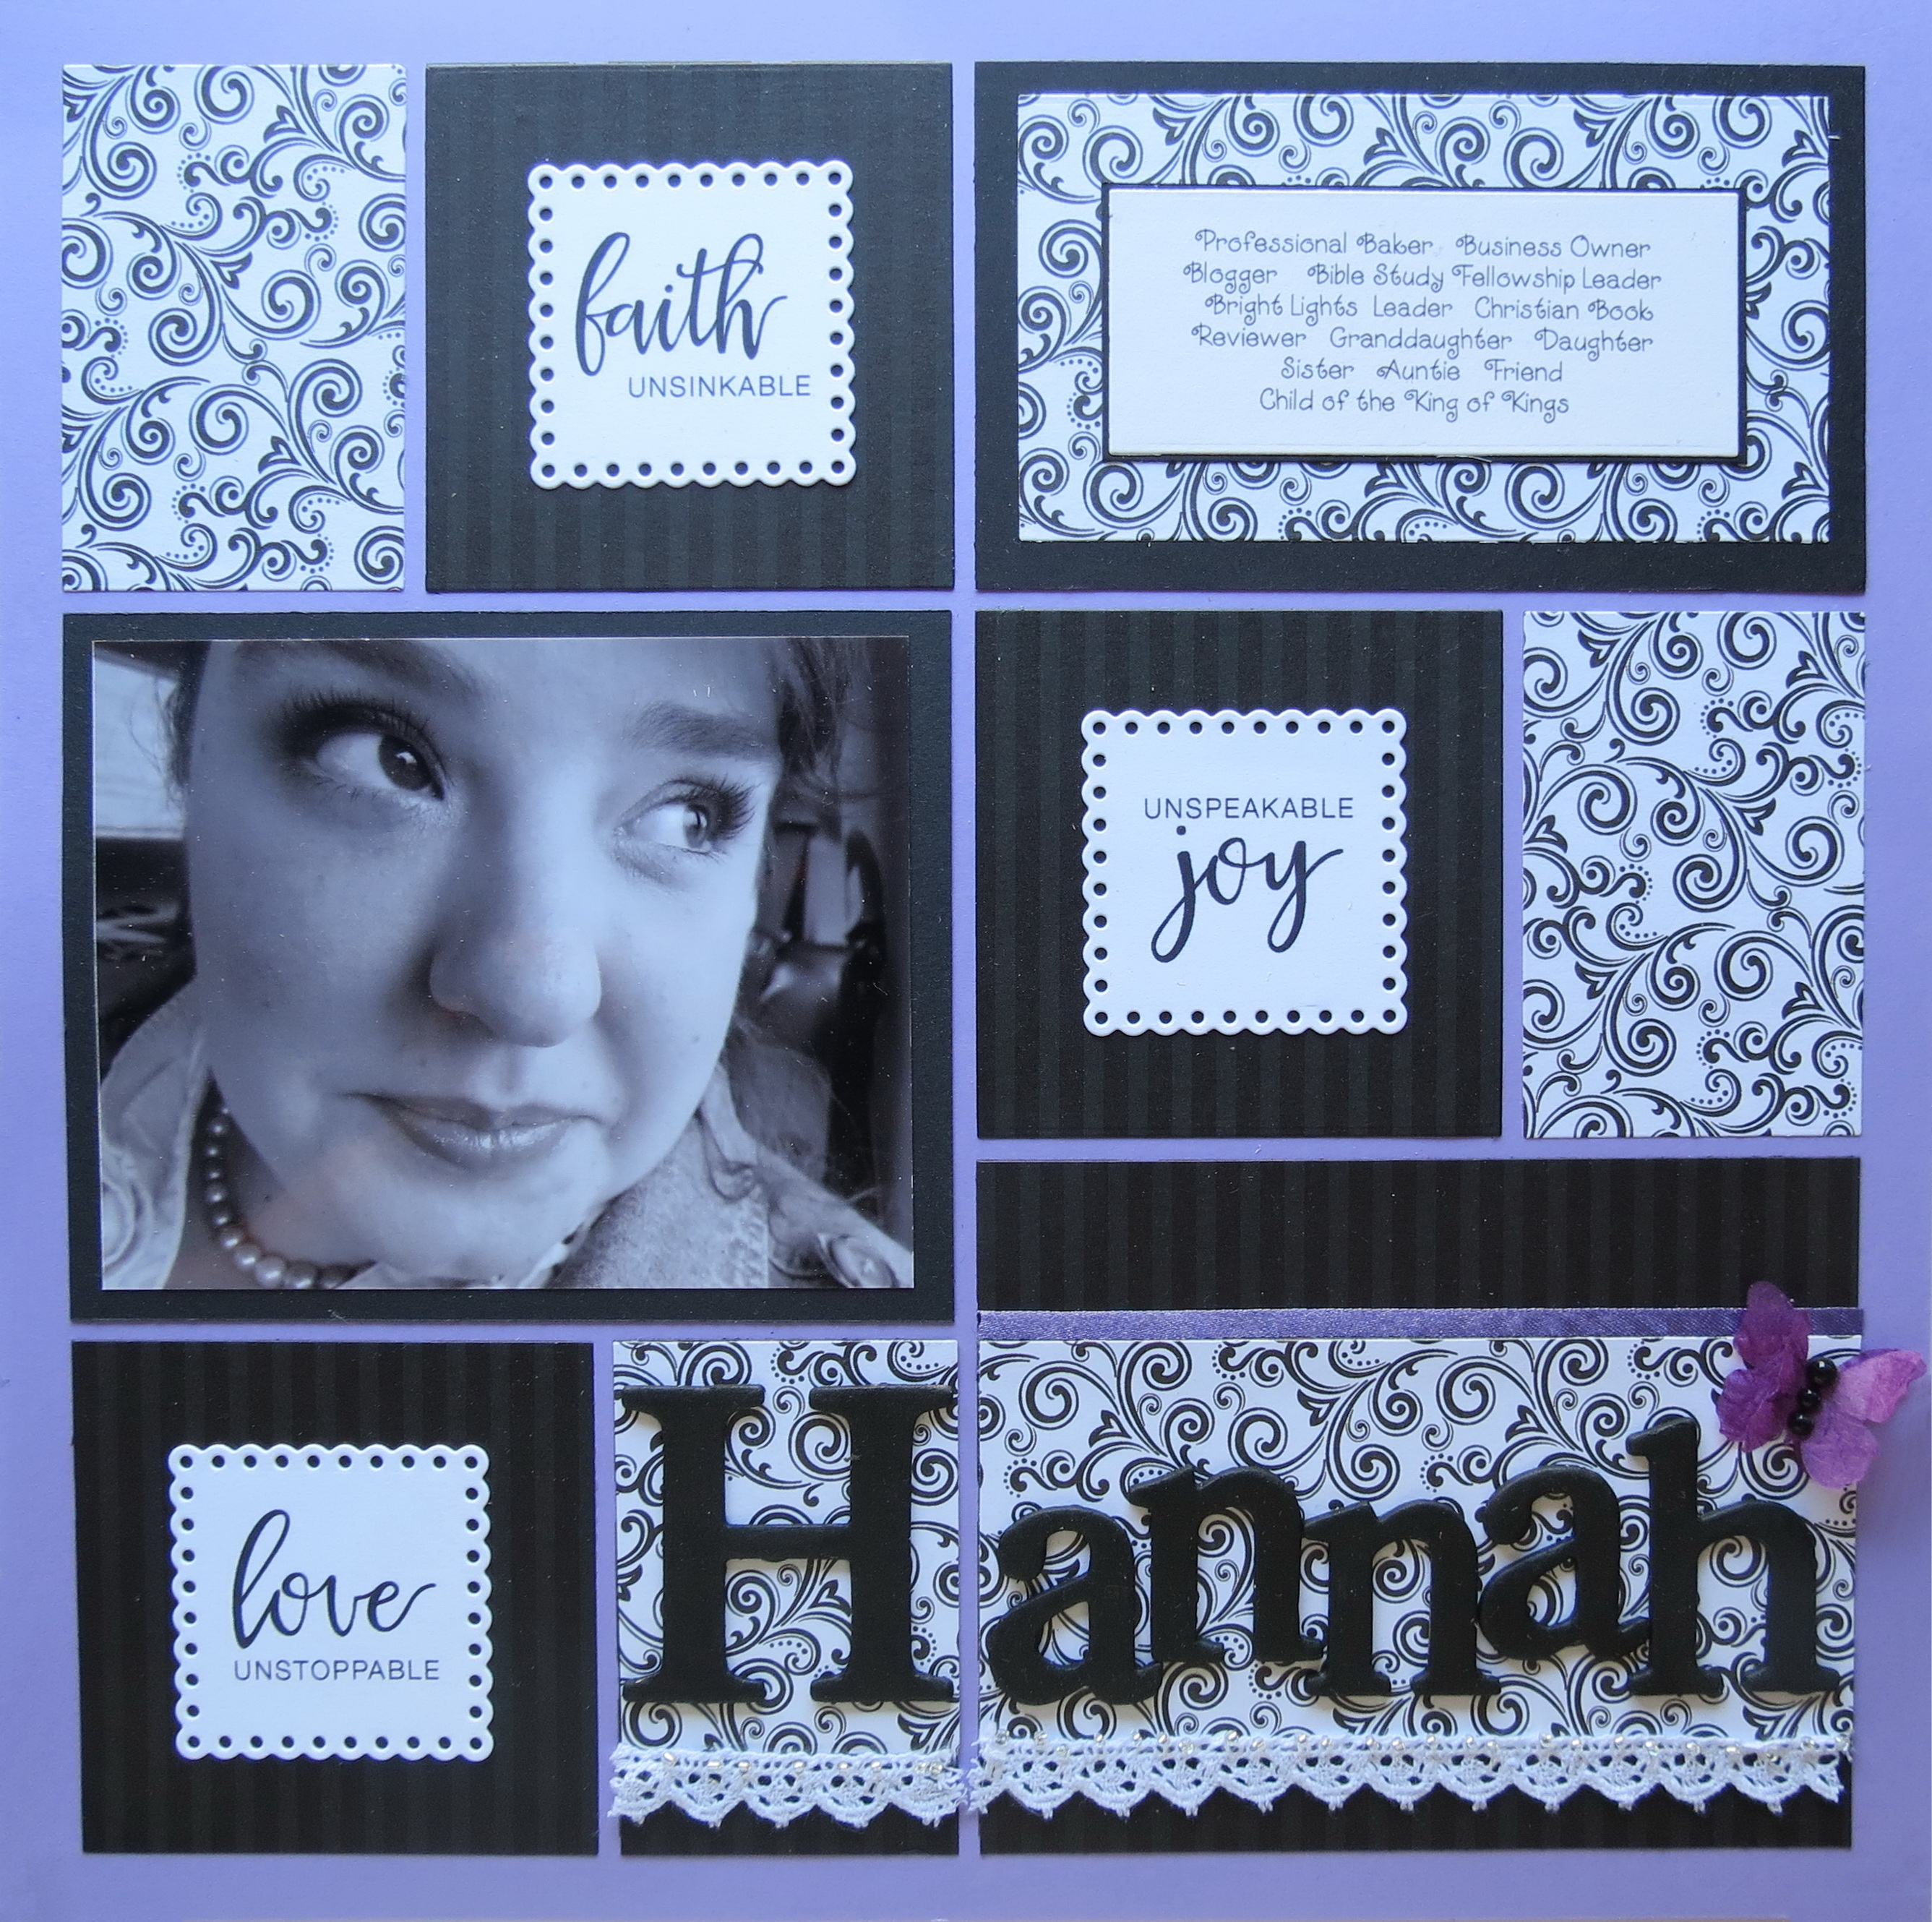
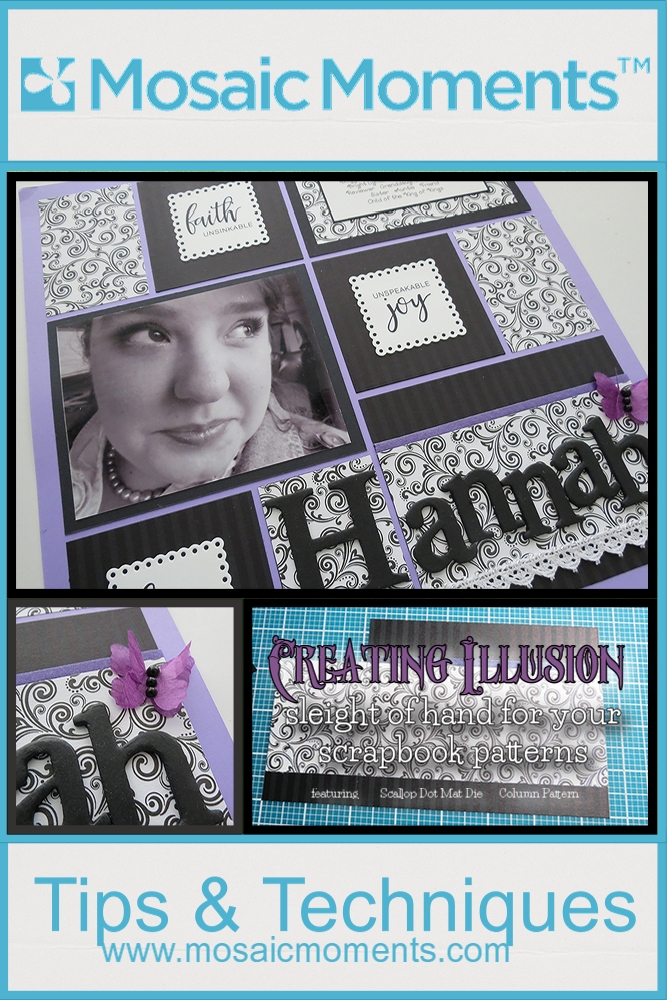
I rarely scrap a 12×12 layout with only a single photo, but this time I wanted to do a layout that would feature a new favorite photo of my daughter Hannah and include journal cards from Danielle Young’s Project Faith series of FREE journal cards. They are digital downloads that you can use in your digital scrapping or print to use in a handmade layout, making this a hybrid element. They were perfect items to use to describe my girl.
Because the journal cards are all black and white I thought a black and white theme would be added fun. The pattern papers are black swirls on white and black stripe on black. To add a pop of color I chose a violet 12×12 grid to display them. The photo I had was great in color, but would it work on the layout better as a reduced color or even black & white? I finally went with the black and white.
As we complete this months theme of “Summertime… and the Scrapping is Easy” let’s review a few of the things we should have:
• Simple Pattern
• Simple Tools
• Simple Embellishments
• Simple Method
I wanted a Simple Pattern that would:
• be easy
• feature a Column Pattern
• accommodate my three journal cards and
• accommodate the feature die, the Scallop Dot Mat Die
Pattern #229 fulfilled all my requirements.

Mosaic Moments Pattern #229
Simple Tools: Die Sets A, B, C and Scallop Dot Mat Die make cutting all the components a breeze.

Mosaic Moments Scallop Dot Mat Die
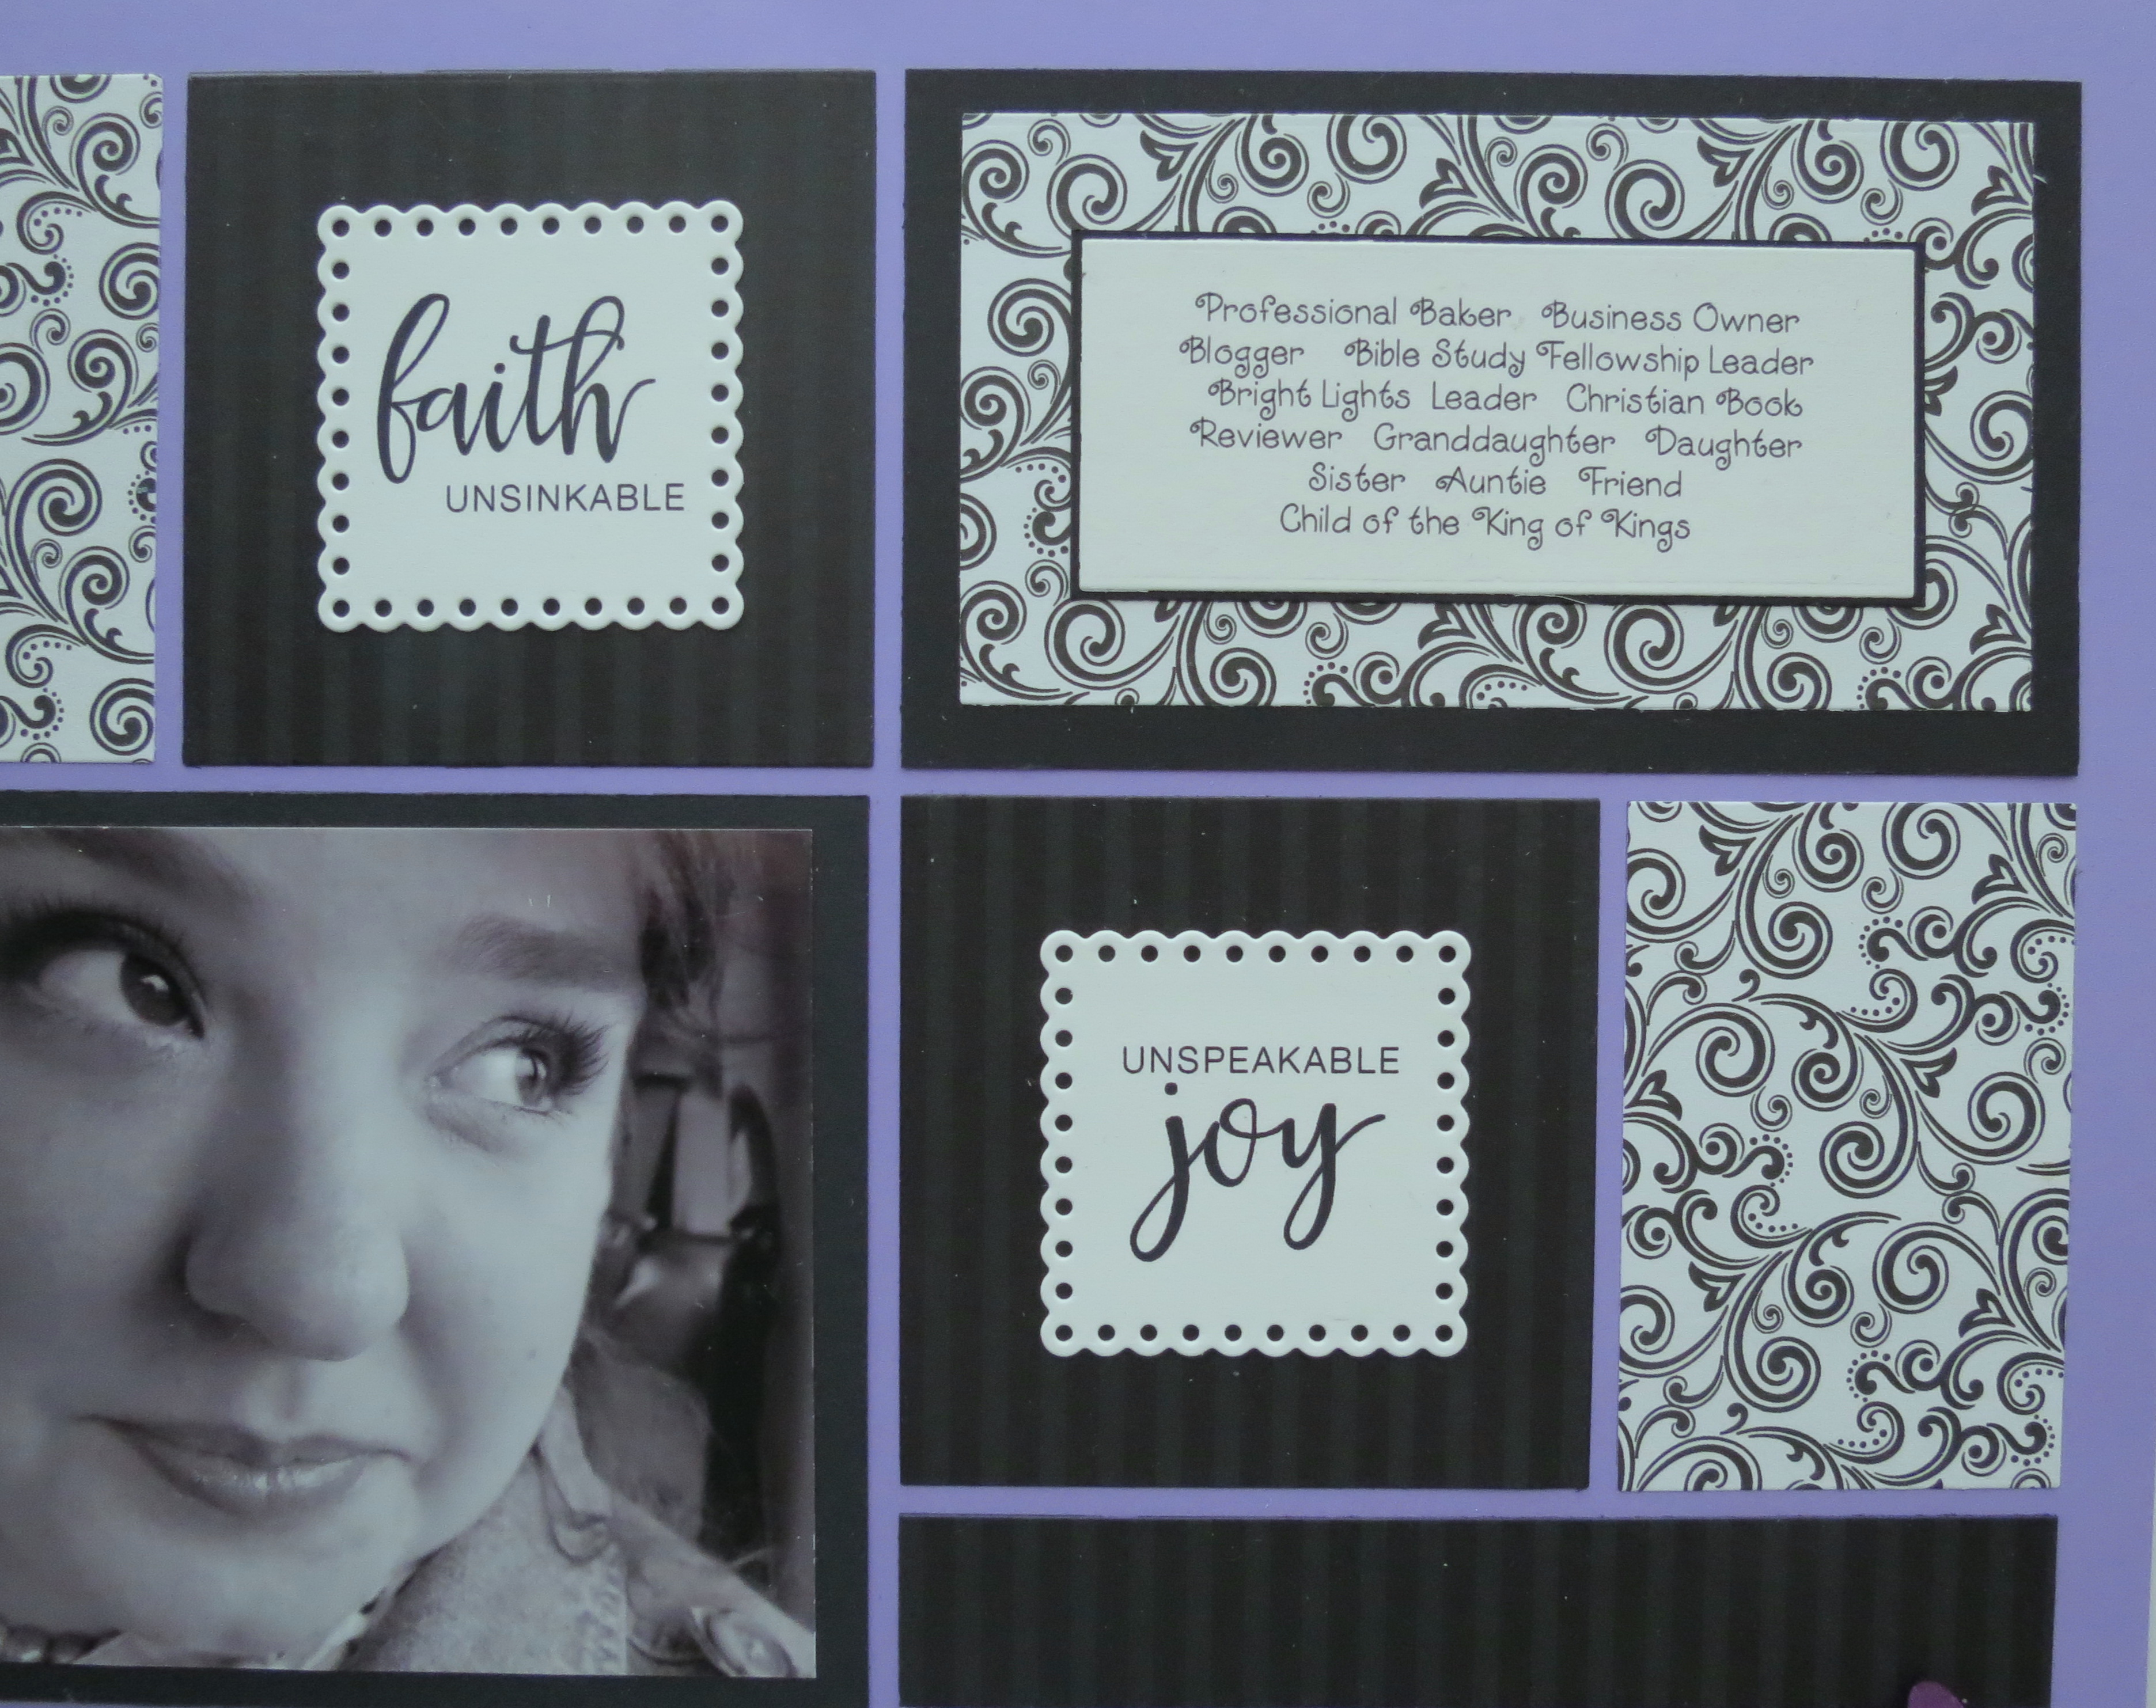
There were three cards I wanted to use and trim to fit the grid with the Scallop Dot Mat Die. I was looking for a larger dramatic border to frame the cards and show off the scallop edge. I used the smaller 2×2 size die to cut and then mounted it on the black stripe 3×3 block.
Creating Illusion Danielle Young’s Project Faith journal cards trimmed with Mosaic Moments Scallop Dot Mat Die
The 2×4 blocks were perfect spots for the swirl patterned paper.
It also carried over to the top right corner block as a layer on top of black cardstock base. The journal block was printed on a 4×6 cardstock and then the 2×4 layering die was used to cut it to size. I hand cut a black cardstock base just 1/8” wider than the journal block for a very narrow border to place behind the journal block giving it definition.
Simple Embellishments: A title block that included: chipboard letters, lace, seed beads and a pearl and mulberry butterfly. Now for the sleight of hand!
Creating Illusion using the grid pattern to change the title block shape with a few optical illusions
The Title Block: Creating Illusion
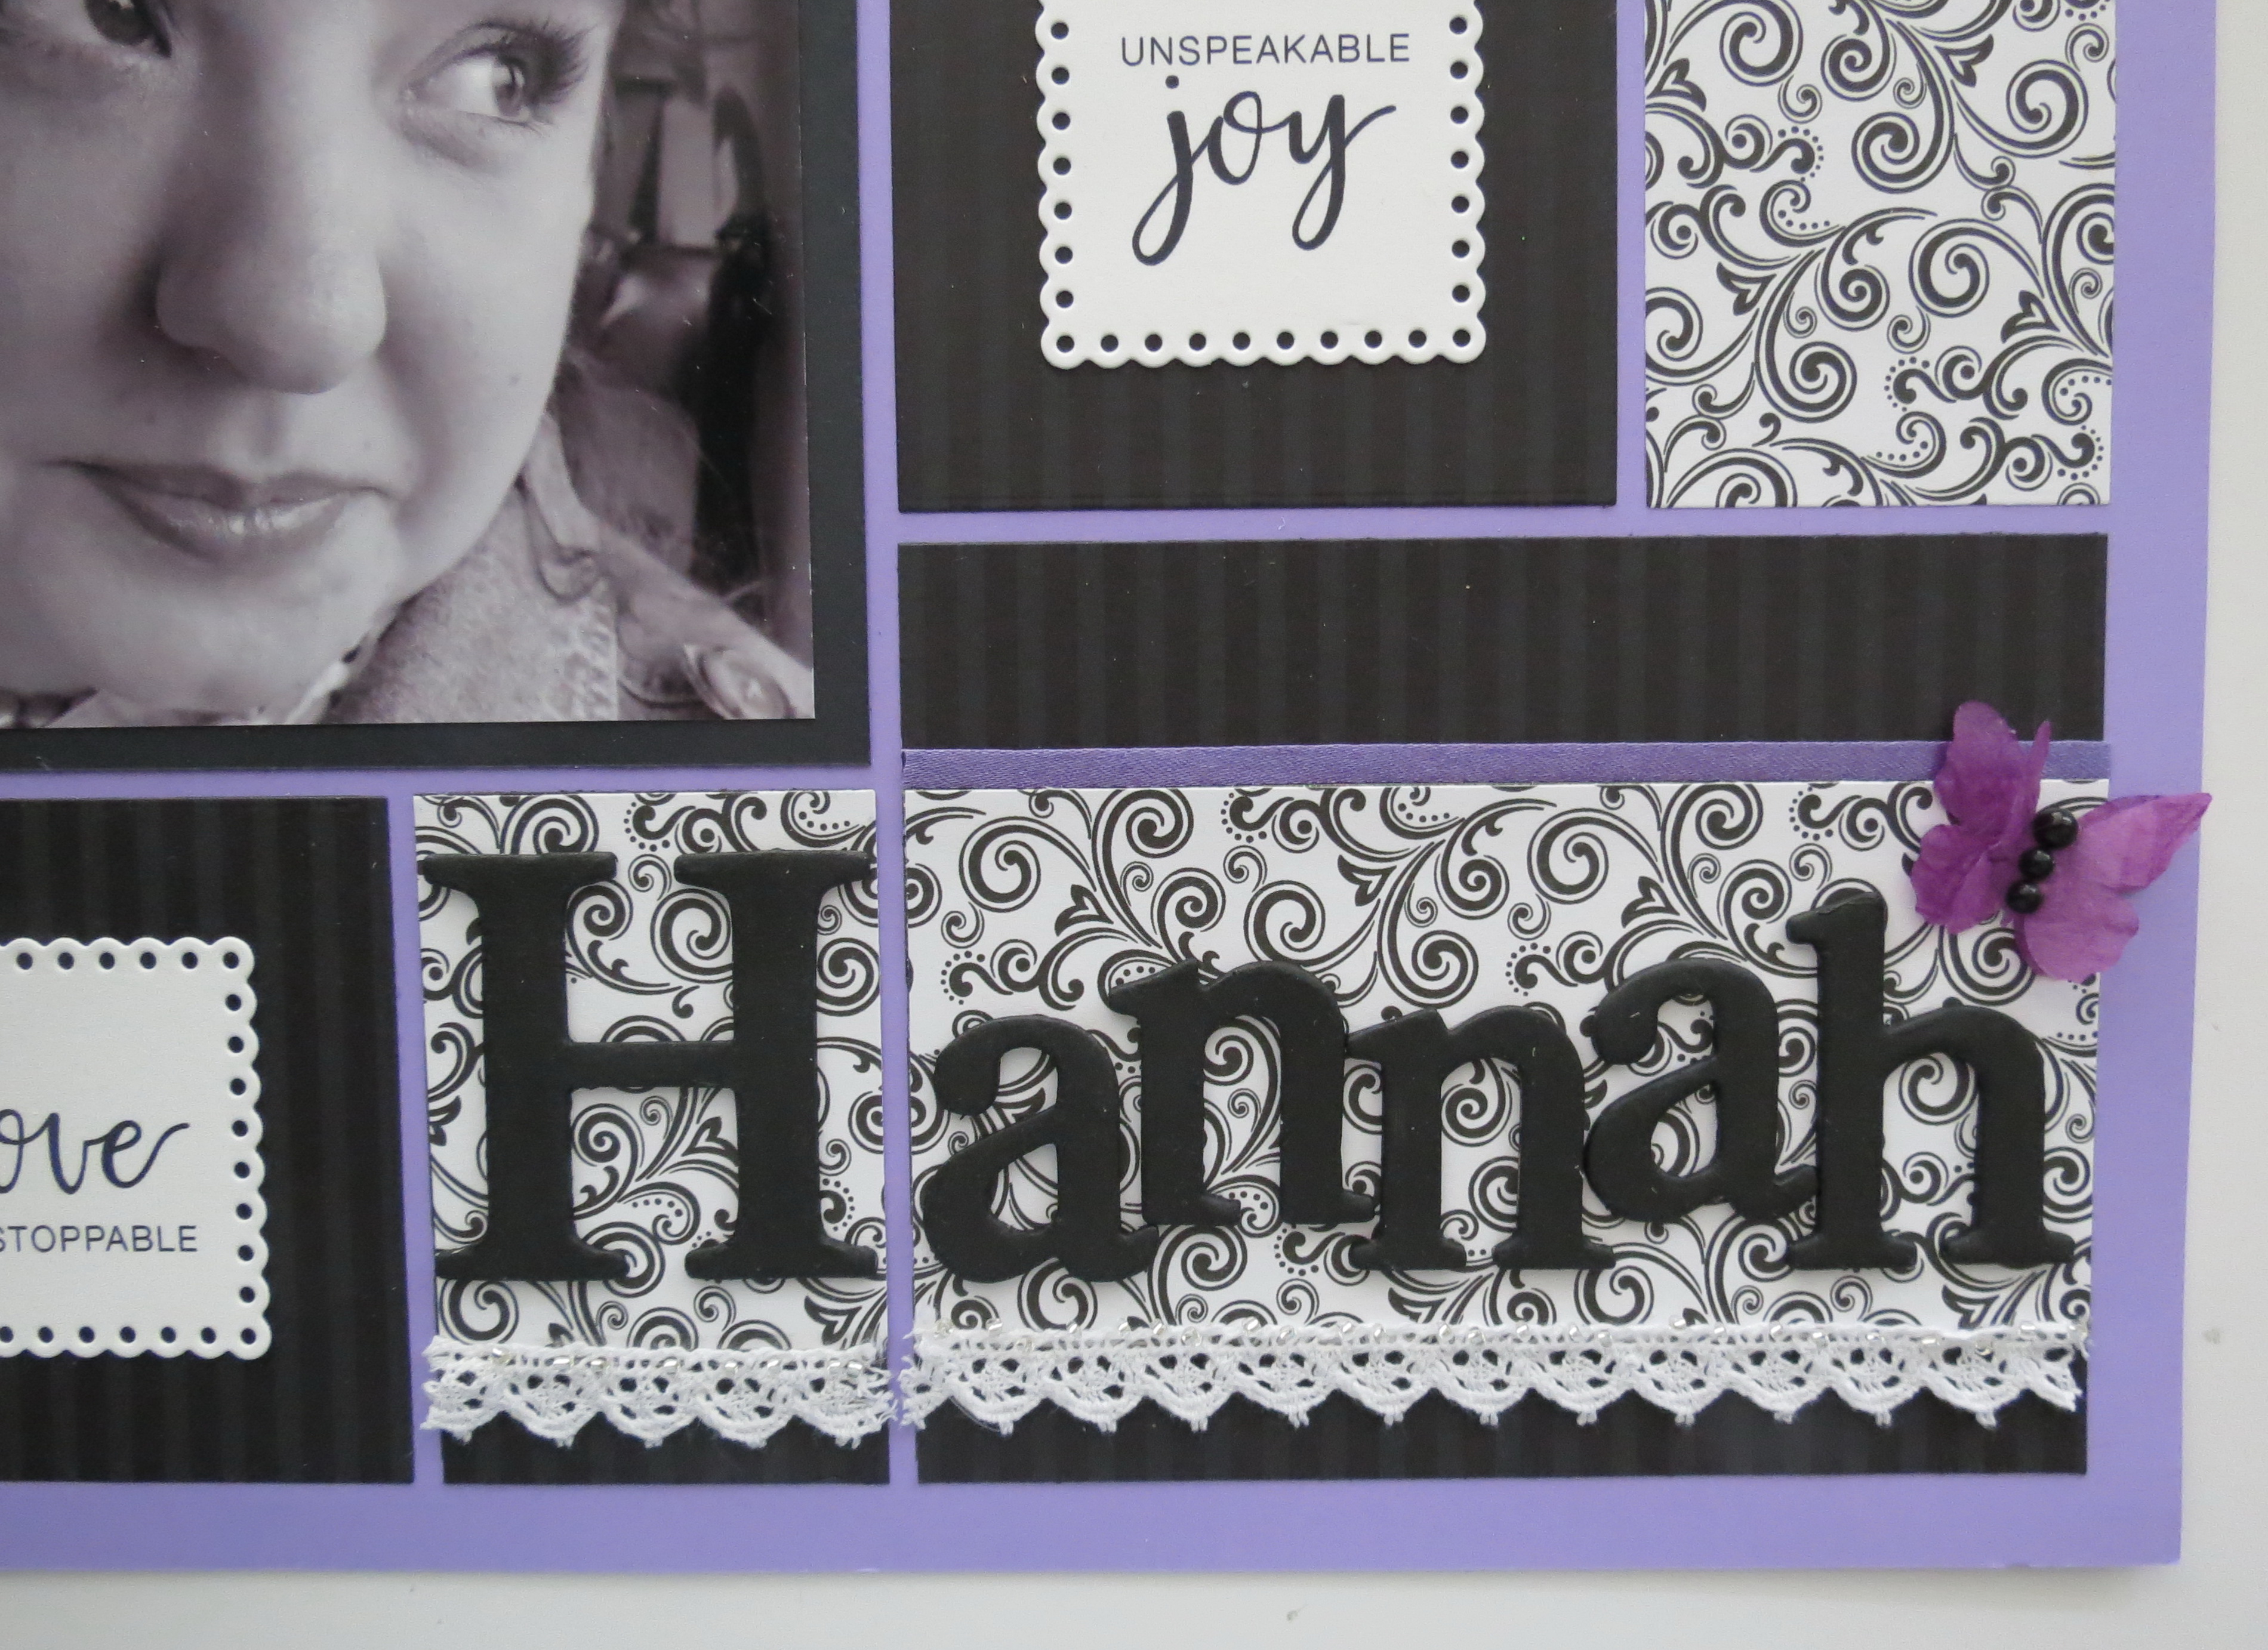
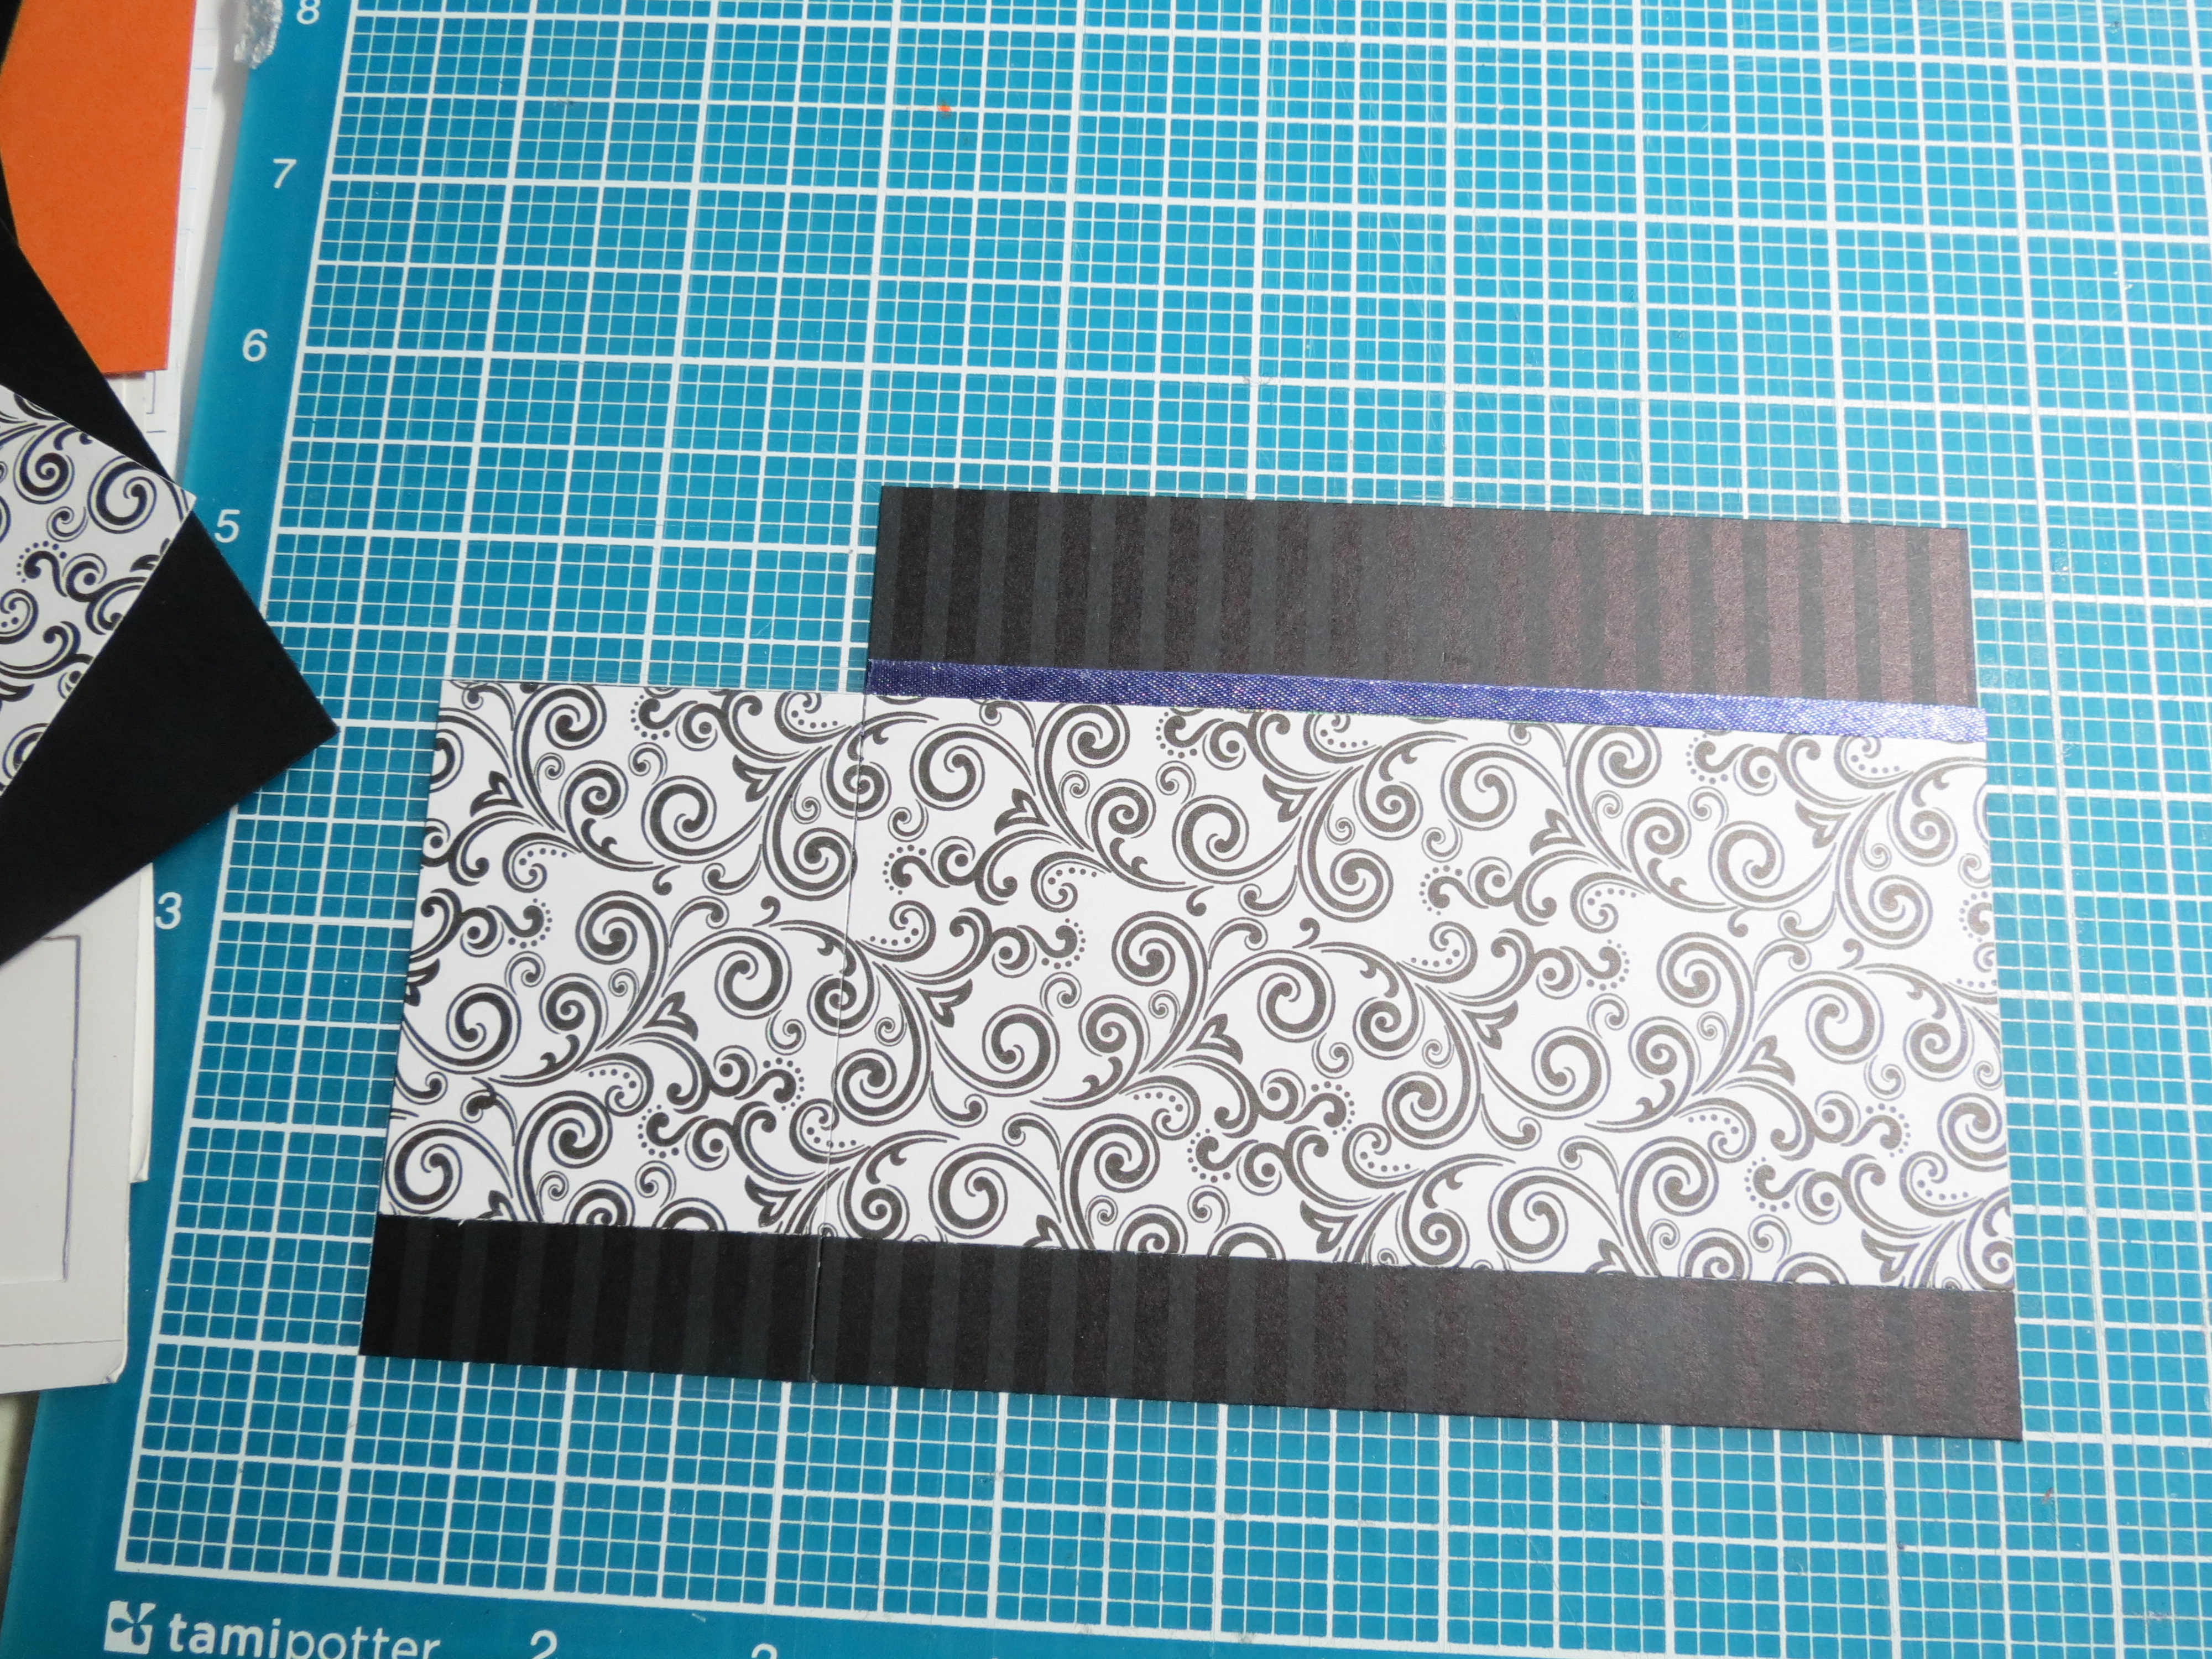
The final section was a 4×5 spot to use as a title block. The only trouble was my letters did not fit. Neither did the second choice. So it was time to find a solution. The choice was to use two blocks and make them look like one…a bit of an illusion.
Here’s how it was done:
I began with black stripe cardstock for both areas. Cut a smaller strip of pattern swirl for both sides and adhered both sides even with the top of the 2×3 block. This leaves a narrow area below and a wider section above the pattern paper.
Creating Illusion Grid sections lined up side by side.
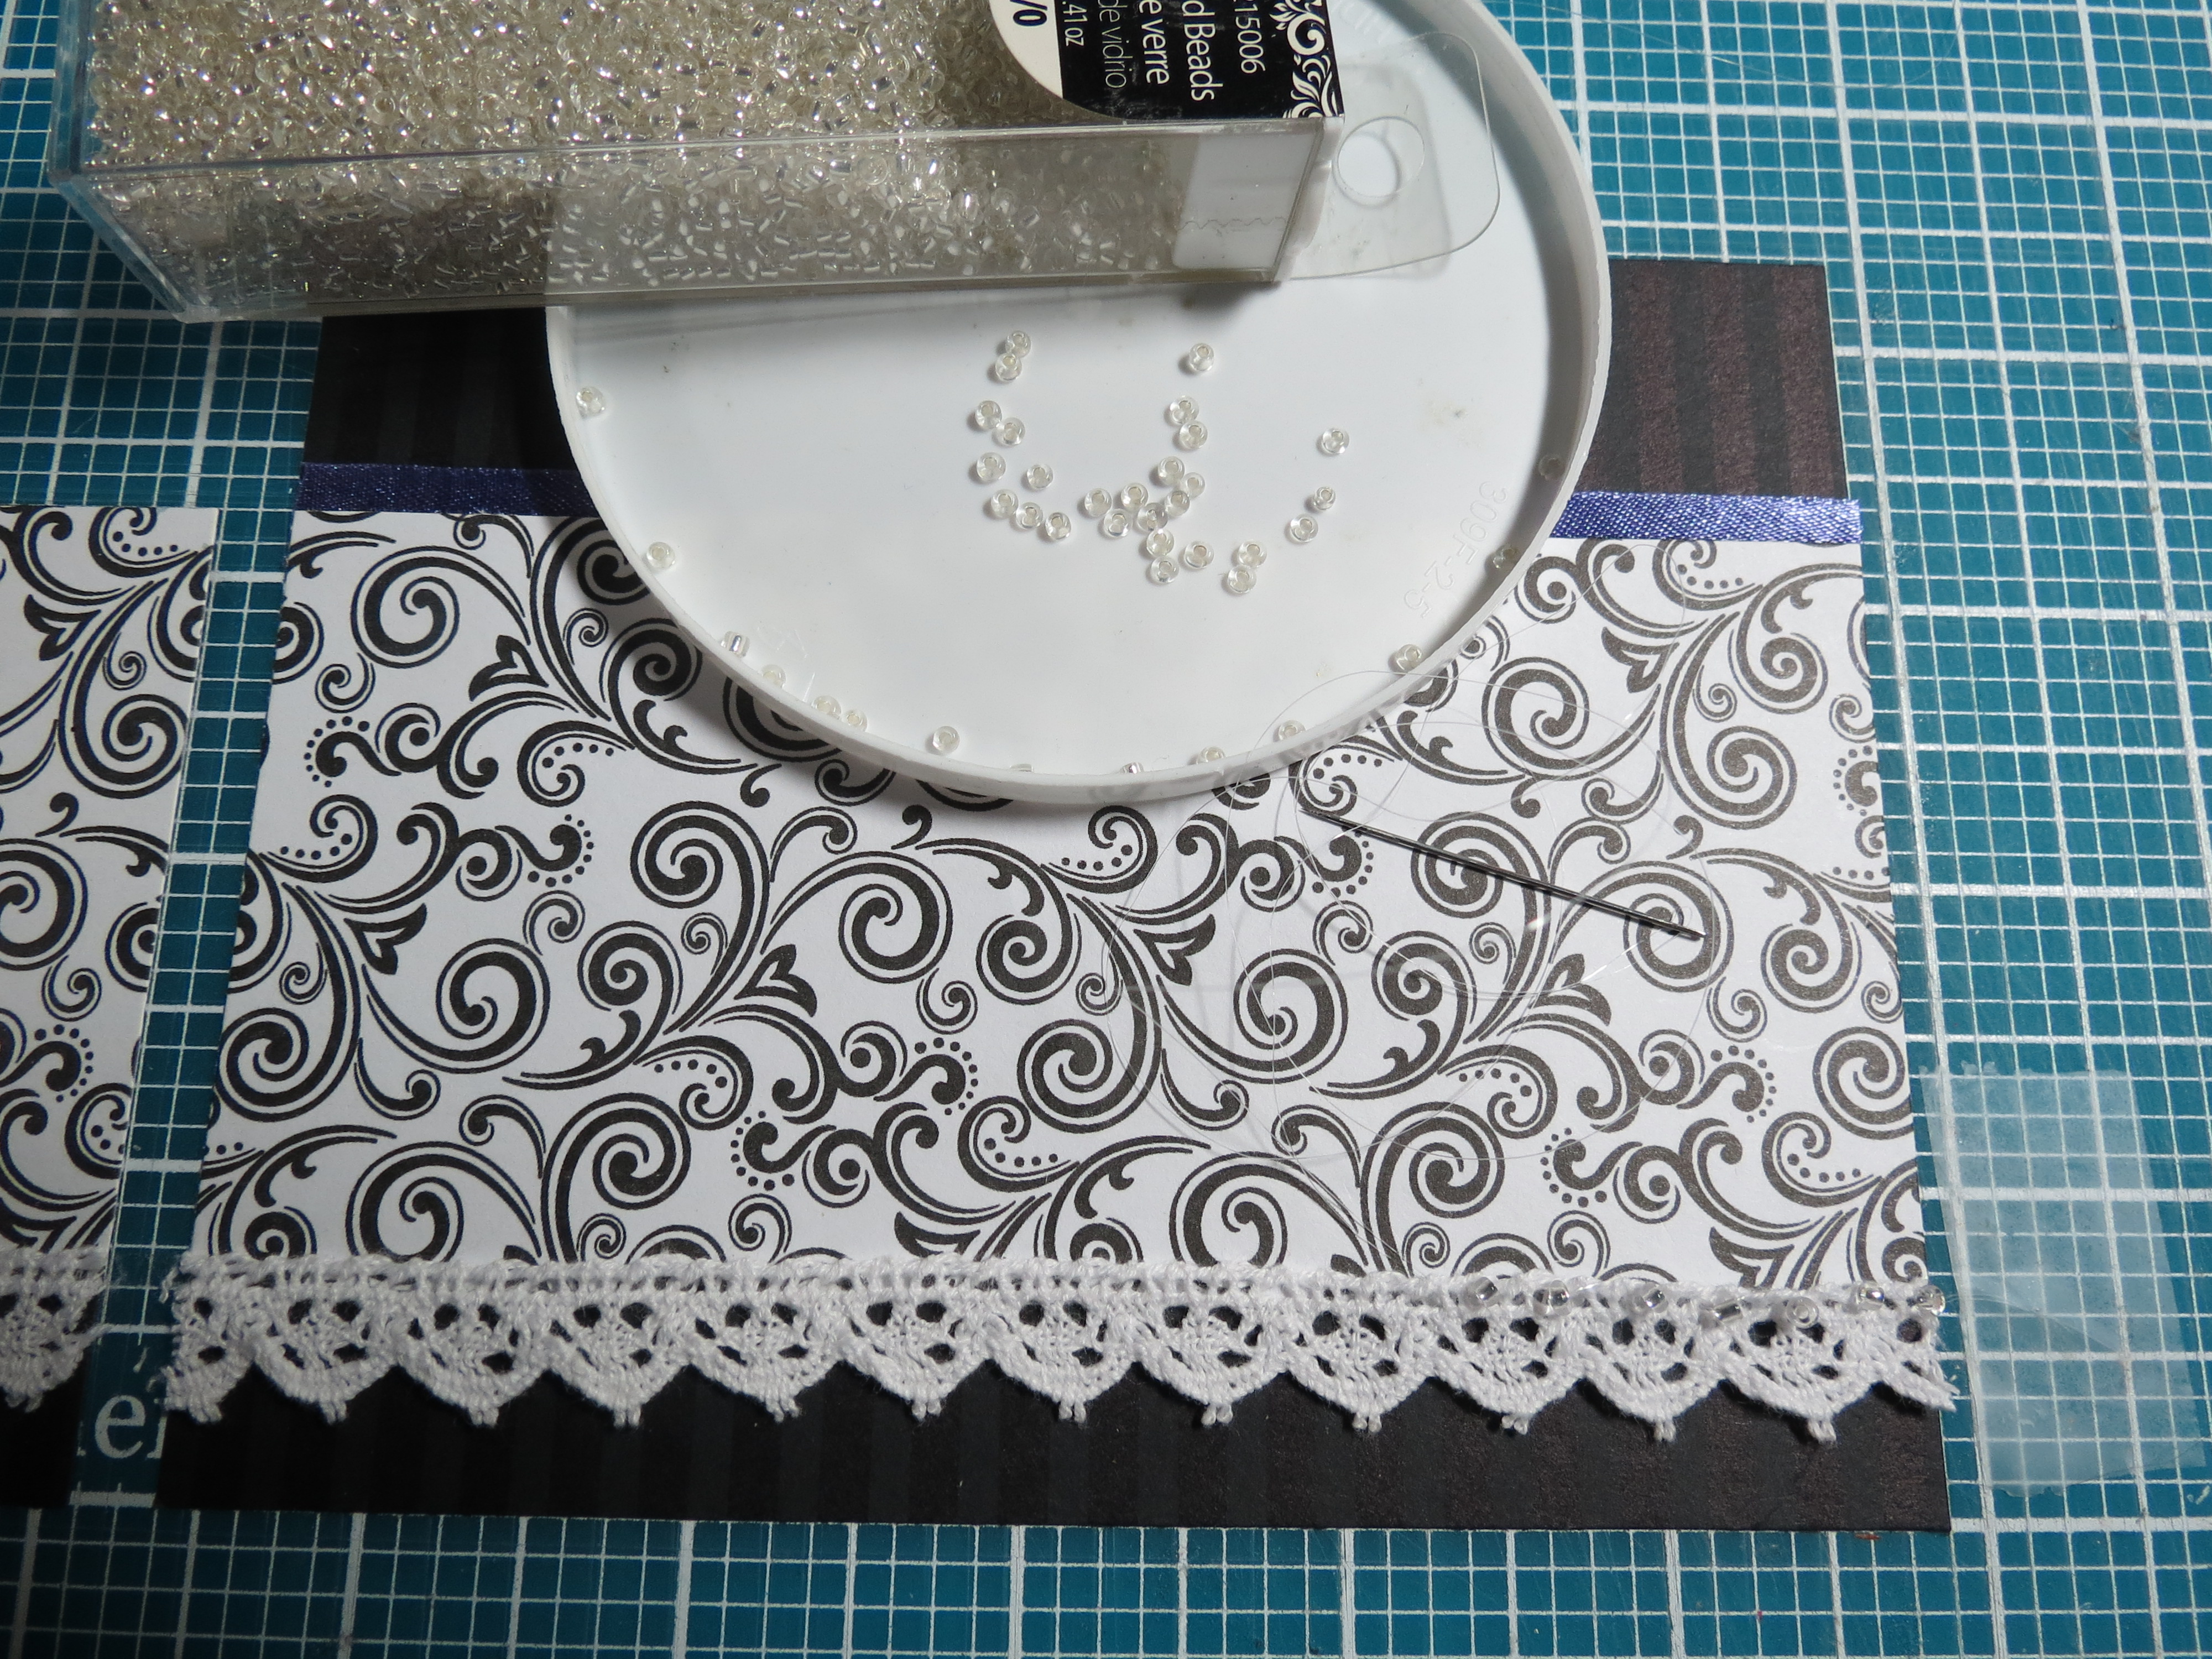
Creating Illusion Adding the pattern paper to the blocks Adding strip of ribbon matching the grid to the topside of larger block.
A narrow strip of purple ribbon tops the edge of the pattern paper and gives the illusion of there being a separation between the pattern paper and the black cardstock tile as it blends with the grid color.
To the bottom edge of the pattern paper on both blocks a strip of lace was added. Take invisible thread, tiny crystal beads and whip stitch the beads in a random arrangement along the lace upper edge for a little added sparkle.
Creating Illusion attach lace to bottom edge, add crystal seed beads
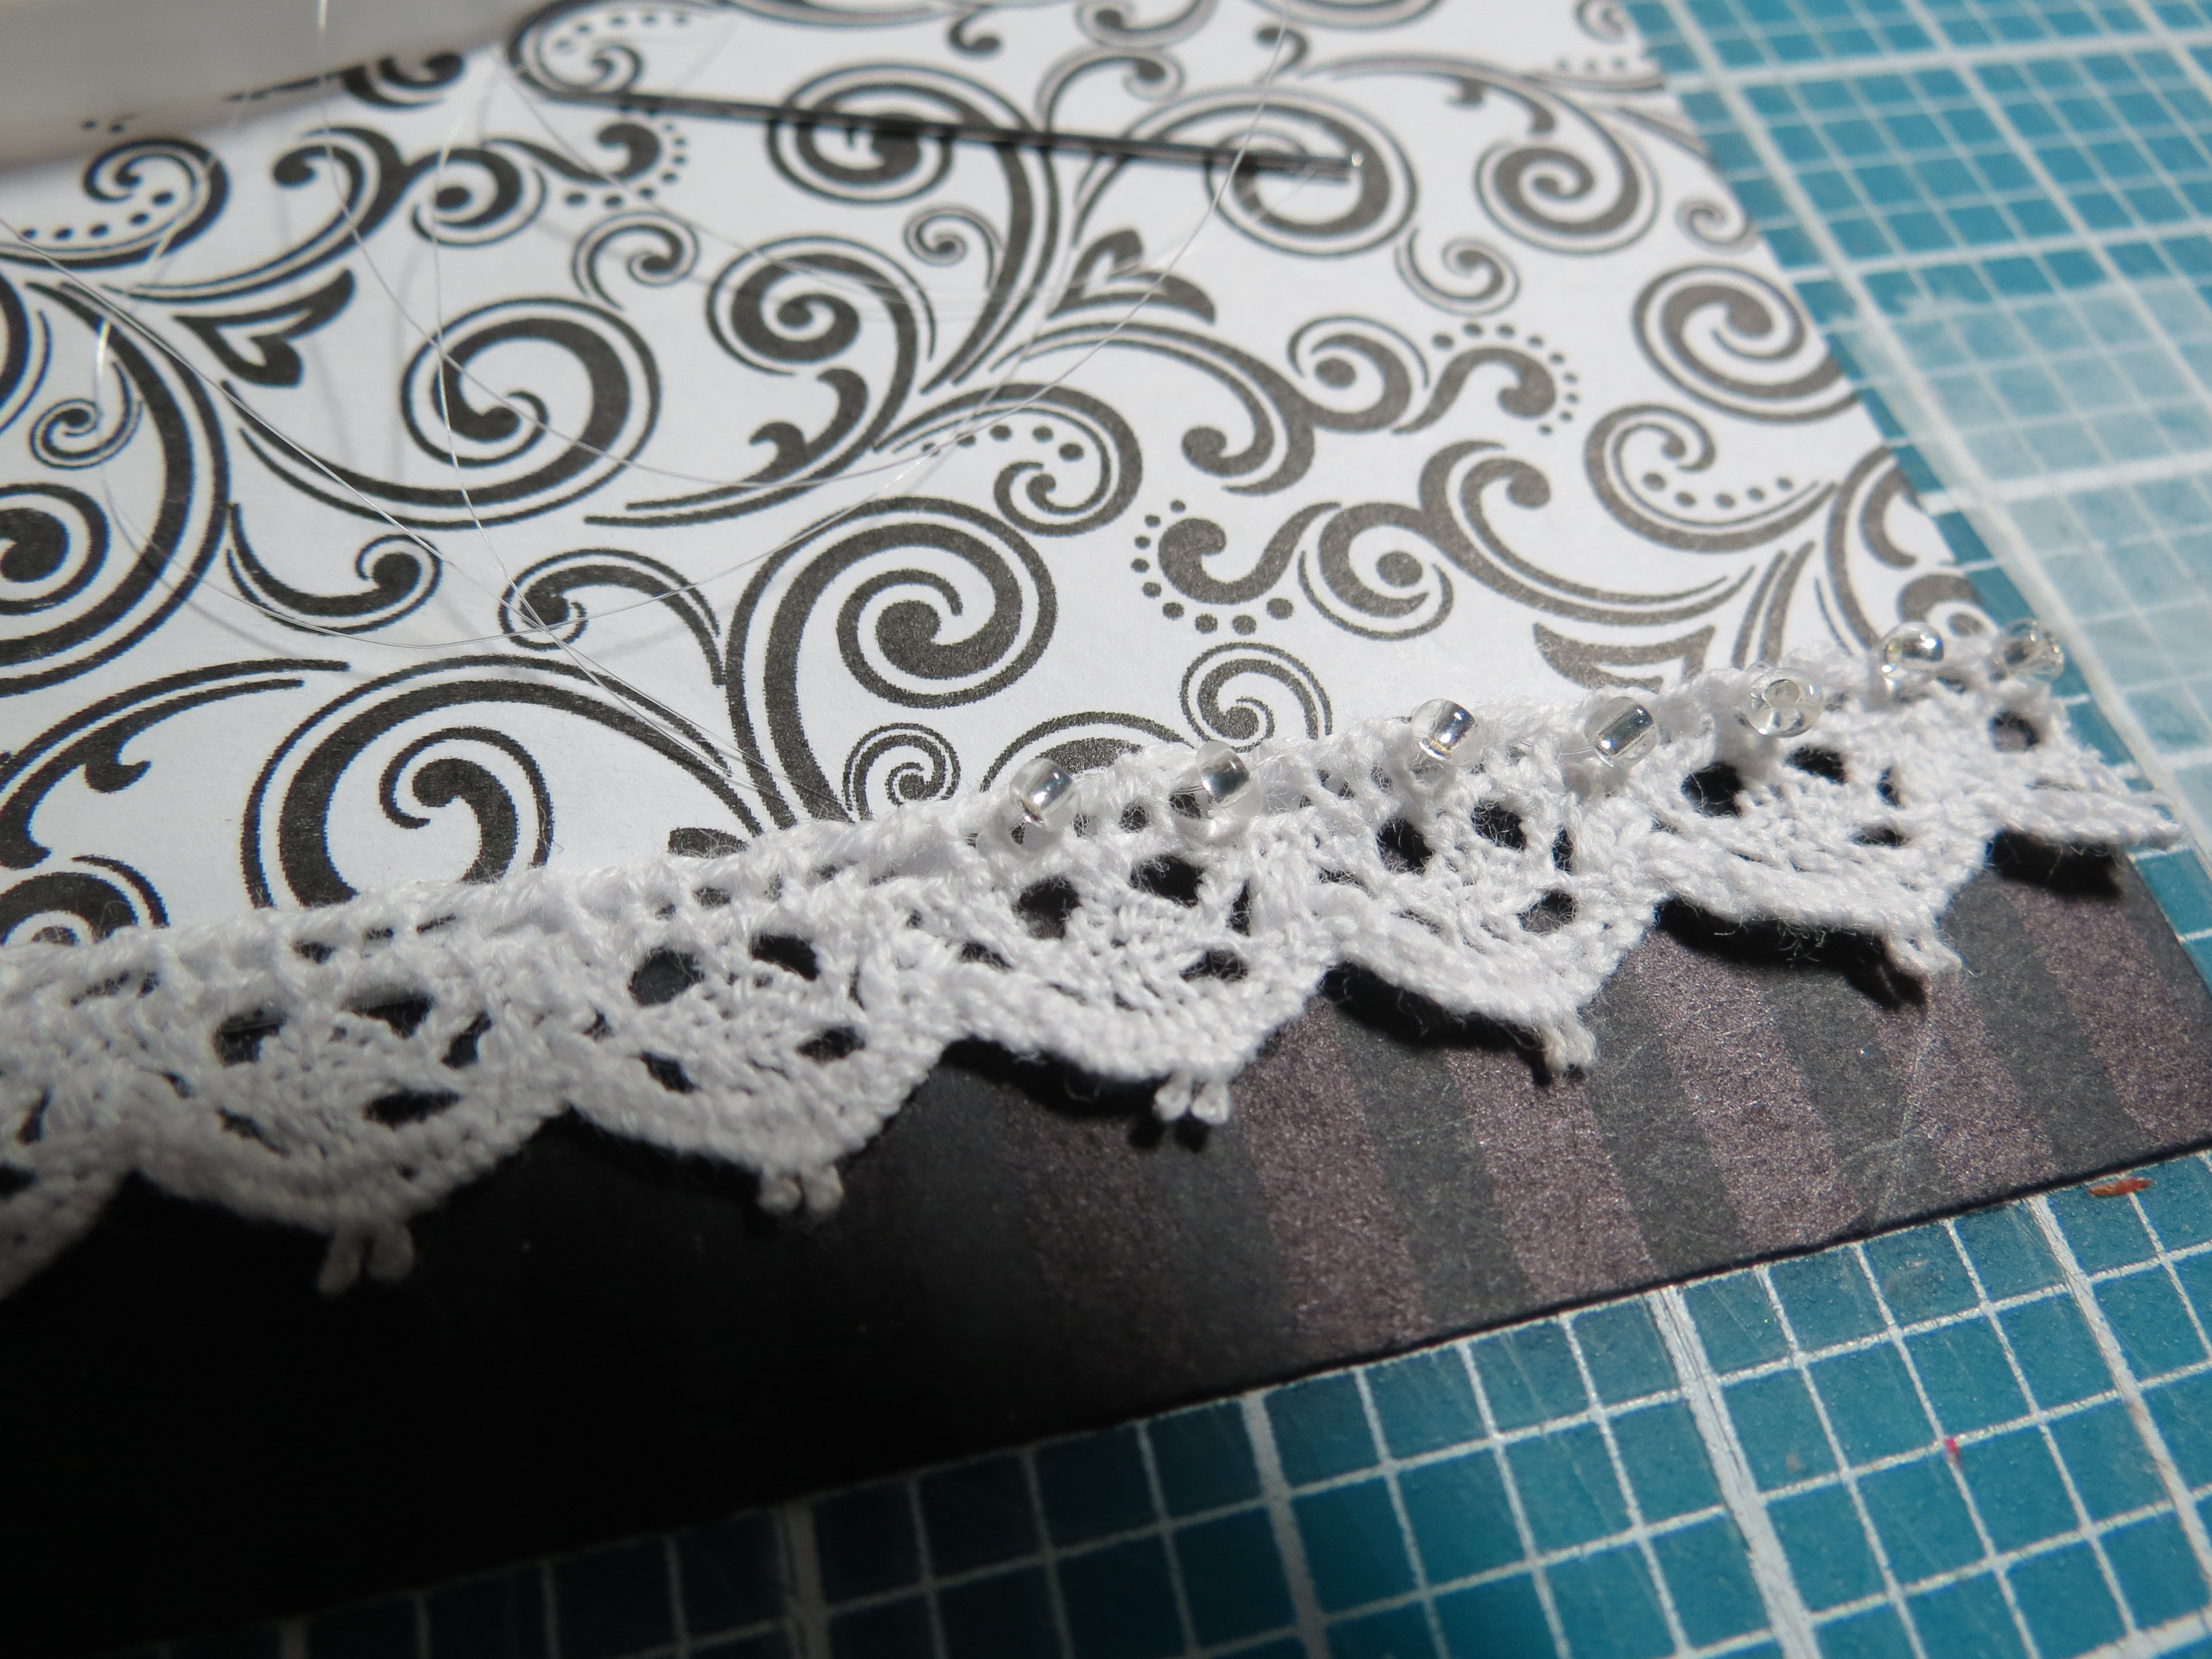
Creating Illusion using invisible thread attach crystal seed beads randomly at lace edge
Chipboard letters were painted with chalkboard paint. Another technique was planned but didn’t have the results hoped for so opted for the solid black of the letters. They stand out nicely against the pattern paper.
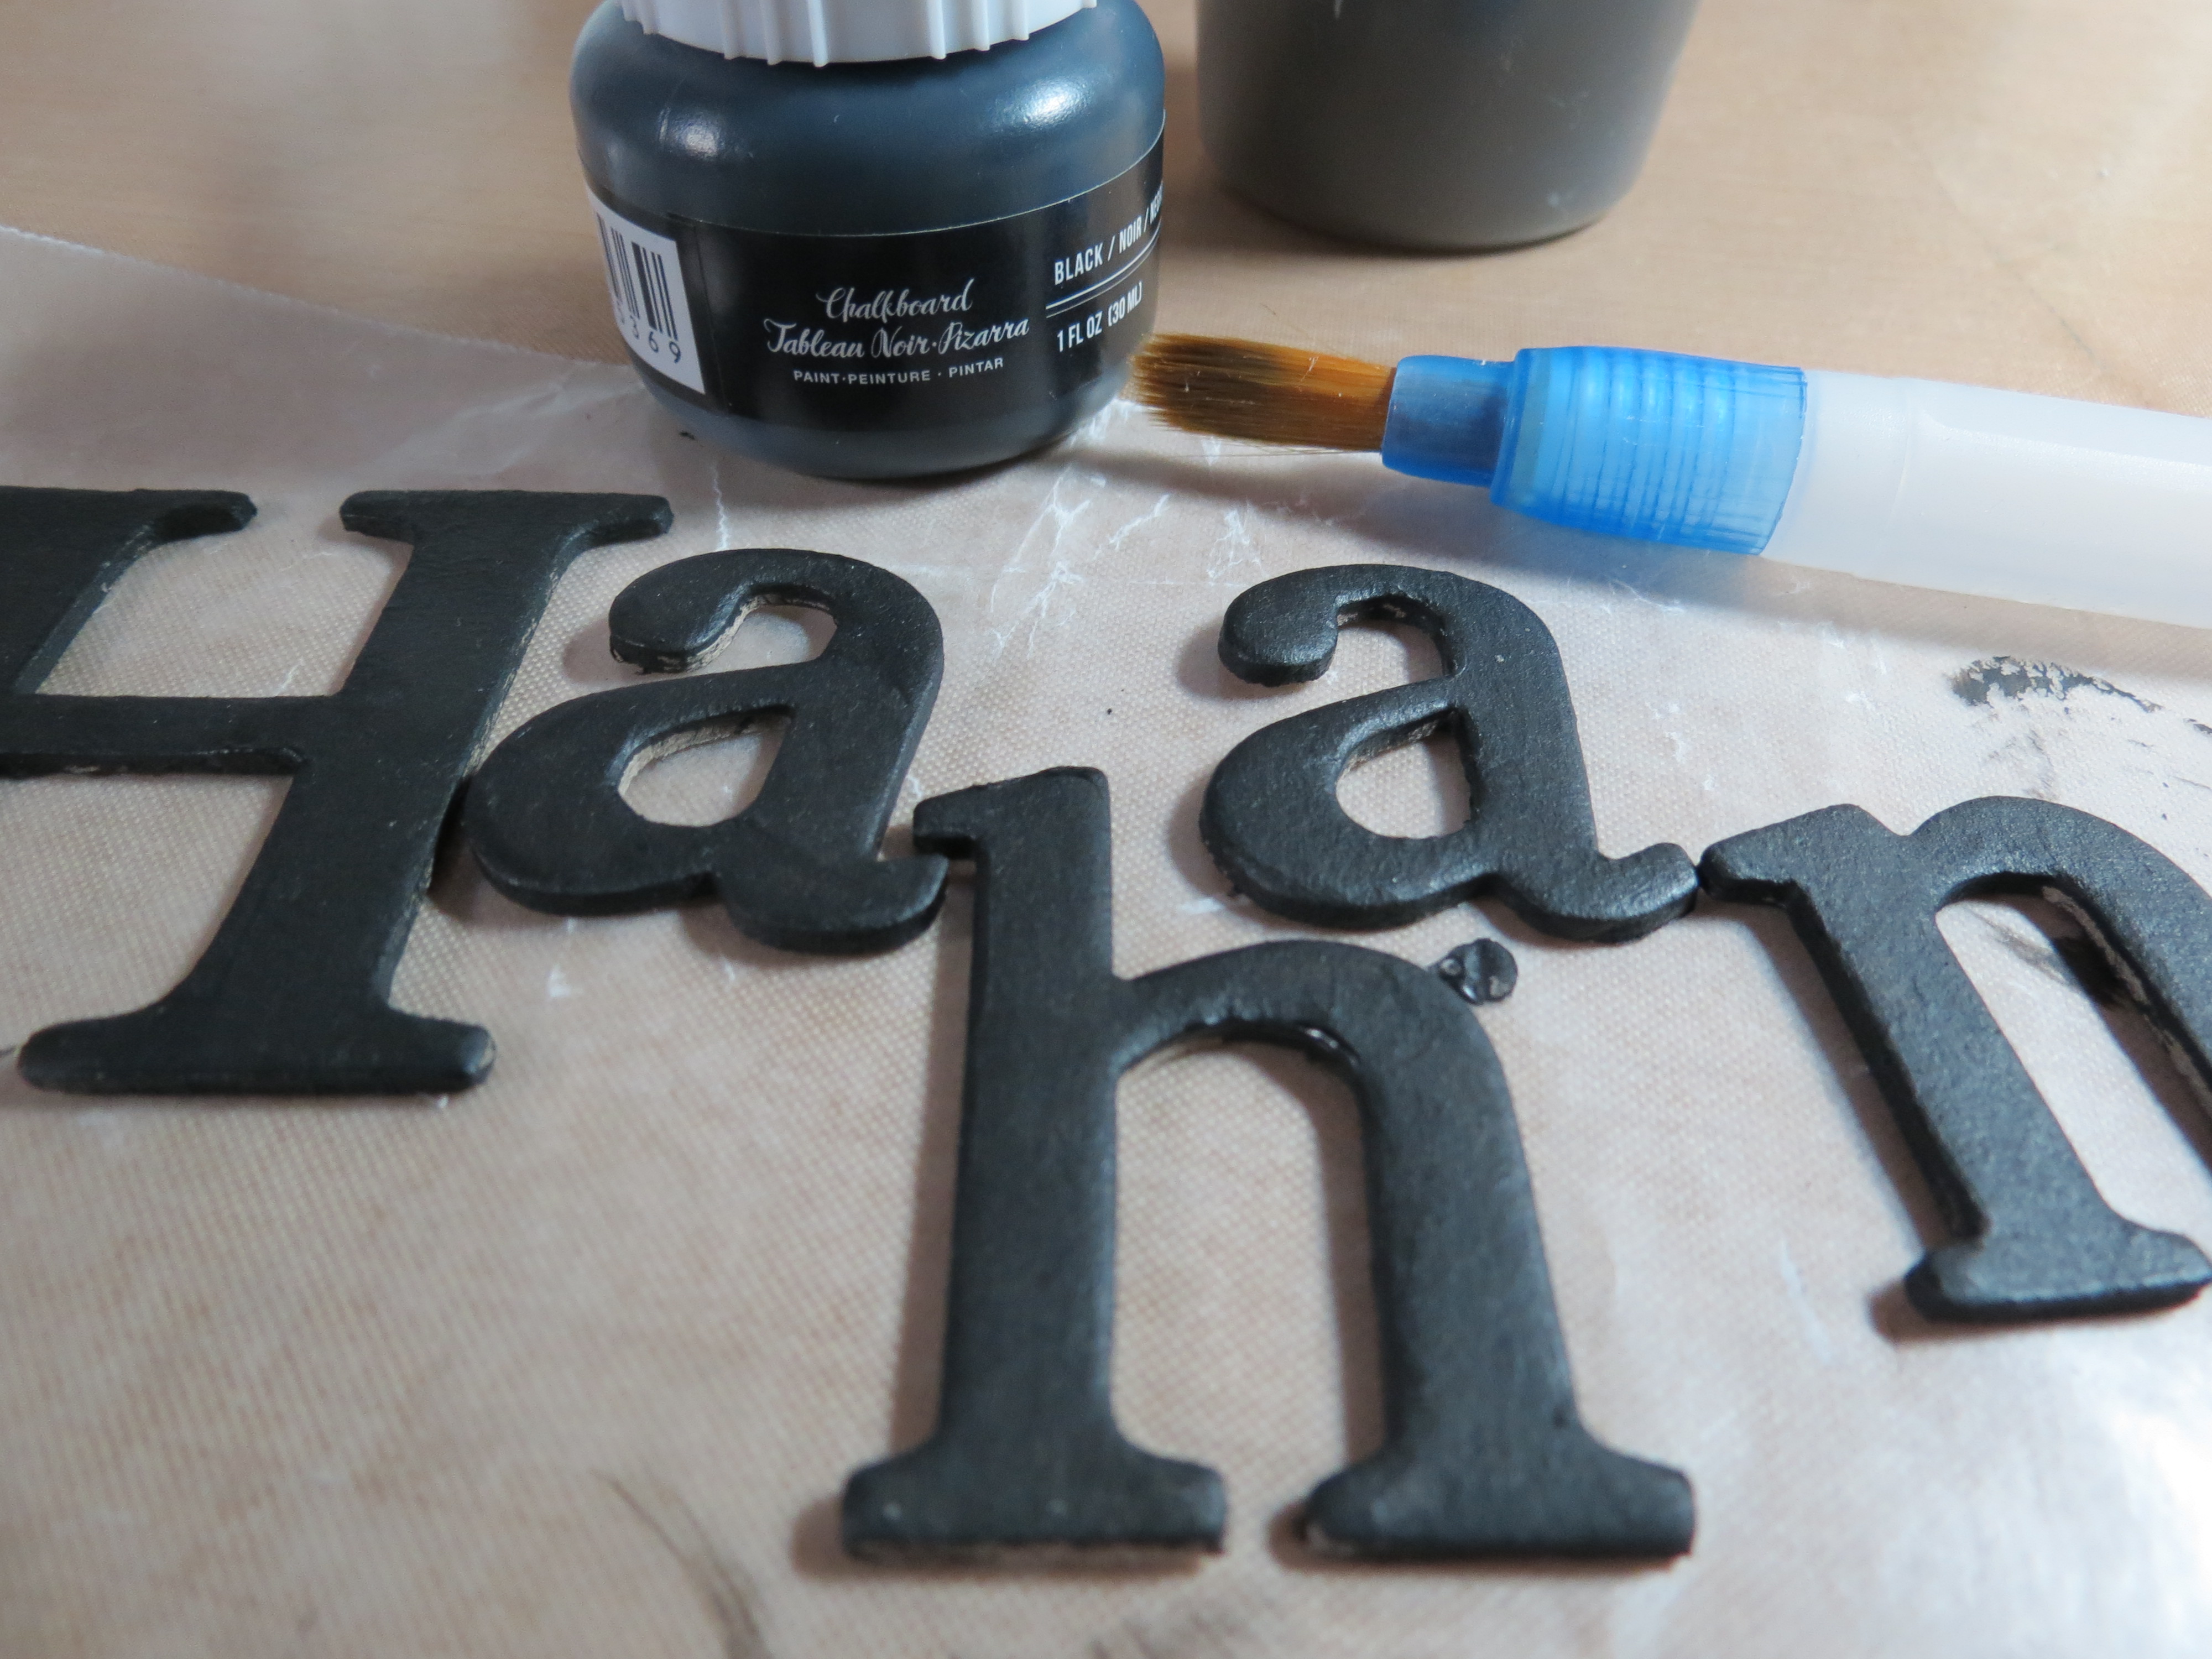
Creating Illusion chipboard letters painted with chalkboard paint
This block is then finished off with a die cut butterfly made from mulberry paper. The veining of thread throughout made it a good look for a fluttery butterfly. Two layers of mulberry paper form the butterfly and three black pearls of varying sizes for the body helps to anchor the shape in place.
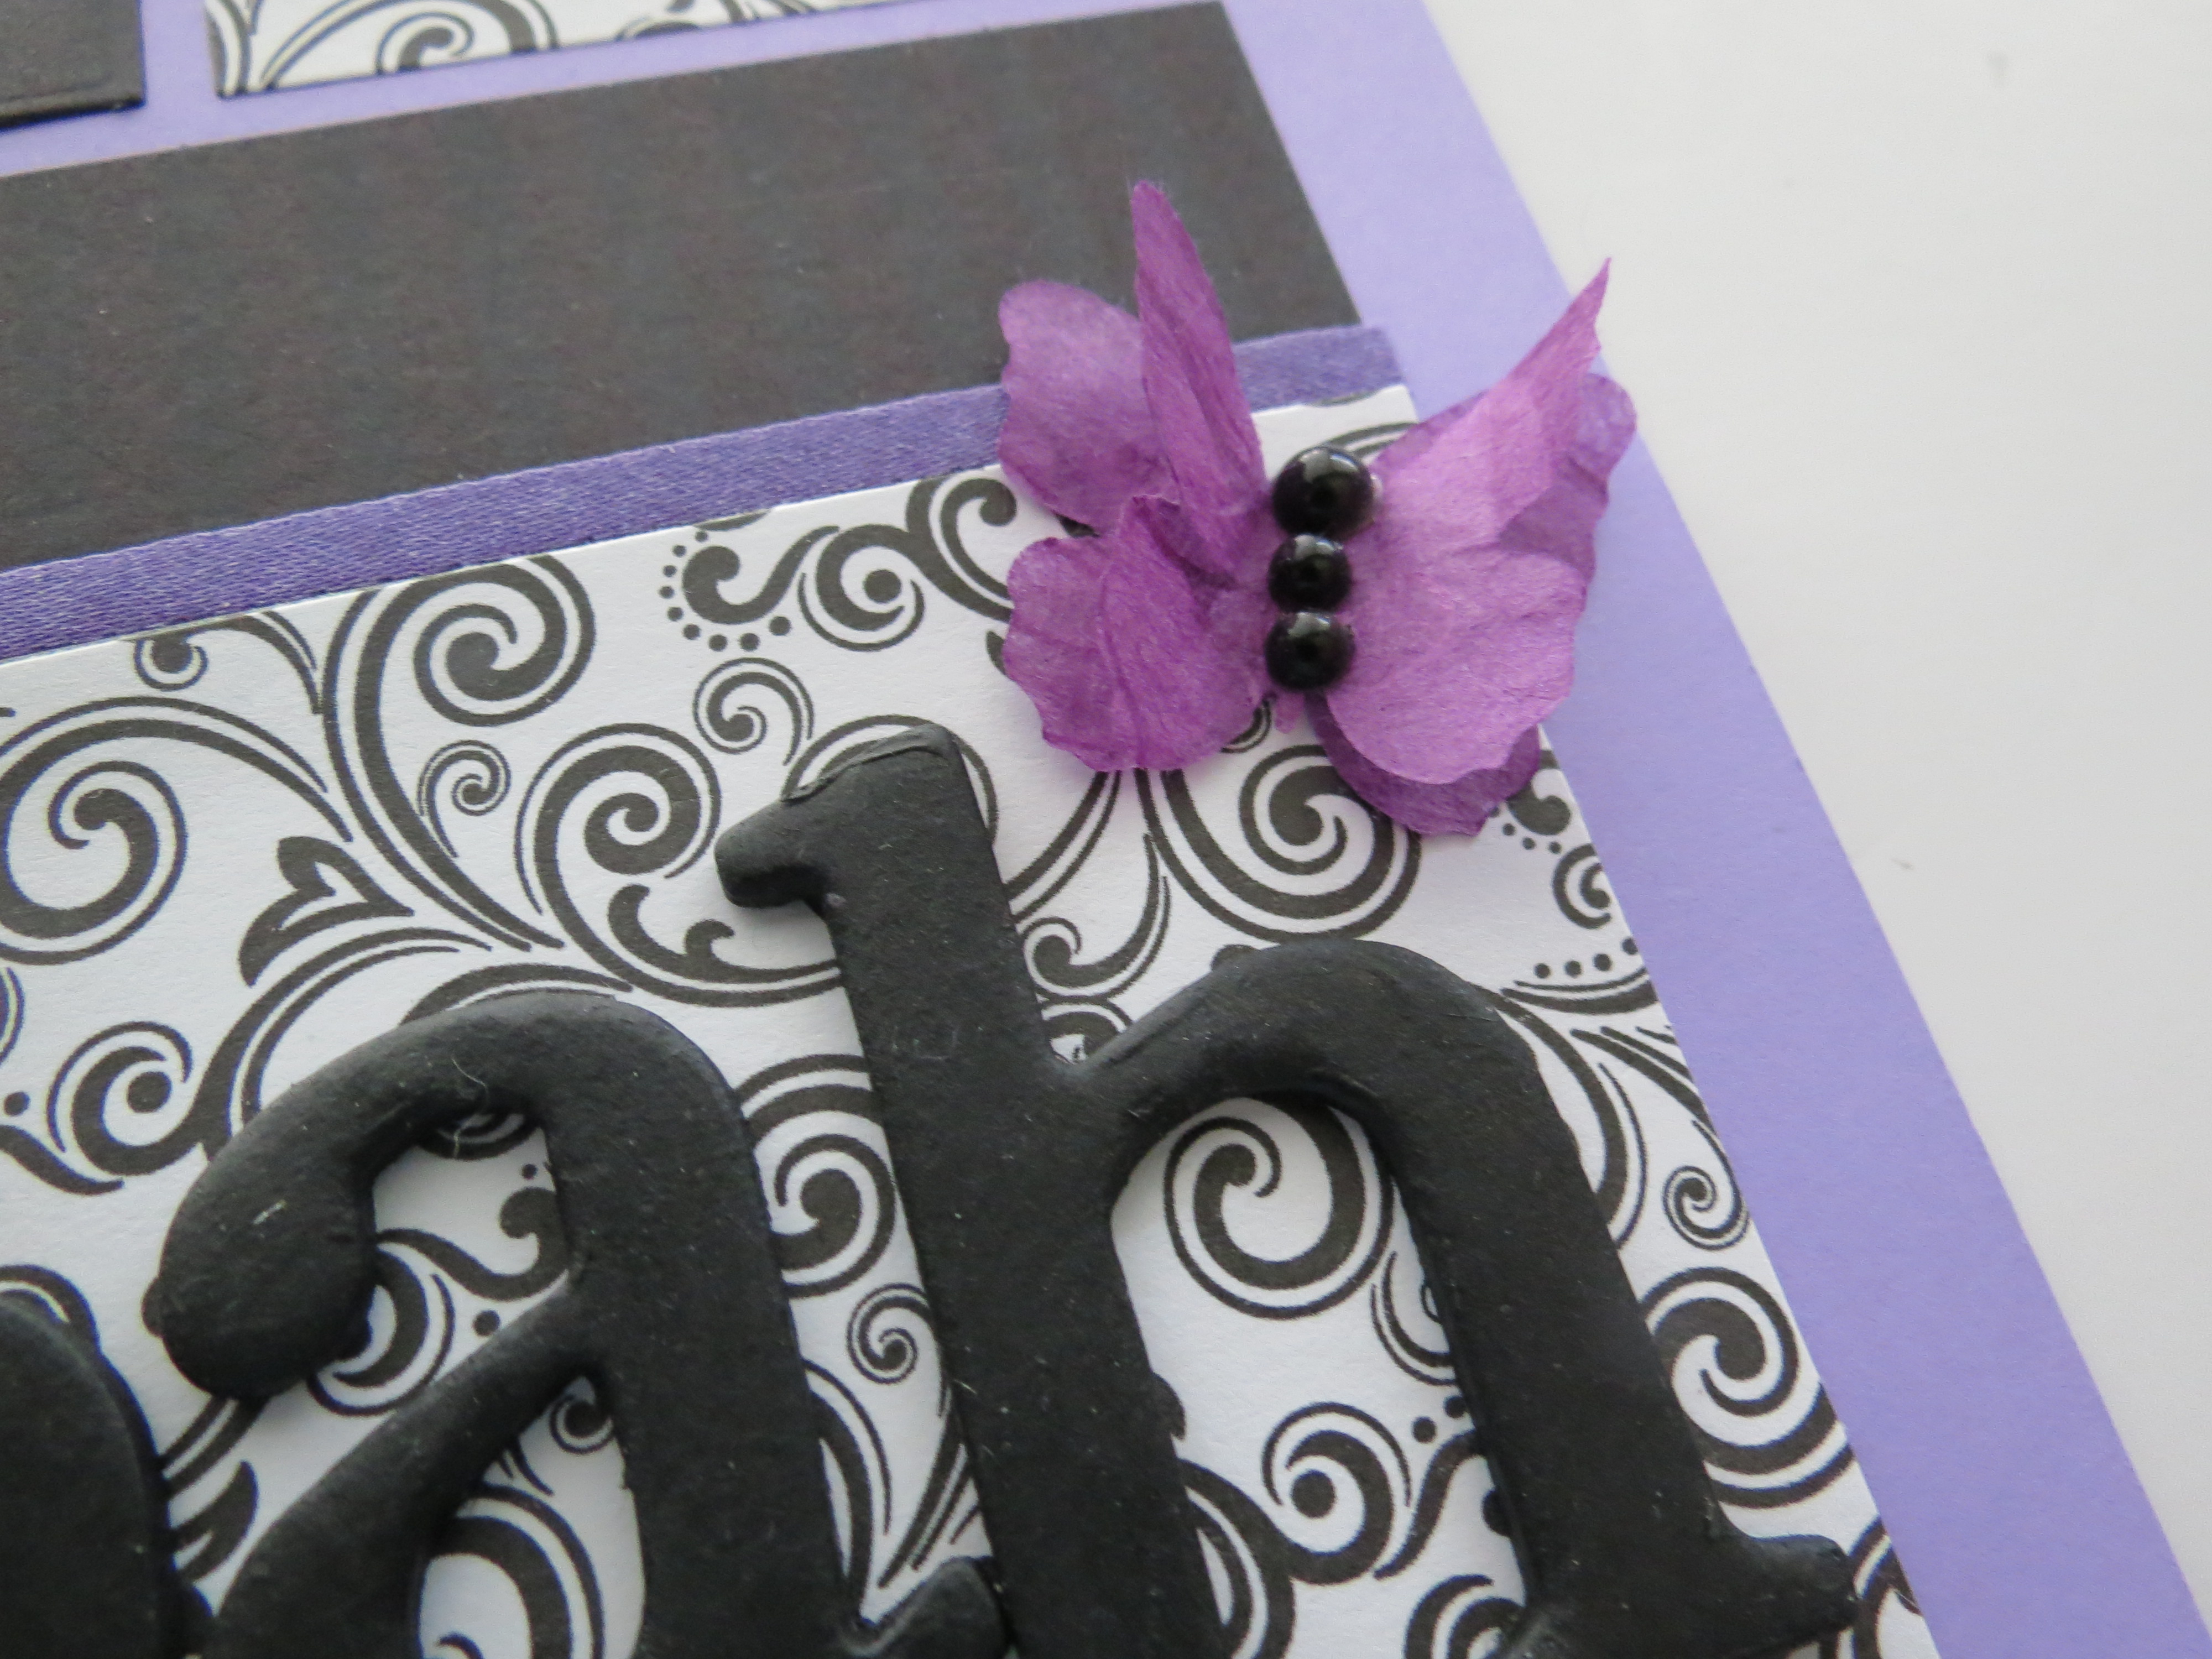
Creating Illusion mulberry and pearl butterfly
Simple Method: altered photo from color to B&W; used my photo editing program ACDSee. Why not take a break from the color for a more dramatic look with some of your portrait photos this summer? It’s usually a quick fix on your computer or through your developer.
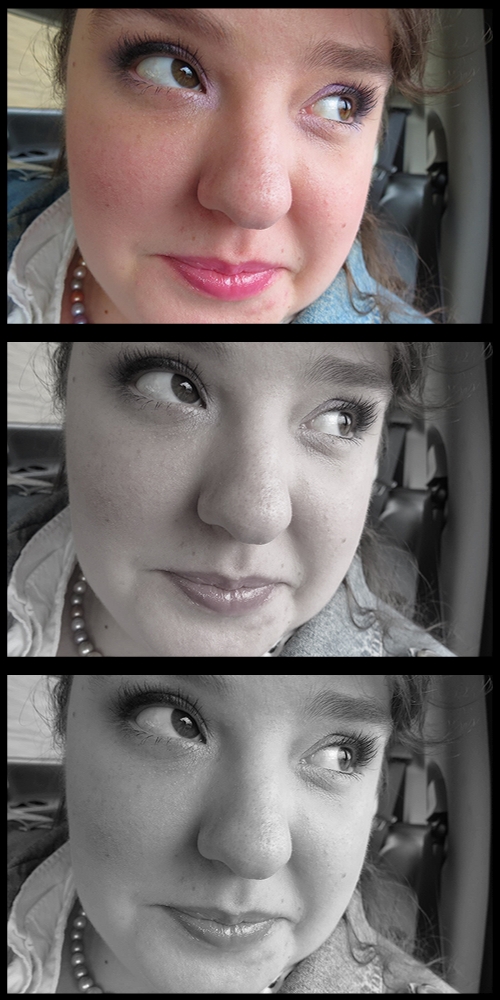
Creating Illusion Method: choosing color, reduced color or Black and White
So the next time you are working with a pattern that is almost perfect…but not quite…remember these tips for making the pattern work by creating illusion and turning it into a new look that will be magic when it’s all finished!
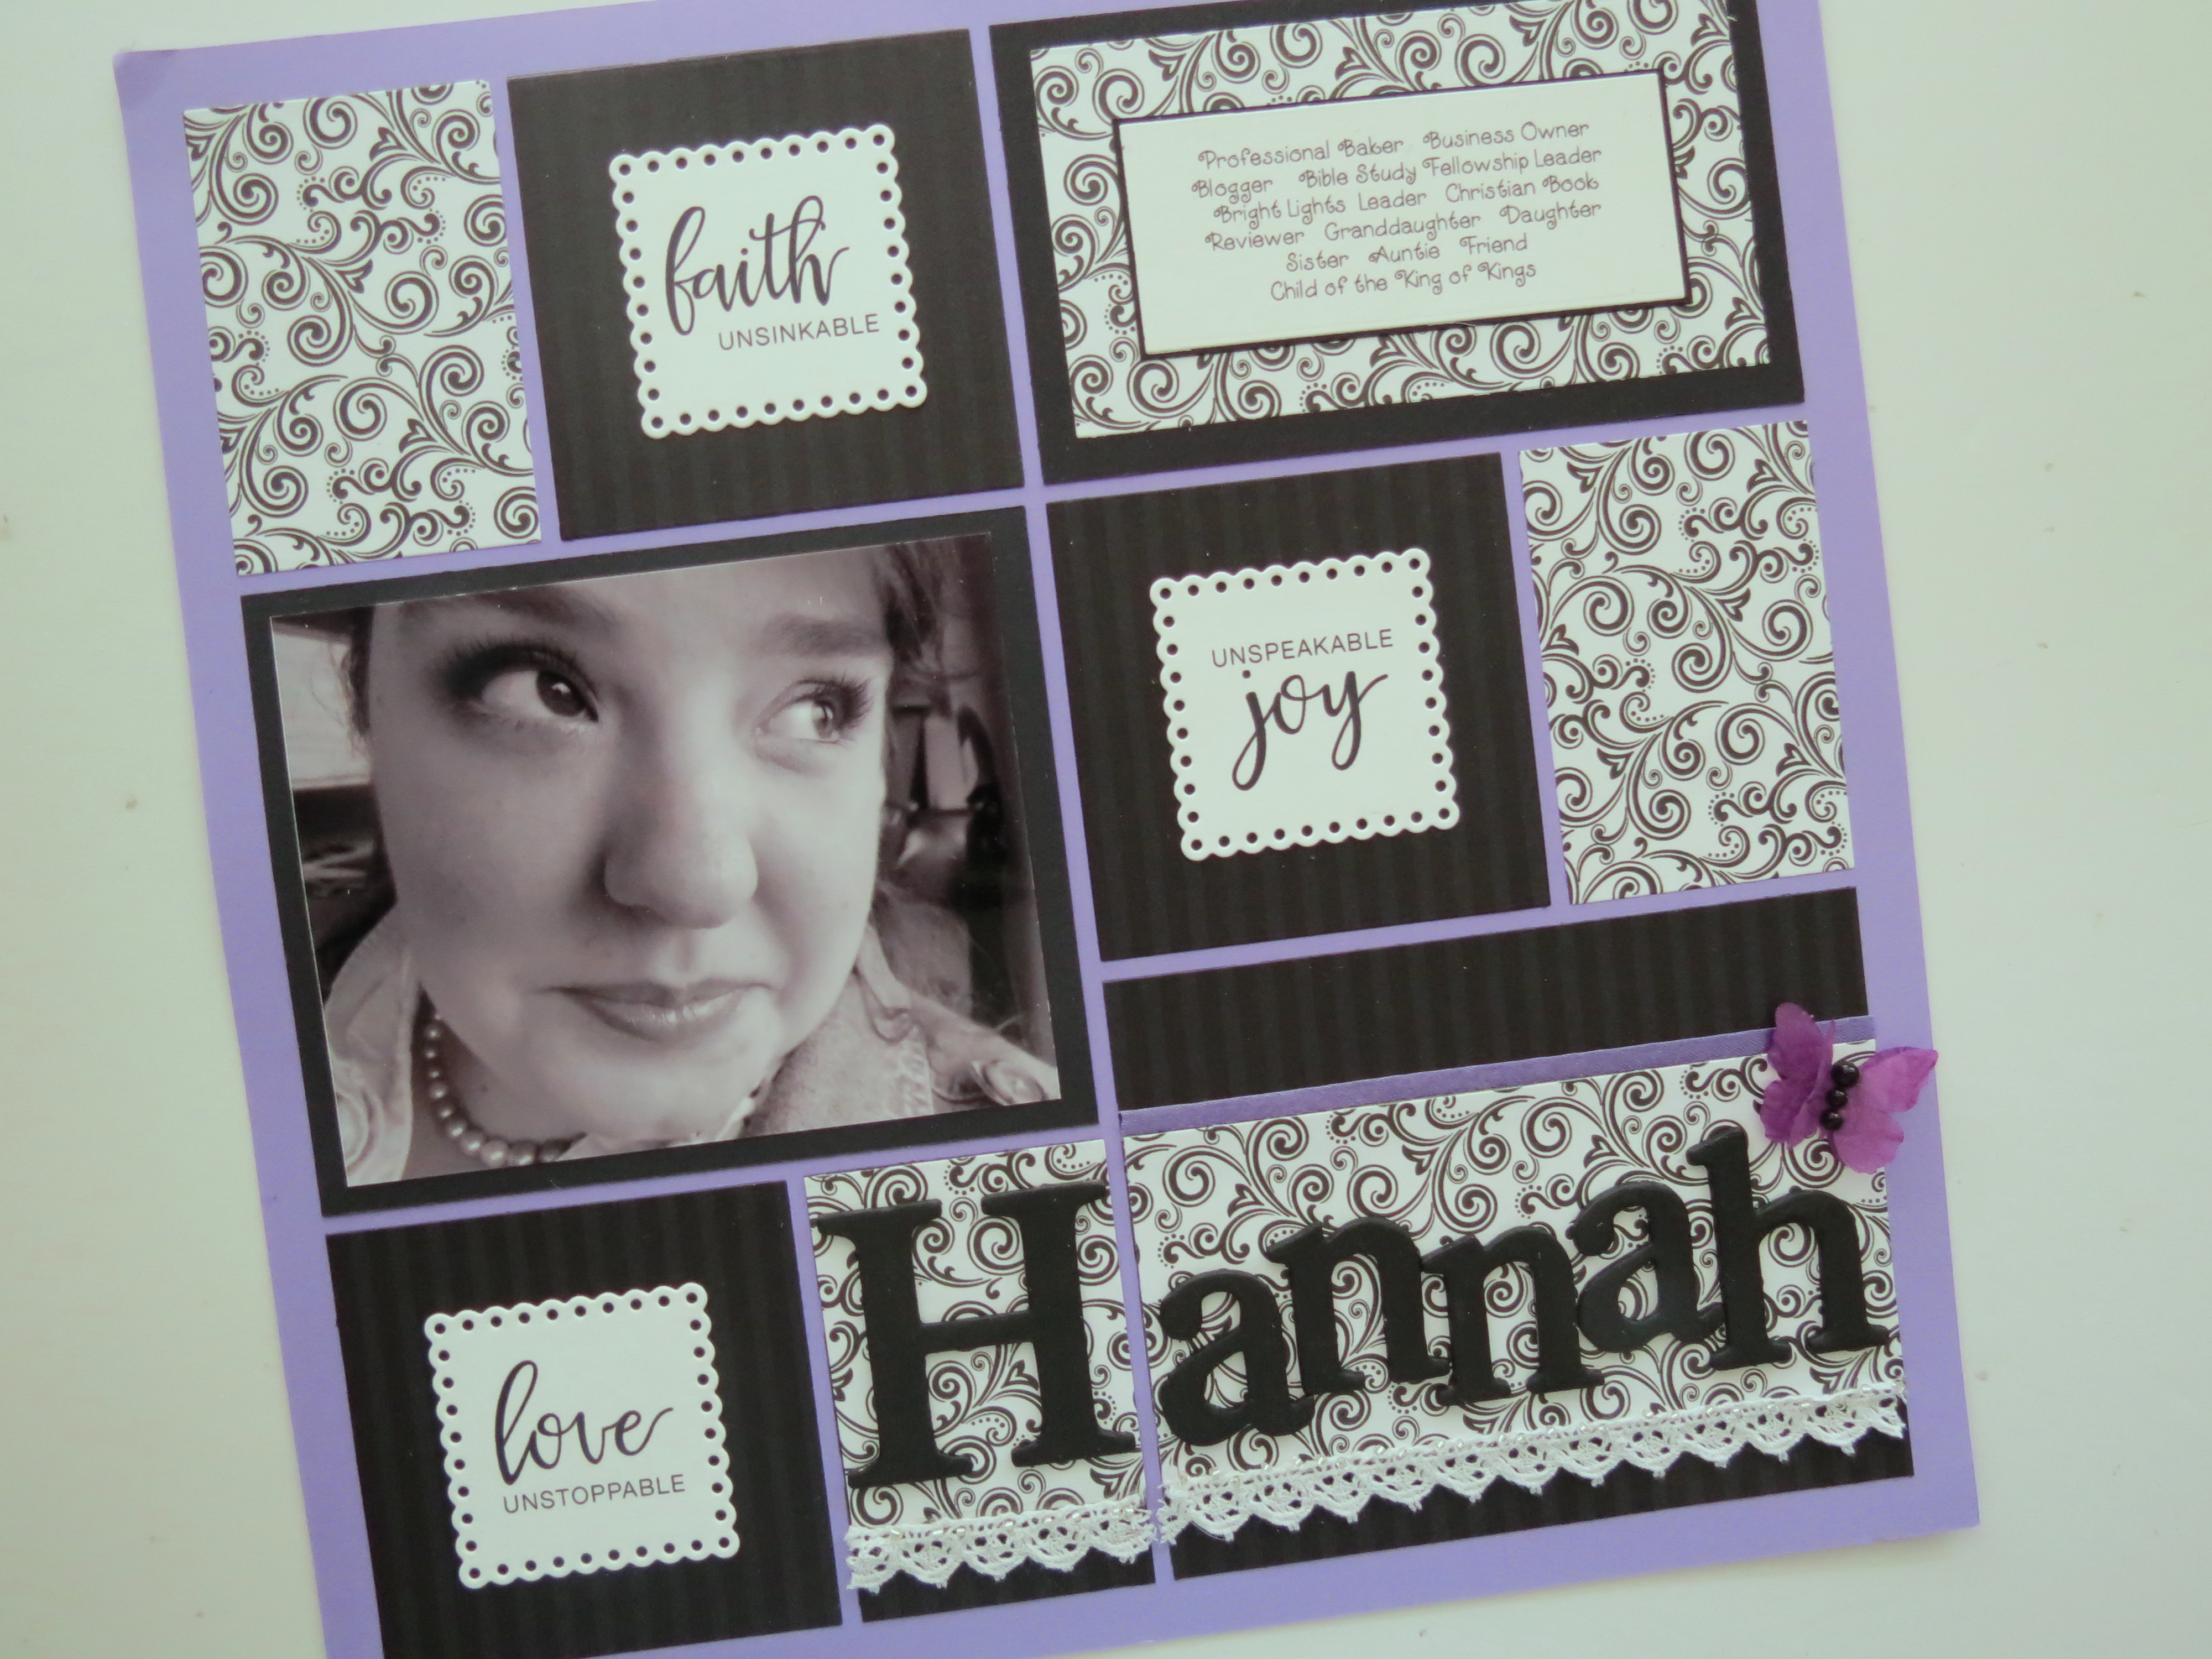
Creating Illusion the final result 12×12 Violet Mosaic Moments Grid Paper, Column Pattern #229, Scallop Dot Mat Die, Black & White theme, Project Faith journal cards by Danielle Young
Andrea Fisher
See all our ideas for your scrapbook pages on our Pinterest boards and this pin too!
Creating Illusion with Column Pattern Scallop Dot Mat Die and journal cards