
 Advanced Techniques: Three Tips for Creating an Elegant Layout

Featuring the new Arches die sets
Kellsie’s Wedding
We’ve added a new Arch Die Set to our collection. This New die set is made up of two arch dies, a 2×3 and a 3×5 arch die, and we’ll see how you can create an elegant layout with just a few tips.
Mosaic Moments New Arches Die Set
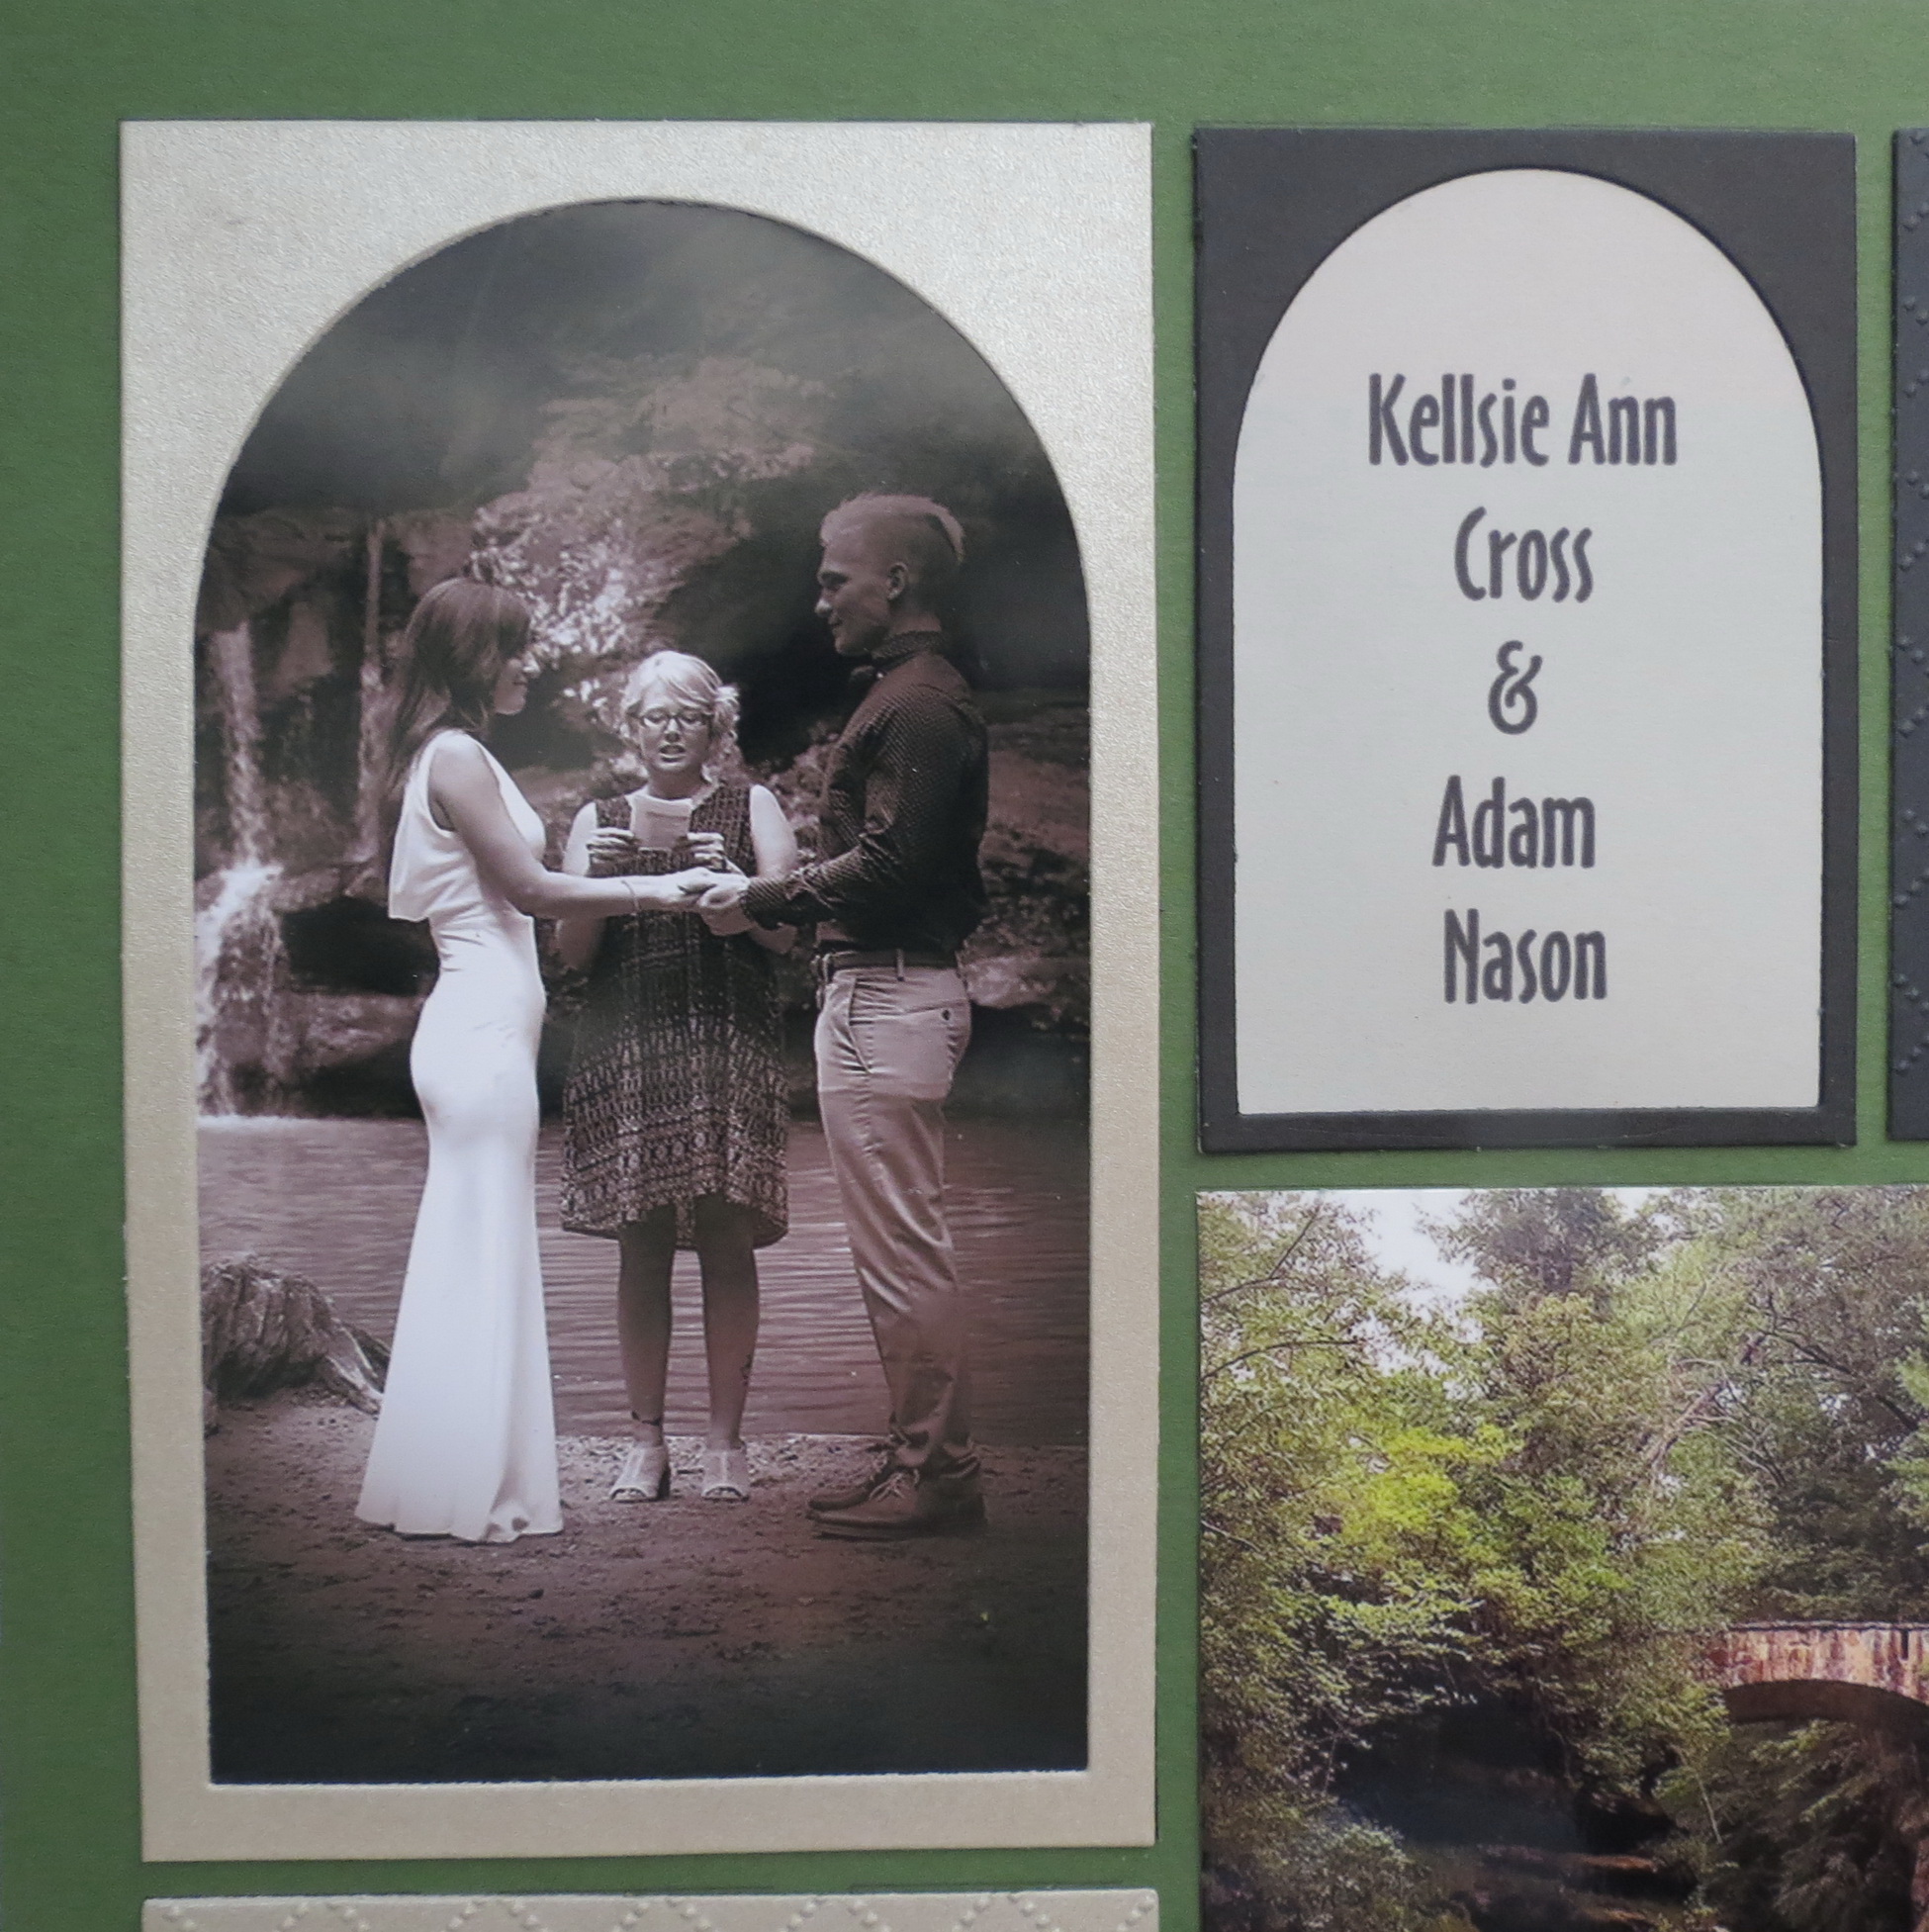
I thought it would be a perfect die for featuring a couple, and a wedding seemed like a good place to start. But this wedding isn’t the usual fancy or frilly wedding, Kellsie and Adam chose a beautiful outdoor setting for their wedding in August at Old Man’s Cave with the Upper Falls for a backdrop. Thanks to Kellsie for sharing photos taken by family and friends for this layout.
From the start this layout would not be full of lace and ribbons; Kellsie’s dress was simple elegance so my embellishing would have to be understated and reflect the natural setting surrounding them.
Mosaic Moments Advanced Techniques: 3 Tips for Creating an Elegant Layout featuring the New Arches Die Set
Deep Spring Green was selected for my 12×12 Mosaic Moments Grid base. Black cardstock and Silver Pearls from Core’dinations Card Maker Series will be used to cut the arches and ovals for framing the photos and creating journal spots for the important details. Gray cardstock is used for all the journaling blocks. I know they seem unusual colors for a wedding, but they are right for this rustic event.

Pattern #103 a pinwheel pattern the mirror image
I’ve used Pattern #103 in the mirror image view for this layout. I wanted the story on the page to begin with a wedding photo in an arch in the top left-hand section of the page and then move to the right in this pinwheel pattern.
Here are a few tips to try and add to your bag of tricks when you want to step it up a bit.
AT #1 Choosing a Special Paper
The 3×5 Arch is cut twice from the Silver Core’dinations Pearl paper. Its soft shimmer has the look of expensive satin and brings with it an elegance that is fitting for a wedding, even one in this park.
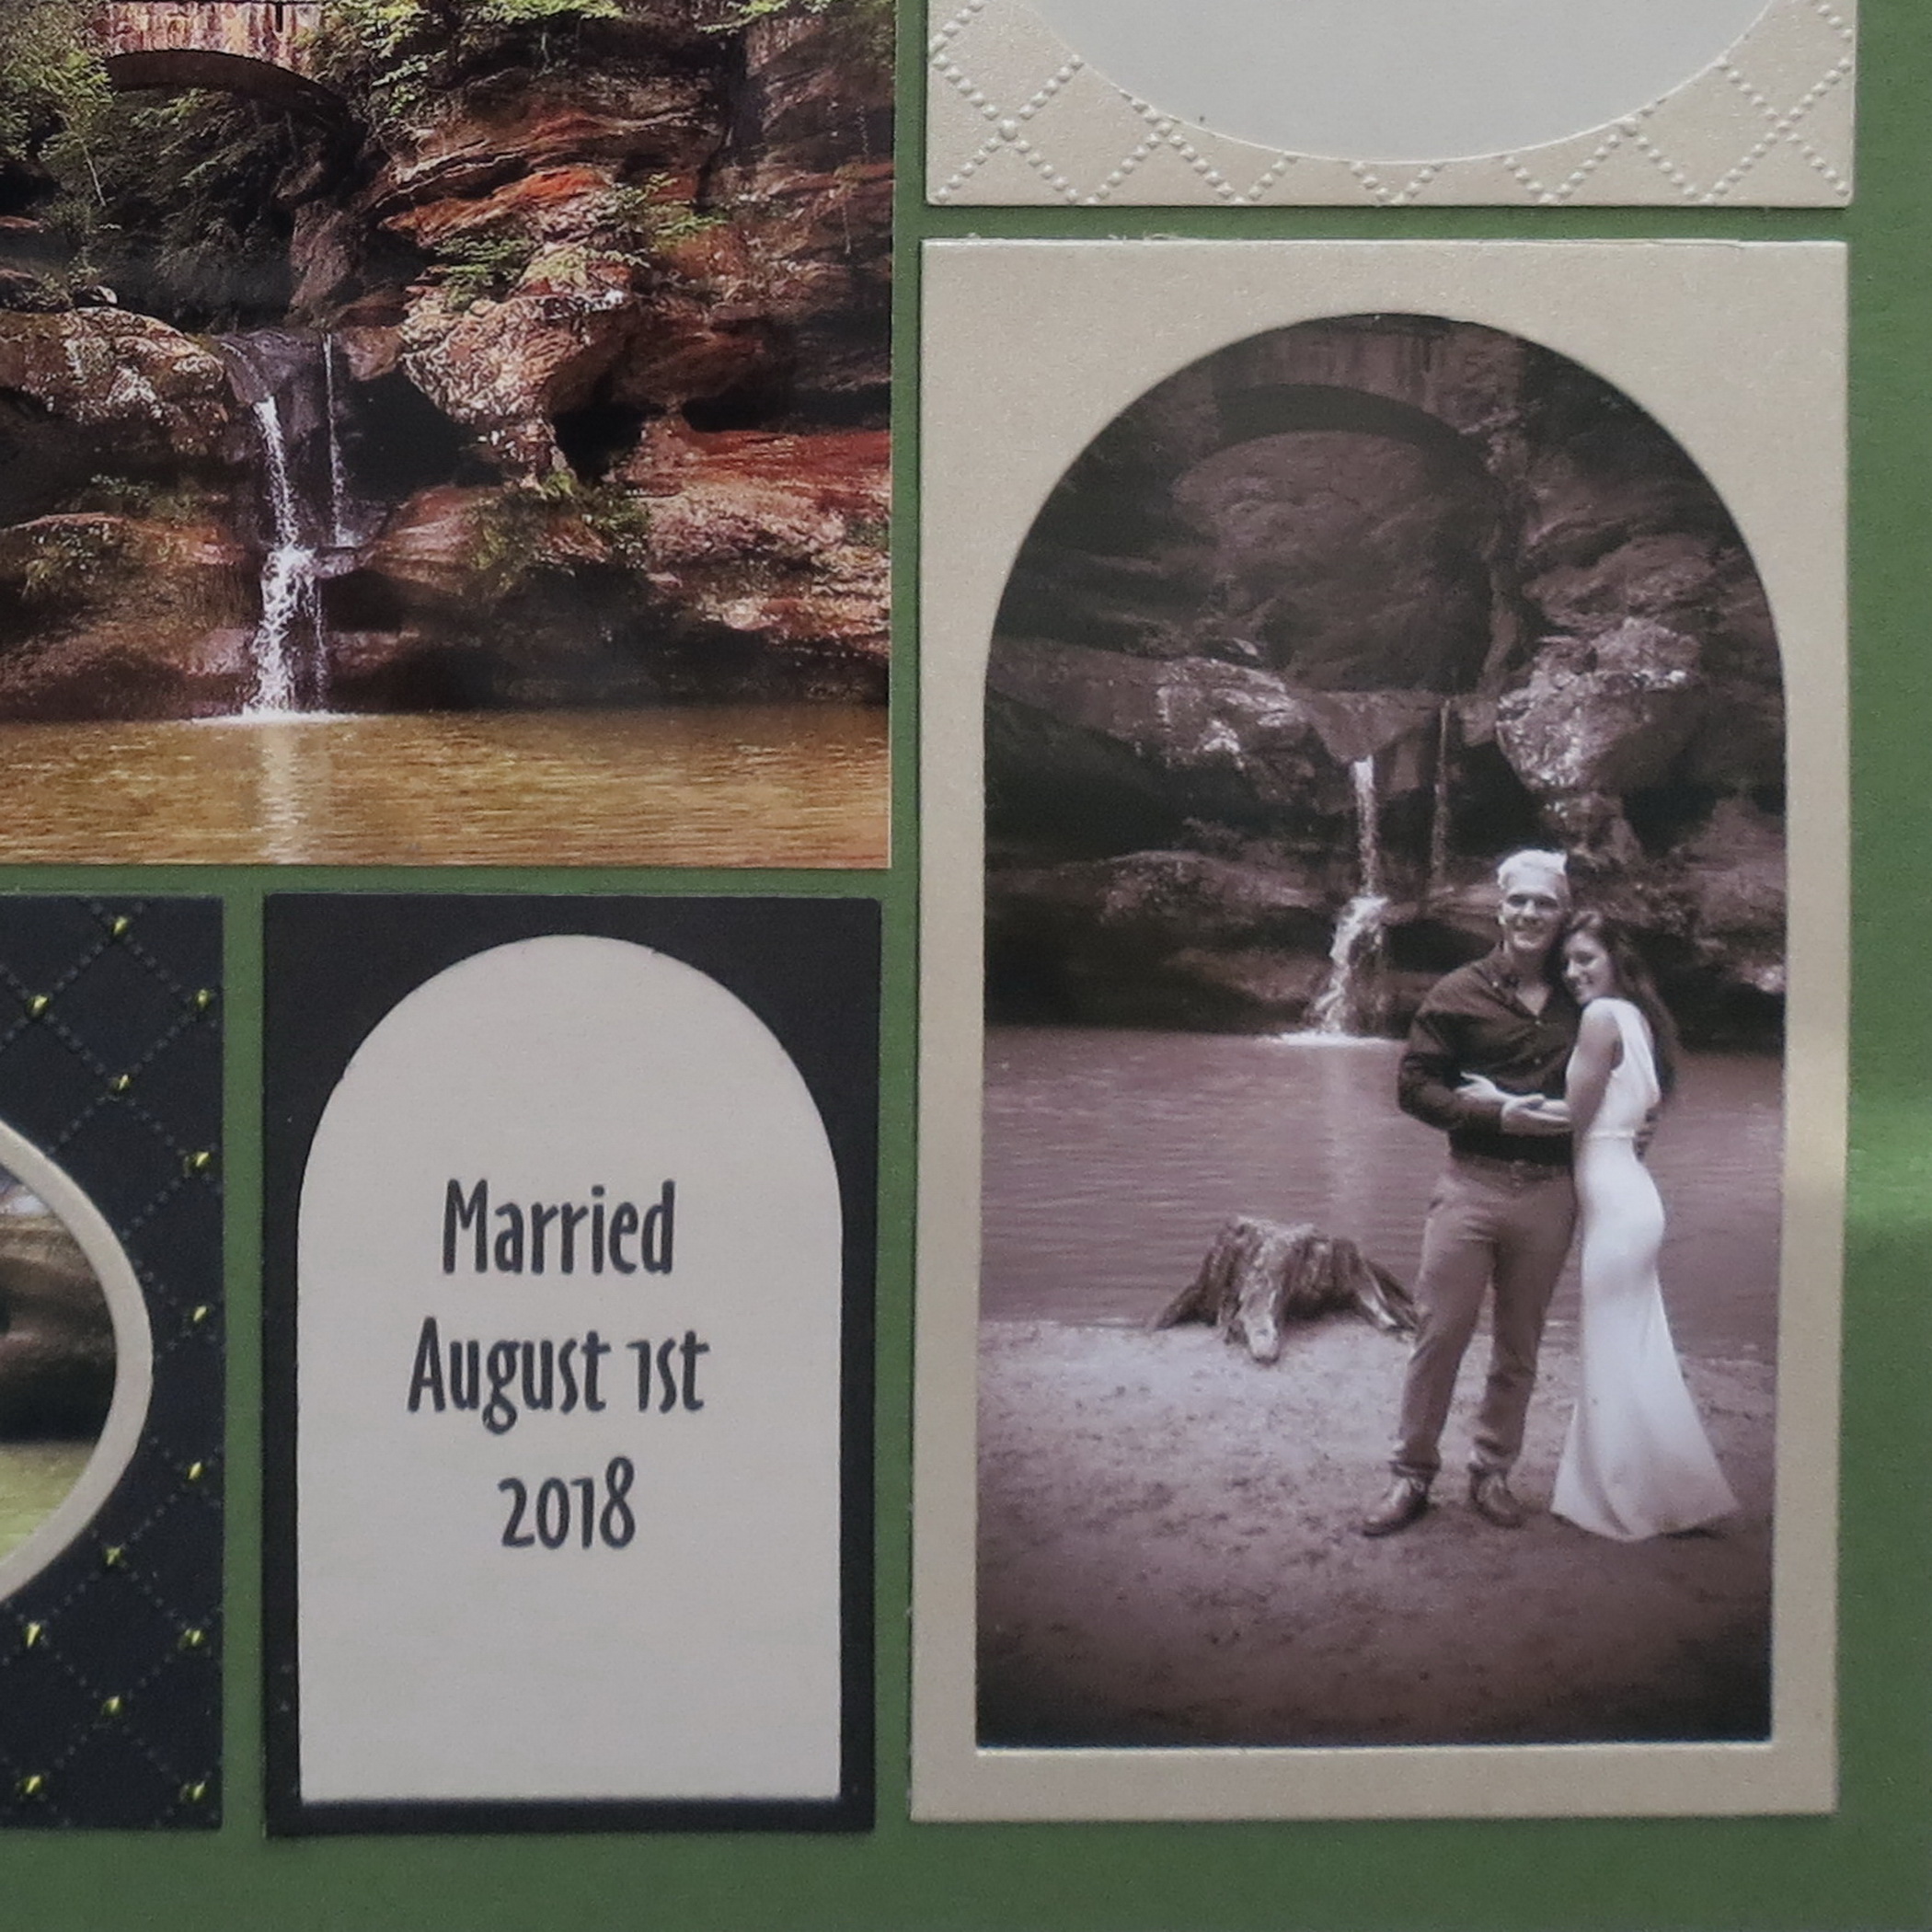
There was one photo taken that was already turned into a black & white photo so turning an additional photo black & white and adding a vignette to both allowed them to match in this feature. The silver pearl arch makes a good way to show off the black & white photo.
Mosaic Moments Advanced Techniques: 3 Tips for Creating an Elegant Layout featuring the New Arches Die Set
In the first photo taken during the ceremony, the couple is centered with the falls still partially visible in the background.
Mosaic Moments Advanced Techniques: 3 Tips for Creating an Elegant Layout featuring the New Arches Die Set
Then the second photo taken following the service has the falls and the arch of the bridge in the curve of the arch.
There are so many specialty papers available that you could try out for any special occasion. Birthdays could use Glitter paper; many new burlap papers will enhance your rustic or farmhouse style pages, and even real denim adhesive backed papers can enhance your layouts. They may not be your everyday papers, but they will bring a great deal to your layouts that are worth a bit more.
AT #2 Embossing
For the two horizontal 3×5’s, I’ve cut the oval frames in black cardstock and again in the pearl paper reserving the inner oval lining to replace the black one. Then using a quilted embossing folder on each frame for a simple textured pattern I’ve elevated the frame just a bit.
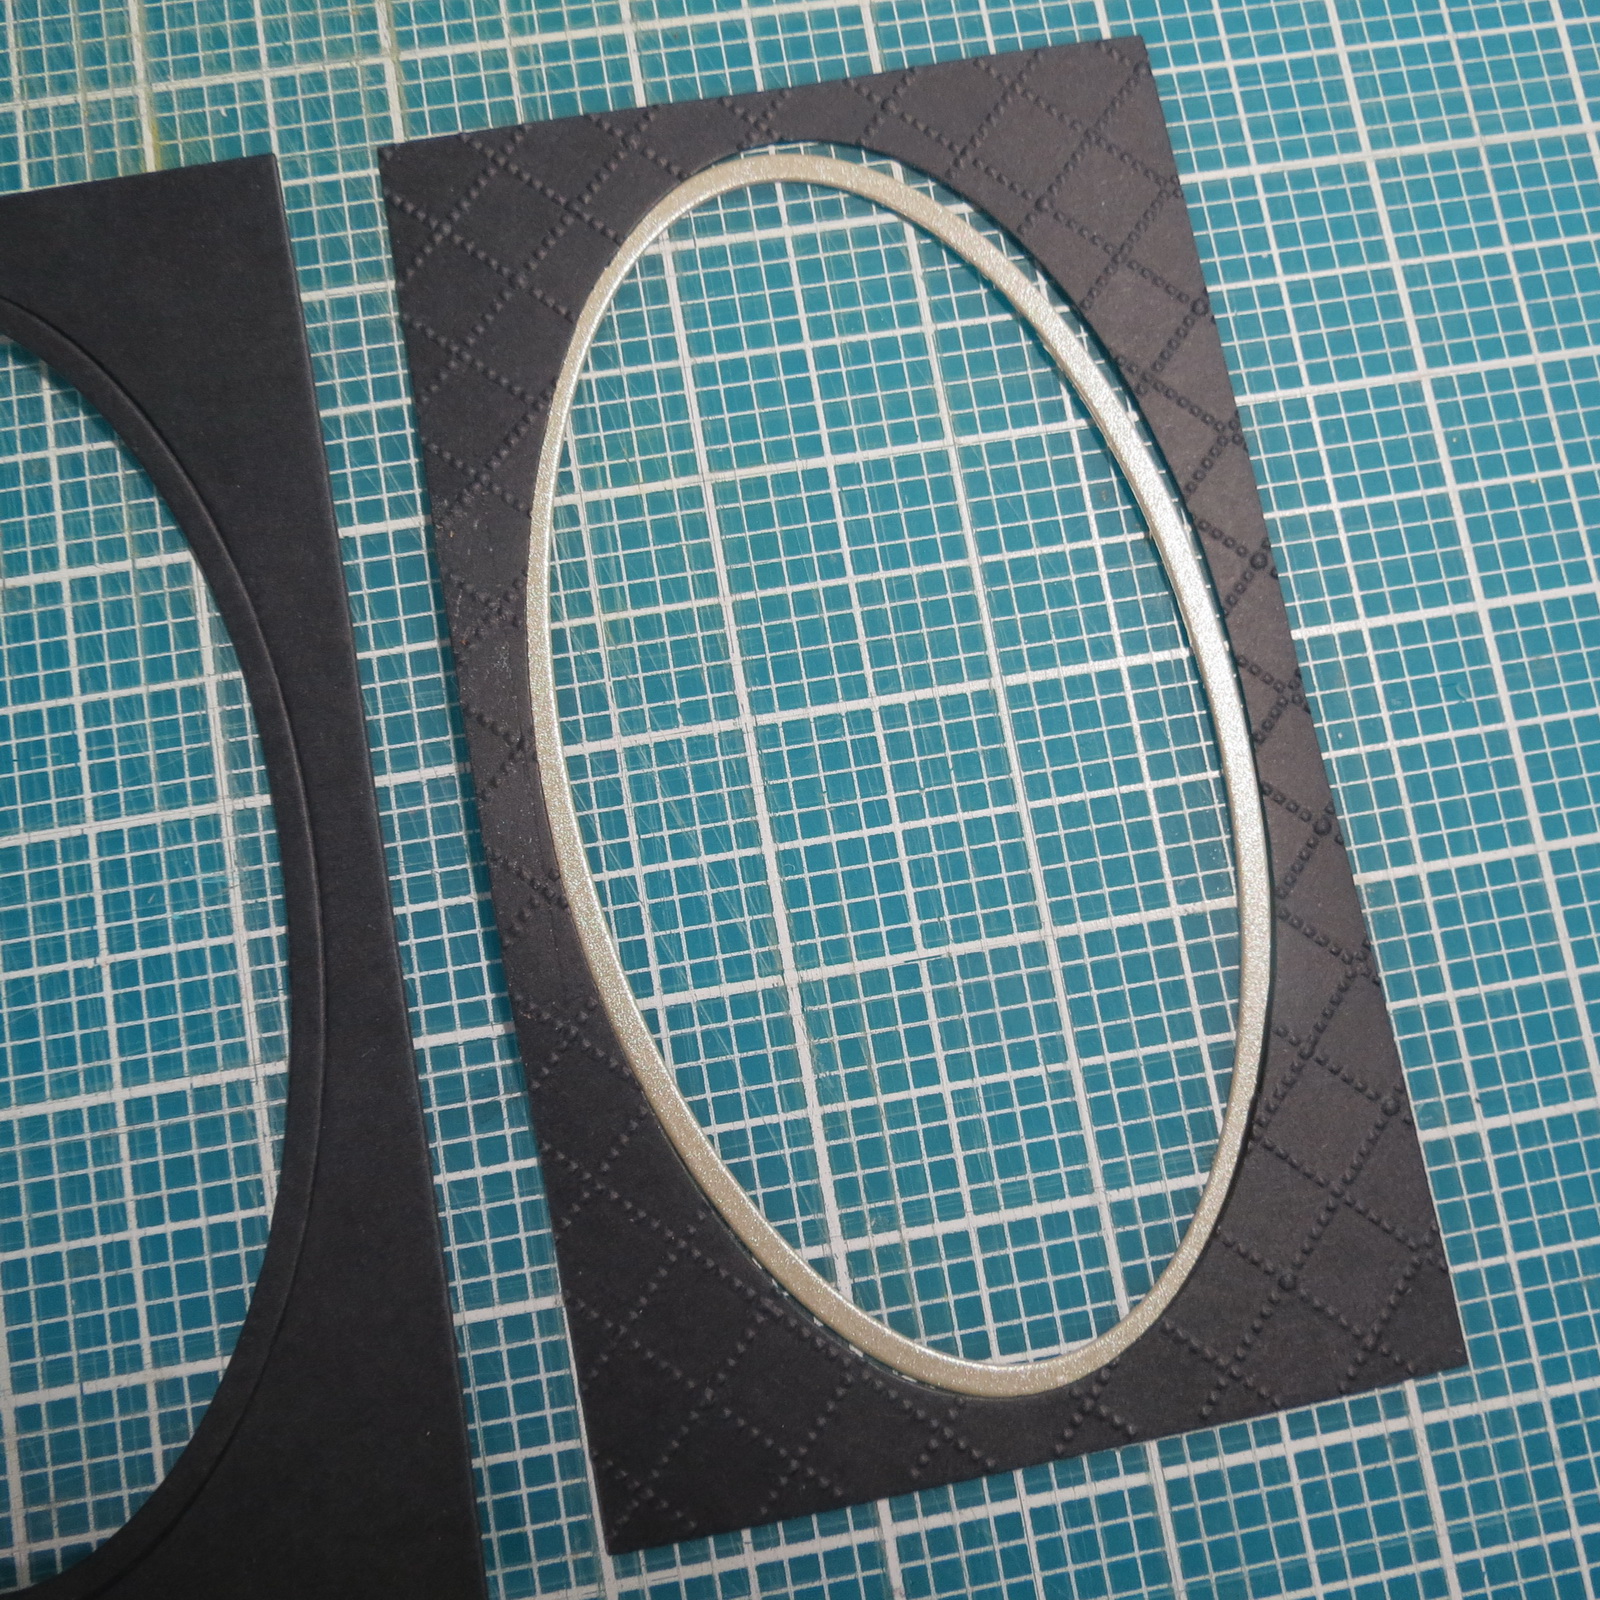
Mosaic Moments Advanced Techniques: 3 Tips for Creating an Elegant Layout: Oval Die Frame plain and embossed, with Pearl Paper inner border
I love how the smaller 2×3 oval embossed adds a simple elegance to the layout.
Mosaic Moments Advanced Techniques: 3 Tips for Creating an Elegant Layout AT#1 Pearl Paper Embossed
Embossing isn’t just for your frames, all those smaller 1×2 spots up to a full-sized grid spot can benefit from the added texture and tone on tone details you get with embossing folders. They aren’t just for cards!
AT #3 Adding Liquid Pearls
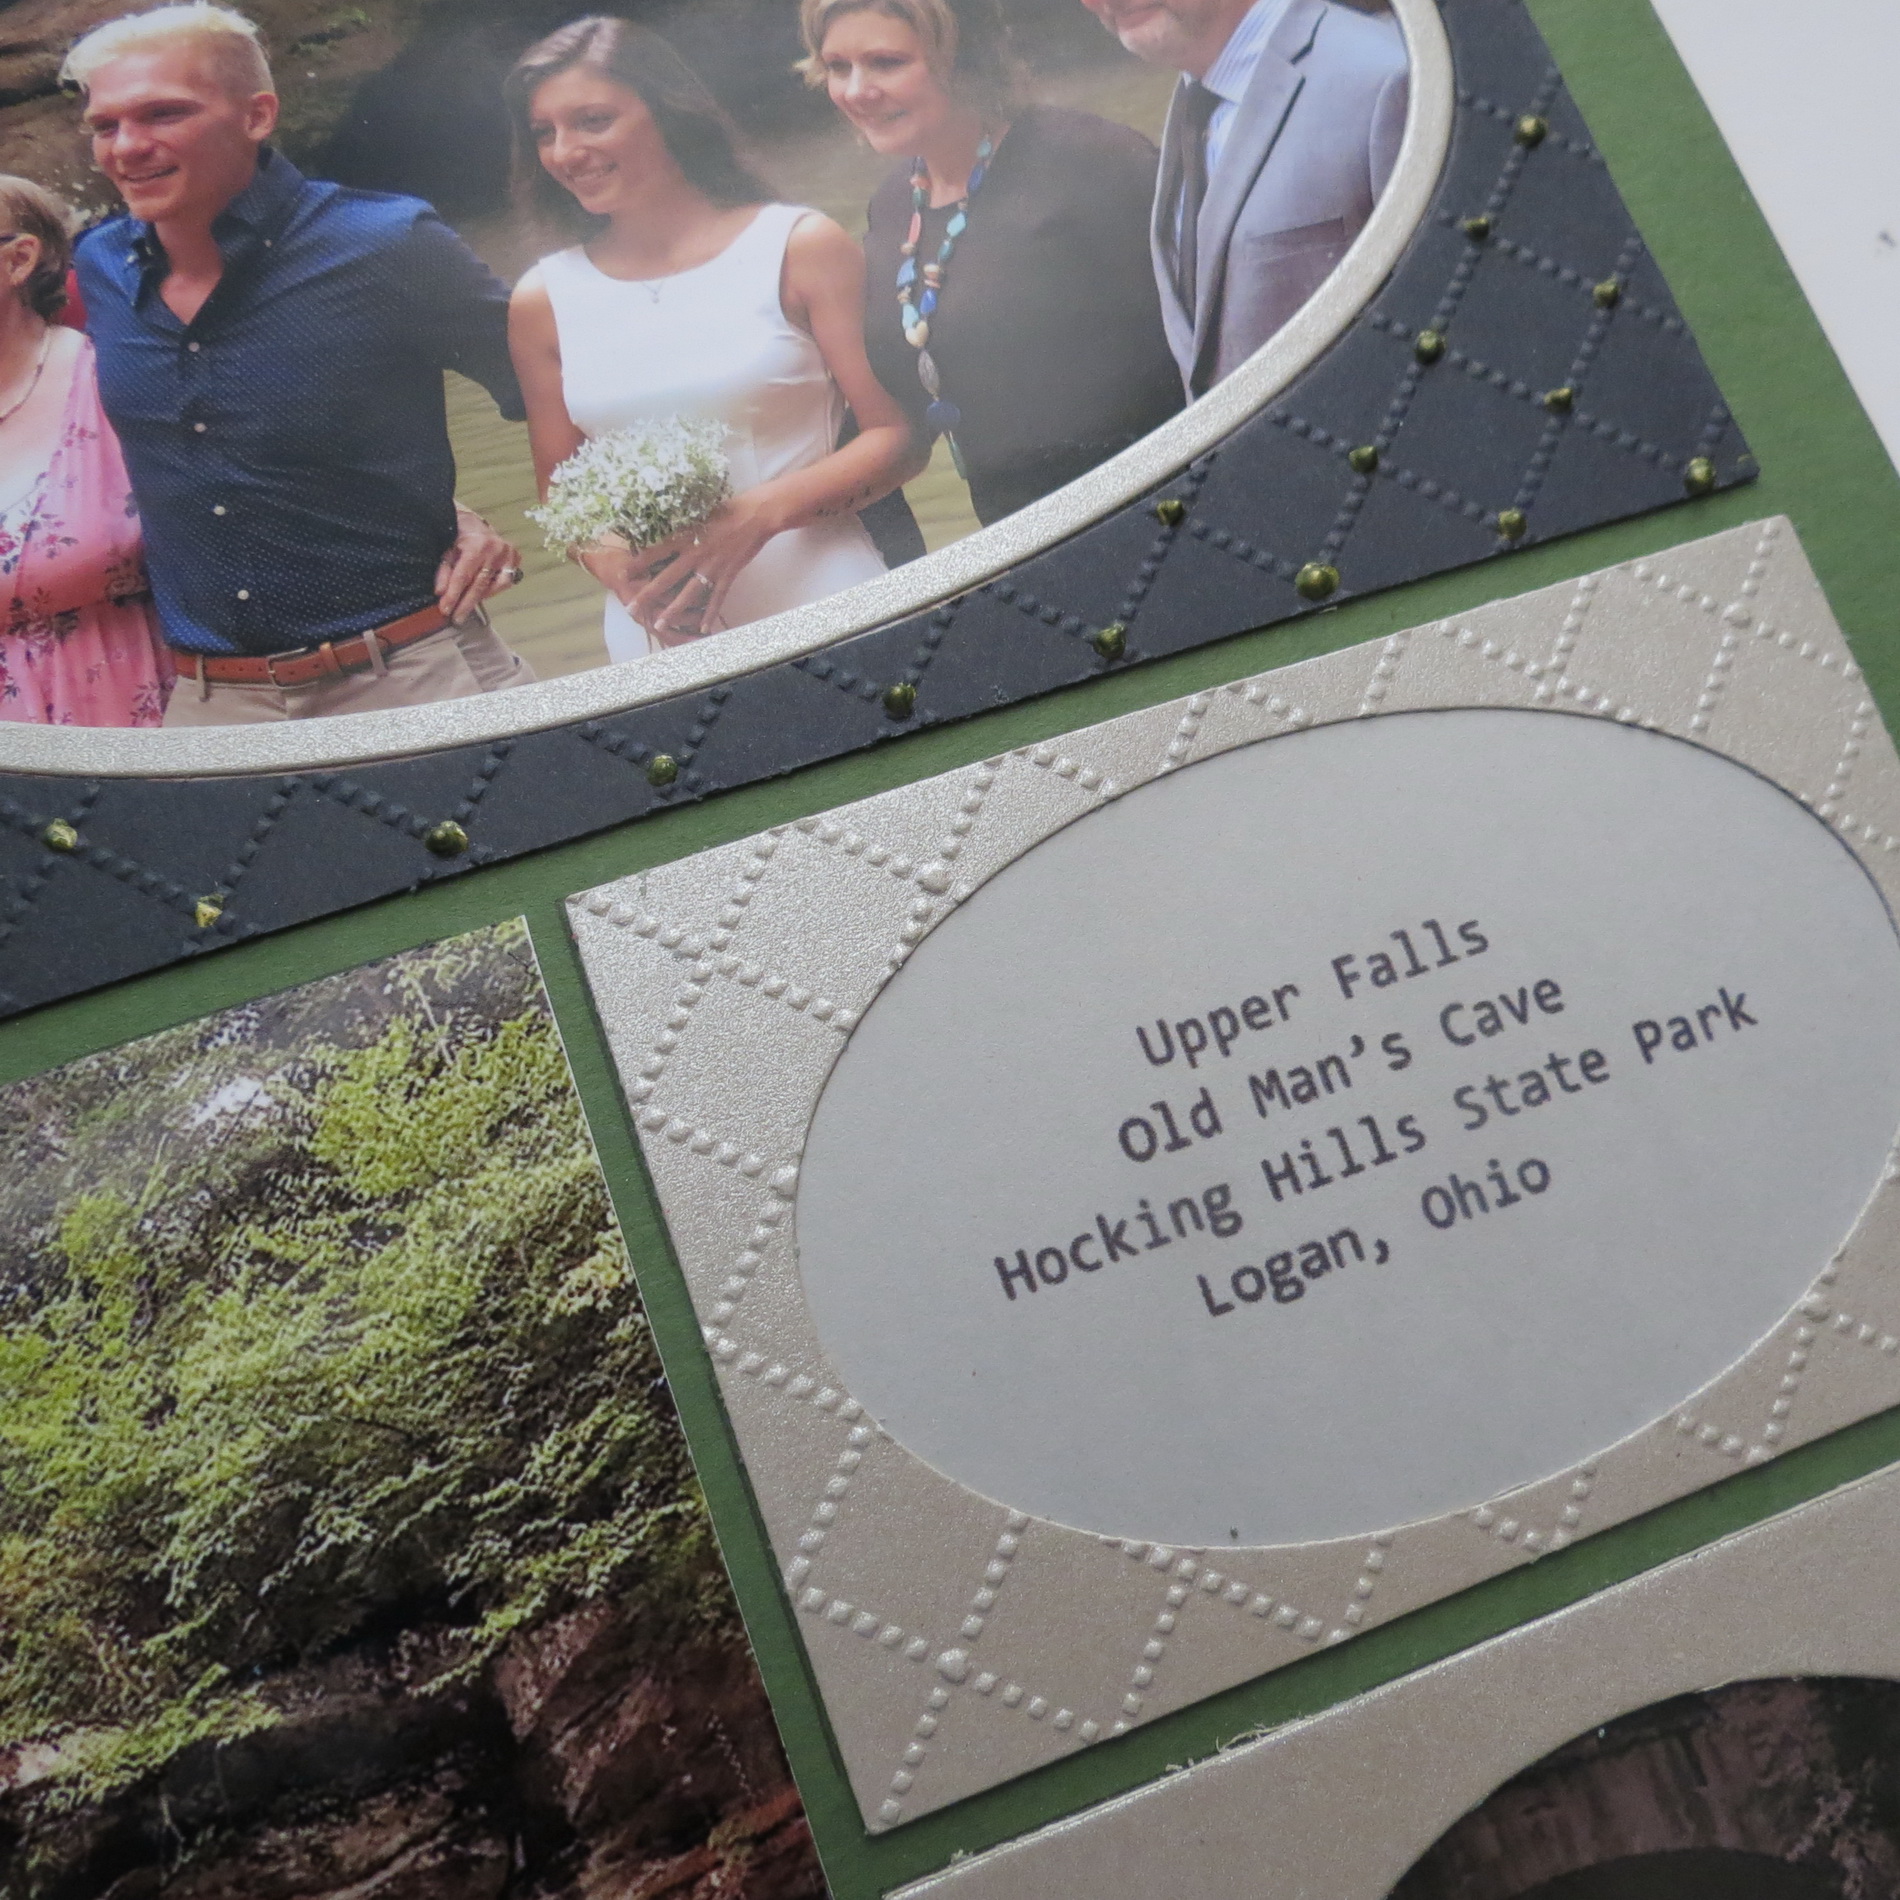
Liquid Pearls are an easy way to embellish and bring added texture, interest and color to whatever you are creating. Liquid Pearls dropped at the cross points of the quilted pattern do that. For these black frames I’ve used Avocado Liquid Pearls for adding a bit of understated shine.
Mosaic Moments Advanced Techniques: 3 Tips for Creating an Elegant Layout featuring the New Arches Die Set AT#2 Embossed and AT#3 Liquid Pearls added
Mosaic Moments Advanced Techniques: 3 Tips for Creating an Elegant Layout AT# 2 Embossed and #3 Liquid Pearls
I like adding Liquid Pearls in various spots on my layouts, but especially when using die cut flower clusters, in borders and in this case while embossing for drawing out the details of the pattern. They come in a multitude of colors and you get a lot of bang for your buck.
If you are looking for quick and easy ways to dress up your layouts or get an elegant look, you’ll find that these simple techniques will change how you finish some of your pages.
If you are looking for more wedding inspiration with embossing, ribbons and lace or burlap, wood with ribbons and lace check out these layouts:
Mosaic Moments Advanced Techniques: 3 Tips for Creating an Elegant Layout Wedding with embossing, lace, and ribbons
Mosaic Moments Elegant Wedding layout tips with burlap, wood with ribbons and lace
The Arch Die set will serve you well for adding unique focal points in any layout, and I love the new larger 3×5 Arch, it’s so versatile and I love how it frames out the photos, you’ll want to try it out too!
Andrea Fisher