
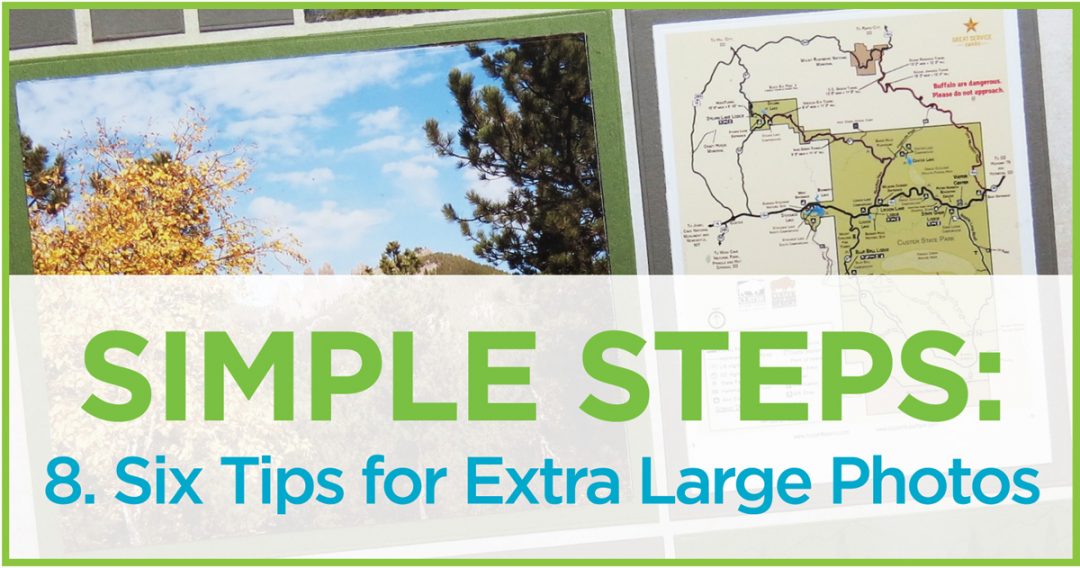
 The Basics: Six Tips for Mosaic Scrapbooking with the Basic Die Sets and Extra-Large Photos
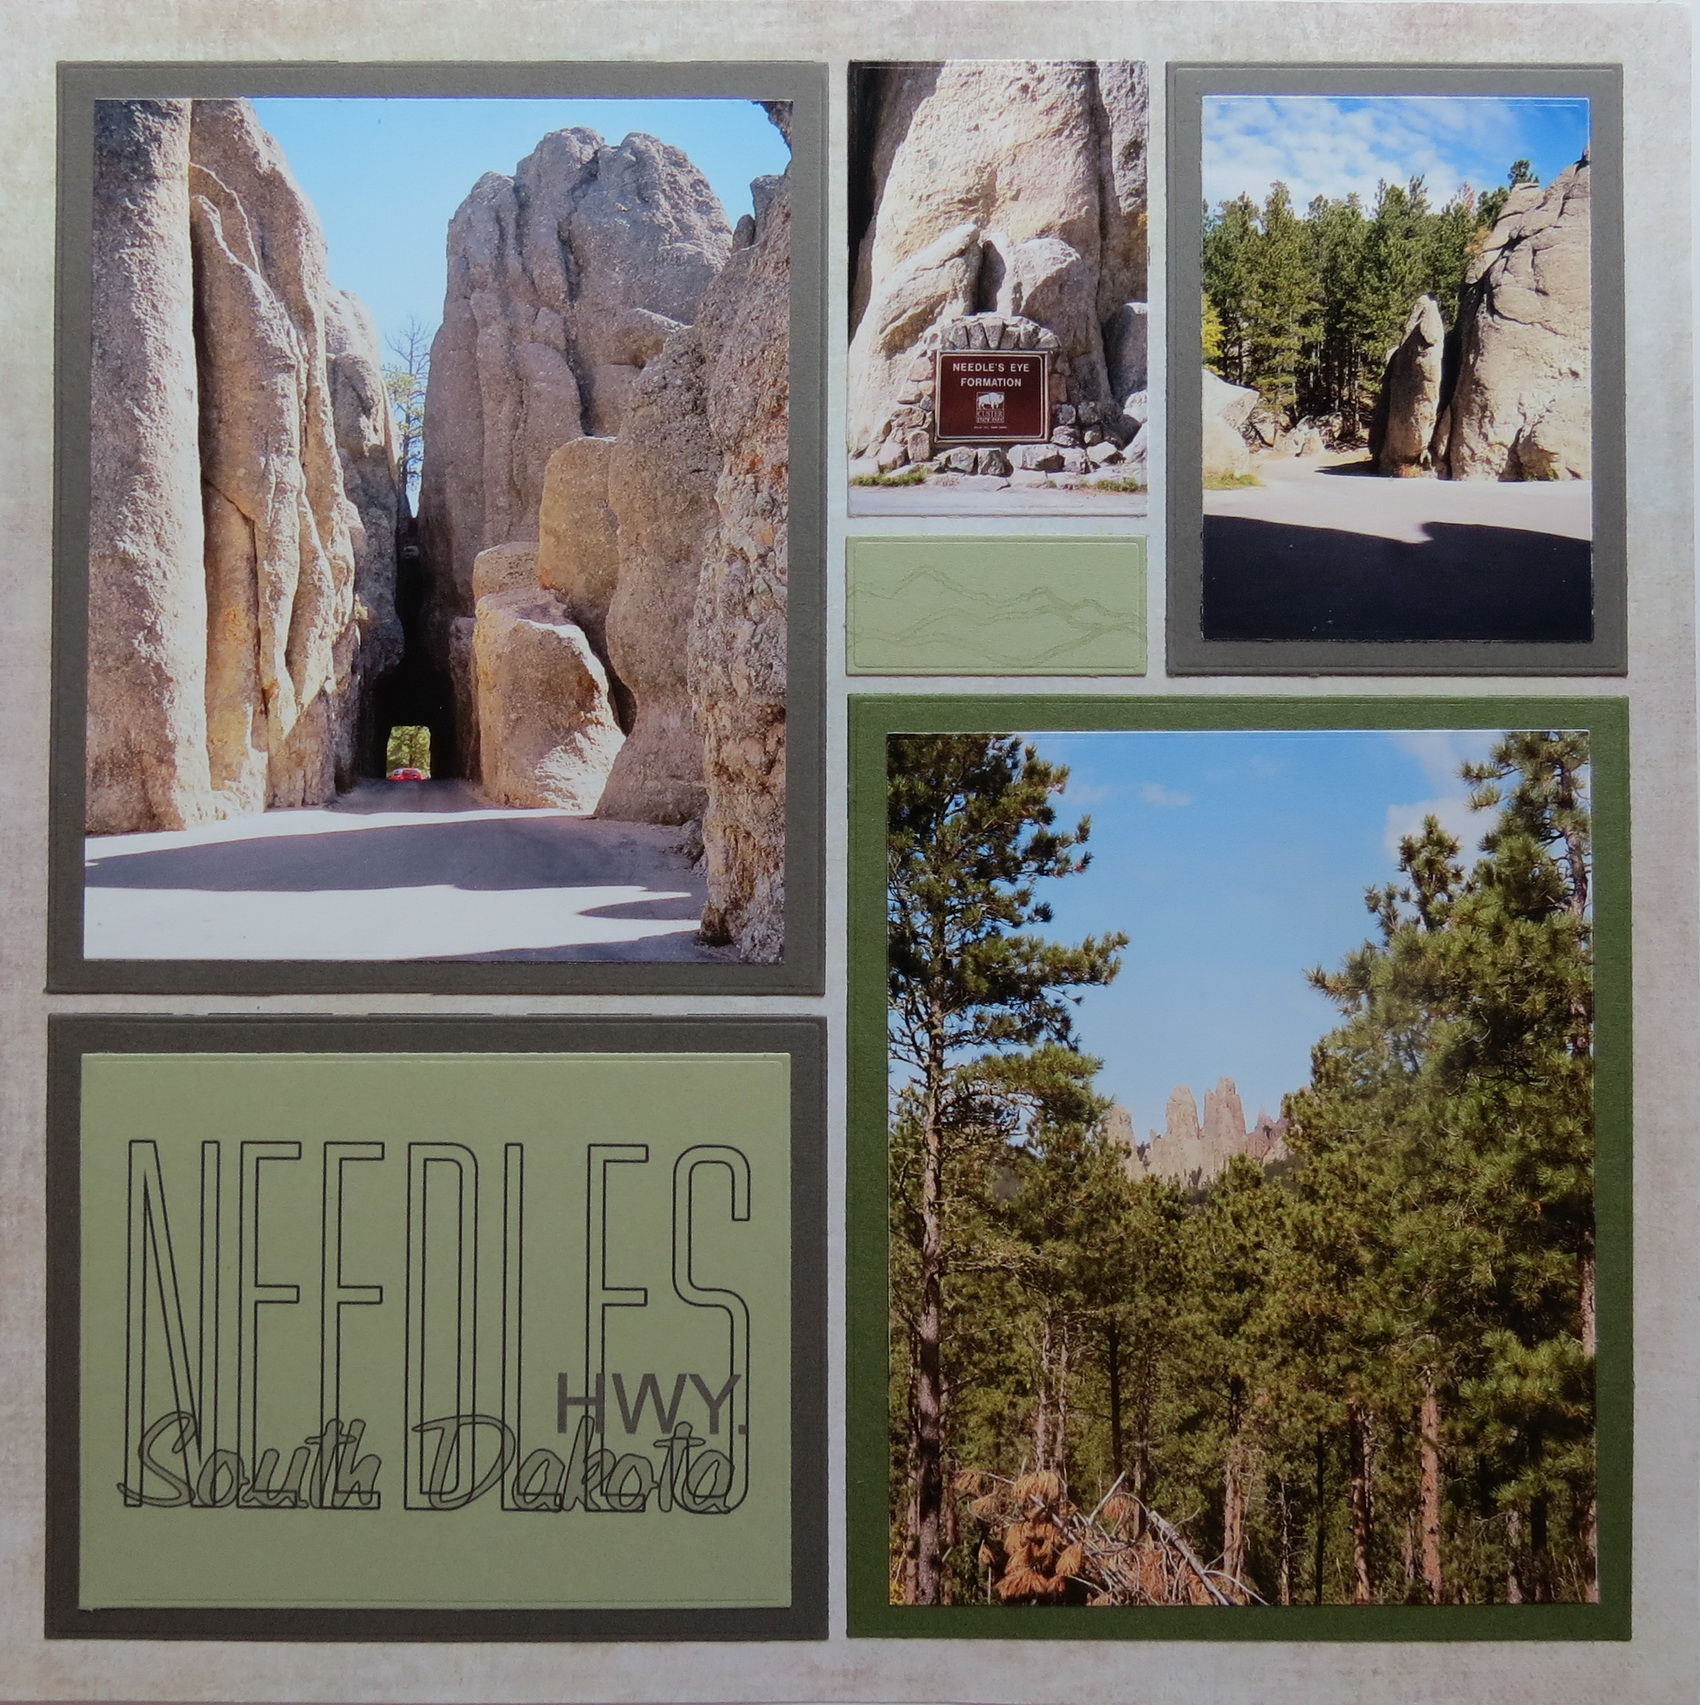
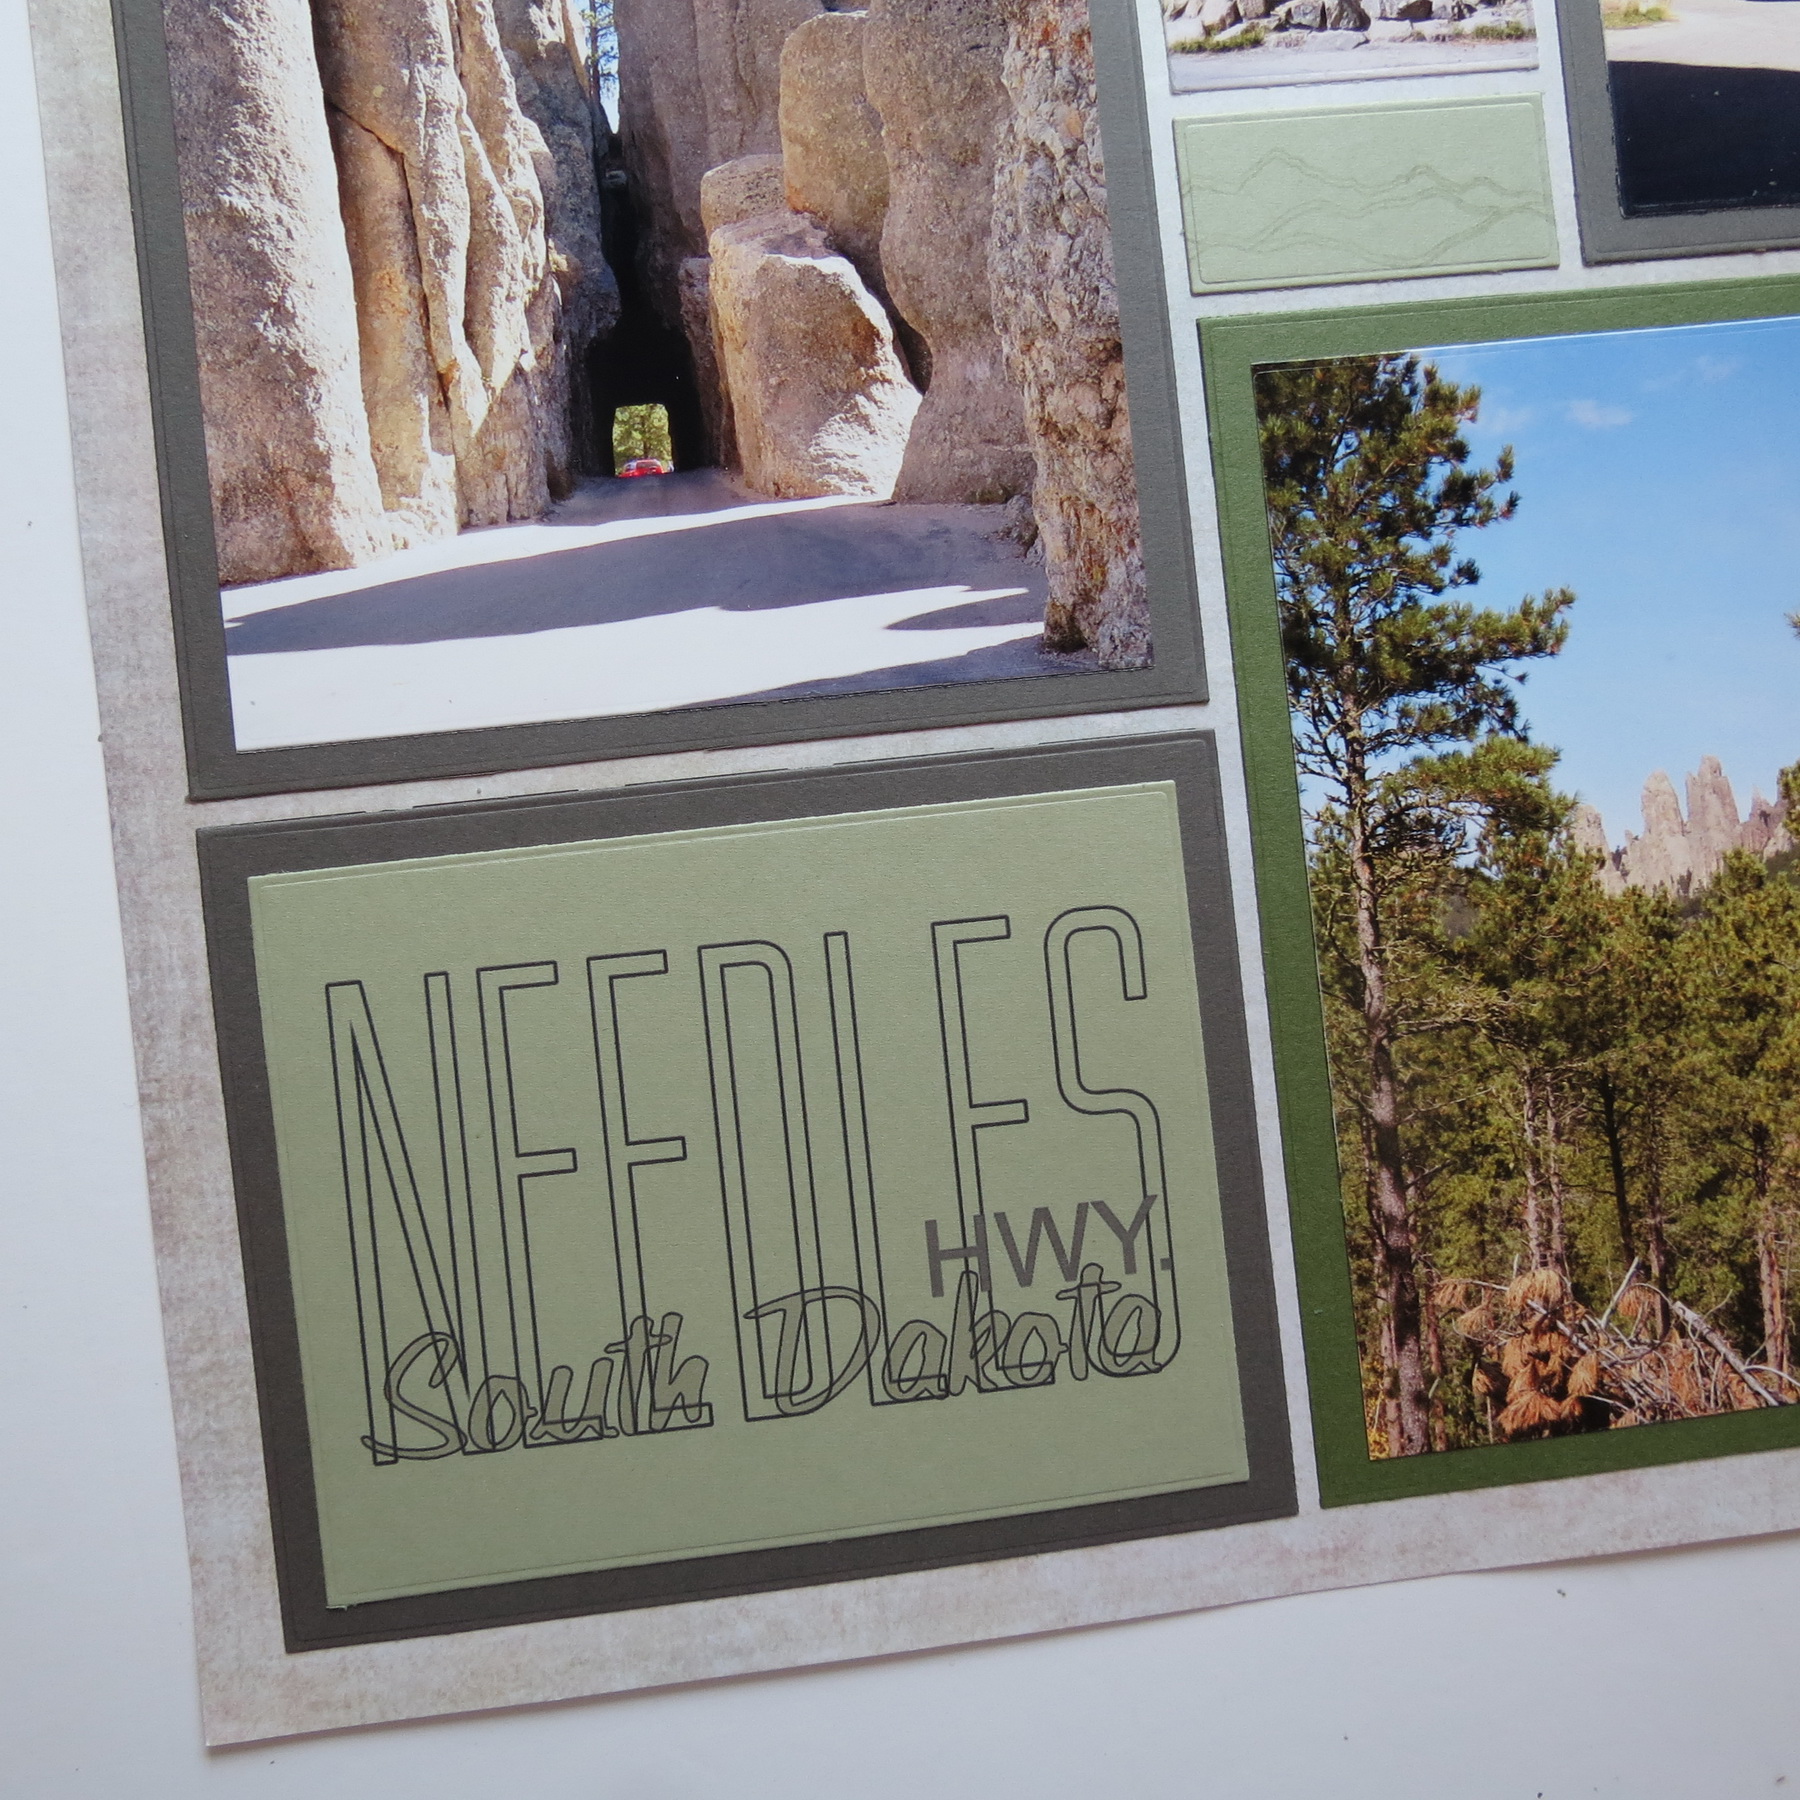
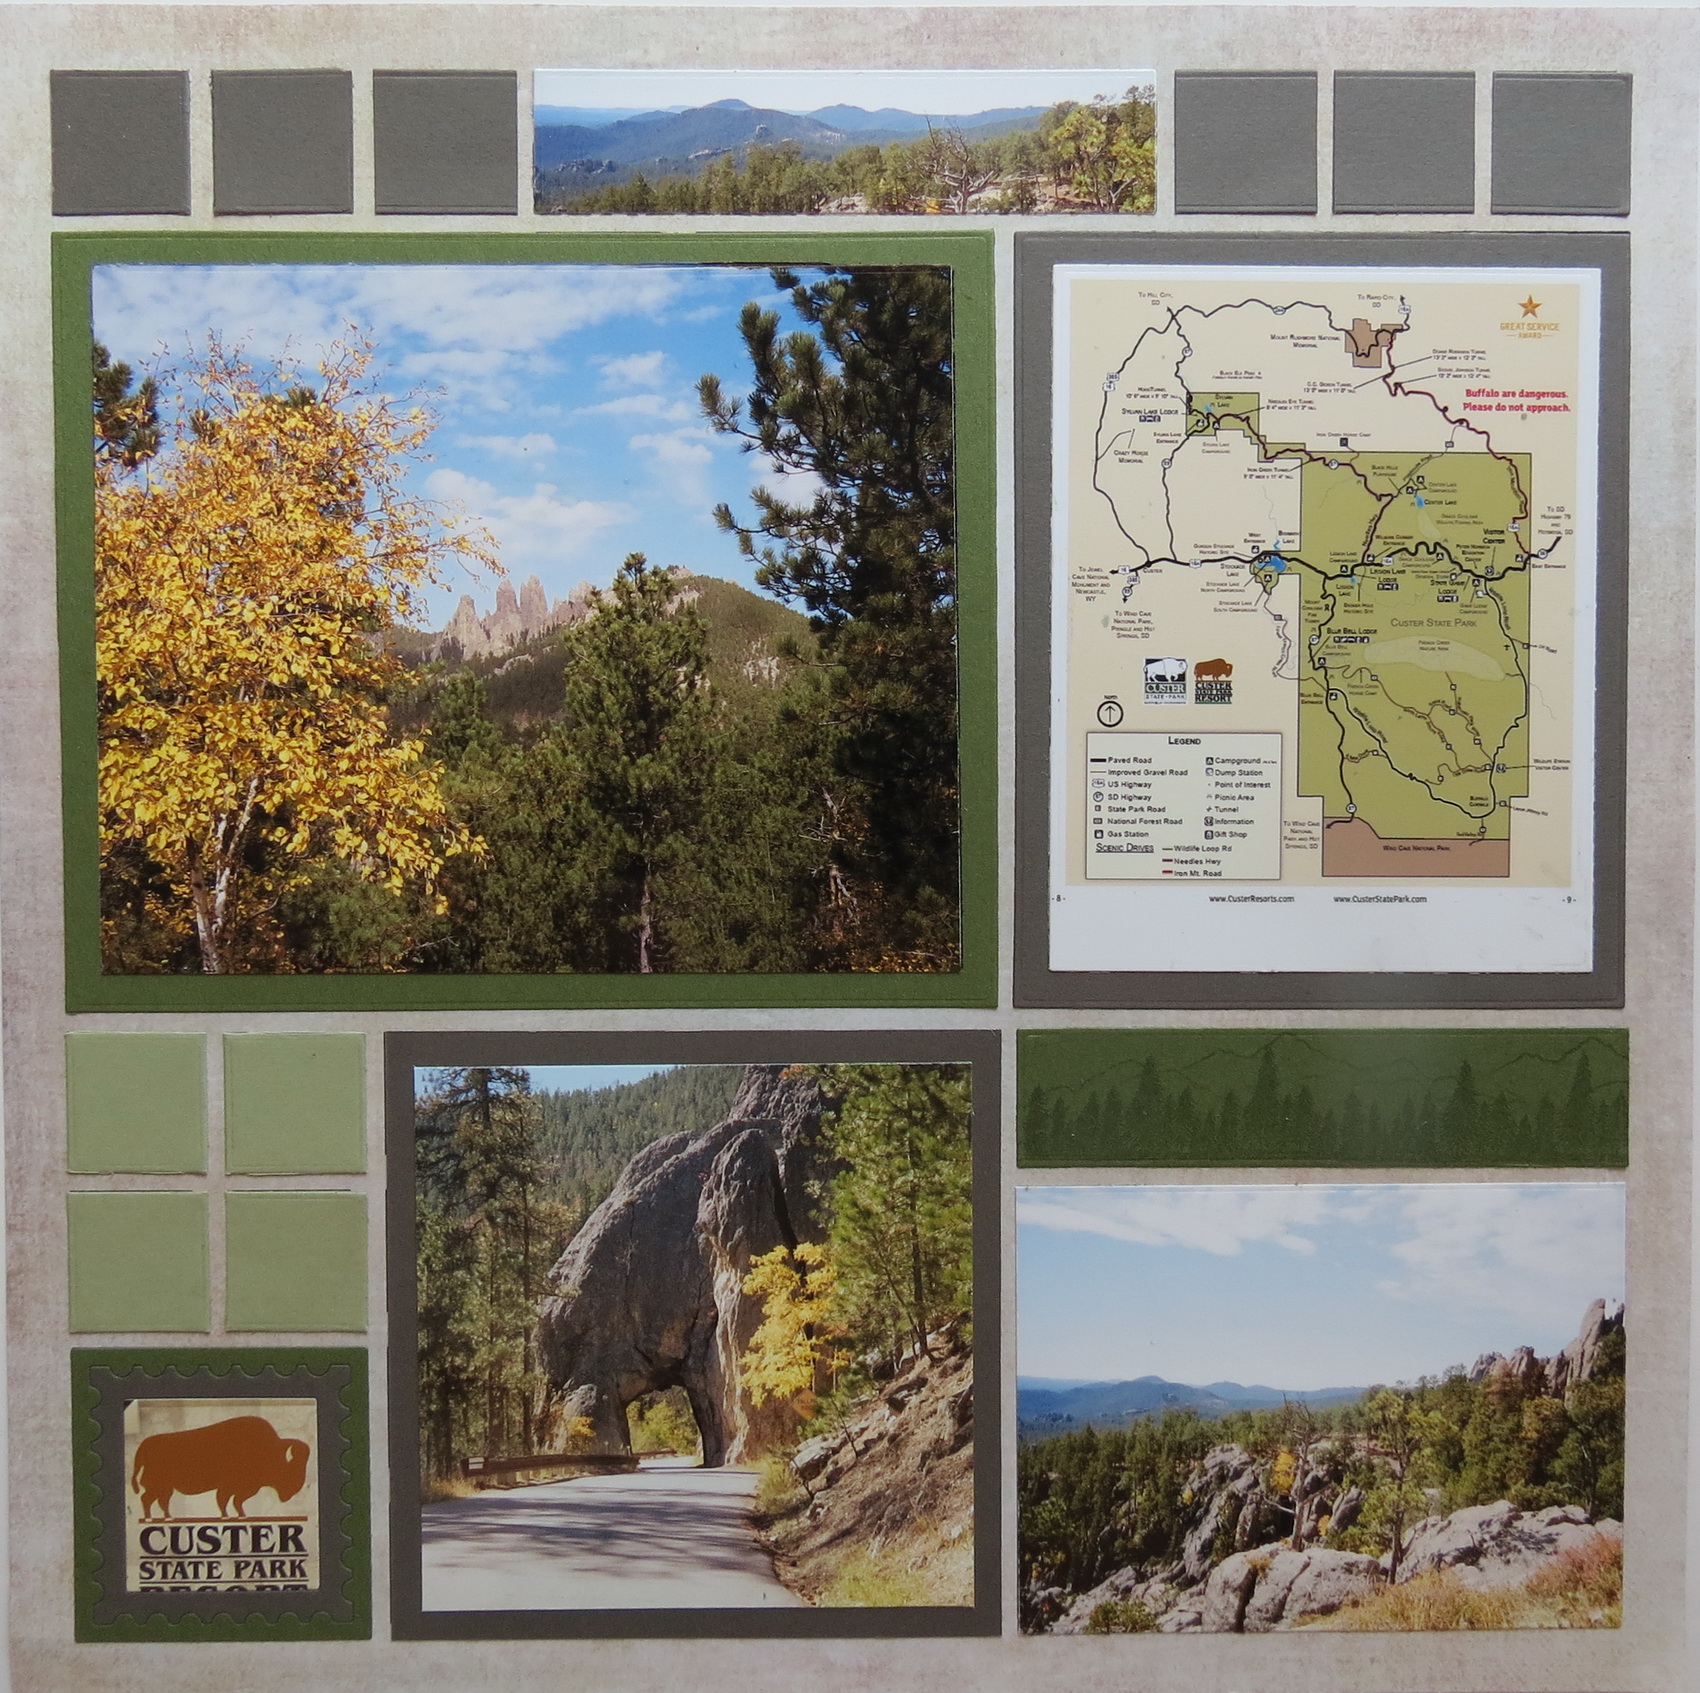
Needles Highway
Have you ever had a photo of a wonderful scene that somehow doesn’t quite capture that feeling of awe you had at the time you took it to when you see it printed in the 4×6 format? Maybe you need to try some extra-large photos and a layout that will help show them off.
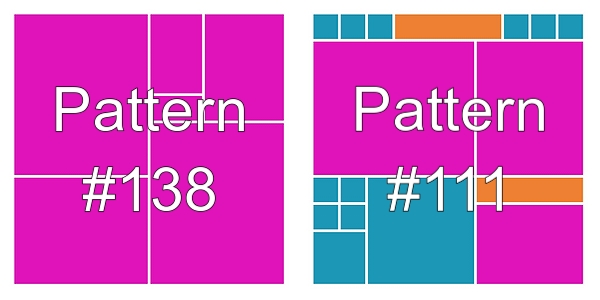
Mosaic Moments Patterns # 138 & #111
I wanted to use one set of dies for this week’s layout so I began searching for a pattern to use with a single die set. In the end I chose two patterns, #138 that fit the bill for all one die set, Set C, and then the second Pattern #111 that also uses the Die Set C with a large photo spot, but it also had a few squares and strips to fill, it’s a good pairing.
Here’s what I’ve done in Six Tips:
1. Fonts – Large title
2. Maps
3. Colors
4. Extra-Large photos – Cropping Photos – Using the Quick Glance Guide – Rule of Thirds
5. Brochures
6. Add Stamped Elements
These large oversized 5×6 blocks gave me the opportunity to do a few things. I could do a large title block or feature some of those dramatic shots that just never seem to do justice to the places I’ve visited. They could really shine here. Sometimes, you do have to Go Big to achieve that!

Mosaic Moments Simple Steps: The Basics 101.08: The Basics, Six Tips and Extra-Large Photos
Mosaic Moments Simple Steps: The Basics 101.08: The Basics, Six Tips and Extra-Large Photos
The Basics, Six Tips, and Extra-Large Photos: TIP ONE: Fonts
TIP ONE: Fonts
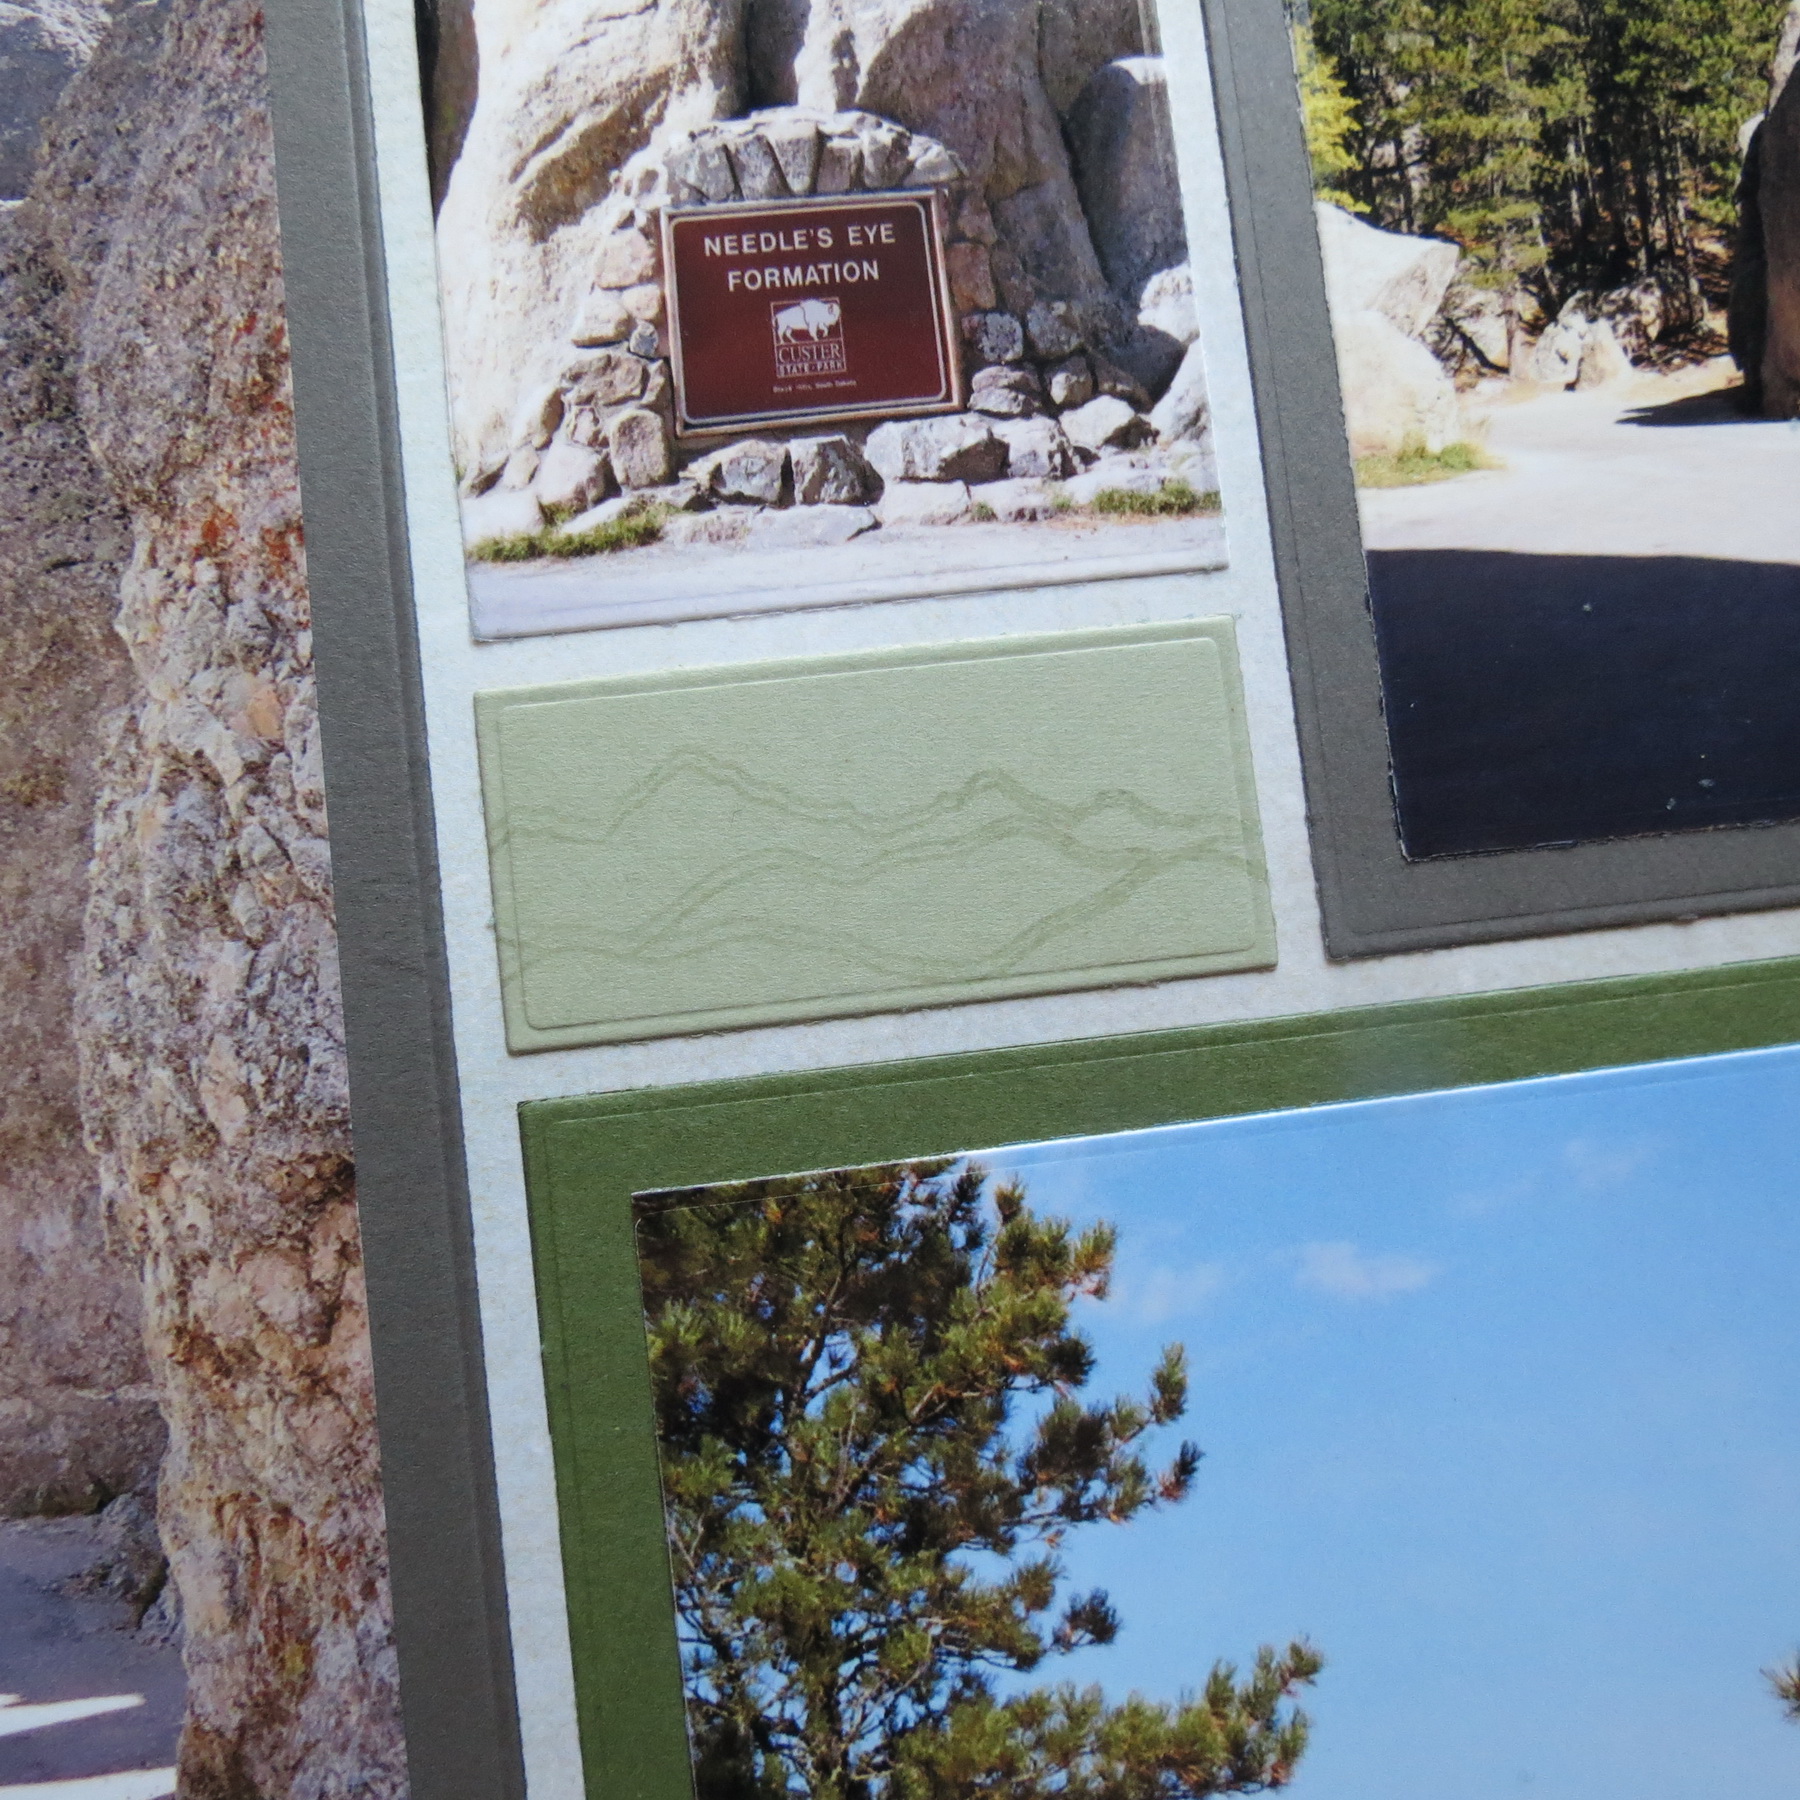
I’ve also included a large, but not oversized, title. I searched for a font that would mimic the tall rock formations along the Needles Highway. The font I chose was Gorgio, a tall narrow font that reminds me of those tall rock formations. “South Dakota” is done in Paintstroke and “HWY.” was Arial.
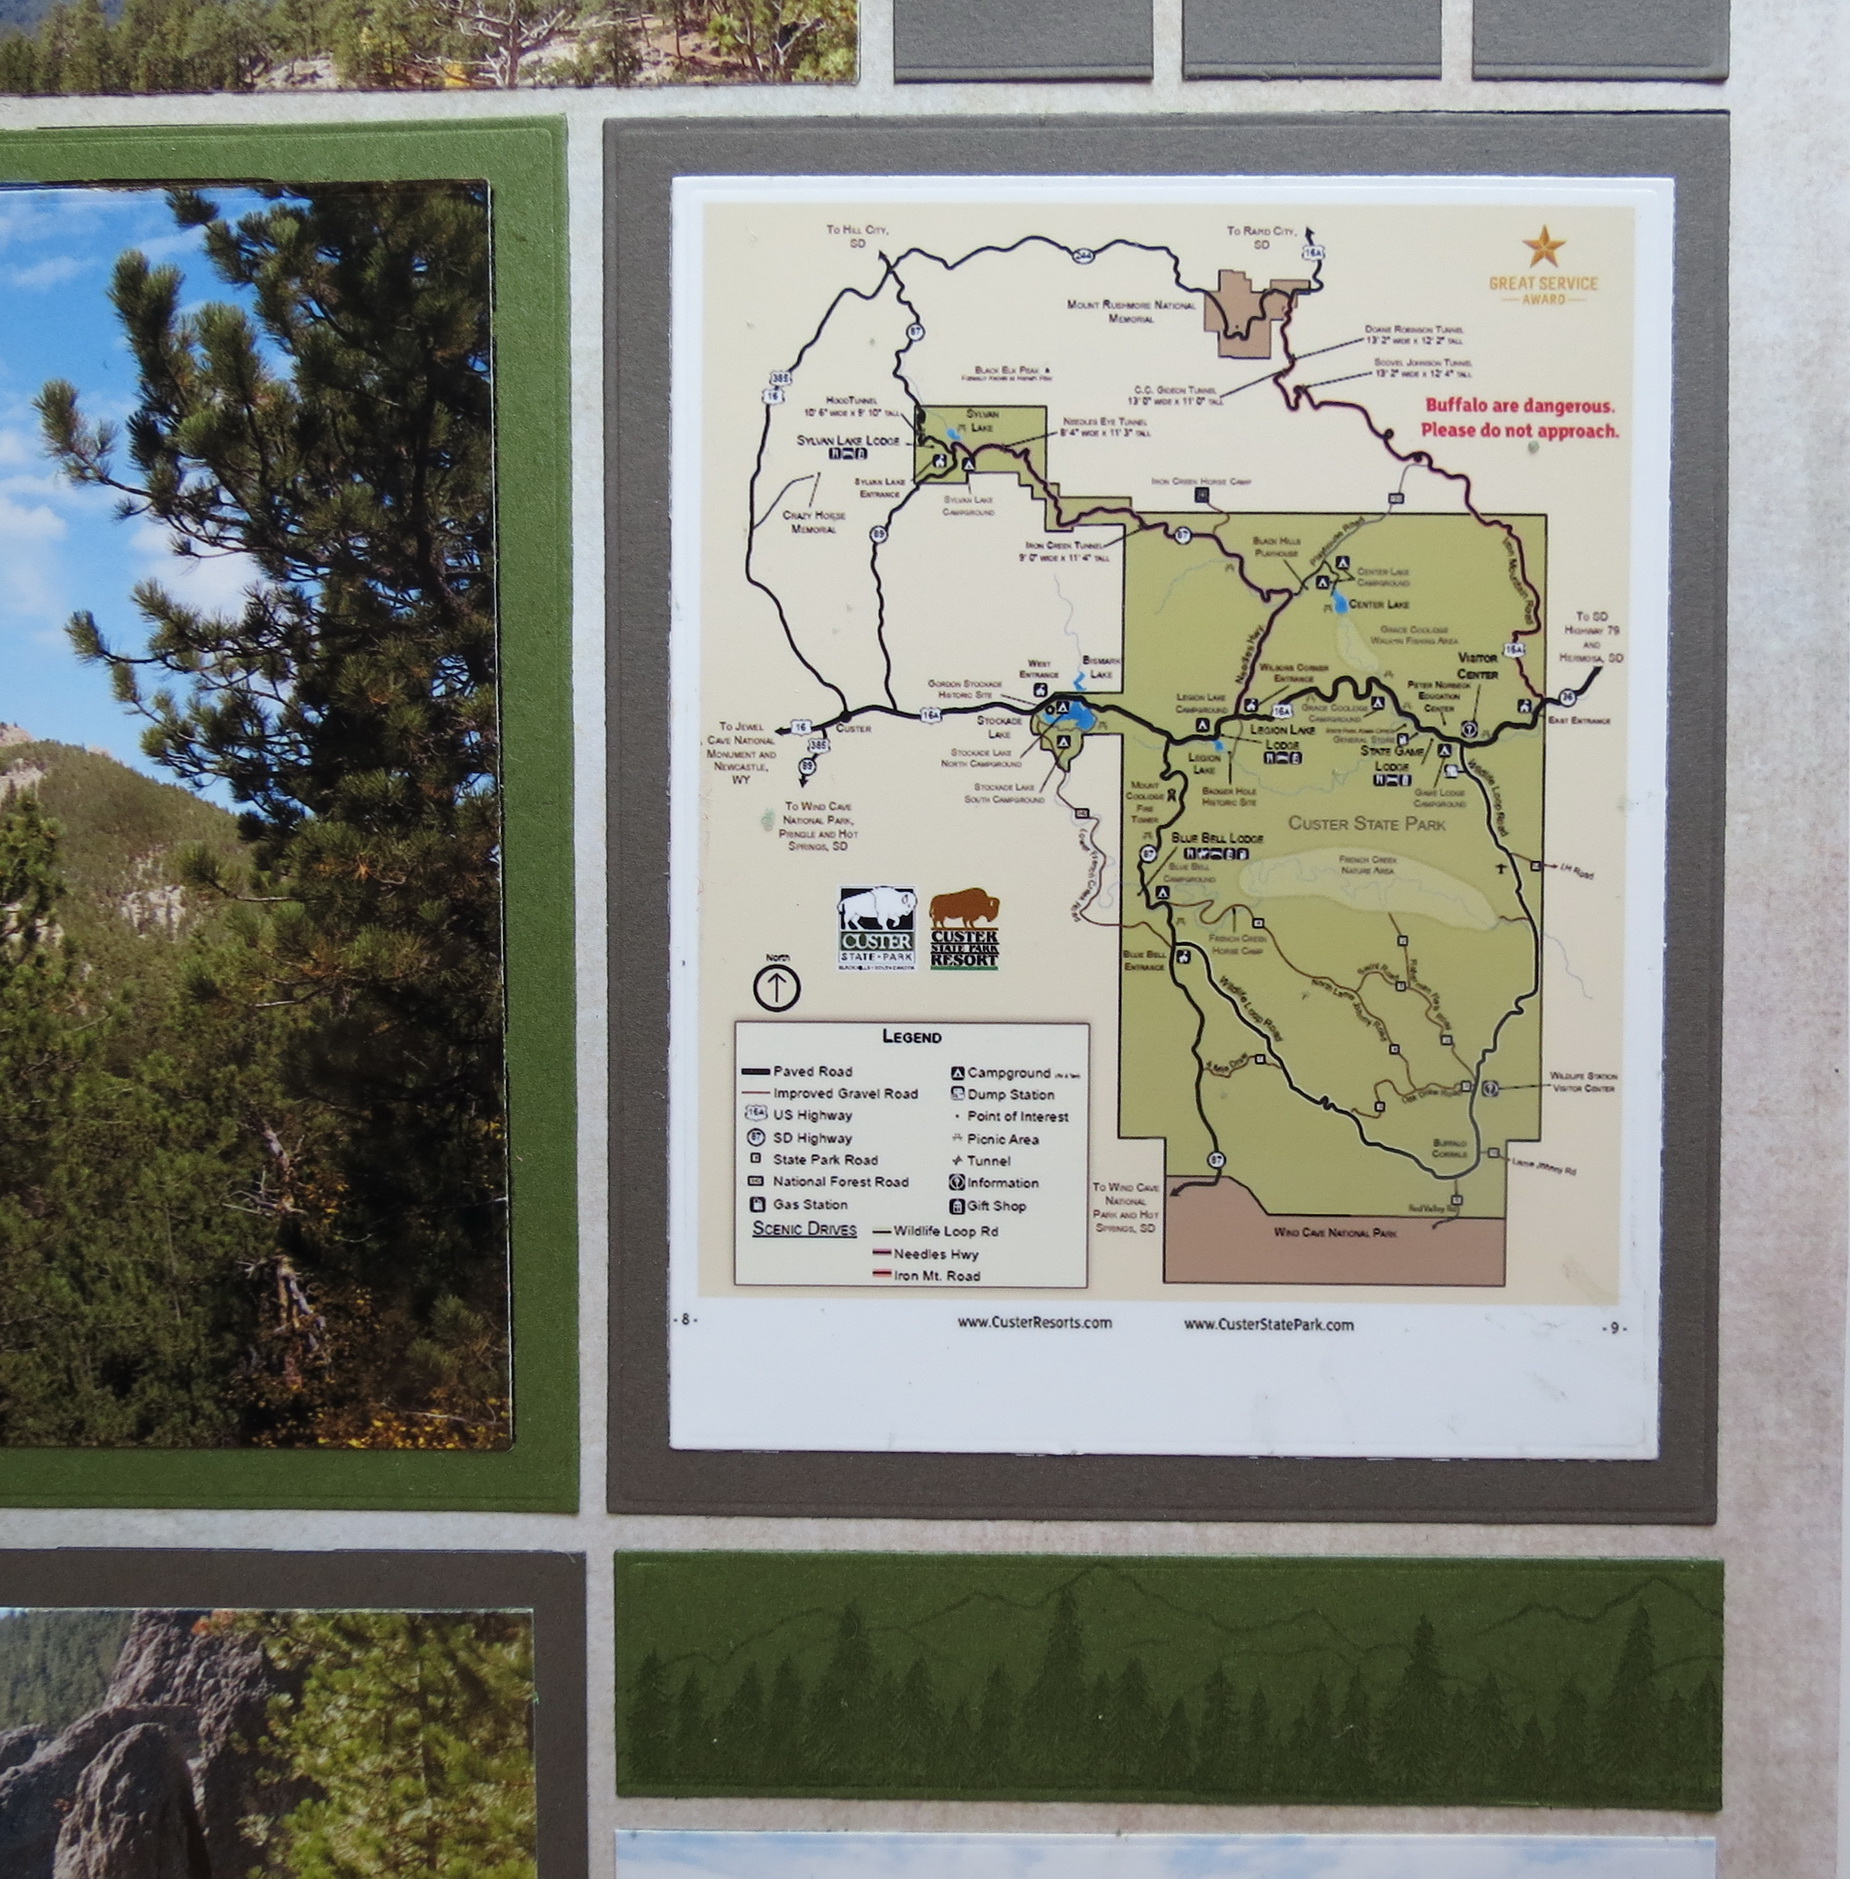
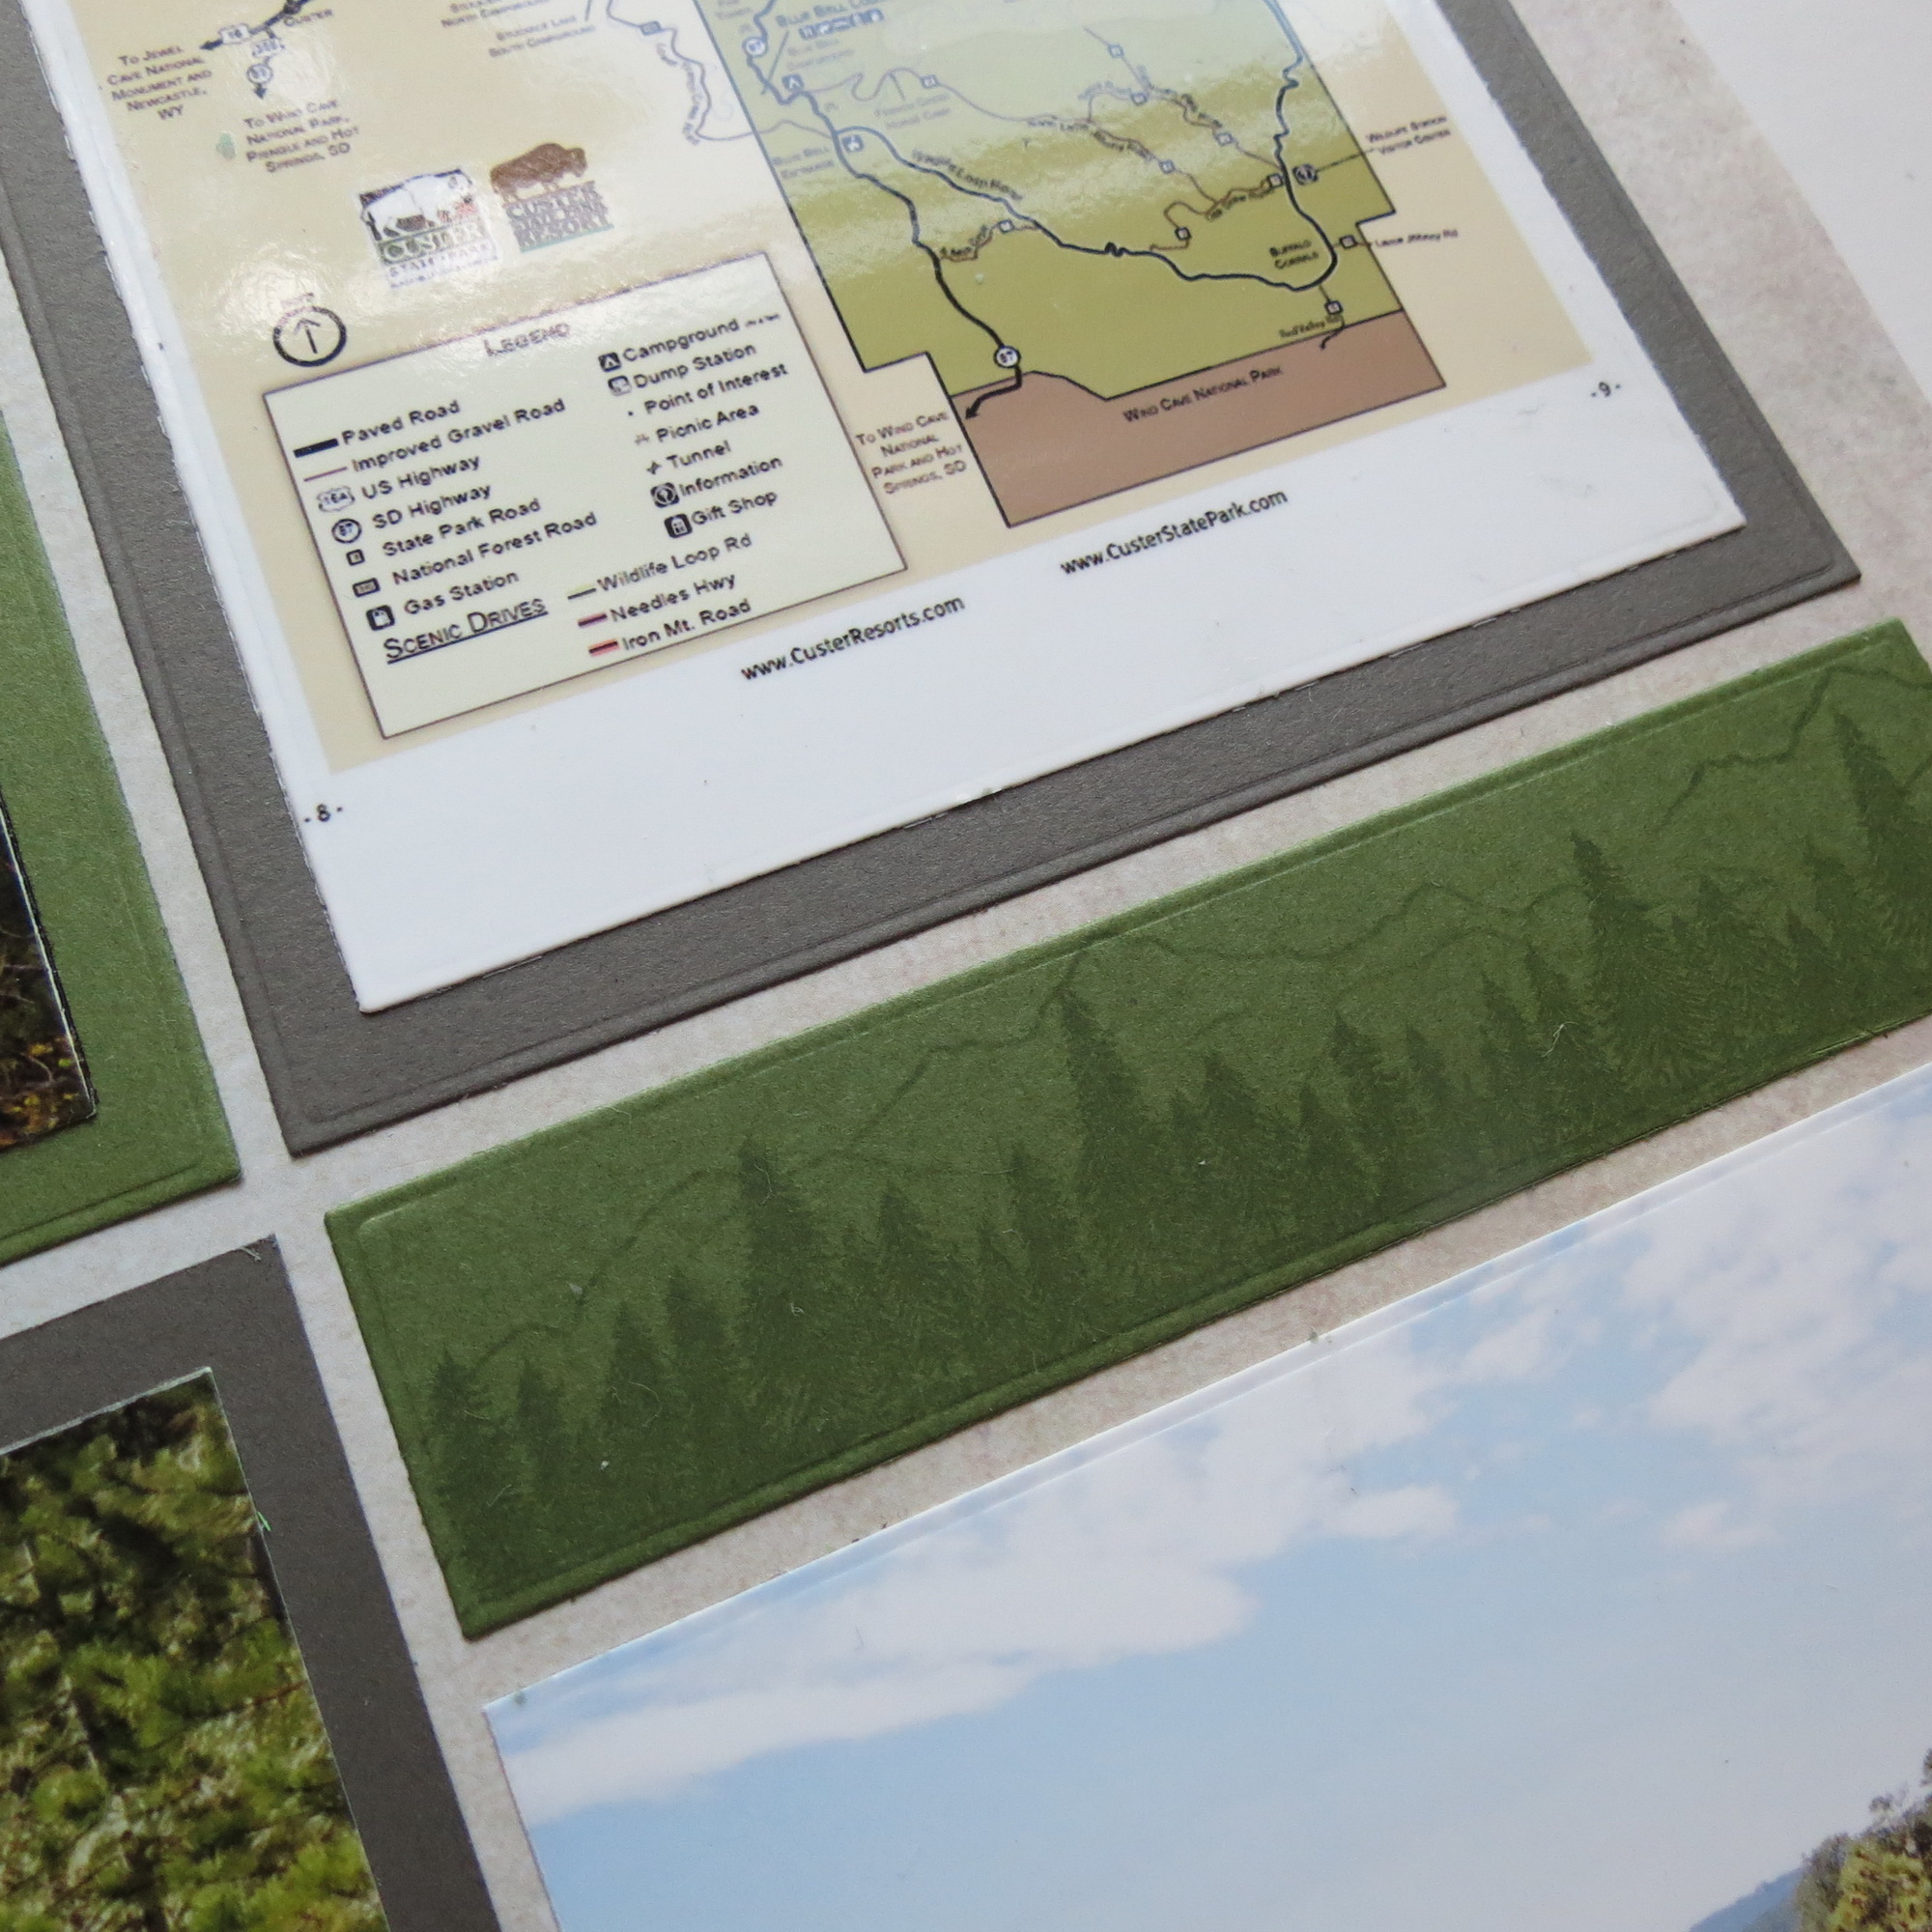
The Basics 101.08: The Basics, Six Tips and Extra-Large Photos TIP TWO: Maps
TIP TWO: Maps
The title properly identifies the “where” for this layout and if that wasn’t enough I printed a brochure map out on photo paper to show off the entire route. When you have several photos from an area you might want to recall the place and the route you took. It helps to put into perspective your journey.
TIP THREE: Colors
It was this map that also gave me the colors I wanted to incorporate in the layout. I’ve got two shades of green and a brown that I think nicely compliment this grid color, ‘Rain,’ from the Lazy Days Collection, and the state park subject.

Extra-Large Photos From the Lazy Days Collection: Rain
For the rock formations, I found I liked the brown mats best and the green mats for the photos with the trees.
Mosaic Moments Simple Steps: The Basics 101.08: The Basics, Six Tips, and Extra-Large Photos
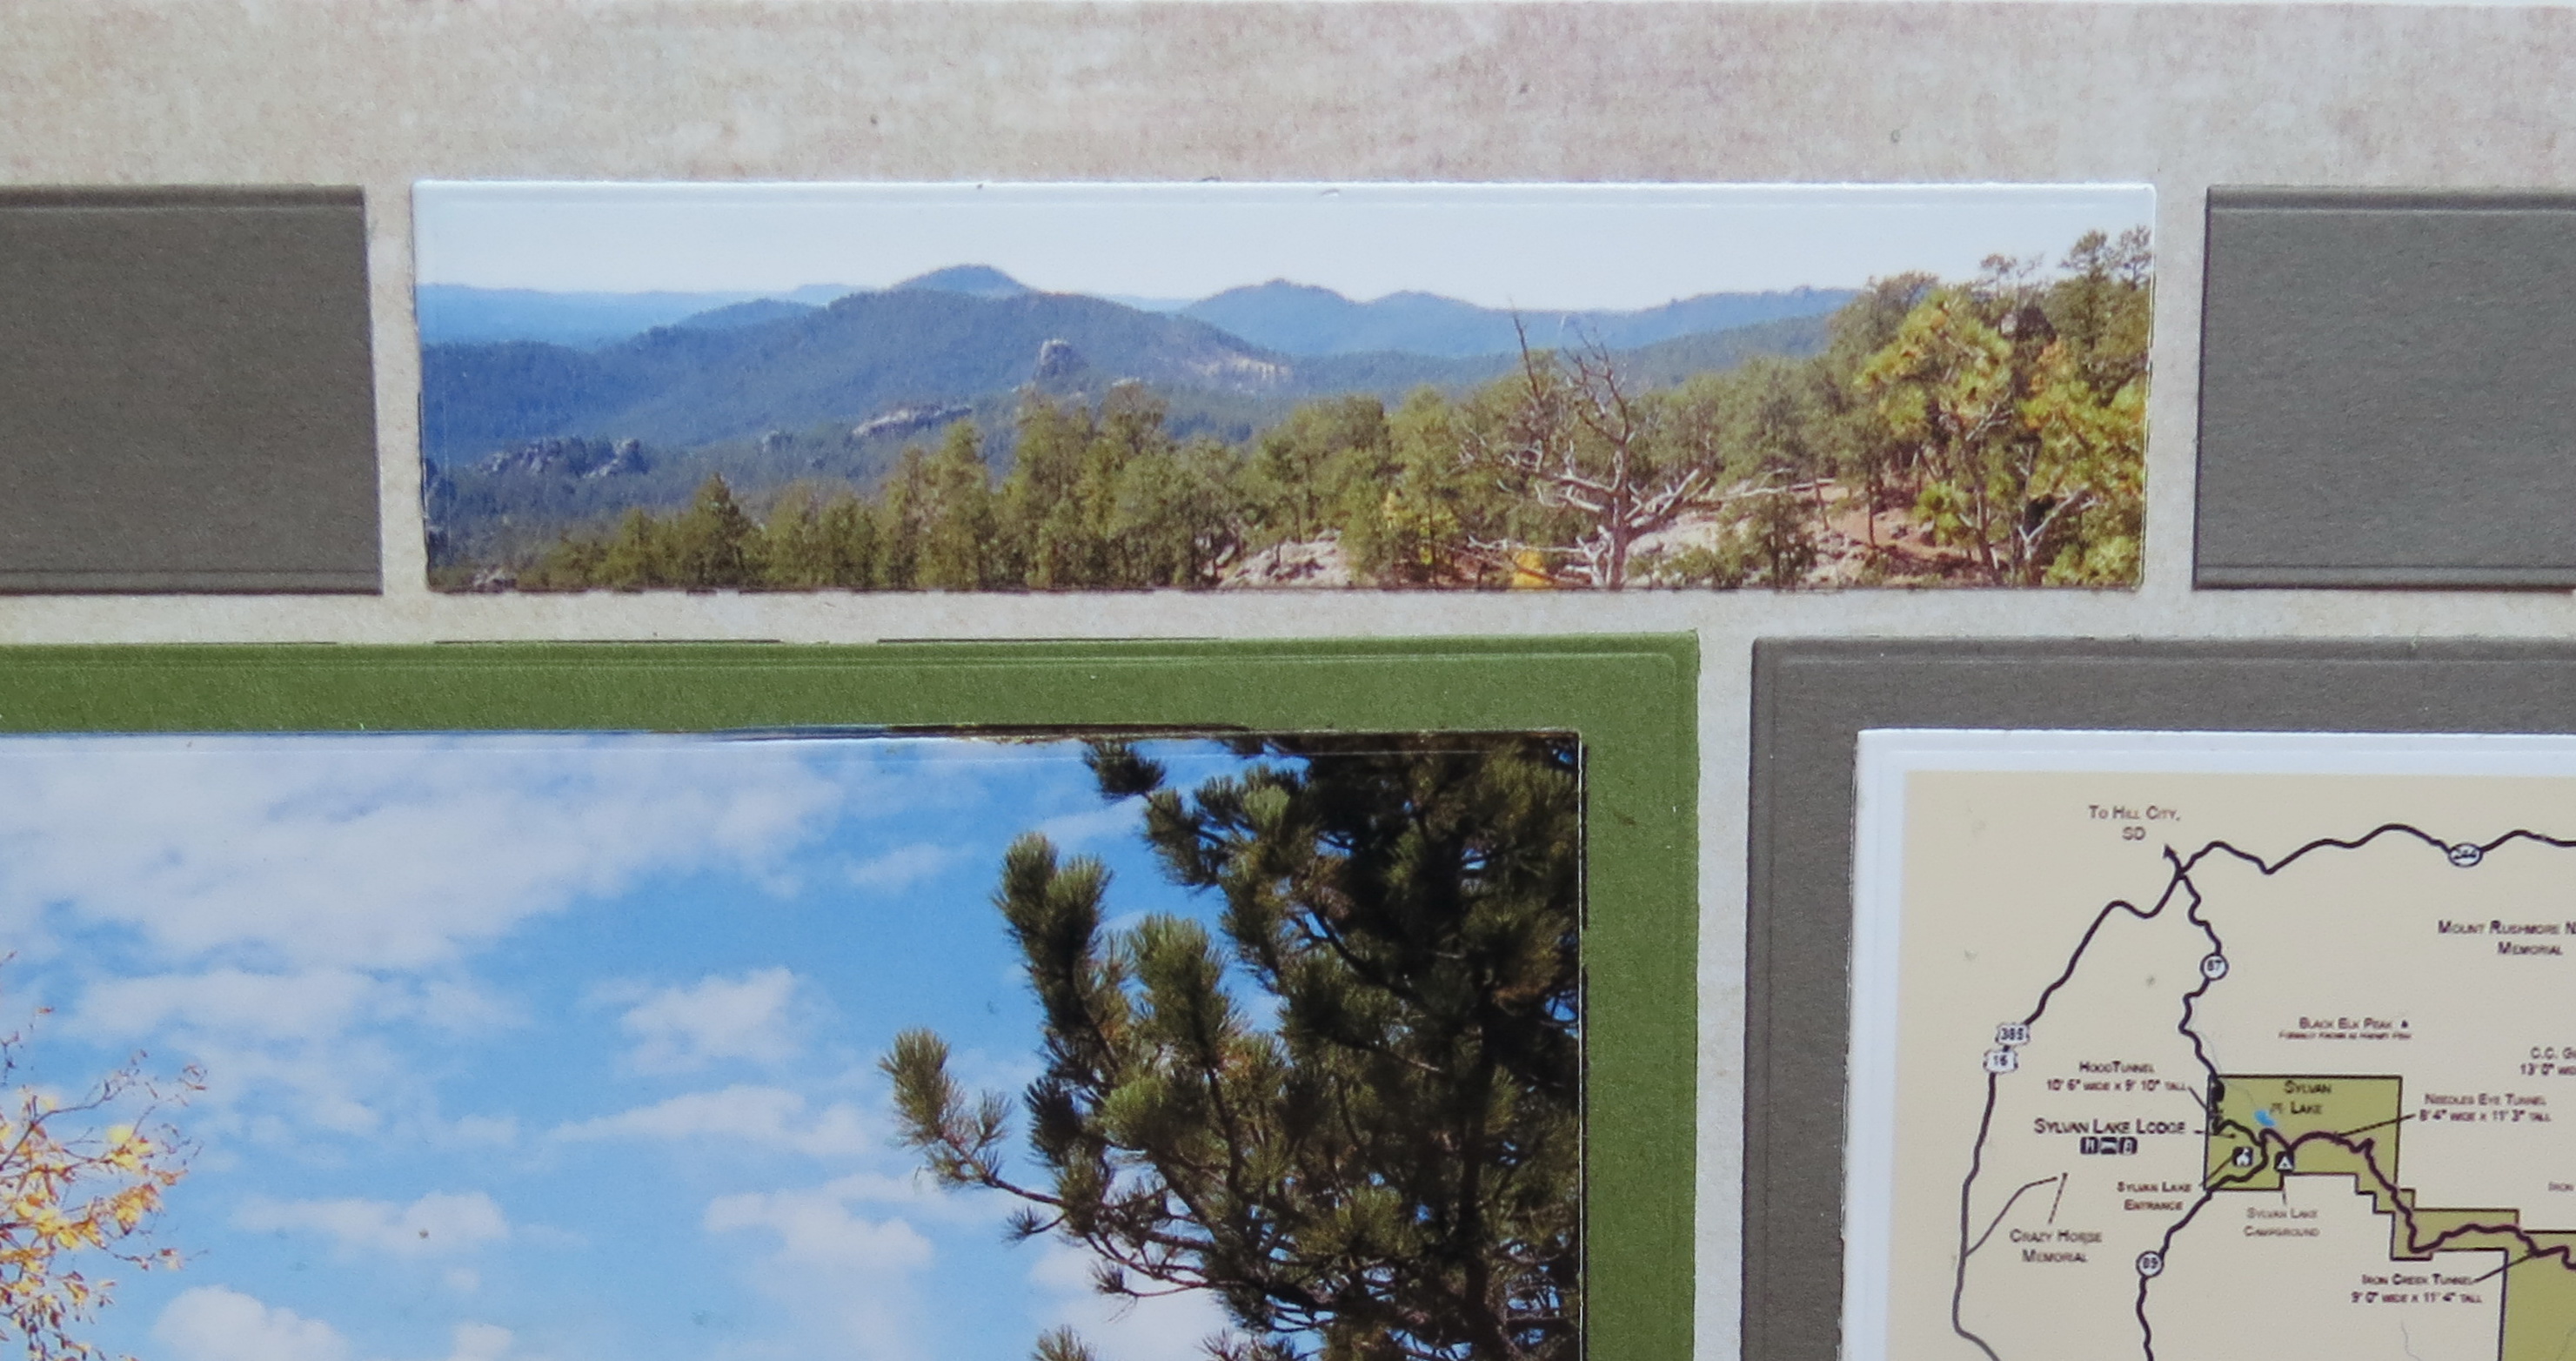
There are three unmounted photos placed directly to the mat. The smallest one is 1×4. This was taken from a photo that I printed bigger than I wanted so salvaging this skyline shot was a perfect solution.
TIP FOUR: Cropping Photos – Using the Quick Glance Guide – Rule of Thirds
This is actually several tips rolled into one as that’s how you are going to use them. For photos to fit into the 5×6 block of your pattern you need to print larger than 4×6. I’ve chosen to print at 5” x 7” and use the layering die for the 5×6. This will give a nice even margin around your photos with only a little trimming. You could choose to print larger on an 8.5” x 11” and set your own print margins to get the size that will fit to the grid without using a mat.
Mosaic Moments Die Set C
Die Set C was all I needed to work on the first page of the layout. I used the largest die to cut the large mats for the page. There is not a lot of space to be able to put these dies through at an angle to cut, so I definitely recommend running it through twice or changing the direction and run it again. Any small spots that might not quite cut all the way through can be helped with an X-Acto knife to loosen or cut it.
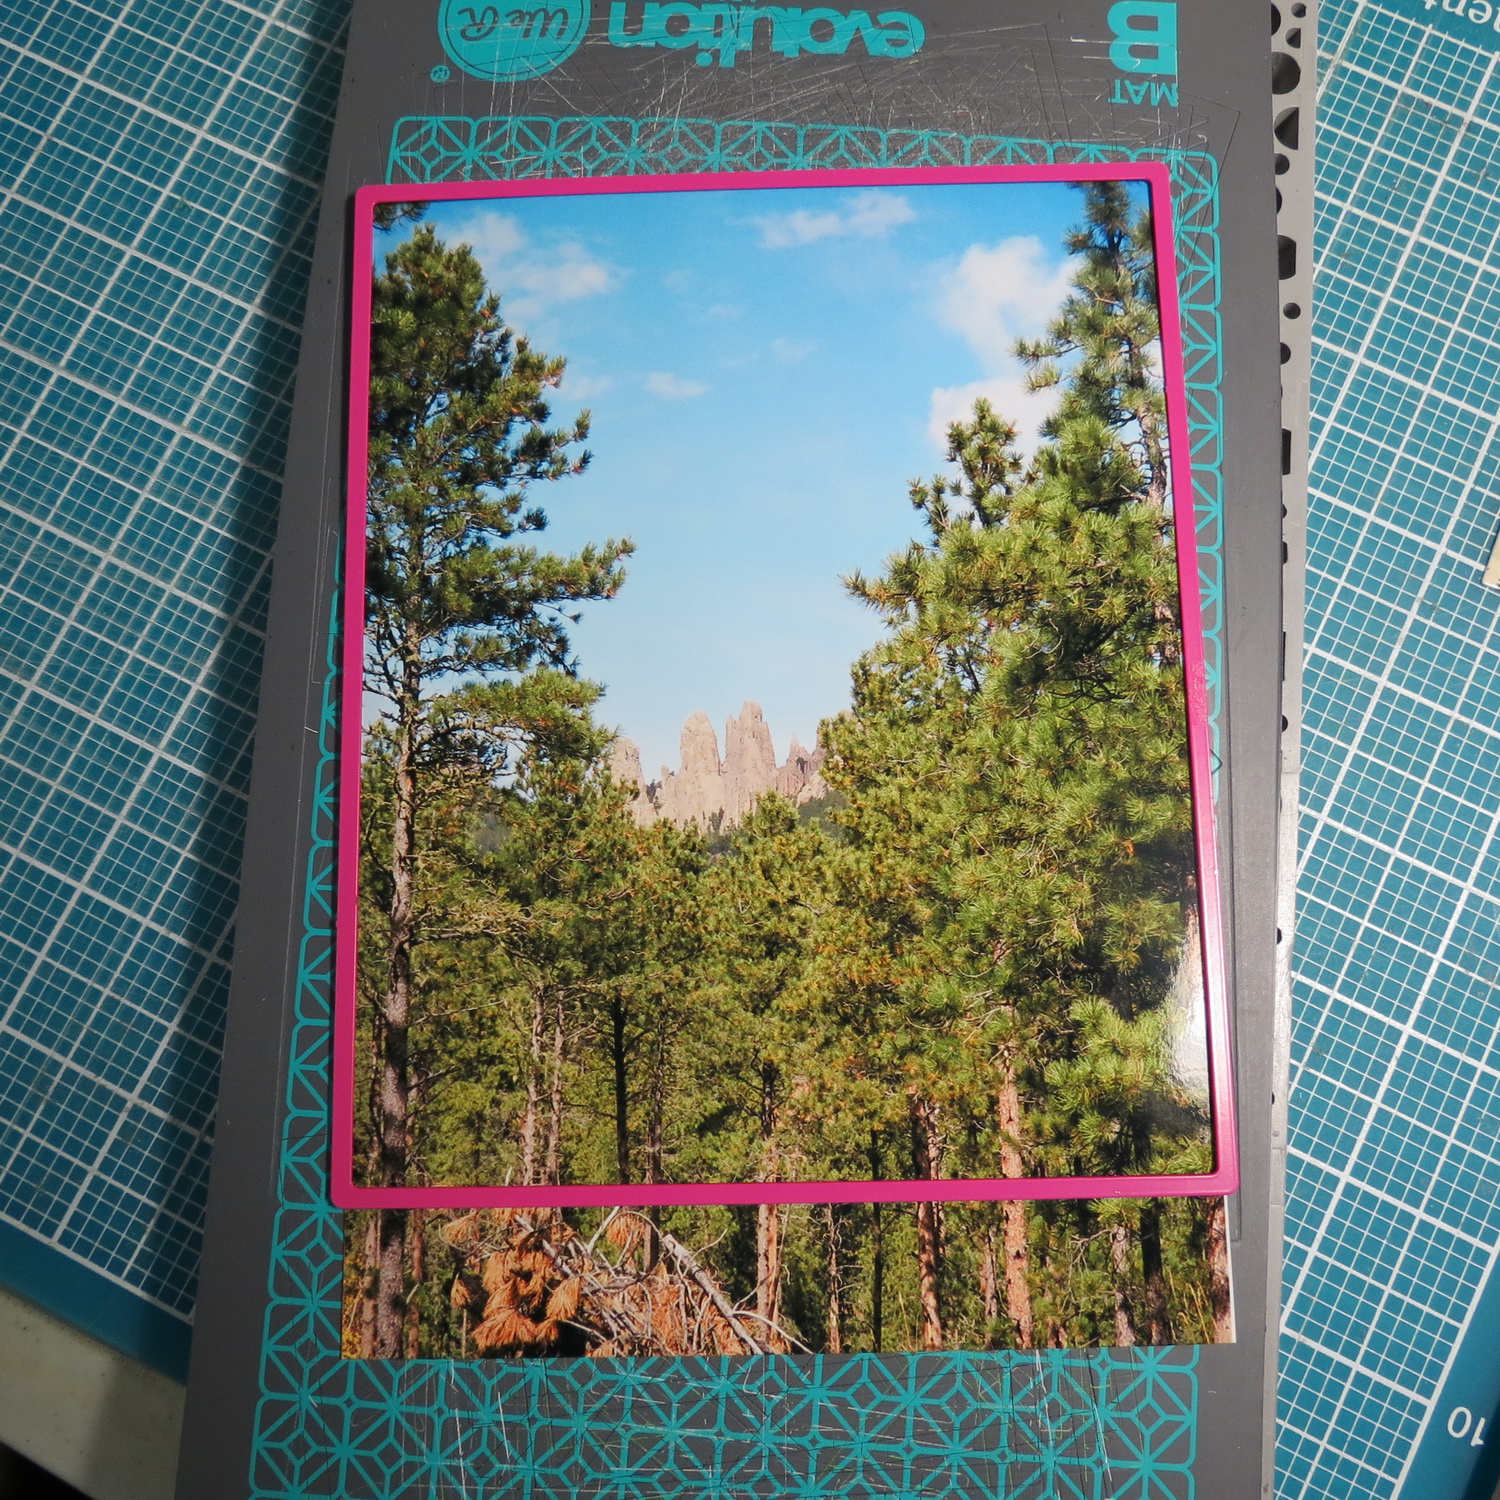
I quickly learned that how I trimmed the photo might make a huge difference. When you frame your photo to shoot it you likely will be eyeballing the composition before you snap-it. So what happens when you need to crop your photo? How does cropping change the look of your photo?
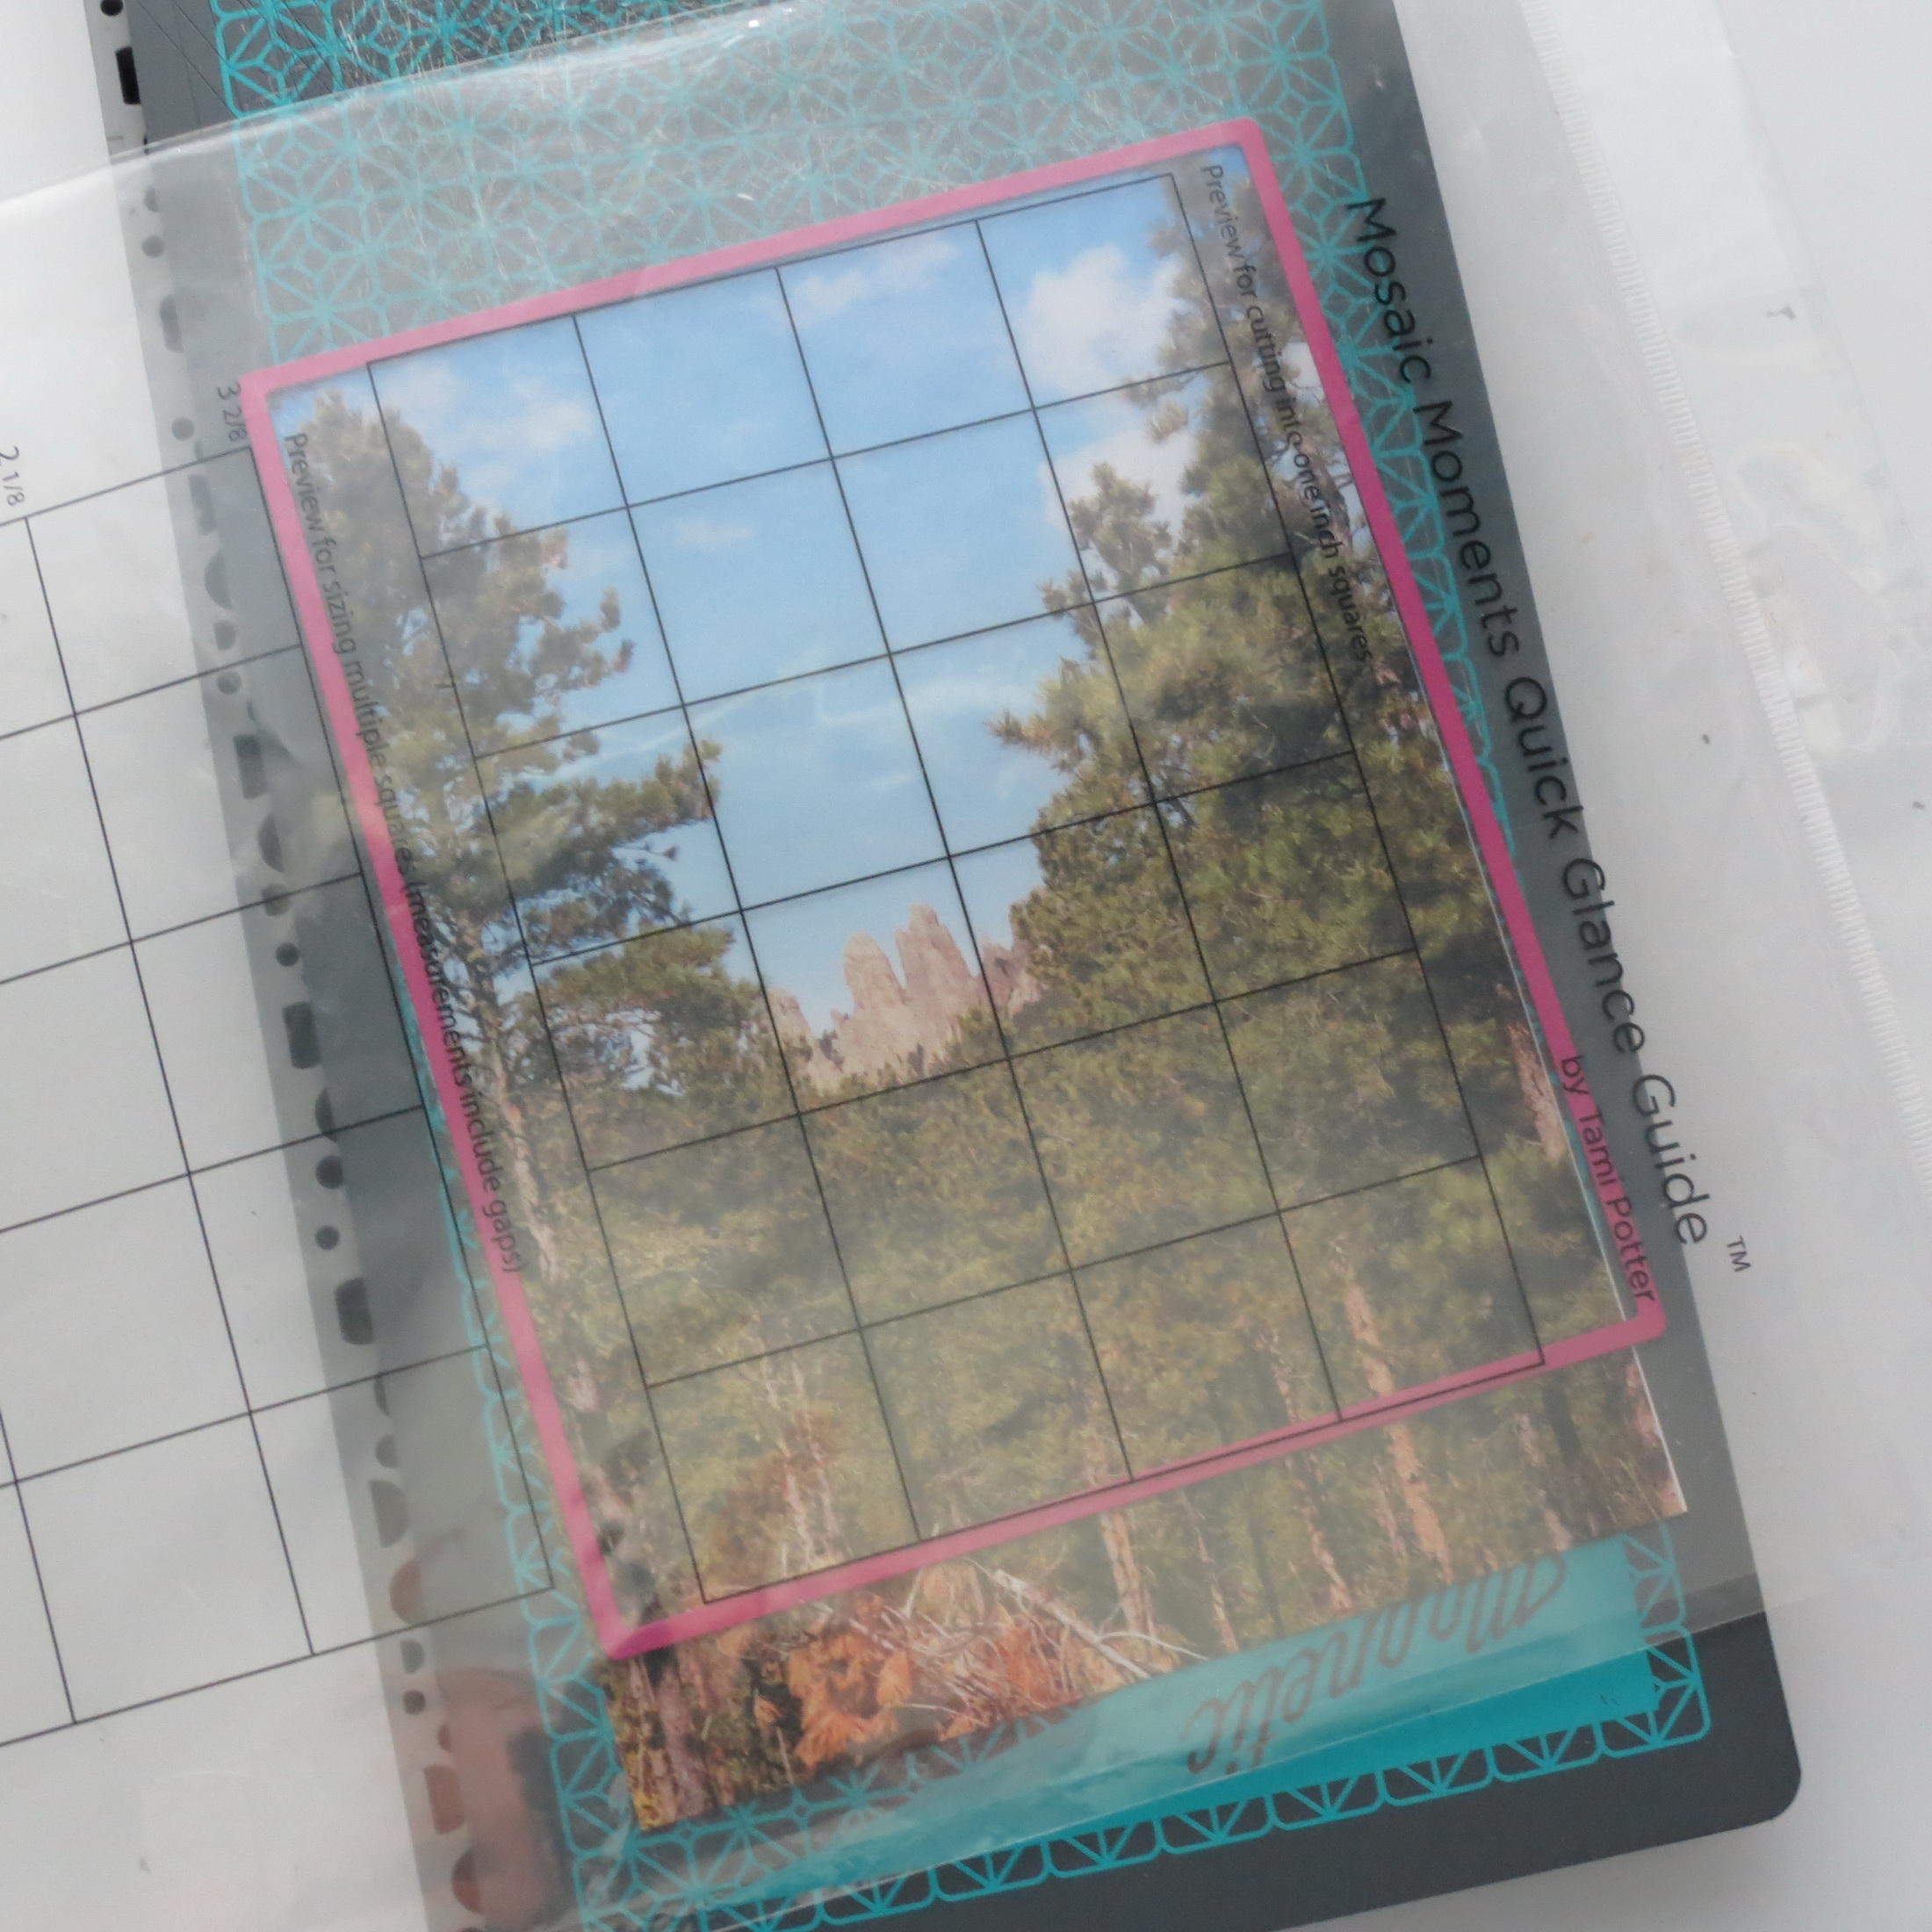
We’ve got a great tool, the Quick Glance Guide, that will help you to re-frame your photo and decide the best look.
I’ll show you the same photo cut two different ways and how the Rule of Thirds will provide some advice to guide you.
The photo is 5”x7” and I’m using the layering die that will cut the photo to 6.125” x 5” so the only trimming we will do is from the top or bottom or a little of both.
Mosaic Moments Simple Steps: The Basics 101.08: The Basics, Six Tips, and Extra-Large Photos TIP Four
The Basics 101.08: The Basics, Six Tips, and Extra-Large Photos TIP: Rule of Thirds
Using your layering die position it over an area of the photo you want to preserve. Then take your Quick Glance Guide and use the top portion that has a grid of 1” squares in a 4×6. It will fit the area that we are considering top to bottom. My focal point, the Needles, falls between the trees, but as you will see, they also fall below the half-way mark dividing the photo visually in half when I orient the die to the top of the photo. This is not ideal.
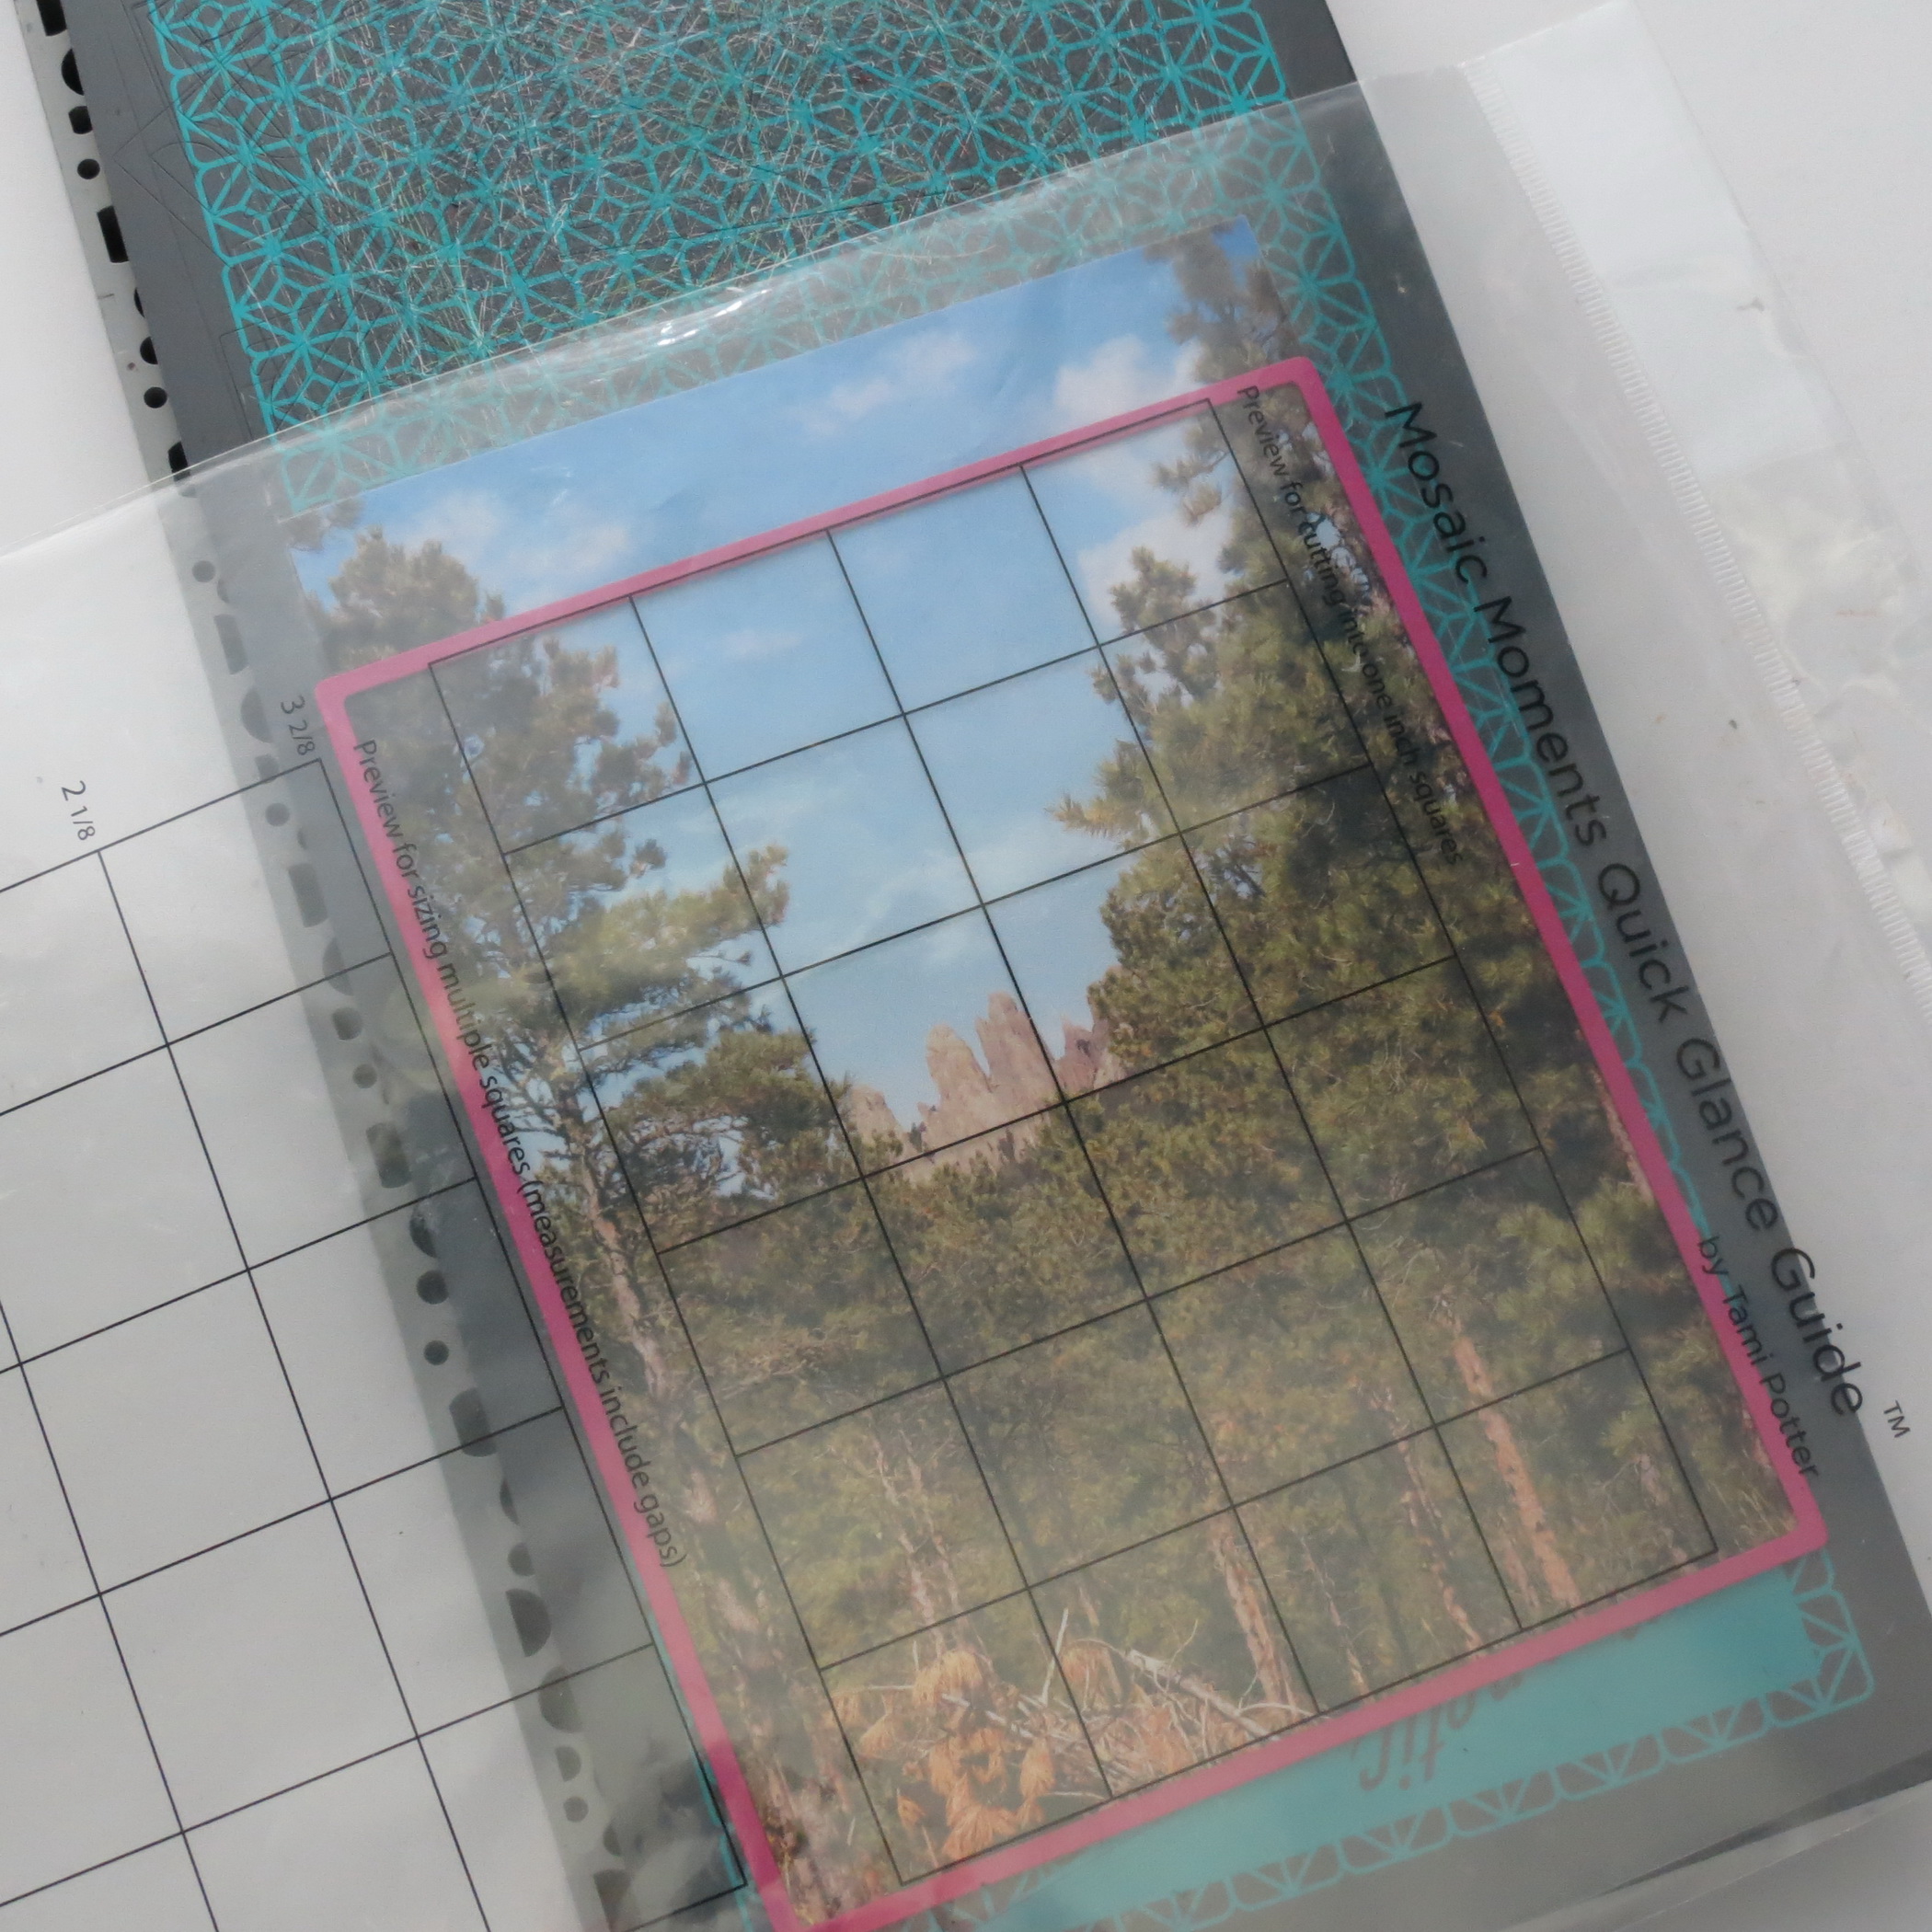
The Basics 101.08: The Basics, Six Tips, and Extra-Large Photos TIP: Rule of Thirds
The second photo, with the die to the bottom, now will be 1/3 to 2/3 proportions. One-third sky, two-thirds trees is one way to apply the Rule of Thirds. Look at the photos side by side with the QGG marking them out, and again without the QGG. Do you see a difference? Which appeals to you more? The first photo has a focus on the trees and sky, while the second elevates the Needles in the composition, and that really is what I’m looking to achieve, the focal point doesn’t get lost.

The Basics 101.08: The Basics, Six Tips, and Extra-Large Photos TIP: Rule of Thirds

The Basics 101.08: The Basics, Six Tips, and Extra-Large Photos TIP: Rule of Thirds
Many of you will have cameras that have a Rule of Thirds grid line built in that you may already be using to frame and shoot your pictures. If you don’t get the “perfect” photo by shooting, you can achieve it by cropping, and of course, using our basic dies you can do that even easier as you choose an area to trim away.
So…what is the Rule of Thirds? It’s a guideline for composing your photos, paintings, designs and more. Imagine a grid of nine equal blocks…should be easy for you Mosaic Moment scrappers, right? Aligning elements of your composition along the grid intersection points can create more interest, add tension and energy, than just centering your photo. It also helps to keep you from dividing your photo in half.
For a great explanation with visuals, you might want to check out this website.
Mosaic Moments Simple Steps: The Basics 101.08: The Basics, Six Tips and Extra-Large Photos

The Basics 101.08: The Basics, Six Tips and Extra-Large Photos TIP Five
TIP FIVE: Brochures
If you are at all like us when we are traveling, we stop at the welcome centers and pick up brochures of all the places that look interesting that we might like to visit. So do you just toss it all out at the end of the trip? Nope! Be selective see what you might be able to incorporate into your layout, maps, logos, or facts to journal.
I had a small brochure image with Custer State Park that I wanted to add to a 2×2 block. The 2×2 Stamp die and both mat colors were used to cut and fill the small 2×2 corner of page two.
Mosaic Moments Simple Steps: The Basics 101.08: The Basics, Six Tips and Extra-Large Photos TIP Six
The Basics 101.08: The Basics, Six Tips and Extra-Large Photos TIP Six
TIP SIX: Add Stamped Elements
The two remaining strips, a 1×2 and a 1×4, looked a bit plain so I used VersaMark watermark ink and mountain and tree stamps from Hero Arts and Echo Park to add a bit of subtle interest with the tone on tone watermark effect.
There you have it, in six tips, ways to make working with the Basic Die Set and Extra-Large Photos a breeze.
Look through the Pattern Gallery to find a single die set pattern that you’d like to try. Don’t be afraid to try some of the tips that are something new for you and see how you can alter it to make it your own style. Enjoy scrapping Mosaic Moments style!
Andrea Fisher