

Simple Steps 101.10
The ‘Balloons Over Wadsworth’ Glow
The new Discovery Die will help us dress up this colorful layout and add a beautiful focal point amidst the balloons.
It’s been a few years since our town has had a balloon event so many people were eager to go and watch the launch and stay later for their return and a promised balloon glow. Many of us sat on the main road in unable to get through the massive amount of traffic backed up as most of the town turned out all at the same time.
We watched the launch from the road as we waited to get in and by the time we actually were on the road in, traffic was already leaving again. While the plan was for launch photos for a layout, Plan B, and a 2-hour wait began to capture the dramatic balloon glow.
Being up close to the balloons as they set up in preparation for the glow was great to see all that goes into getting them inflated. Being able to take a walk back a bit and get a look at all of them in a row as they lit up on and off, added to the whole experience. Being able to include a few of each of the photo views adds to the interest of the layout.
I’m beginning with another Pattern from the Pattern Gallery that uses almost only one die set, in this case, Die Set B.
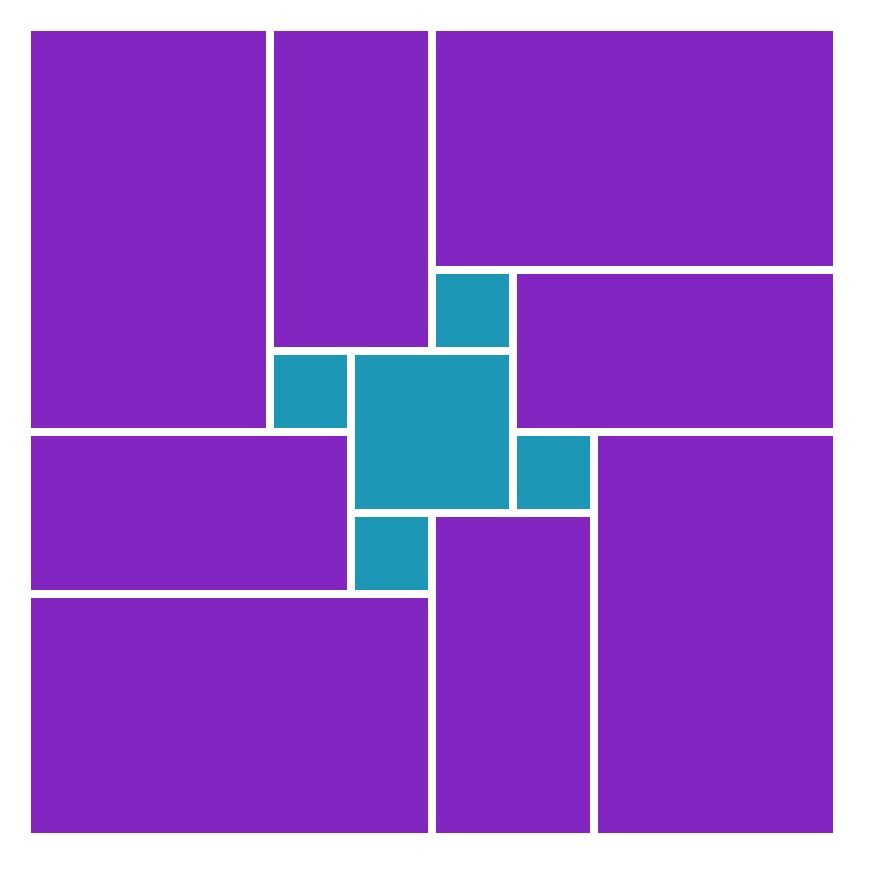
Mosaic Moments Pattern 164 pinwheel
This time Pattern #164, a pinwheel pattern, and in the very center of the pattern is the perfect spot for this weeks featured die one of our latest new dies the Discovery Die Set. This set is a 2×2 block with two smaller 1×1 squares to match. They are an intricate cut design that has so many options with so many colors.

Mosaic Moments Simple Steps 101.10 featuring the Discovery Die Set

Mosaic Moments Simple Steps 101.10 With the Discovery Die
With pattern and photos in hand I decided on a Black 12×12 Mosaic Moments Grid paper and to cut each of my die cuts in black as well. This actually gives the illusion of wider spaces at the center of the layout and the die sections really stand out. For each of the smaller 1” squares, I’ve chosen a blue 1” tile close to the color of the sky in the photos. For the larger 2×2 square I wanted to incorporate some of the colors from the balloons. I’ve used an orange, two reds, teal and aqua shades and mounted all on a Scarlett 2×2 tile.
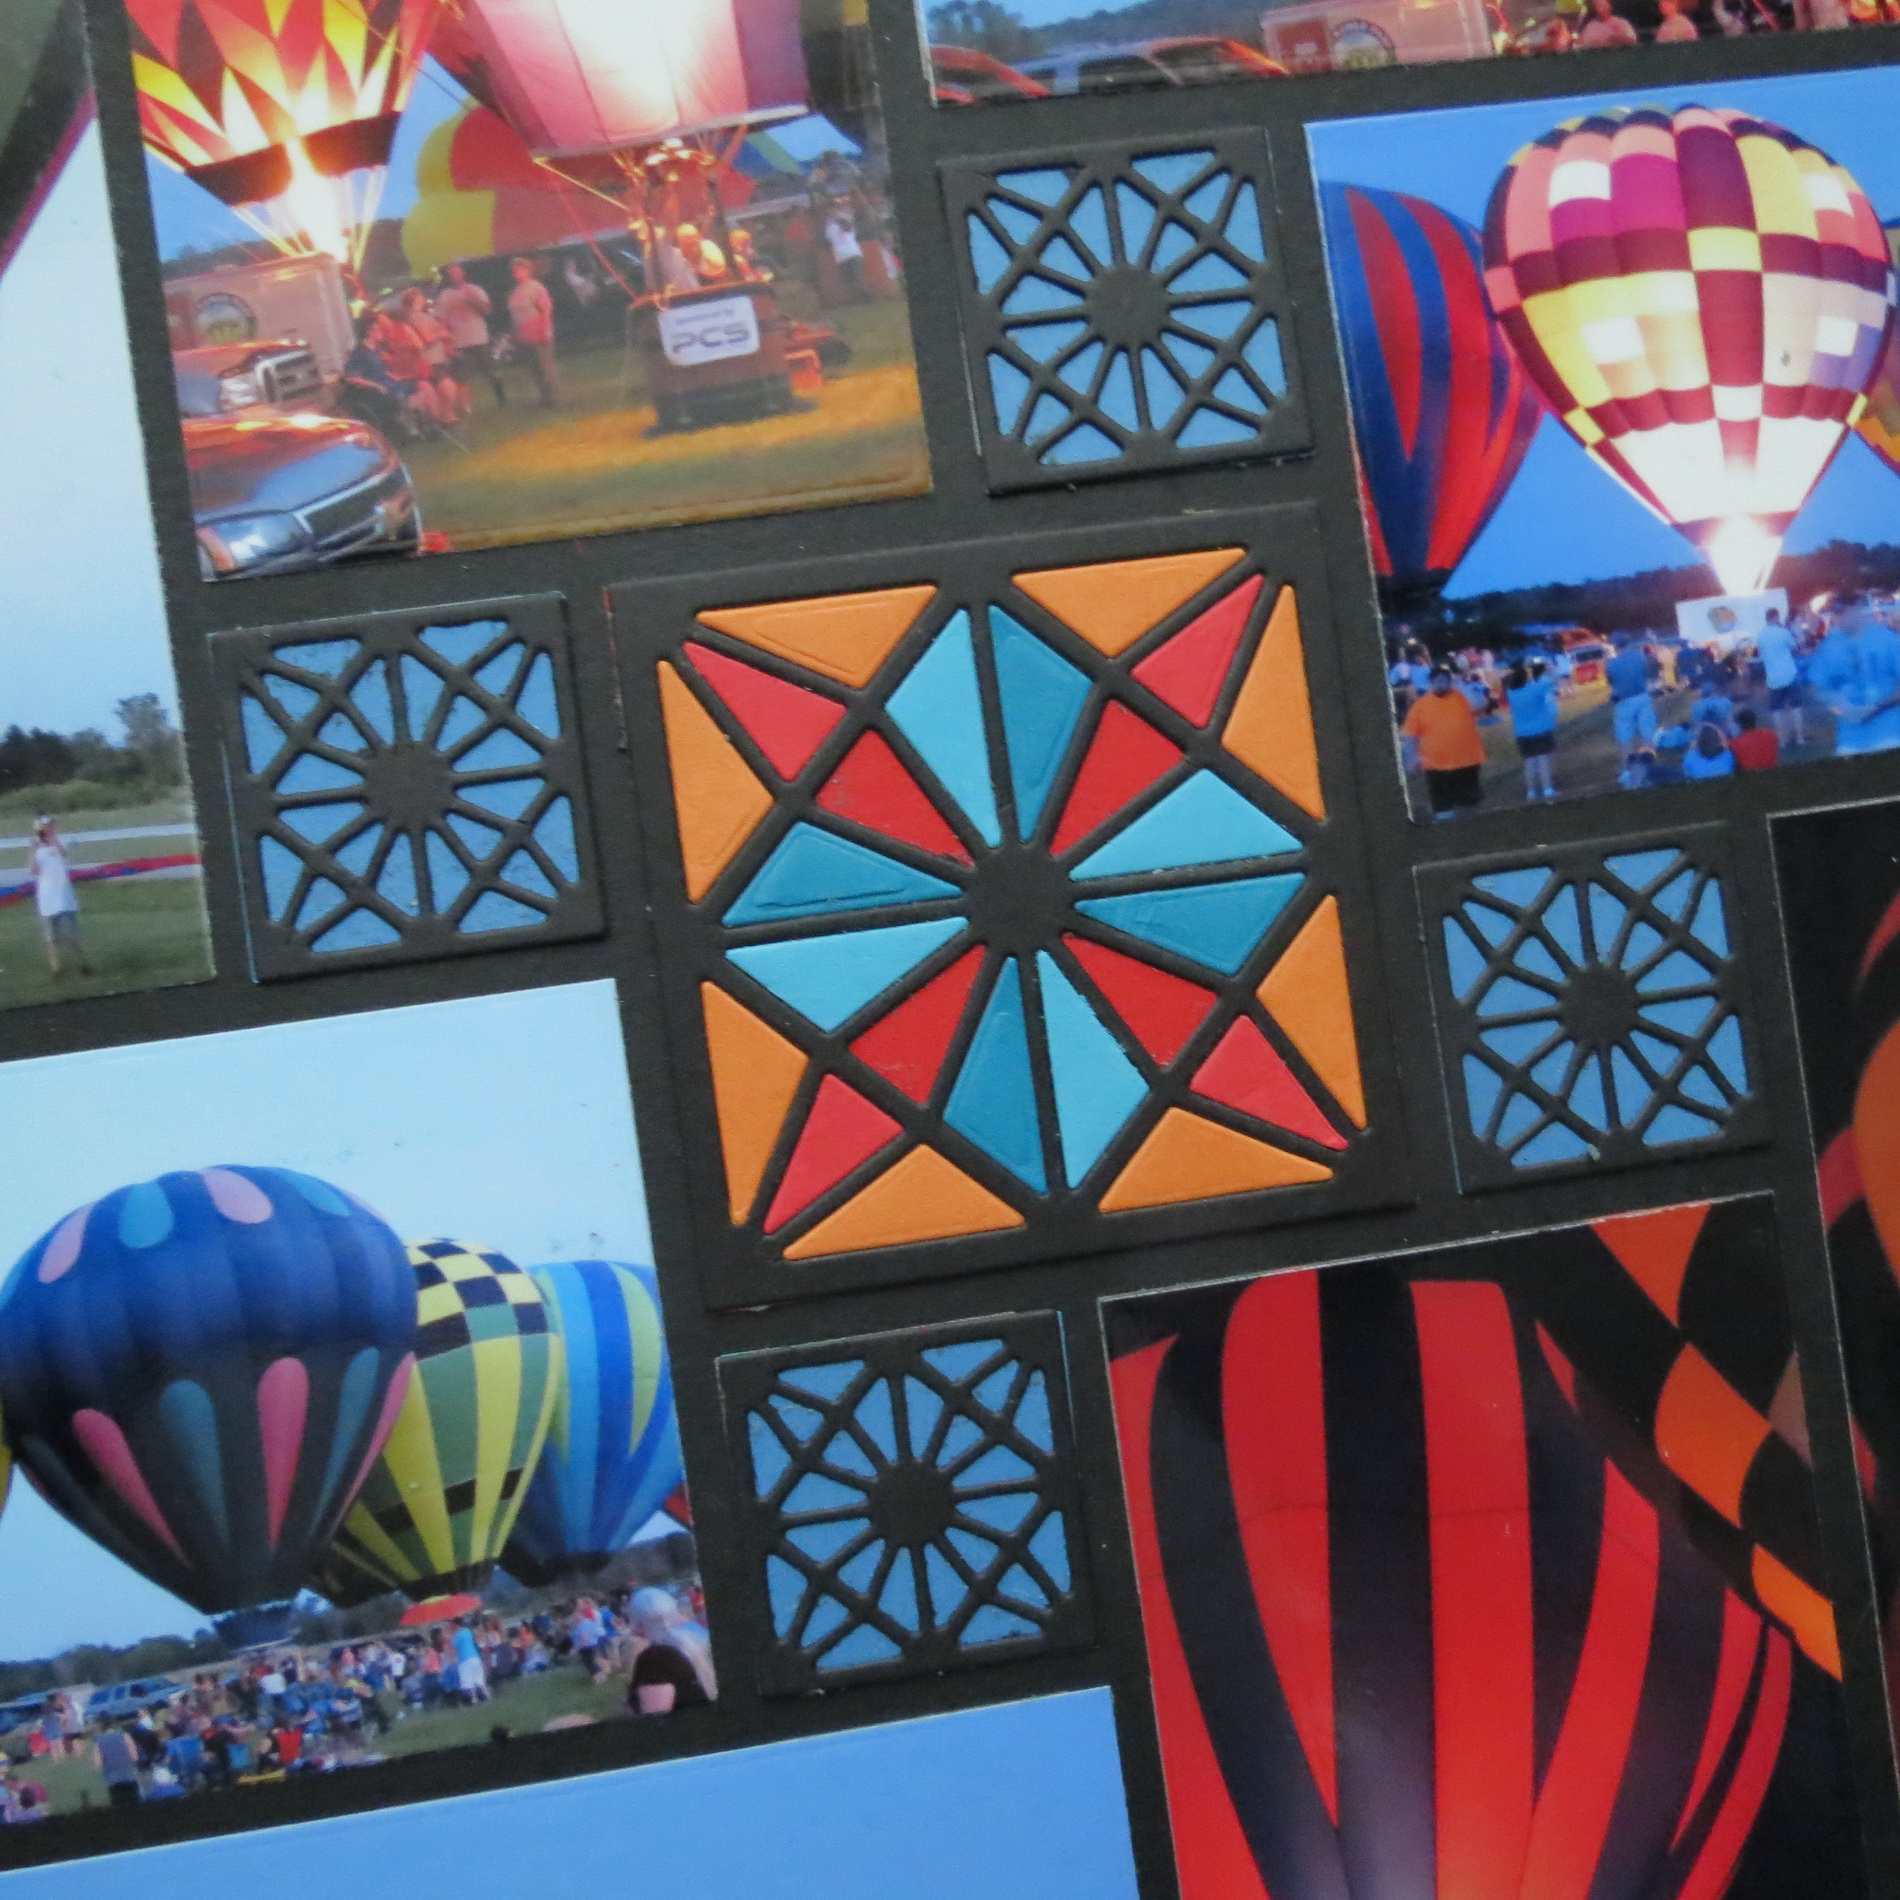
Mosaic Moments Simple Steps 101.10 With the Discovery Die
The center red sections of the Discovery Die resemble a propeller to me, so fitting for the balloon launch at the local airfield, but I also wanted to use different colors in the varying segments of the die cut to mimic the patterns on the balloons. Using two-tones side by side was to help create some movement and dimension. Use a different set of colors and you can have a compass rose or something else to fit with your photos.
Photos are cut using Die Set B and then adhered directly to the grid. By choosing a black 12×12 Mosaic Moments Grid paper the colors of all the balloons are not competing with the grid color but actually pop off the page.
It’s a fun pattern and very easy to assemble once you’ve decided on which photos you want to use. I haven’t added a title or even journaling to the page as there are more photos to scrap and plenty of time to add those elements to the story. This pattern allows showcasing some of the more dramatic shots and the featured dies.
I hope these few simple steps will help you when you get started on your next layout!
Andrea Fisher