
March continues its advance toward spring and of course, the flowers and showers of that time of year. Working on a rainbow technique using watercolors last week kept me thinking of ways to make the very most of this color palette in scrapbooking. So we’ll continue the theme with two more projects.
Spring arrives on March 20th, and we are often buried in snow and windy weather with only hopes of warmer days, green grass and budding flowers. As the rhyme suggests April follows with showers and May with her flowers. I’m hoping that given this idea, you will be able to plan ahead to take wonderful spring photos and try this out for yourselves.
I love taking photos of the flowers in my garden each year. I love to observe the details of each variety. Some photos are better than others and then there are some that are absolute favorites. So what do you do with them all? Wouldn’t you love to have a nice page of blooms to enjoy in your scrapbook or to mount on your living room wall?
Let me show you one way to make your photos the star of the page and bring the rainbow in in a subtle way. Then let me take the same photos plus a few more along with a variety of papers from a coordinated pack and really let the colors of the rainbow playfully dance across your page.
Page One
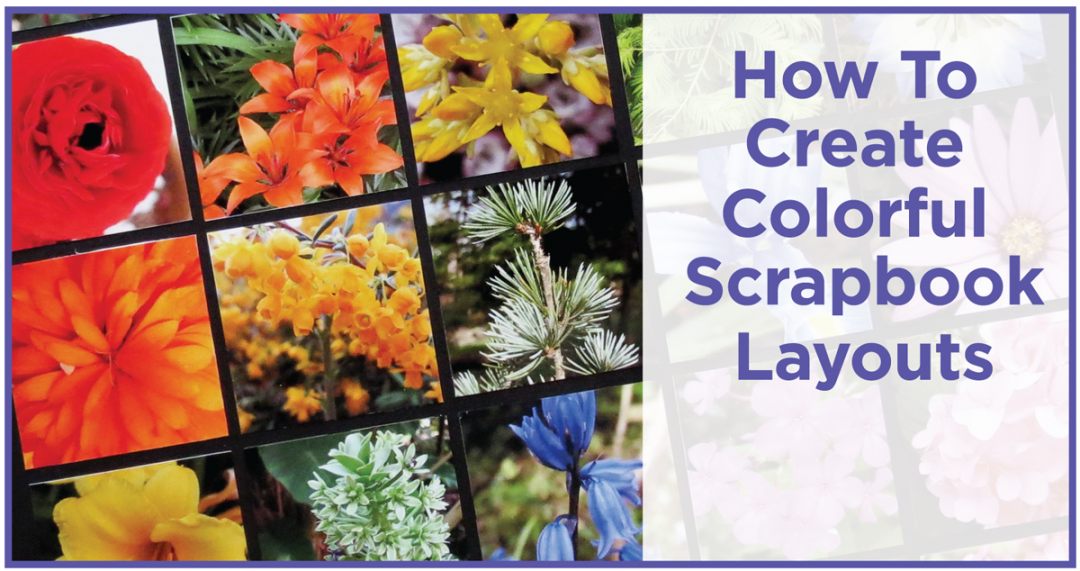
I have printed 25-2.125”squares of flowers in Red (3), Orange (3), Yellow (4), Blue (4) and Violet (6) shades. Additionally I included 5 green foliage plants/trees to represent the colors of the rainbow. ROY G BIV is an acronym for the sequence of hues commonly described as making up a rainbow: Red, Orange, Yellow, Green, Blue, Indigo and Violet and my guide for this collection.
- I cropped the photos in my photo editing program (ACDSee) that I wanted to include into squares focusing on eliminating anything that was distracting from the flower surroundings and saved them as a square keeping the original copy untouched.
- Then I used a template I had created in Print Shop 20, a program I’ve had forever and you probably do too, to print multiple photos at a time. To create a template begin with a blank 8.5 x 11” page and use the guide lines and rulers to create a page with 1” squares separated by 1/8” spaces. This general template allows me to print any photo to the exact size I want to cover the right amount of tiles, and is helpful for doing several economically on one 8.5” x 11” page.
- Once you create this template be sure to name it and save it to reuse again and again. With every project you create with it if you want to save those to print later, or another time, rename it something else to save the project and your template will remain original.
- For the larger squares I relied on my X-Acto knife, my Mosaic Moments Self-healing cutting mat, and metal cork backed ruler to trim them away from the sheet, but the 1” squares were easily punched out using an EK Success 1” punch to accomplish the task.
- I decided I really liked the way the colors of the photos popped off of a Black Mosaic Moments 12 x 12 Grid, and thought it helped to visualize the rainbow as I arranged the colors in order from the top left corner to the bottom right corner.
Once again, following Tami’s philosophy of letting the photos you take be the focus, “to use…photos to decorate the pages,” you can see how stunning the colors can appear when presented this way.
Page Two:
- Taking the sheet of 1” printed squares and punching them out is the beginning.
- Next cut your paper selections into 1” strips. I used an 8×8” pad of coordinating papers (I chose The Basics by The Paper Studio from Hobby Lobby,) that had 5 patterns for each of the colors. One strip of each was more than enough.
- For this one I wanted a playful feel to the page and chose to go with the White 12” x 12” Mosaic Moments Grid Paper where the added white in the patterned papers added to the openness of the white space.
- Arrange your photos on your grid in a pattern or order that pleases your eye. Think of them first as a color and second as a flower; don’t be afraid to rearrange them until you have something that pleases you.
- Once all the photo colors are arranged begin with the red papers and cut a few 1” tiles from your 1” strips of paper. Keep each of the colors in the block area that you have planned for each color. Directional patterns need not remain in one direction only; stripes can be vertical or horizontal.
- When you have all the patterned paper in place, look at it from above, even take a picture and view it on your camera to get another perspective. Does it feel balanced? Is this how you want it? Want to move a few photos…go right ahead! Are there too many dotted papers in one area, is that what you wanted, if not switch it around. Same pattern different color tiles sitting side by side? That’s okay if it appeals to you, just be sure before the final step…
- Attach each tile with adhesive. You’re done!!
Now, that wasn’t too hard. Do you like your results? Frame it! Or add it to your scrapbook for spring. If you work this pattern on a 6 x 6 or 8 x 8, you can incorporate that piece into a larger 12 x 12 layout. Maybe only use a portion of this technique on a page; maybe use it to create a frame around a few focal photos…the possibilities are endless. AND…don’t forget to share it with us on our Facebook page or on the Story Board at Journella.com!!
A final note, while I have used flowers to build this floral rainbow, it’s a style you can accomplish with just about anything and a little planning, so why not search for the rainbow in your neighborhood?
Thanks so much for dropping in, we’d love to get to know you too!
Show us your Color!
andrea