
Photo Tips: Look down!
Cherry Valley, Ontario
Greetings! Are you ready to start shooting all your spring photos? Our Photo Tips: Look Down! will help your scrapbook pages capture some of the exciting and often overlooked things around us when we are taking our photos. Whatever the subject of your photos you need to look around…and look down to find things that will help you fill in some of the smaller spots on your grid or make a great mosaic area.
Let’s get started!
I will be using our featured dies, the Oval Frames die sets. We have a new 3×5 Oval that joins our 4×6 & 2×3 Ovals. Each set comes with additional accent dies of layered flowers or 1×3 design.

Mosaic Moments Supplies: 12×12 Ombre Grid Paper and Oval Frame Dies
The Golden Hour 12×12 Grid paper from the Ombre Collection will be our page for building this layout. You’ll notice the blue to orange progression of the grid, we’ll be working with that in our choices of frames and mats you can see those cardstocks below…but, more on that later.

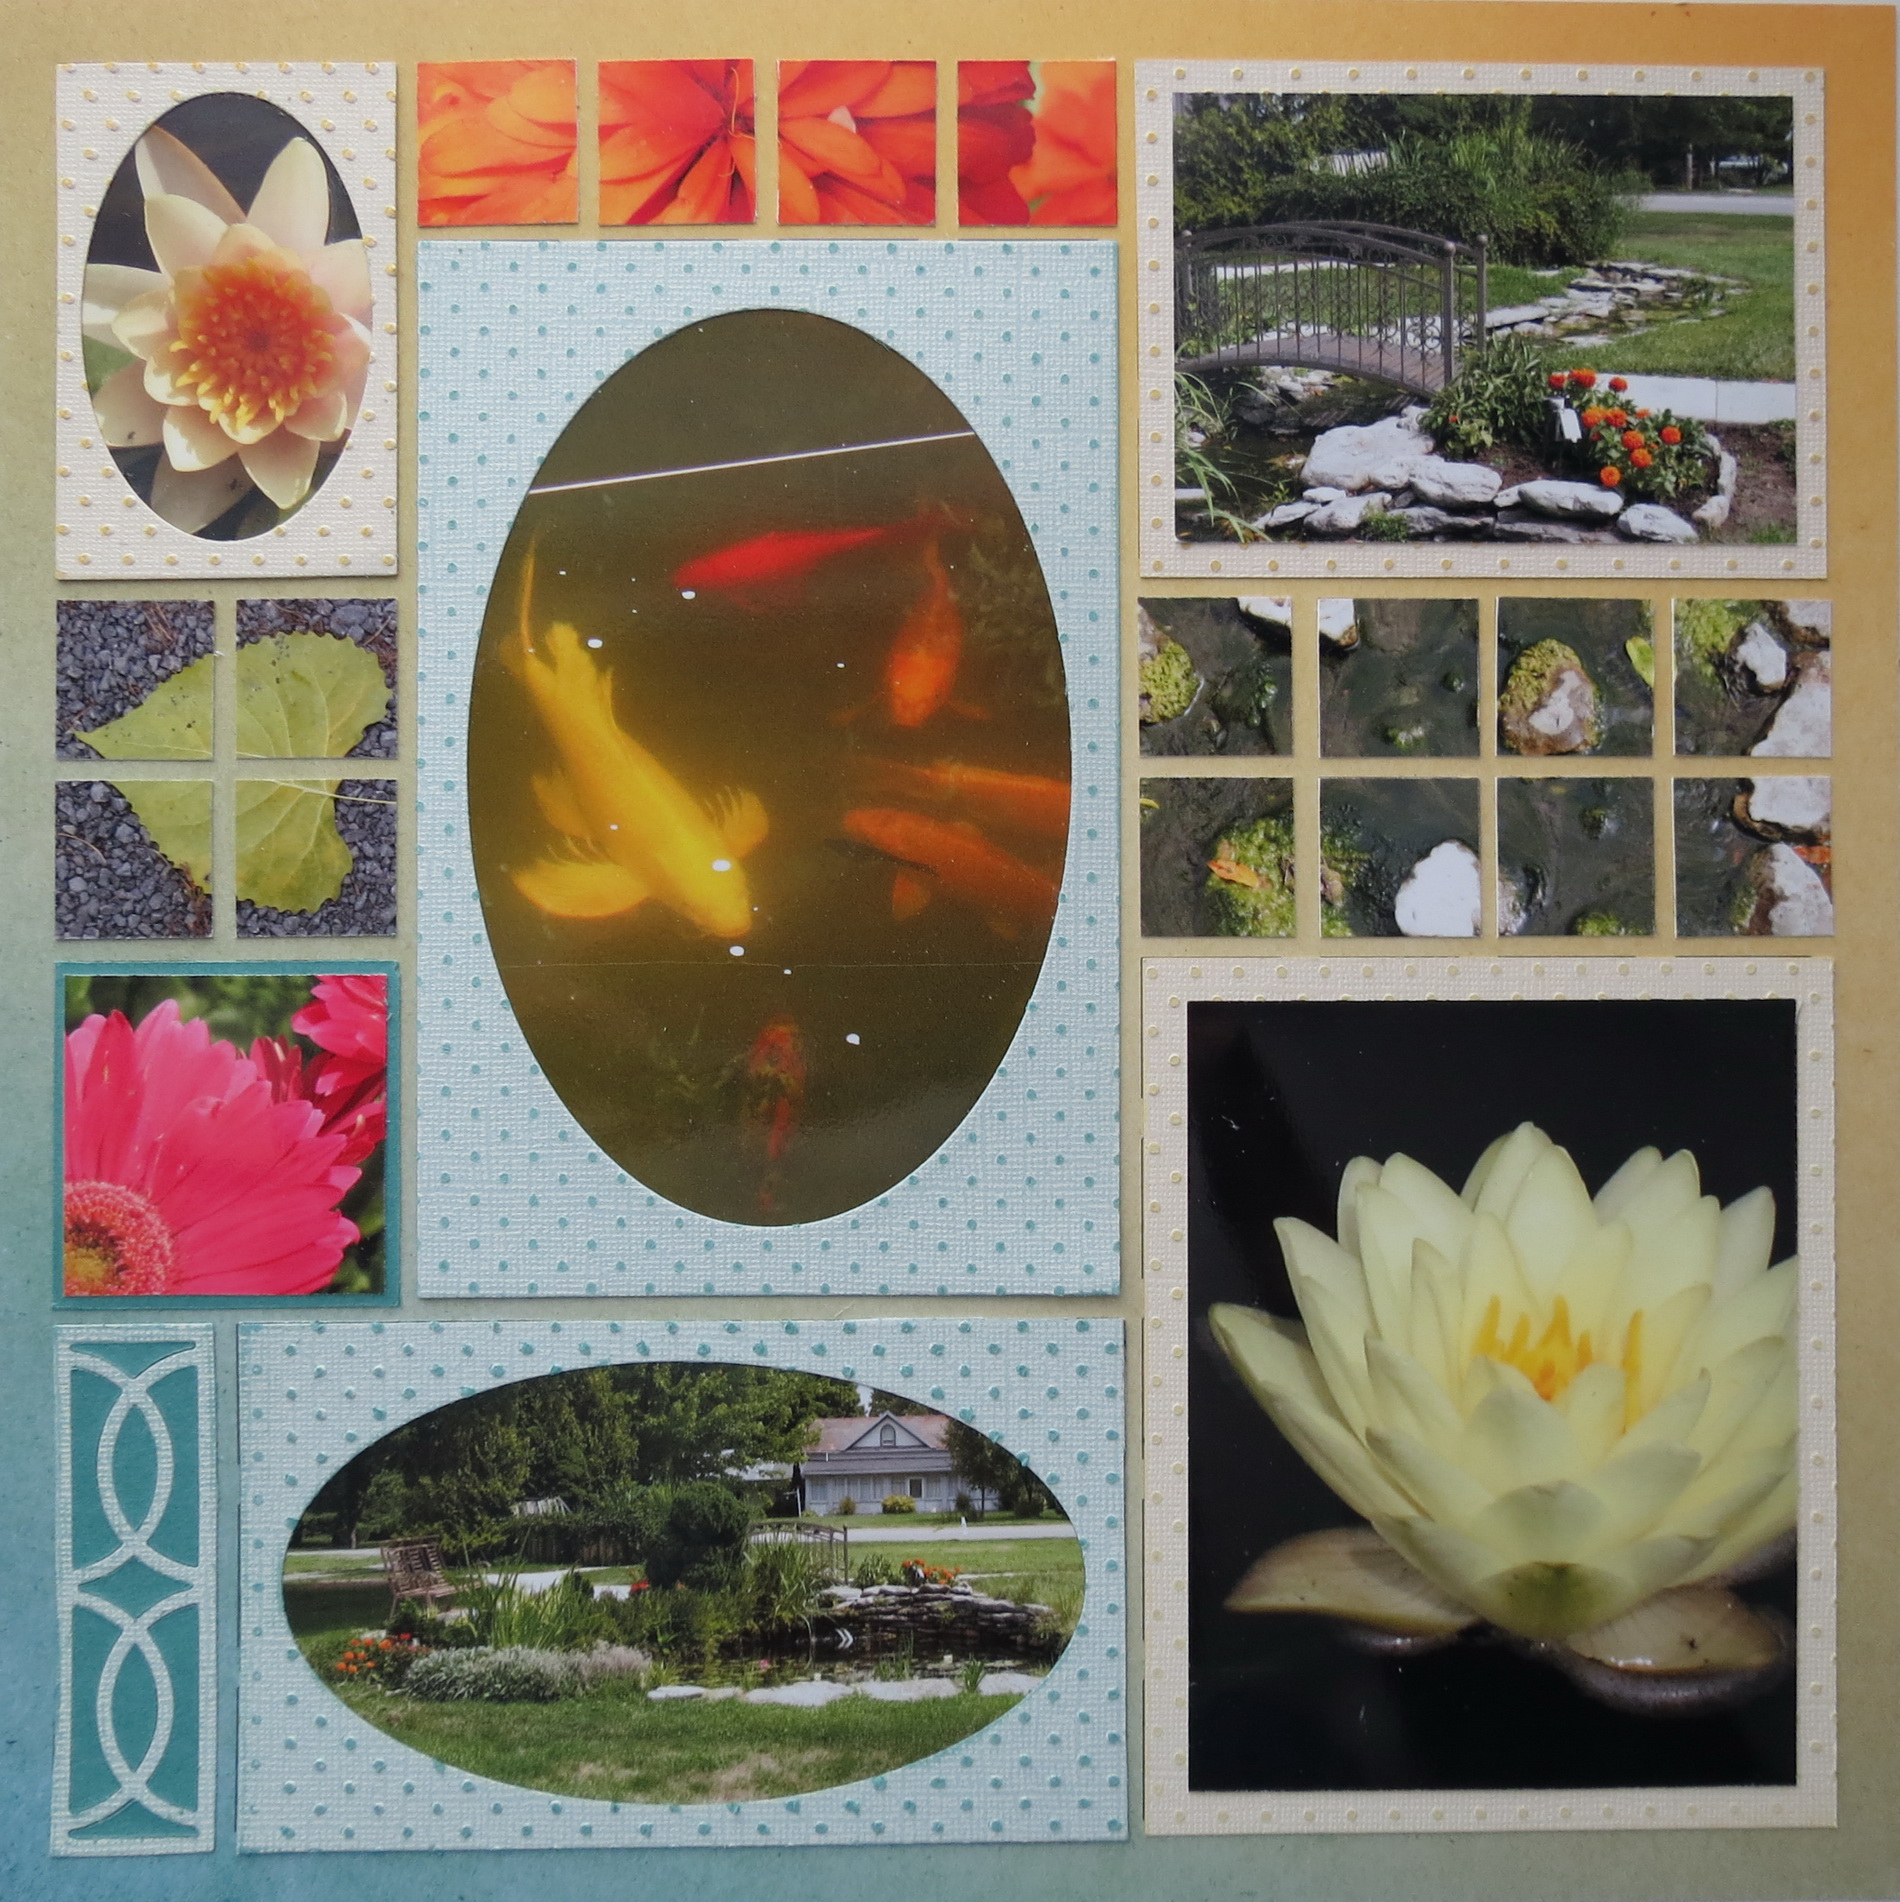
Mosaic Moments Pattern #159 a puzzle pattern
The pattern I’ve selected from the Pattern Gallery is #159 a puzzle pattern. This was chosen because it would allow all three of the oval frames and the 1×3 to be used. Additionally, there are two mosaic areas that will come in handy for some of the photos chosen for this page.
So that’s the basic supplies we need to get started. Now for the photos!
As spring unfolds before us we watch all those plants emerging from the ground and bursting into full bloom. We tend to concentrate on the beautiful blooms and not all the early stages. You might want to include some of those close ups for a change! Here are a few suggestions on things to look for if you are looking down that you may want to include, no matter the season!

Mosaic Moments Photo Tips: Look Down! A few examples of what to look for on your next photo shoot!
The ground beneath your feet; the pots and planters on the deck; the animals, bugs and critters you almost missed; budding plants at ground level or mushrooms in the grass, these are a few of the things you will find when you take time to look down and snap a picture!
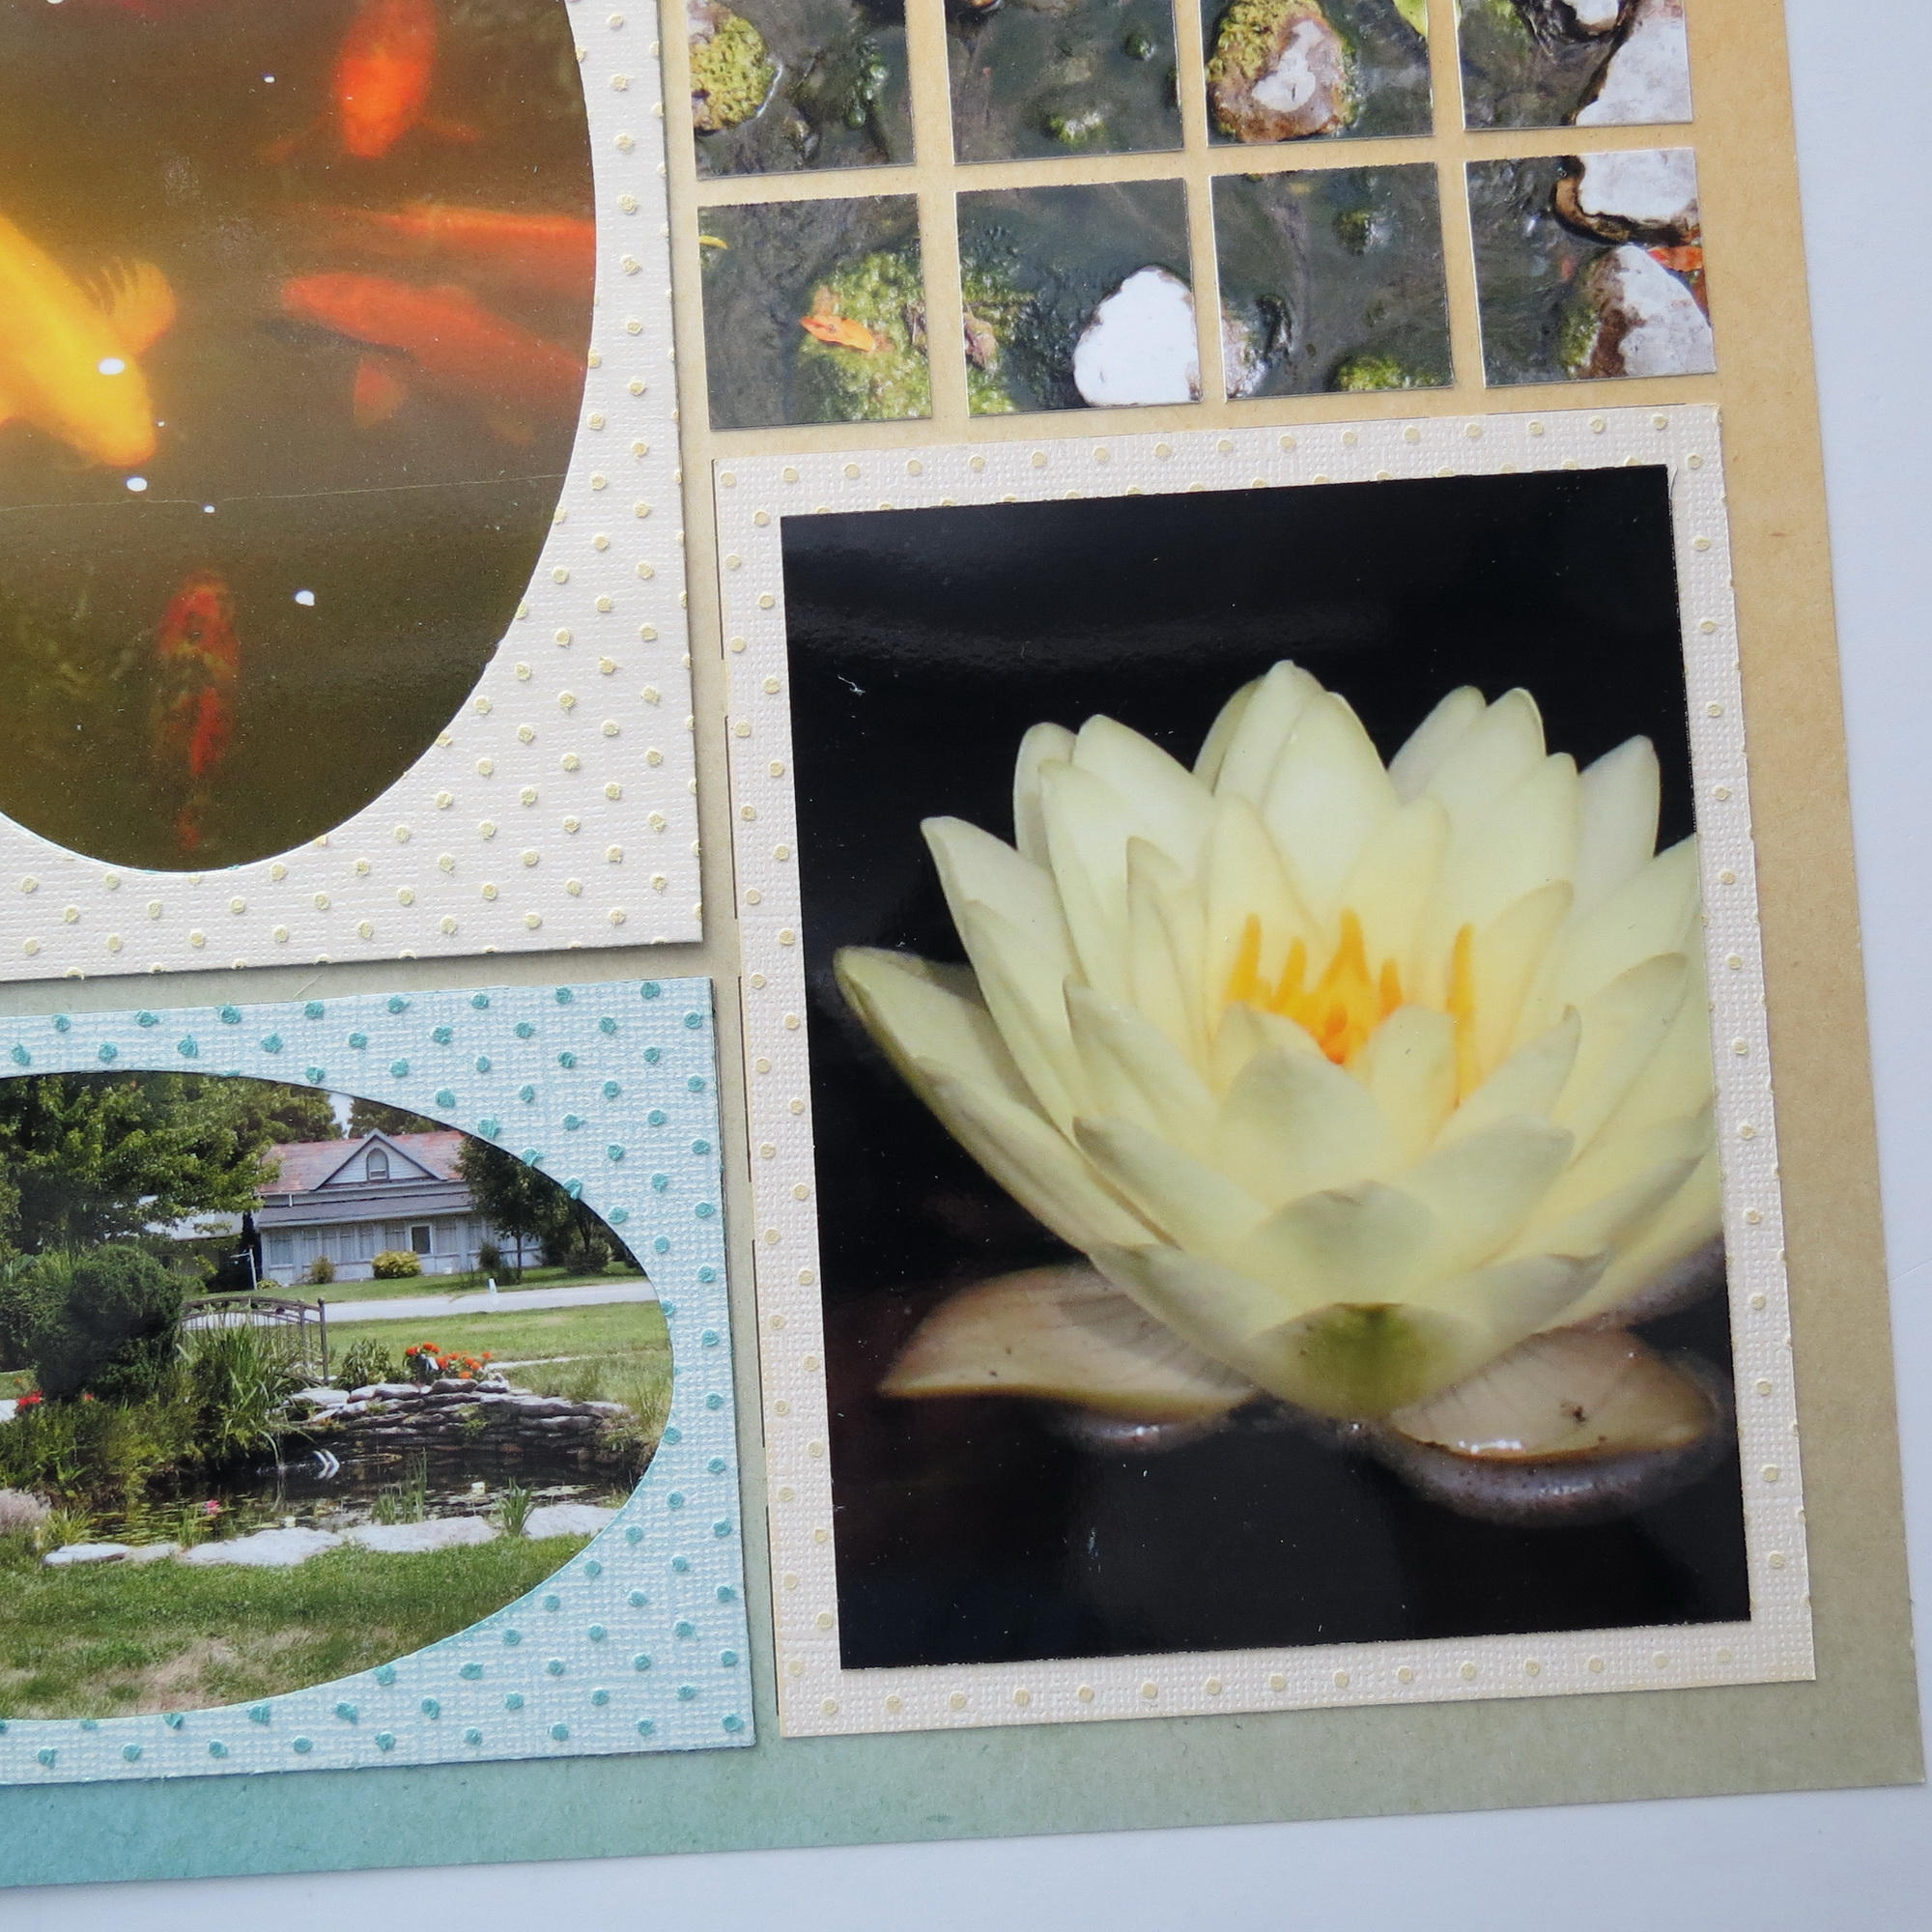
Putting it all together!
Mosaic Moments Photo Tips: Look Down! A trio of options
Instead of showing how a few of these photos can add to your page, this page will begin with one photo and show you what all the little details I found there when I looked down.
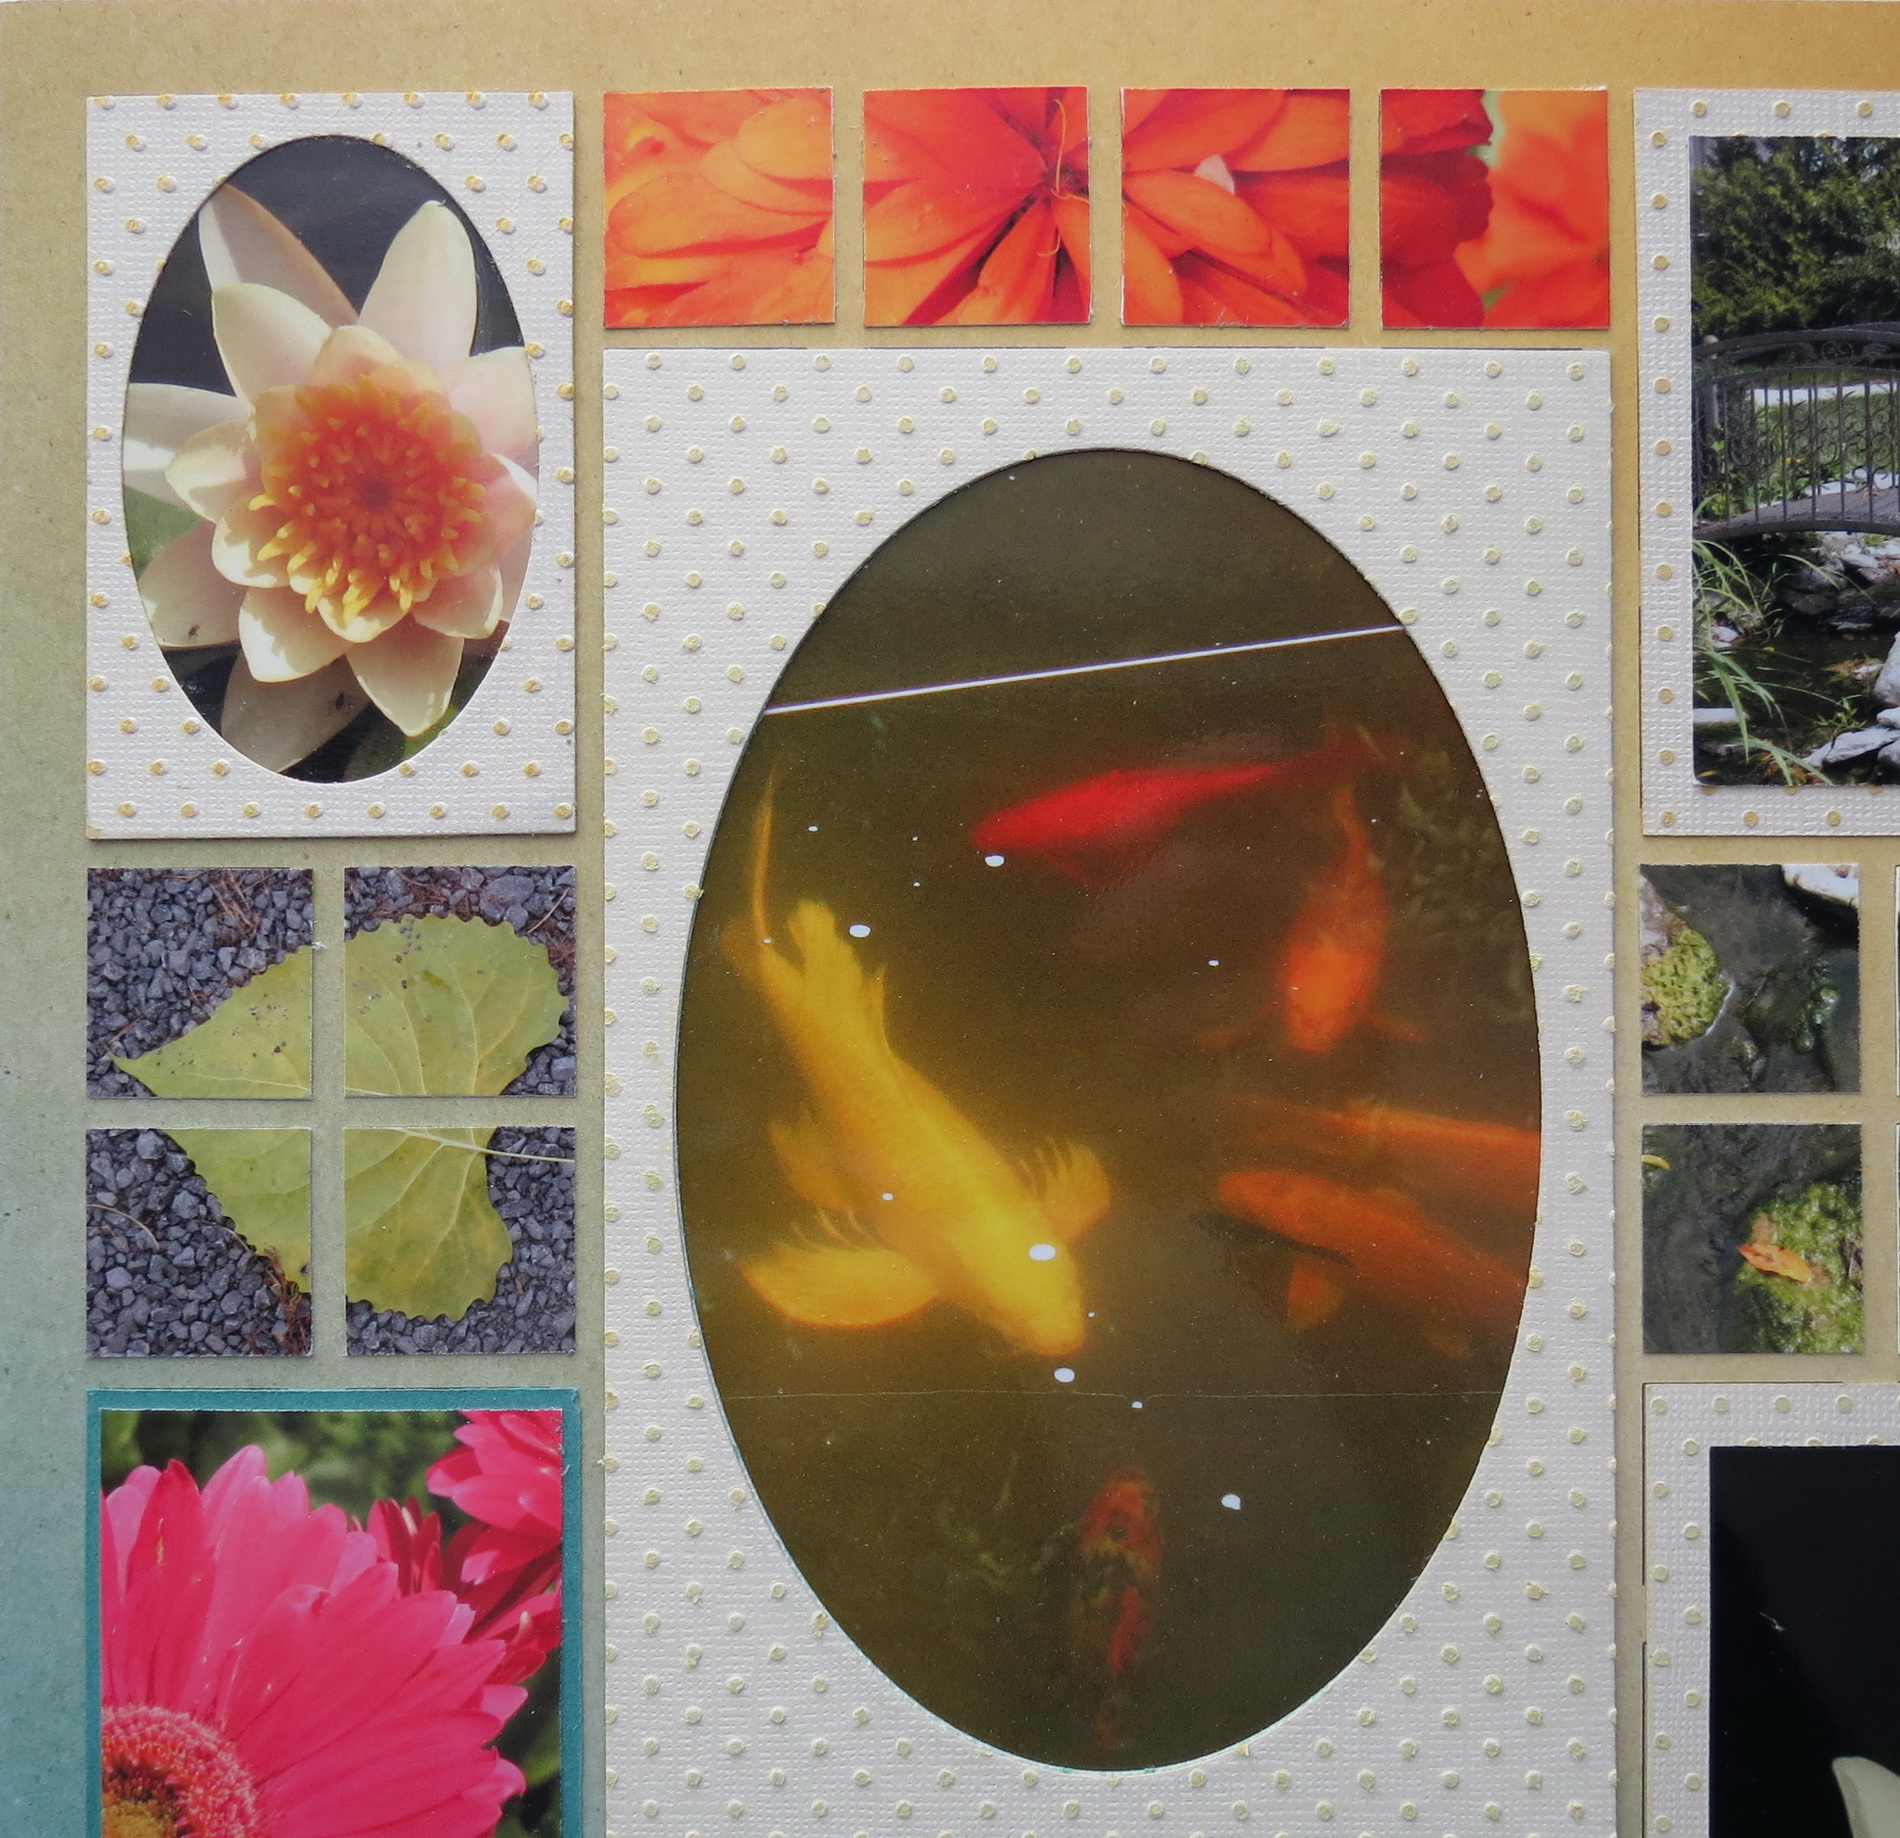
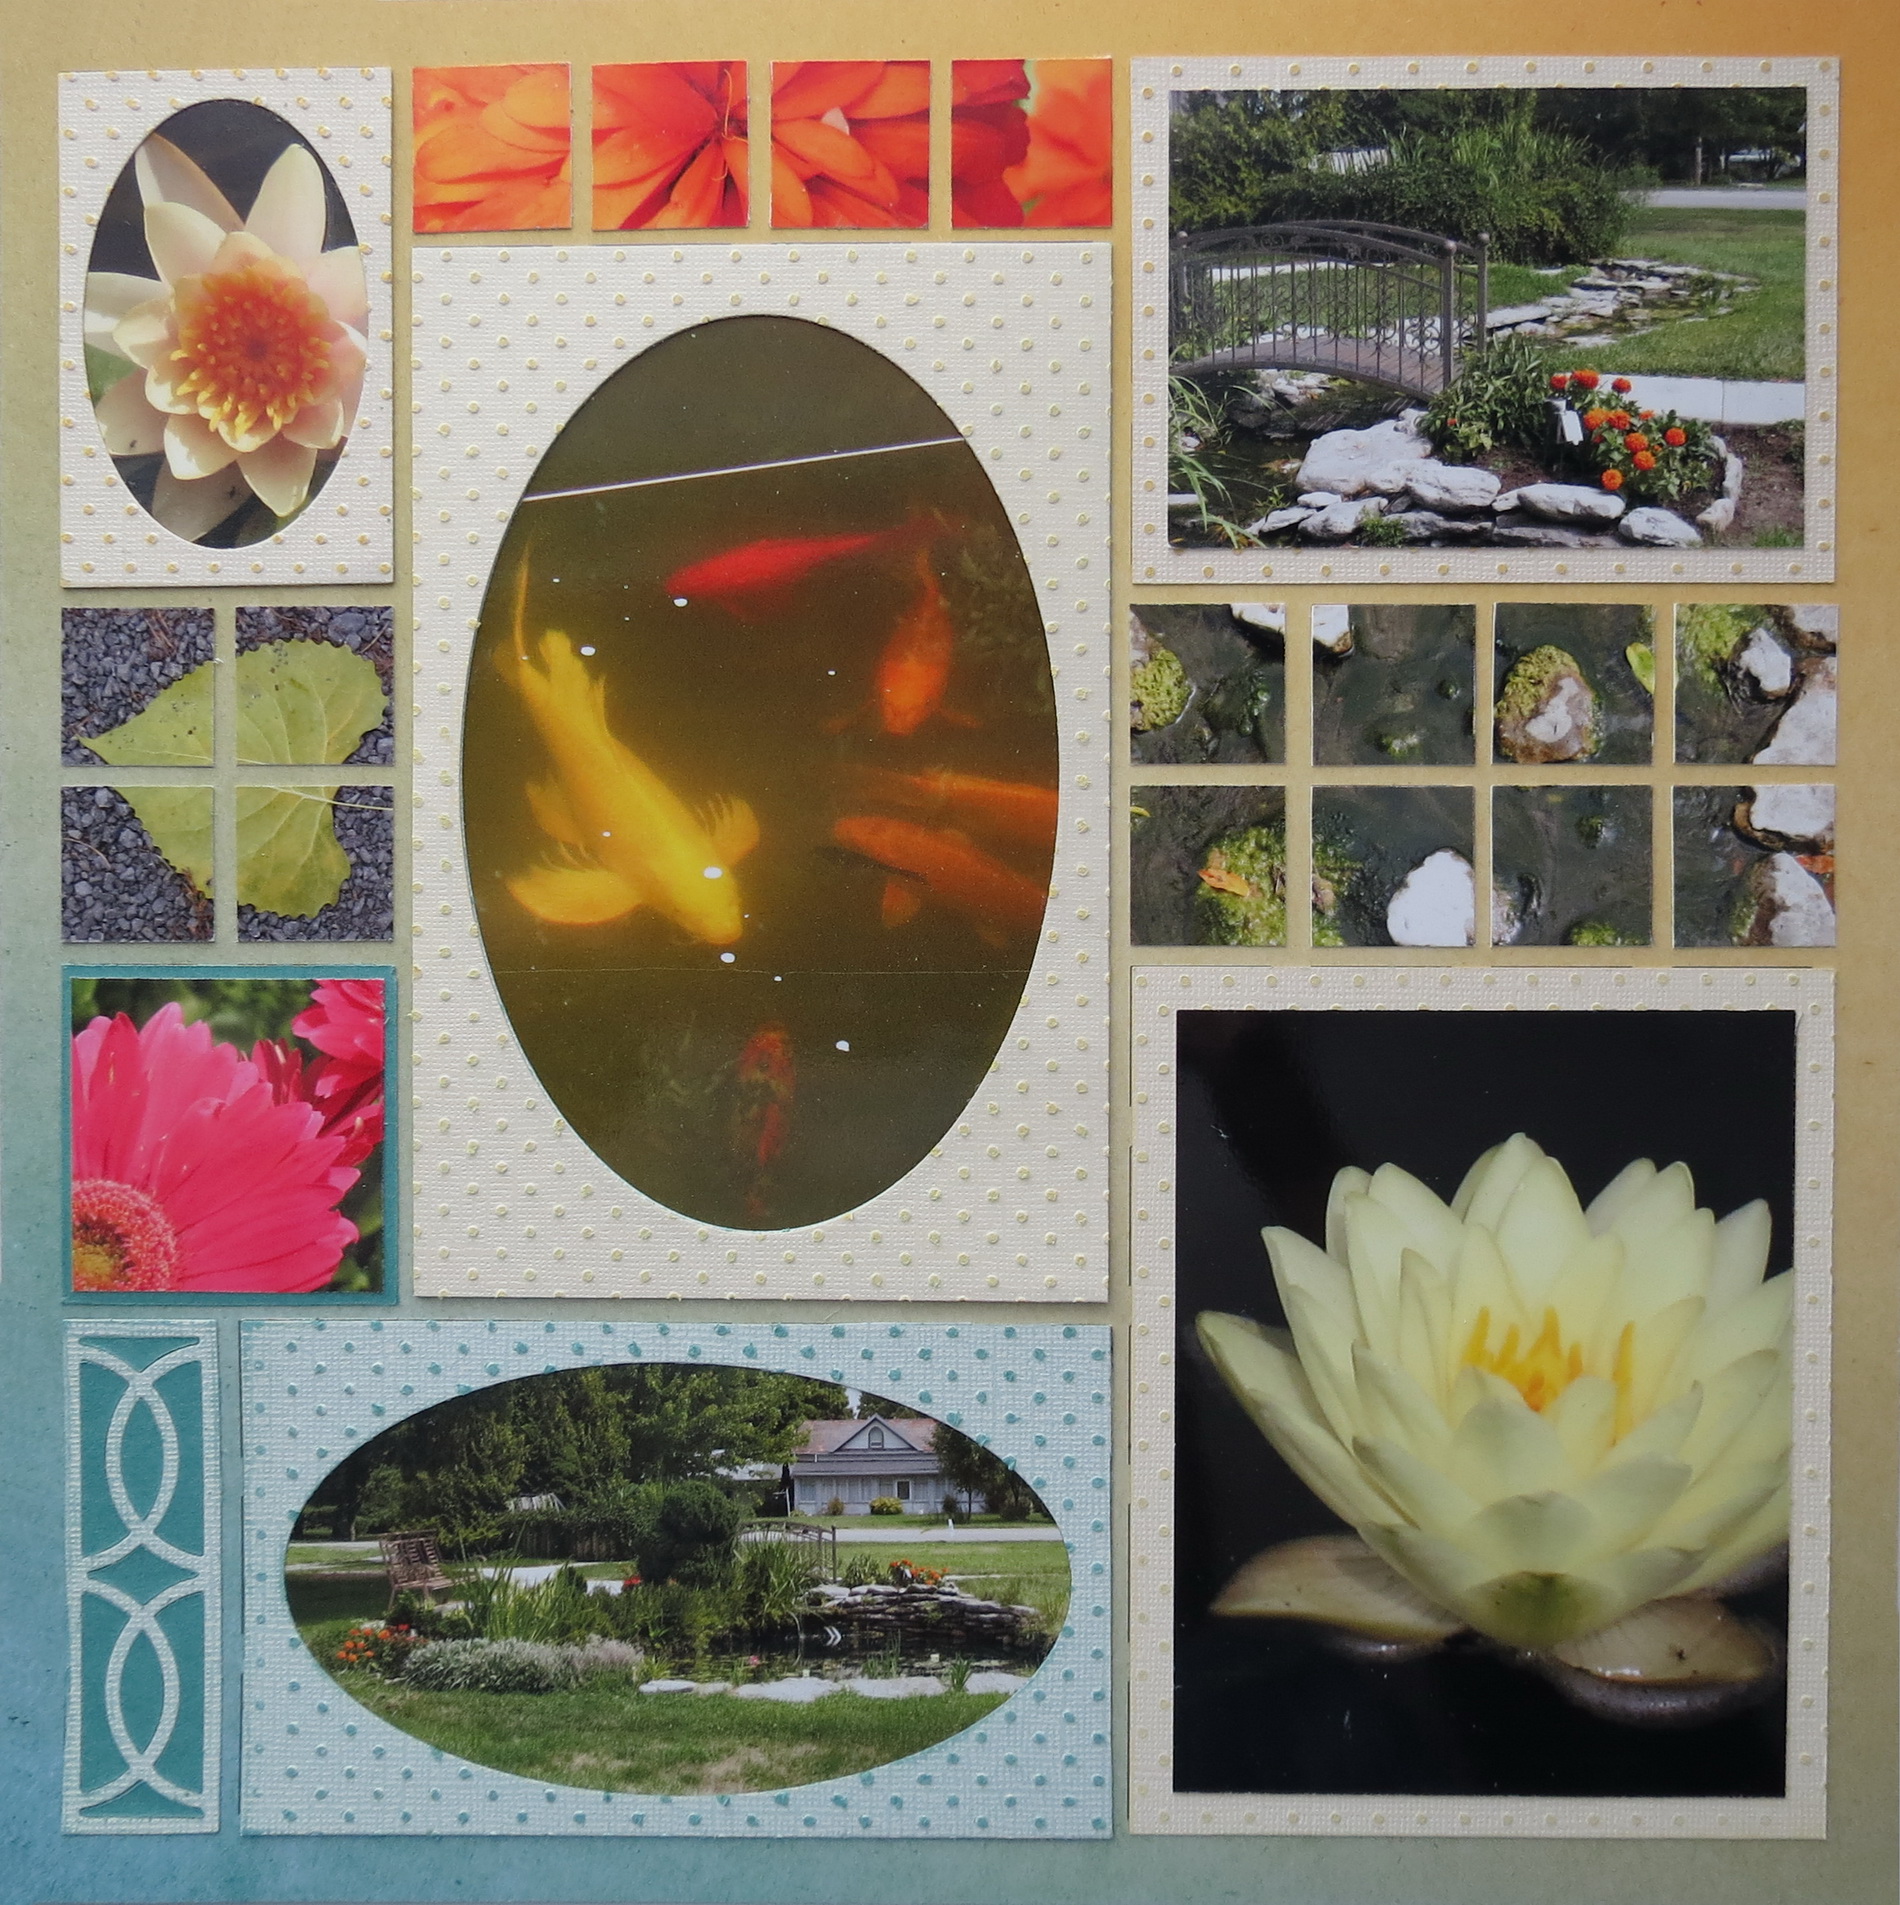
Mosaic Moments Photo Tips: Look Down! Inspiration Photo where all the other photos will be found.
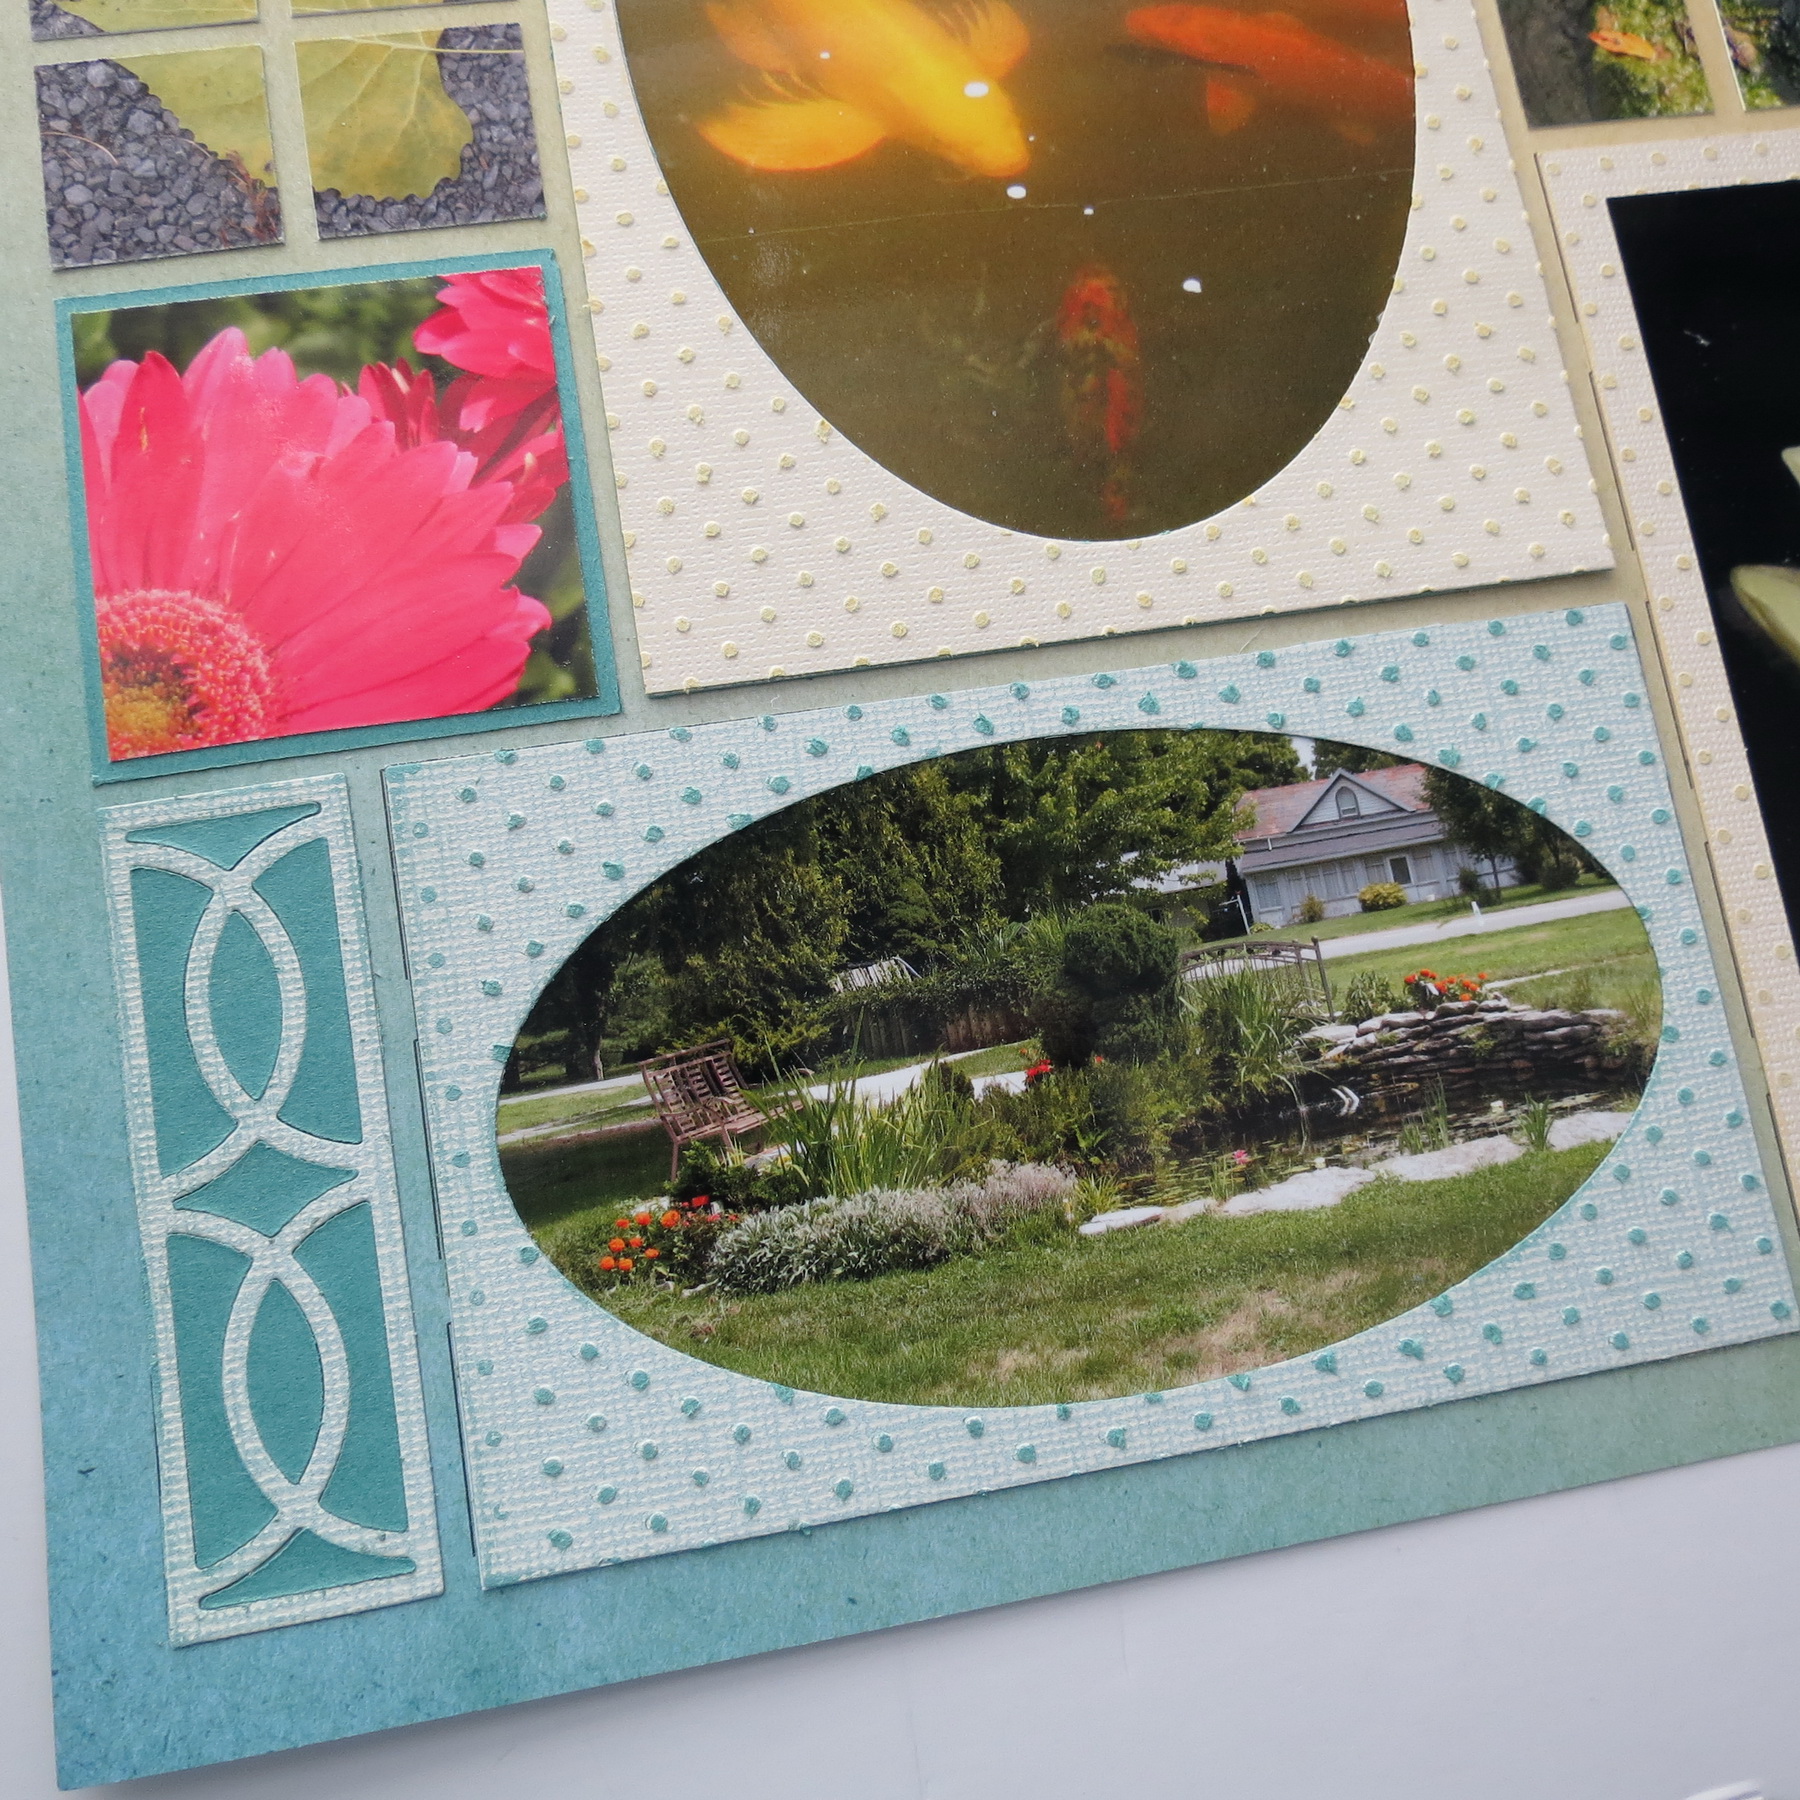
The 3×5 oval frame’s my inspiration photo, a small garden oasis with so many things to see. The remaining photos display most of them. A koi pond, water lilies, a rocky stream bed where the water swirls around moss covered rocks. There are leaves, flower petals and an arched bridge across the stream.
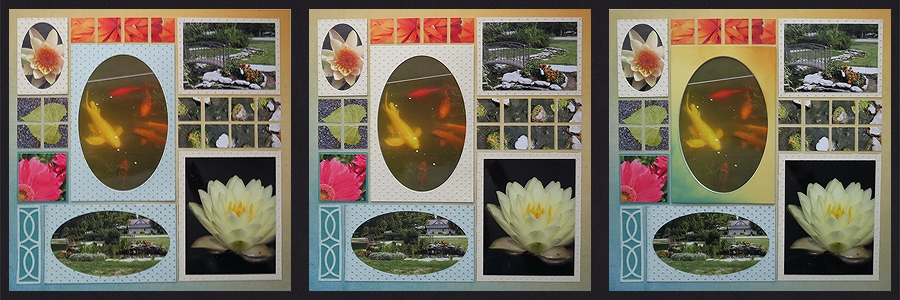
Mosaic Moments Photo Tips: Look Down!

Mosaic Moments Photo Tips: Look Down!
Mosaic Moments Photo Tips: Look Down!
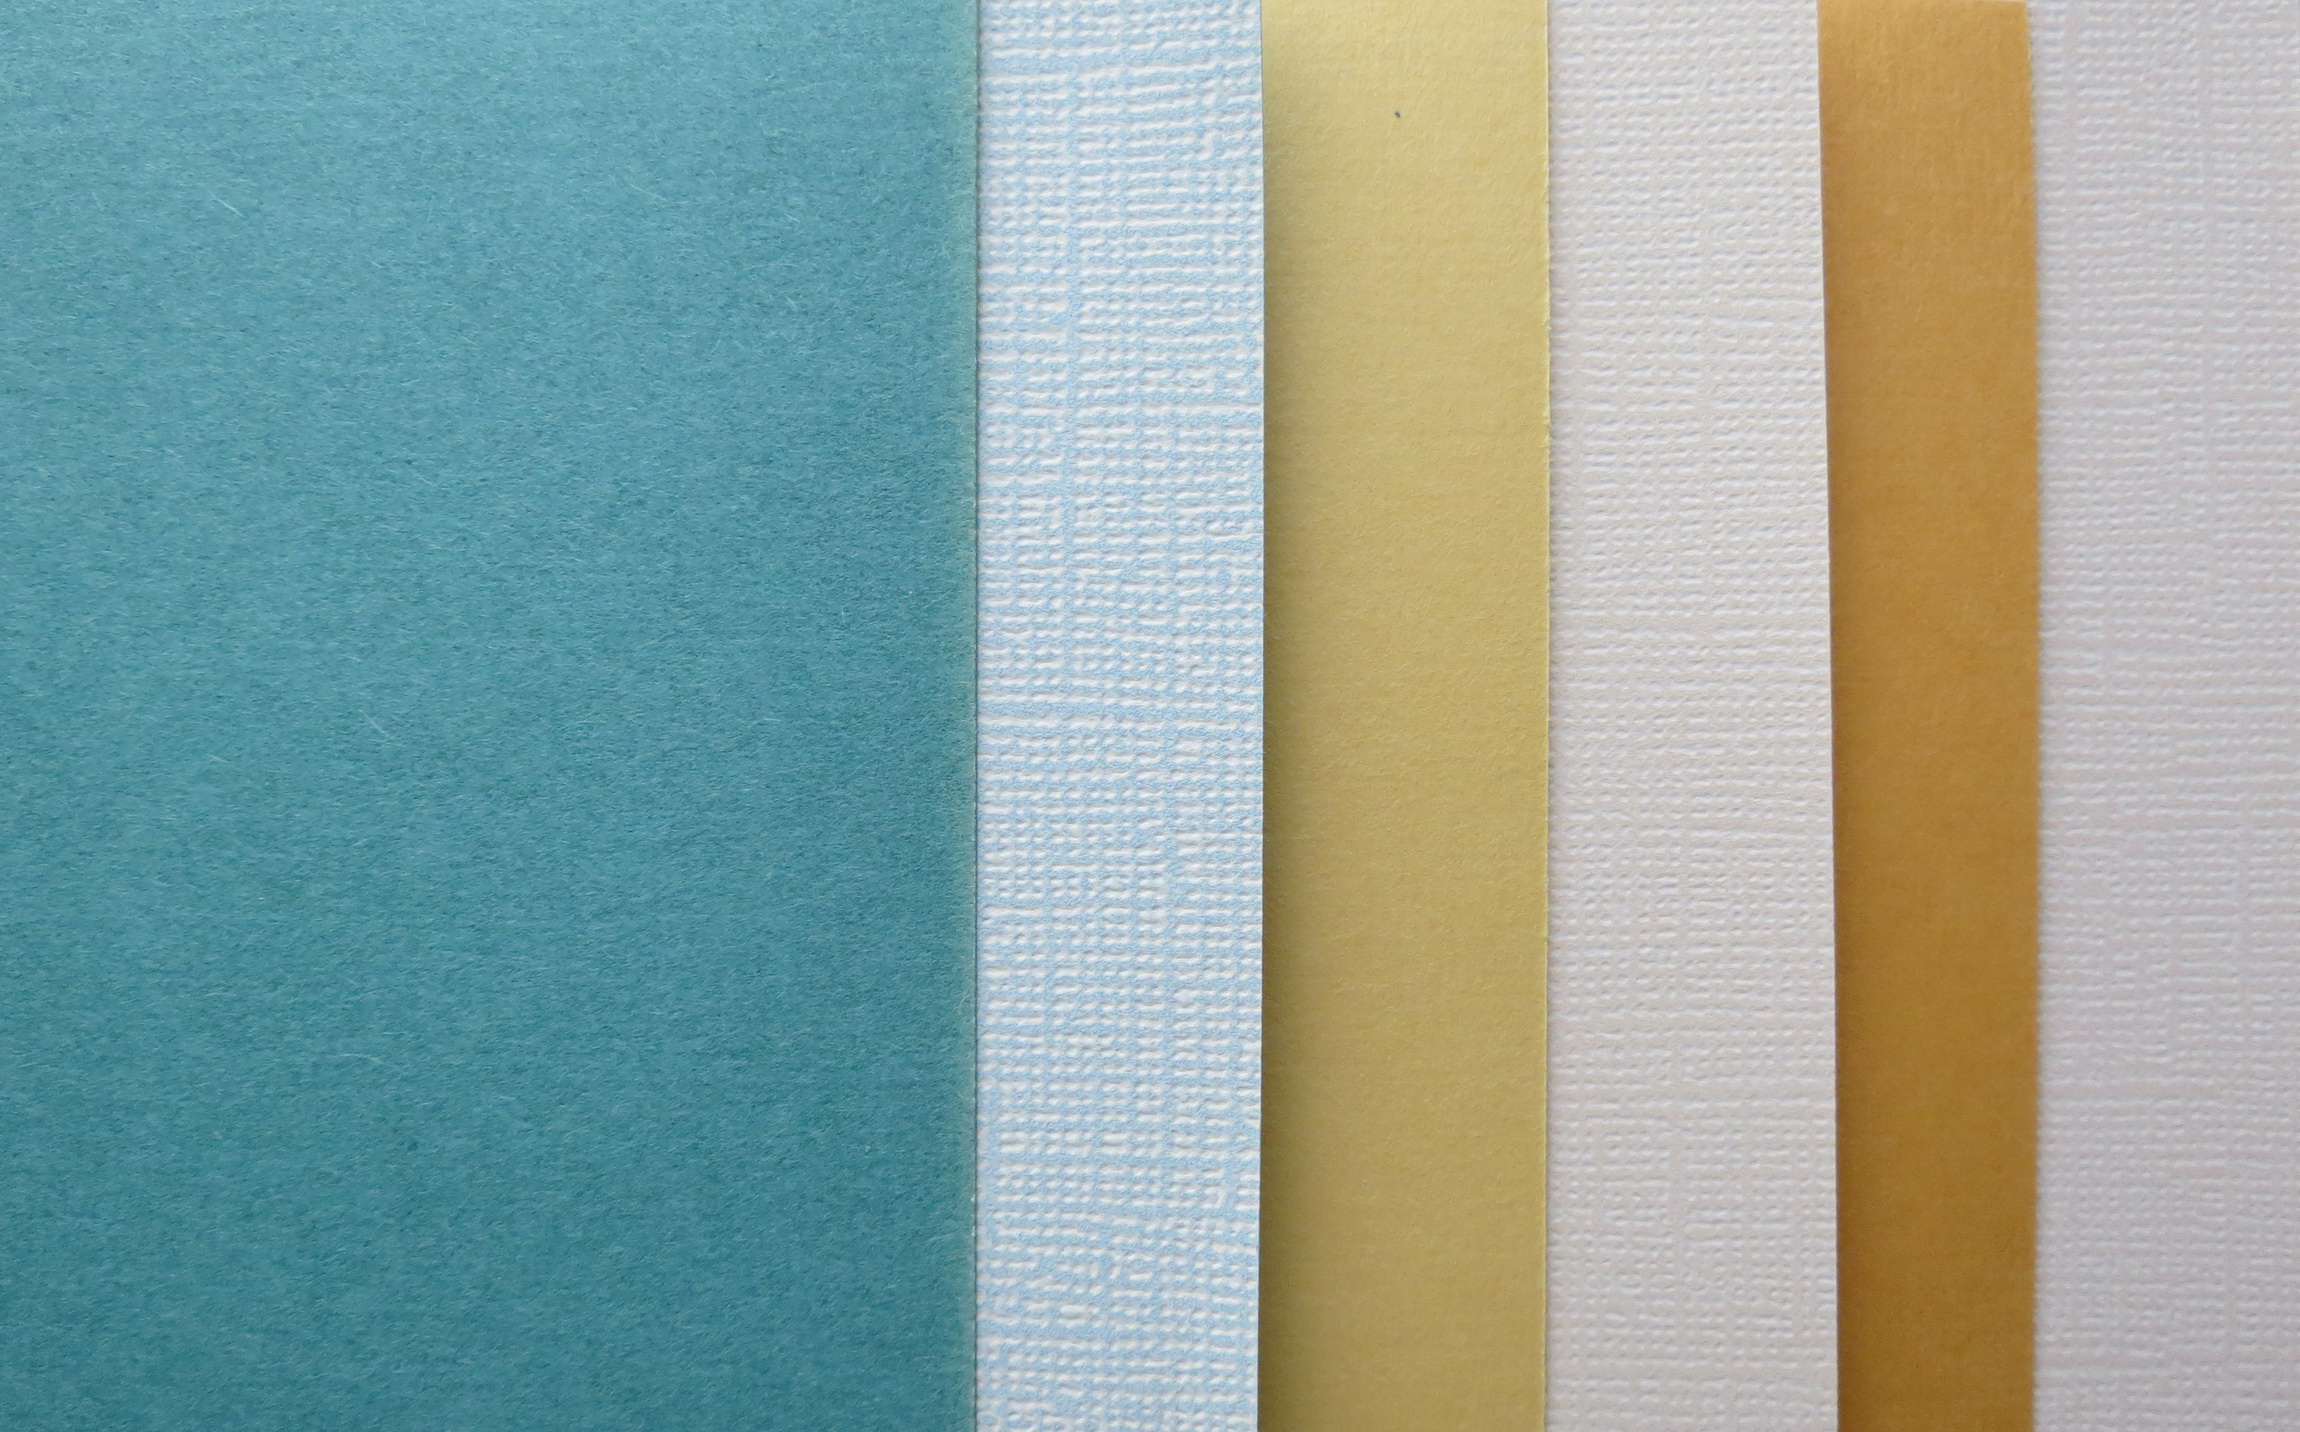
Core’dinations Whitewash cardstock
For each of the frames I’ve used Core’dinations Whitewash cardstock, run them through a Swiss Dot embossing folder and sanded the dots to reveal the color core. There were three colors that matched the Golden Hour so for the mats and frames I tried to arrange them to match.
Mosaic Moments Photo Tips: Look Down! With blue 4×6 Oval Frame option
My first choice for the larger 4×6 frame the blue was selected. However, I didn’t like the way the page felt, it seemed that an imbalance in color and shapes all favored the left-side of the page.
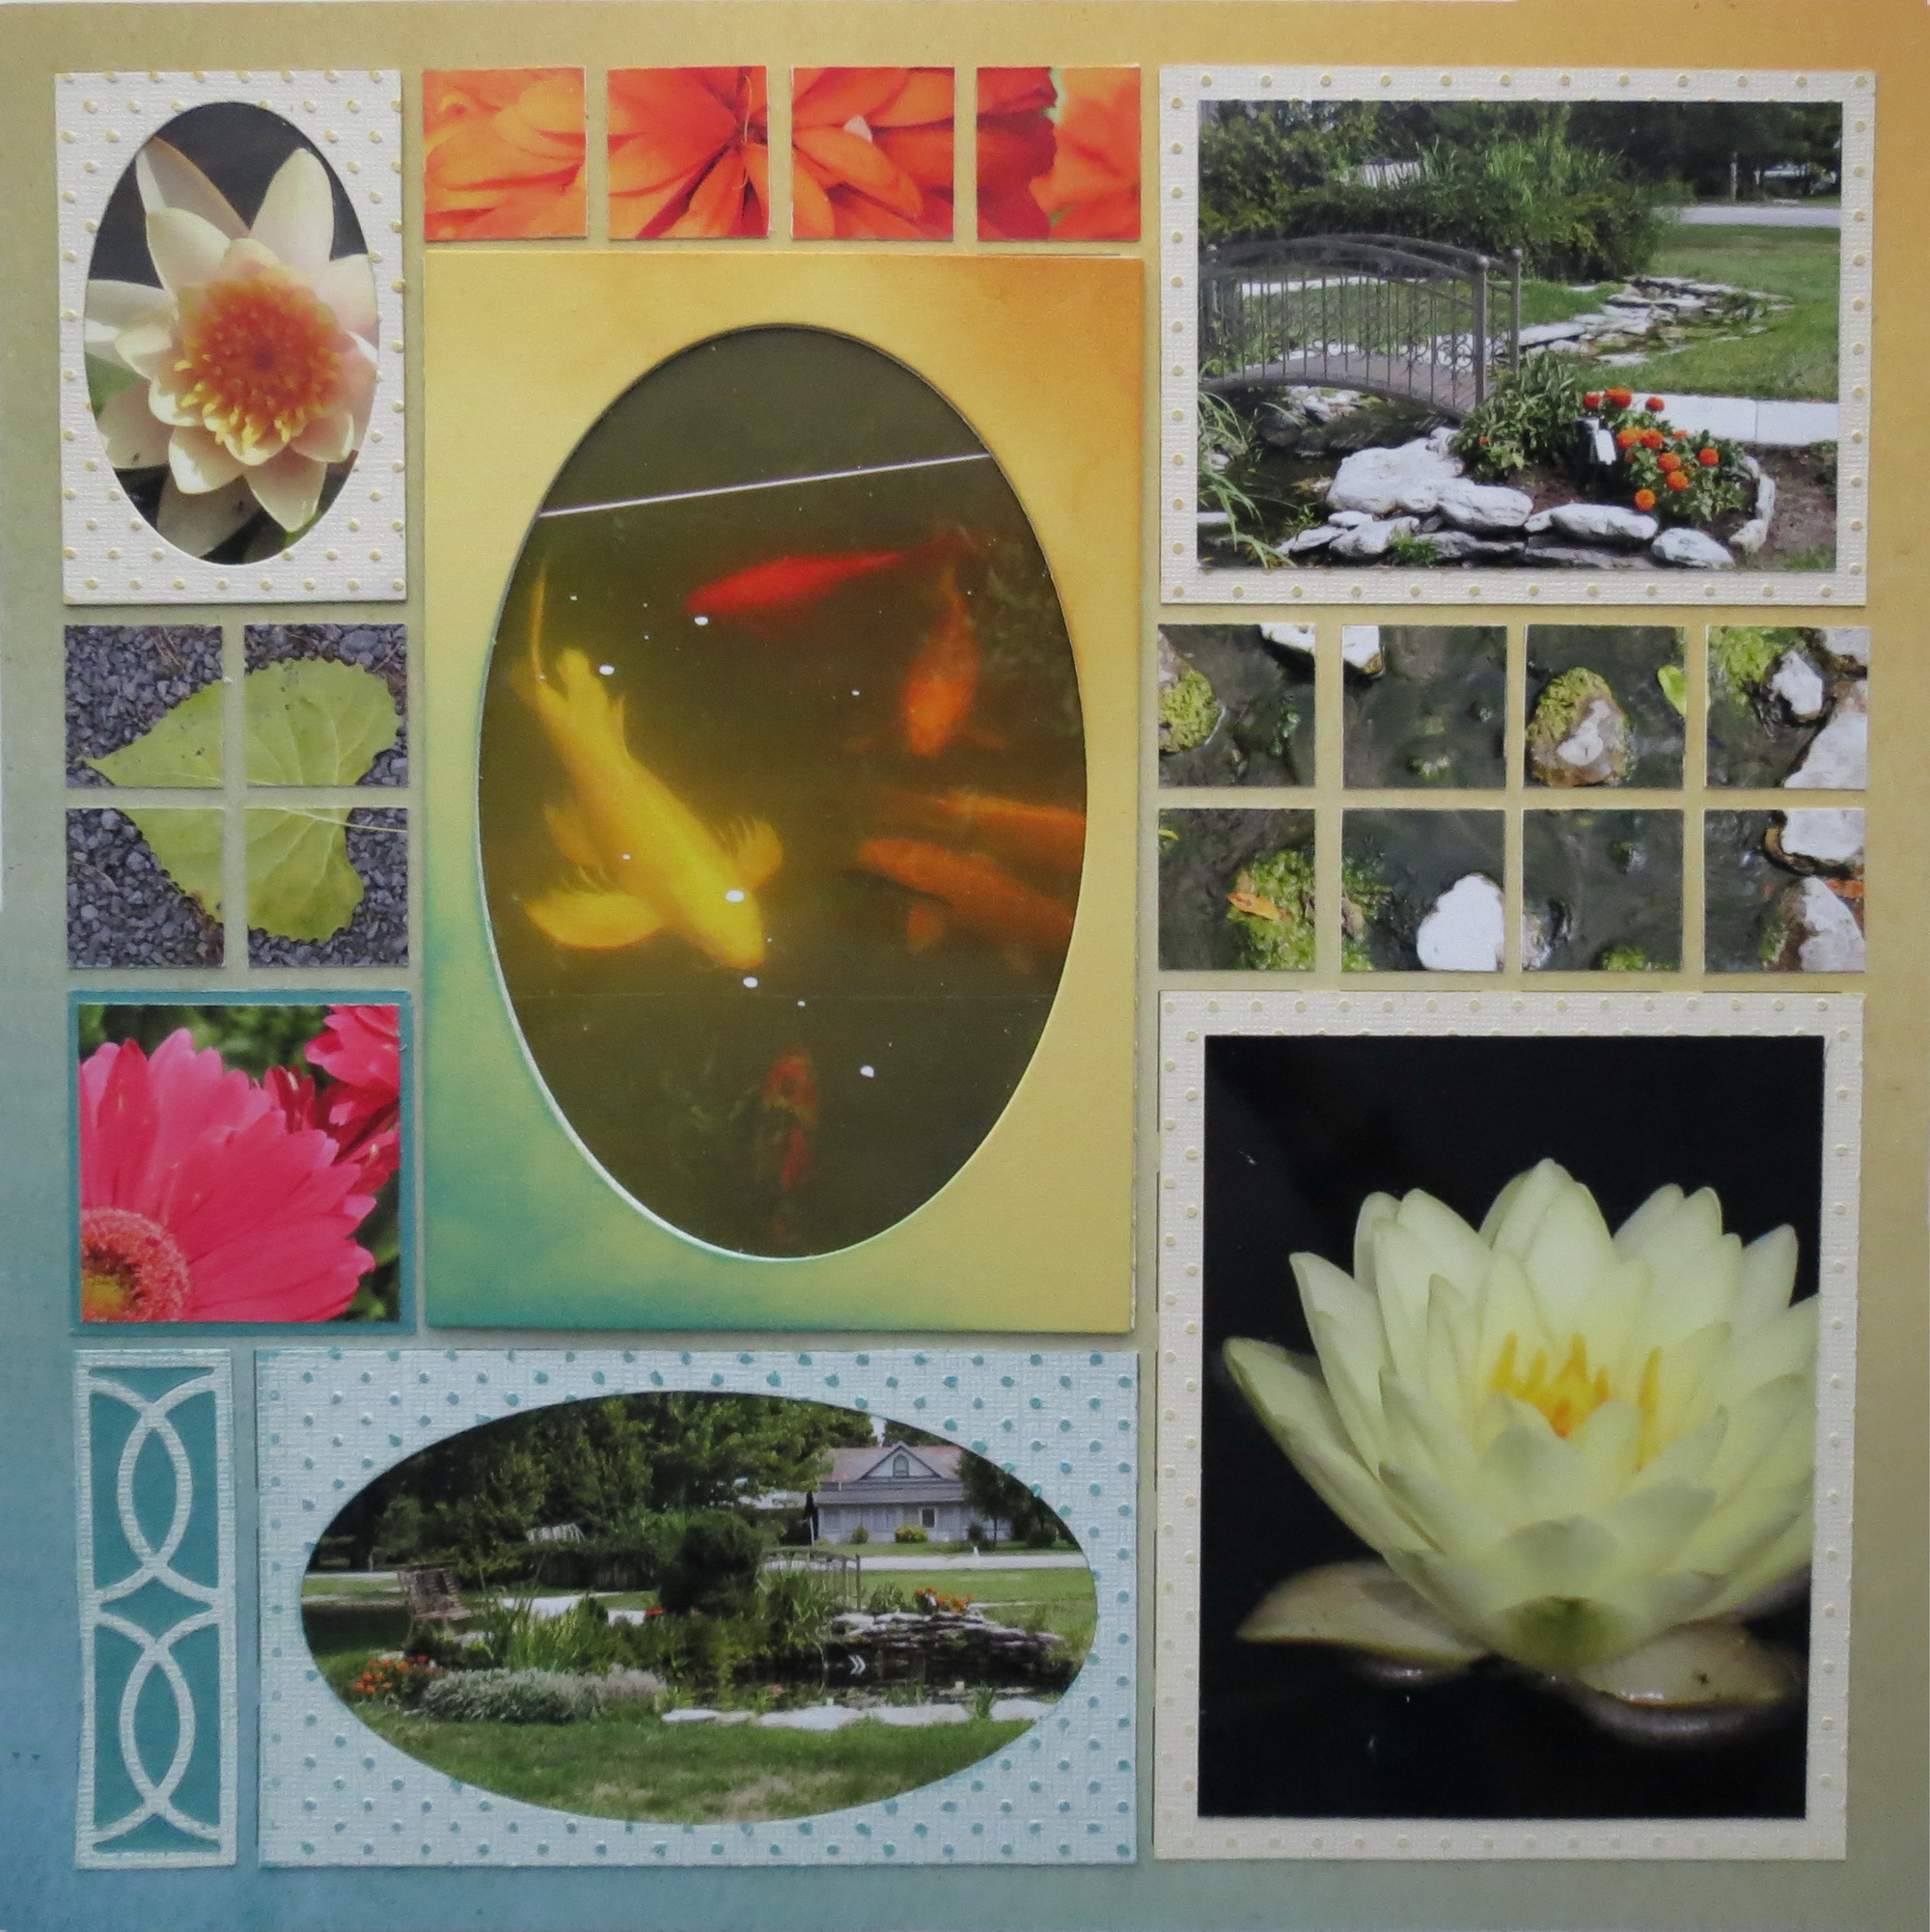
Mosaic Moments Photo Tips: Look Down! 4×6 Yellow frame option
Next the light yellow I’d used in the right hand corner became my choice. Now the page feels divided diagonally and a bit more balanced, but I worried about the light color being so significant. That’s when I tried a third way.
Mosaic Moments Photo Tips: Look Down! Using colored side and inked with Distress inks to match
I flipped the cardstock to the backside for the color and then inked the lower left with Distressed Ink-Broken China and the upper right corner with Wild Honey to mimic the grid paper below. While I think the color works well with the page, I returned to my previous choice.
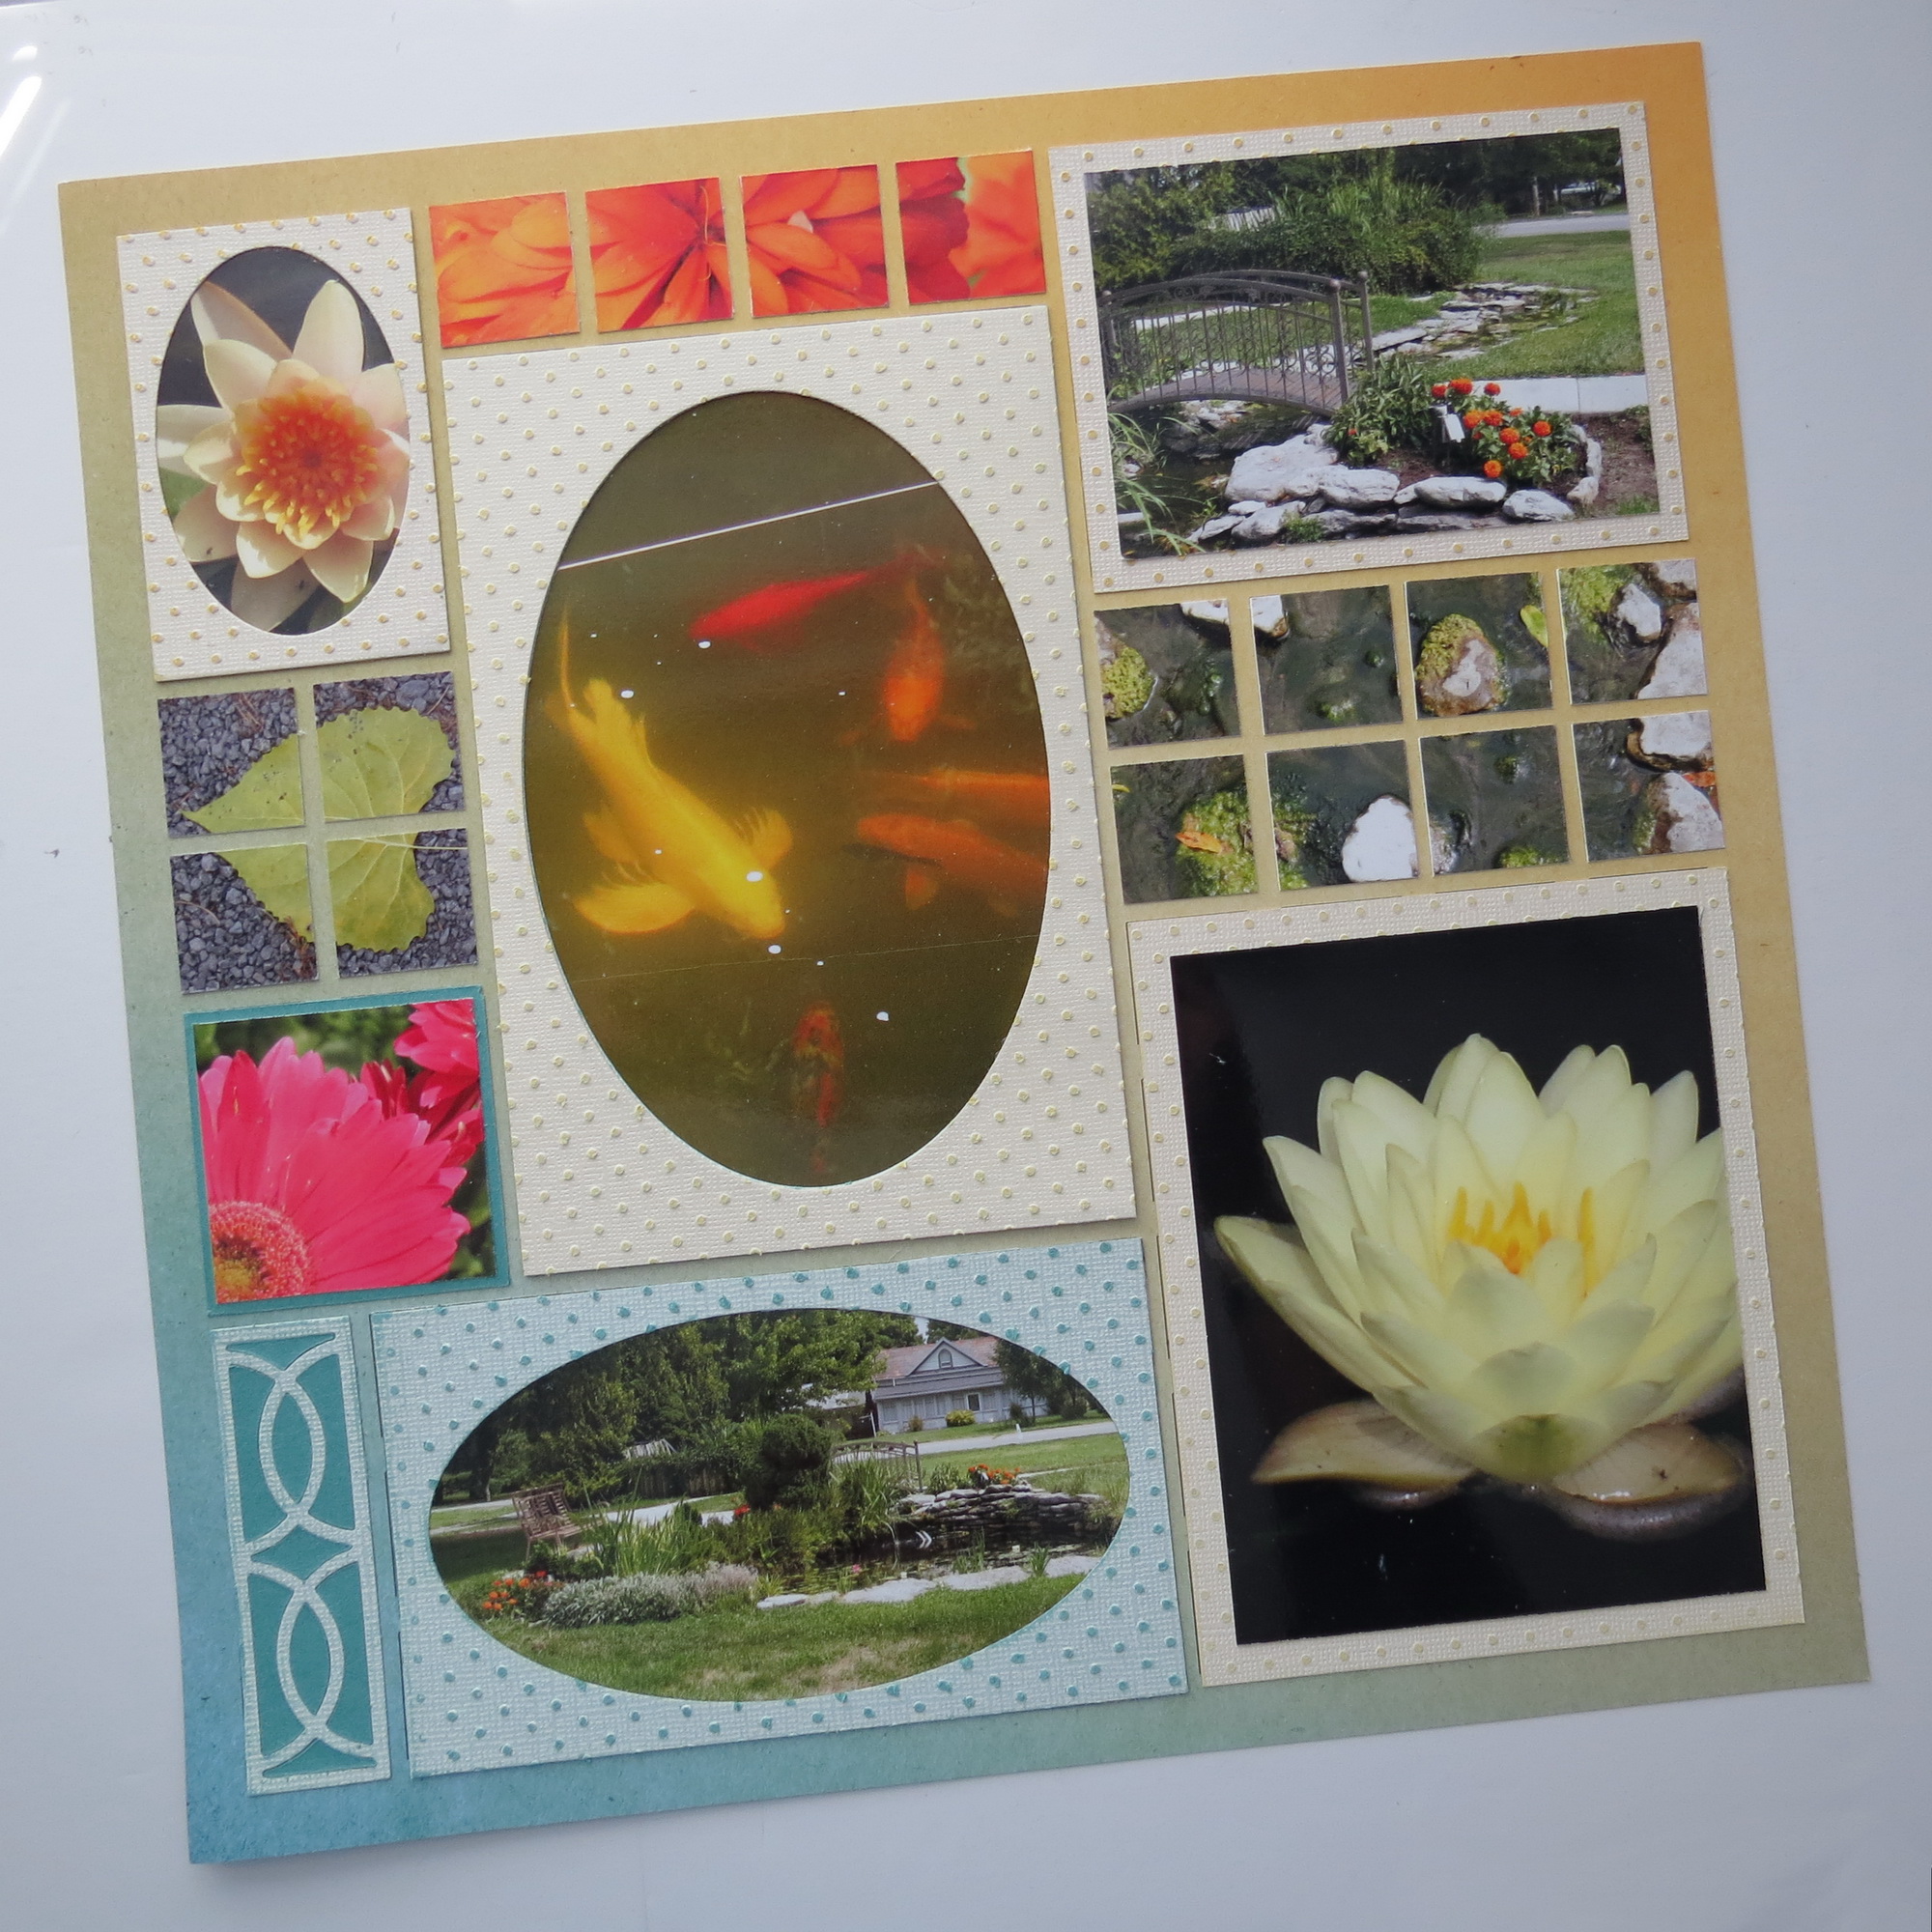
Finally!
Now I don’t want to forget about the 1×3 that is a part of the new die set. I used both sides of the cardstock for this one! A little sanding was used to reveal some of the core color and then the pieces were flipped and filled the spaces back in again.
Mosaic Moments Photo Tips: Look Down!
Now it’s time to get out there and take photos! Look up and look down! Don’t’ forget to have fun!!
Andrea Fisher