
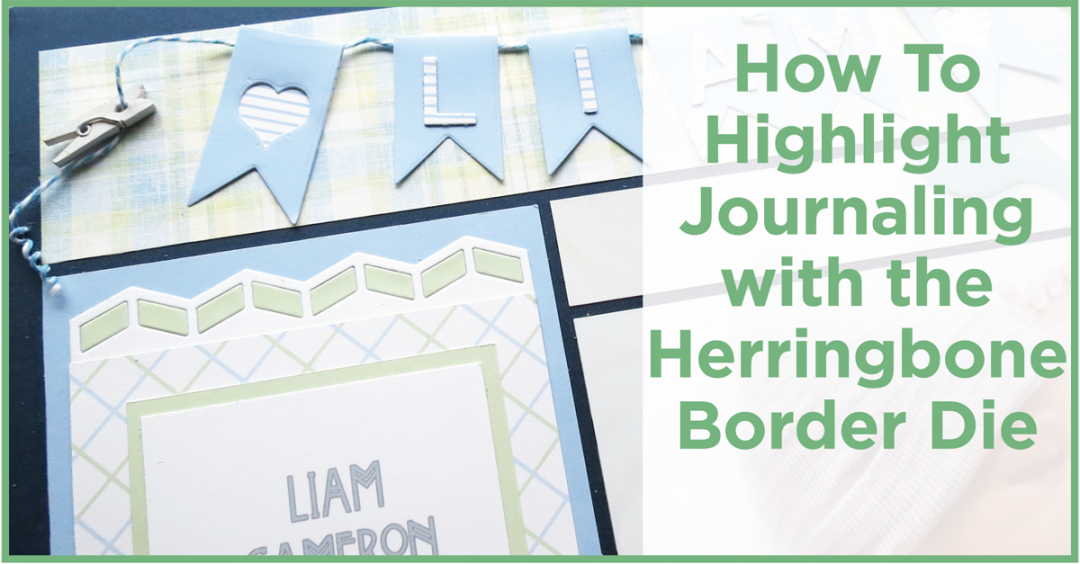
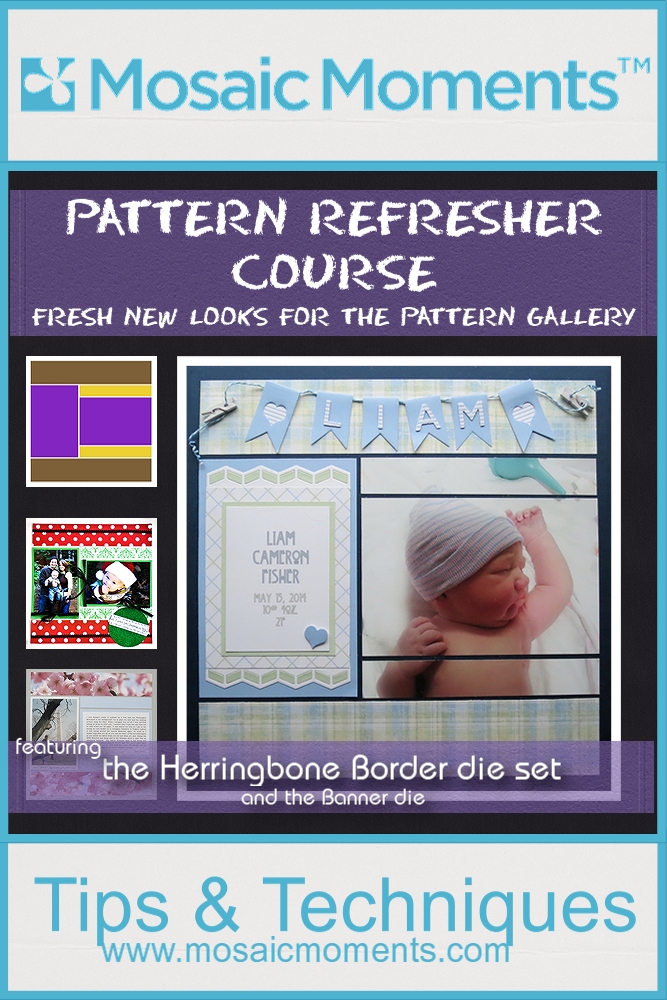
Borders and Banners
featuring the Herringbone Border and Banner Dies and Navy Grid Paper
The pattern I’ve chosen to update from the pattern gallery this week and show off our new Herringbone border die is Pattern #280 a row pattern.
Mosaic Moments Pattern #280 a row pattern
The original example in the gallery features two 4”x 6” photos and two border strips with a large ornament embellishment for the Christmas theme.

Original Example of pattern #280
I played around with the new die and several pattern layouts before deciding on this one. Three things I really liked about it were:
• The large right-hand section of two 1x strips and a 4×6 block. I wondered how a large photo to fill all three sections would look. Sometimes you really want to go big and let your photo really stand out.
• I also saw the potential of multi-use in the spot to the left, in this case for my announcement and using the feature die and finally,
• The borders to add a banner.
Pattern Gallery Refresher with Pattern #280 a row pattern featuring the Herringbone Border Die
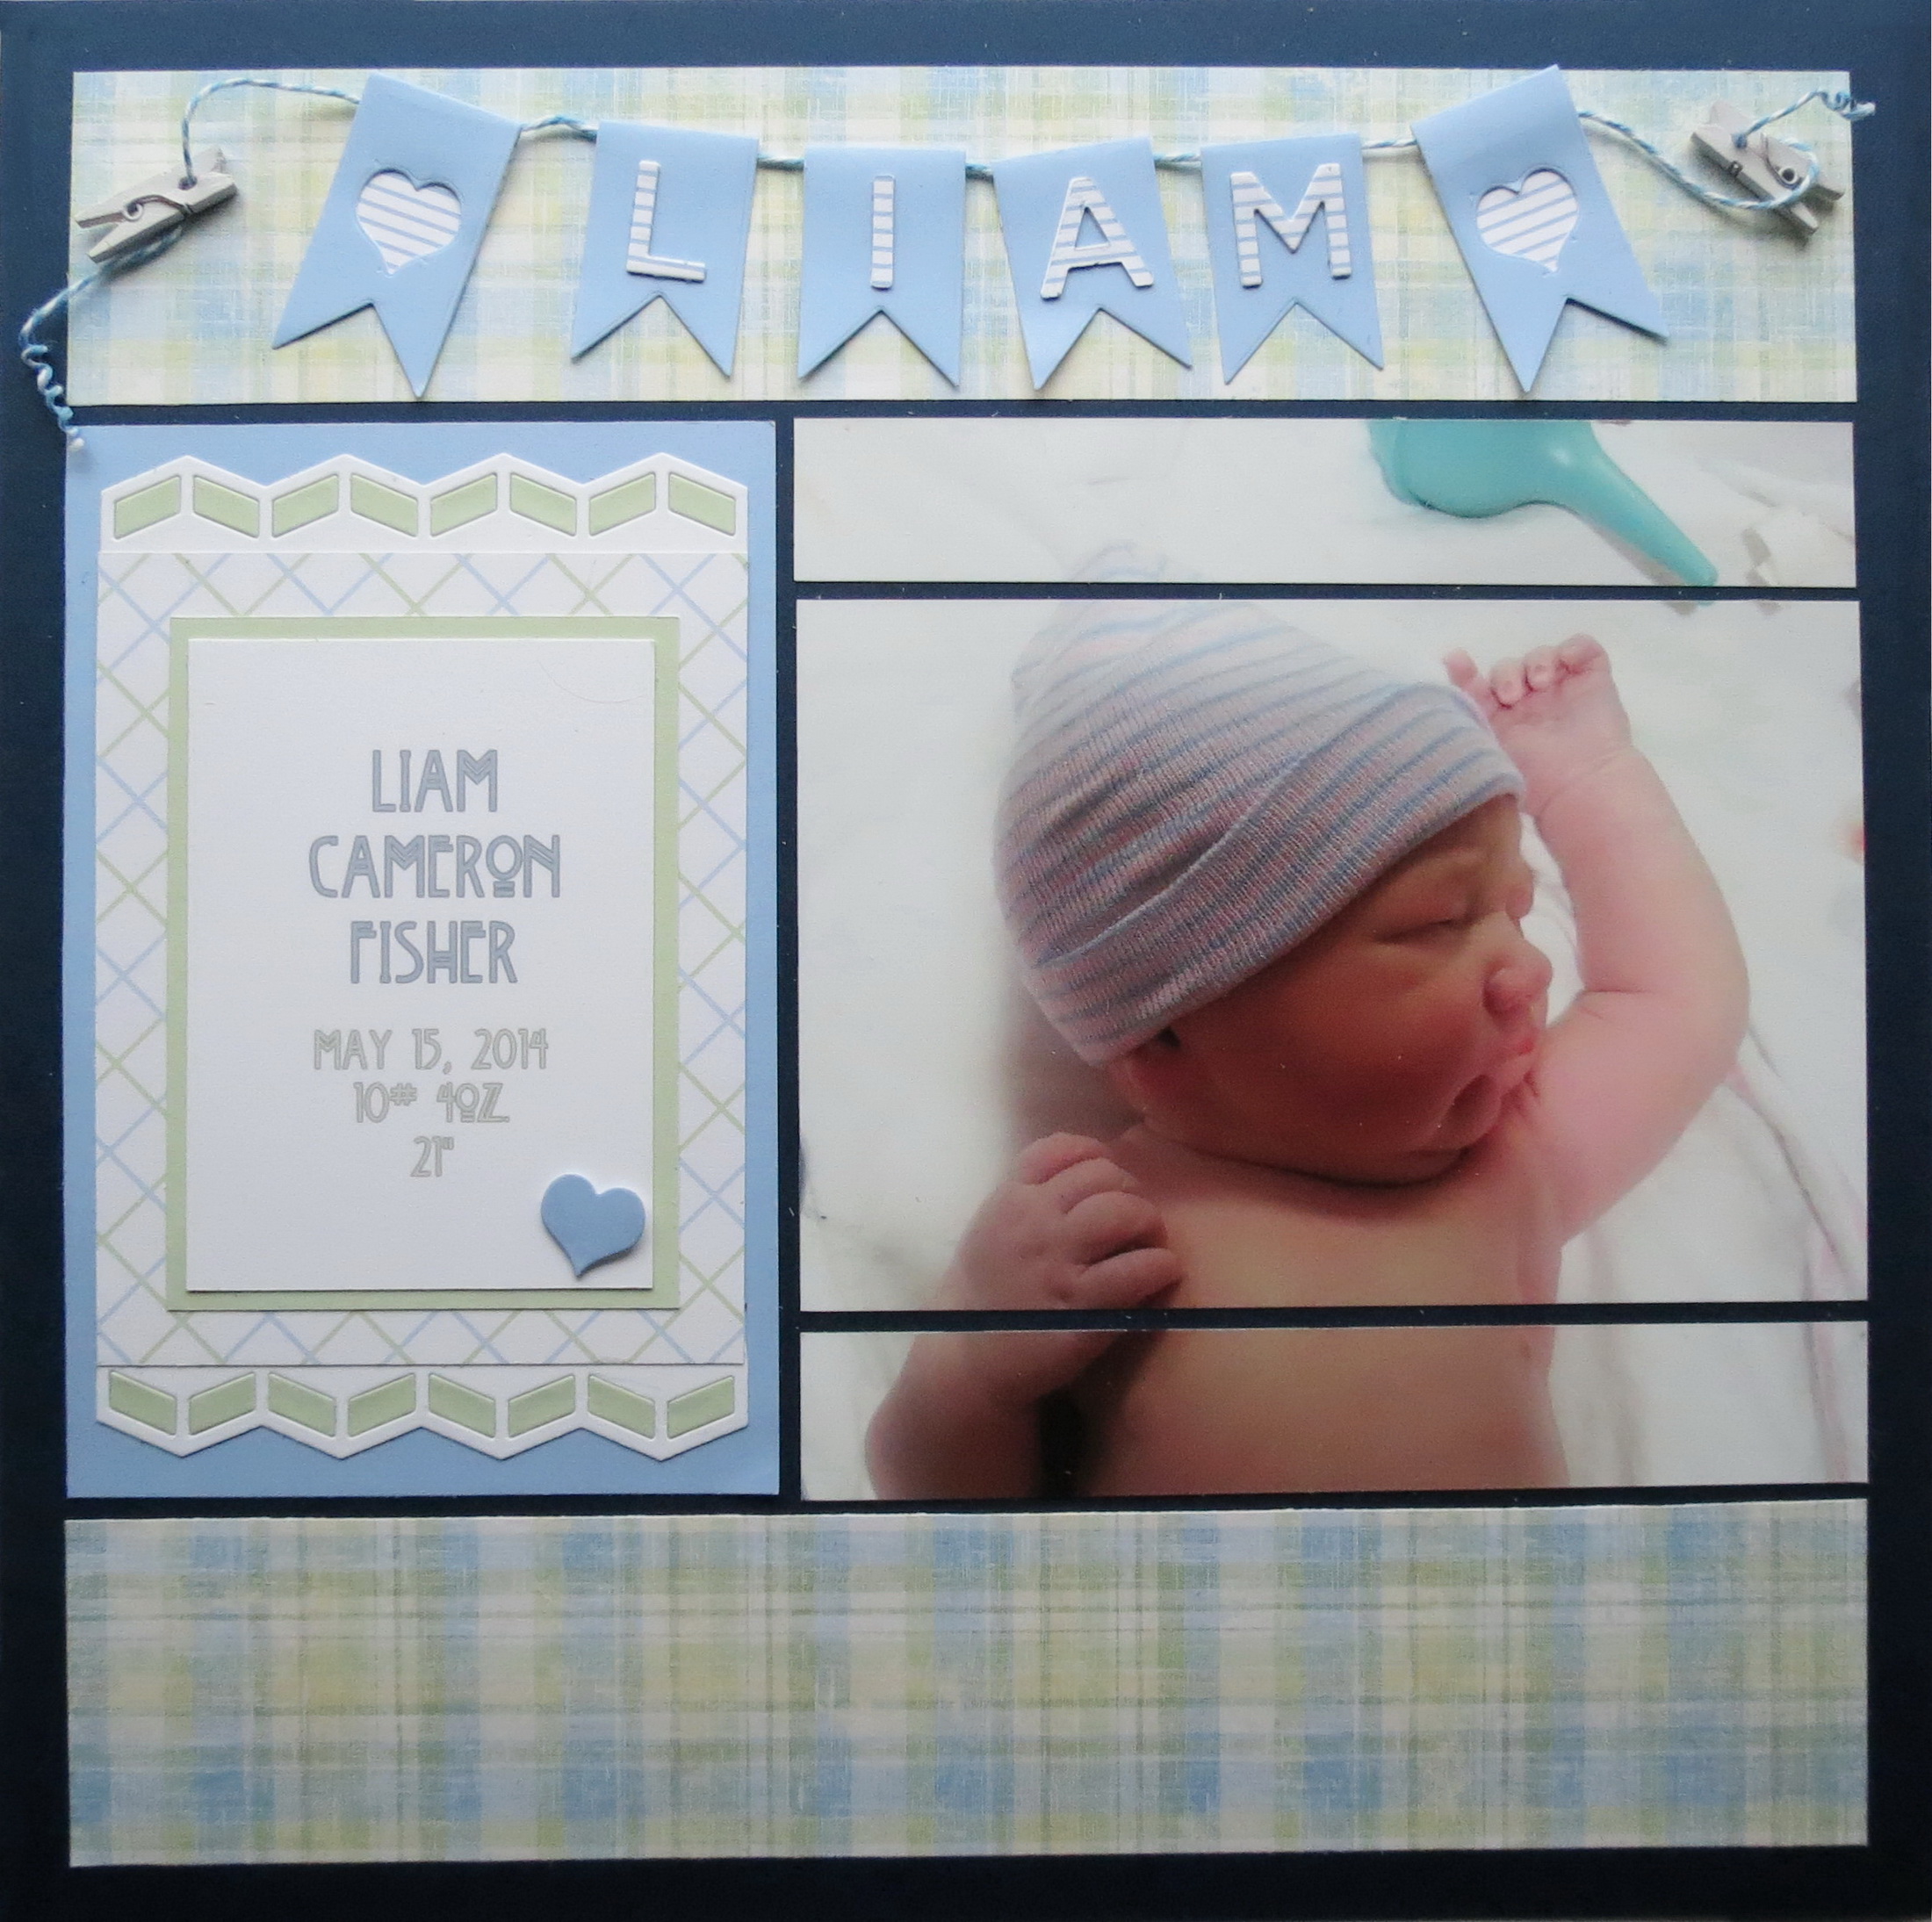
I like this pattern to use as a header page for an album to set the page for the layouts to follow, but this time I was seeing it as a page to stand alone, to use for an important occasion, a wedding, graduation or in this case a birth announcement. That’s where I saw the new Herringbone die working well.
A page like this will work great not only as a scrapbook page but as a wall hanging to adorn a baby’s room.
Mosaic Moments Herringbone Border Die as border accent top and bottom
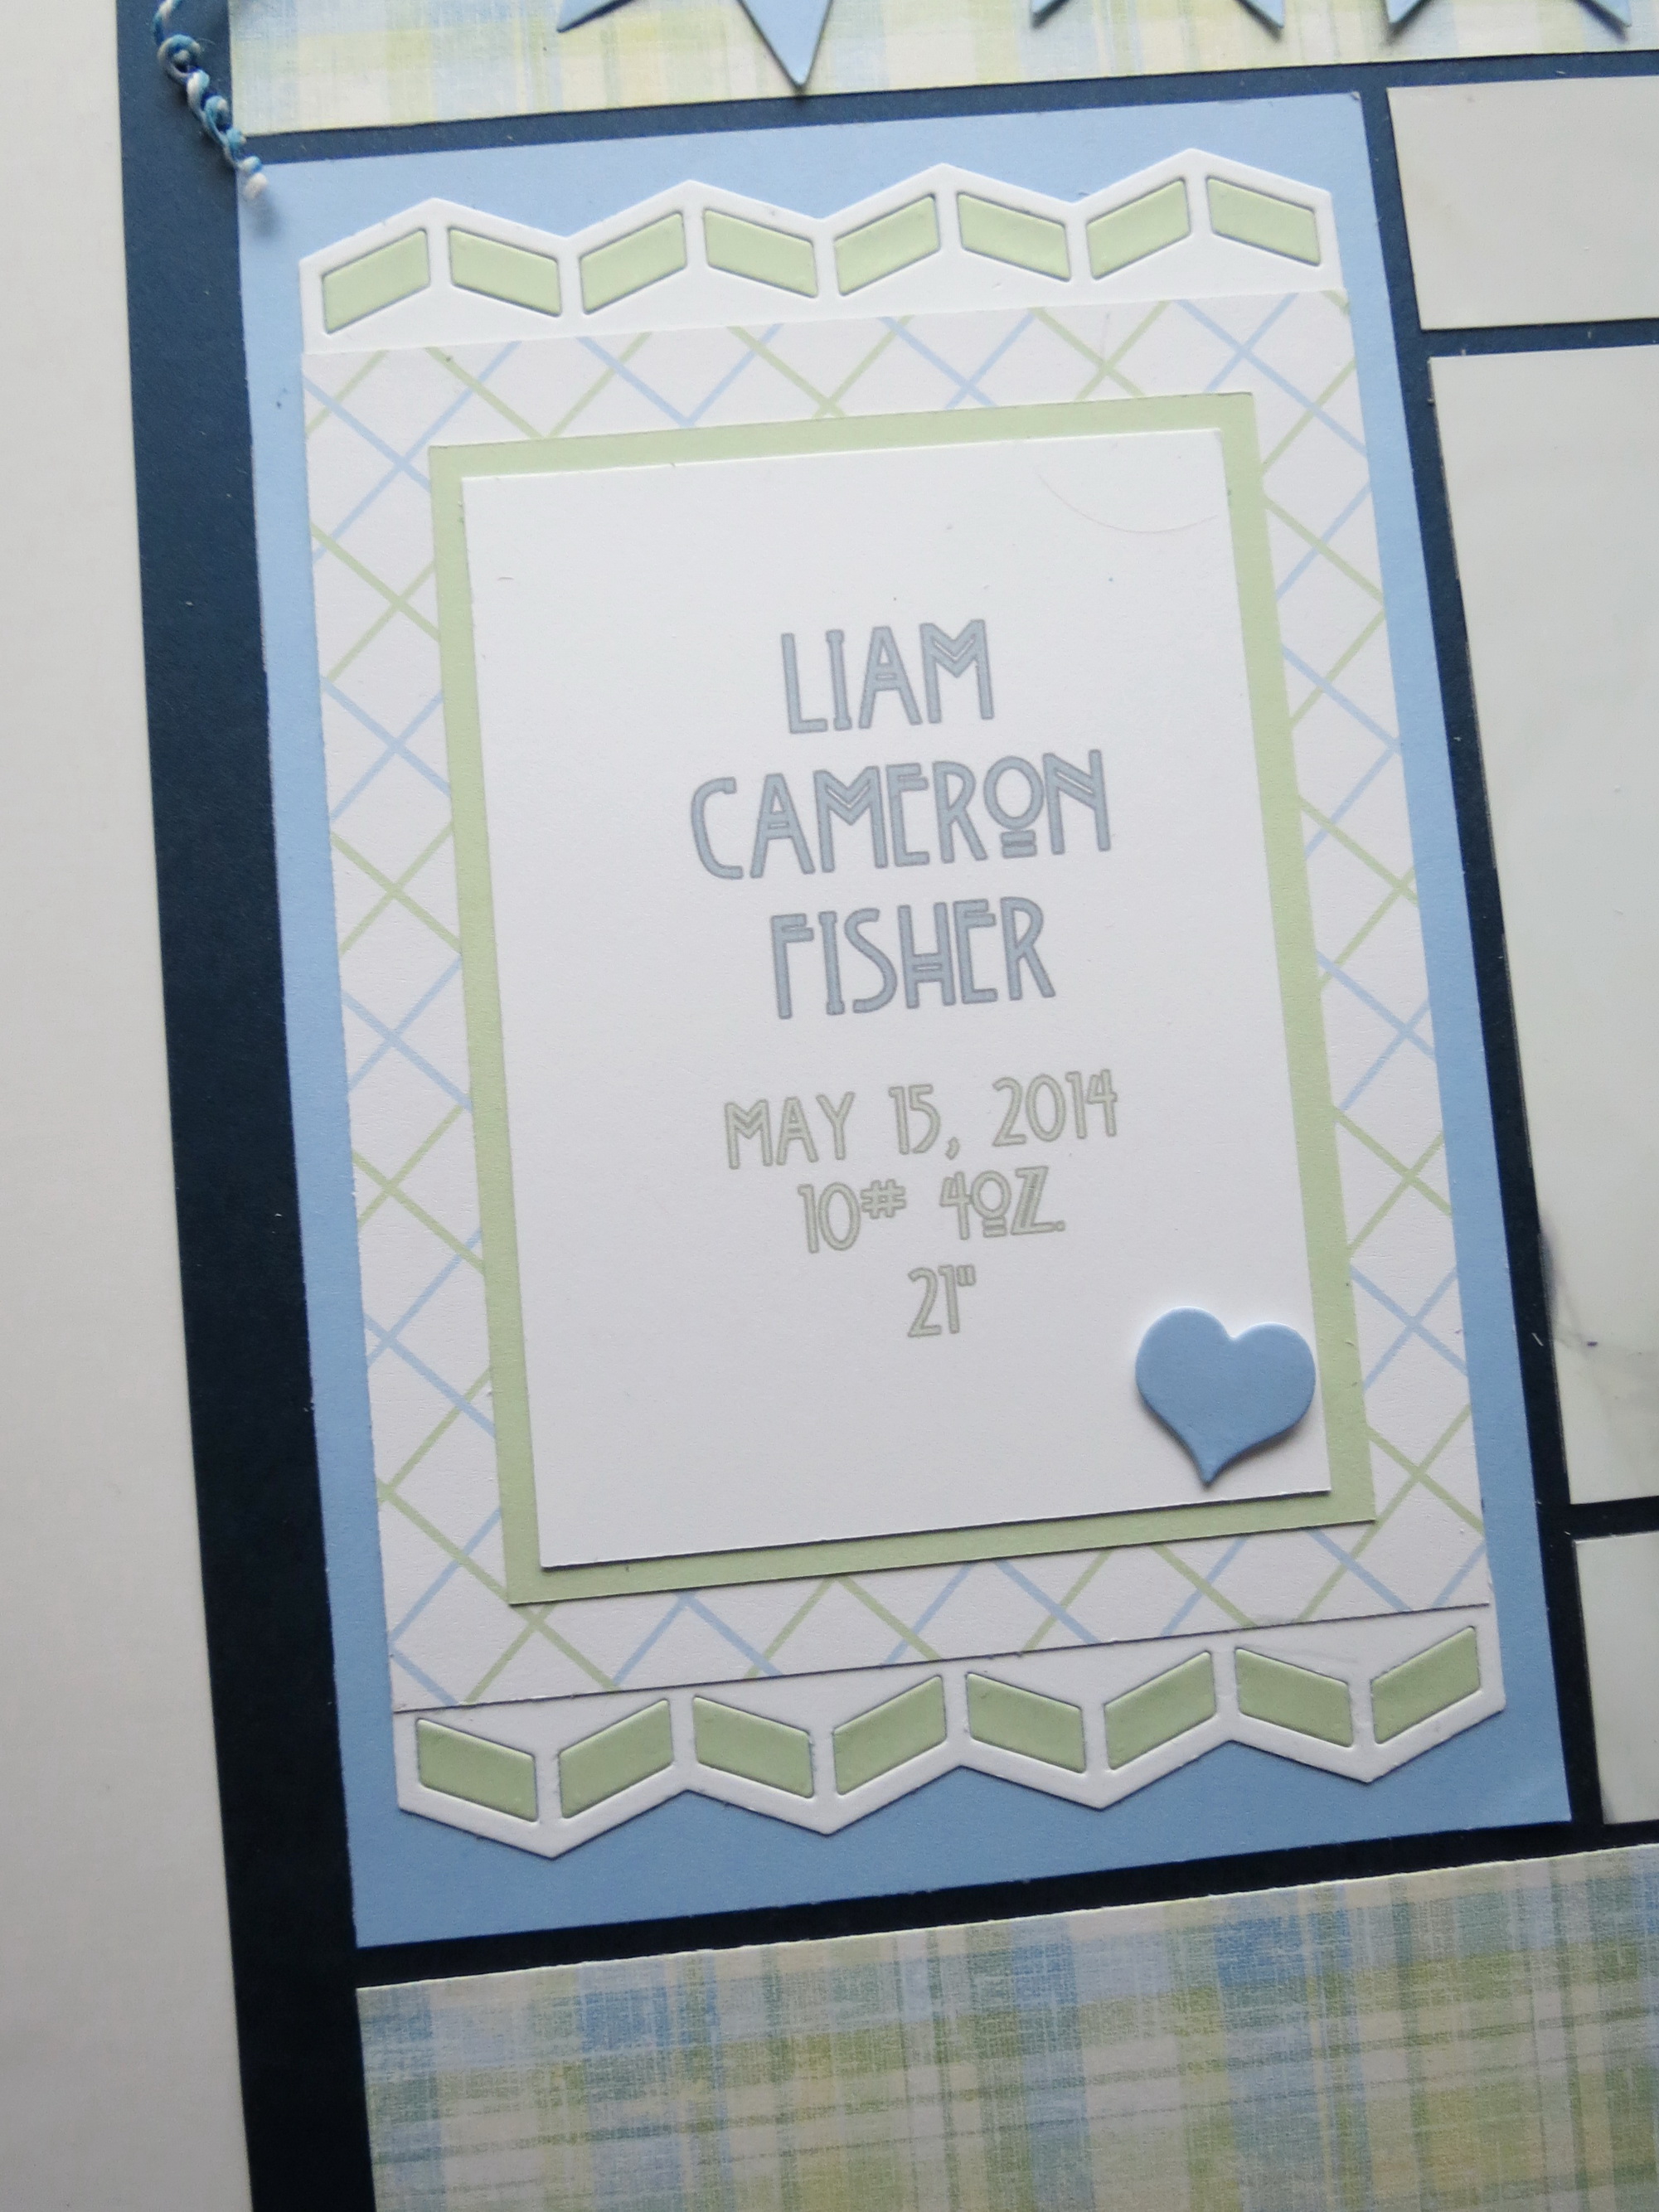
The announcement block is layers of cardstock mats with the details printed on white cardstock, the font is CK Gatsby. A heart outtake from the banner is mounted on a pop dot for depth.
I’ve added the smaller die to both the top and bottom of my announcement block. I’ve inset green cardstock by cutting two borders in green and only using the small pieces. It reminded me of ribbon being strung through the edge without adding any bulk.
I really like the idea of this large space to feature a photo that is special, maybe a wedding or maybe a beautiful landscape from a trip you’ve taken.
The large photo I’m using is one of the first of Liam when he was born. I can’t believe I haven’t done a page with this photo before now! It’s my favorite. I cropped the photo into a square in my photo editing program and then printed it on an 8.5” x 11” sheet of photo paper adjusting my borders to get the 6.625” size I needed. I trimmed the photo to the size I needed, an inch strip for the top section first and the main center section next finishing with the remaining 1” strip.
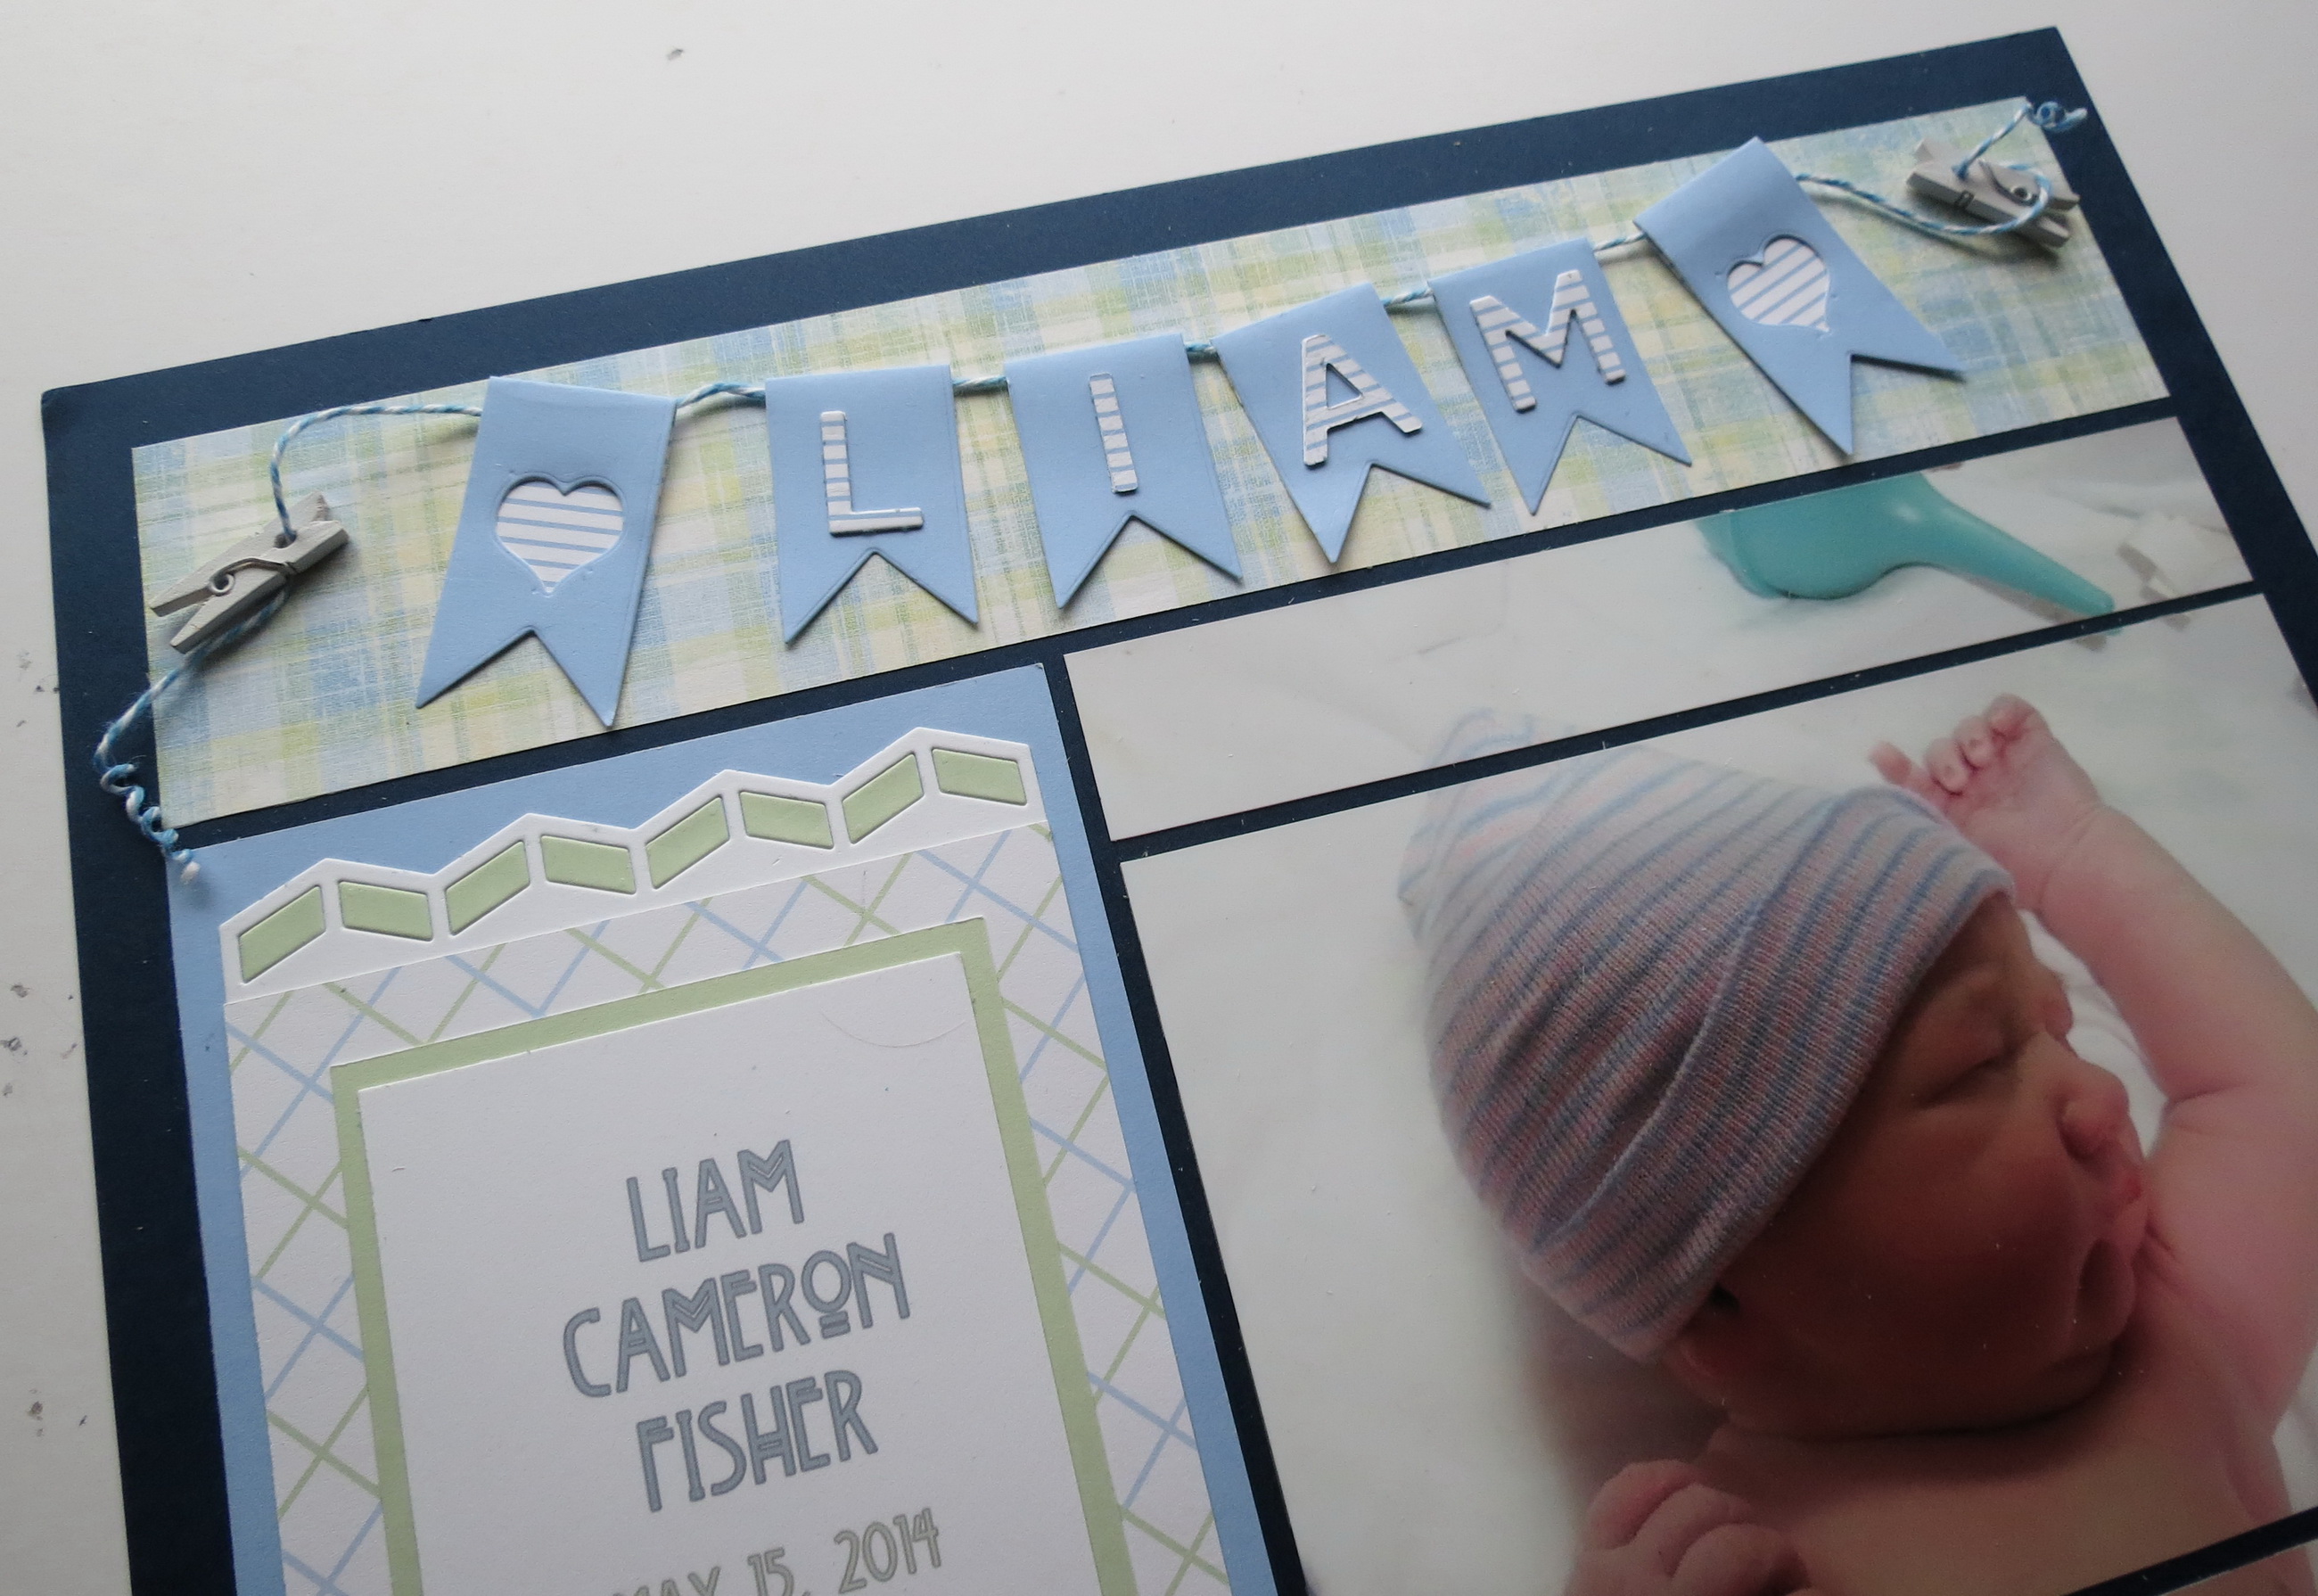
MM PG Banner Die topper plus Alphabet 2 Die
Finally, I used the top 2×10 block to add a banner. I used the 4 Banners Die to make several banner sections quickly. The two end banners remove a heart so that the double-side of the blue cardstock shows through when the banner is folded over. I only folded to the top of cut peak so it is longer than the rest and center ones are trimmed away so they won’t hang below the banner points.
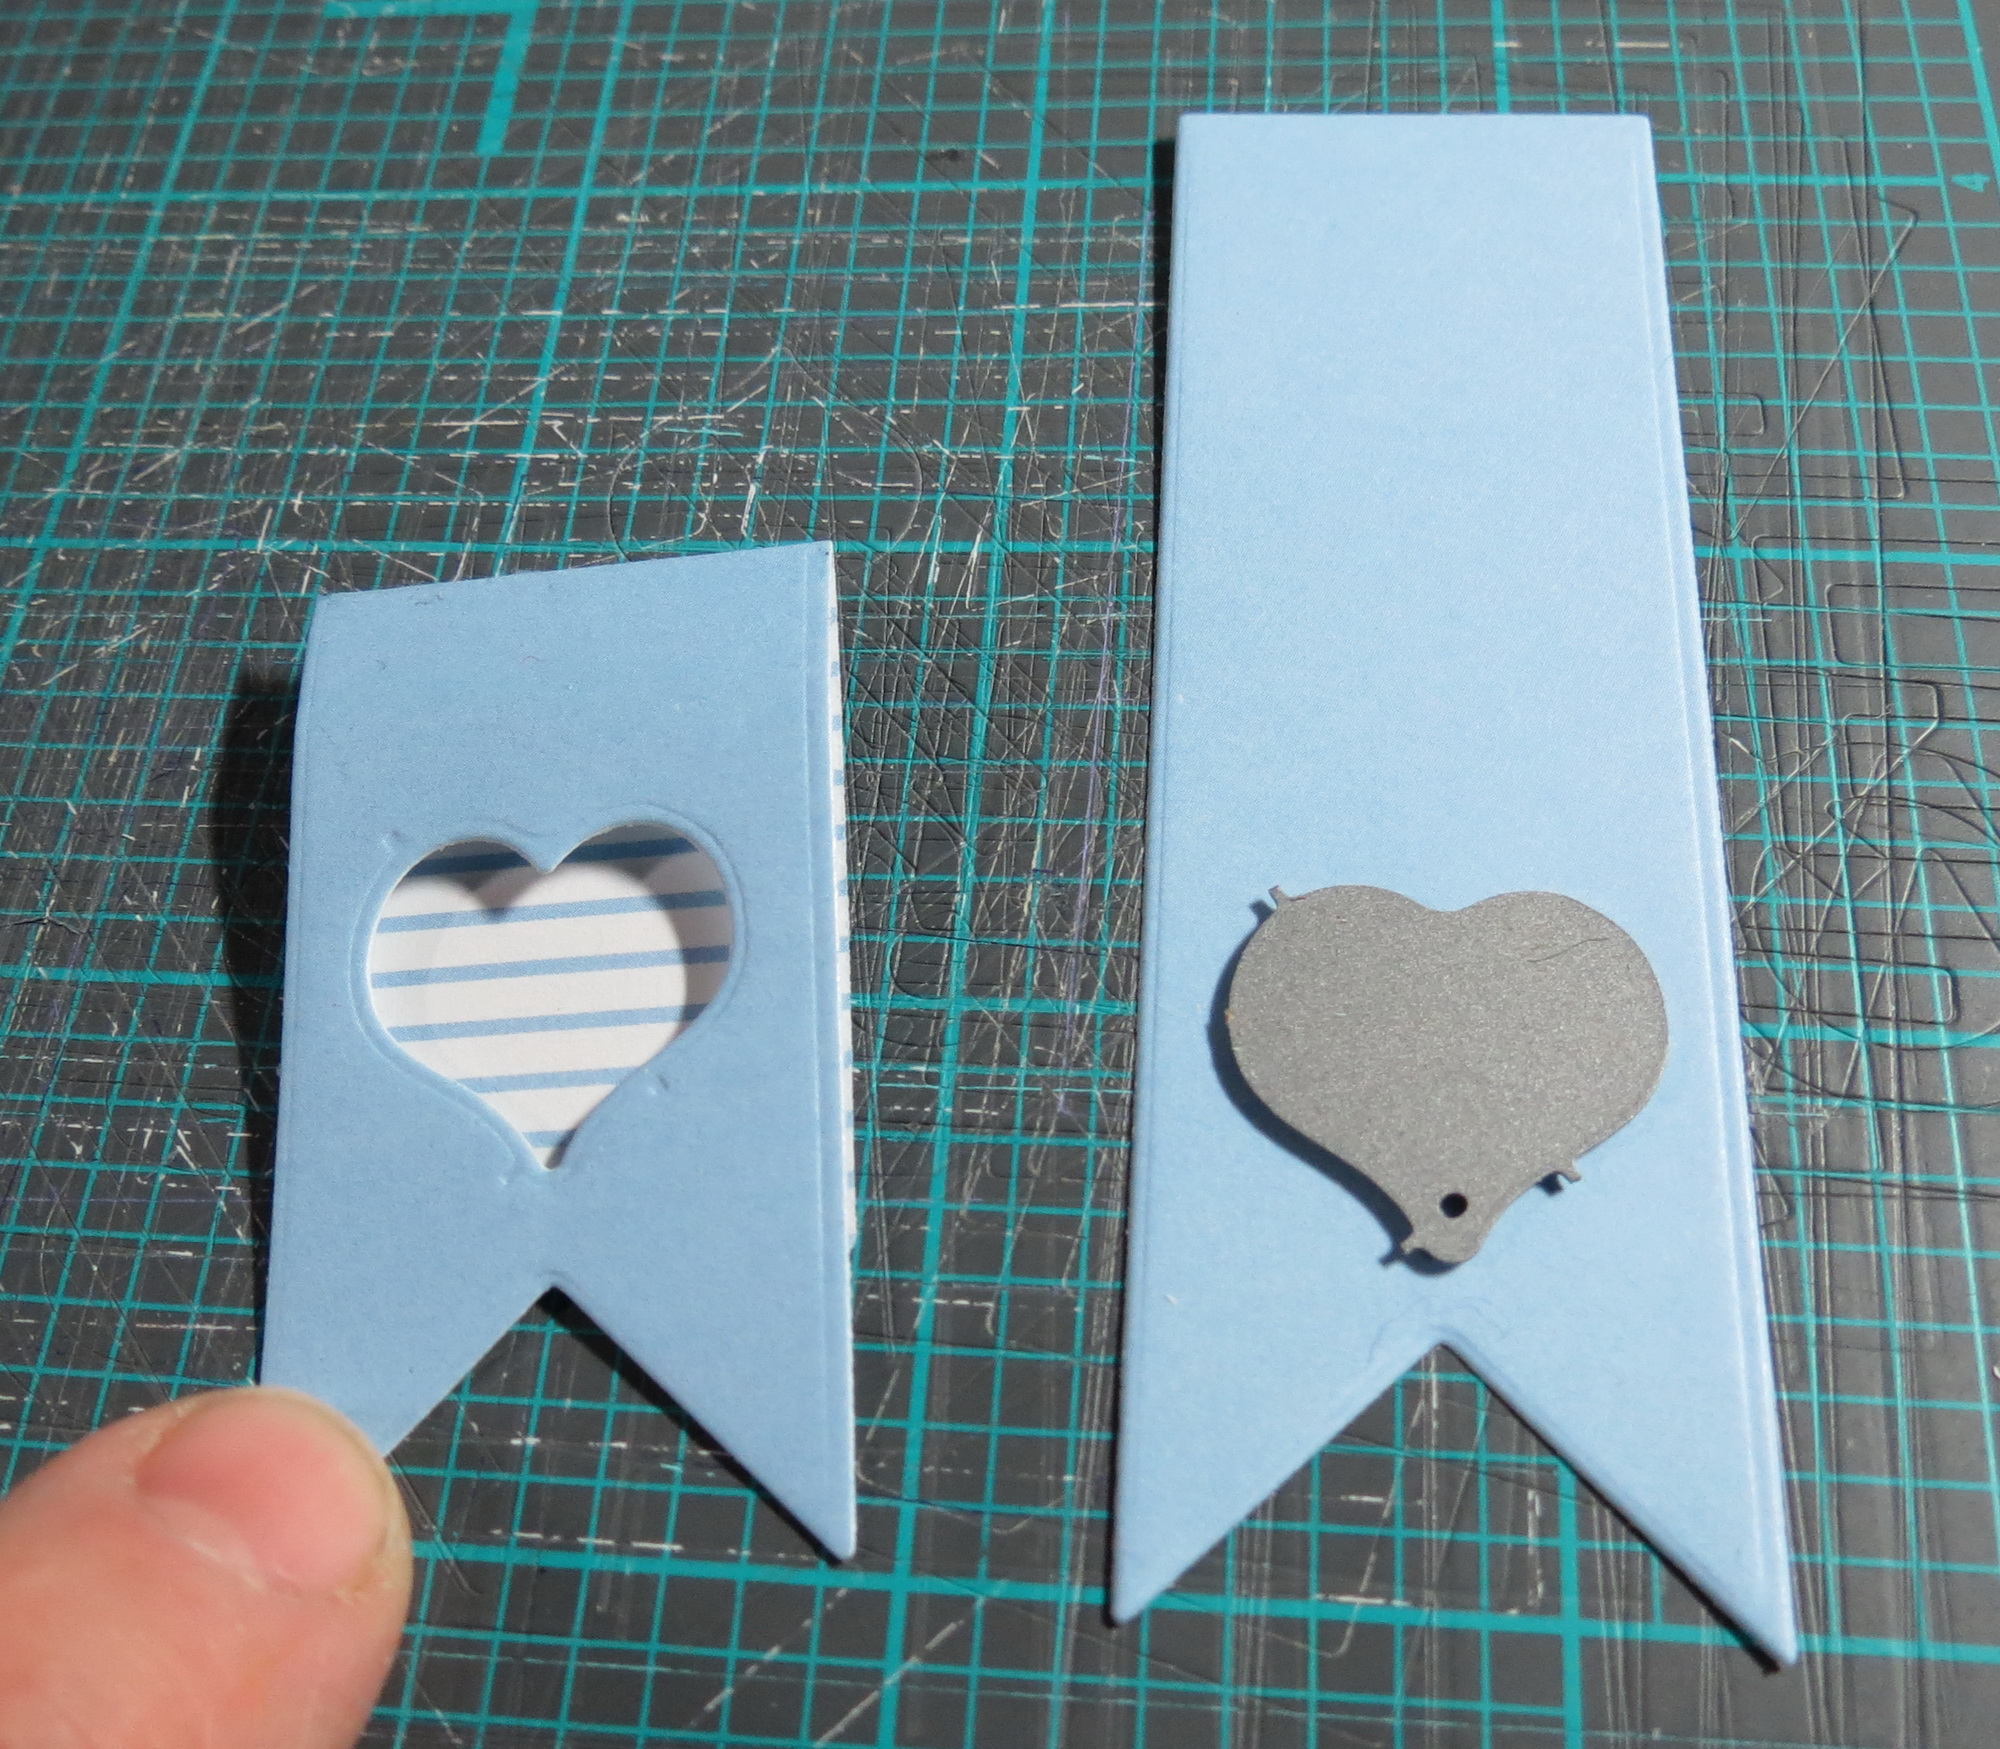
MM PG Banner Die cutting the heart from the banner for see through effect
The new Alphabet 2 die was used to cut each letter twice, once in the stripe paper, and once in white to stand out a bit and match the see through hearts. I glued them together giving them some dimension.
The banners pieces are draped over the twine and attached to the clothespins. I arranged the banner and used small glue dots to attach each banner so that it stays in place.
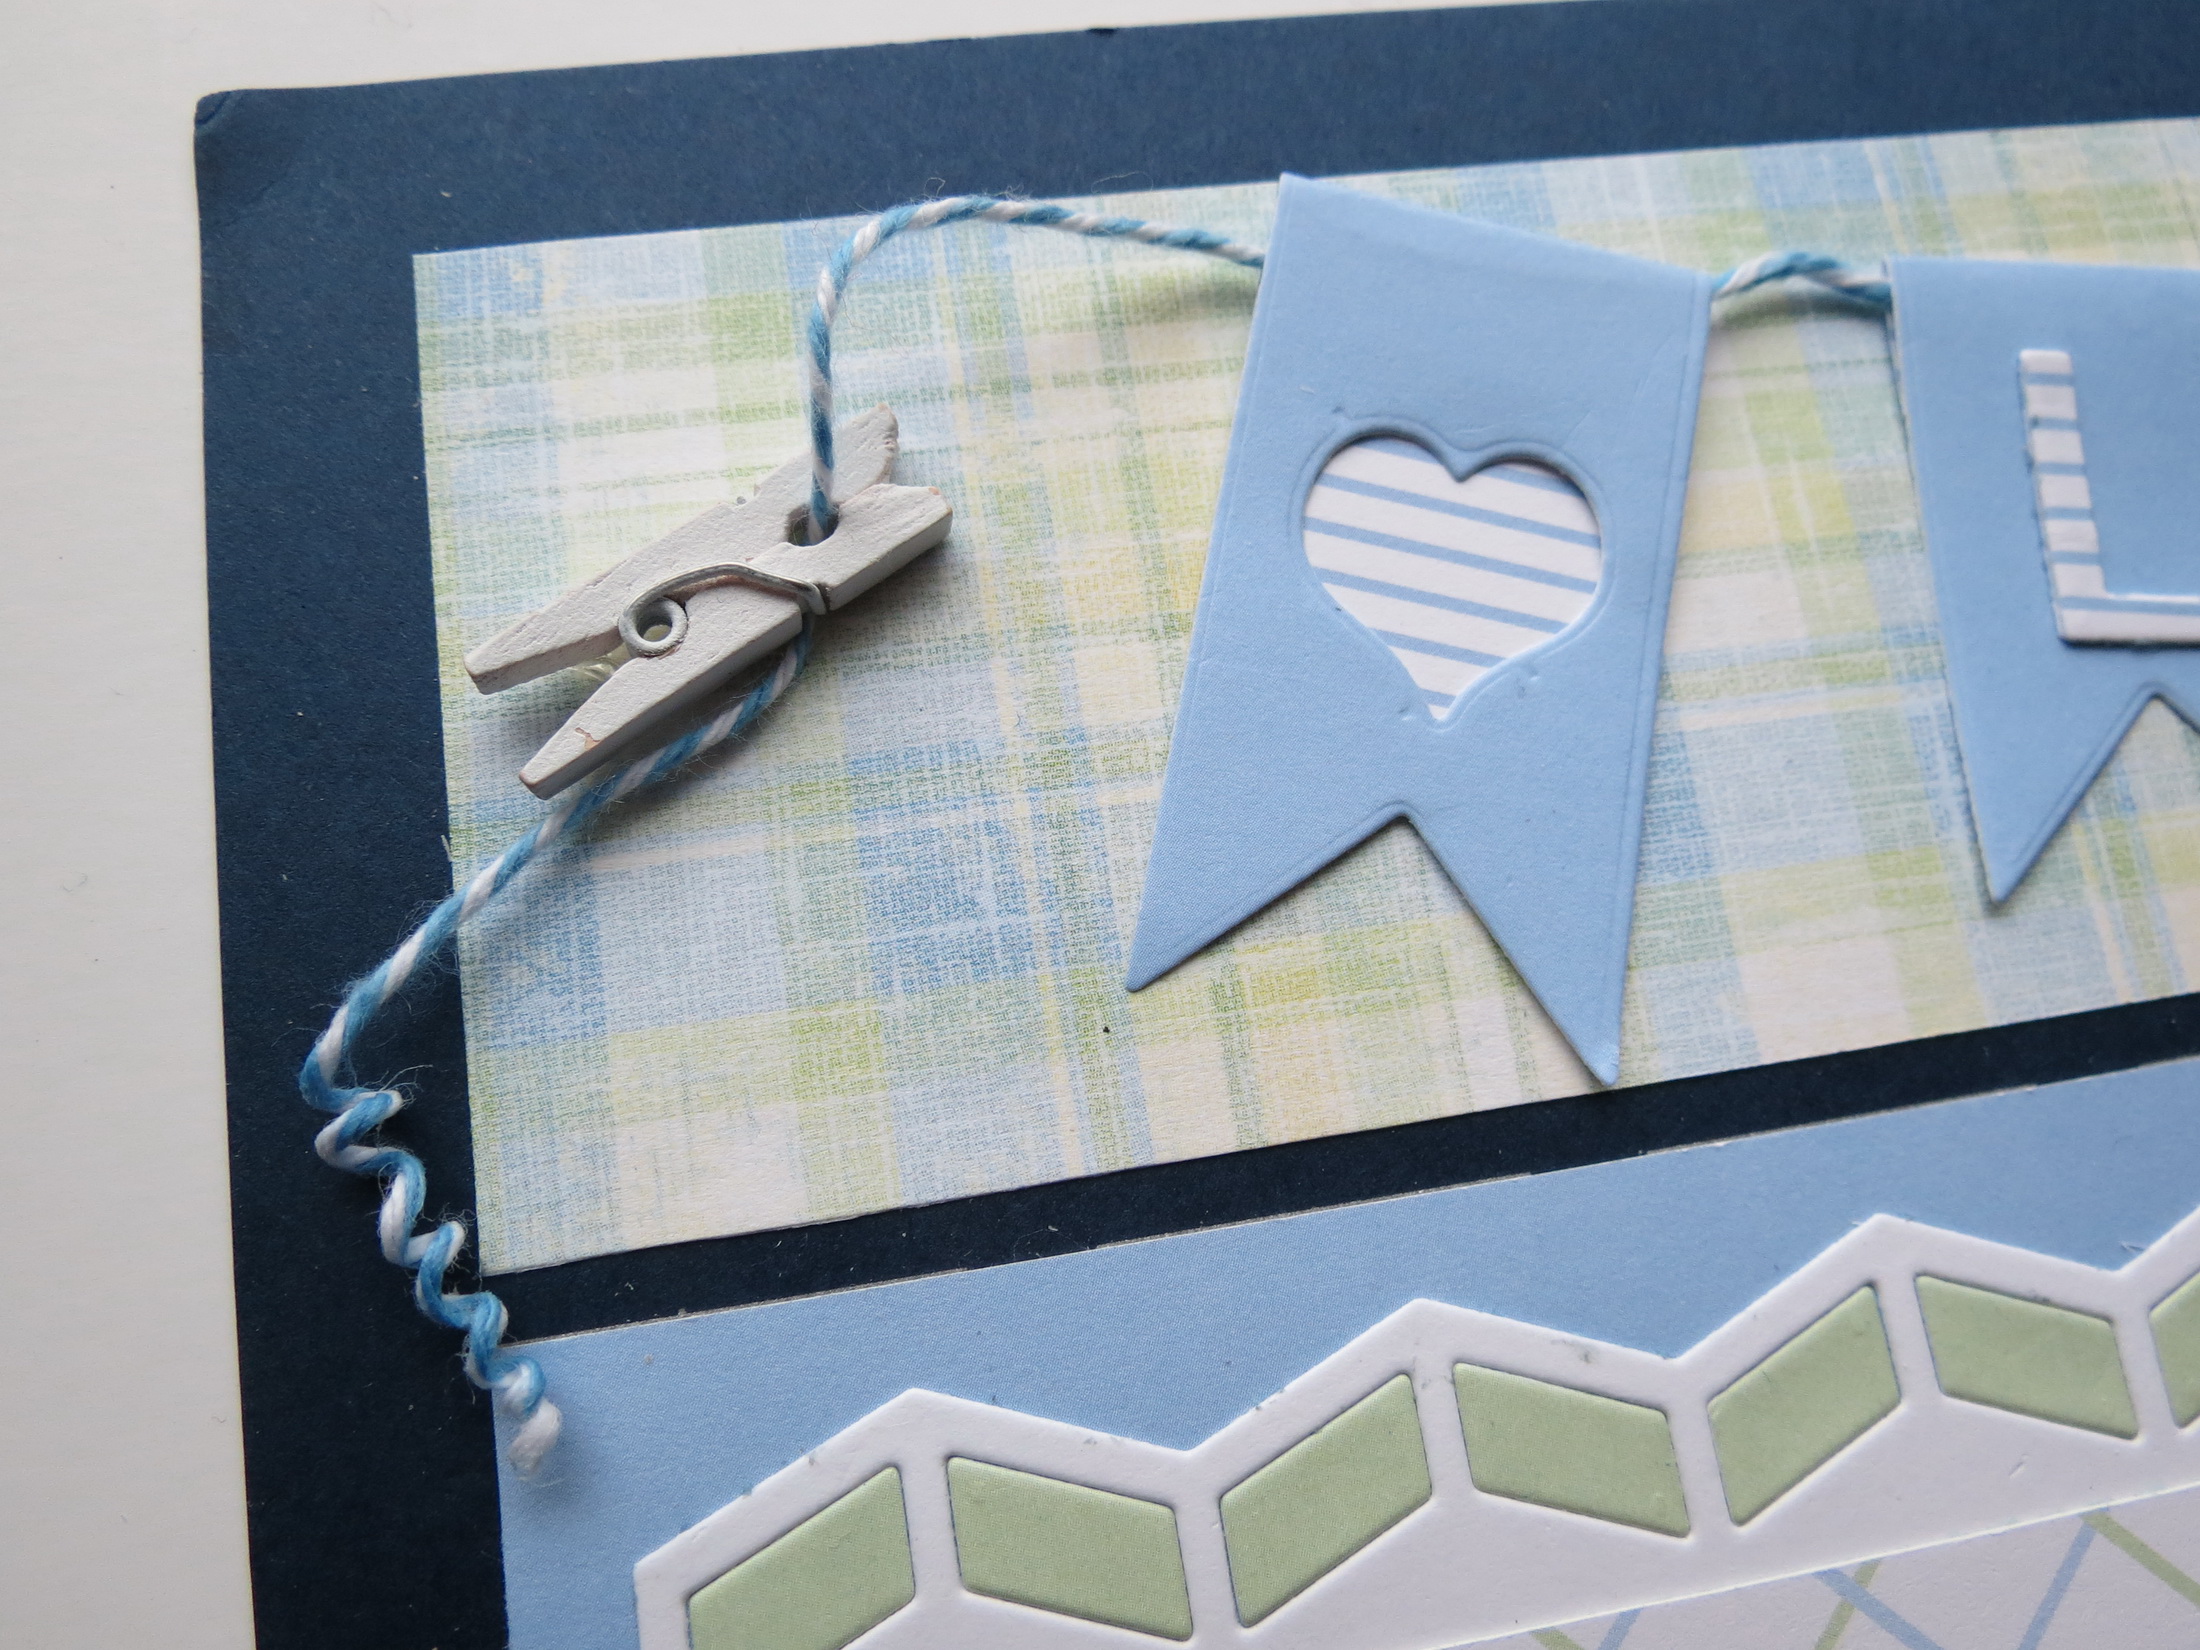
MM PG Banner Die with clothespin and twine coil detail
I took a little bit of glue on the twine ends and then wrapped them around a piercing tool for a narrow coil. I let it set up a bit before removing it from the tool.
I think that dresses this pattern up a bit with a fresh new look, don’t you? I bet you have a favorite photo you just might like to try out with this almost half sheet photo page.
I’m sure you will find more ways the Herringbone border die will accent your layouts, we’d love to see what you come up with so share with us on Facebook!
MM Supplies including Herringbone Border Die
MM Color Palette
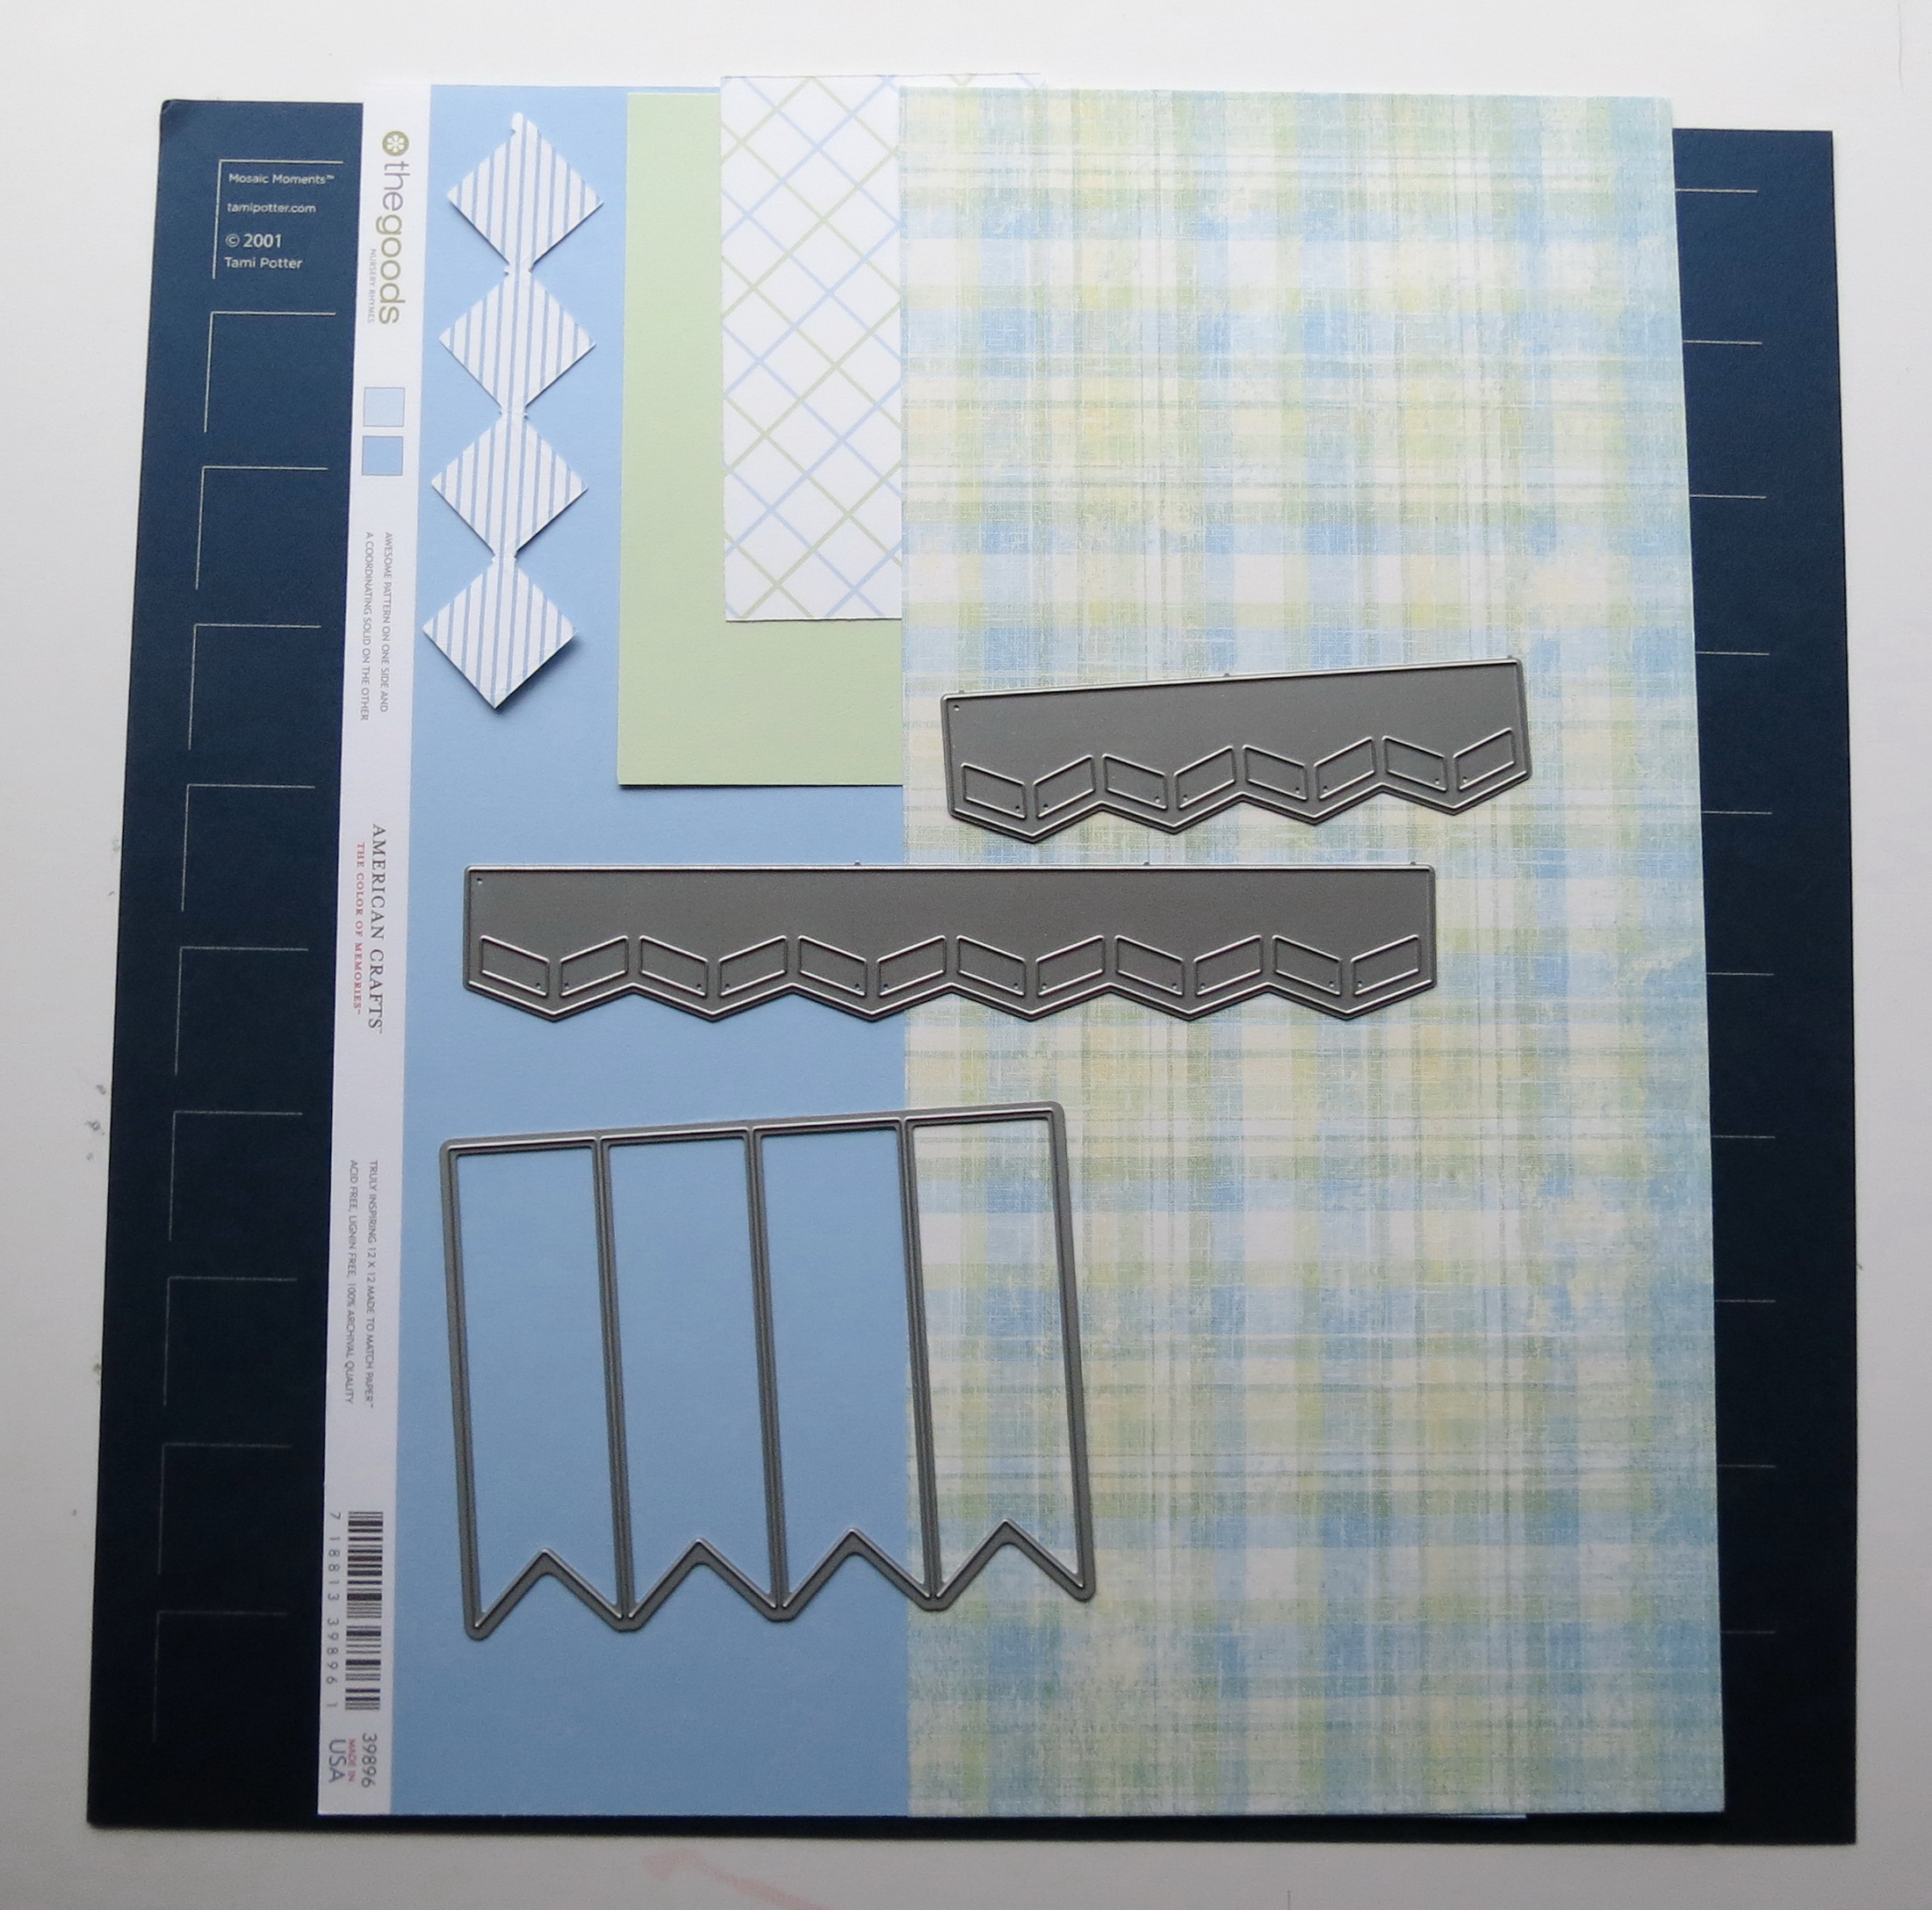
Here are the Supplies I’ve used:
• Herringbone Border Die Set
• 4 Banners Die Set
• Alphabet 2 Die Set
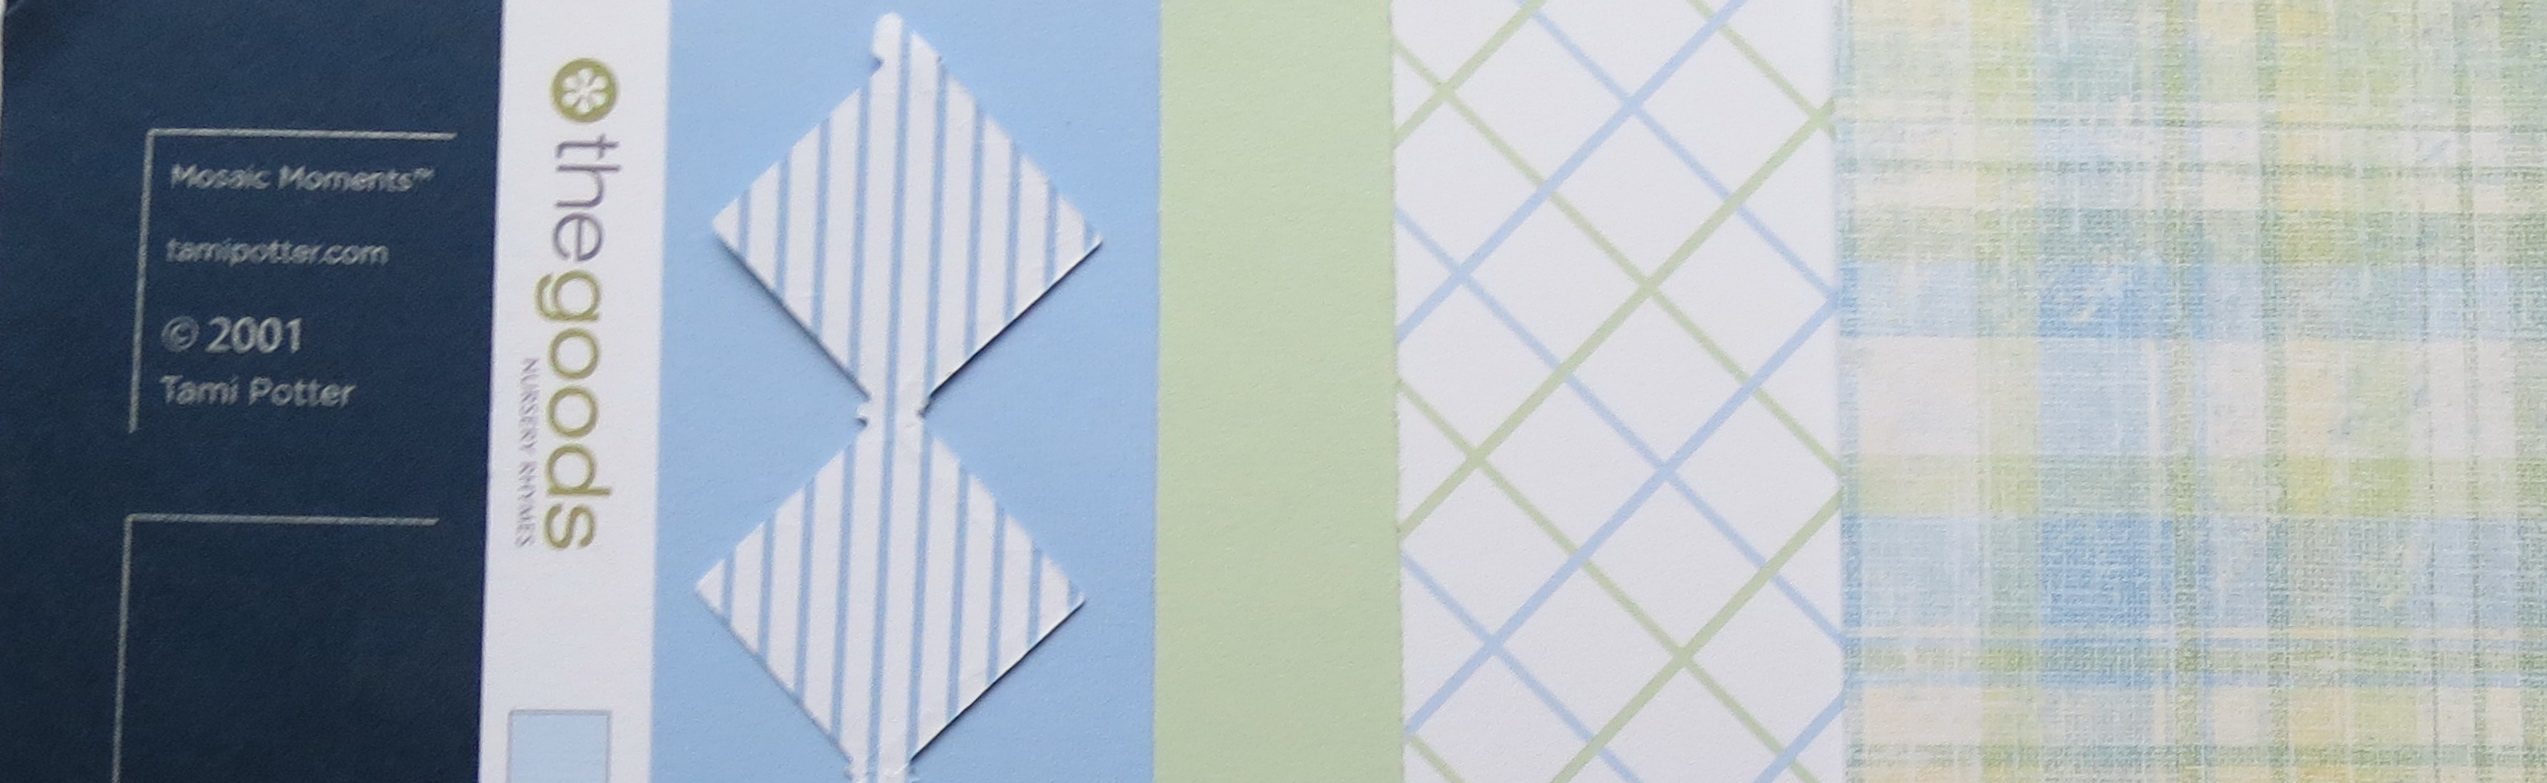
• Mosaic Moments Navy Grid Paper
• Patterned Paper from The Paper Studio: Linen Door Boy Plaid
• American Crafts double sided cardstock Nursery Rhymes (blue solid/blue stripe) and Blocks (green solid/blue-green crosshatch)
• Heart die from Technique Tuesday’s “Going Places”
• White mini clothespins
• Doodlebug Designs blue/white baker’s twine
• Glue to set twine coils
Andrea Fisher
MM PG_Feb refresh Pattern #280 with bold look