
Throwback Tuesday: Hand Lettered Titles
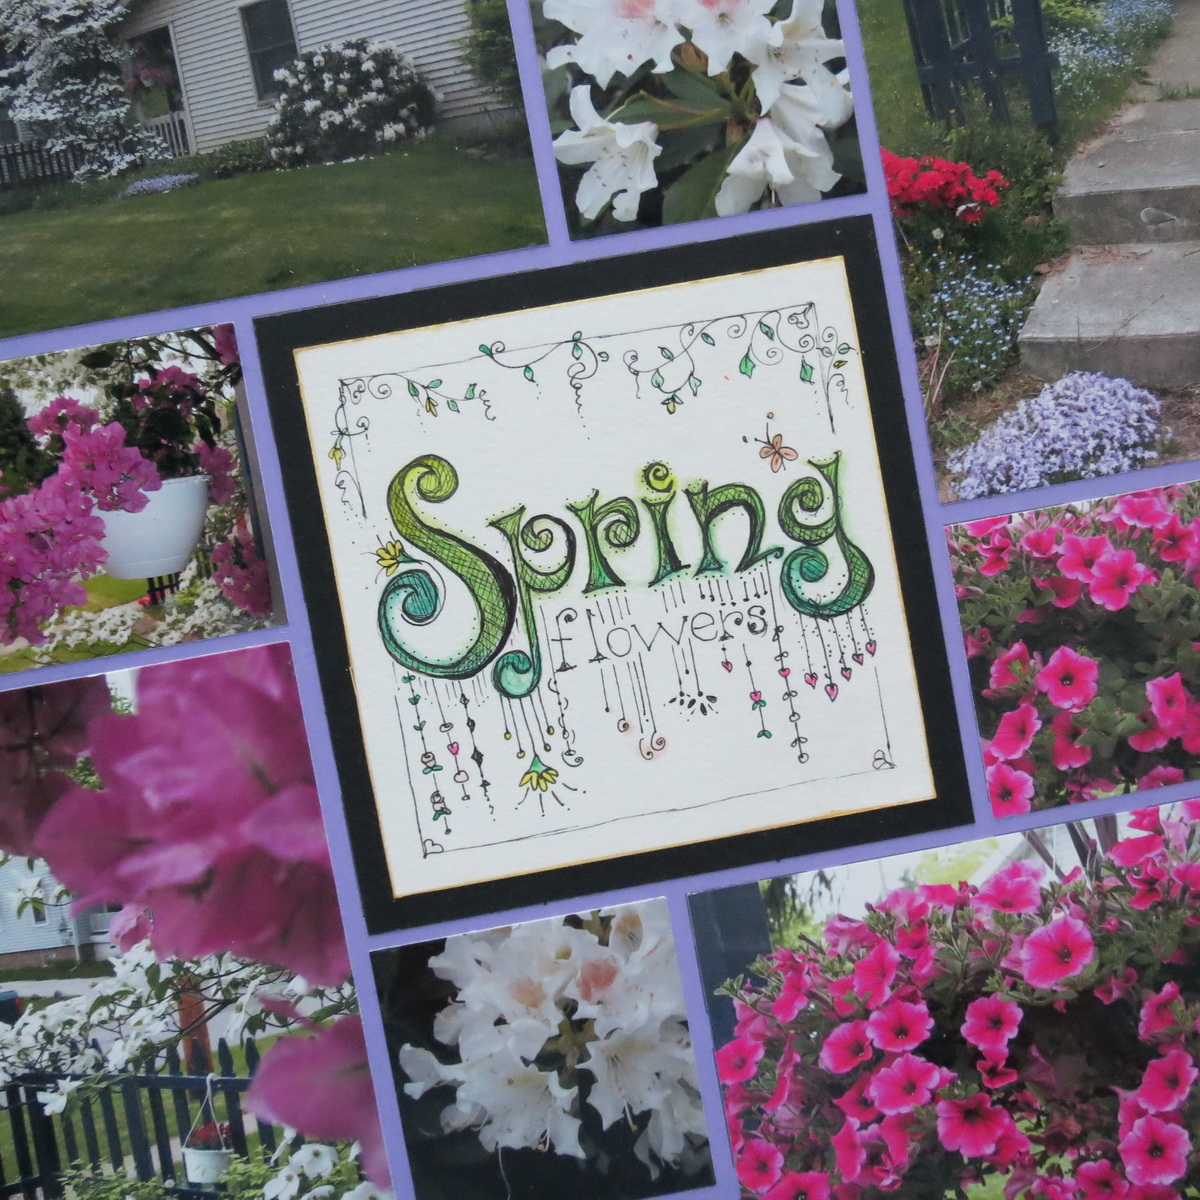
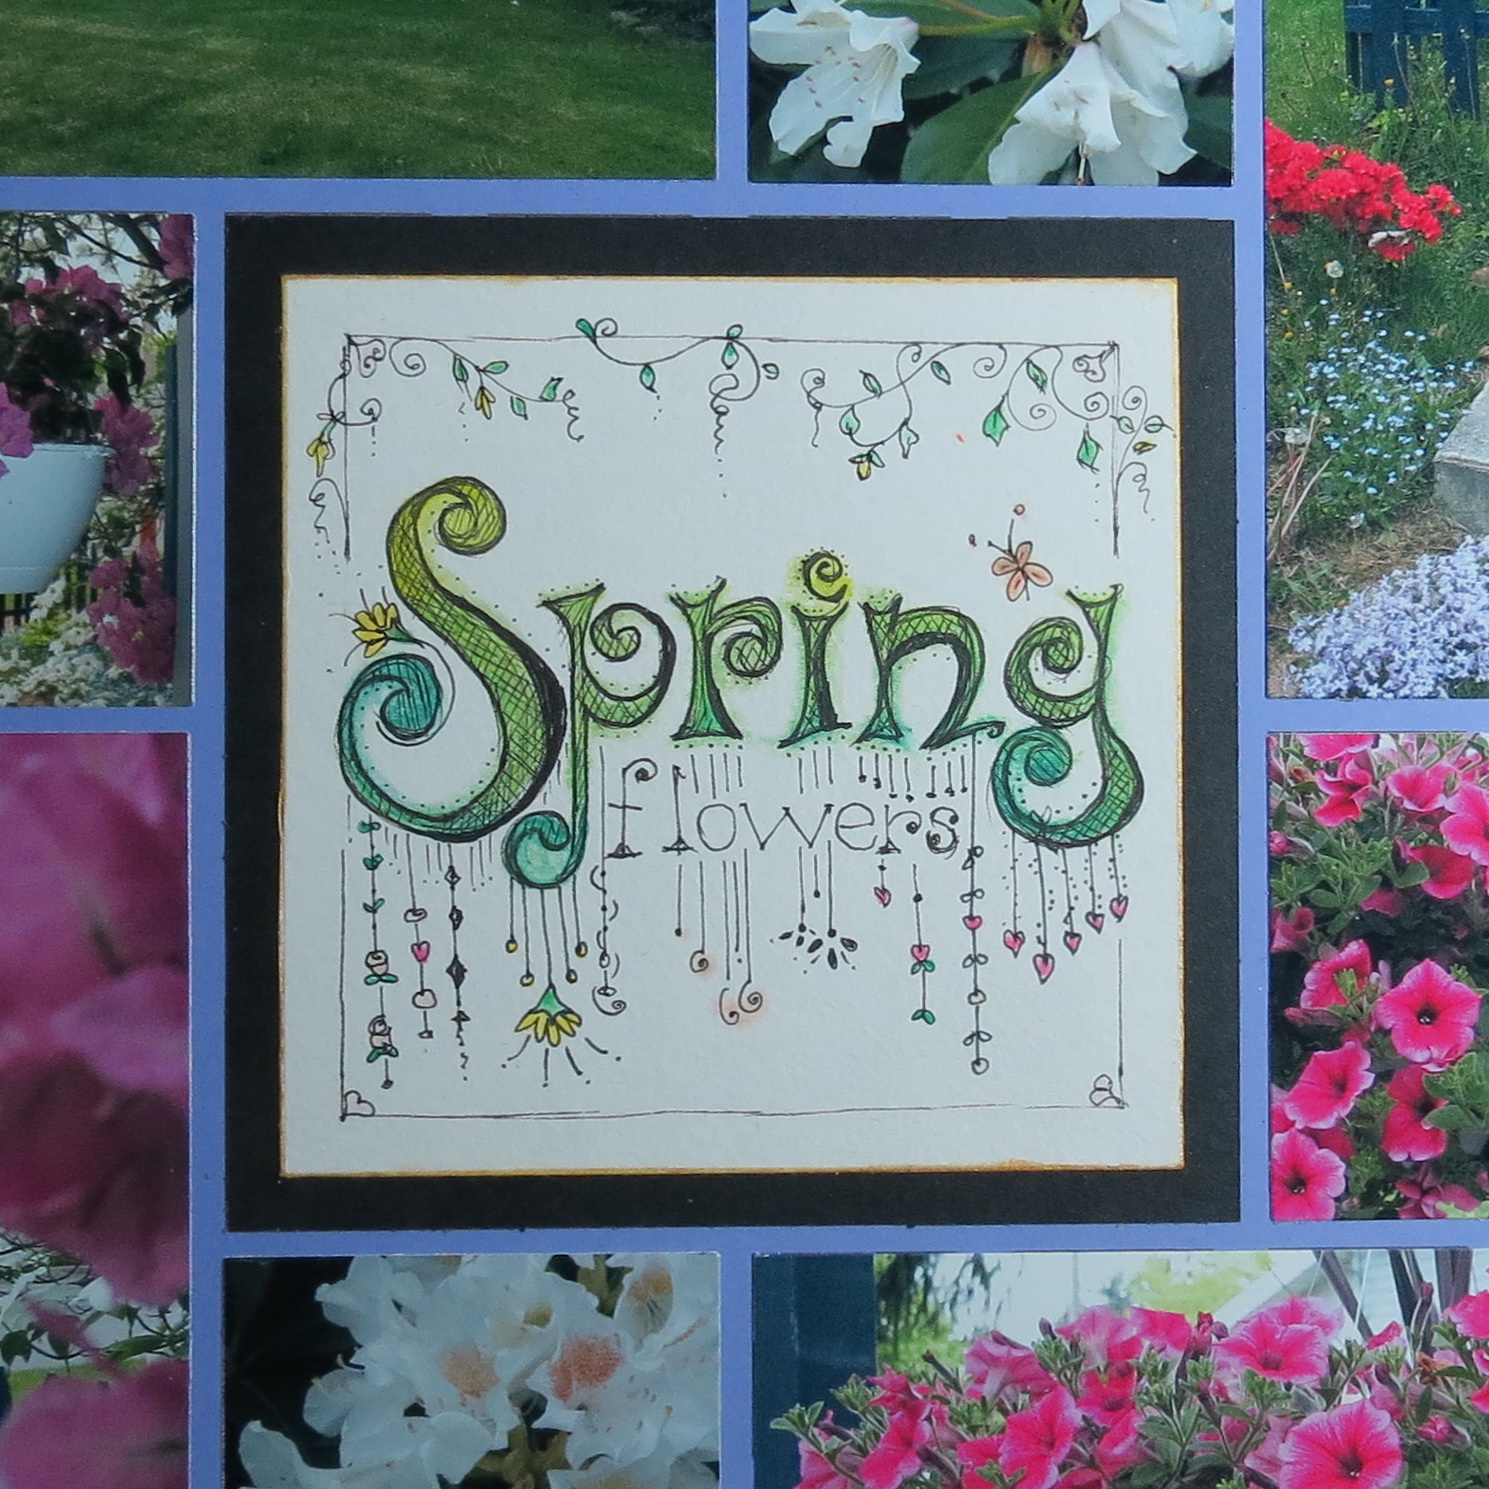
Time Began in a Garden becomes Spring Flowers
Today I’m going to revisit one of my previous layouts from the Design Team and see what I can take and redo in a new layout. I’m going to try to do this once a month so it ought to be interesting to see me “scrap lift” my own layouts!
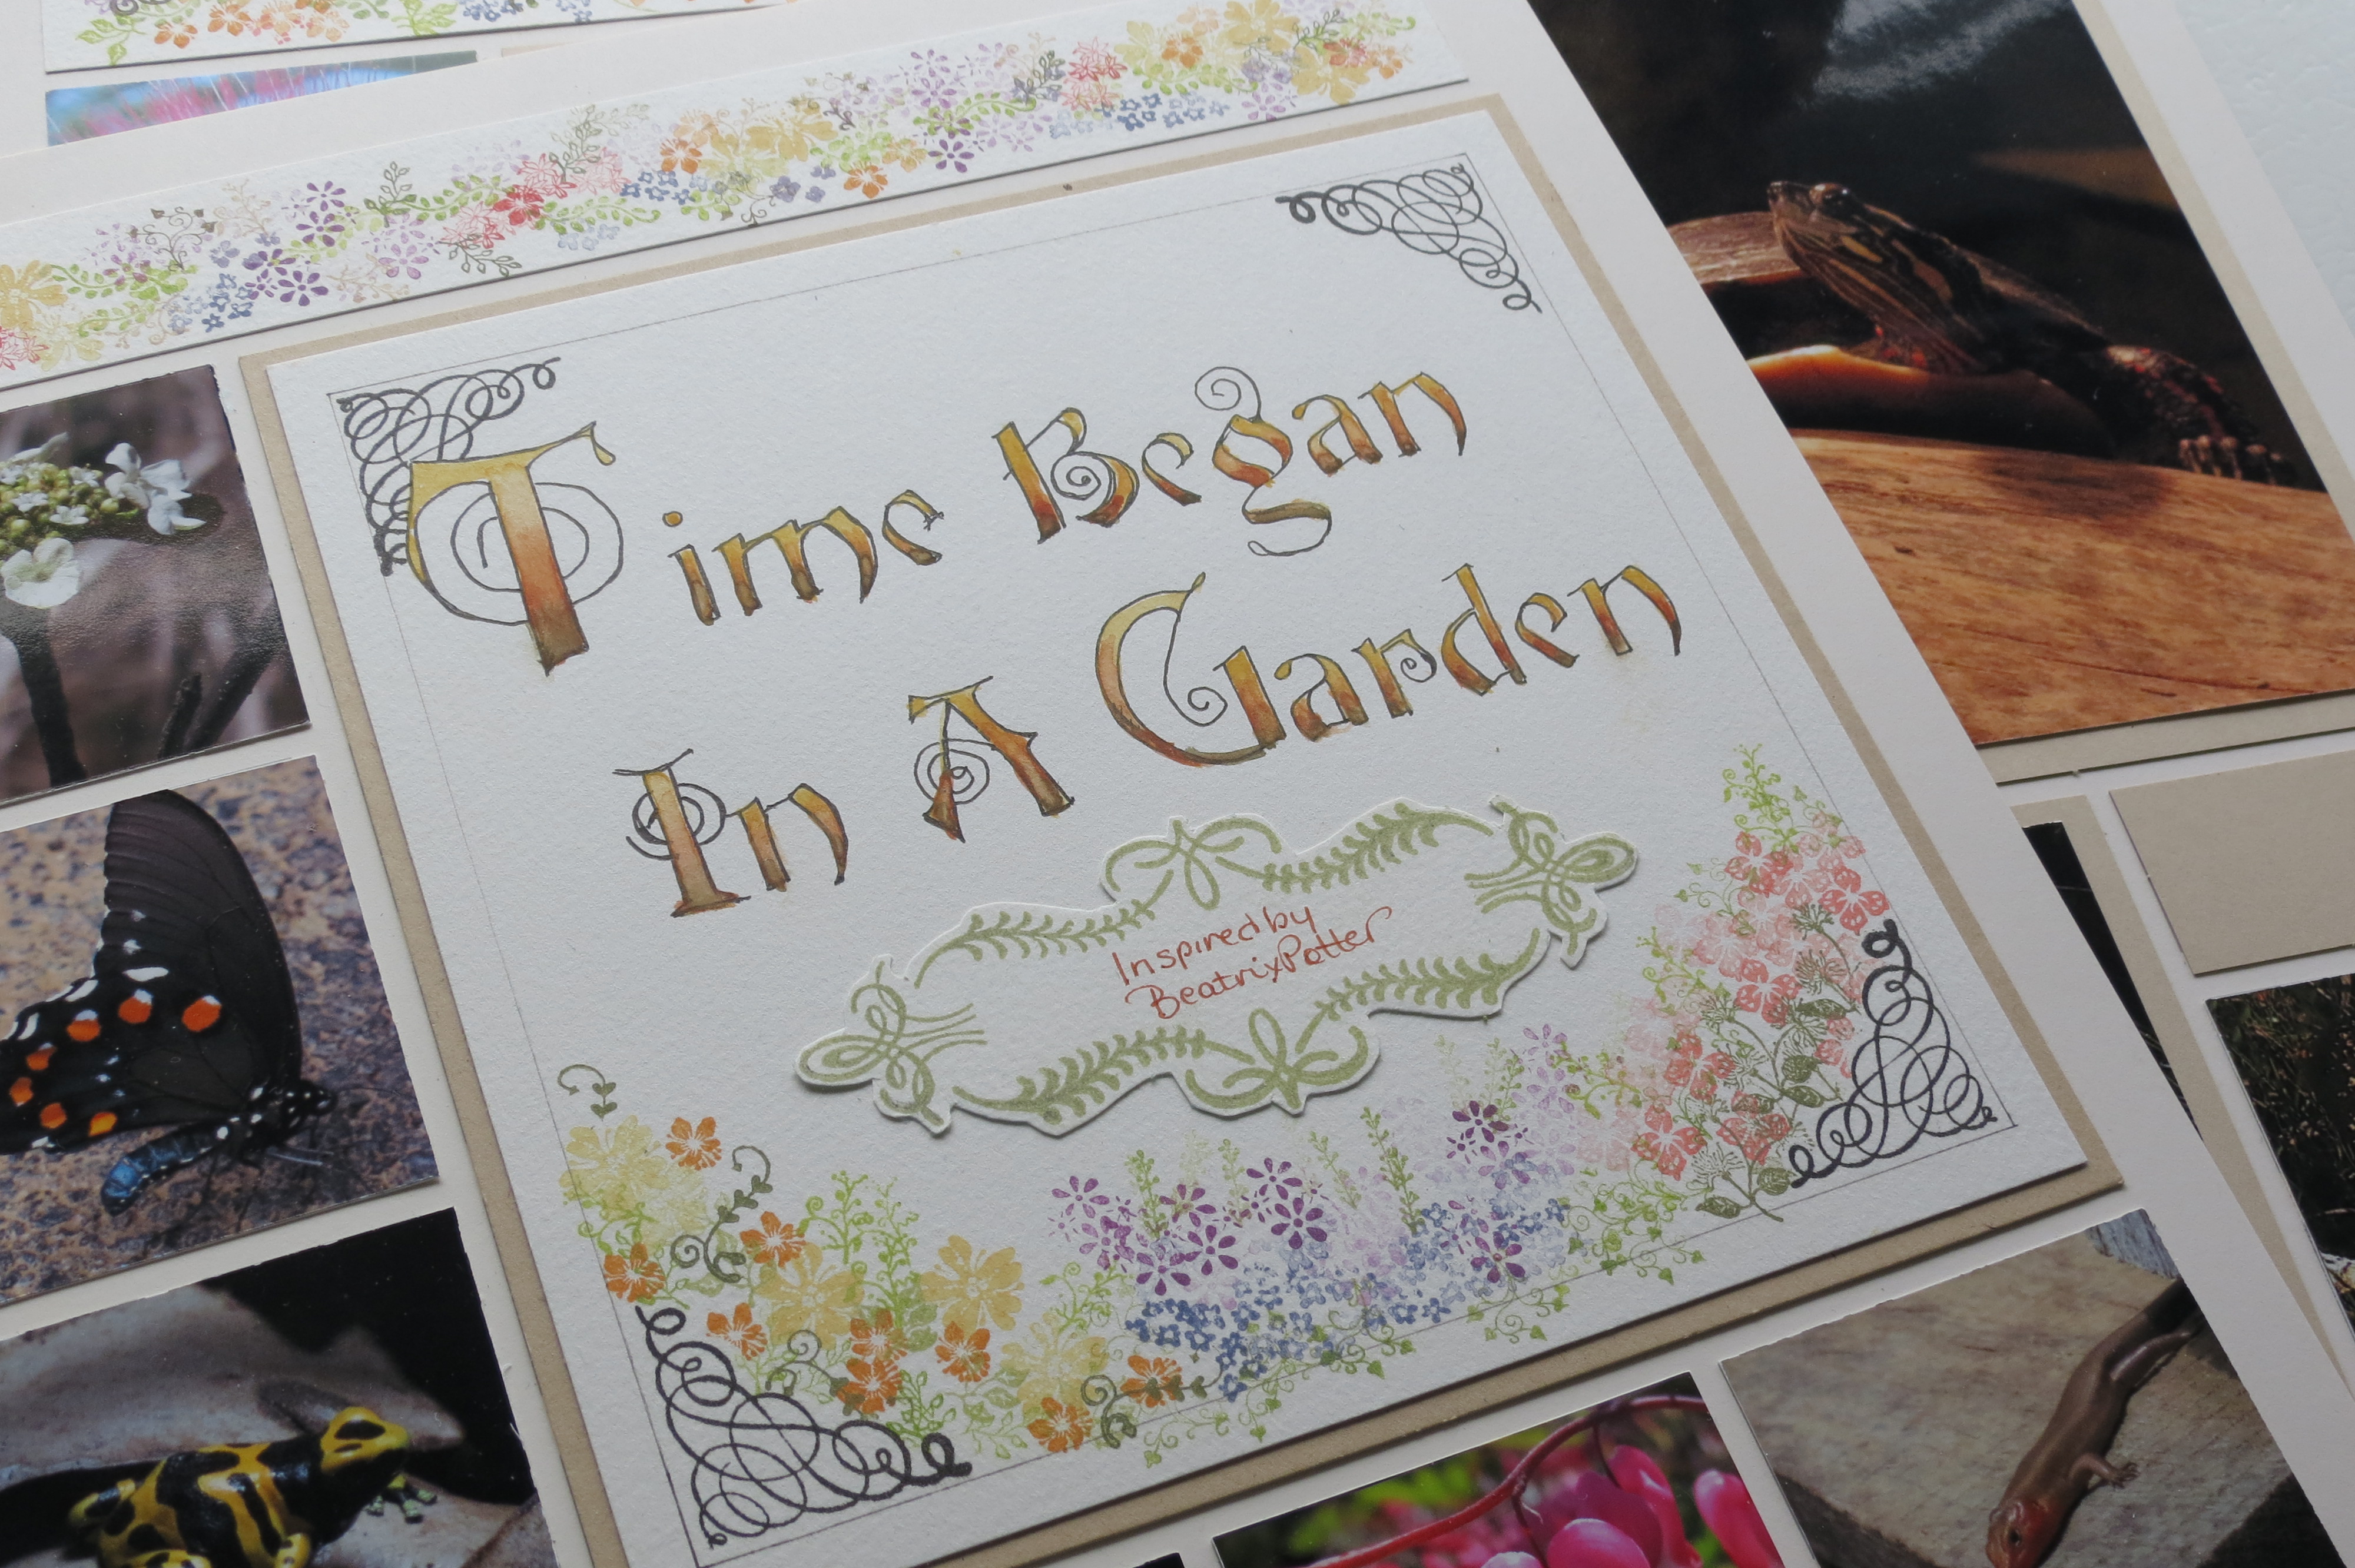
This is the original layout; a Famous Artist Challenge Tami gave the Design Team in March of 2013. The artist I chose was Beatrix Potter and if you’d like to see the full post and details you can find it here on Journella.
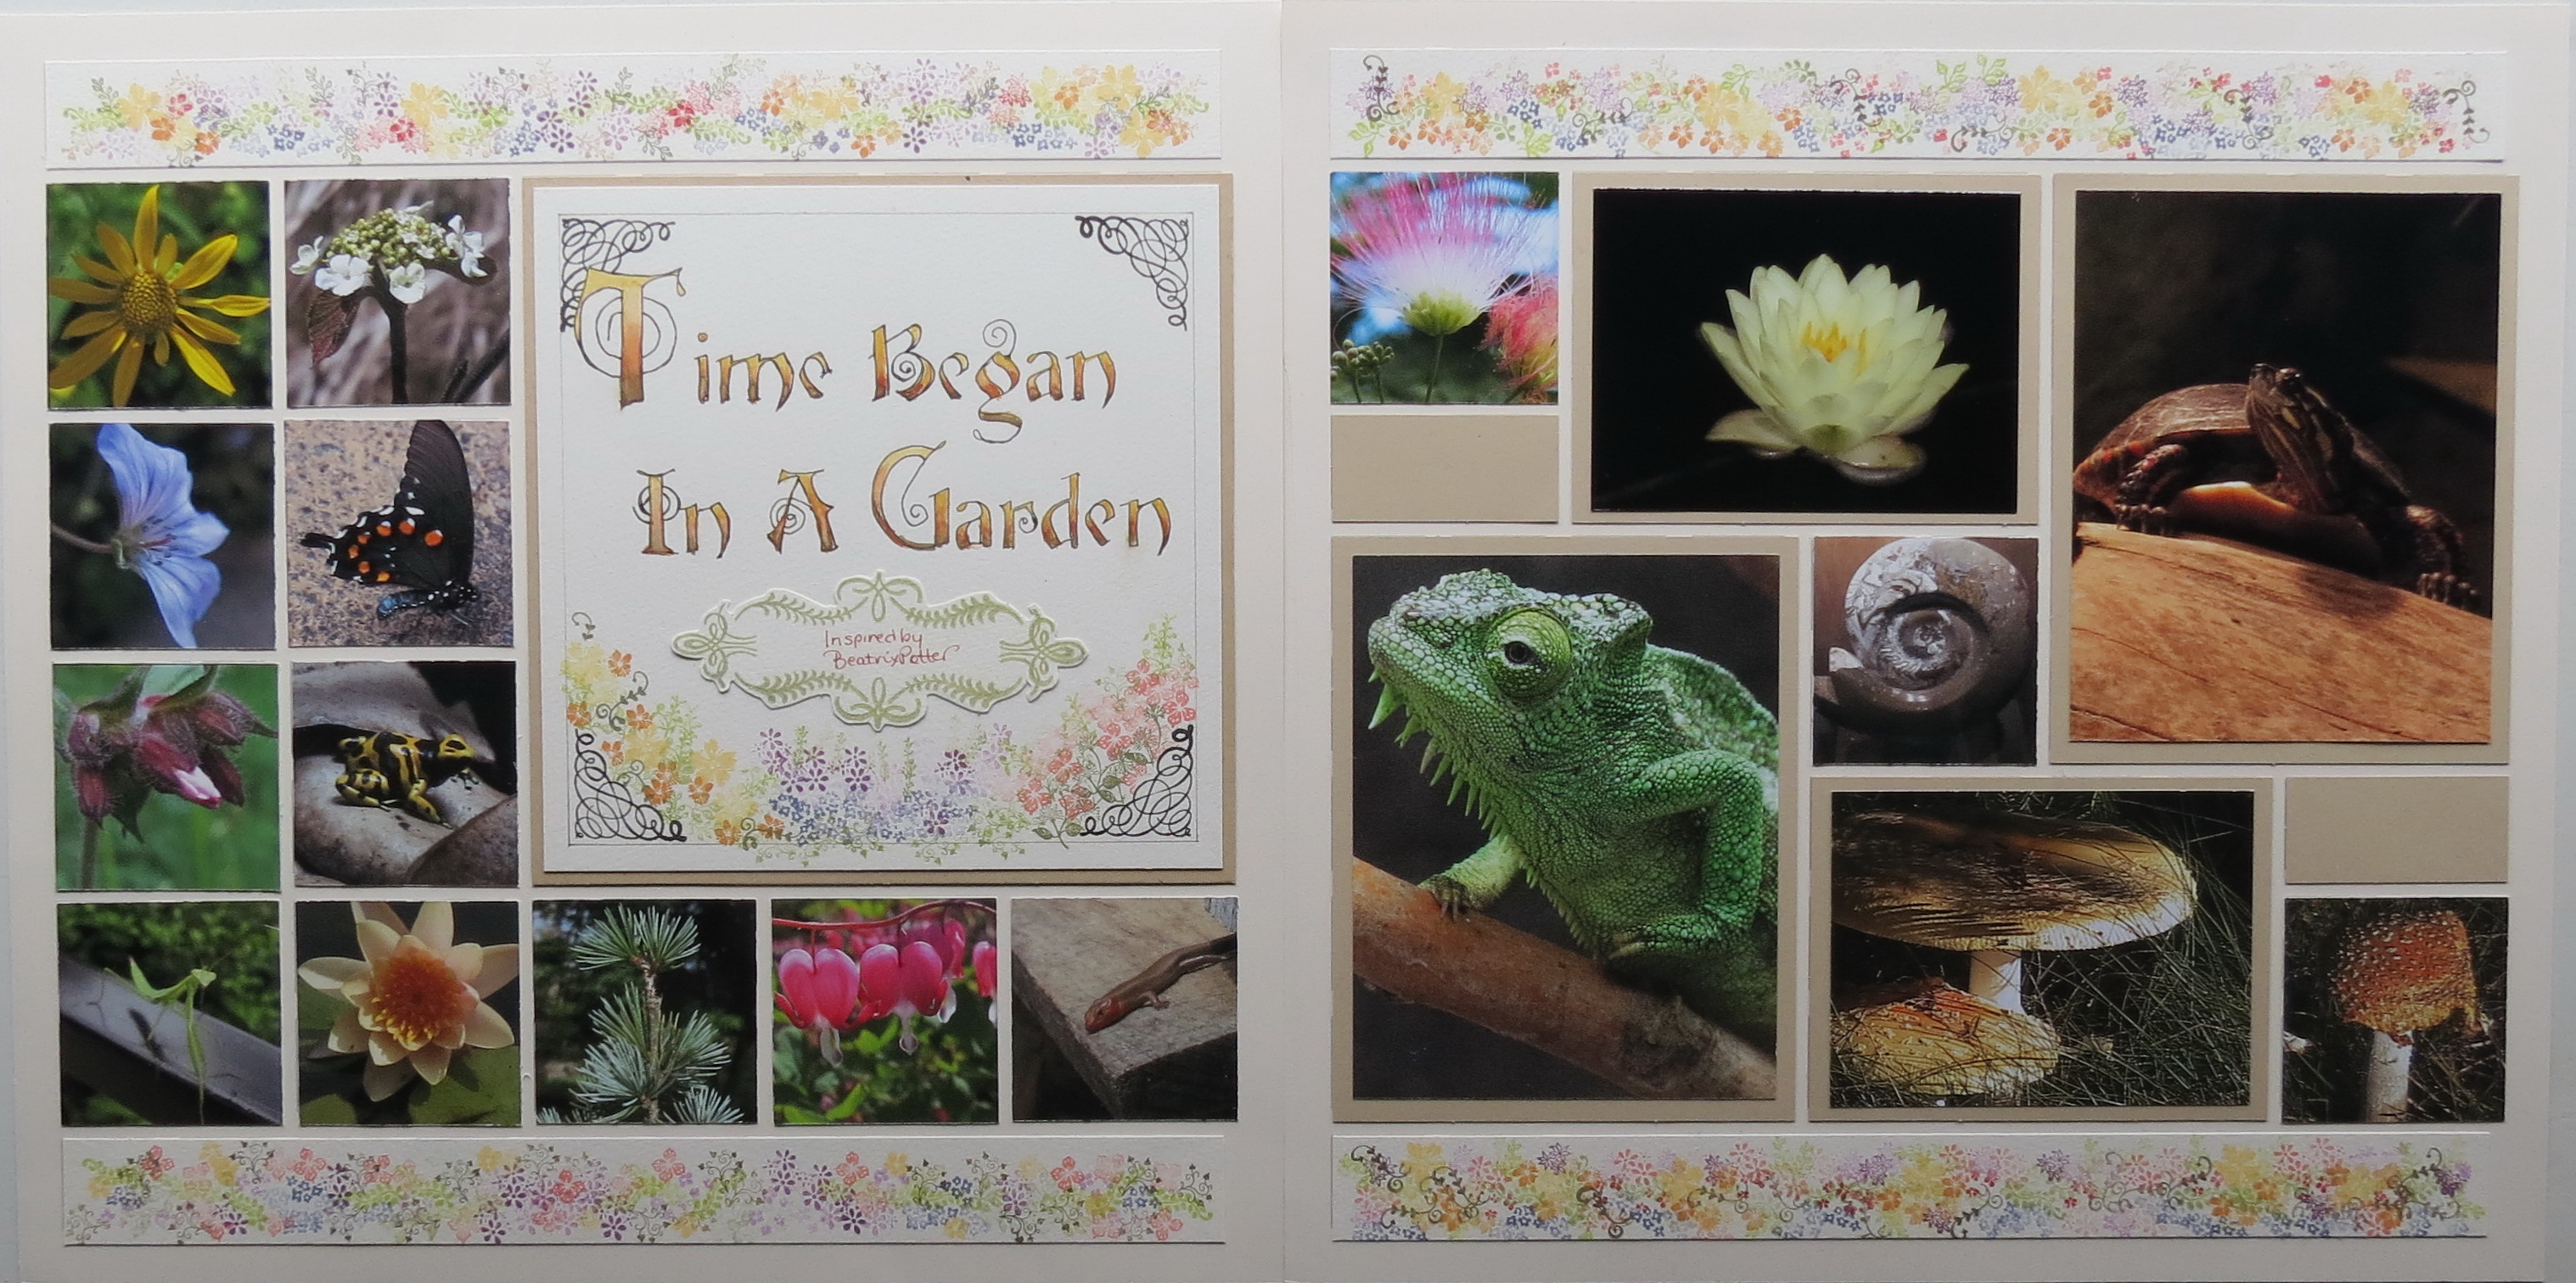
Hand Lettered Titles: Original Layout Time Began in a Garden
In the original layout I used rubber stamps, chalks and hand lettering to do the borders and title block.
For this project I decided to do another large title block with hand lettering and a trending patterning technique known as Zenspirations by artist Joanne Fink. I love her dangles and tangles! If you’ve done any doodling you will have fun adding your own touch of creativity to your layout by trying this technique!
The advantage to this is you do not need any special tools. An inexpensive Sharpie fine point marker will do and if you’d like to vary the line width Micron Pens can be used for an even finer line. You can do it all in pen and ink or add color using markers, pencils or watercolors. It’s all up to you.
I think everyone has doodled away as you chat on the phone, as you sit thinking or even as a fun past time. Lately there have been several people who have elevated doodling to a new level. I have created a Pinterest board that has links to several video how-to’s for these techniques along with some samples of the beautiful Illuminated pages from the Book of Kells and the art they have inspired. You can check that out HERE.
There is no real right or wrong way to do this and perfection isn’t the goal. Swirls, twirls and random patterns can be as much or as little as you want. You will see my lines are very rough and sketchy/scribbly in their appearance. This is a chance to let your own style show through.

Hand Lettered Titles Layout:Spring Flowers inspired by Zentangles.
The pattern I have used is Pattern #107 you’ll find it and many more in our Pattern Gallery. This is a pinwheel pattern which is what I used on the second page of the original layout, too.
I also revisited the garden theme focusing on my yard in early spring several years ago. My kids had given me lovely Mother’s Day hanging plants that really added color to my predominately white blooming garden. I began the garden when we moved into our newly built home 21 yrs. ago with bargain gallon potted burning bush and rhododendron along with three dogwood tree shoots we were given and several transplanted hostas that made the move with us. It’s been nice to see it grow and change over the years. Weeds…are another matter.
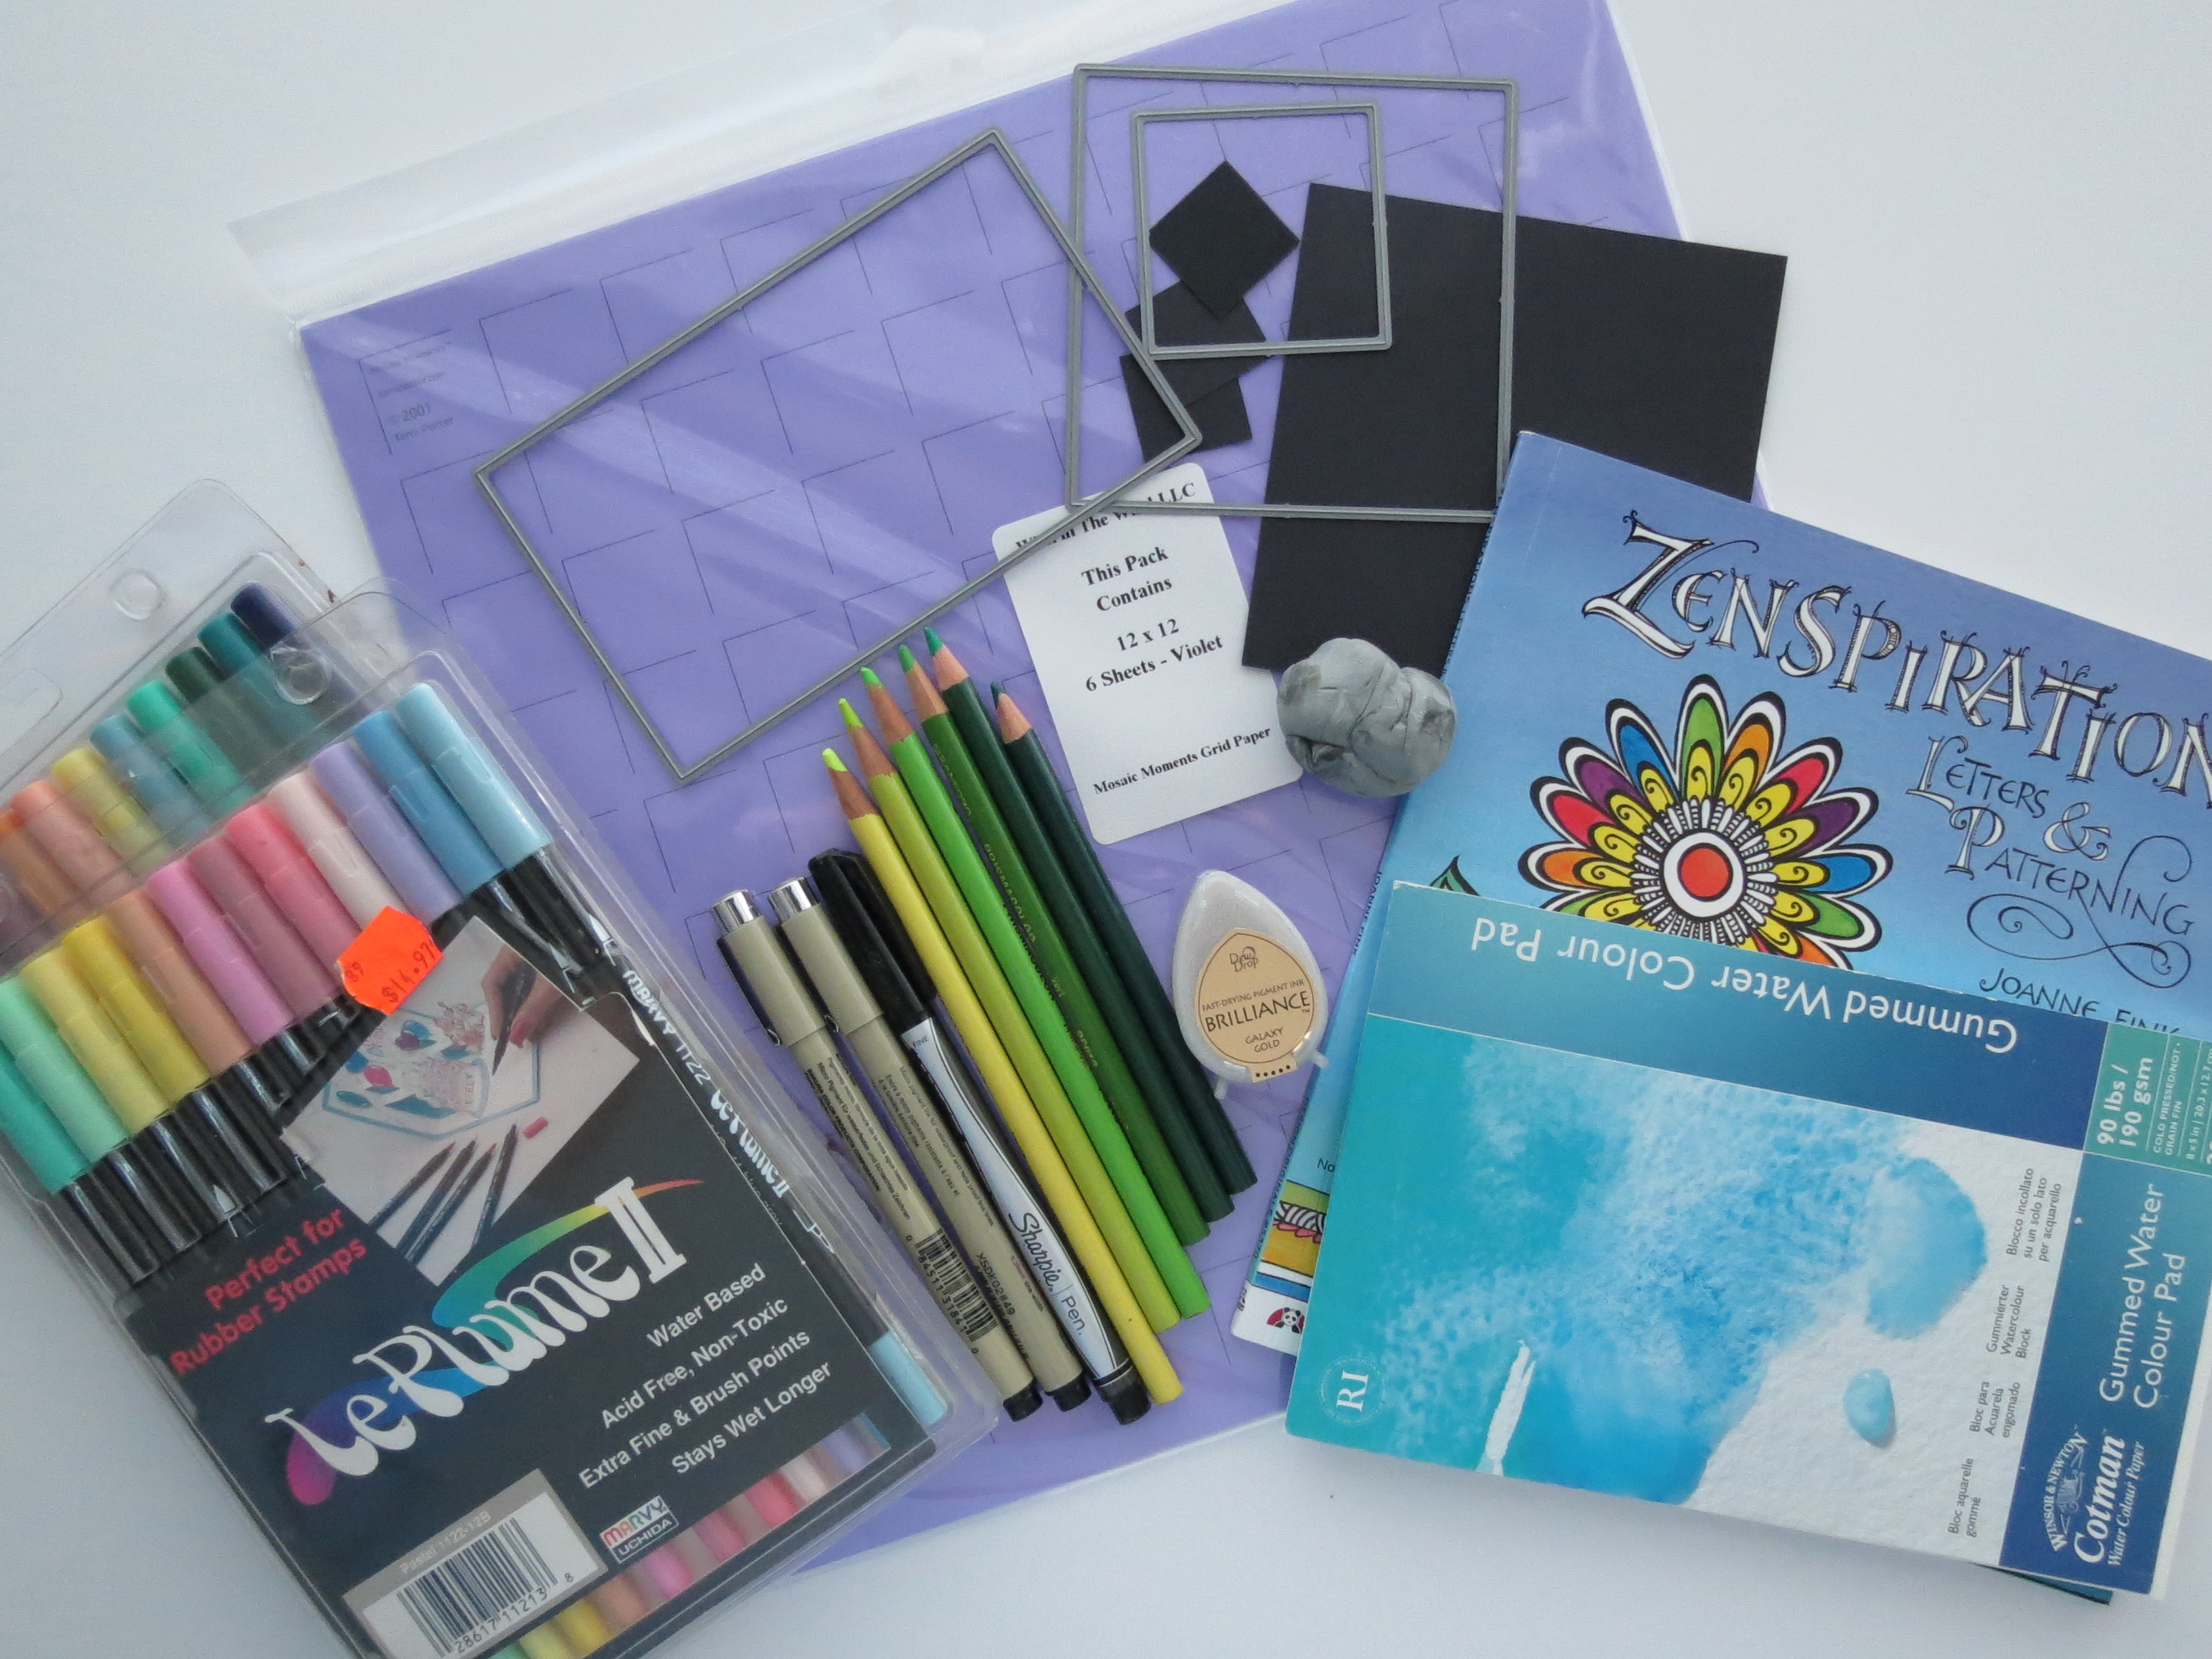
Hand Lettered Titles supplies used to create this layout. Mosaic Moments Grids, Paper Tiles and Die Set A & B.
• Mosaic Moments Violet 12×12 Grid was my foundation.
• Black Paper Tiles
• Watercolor paper
• Pencil and kneaded eraser
• Micron pens 005, 02
• Sharpie fine point pen
• Marvy Uchida Le Plum water base markers
• Prismacolor pencils
• Dew Drop Brilliance Galaxy Gold Ink
• Gamsol from Inky Antics
• Blending stumps
• Mosaic Moments Die sets A & B
• Photos
Mosaic Moments Die Set A

Mosaic Moments Die Set B
All of the larger photos have been trimmed to fit the grid using the 3×5 rectangle die from Set B. And the smaller 2×2 square from Set A. The title block was made using the layering die for the large 4×4 square. I can’t stress enough how quickly your layouts will come together when you use the dies, and because it does it gave me the opportunity to doodle away on the Title.
We haven’t talked a lot about Titles in these posts yet and I thought it might be a good time to begin. We like photos to be the stars in our Mosaic Moments Grid layouts, but journaling and titles are important too. Titles can draw you in, tell part or all of your story, set the theme, reinforce the story the photos tell…so many things. Why not make it stand out?
Several of our patterns allow for a nice sized title so you may want to consider the pattern you use based on the type of title you’d like to have in your layout. The pattern in the original layout had a large 6×6 spot that I used for a title and this pattern #107 has a large 4×4 space that became my title block. Both blocks were double mounted and the new dies with the layering ability make everything quick, easy and balanced.
Hand Lettered Titles details of stamped flowers, hand inked letters watercolor painted
In the original layout a hand lettered title was used with watercolors to fill in with a gradient shading technique. On the new layout I used my colored pencils and the Gamsol to blend the colors together. You just apply the Gamsol to the blending stump and rub lightly over the pencil coloring to blend smoothly.
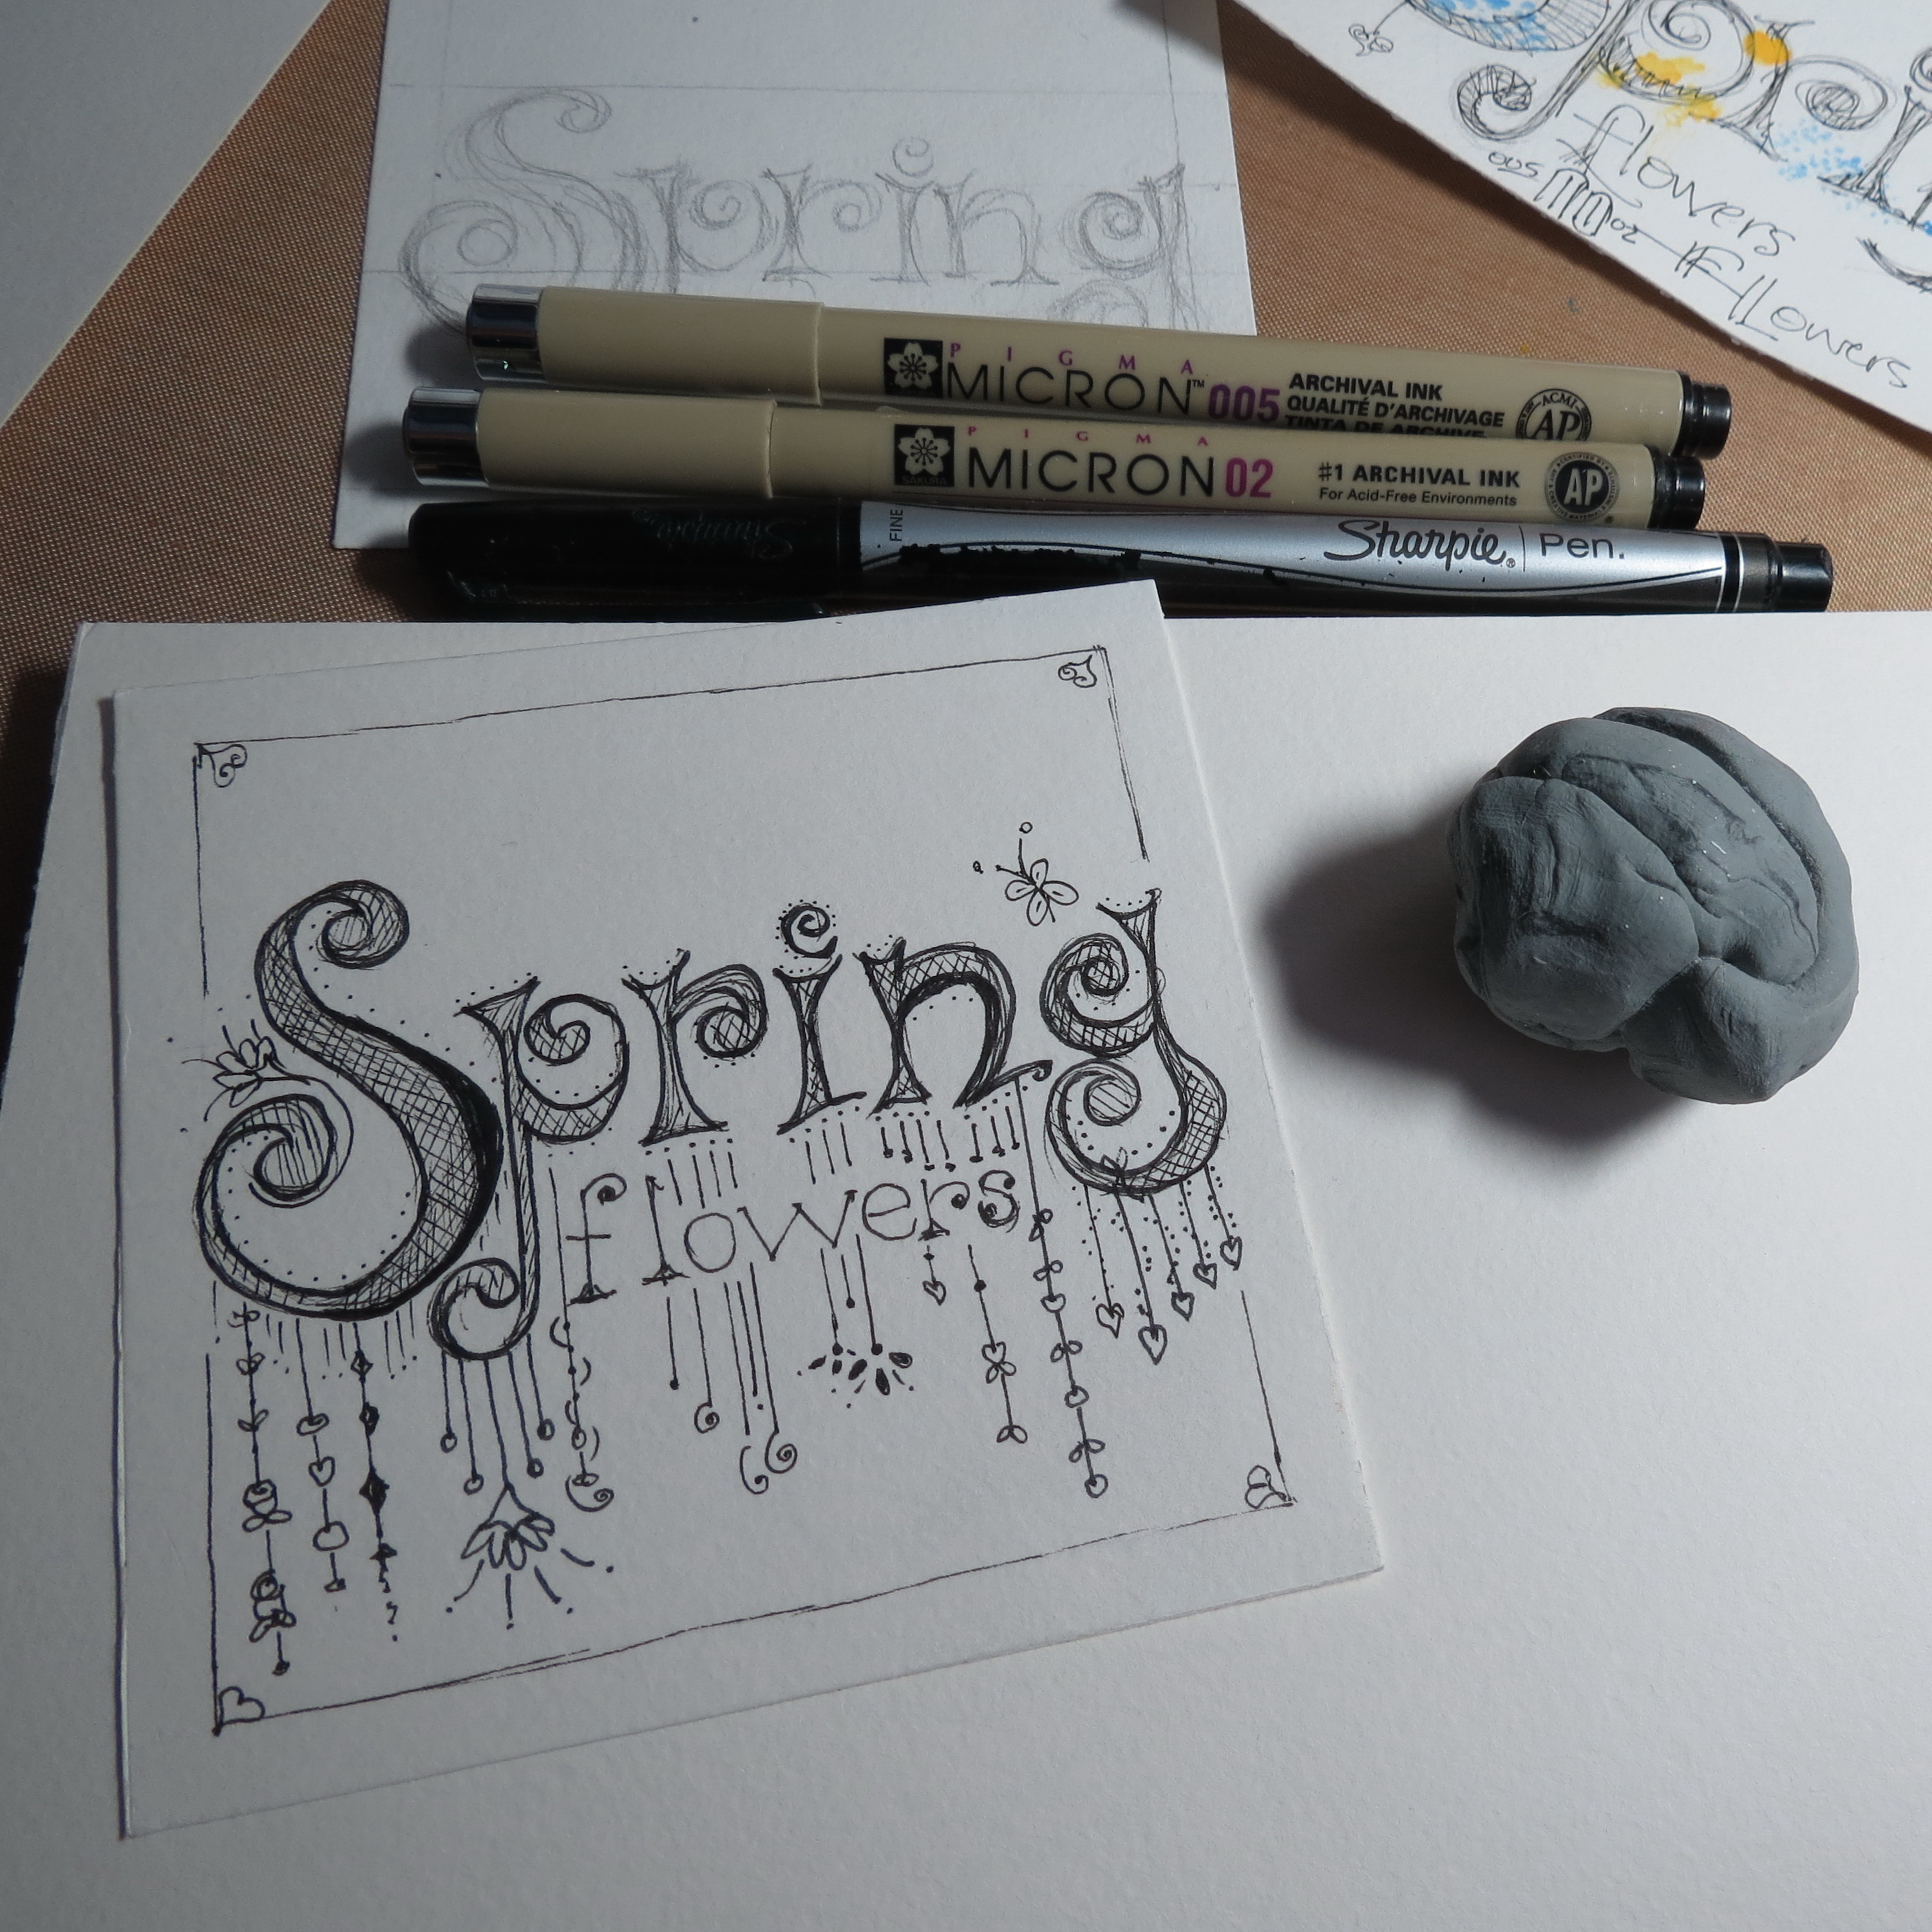
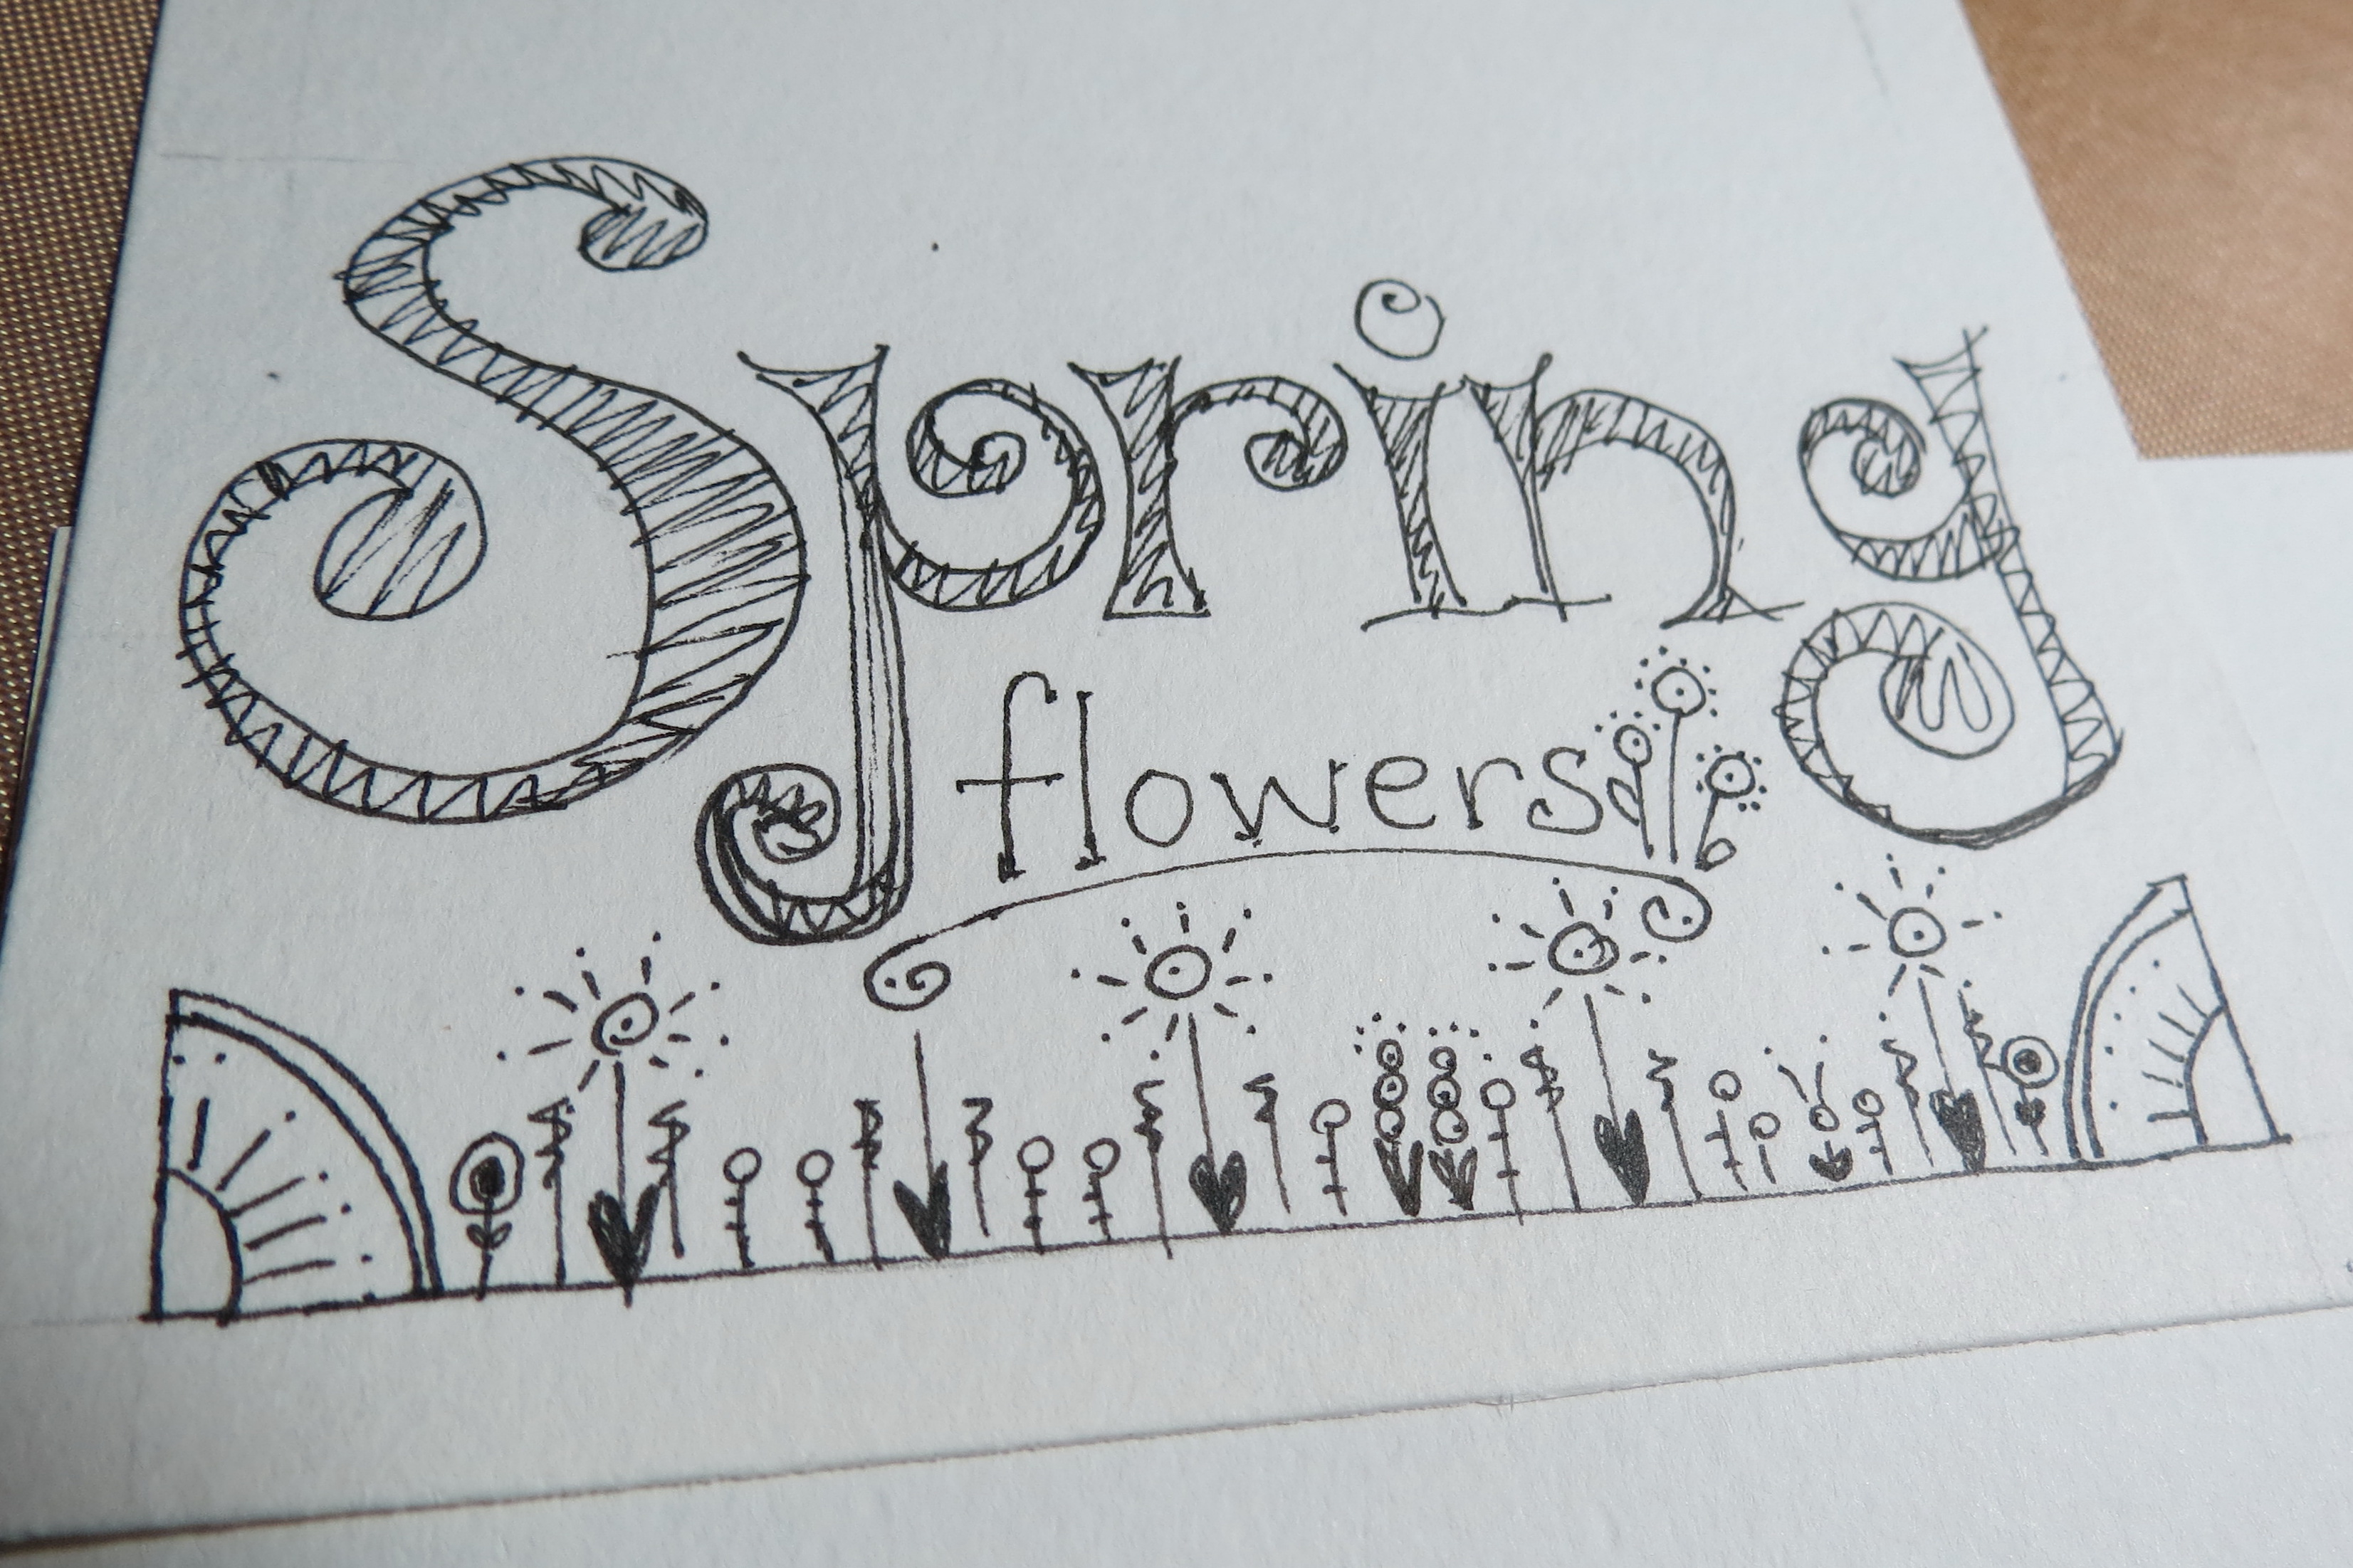
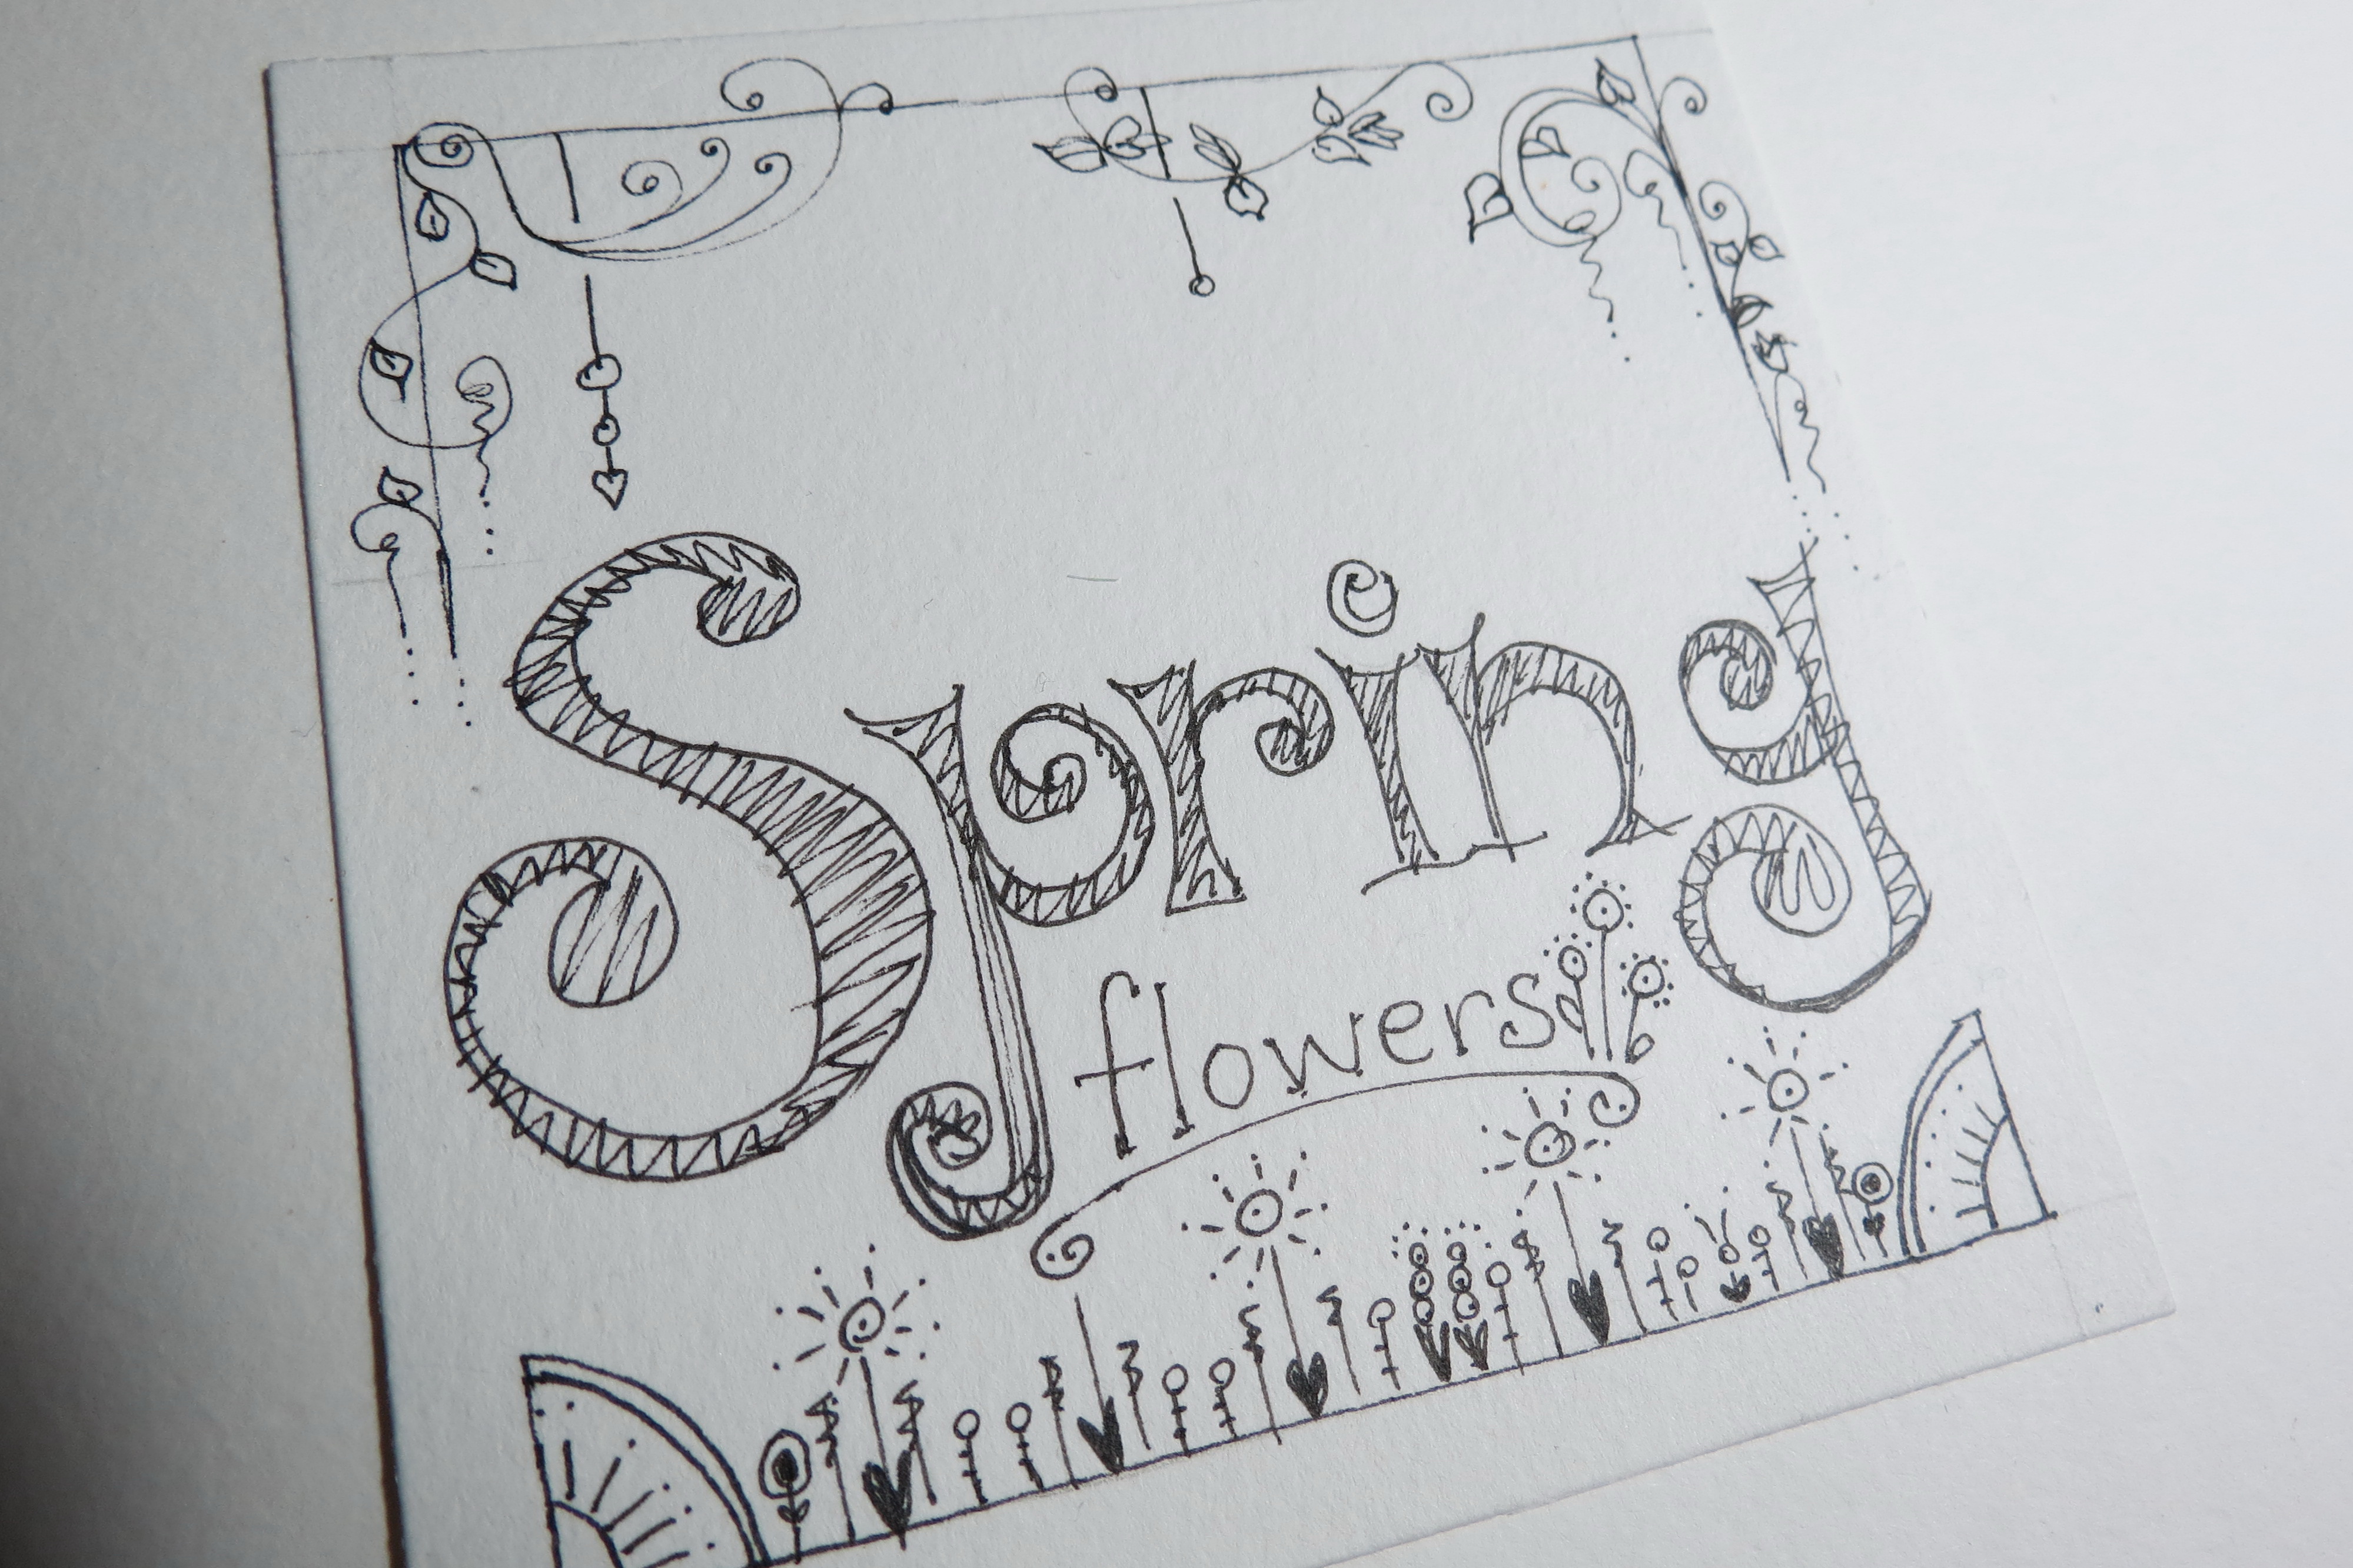
I’ve actually done two different titles one where the dangles hang from the letters and one where they hang from the top edge of the block. This second version also has a floral pattern border along the bottom. One is colored in and the other is not. I’ll show you a few photos of the step-by-step process of turning a paper tile into a canvas.
• Begin with a rough sketch of your letters in pencil. These lines will be removed later, so make them as light as you can and still see them.
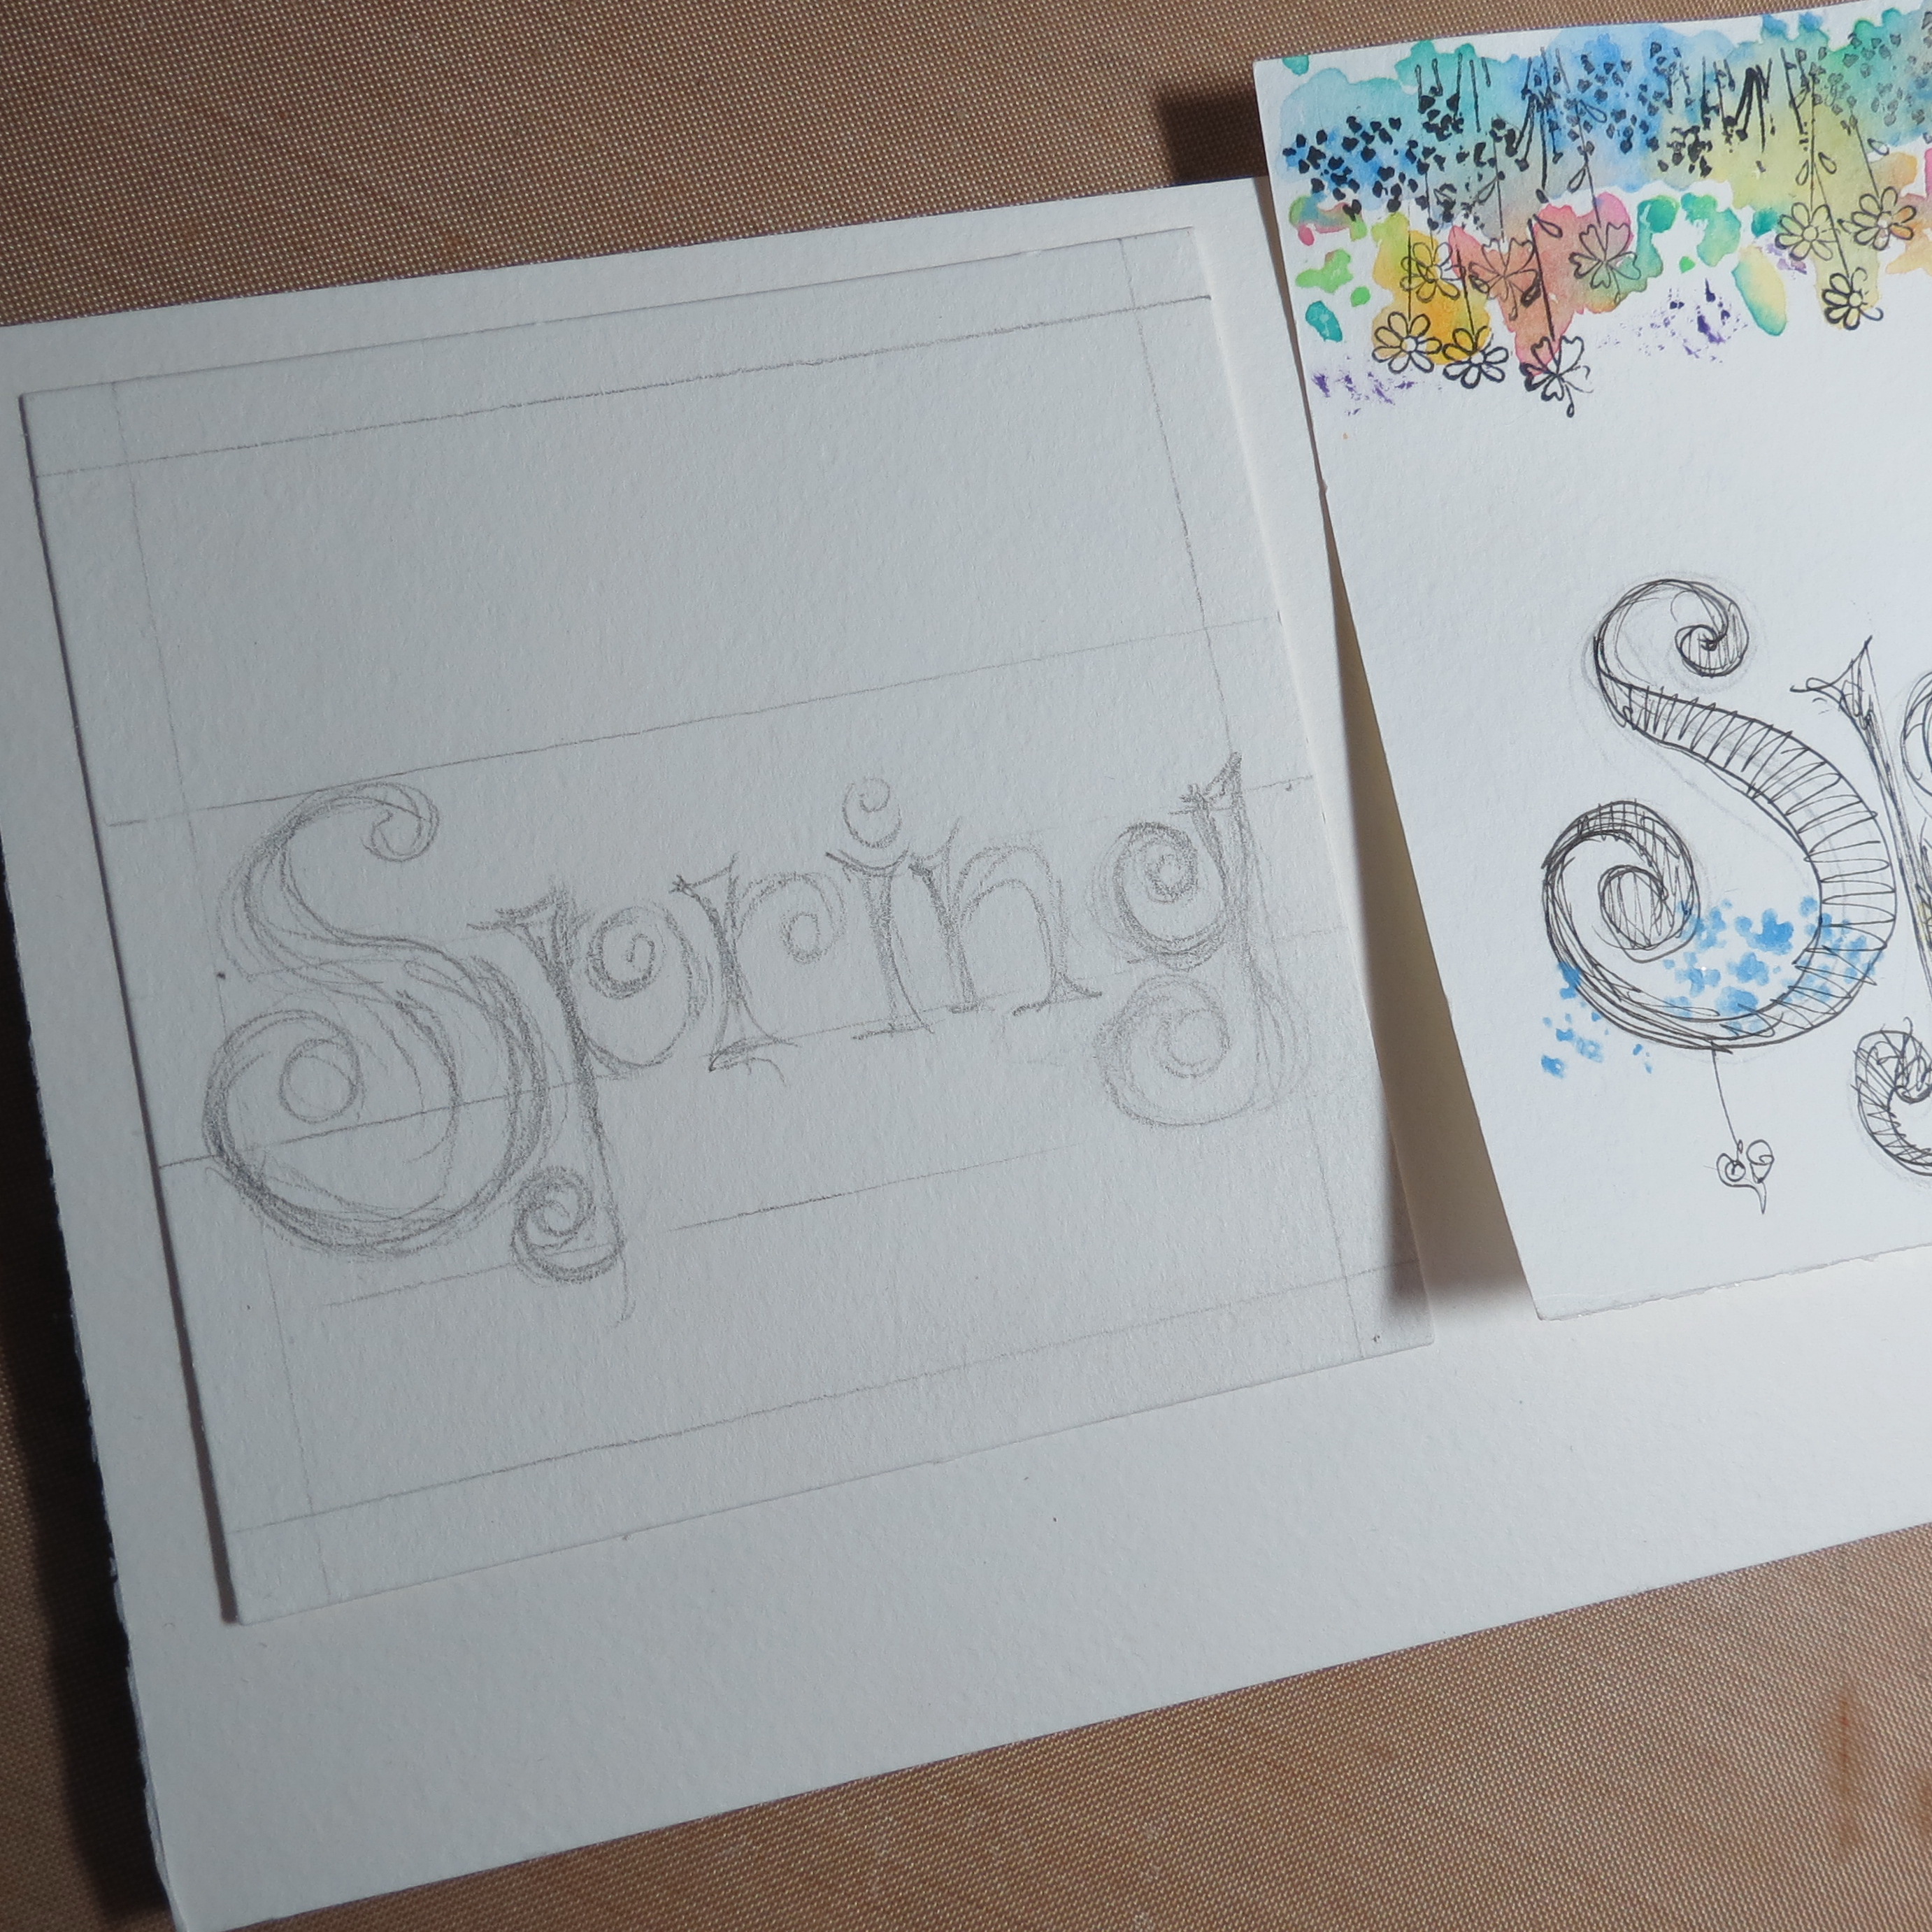
Hand Lettered Titles Step 1. Sketch your title in pencil
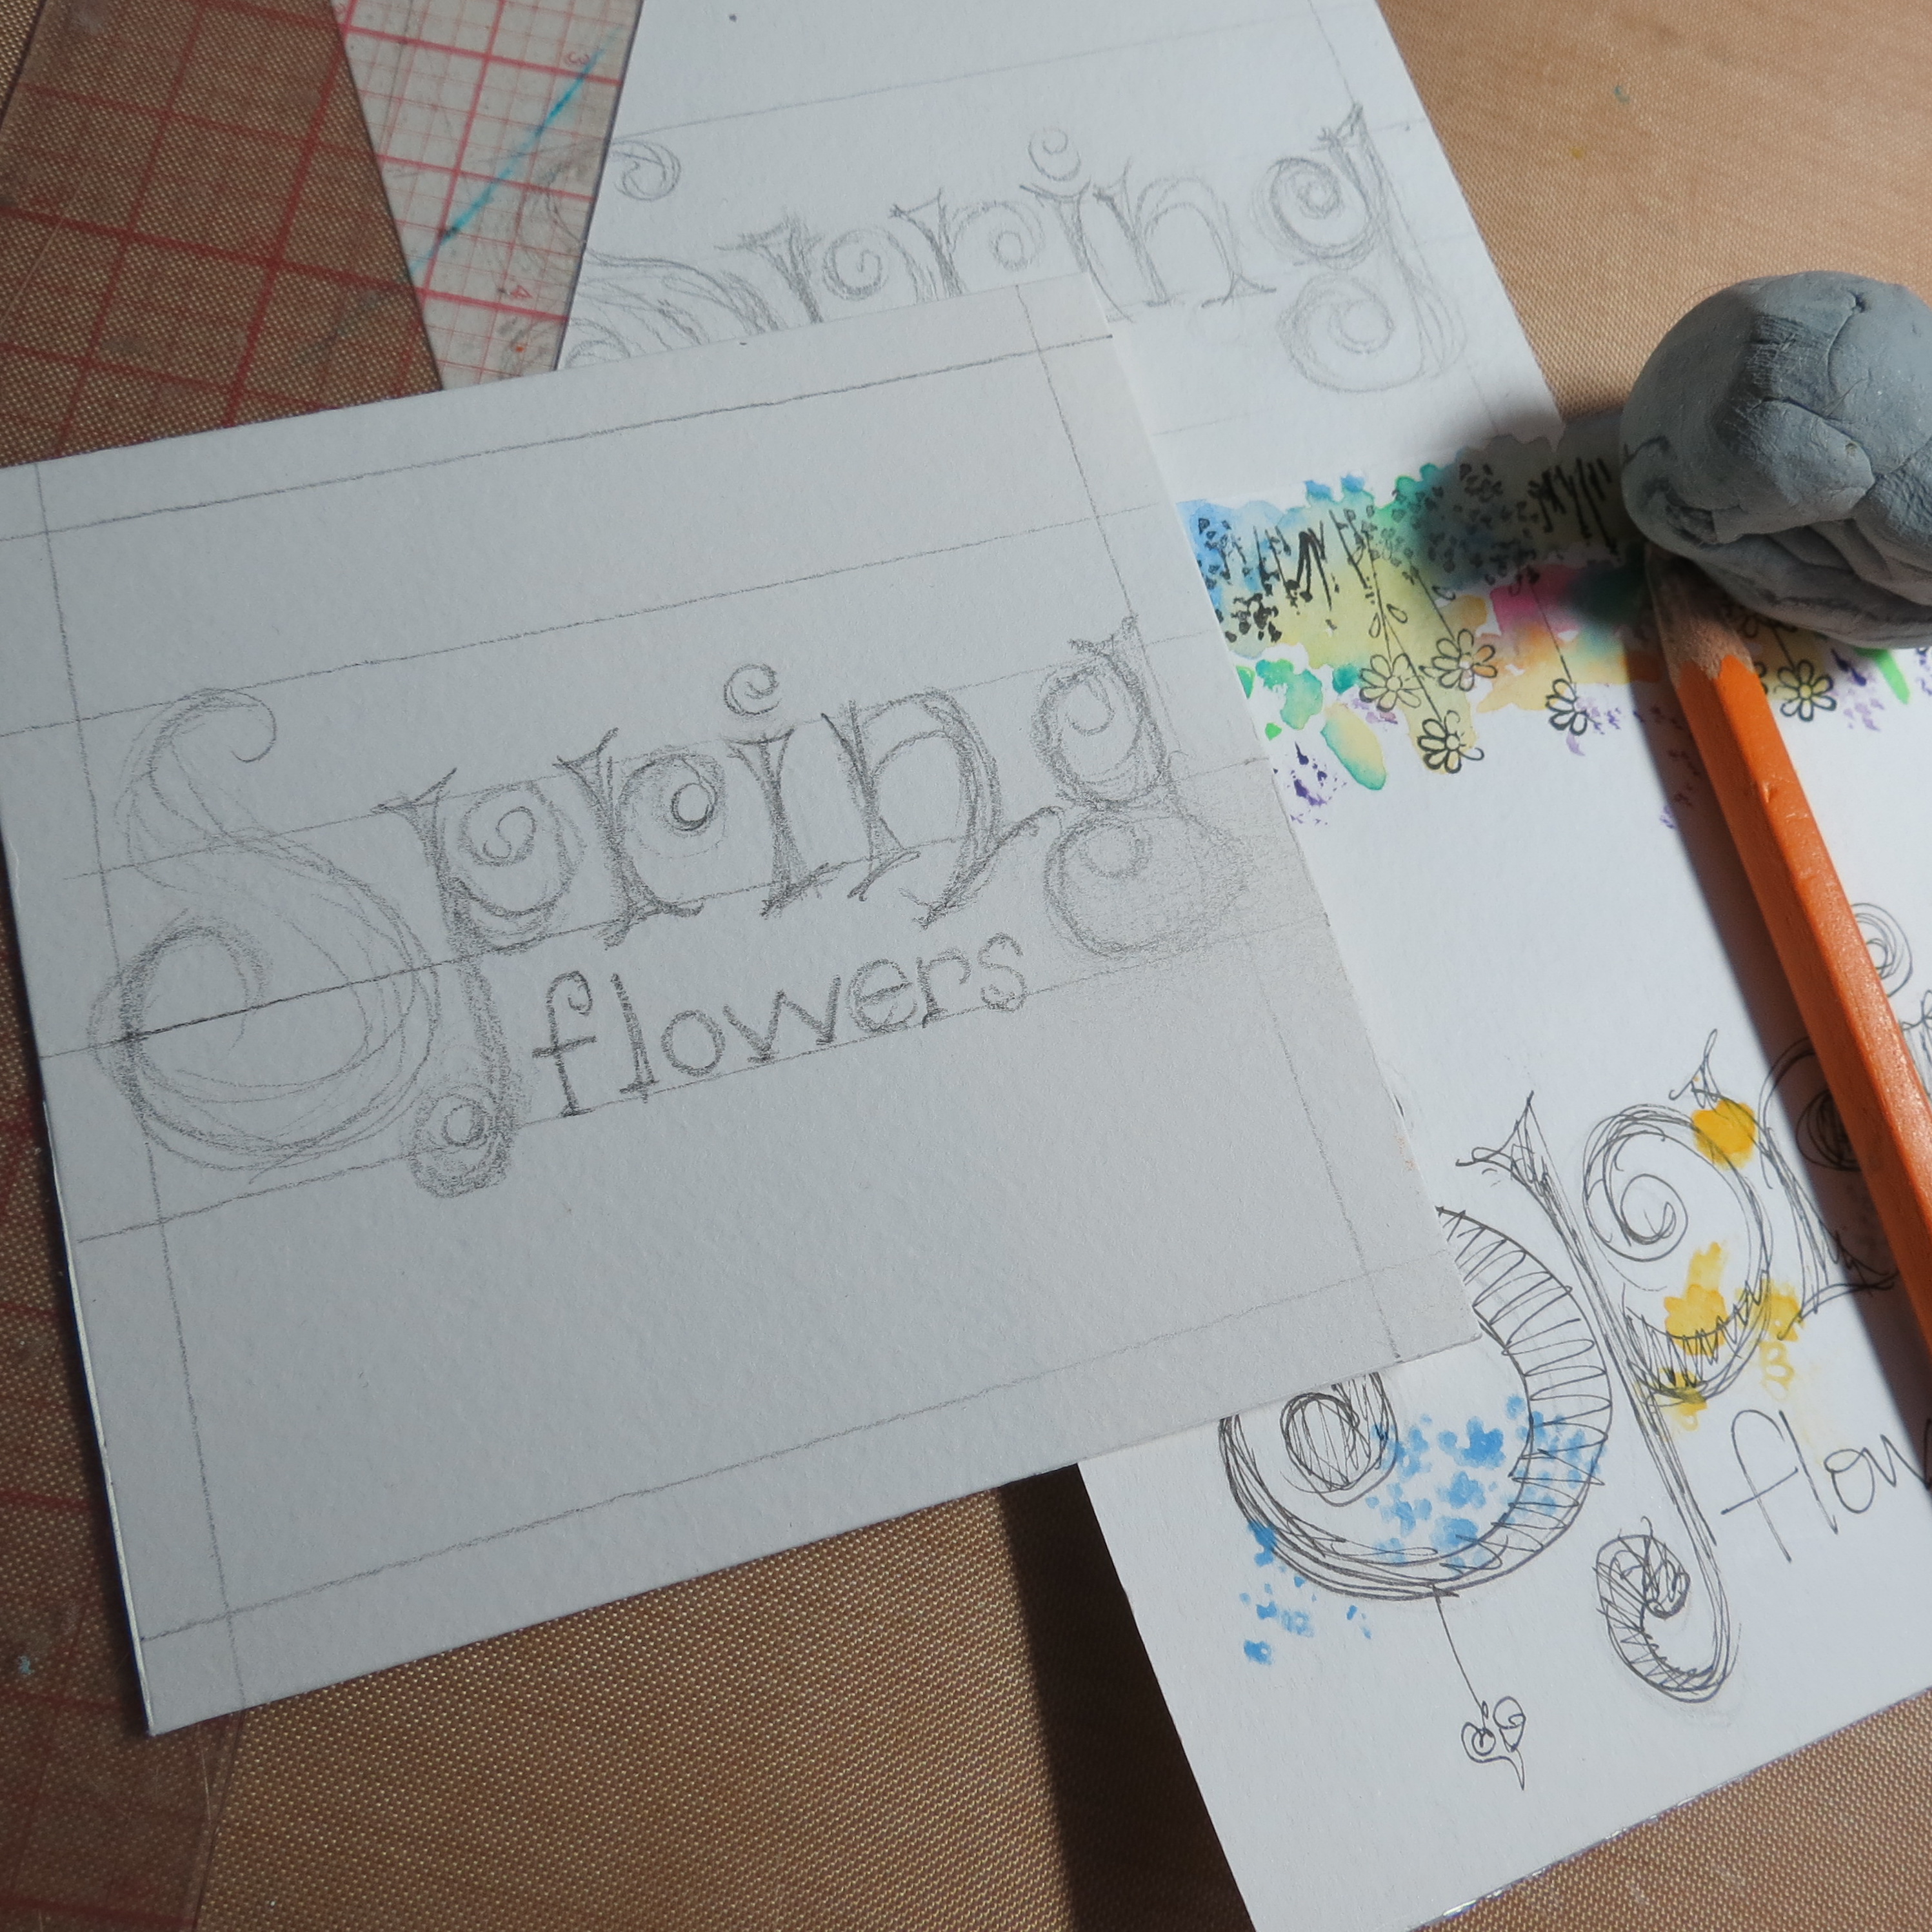
Hand Lettered Titles Two different layouts One is centered and one is in the bottom half of the square.
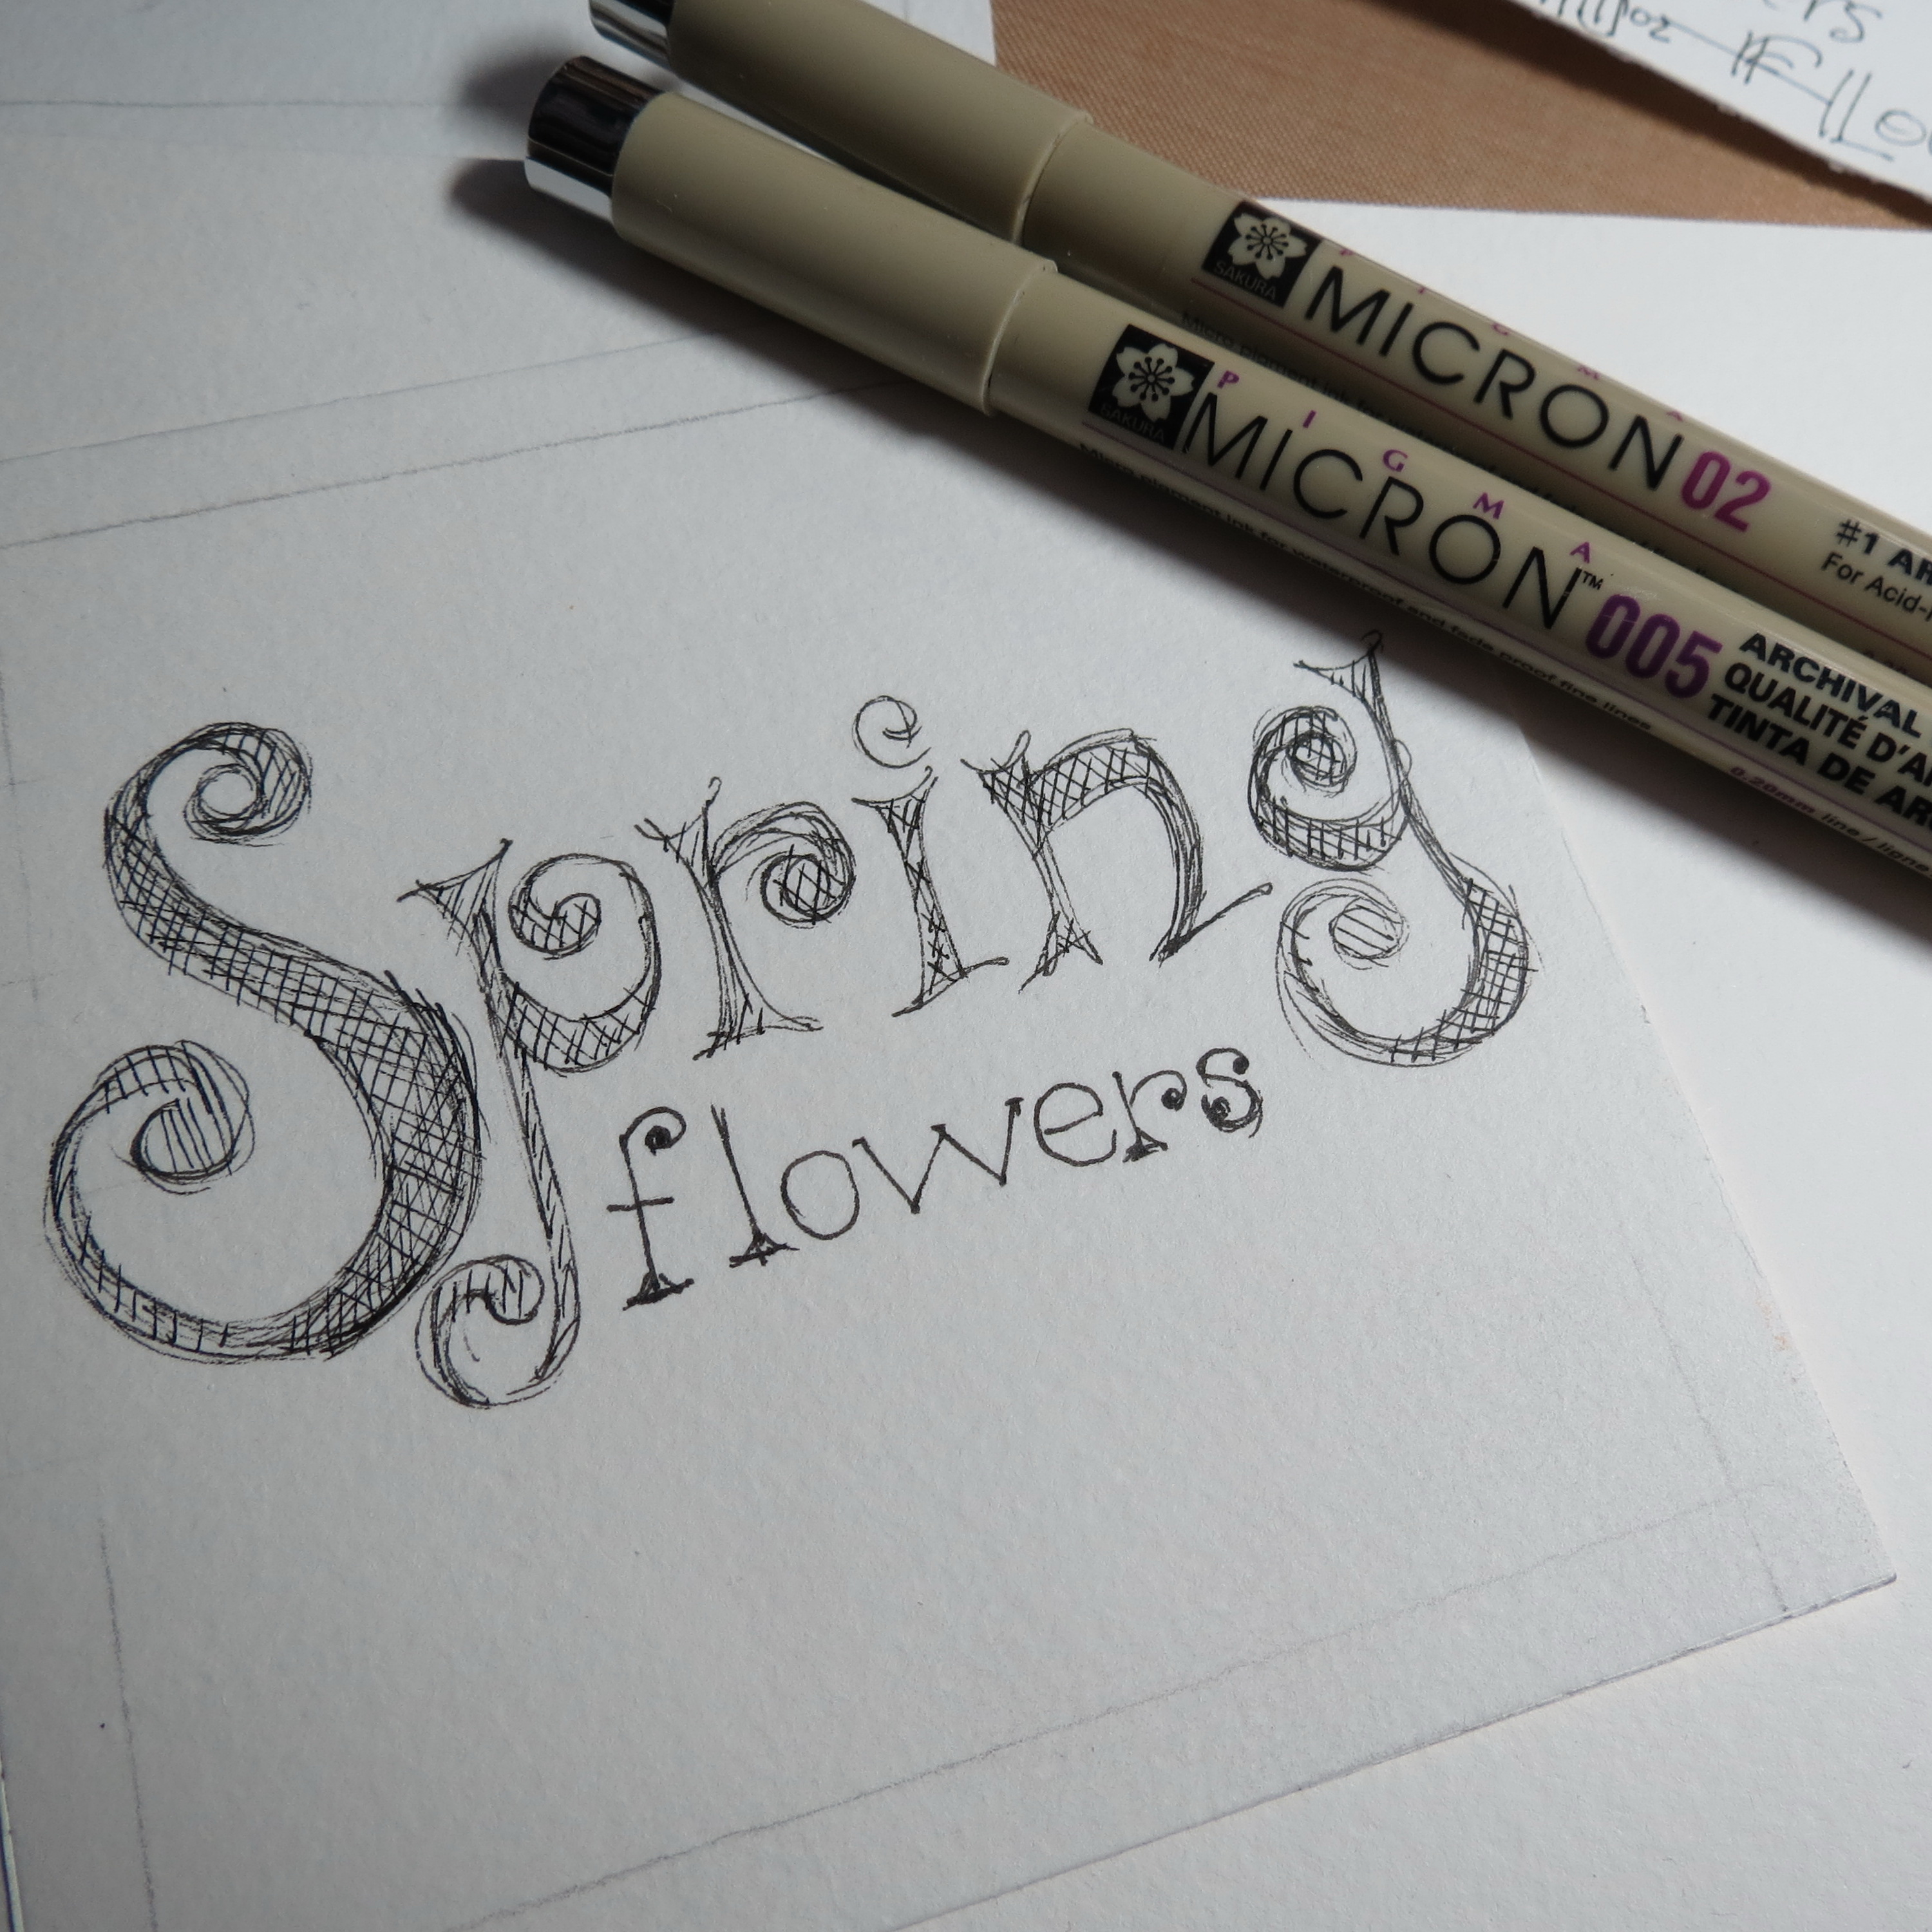
• Outline in ink your title.
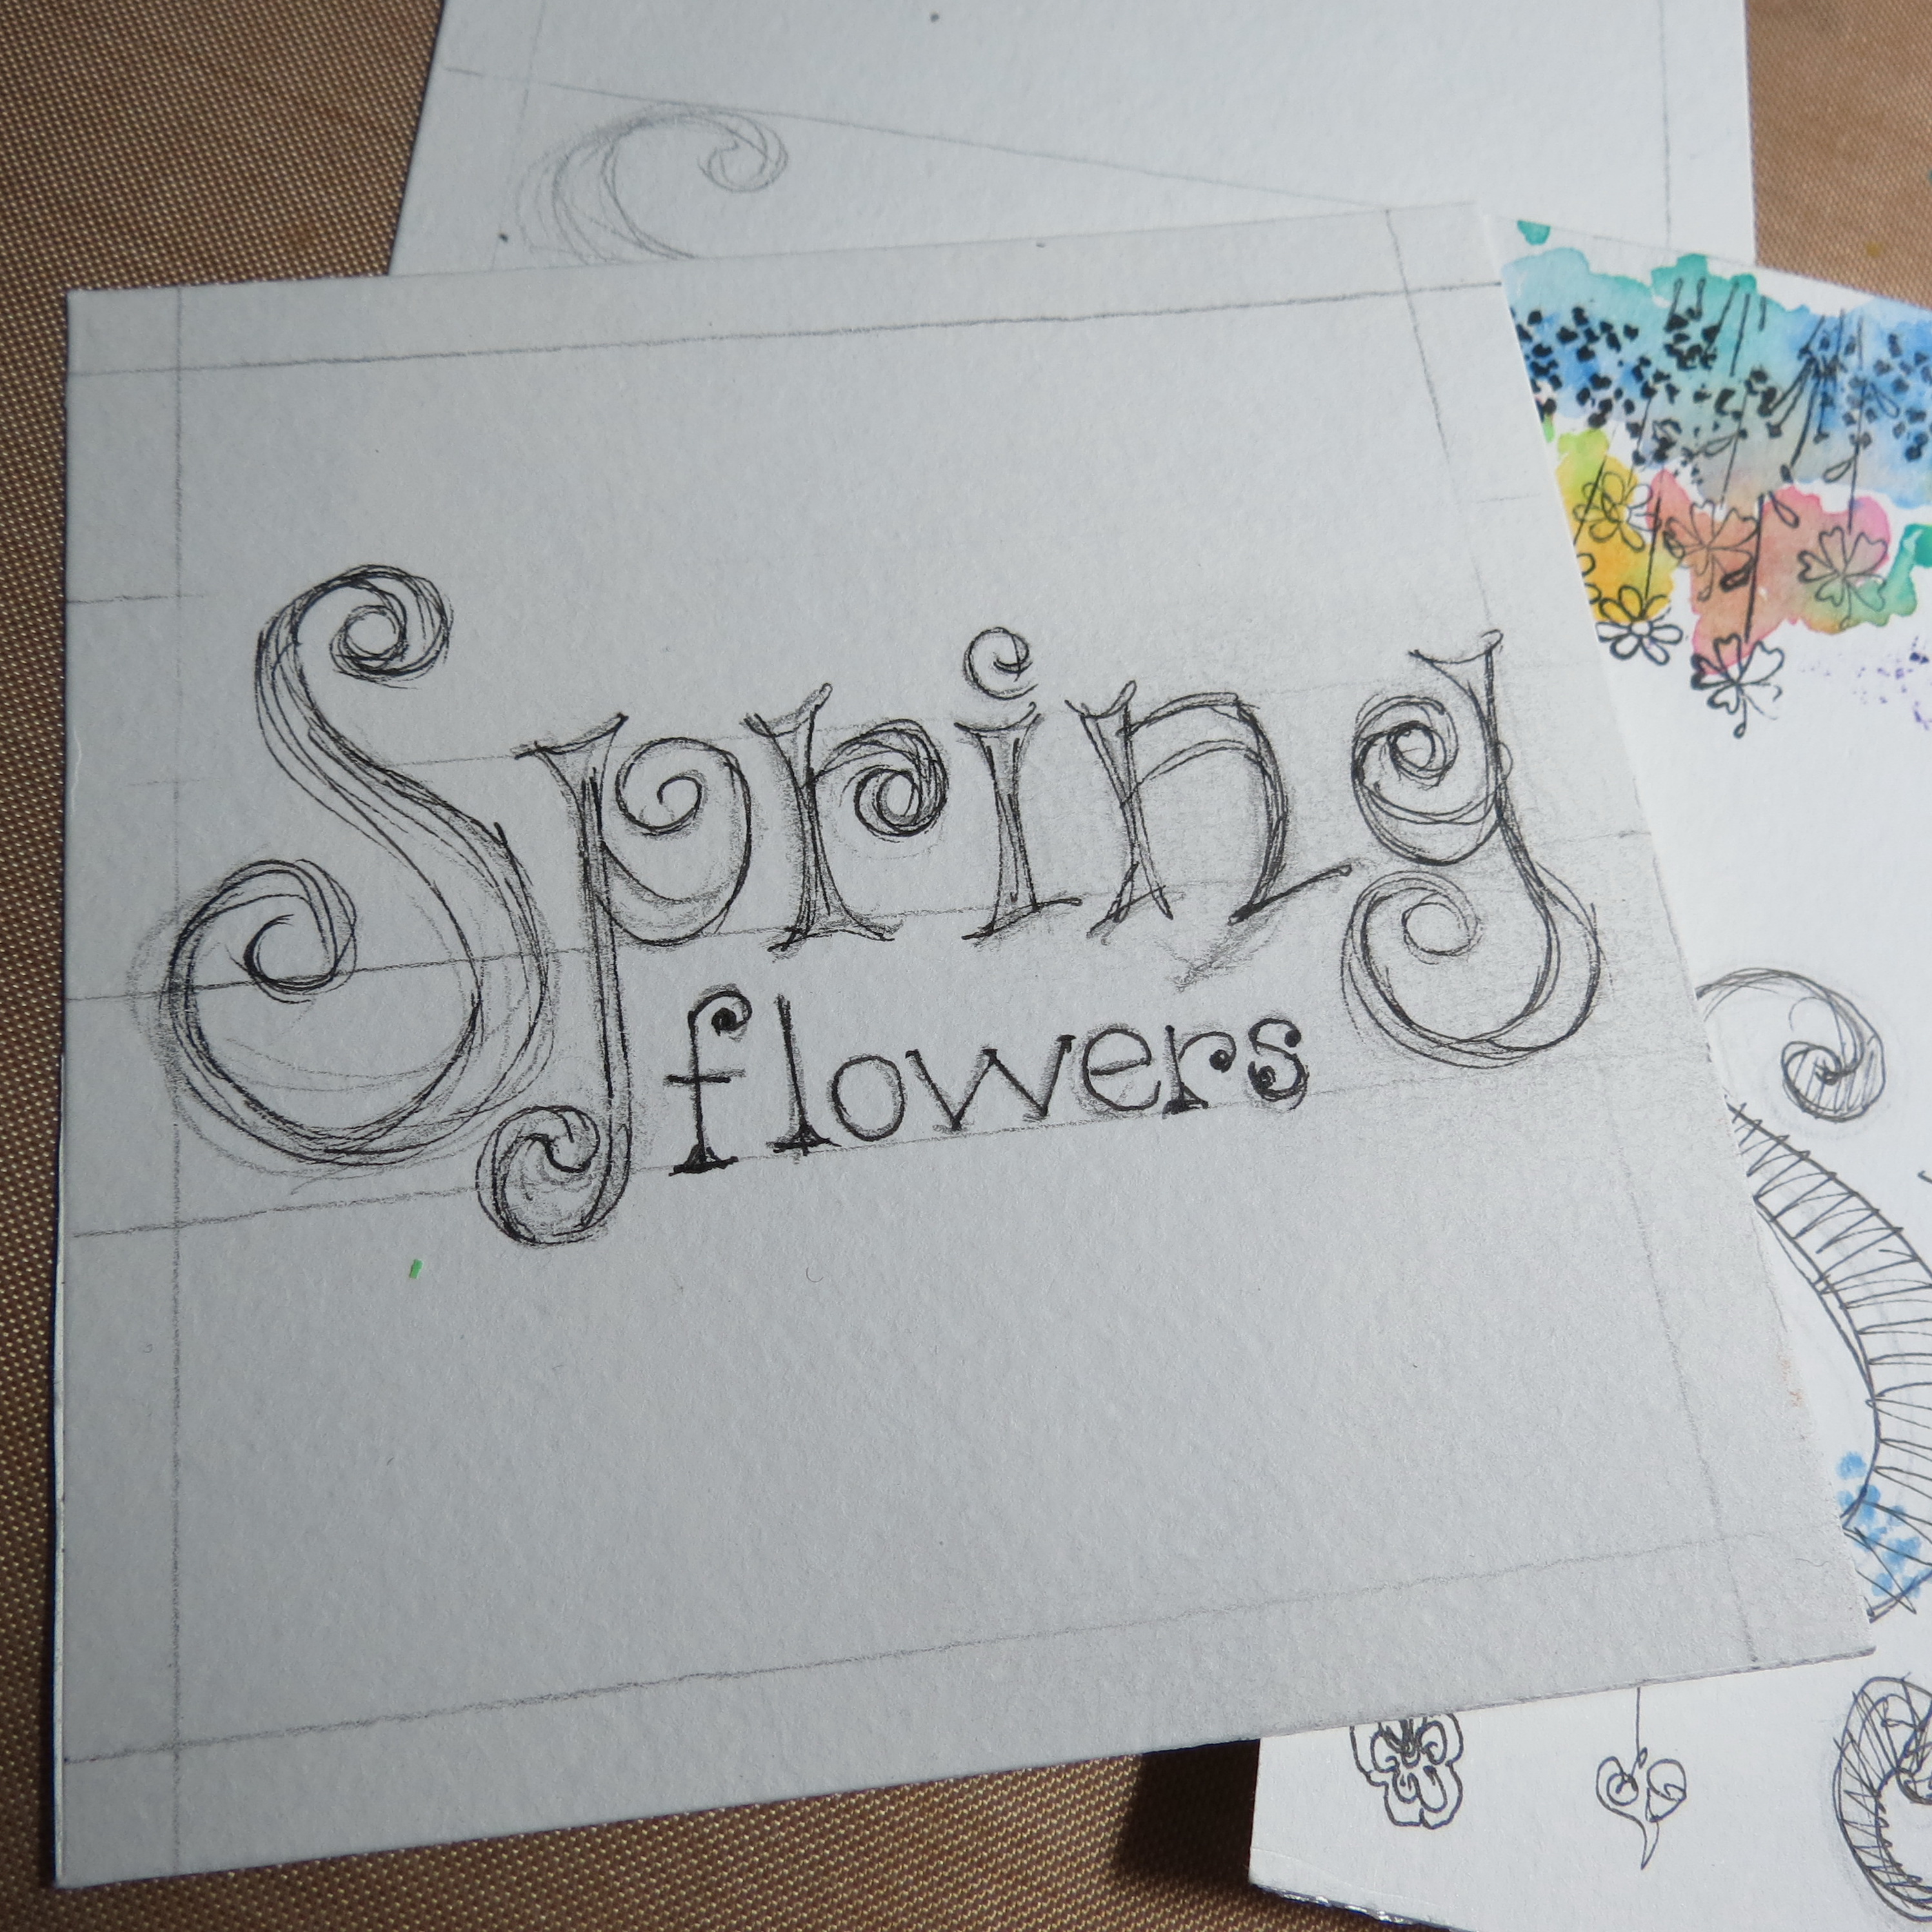
Hand Lettered Titles Step 2. Ink in your title
• Erase your pencil lines
Hand Lettered Titles Step 3. Erase your pencil lines around your letters. Step 4. Add patterns to letters.
• Add patterns to letters
• Begin to fill in your space with doodles
Hand Lettered Titles Step 4. Begin adding your Doodling to your letters.
• Add patterns on the top border and sides
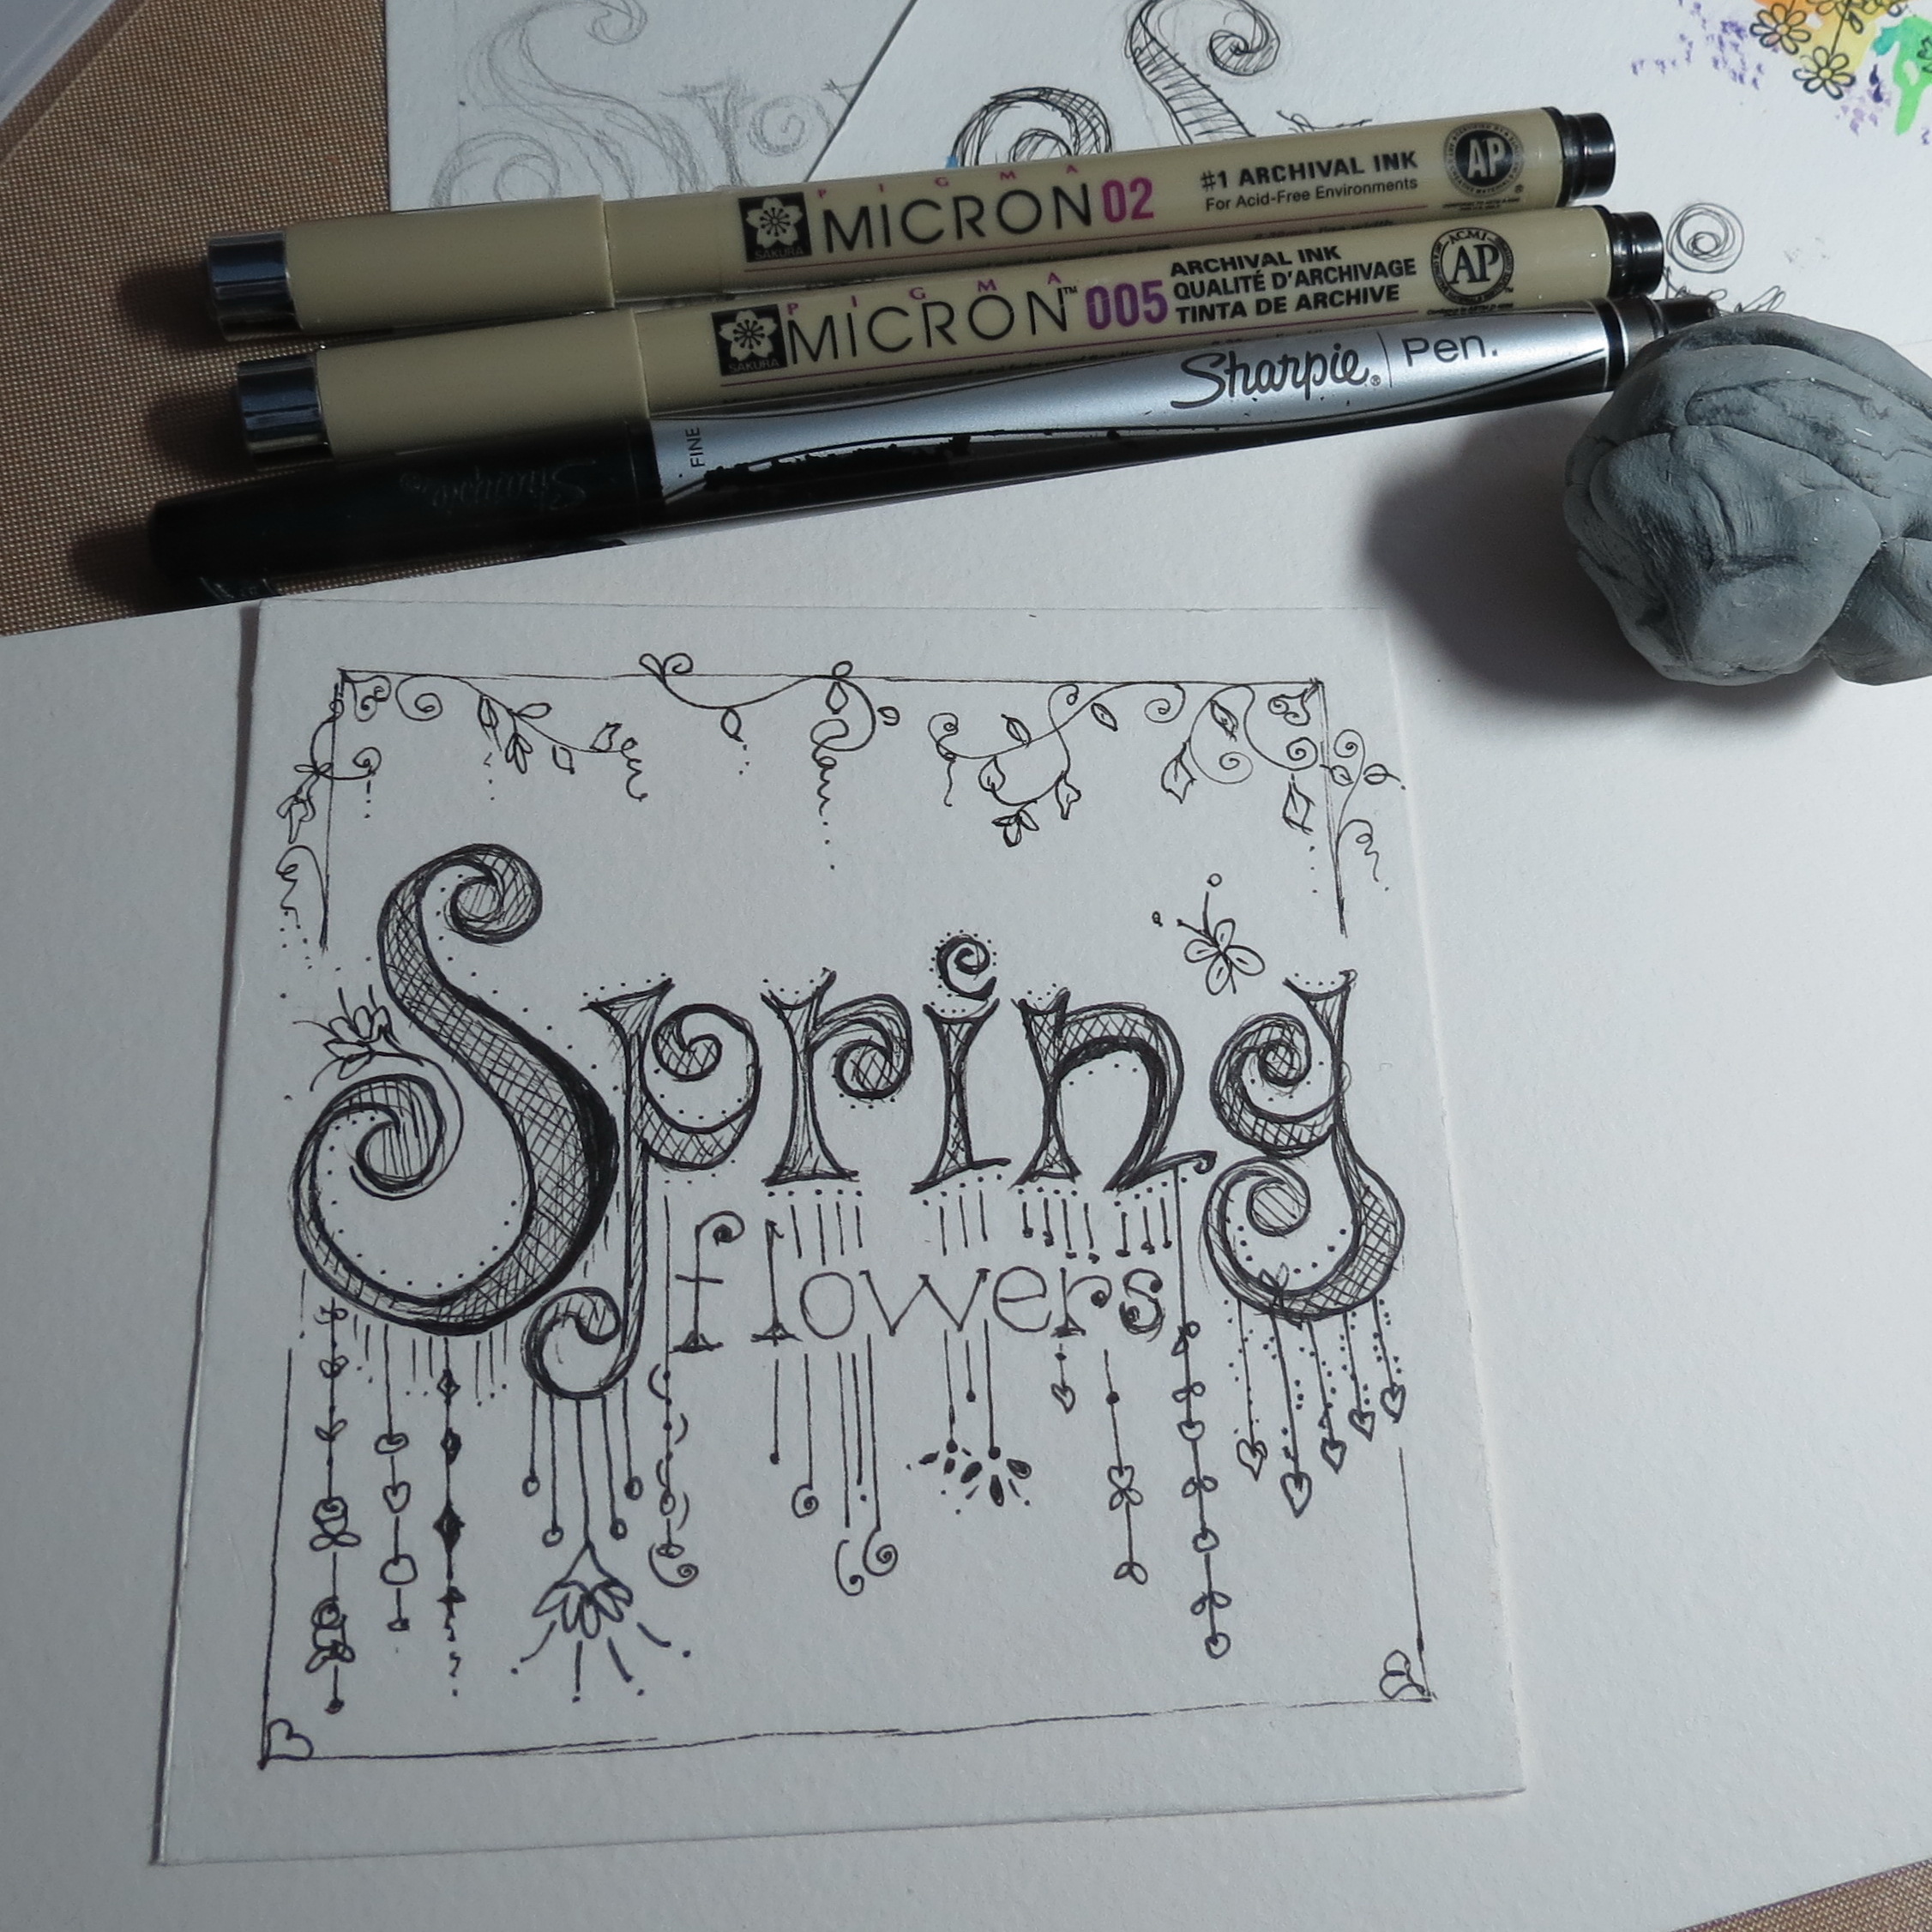
Hand Lettered Titles Step 6. Add along top border
• Add color
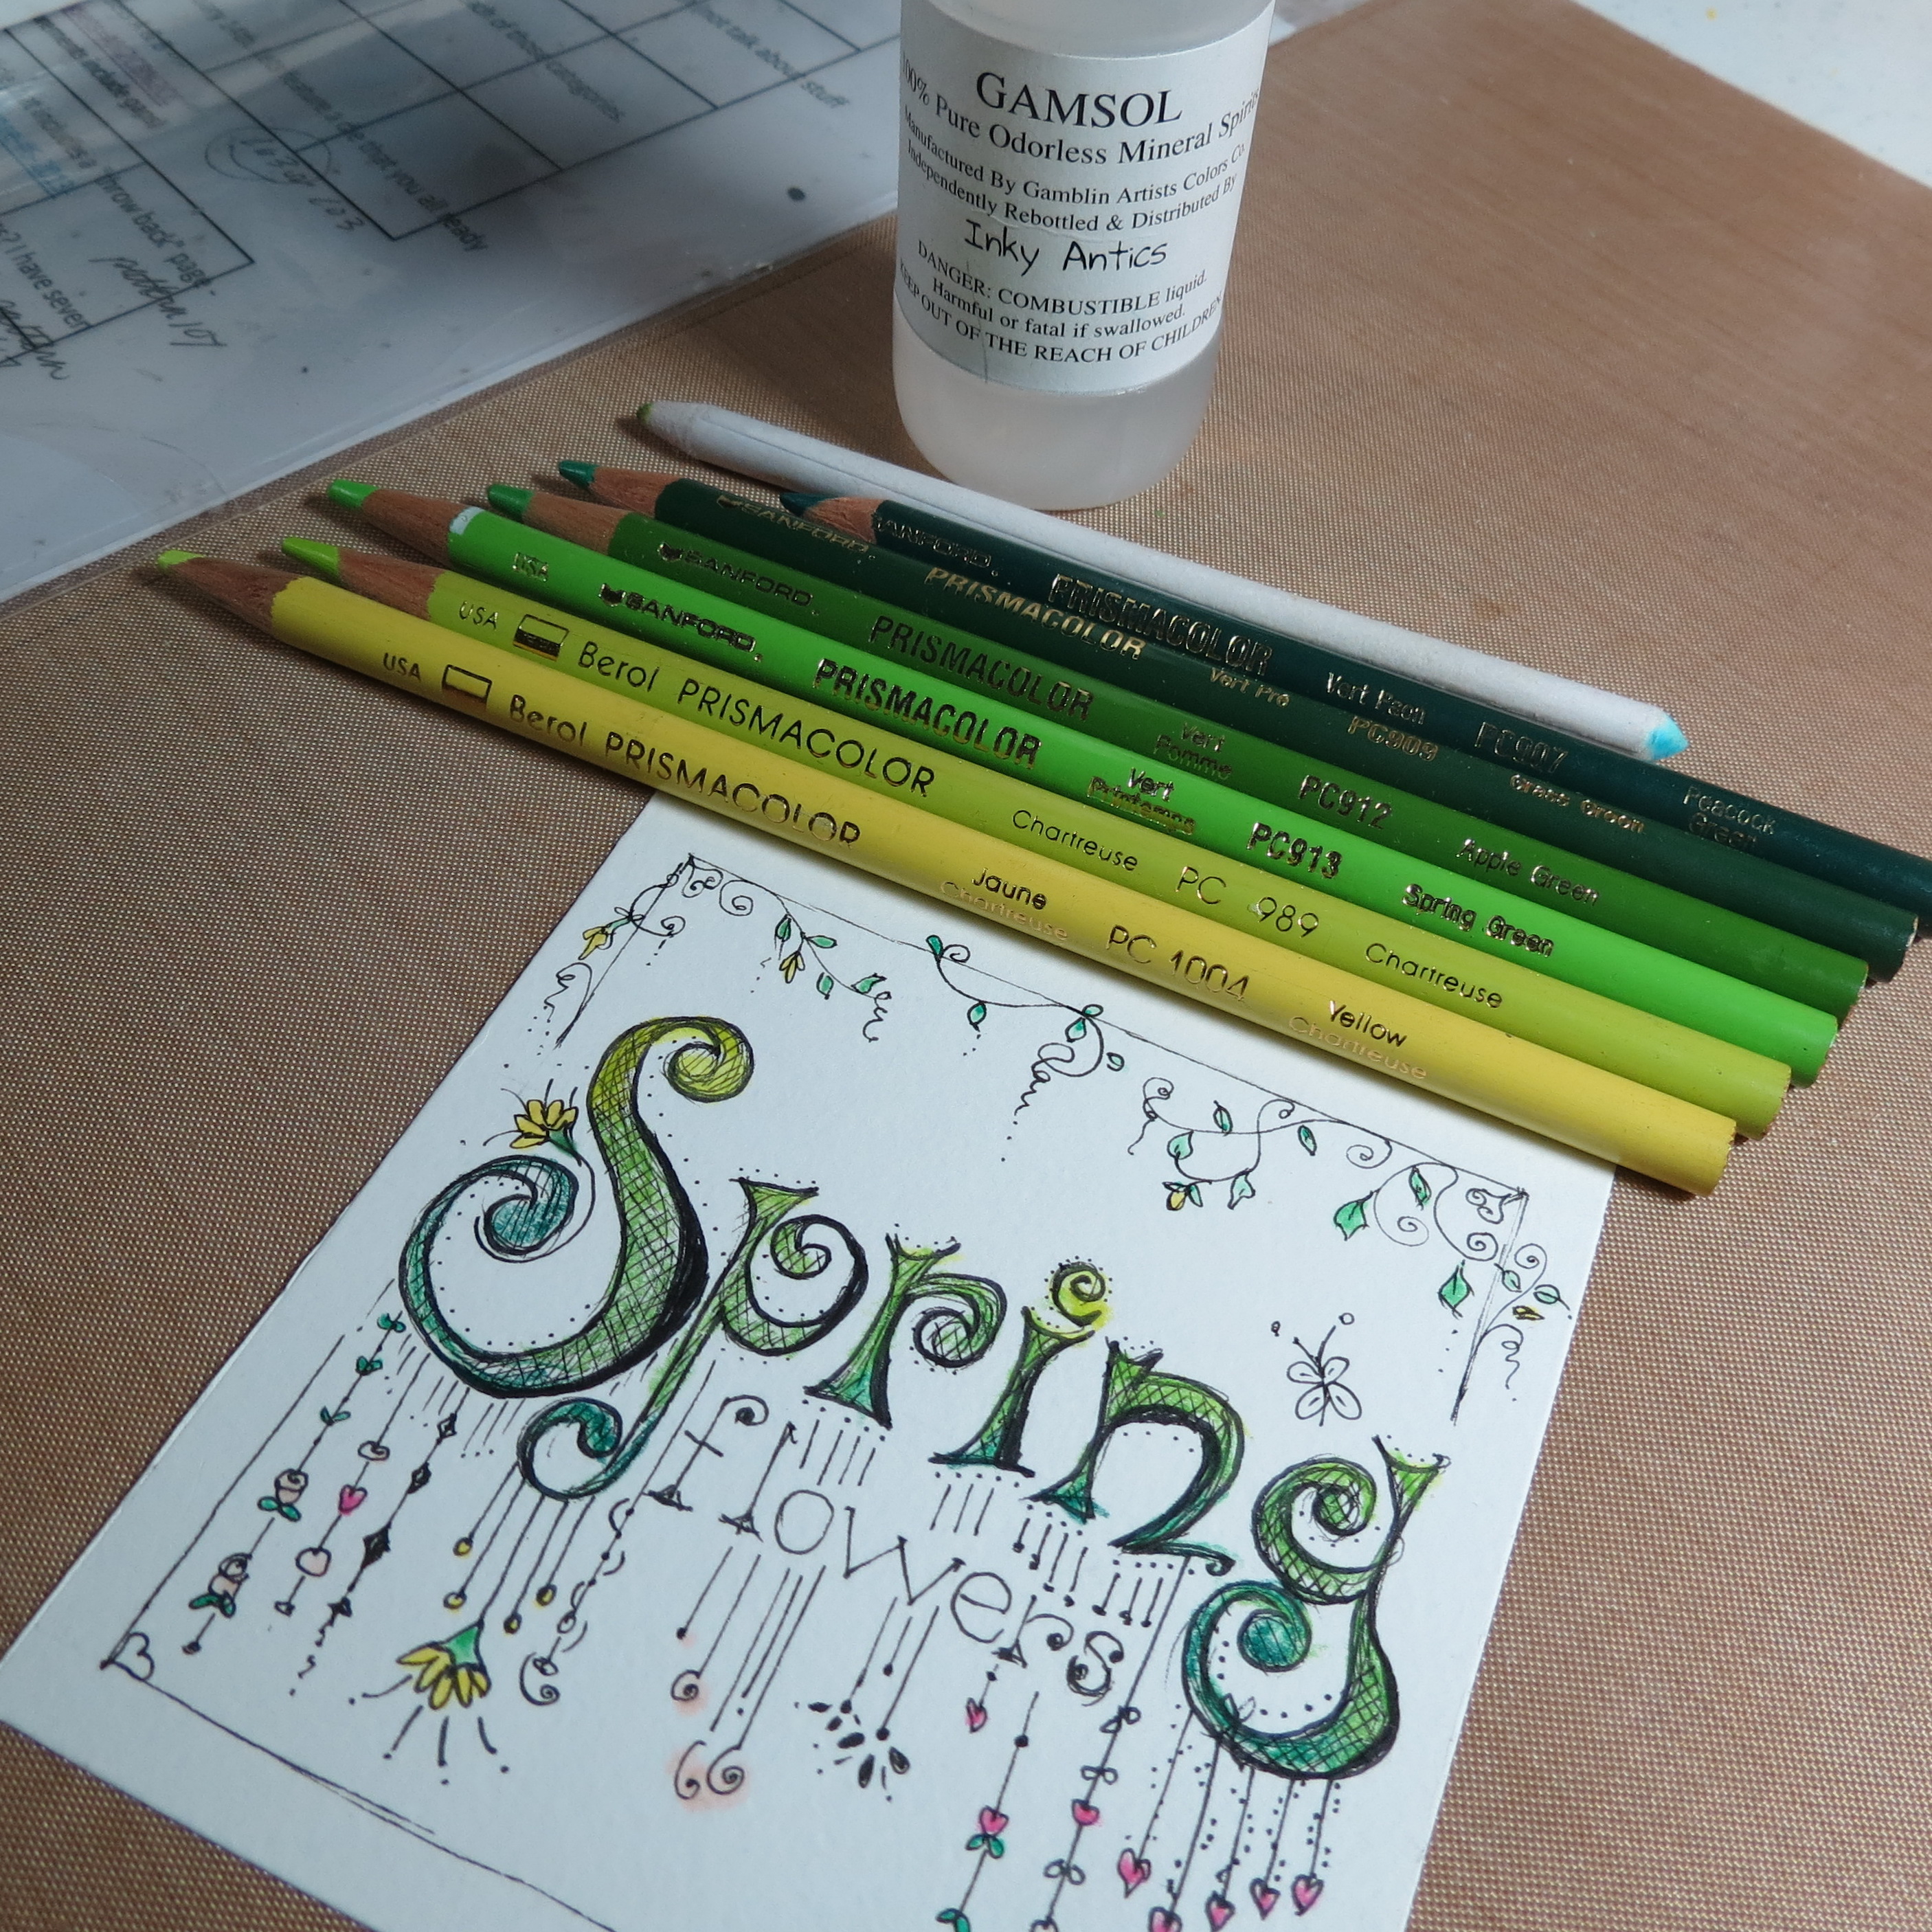
Hand Lettered Titles 7. Add color to title block if desired. Prismacolor pencils and Gamsol to get desired look.
• Add gold ink to edge of square
• Attach to center block
Hand Lettered Titles Step 8. Ink edge with gold ink 9. Attach to center title block Paper Tile.
The second layout title block has dangles and tangles falling from the top edge and sides and a bottom row of blooming doodles with 8-1” blocks in black topped with ¾” tiles with doodled borders for a different look.

Hand Lettered Titles Layout Two. B&W Doodling
Hand Lettered Titles
Hand Lettered Titles

Hand Lettered Titles
Most of all this style allows you to add a little fun to your pages. While I have used this here on a large block the possibilities are endless when you add these tiny sketches into your pages 1” squares at a time. So let’s get doodling!!
Andrea Fisher
On our Pinterest board:

Throwback Tuesday Mosaic Moments Layout with Hand Lettered Title