

 Designing with Dies: The Diamond Mine Dies
Featuring these Dies: the Diamond Mine Dies 3×3; and 3×4
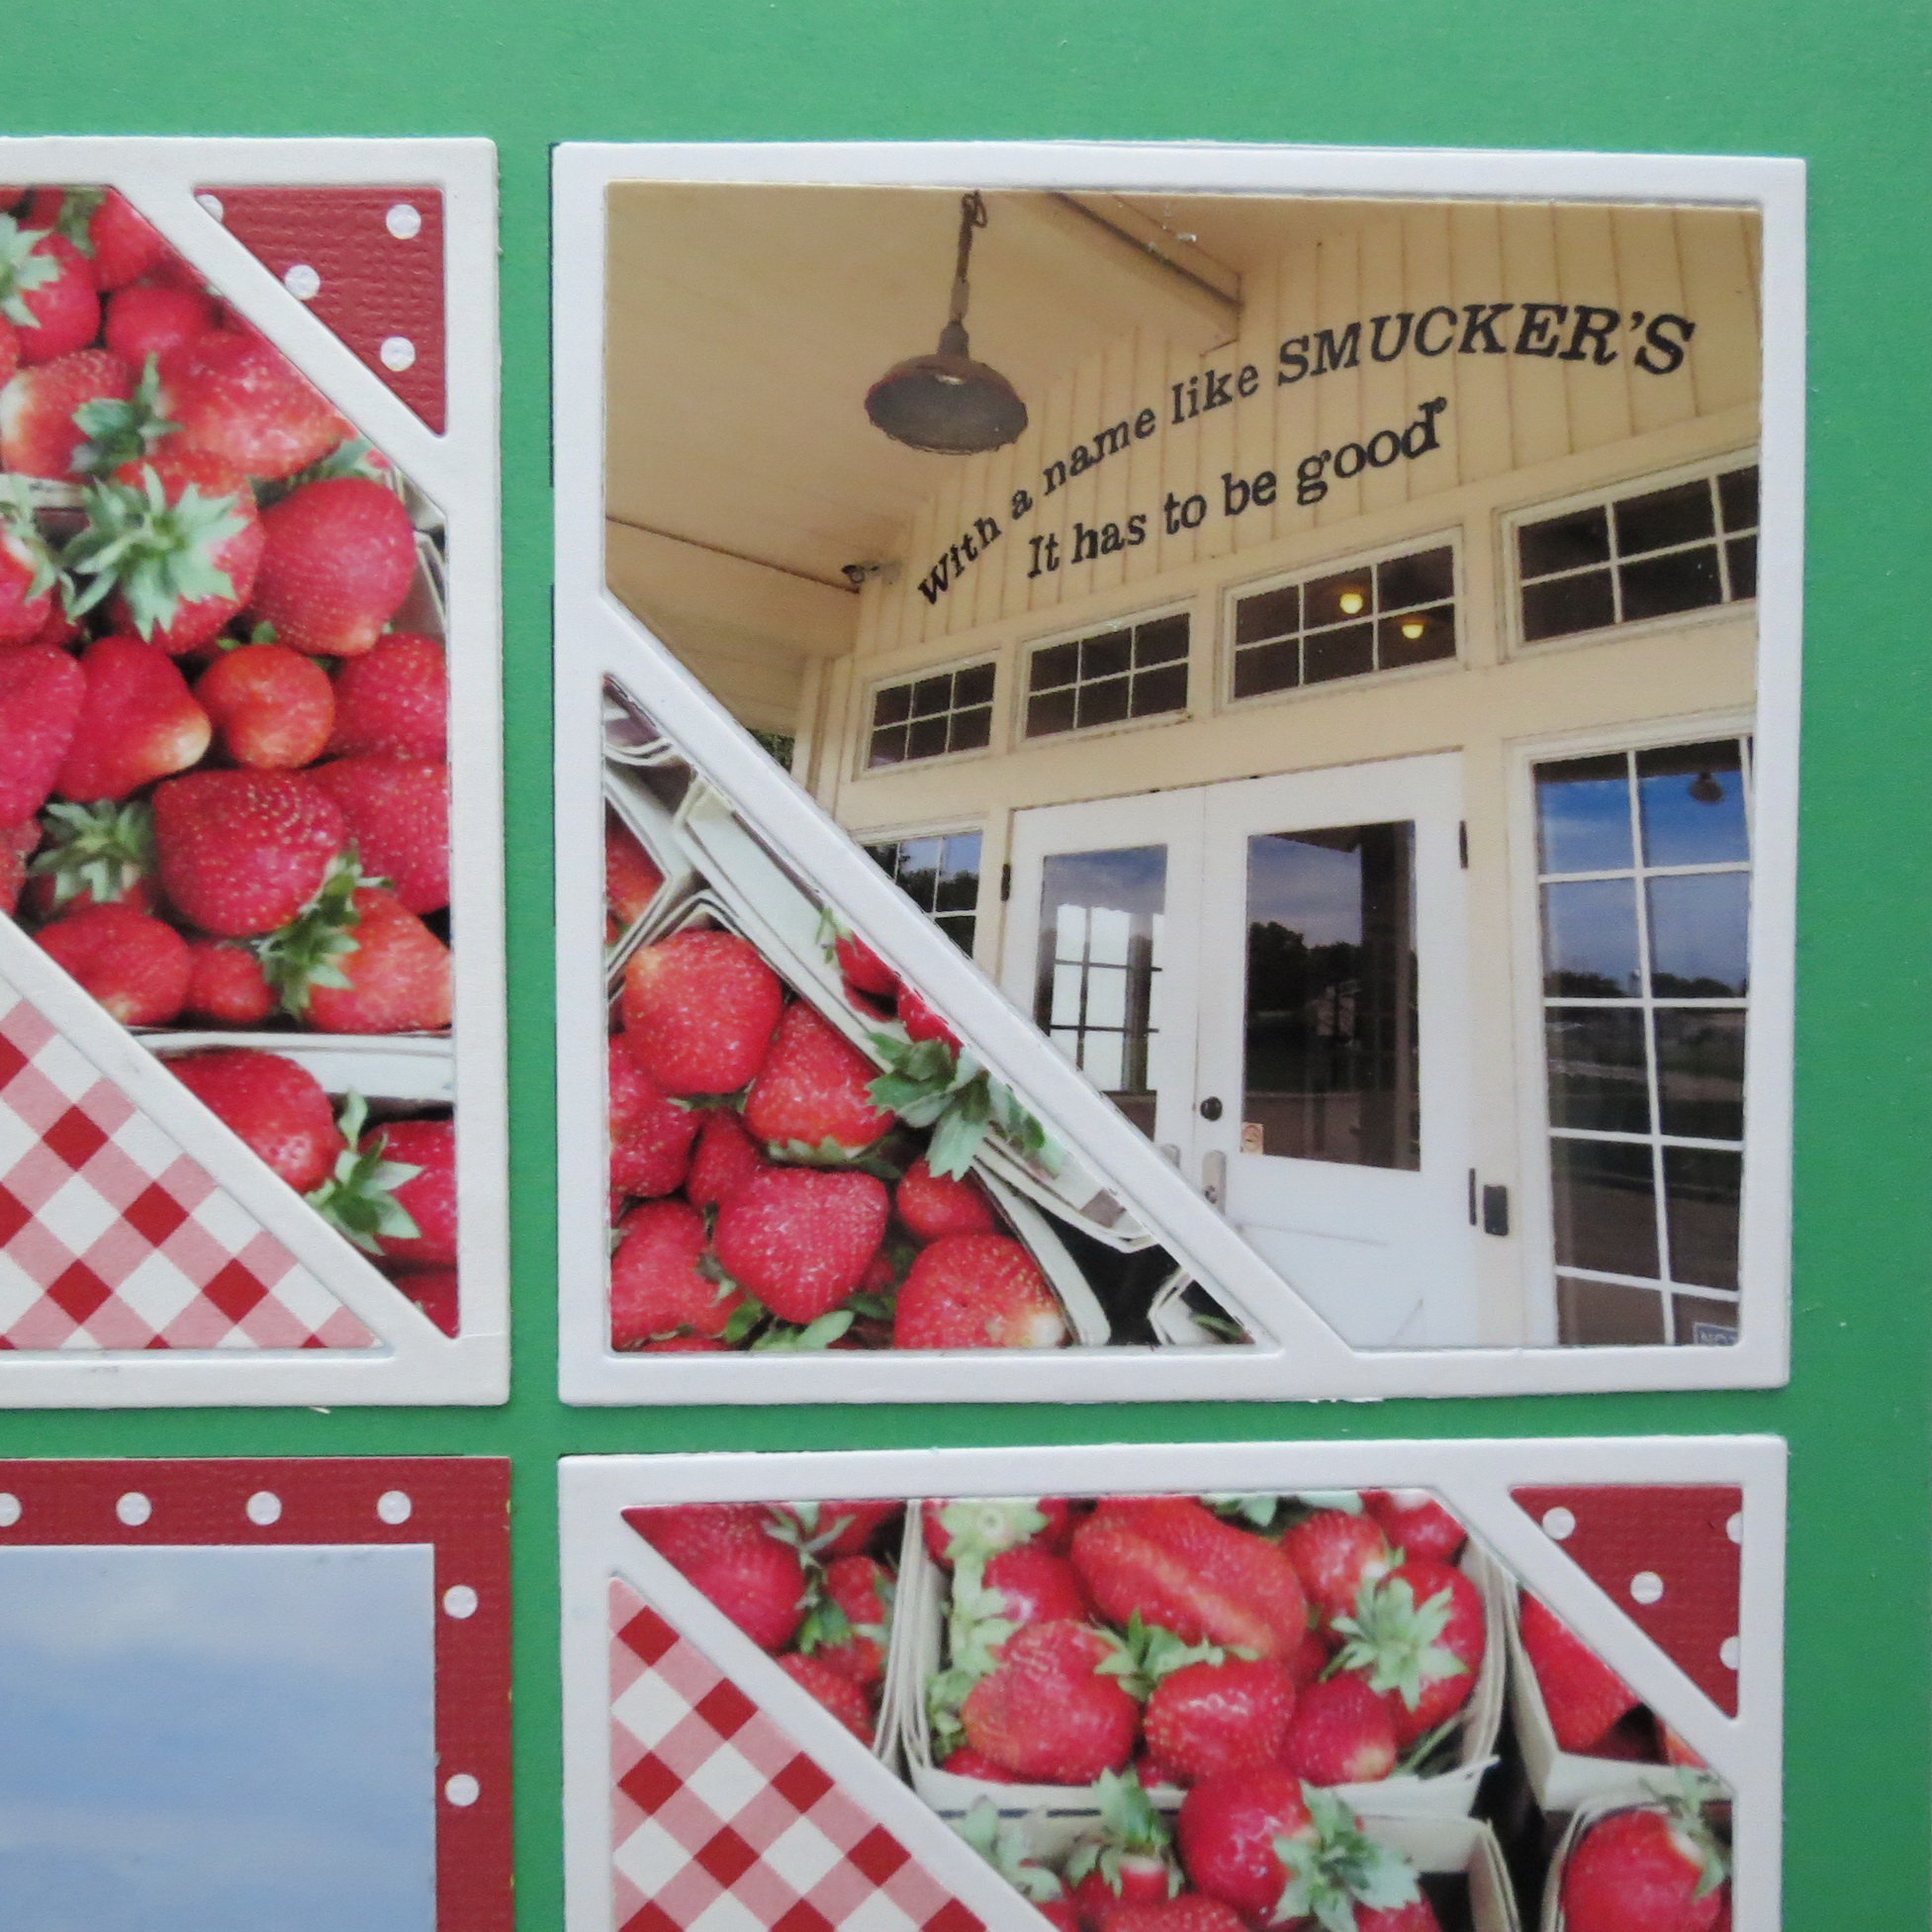
“…it has to be Good”
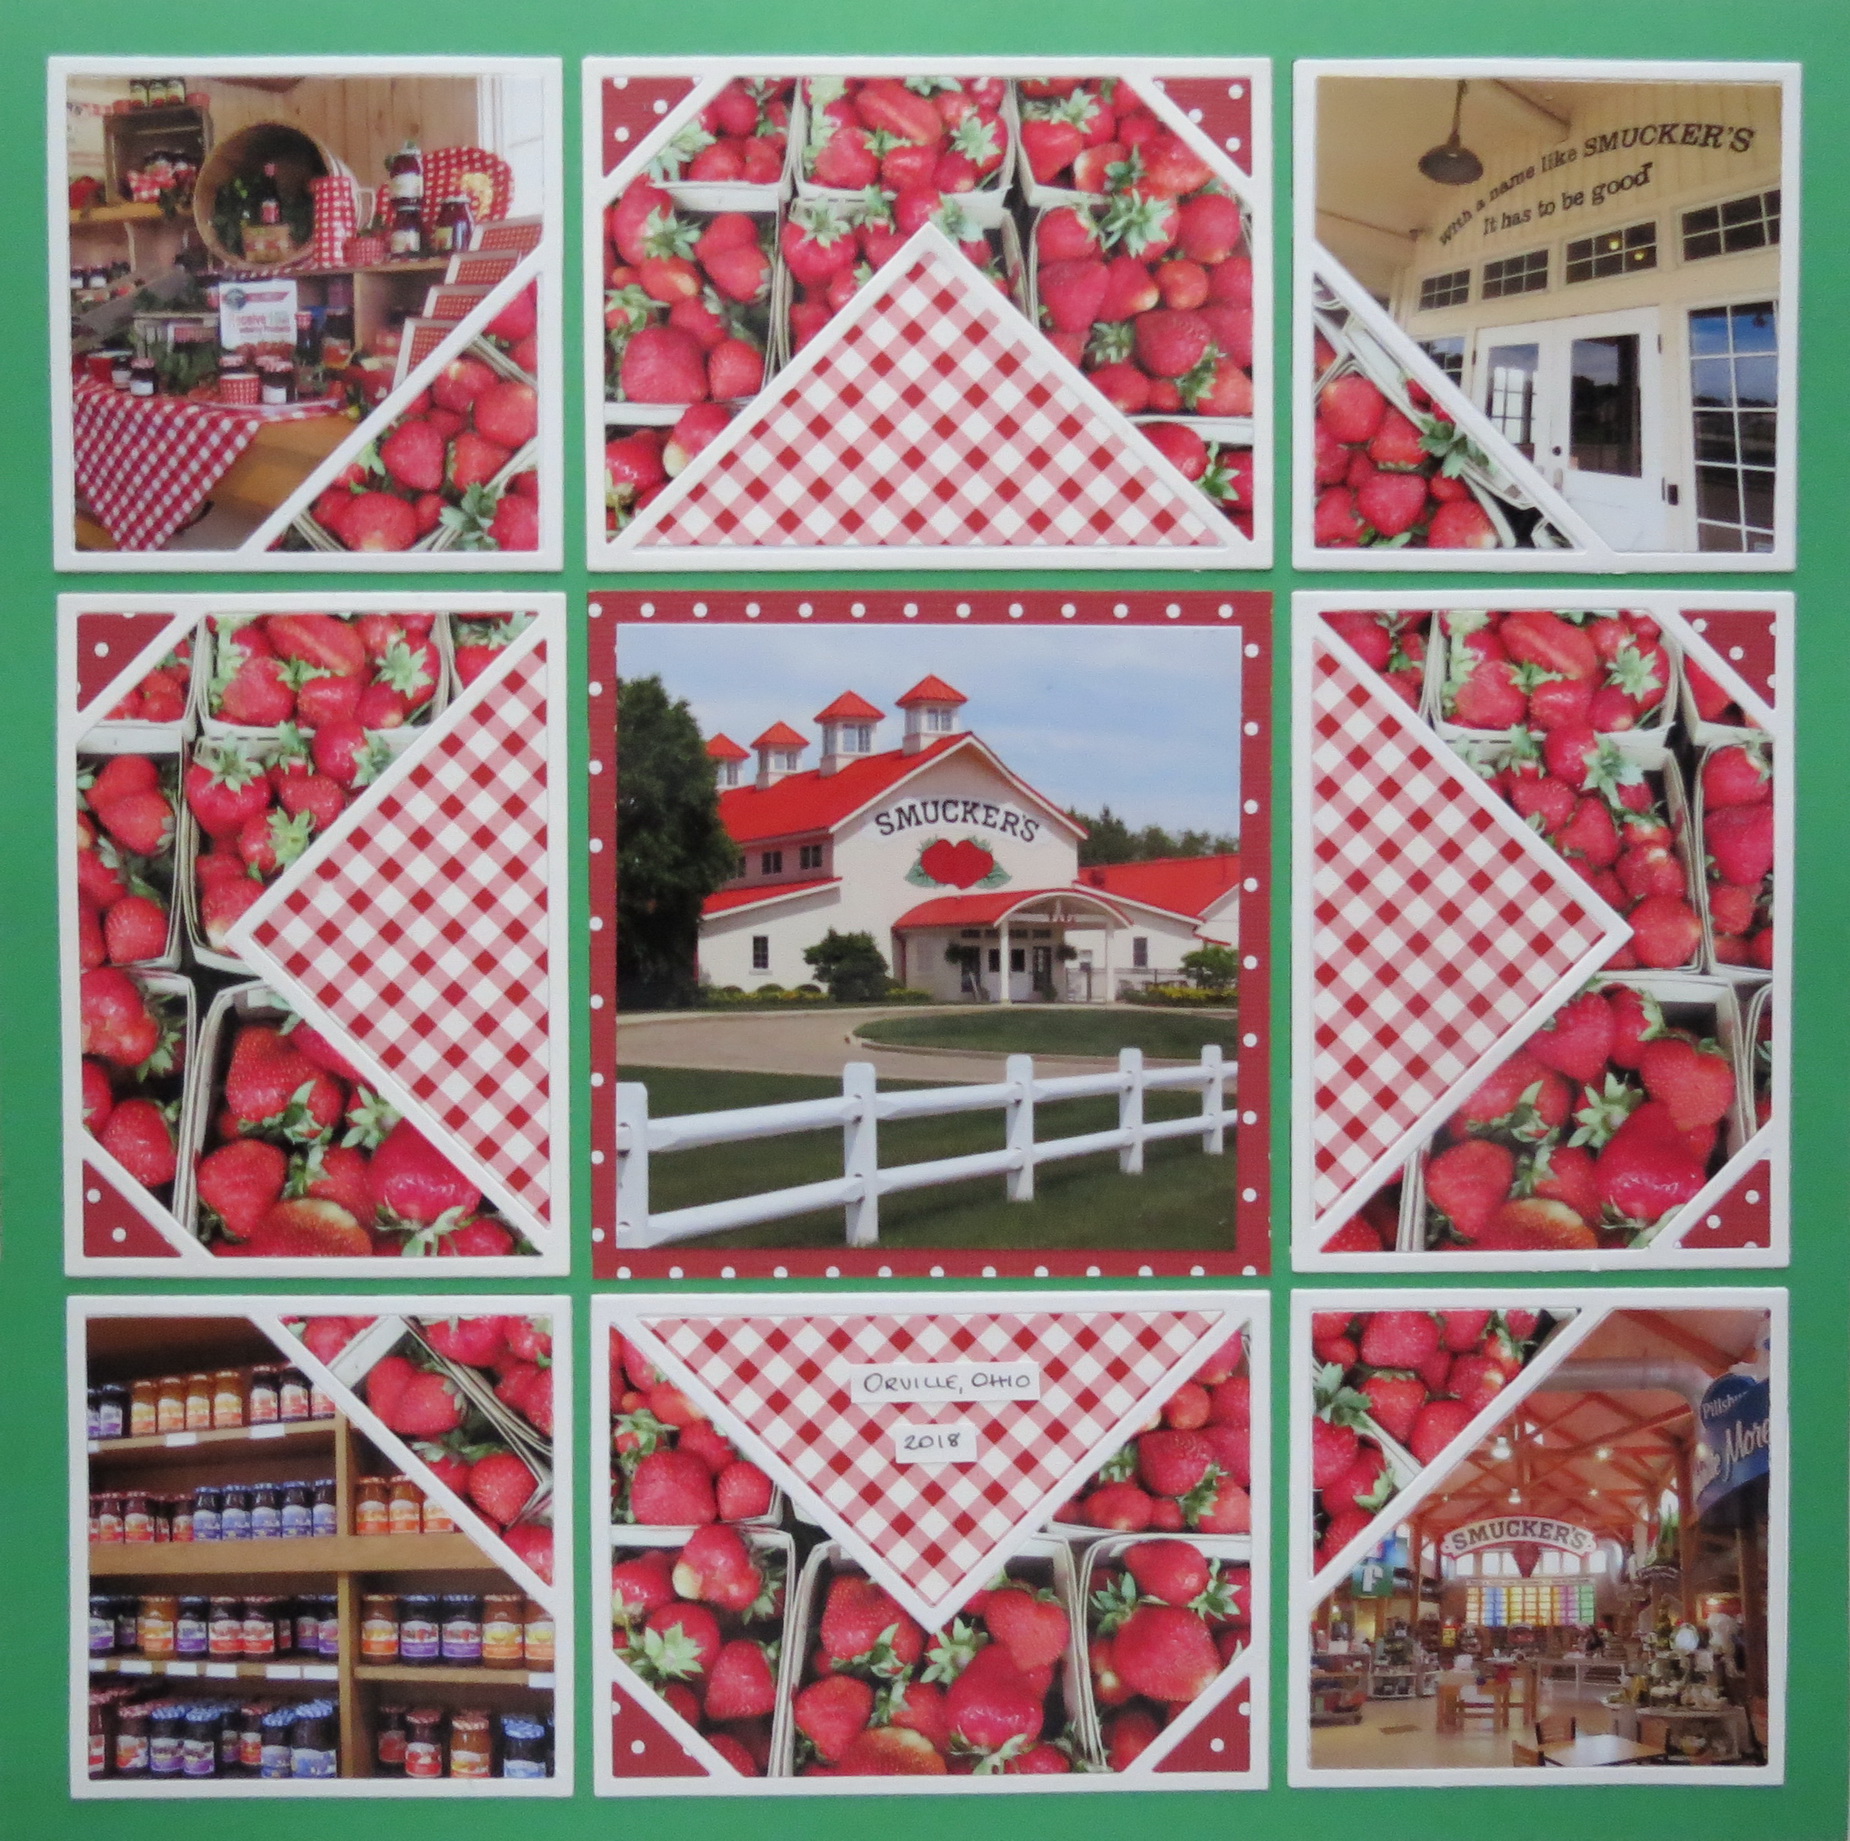
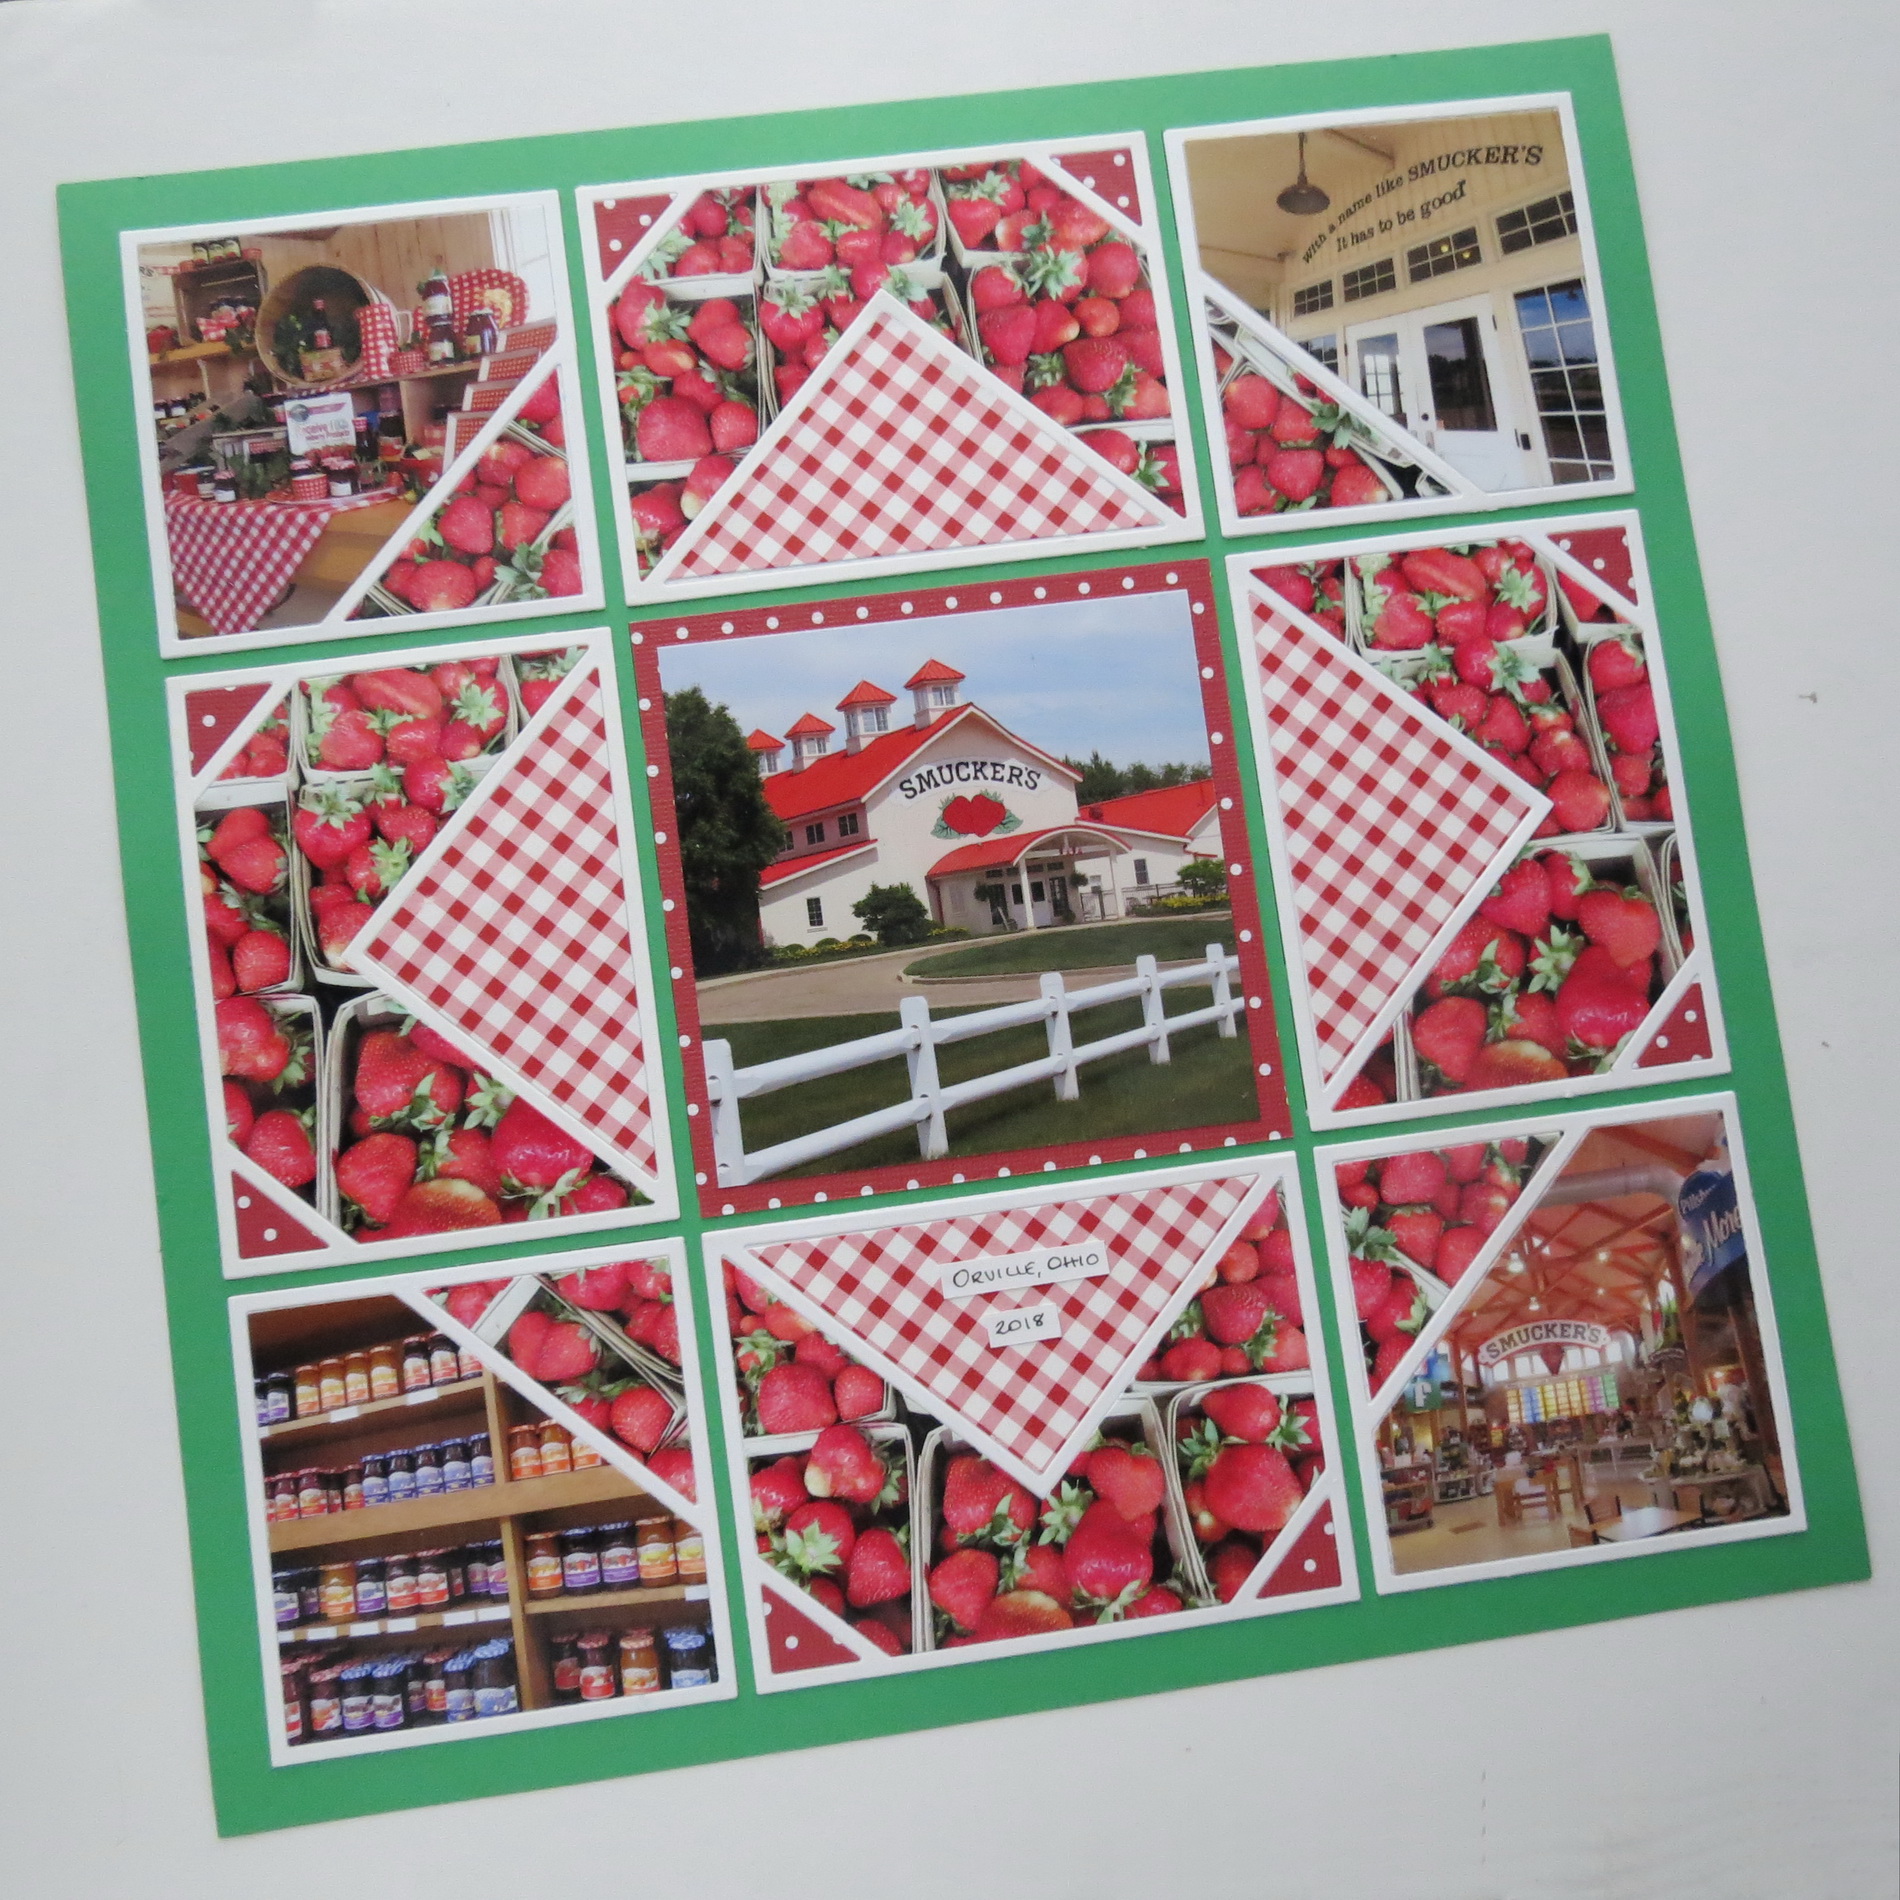
Around here the town of Orville is known as the home of Smith Dairy and Smucker’s. A quick trip down the street and the new Diamond Mine Dies will show you how you can feature a favorite spot you visit in this “looks more complicated than it is” layout.
Mosaic Moments Designing with Dies: The Diamond Mine Die
I began with the new Green Mosaic Moments Grid paper. It’s one of three new solids that came out this spring along with Sapphire and Really Buff. It seemed the perfect match for the greens in the Smucker logo and contrast to the reds. I think it says more “Smucker’s” than Christmas…I hope!

Mosaic Moments 12×12 Grid Papers Sapphire, Really Buff and Green

Mosaic Moments 12×12 Green Grid paper, 3×3 and 3×4 Diamond Mine Dies
Mosaic Moments Pattern #344
Pattern #344 is a very good base for many of the new dies, including the Diamond Mine Die family.
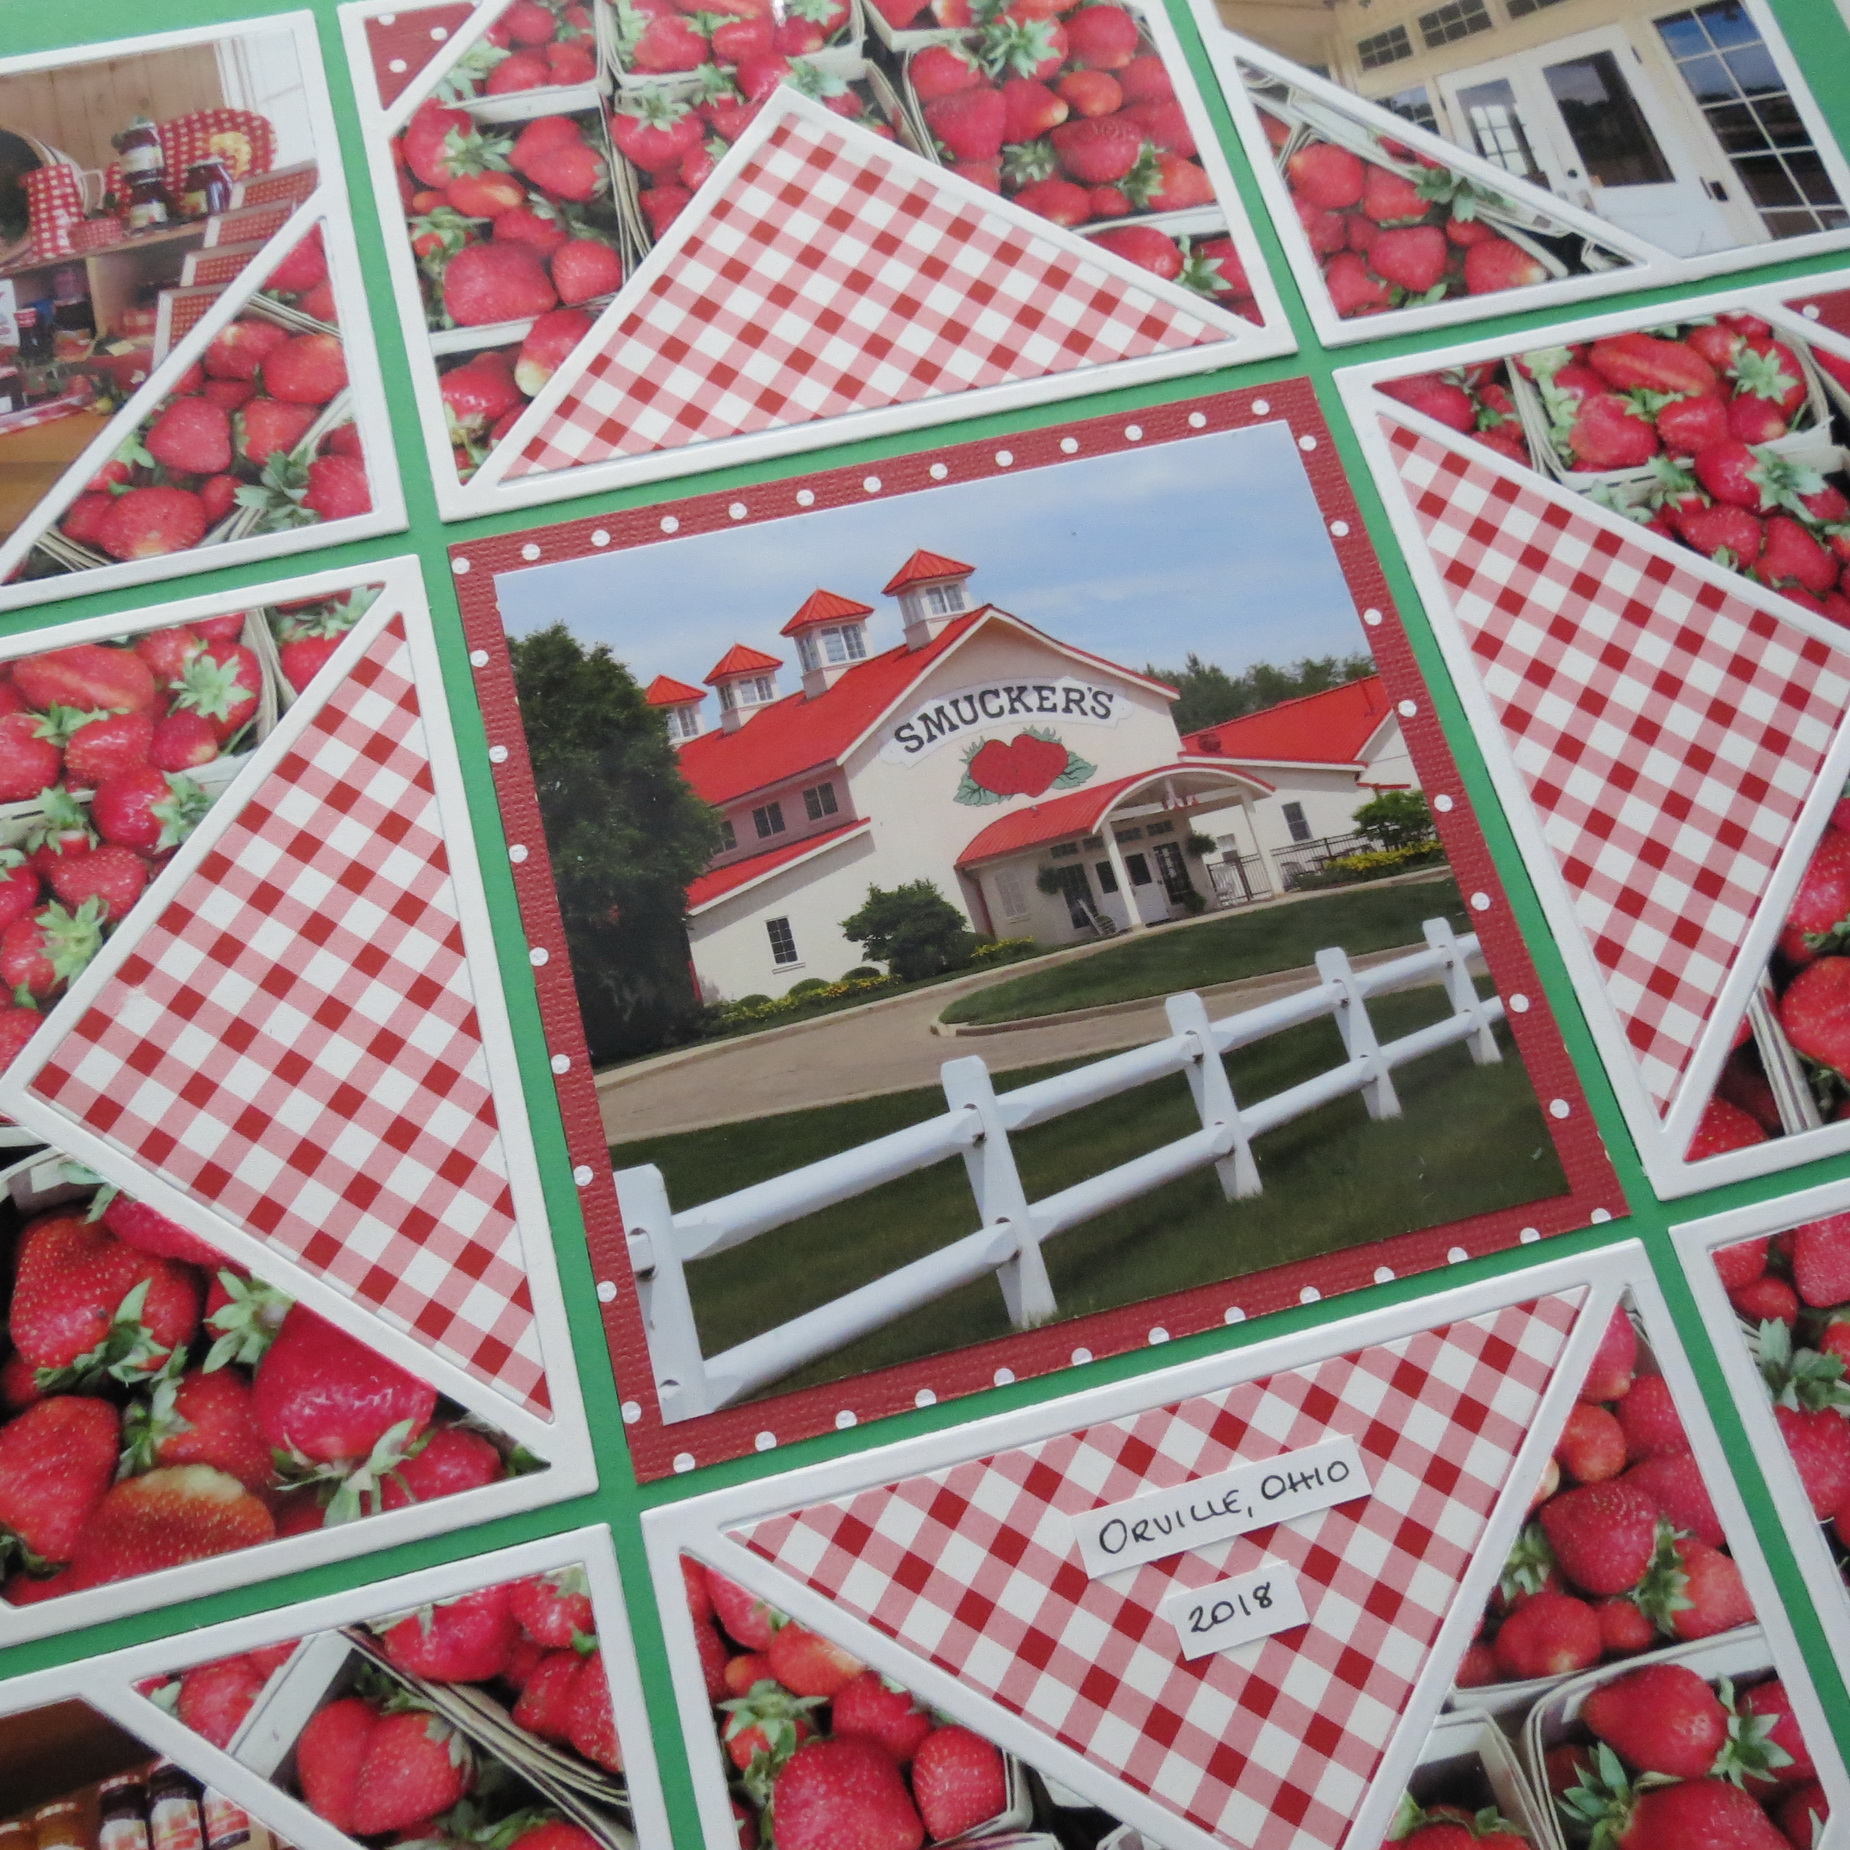
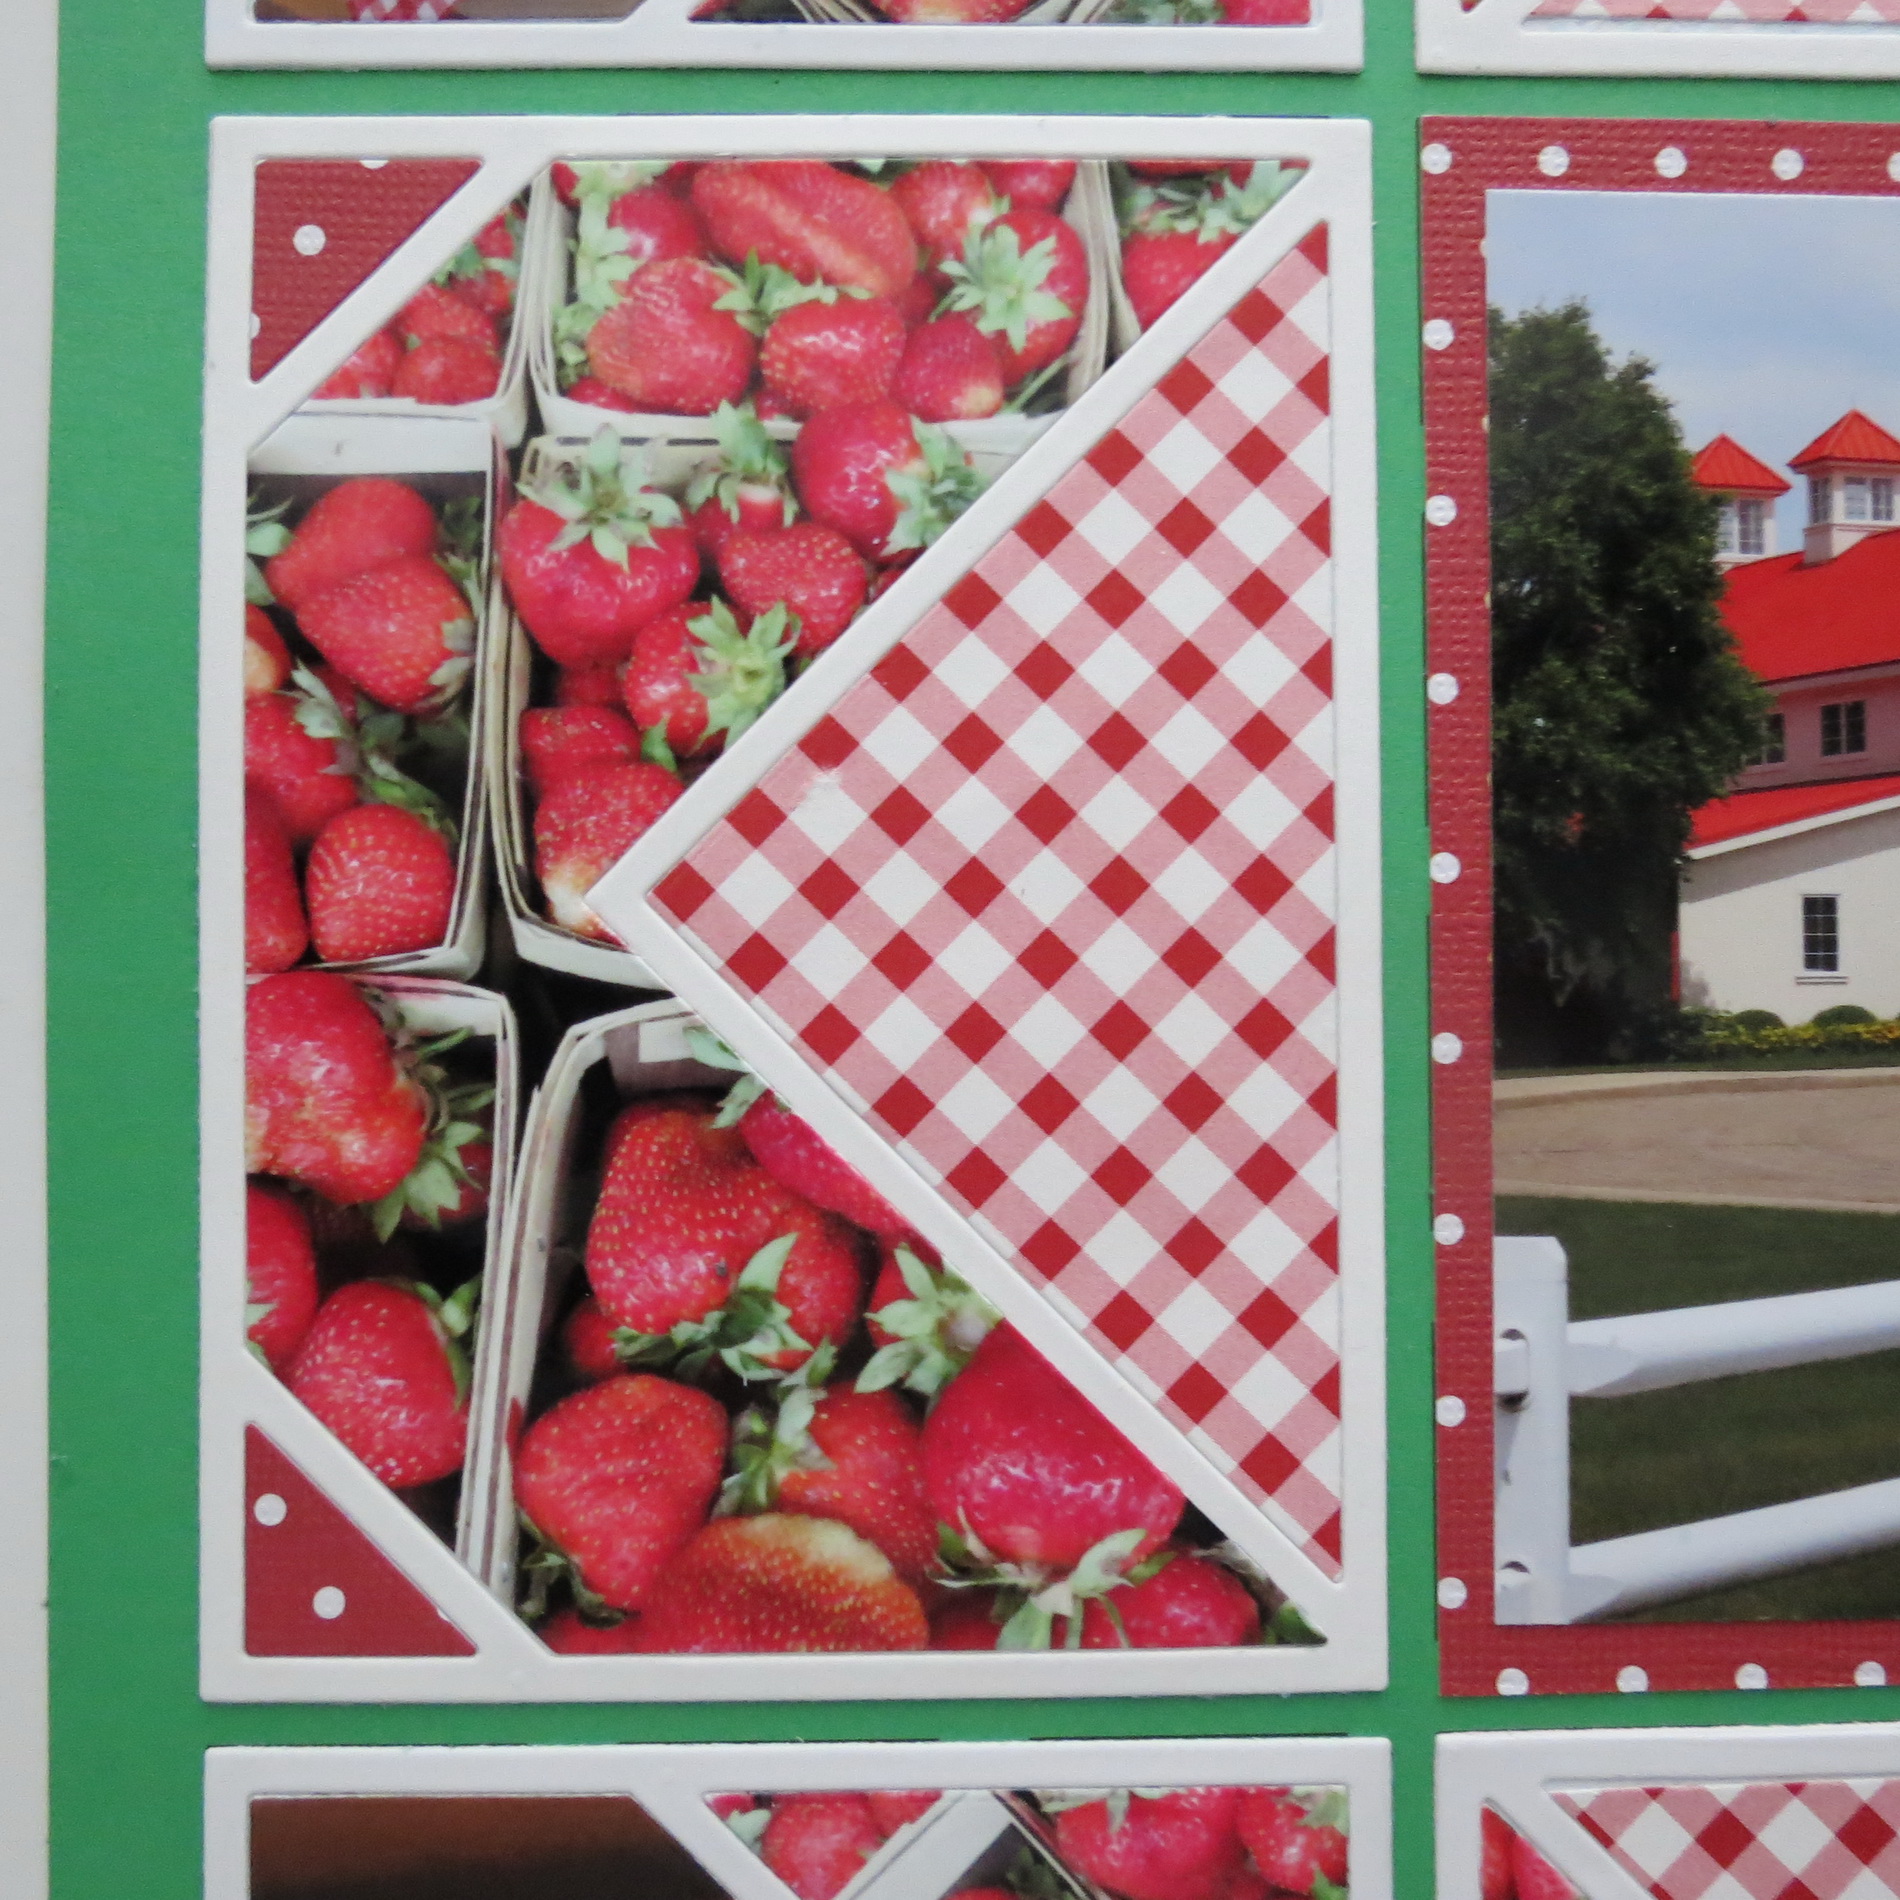
Red Gingham is a trademark of Smucker’s, so it only made sense to include some in patterned paper. Smaller portions of a red and white dotted are used as a mat for the center photo and the smaller outer triangles in the 3×4 Diamond Mine. White cardstock was used for cutting all the die pieces and mats to mount all the die sections for stability.
Question: Why cut 3×3 and 3×4 blocks to mount the die cut-outs? First and foremost it’s for stability and structure. For this die to be successful all the pieces of your photos need to fit in precisely. Applying it to the grid then becomes a breeze.
TIP: It also makes the process simpler by running your adhesive along the mat’s four sides (top side) and attaching your die section to the top lining up one corner at a time and easing the sides into place. This allows accuracy without a lot of repositioning. Running a line of adhesive in the center under the “V” of the 3×4 or in the corner of the 3×3 (before anchoring this corner) will secure die section but also give you sufficient adhesive to lay in all your photo sections too. No fuss, no mess!
Gingham patterns are still on trend in the scrapbook world at the moment and really a ‘must have’ on this Smucker’s layout. I’ve cut the paper on point to surround the center photo. A slightly darker red with white dot pattern anchors the center photo.
Mosaic Moments Designing with Dies: The Diamond Mine Die
I chose to feature strawberries in my outer diamond because it’s the one thing I usually think of when I think of Smucker’s and they are in season for picking right now so also plentiful!
The photos for the 3×4 that will connect all the pieces in a Diamond pattern are actually only one photo that I printed four times. Two prints are done on the horizontal as I originally took them to use in the top and bottom sections. The two that I used for the sides needed to be re-oriented vertically to keep the same perspective and get the size needed.
Mosaic Moments Designing with Dies: The Diamond Mine Die
I also used the large triangle left over from the 3×4 to cut with the 3×3 Diamond Mine die and give me the corners for each of the 3×3 corner sections of the pattern.
Mosaic Moments Designing with Dies: The Diamond Mine Die
The arrangement of the corner photos was determined by what portion of the photo was expendable without taking away from the story being told.
I finished the page with two narrow ¼” strips with the town and date handwritten and placed in the lower triangle.
Mosaic Moments Designing with Dies: The Diamond Mine Die
Have fun exploring ways to show off your photos with the Diamond Mine Dies!
Andrea Fisher